Hola, hola amigos creativos de @Hivediy reciban un caluroso abrazo 🤗
Hoy les traigo un nuevo y creativo proyecto, para un rincón de nuestro hogar que merece también tener una linda decoración ese es nuestro baño, se me ocurrió realizar un porta papel higiénico con forma de poceta 🚽, ya que no tenía donde colocar el papel y esto me pareció una buena idea, espero a ustedes les parezca genial como a mi, por eso les invito a este sencillo paso a paso.
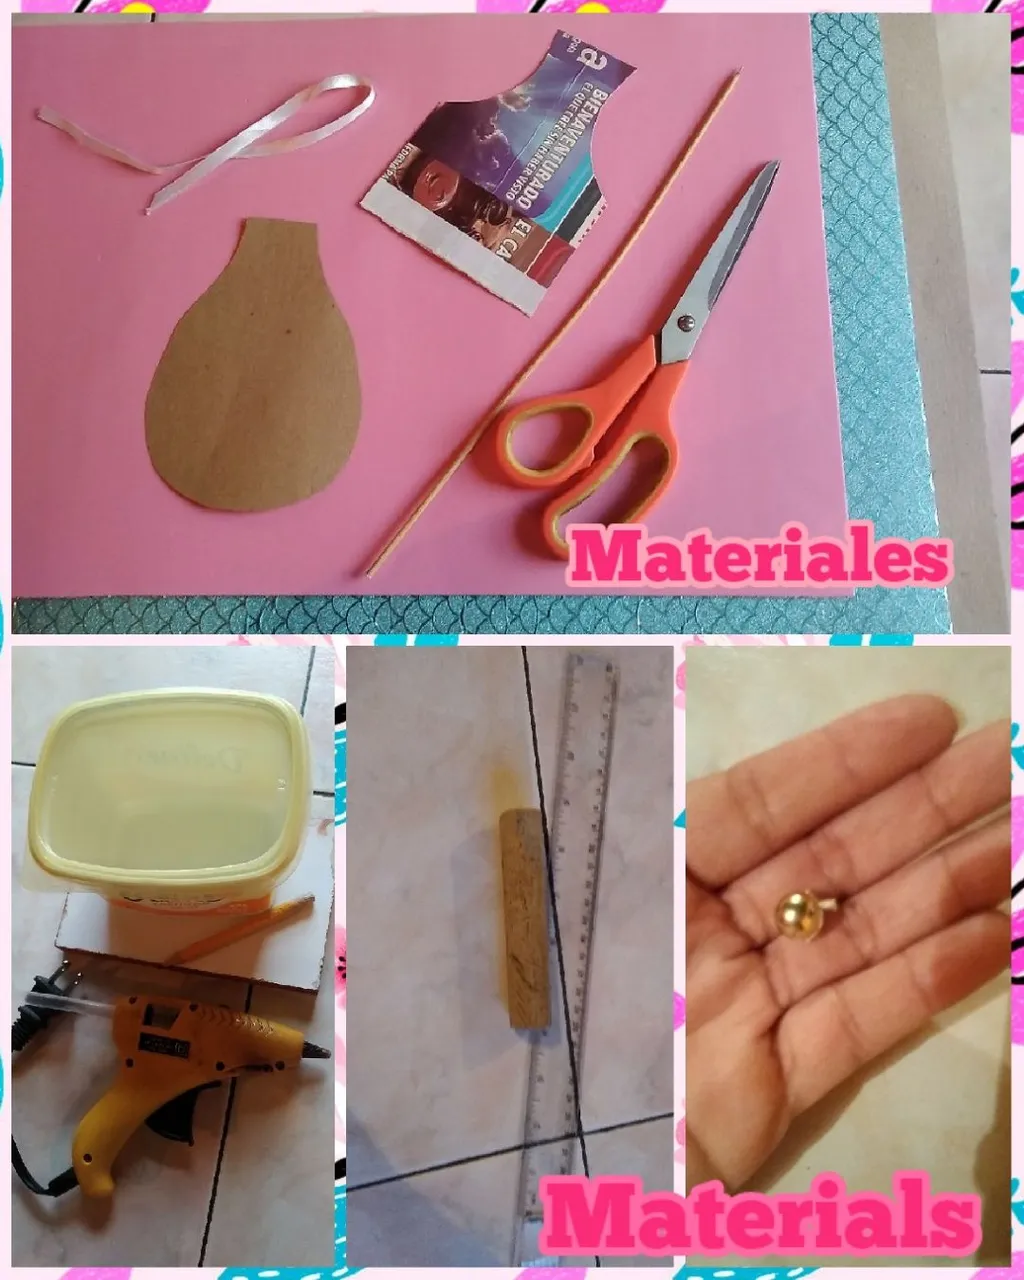
Materiales 📝
🚽 Foami (goma eva) rosado, texturizado azul, cartón grueso
🚽 1 Envase de mantequilla con tapa
🚽 Tijera, palito de altura, pistola de silicón, lápiz, regla
🚽 Cinta de raso delgada blanca, una perla dorada mediana
🚽 1 Rectángulo de madera de 15cm largo X 10cm ancho
🚽 1 Palito de escoba este se cortara a 11cm largo
🚽 patrones
Hello, hello creative friends of @Hivedi and receive a warm hug 🤗
Today I bring you a new and creative project, for a corner of our home that also deserves to have a nice decoration, that is our bathroom, it occurred to me to make a toilet paper holder in the shape of a toilet 🚽, since I had nowhere to put the paper and This seemed like a good idea to me, I hope it seems great to you as it did to me, that's why I invite you to this simple step by step.
Materials 📝
🚽 Pink foami (eva rubber), blue textured, thick cardboard
🚽 1 Container of butter with lid
🚽 Scissors, height stick, glue gun, pencil, ruler
🚽 White thin satin ribbon, one medium gold pearl
🚽 1 Wooden rectangle 15cm long X 10cm wide
🚽 1 Broomstick this will be cut to 11cm long
🚽 patterns
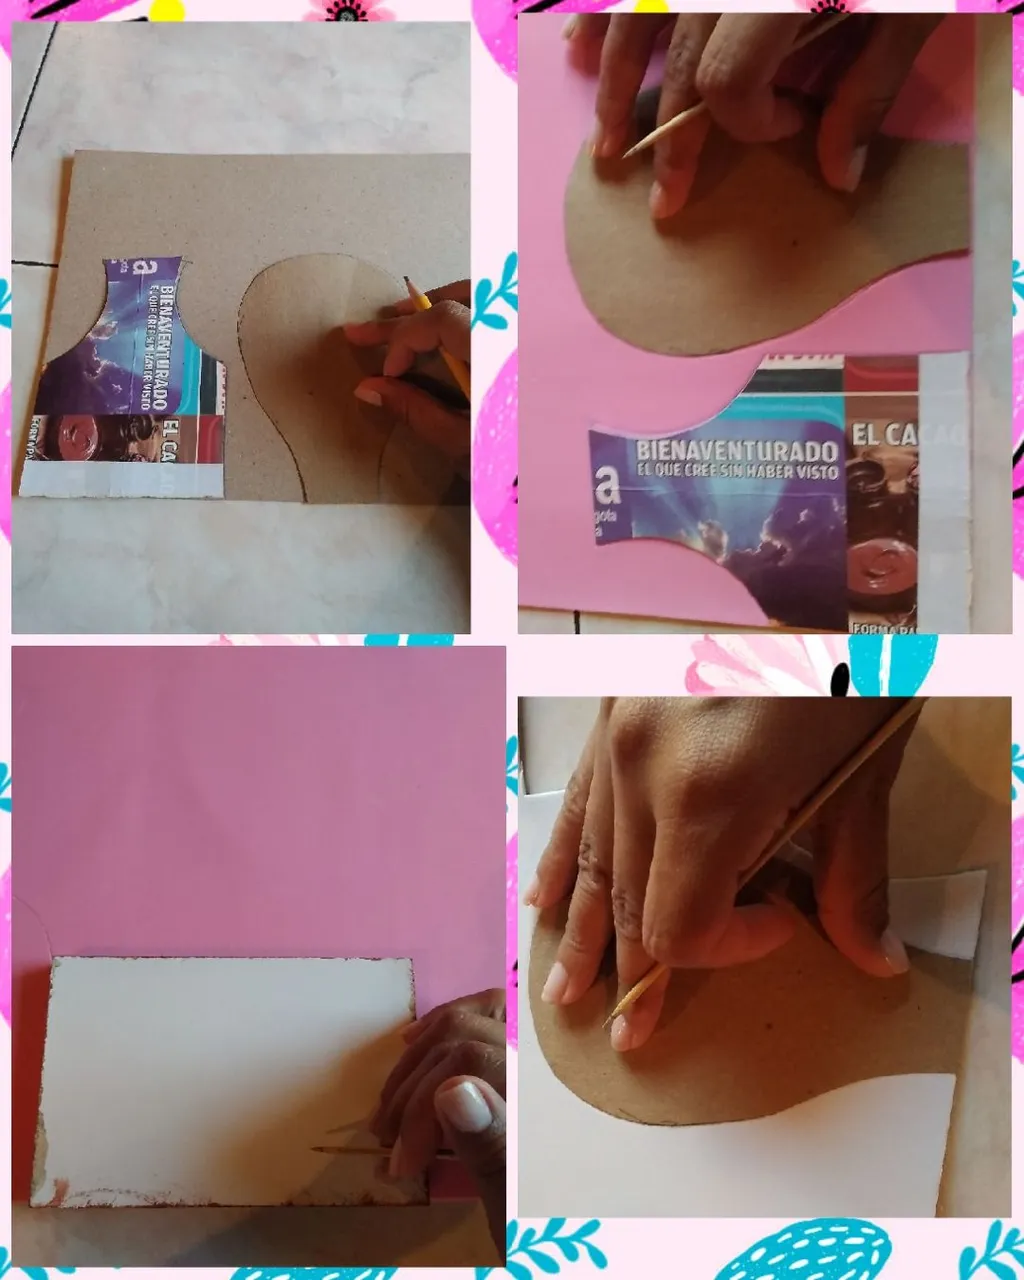
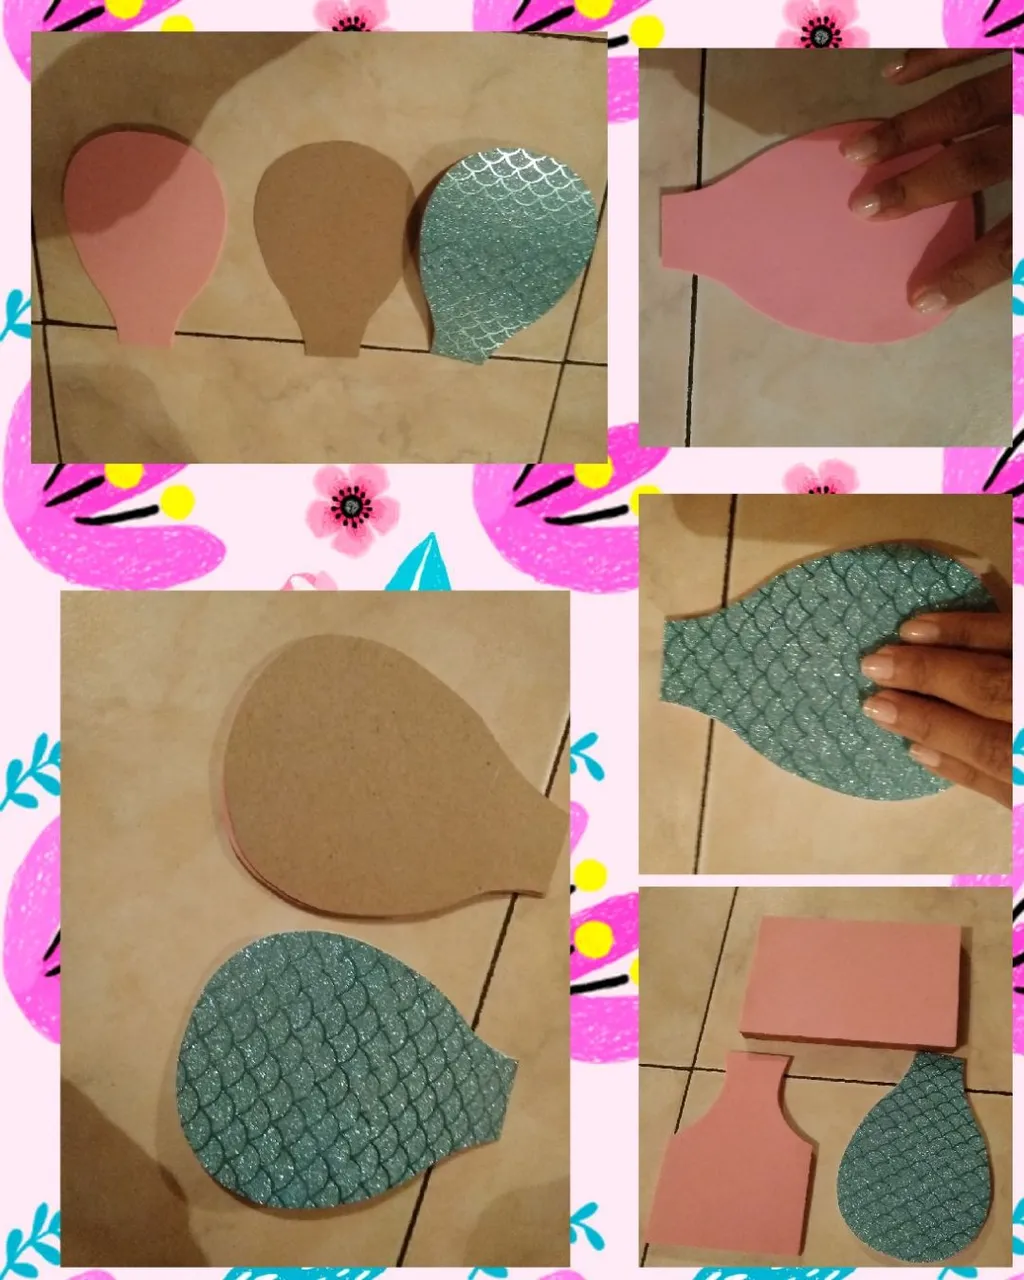
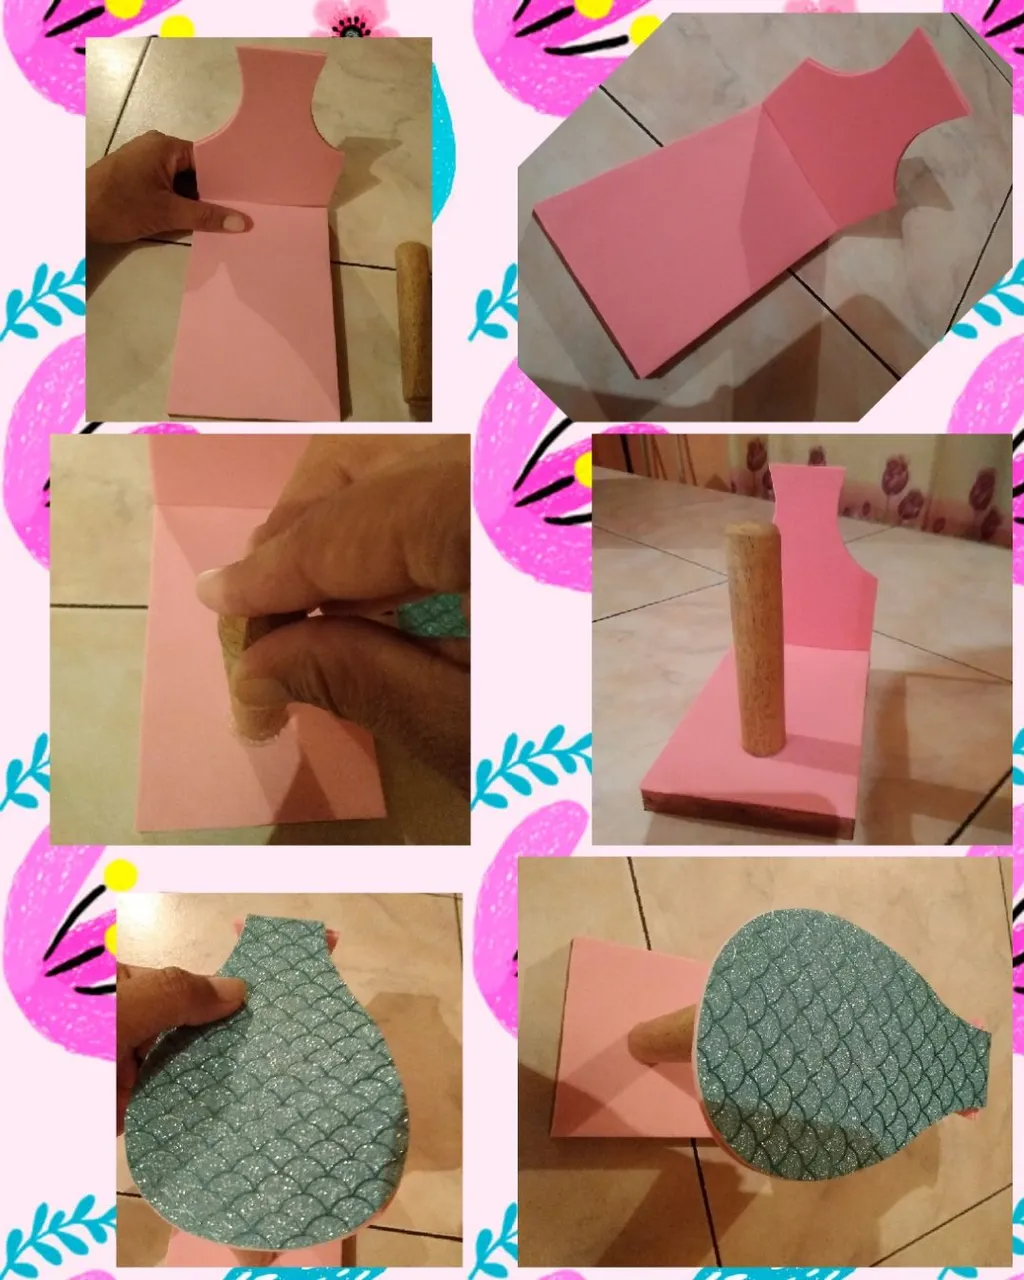
Iniciaremos pasando al cartón los dos patrones, en el foami (goma eva) rosado se marcaran haciendo uso del palito de altura: la tabla rectangular y la base de la poceta se sacaran dos, la tapa se marcara uno en el rosado y uno en el texturizado azul.
We will begin by transferring the two patterns to the cardboard, in the pink foami (eva rubber) they will be marked using the height stick: the rectangular table and the base of the pot will be removed two, the lid will be marked one in the pink one and one in the blue textured.
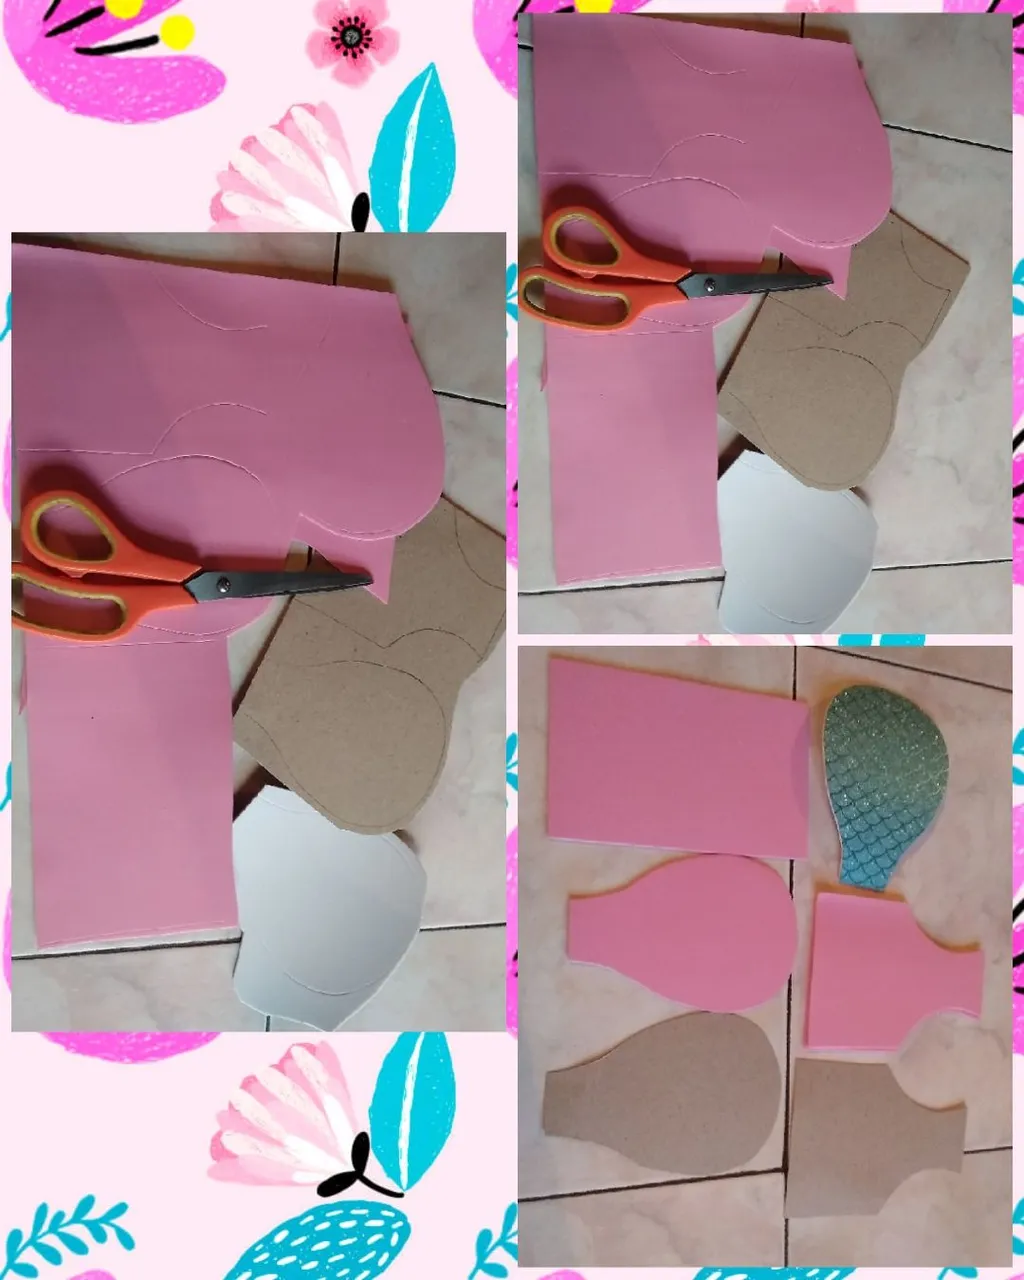
Ahora tomaremos la tijera para recortar cada uno de los patrones que marcamos en el paso anterior, al hacerlo es importante cuidar de picotear el material, ya que de esto depende que nuestro trabajo quede impecable.
Now we will take the scissors to cut out each of the patterns that we marked in the previous step, when doing so it is important to take care to peck the material, since our work is impeccable depending on this.
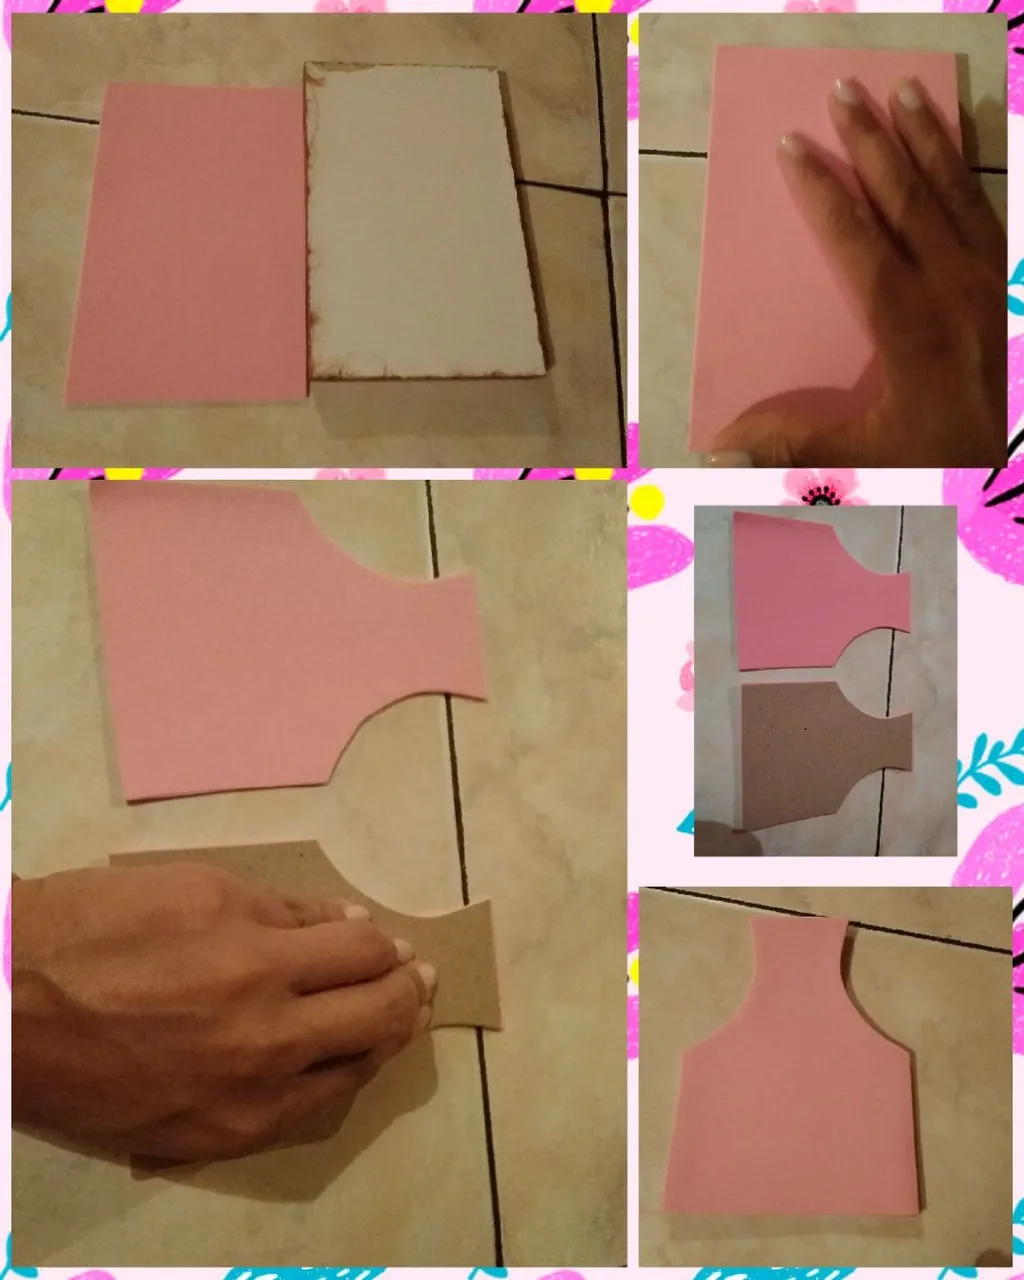
Con silicón uniremos las piezas que recortamos en el paso anterior: a la tablita le pegaremos encima la pieza que sacamos en el foami (goma eva) rosado, seguidamente tomaremos las piezas que serán la base de la poceta una la pegaremos al cartón y encima se pegara la otra pieza de foami esto hará que nuestra pieza nos quede fuerte.
Las piezas de la tapa de la poceta primero se pegara al cartón la de color rosado, volteamos la pieza y se pega ahora la que sacamos en el foami texturizado azul.
With silicone we will join the pieces that we cut out in the previous step: on top of the board we will glue the piece that we took out in the pink foami (eva rubber), then we will take the pieces that will be the base of the pot, one we will glue to the cardboard and on top glue the other piece of foami this will make our piece strong.
The pieces of the lid of the pot will first be glued to the cardboard, the pink one, we turn the piece over and now the one we took out is glued on the blue textured foami.
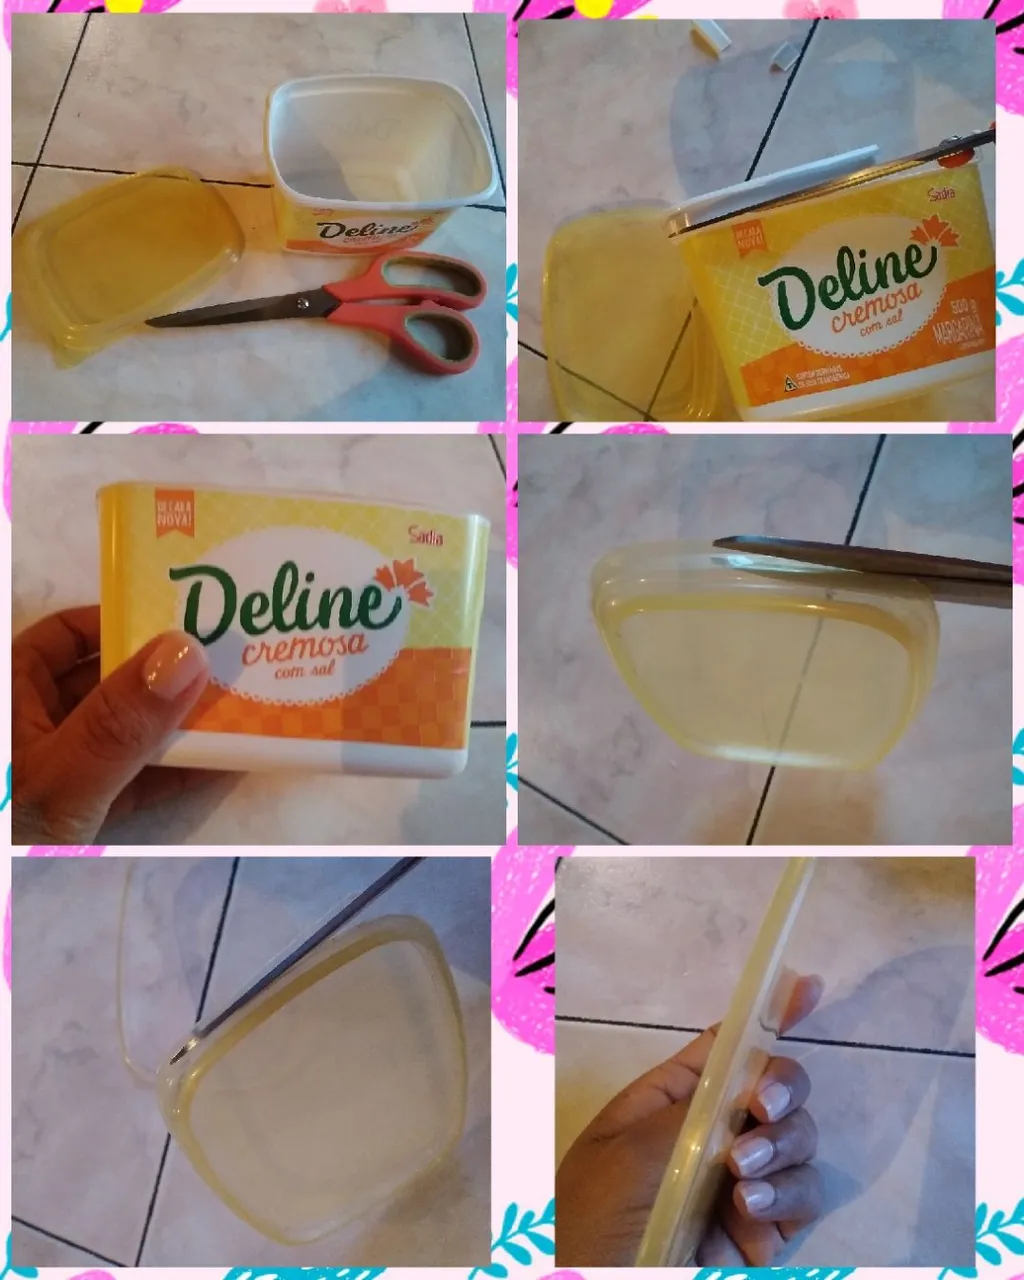
Ensamblaje del tanque de la poceta 🚽
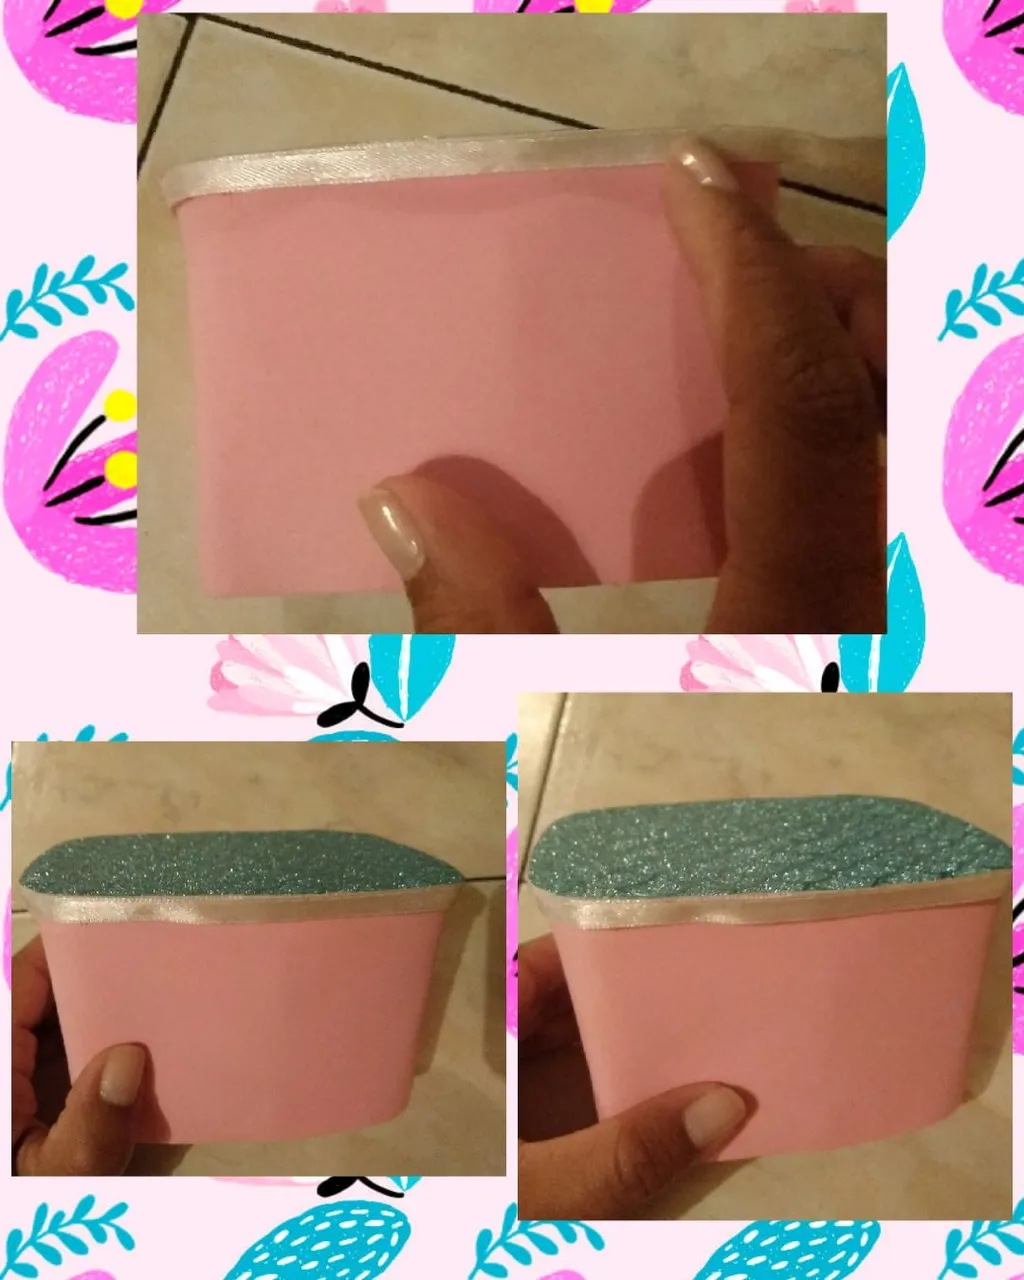
📌Para este paso usaremos el envase de mantequilla de esta manera reciclamos y reusamos, este me sirvió porque tiene forma rectangular y así son los tanques de las pocetas. Tomaremos la tijera y el envase le cortaremos la parte de arriba que es la pestaña del envase, continuaremos con la tapa y recortaremos la misma dejándola un tanto delgada.
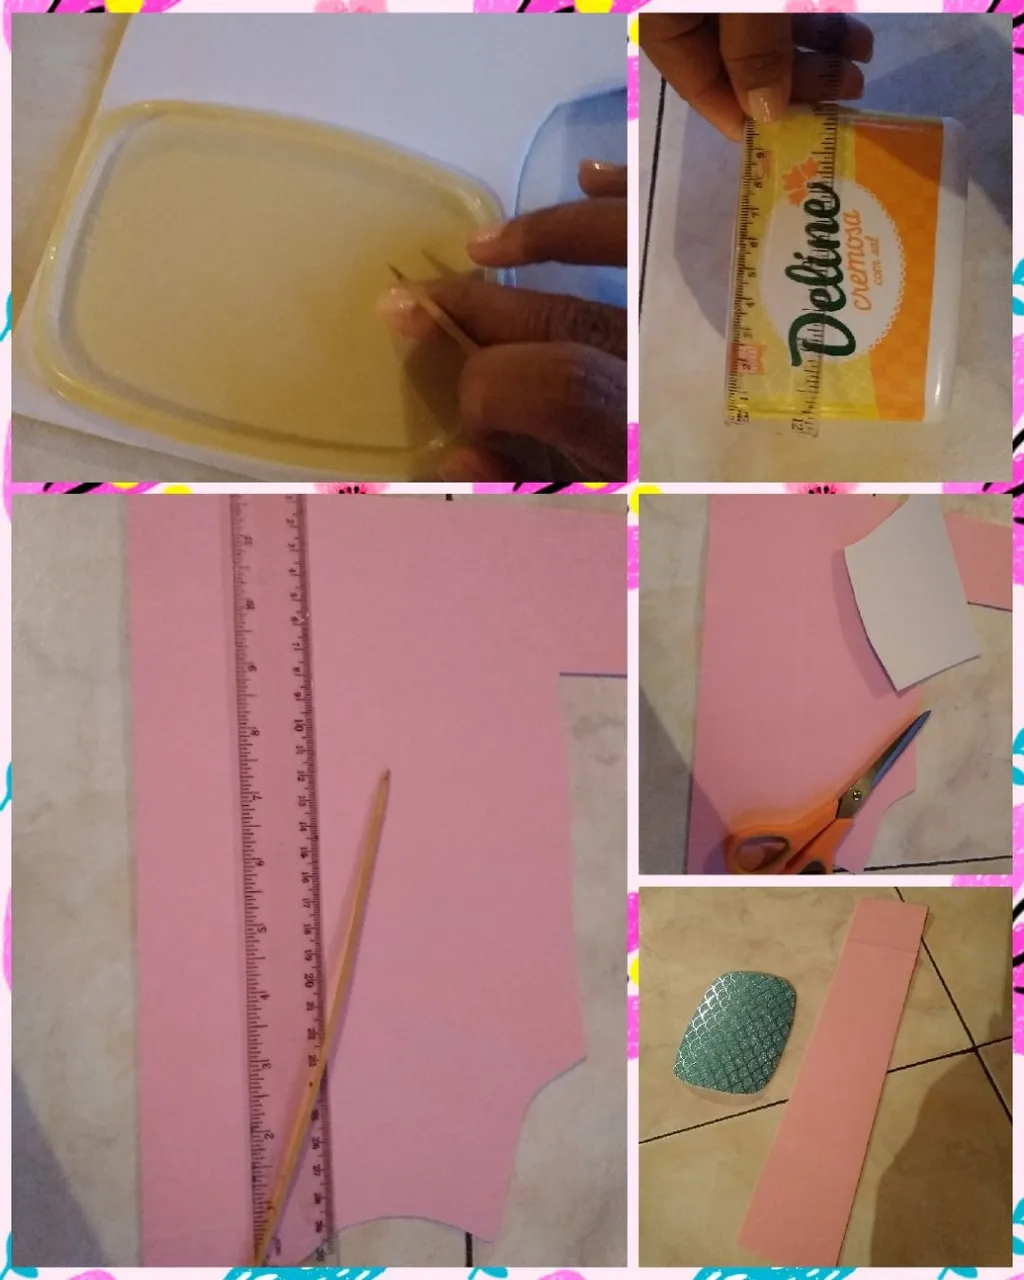
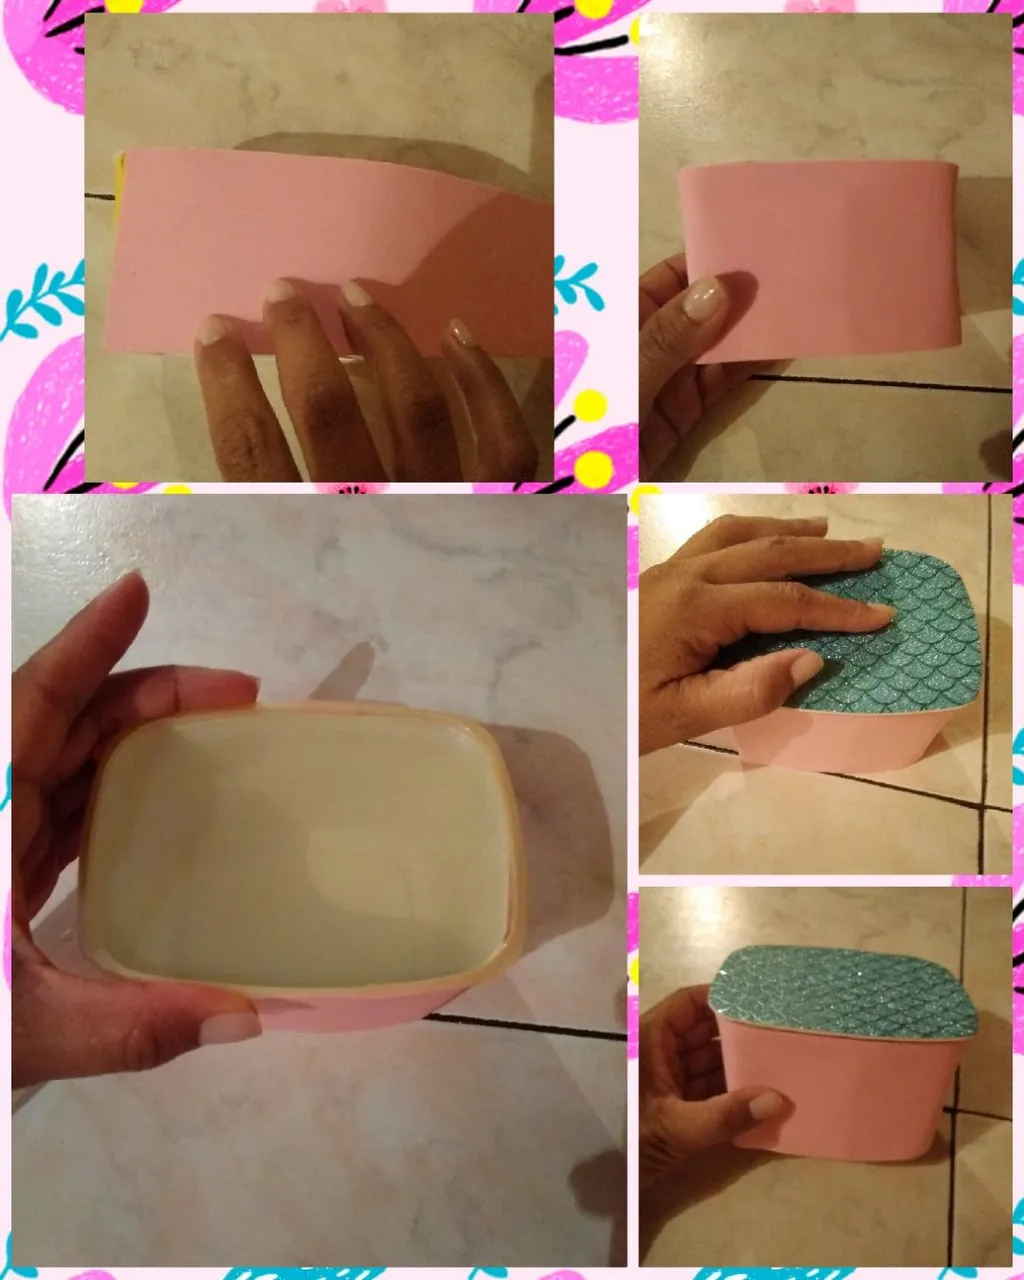
📌La tapa del envase se marcará con el palito de altura en el foami (goma eva) azul texturizado y para forrar el envase, le tomaremos las medidas con la regla para luego pasar al foami rosado el rectángulo de 35cm largo X 7cm ancho, luego se recortarán dichas piezas que marcamos.
📌Con el rectángulo que sacamos en el foami rosado vamos a forrar el envase de mantequilla haciendo uso del silicón, se le pegara la tapa al envase y encima se le pega la pieza que sacamos en el foami texurizado azul.
Poceta tank assembly 🚽
📌For this step we will use the butter container in this way, we recycle and reuse, this one worked for me because it is rectangular in shape and that is how the tanks of the pots are. We will take the scissors and the container, we will cut the upper part, which is the tab of the container, we will continue with the lid and we will cut it, leaving it somewhat thin.
📌The lid of the container will be marked with the height stick in the textured blue foam (eva rubber) and to line the container, we will take the measurements with the ruler and then transfer the rectangle of **35cm long X 7cm wide to the pink foami **, then those pieces that we marked will be cut out.
📌With the rectangle that we took out in the pink foam, we are going to line the container with butter using silicone, the lid will stick to the container and on top of that the piece that we took out in the blue textured foam will be glued.
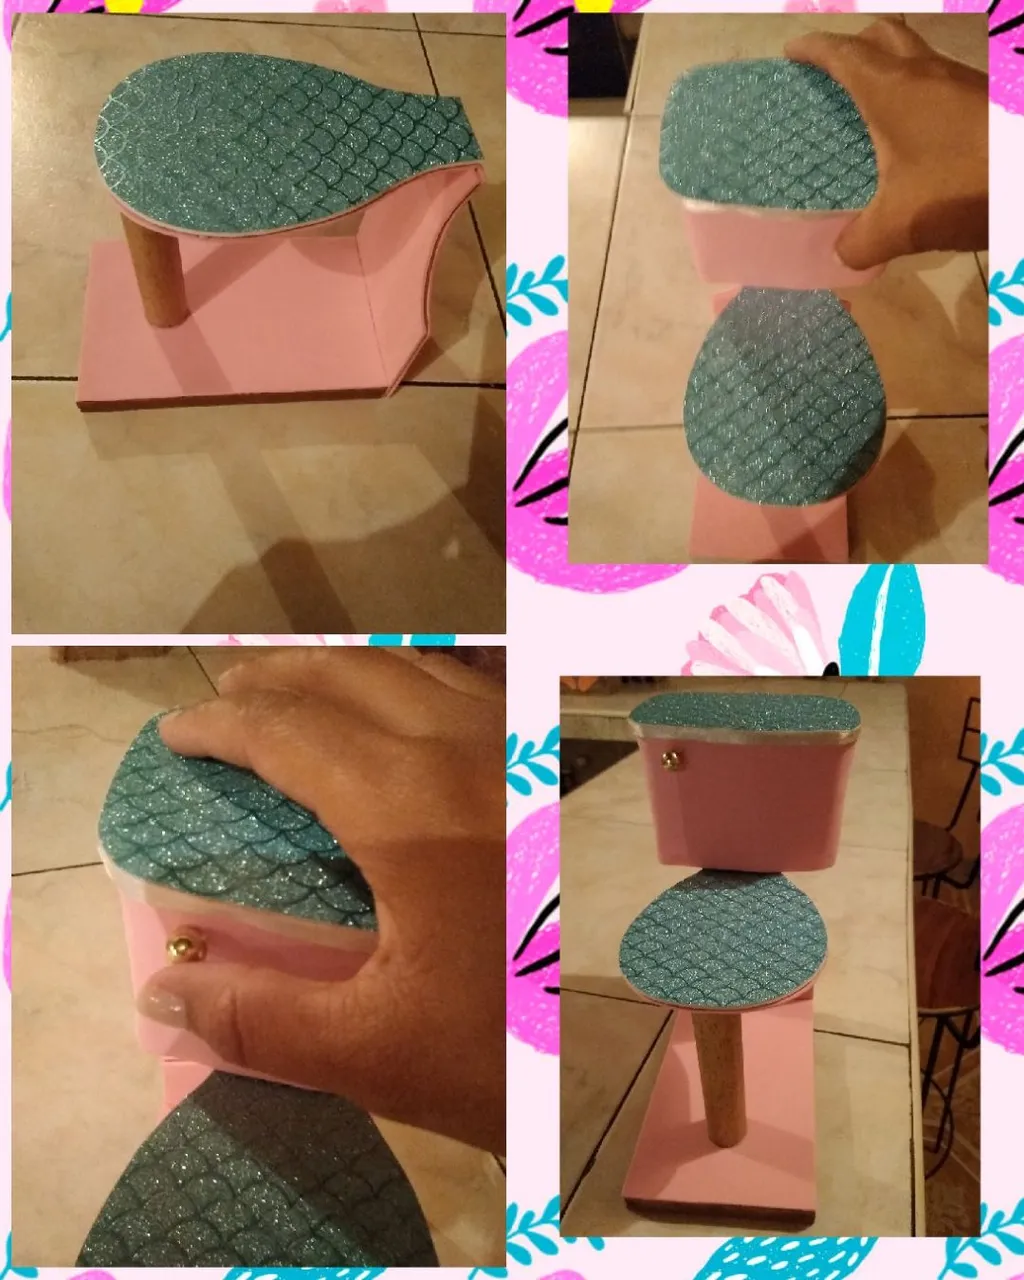
⏰ Hora de armar nuestro porta papel higiénico
📌Toma el rectángulo de madera ya forrado y con abundante silicón pegaremos en el extremo menos ancho sosten por unos segundos para que pegue muy bien, luego toma el palito de maderaque cortamos de un palo de escoba de barrer sus medidas recordemos que son 11cm largo este se pegara buscando el centro de la tabla dejaras unos 3 o 4cm del final de la tabla presiona por unos segundos para que no se nos despegue, ahora toma la tapa de la poceta y la pegaras a la base de la poceta dejando por encima la cara que se forro con el foami texturizado azul.
📌El envase de mantequilla que se convirtió en el tanque de la poceta la pegaremos con abundante silicón al final de la tapa de la poceta, es importante equilibrar el peso del tanque para que no se caiga y deberá quedarnos centrado. Para simular el bajante de la poceta usaremos la perla dorada mediana la cual se pegara con silicón en el lado izquierdo del tanque de la poceta.
⏰ Time to assemble our toilet paper holder
📌Take the wooden rectangle already lined and with plenty of silicone, we will glue it to the less wide end, hold it for a few seconds so that it sticks very well, then take the wooden stick that we cut from a broomstick to sweep its measurements, let's remember that they are 11cm long this will stick looking for the center of the table you will leave about 3 or 4cm from the end of the table press for a few seconds so that it does not come unstuck, now take the lid of the well and stick it to the base of the basin, leaving above the face that is lined with the blue textured foami.
📌The butter container that became the tank of the pot will be glued with abundant silicone at the end of the lid of the pot, it is important to balance the weight of the tank so that it does not fall and it must remain focused. To simulate the downspout of the sink we will use the medium golden pearl which will be glued with silicone on the left side of the sink tank.
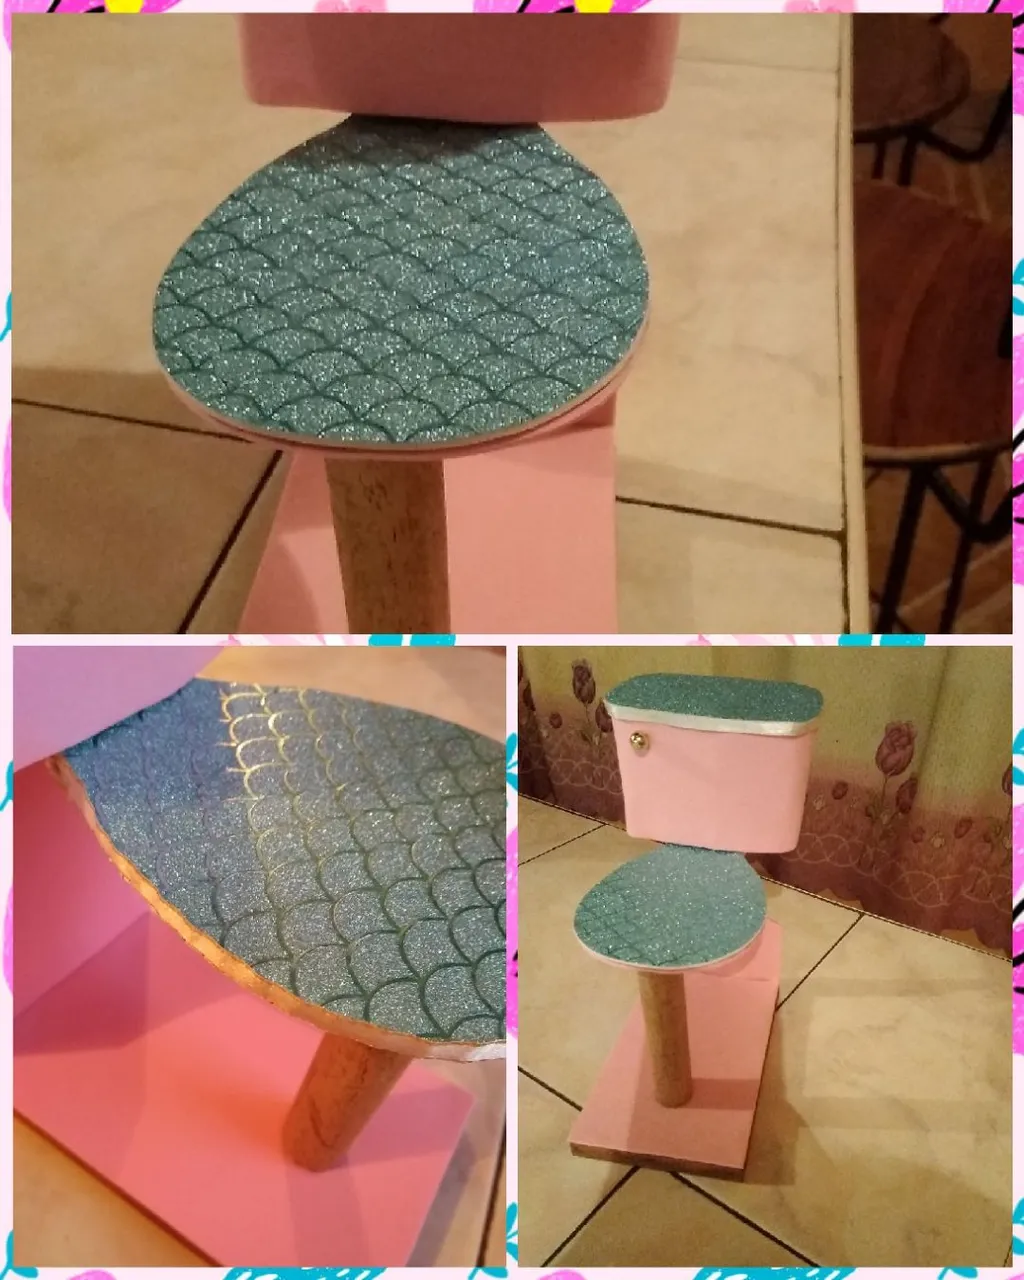
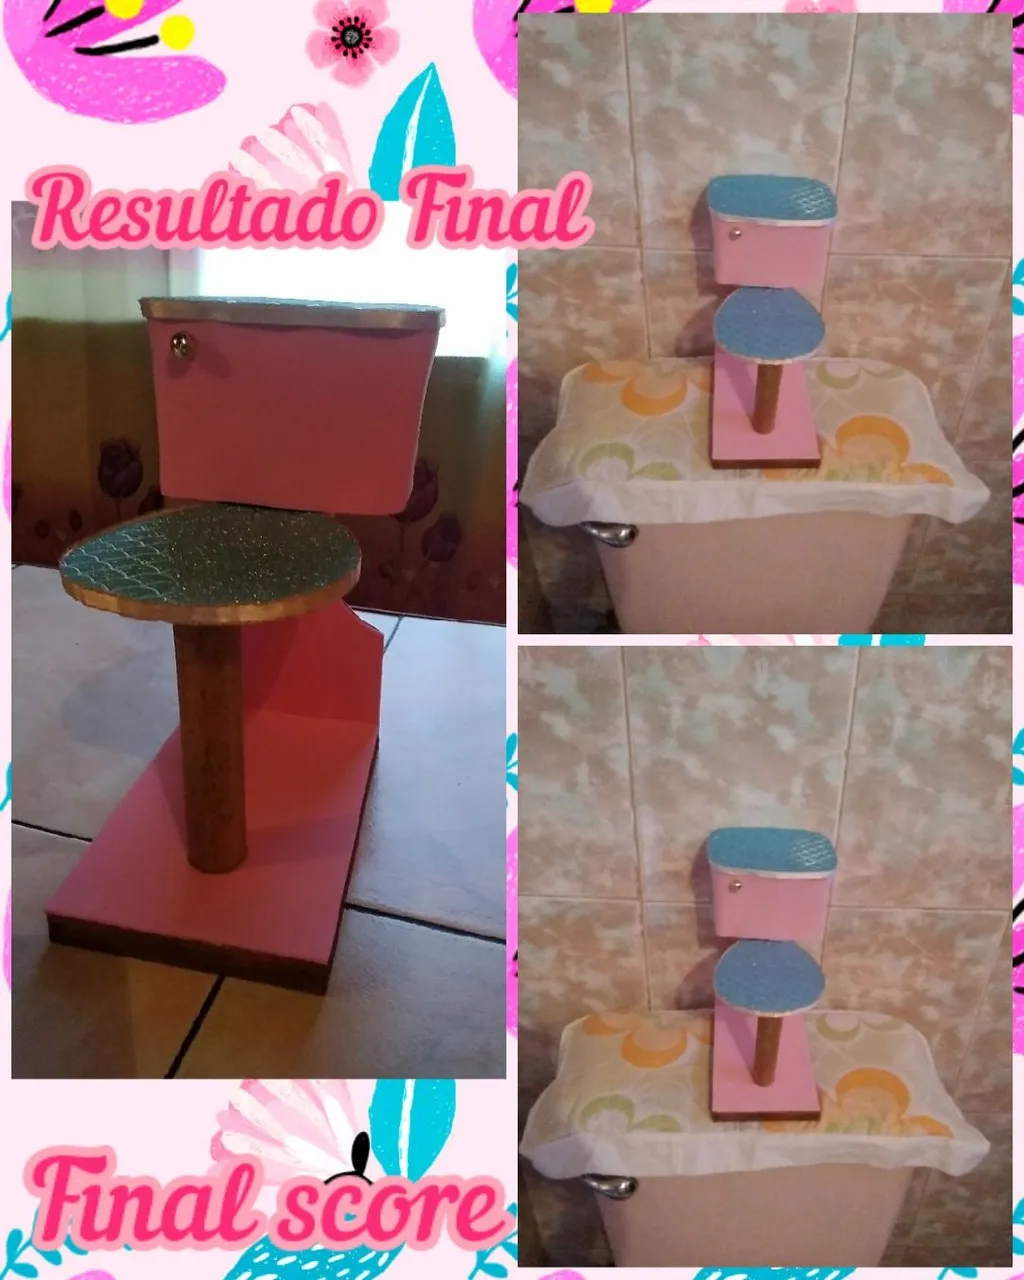
Para darle un último toque a este lindo porta papel higiénico a la tapa de la poceta le pegue con silicón por todo el borde cinta de raso así haría juego con el tapete de la tapa y de esta manera concluí con este proyecto del día de hoy, esperando les sea de gran utilidad para ustedes y lo realicen para acompañar la decoración de sus baños, es un porta papel un tanto peculiar porque tiene forma de una poceta pero en miniatura a mi me encanto este bello resultado por acá se los dejaré.
To give this cute toilet paper holder a final touch to the lid of the pot, I glued it with silicone all over the edge of the satin ribbon so it would match the mat on the lid and in this way I finished with this project for today, I hope it will be very useful for you and you can do it to accompany the decoration of your bathrooms, it is a somewhat peculiar paper holder because it has the shape of a small well but in miniature, I loved this beautiful result, I will leave it here for you.
Y bien amigos gracias por llegar hasta acá y leer cada una de mis publicaciones, que tenga un lindo y bendecido día lleno de energías positivas ✨🤗
Las fotos fueron tomadas y editadas con mi celular
use la aplicación "Foto Collage"
La traducción la realice con el traductor de google
Hasta un Próximo Encuentro!!!
🤗😘
And well friends, thank you for getting here and reading each of my posts, have a nice and blessed day full of positive energy ✨🤗
The photos were taken and edited with my cell phone.
use the "Photo Collage" app
The translation is done with google translator
Until a Next Meeting!!!
🤗😘