


Hola amigos de Hive ❤️ Hoy les quiero compartir una loca idea que se me ocurrió luego de mirar varios tutoriales sobre cuadros realizados con este tipo de técnicas que para mi era bastante inusual. Desde niña siempre me ha llamado la atención dibujar, aunque me siento mas cómoda dibujando con grafitos, y aprender a pintar usando este tipo de material me interesa mucho, y que mejor oportunidad y facilidad que tenemos hoy en día con en internet para practicar. La técnica de por si es bastante curiosa porque este tipo de pinturas o cuadros, no se usan brochas o pinceles, sino cualquier material que nos ayude a darle la forma, el relieve y el acabado como un cuadro hecho de la manera convencional. La idea en si, es bastante atractiva, sobre todo por la facilidad con el que puedes hacer hermosos cuadros como un profesional, sin imaginar que usaremos materiales que tenemos en casa, y sobre todo mucha practica para tener mas seguridad y agarrarle el truco. Para este diseño estaré usando como base un cuadrado de cartón que recicle de una caja que tenia guardada, por lo menos para empezar a practicar, si mas adelante nos sentimos capaces de hacerlo mejor, podemos intentar hacerlo en una base mas bonita y profesional. Además usare una cuchara, unos cotonetes, una esponja y varias pinturas acrílicas de colores para combinar tonos y crear el efecto que se busca con este tipo de técnica. Si te gusta, y al igual que yo te quieres animar e intentar, te animo a que me acompañes y practiques junto a mi para realizarlo, y ahora sí, sin más que agregar... Comencémos!!

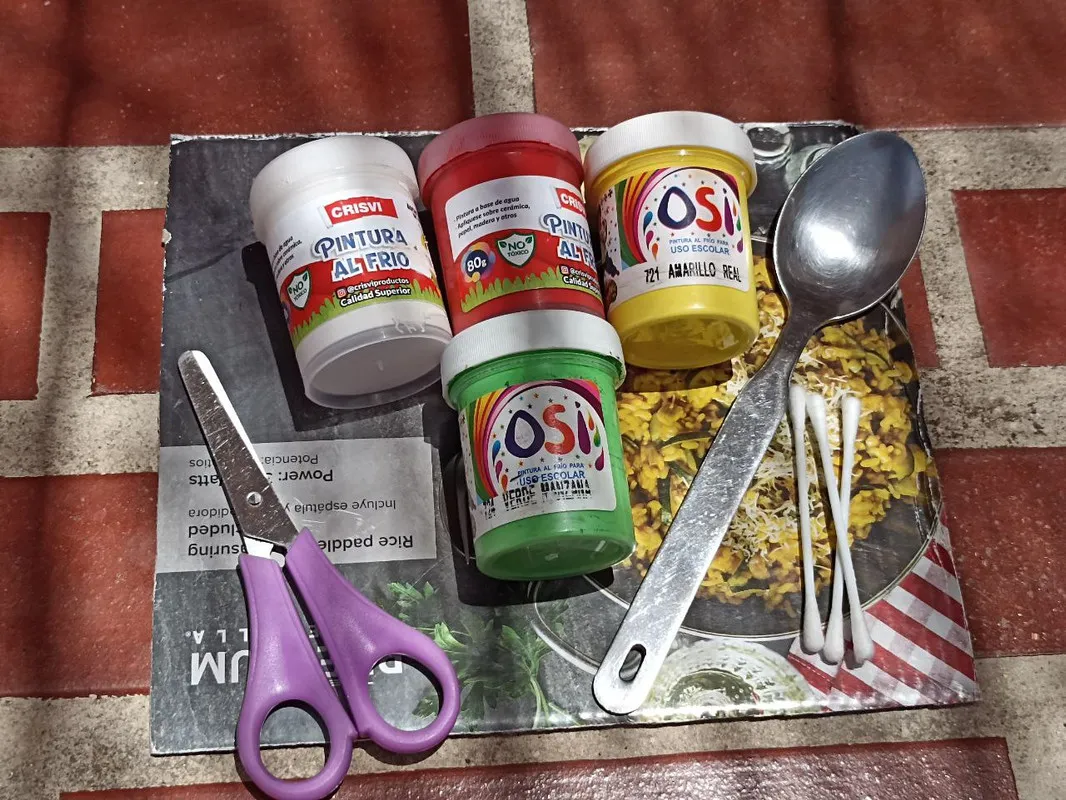

- Cuadrado de cartón
- Pinturas acrílicas
- Cotonetes (Isopos)
- Cucharas
- Tijera
- Esponja
- Brillo

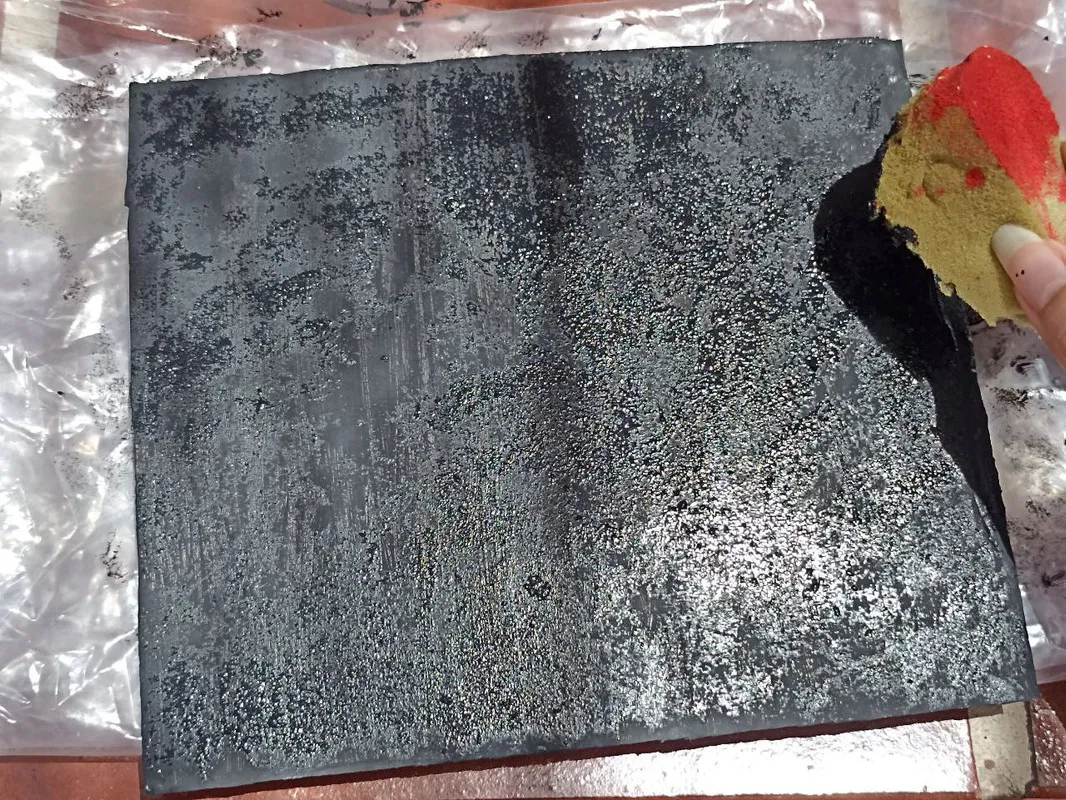
Primero voy a tomar el cuadrado de cartón y lo voy a pintar de color negro con ayuda de una esponja para darle un lindo efecto, en caso de no tenerlo, lo puedo recortar del tamaño que desee, pero como en este caso lo usare para practicar, usare un pequeño cuadrado de cartón. si hace falta le agregamos varias capas hasta que cubra todo.
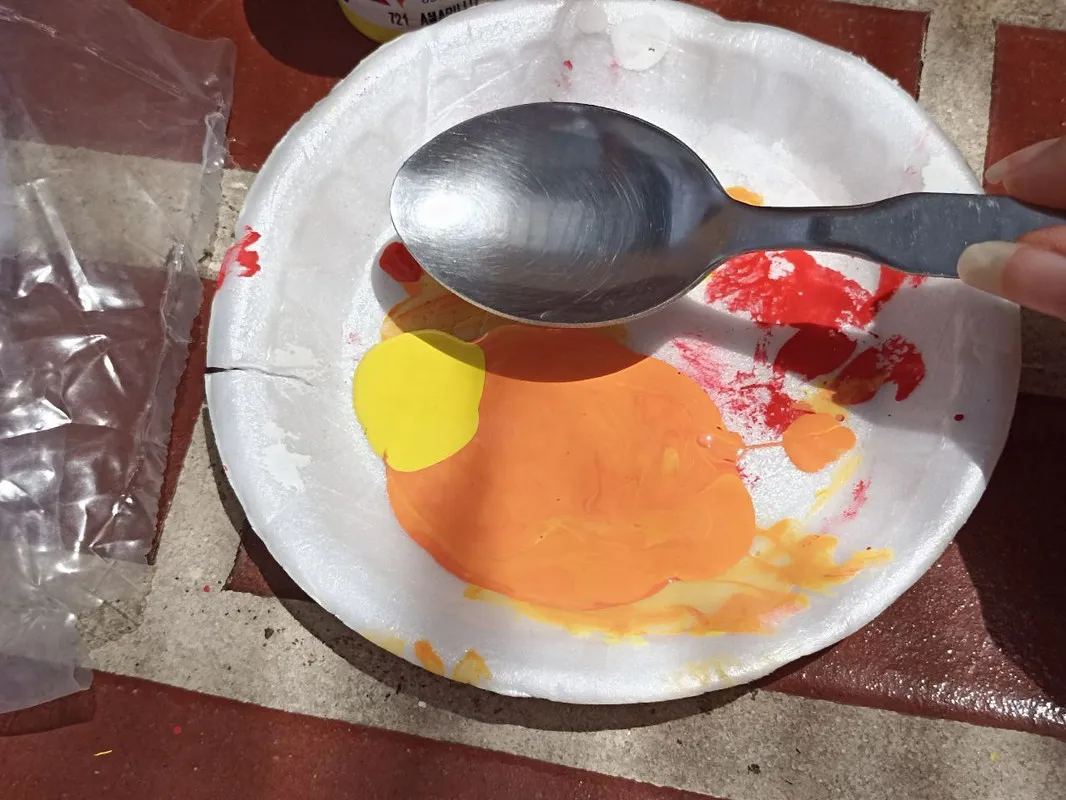
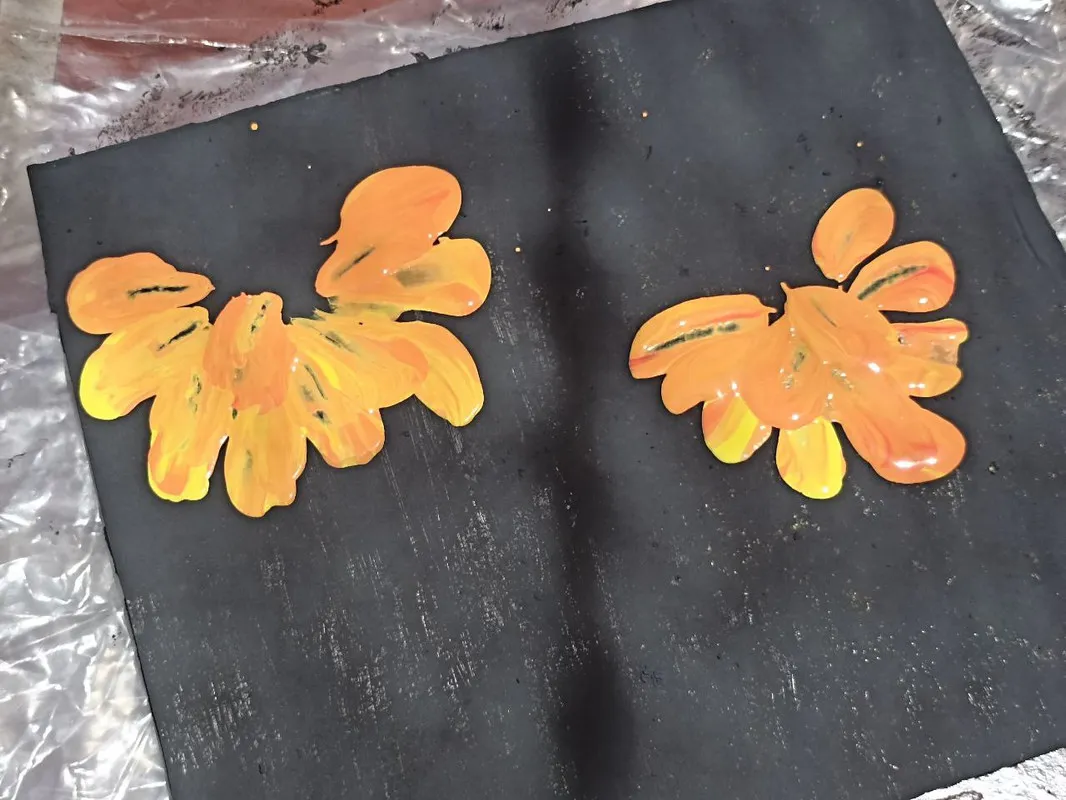
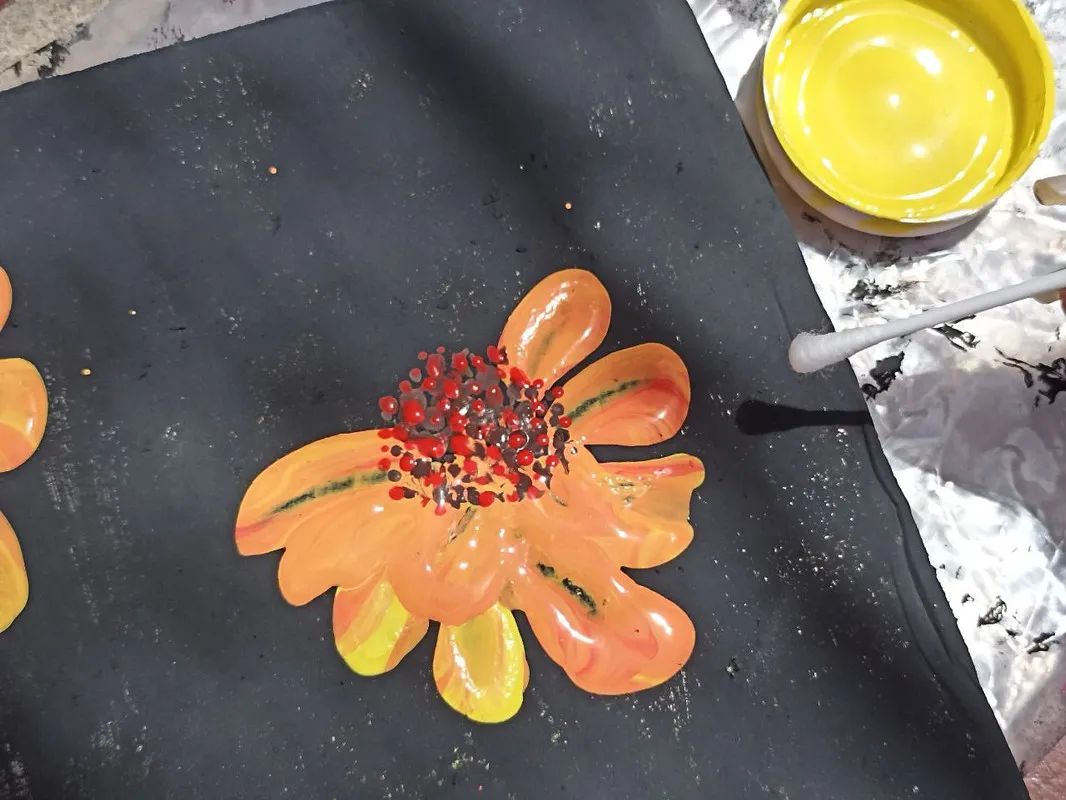
Aun con la pintura base fresca, vamos a combinar dos tonos de colores, en este caso, para que parezca un cuadro primaveral, usare tonos cálidos para que se degraden muy bien entre si, como lo son el amarillo, el naranja y el rojo. Para comenzar a pintar voy a tomar un poco de pintura de cada color con la cuchara como les muestro en las fotos, y empezare a pintar unas especies de gotas, haremos varias hasta dar la forma de lo que serán los pétalos de nuestras flores. Aquí no me salieron como esperaba, pero creo que con mas practica se puede mejorar!

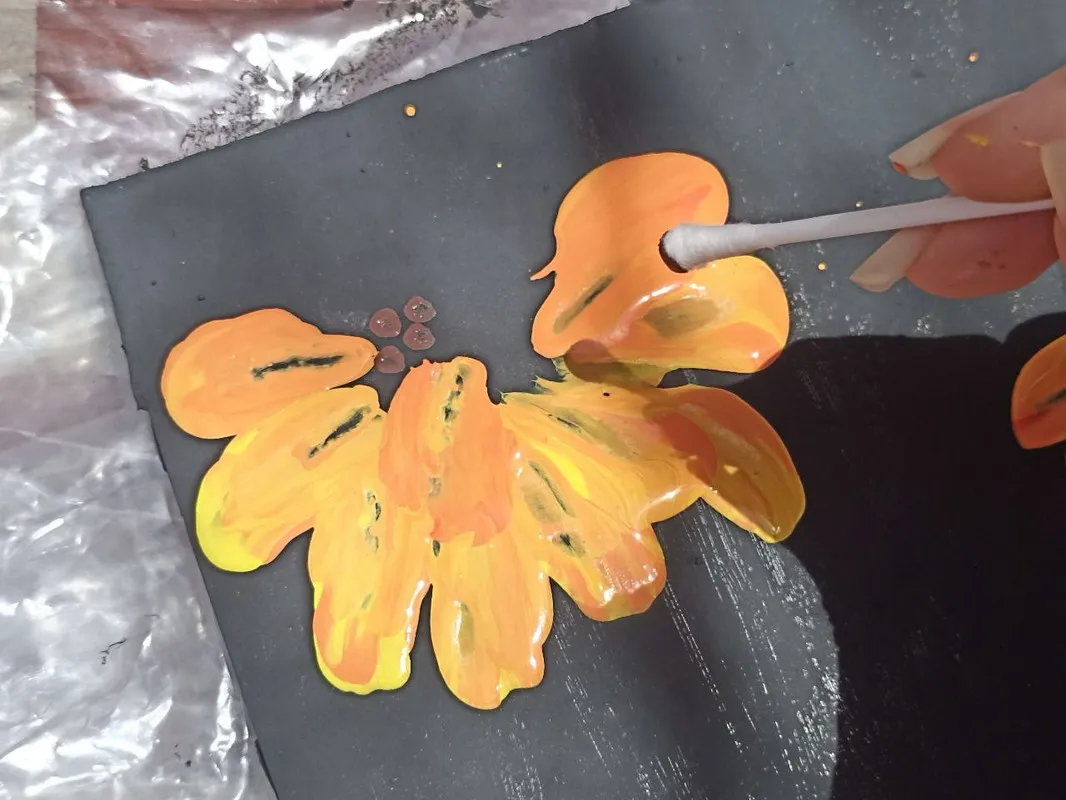
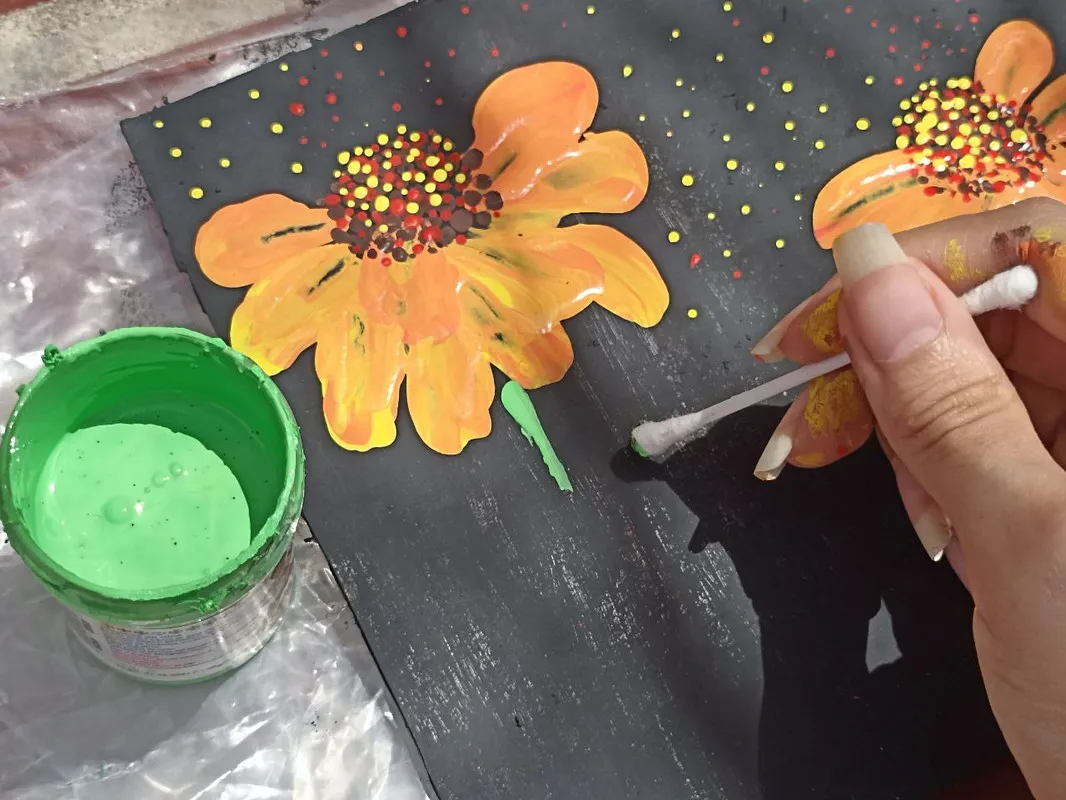
El siguiente paso será con los cotonetes, vamos a usar otros tonos de colores como el marrón, luego rojo, y después el amarillo, con la punta, haremos en la parte superior de los pétalos varios puntos sin ningún orden, aquí dejamos volar la creatividad e imaginación para darle la forma y el tamaño, además de jugar con los tonos para crear un lindo efecto de luces y sombras, y luego de la misma forma que hicimos los puntos, haremos el tallo de nuestras flores con pintura verde, con un poco de pulso y precisión hasta terminar hasta el final del cuadrado y las hojas.
Ya casi para terminar y darle un toque de luz, voy a usar una pintura al frio que actúa como brillo para este tipo de superficie, vamos a usar una brocha grande o mediana según el tamaño de nuestro cuadro, como seca bastante rápido no debemos repasar, sino pintar de forma continua y esperar que seque para repetir otra capa si es necesario.
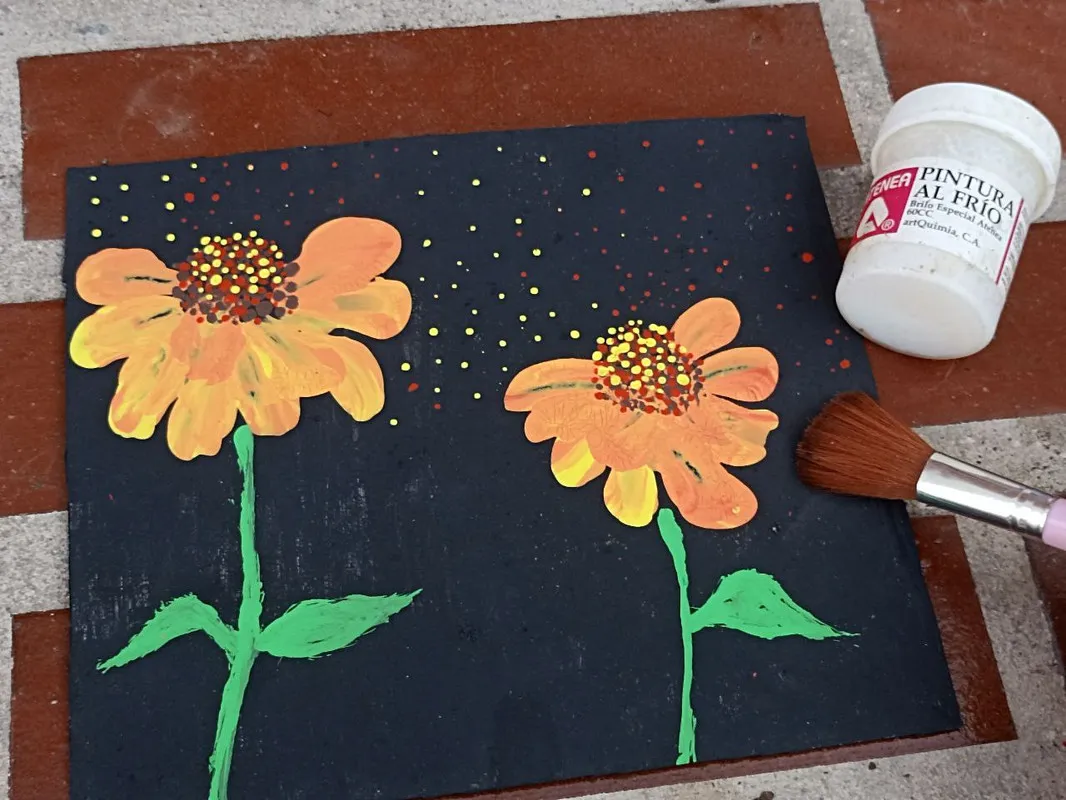

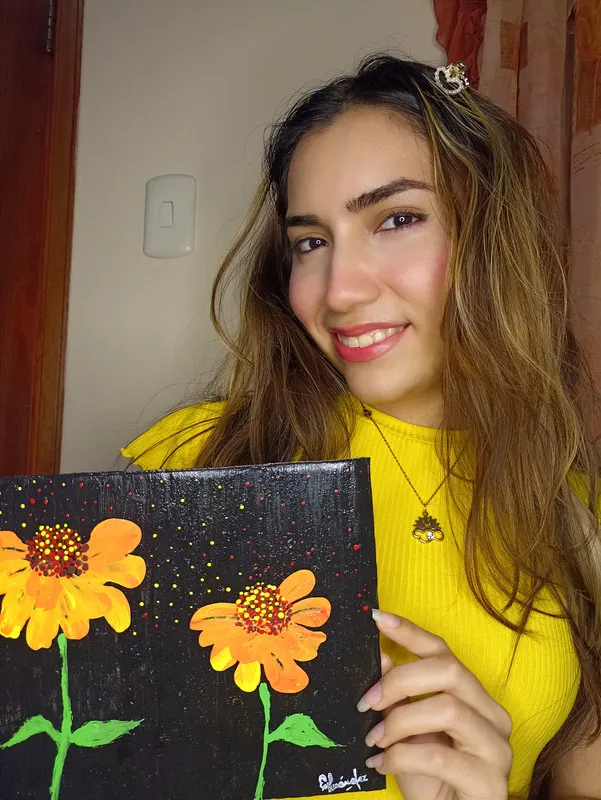
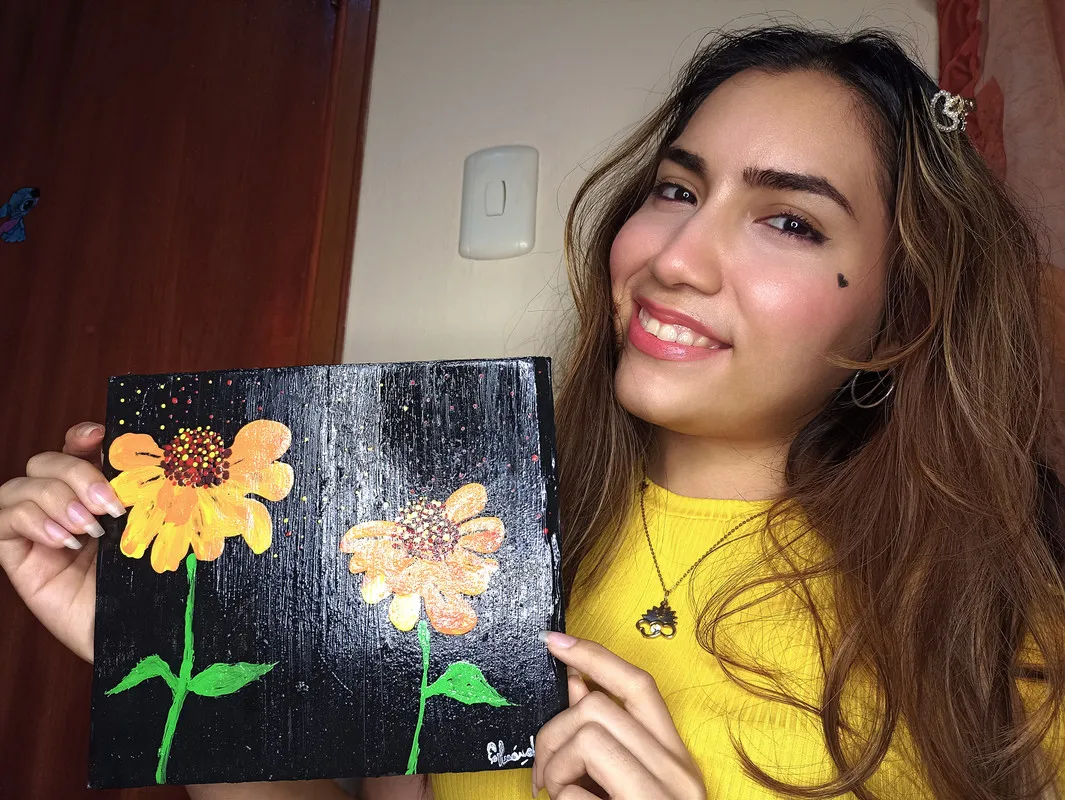
Y aquí les muestro el cuadro terminado!!. aunque fue mi practica espero compartirles nuevas ideas de técnicas para realizar lindos cuadros como un profesional usando materiales super fáciles de conseguir y manipular... La creatividad es tuya y por supuesto un toque secreto de amor para que el trabajo quede con el mejor acabado 🥰.!! si te gusto te animo a que lo intentes, me encantó mostrarles este pequeño tutorial ...espero compartirles muy pronto nuevos trabajos, con mucho cariño me despido y será hasta la próxima !!💕


Hello friends of Hive ❤️ Today I want to share with you a crazy idea that came to me after watching several tutorials on paintings made with this type of techniques that for me was quite unusual. Since I was a child I have always been interested in drawing, although I feel more comfortable drawing with graphite, and learning to paint using this type of material interests me a lot, and what better opportunity and facility we have today with the internet to practice. The technique itself is quite curious because this type of paintings or pictures, do not use brushes or paintbrushes, but any material that helps us to give the shape, relief and finish as a painting made in the conventional way. The idea itself is quite attractive, especially for the ease with which you can make beautiful paintings like a professional, without imagining that we will use materials that we have at home, and above all a lot of practice to be more confident and get the hang of it. For this design I will be using as a base a cardboard square that I recycled from a box that I had saved, at least to start practicing, if later we feel able to do it better, we can try to do it in a more beautiful and professional base. In addition I will use a spoon, some cotton swabs, a sponge and several colored acrylic paints to combine tones and create the effect that is sought with this type of technique. If you like it, and like me you want to try it, I encourage you to join me and practice with me to make it, and now, without further ado.... Let's start!

- Cardboard square
- Acrylic paints
- Cotton swabs (Isopos)
- Spoons
- Scissors
- Sponge
- Glitter
![]()
First I am going to take the cardboard square and paint it black with the help of a sponge to give it a nice effect, in case I don't have it, I can cut it to the size I want, but as in this case I will use it to practice, I will use a small cardboard square. If necessary we will add several layers until it covers everything.
Even with the fresh base paint, we are going to combine two tones of colors, in this case, to make it look like a spring painting, I will use warm tones so that they degrade very well with each other, such as yellow, orange and red. To start painting I will take some paint of each color with the spoon as shown in the pictures, and I will start painting some drops, we will make several until we get the shape of what will be the petals of our flowers. Here they did not come out as I expected, but I think that with more practice you can improve!
The next step will be with the cotonets, we will use other shades of colors like brown, then red, and then yellow, with the tip, we will make at the top of the petals several points without any order, here we let fly the creativity and imagination to give the shape and size, besides playing with the tones to create a nice effect of lights and shadows, and then in the same way we did the points, we will make the stem of our flowers with green paint, with a little pulse and precision to finish until the end of the square and leaves.
Almost to finish and give it a touch of light, I will use a cold paint that acts as a gloss for this type of surface, we will use a large or medium brush depending on the size of our painting, as it dries fairly quickly we should not go over, but paint continuously and wait for it to dry to repeat another layer if necessary.
And here I show you the finished painting!!!. although it was my practice I hope to share with you new ideas of techniques to make beautiful paintings like a professional using super easy to get and manipulate materials..... The creativity is yours and of course a secret touch of love so that the work is with the best finish 🥰.!!! if you like it I encourage you to try it, I loved showing you this little tutorial ...I hope to share with you very soon new works, with much affection I say goodbye and will be until next time !!!💕
Todo el contenido es de mi autoría y las imágenes son de mi propiedad
Cámara: Redmi note 10s
Uso un aro de luz LED como base para mi teléfono y tomarme las fotos
All content is my own and images are my property
Camera: Redmi note 10s
I use an LED light ring as a base for my phone to take pictures of myself

Edición y Separador|Editing and Separator
App PicMonkey - App Picsart - App Canva
Traductor|Translator
DeepL


