Buenas noches queridos amigos.
Bienvenidos todos a mi Blog.
Espero todos estén bien.
Ahora te invito a que me acompañes a ver el proceso.
Para ello vas a necesitar los siguientes materiales:
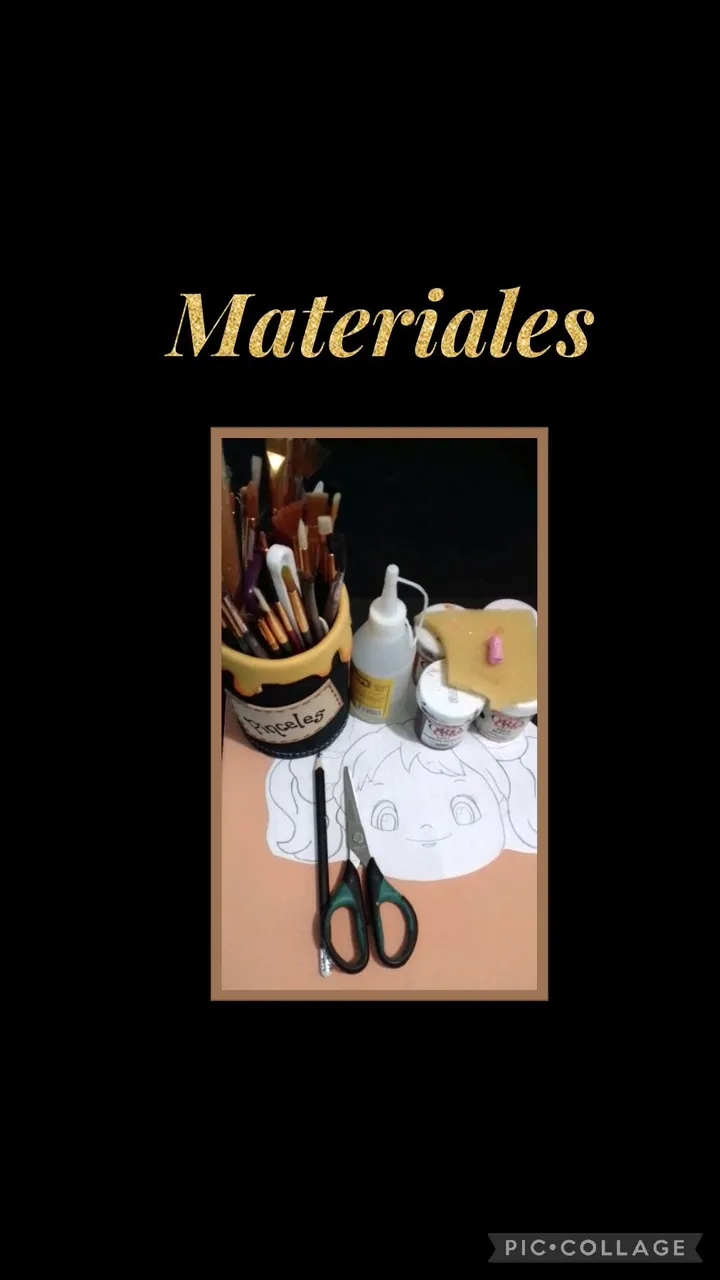
| Foami mate | Pinturas y pinceles al frío! |
|---|---|
| Tiza pastel o rubor | Goma espuma |
| Tijera | Lápiz |
| Molde o dibujo | Palito de madera |
| Pañito | Agua |
Comencemos:
Paso 1:
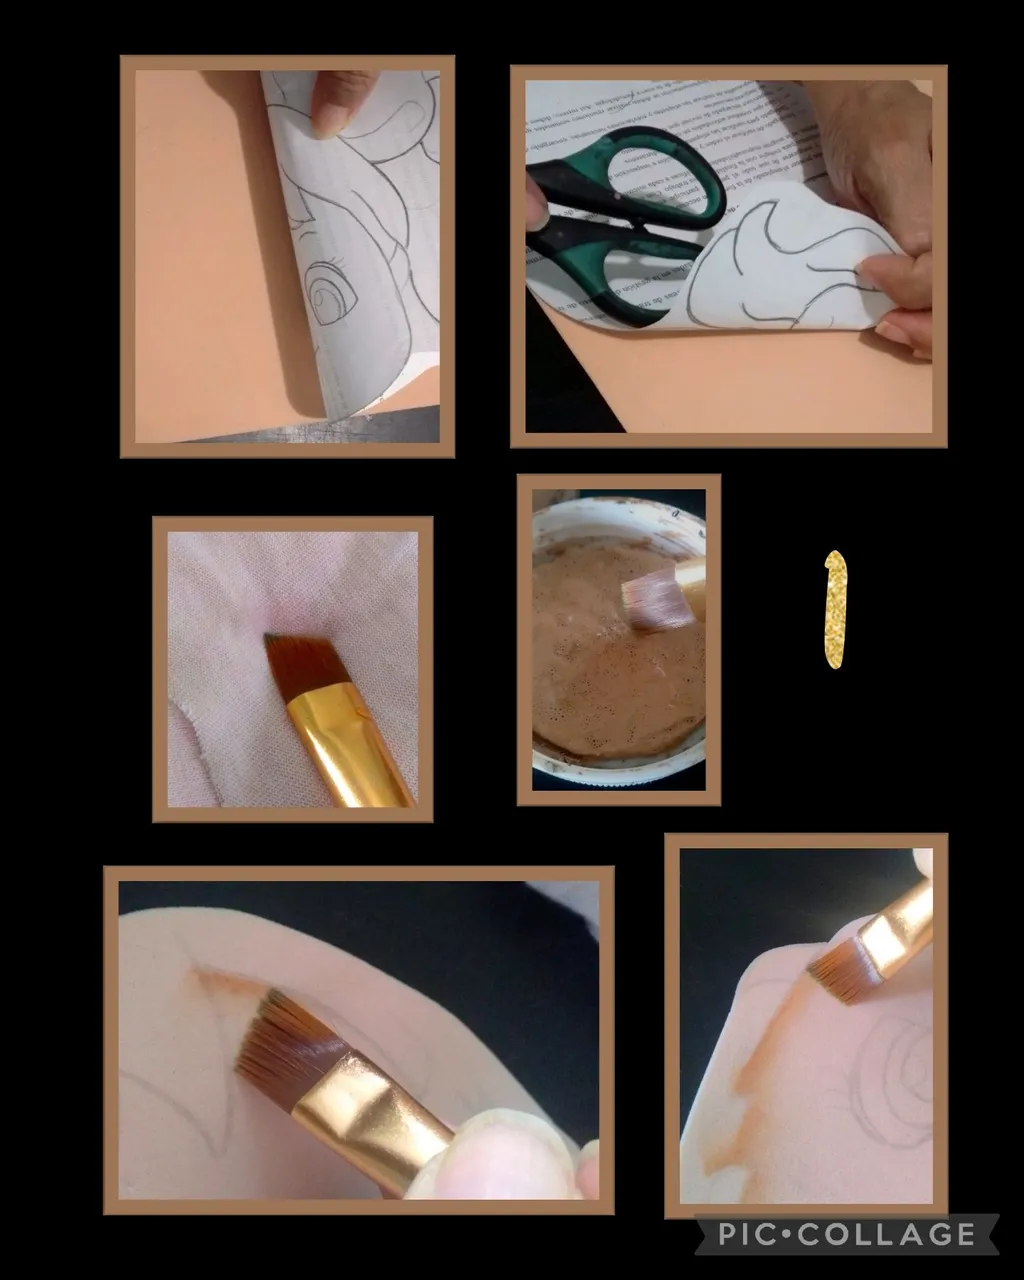
Transferir, recortar y pintar usando el pincel angular:
- Primero remarca el dibujo o impresión con un lápiz de mina blanda como HB, luego para transferir la cara, coloca el dibujo sobre el foami color piel, frota con la ayuda de la tijera y recorta, igualmente harás con el cabello.
- Ahora moja el pincel angular y pasa por un pañito para quitar el exceso de agua, luego moja solo la punta en el color de la pintura que vas a utilizar y comienza a pasar por el borde marcado como se ve en la foto.
Paso 2:
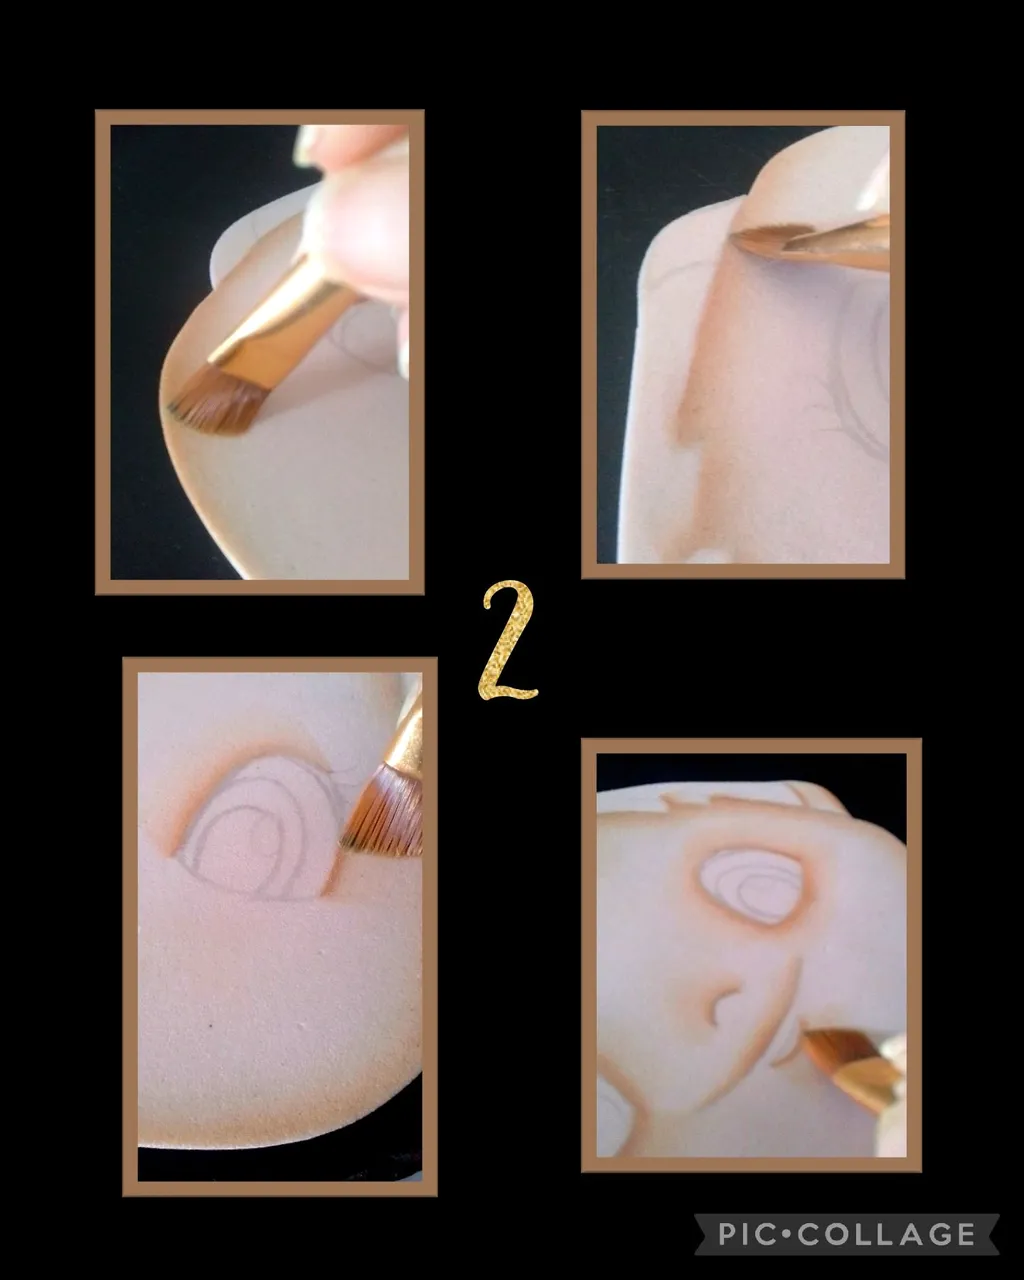
- Cuando el pincel se seque, vuelve a repetir el procedimiento y para que no te quede como una línea, puedes humedecer con agua el pincel e ir pasando el pincel un poco hacia adentro para difuminar el color.
- Igualmente repite en los ojos, nariz y boca.
Paso 3:
Pintar con pincel plano:
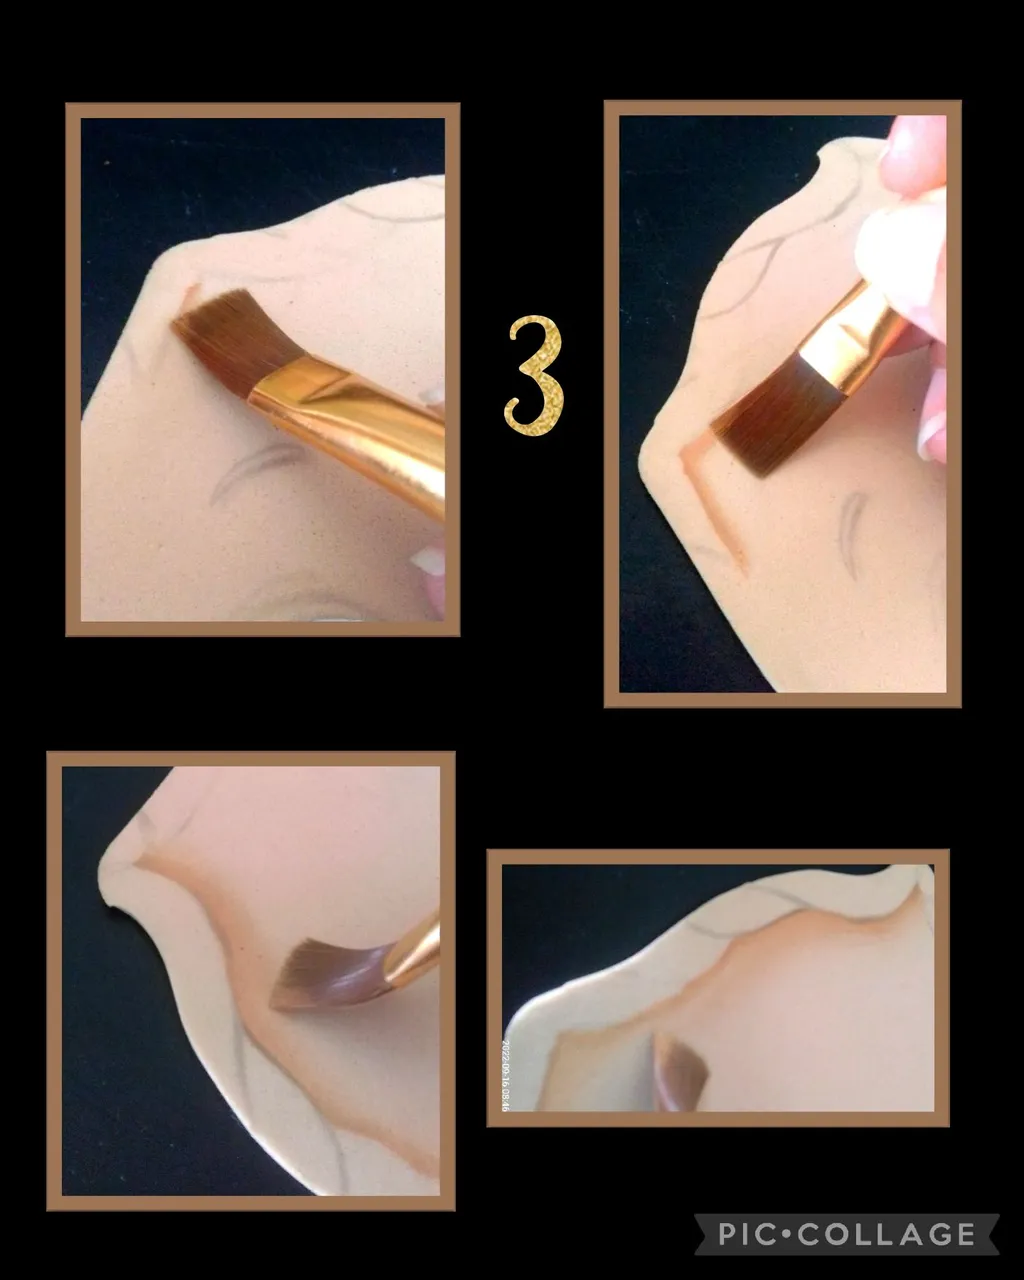
- Como a veces no tenemos un pincel angular, puedes igualmente utilizar un pincel plano para pintar, difuminar o sombrear las figuras o piezas de foami.
Sólo debes repetir el mismo procedimiento que usaste con el pincel angular y si quieres que tu difuminado sea más ancho, solo debes mojar un poco más de la punta del pincel en la pintura.
Paso 4:
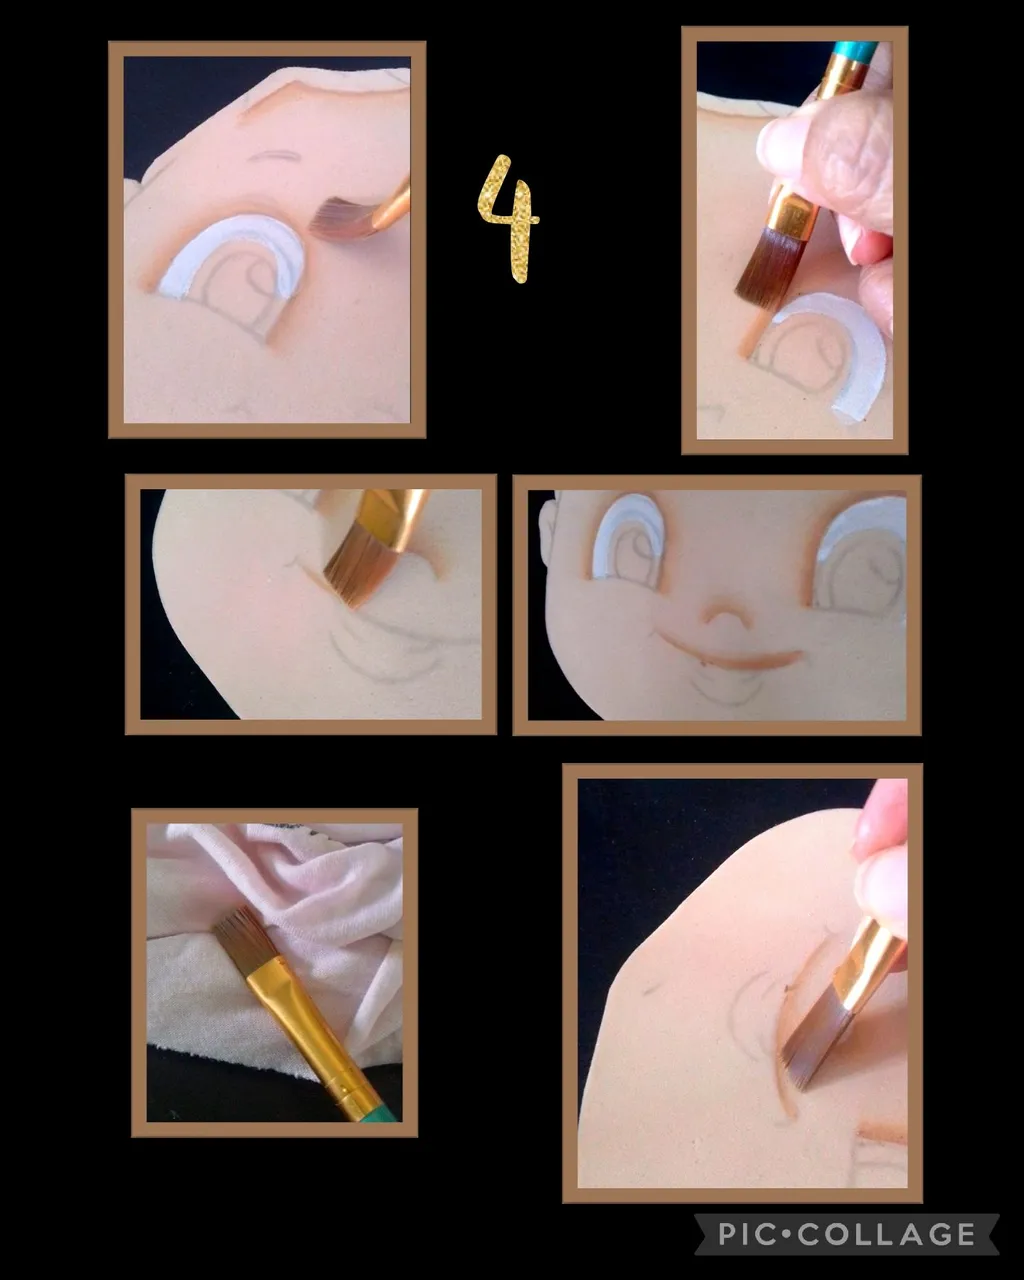
- En este paso, rellené los ojos con pintura blanca usando un pincel delgado y después difuminé todo el contorno con pintura piel canela, igualmente la nariz y contorno de la boca.
- (Como puedes ver en la parte derecha de la boca me quedó muy grueso el borde, y si te llega a pasar, para corregirlo, debes lavar el pincel, pasar por el pañito y quitar el exceso de agua, luego pásalo por encima de la línea y corrige.) Este procedimiento debe ser con un pincel de cerdas un poco duras.
Paso 5:
Pintar con pañito de tela:
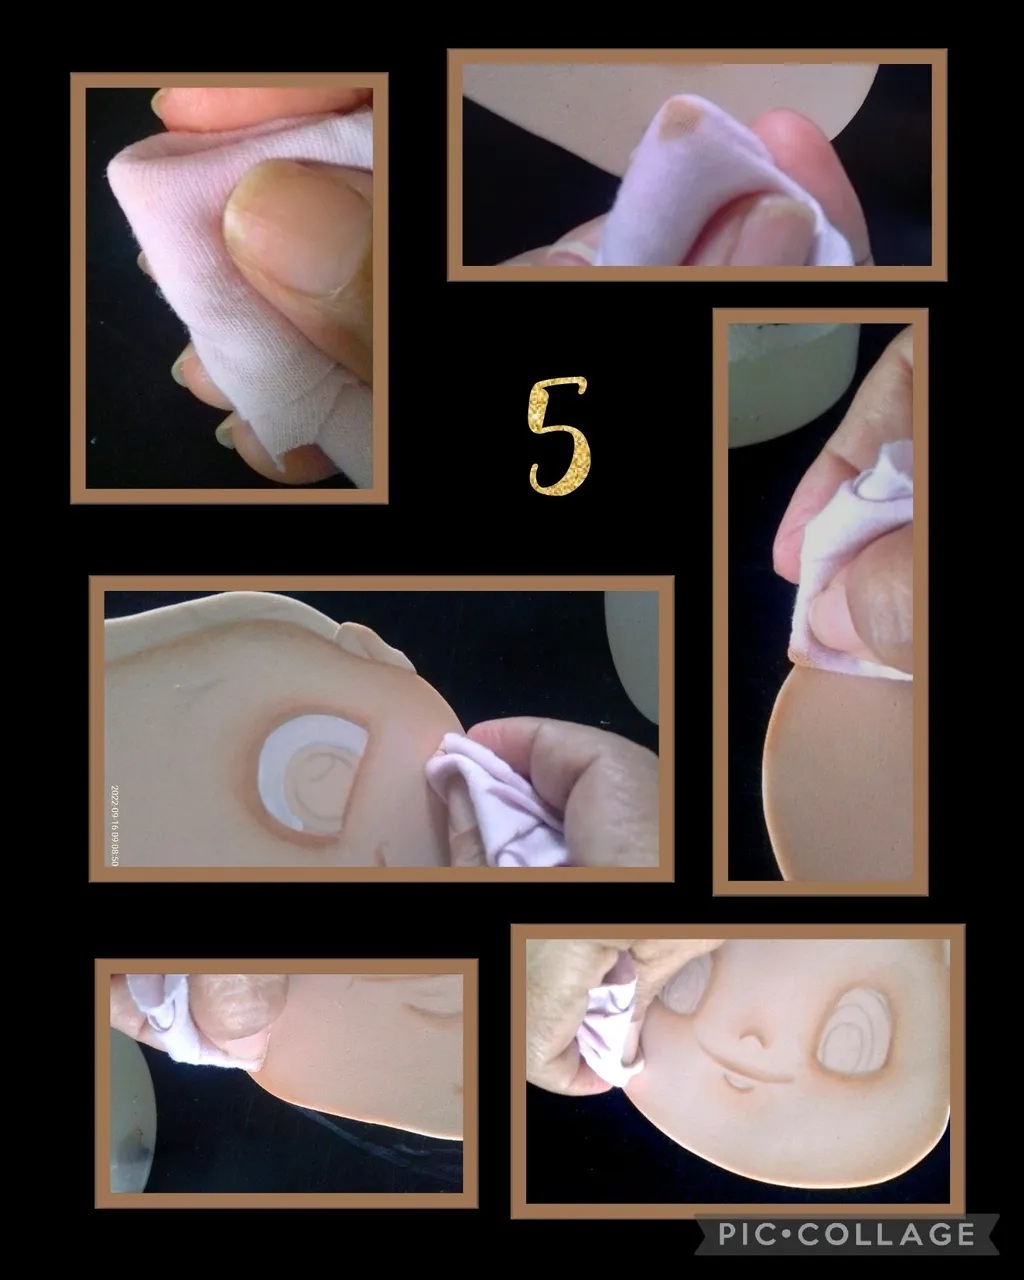
- Recorta un pedacito de tela de algodón y dobla en 2 partes, humedece la punta con agua y luego en la pintura color piel y comienza a pasar frotando por todo el borde de la carita, este método se utiliza más que todo para el borde, los rasgos de la cara hazlo con pincel.
Mi recomendación es que practiques en un pedazo de foami y luego lo haces en la pieza.
Paso 6:
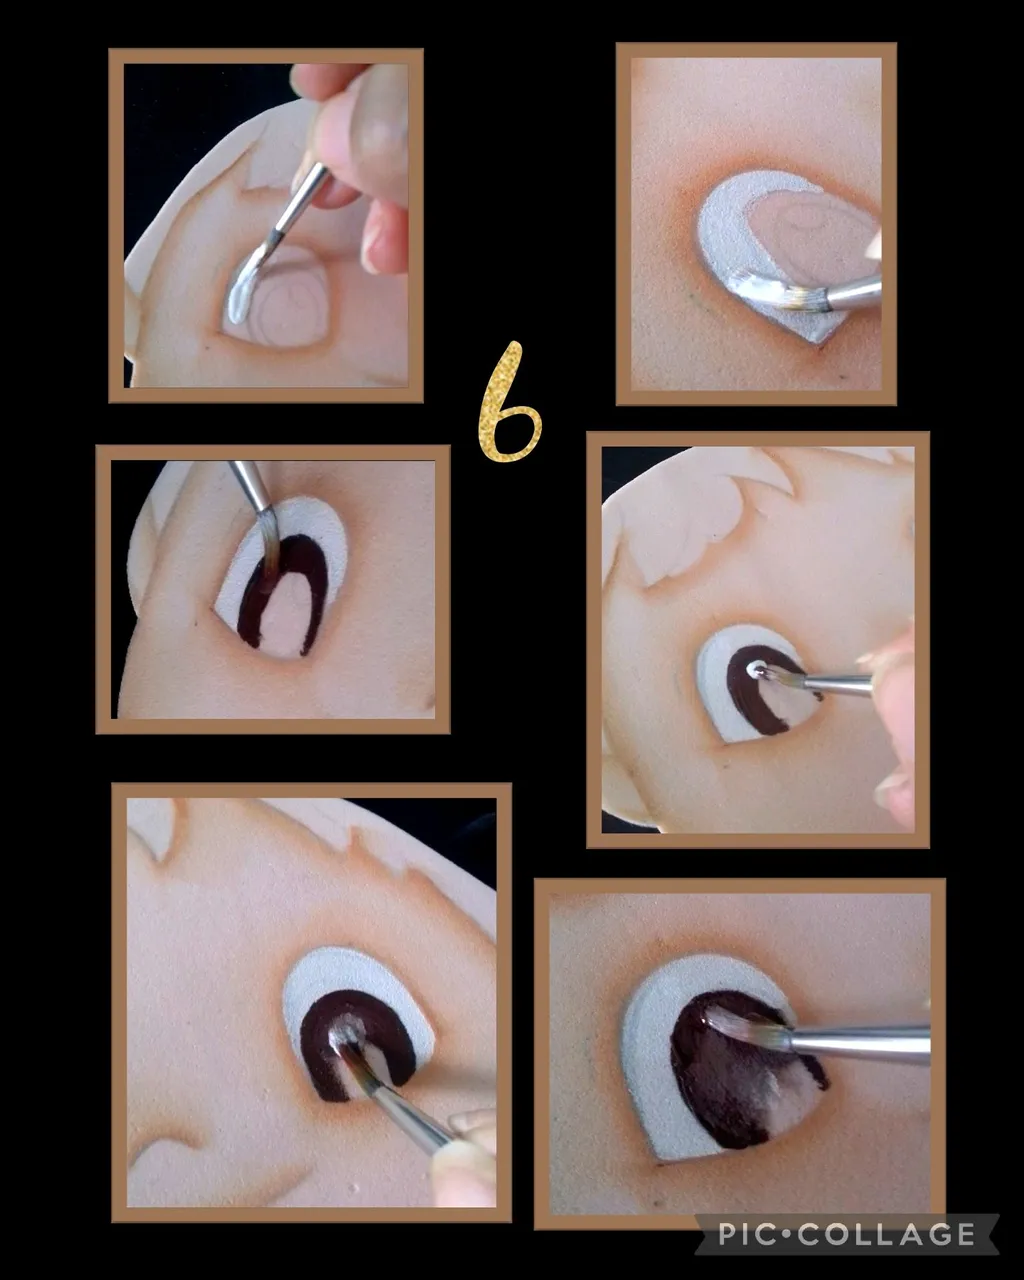
- Ahora rellena los ojos de la primera carita con pintura blanca usando un pincel delgado y deja secar.
- Luego comienza a pintar el iris, con pintura color marrón y guiándote por el dibujo transferido, aparte lava el pincel y aún húmeda la pintura, moja en la pintura blanca y pon un poco en la parte superior del ojo y comienza a unir con el marrón para bajar el tono del color e iluminar el ojo.
Paso 7:
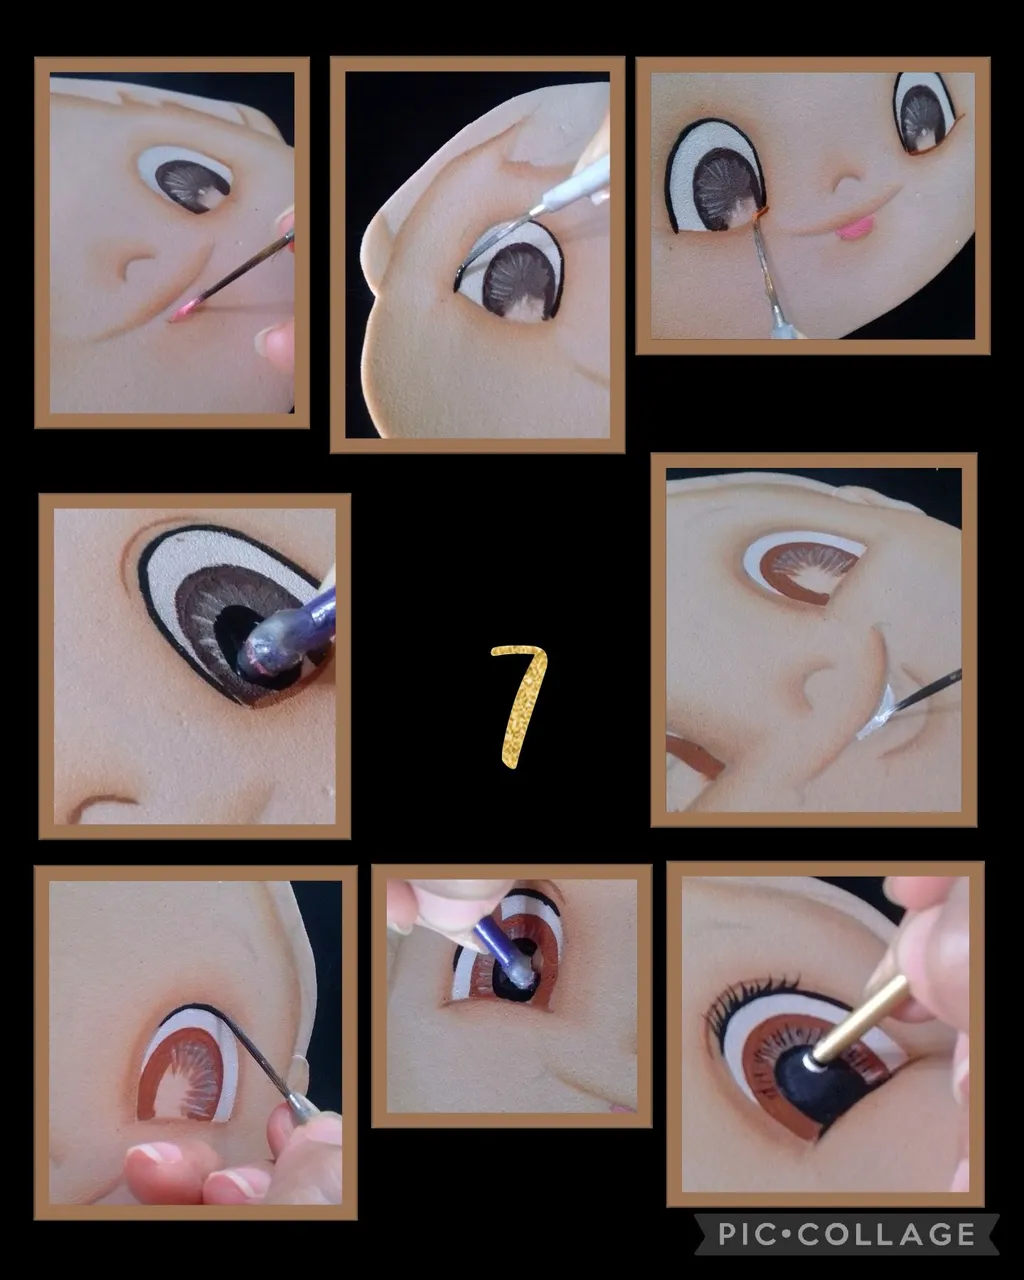
- Luego con pintura blanca haz líneas como si fueras a pintar los rayos del sol (ver foto)
- Rellena la boquita y con un pincel liner o 00 comienza a delinear el ojo y después toma un pincel y moja la parte trasera en pintura negra, haz la pupila girando en forma redonda, así es más fácil que rellenar con pincel.
- Luego a la otra carita haz igual procedimiento, rellena boca, ojos, delinea bordes de ojos, pestañas y con otra punta de pincel más delgado coloca un punto de luz.
Paso 8:
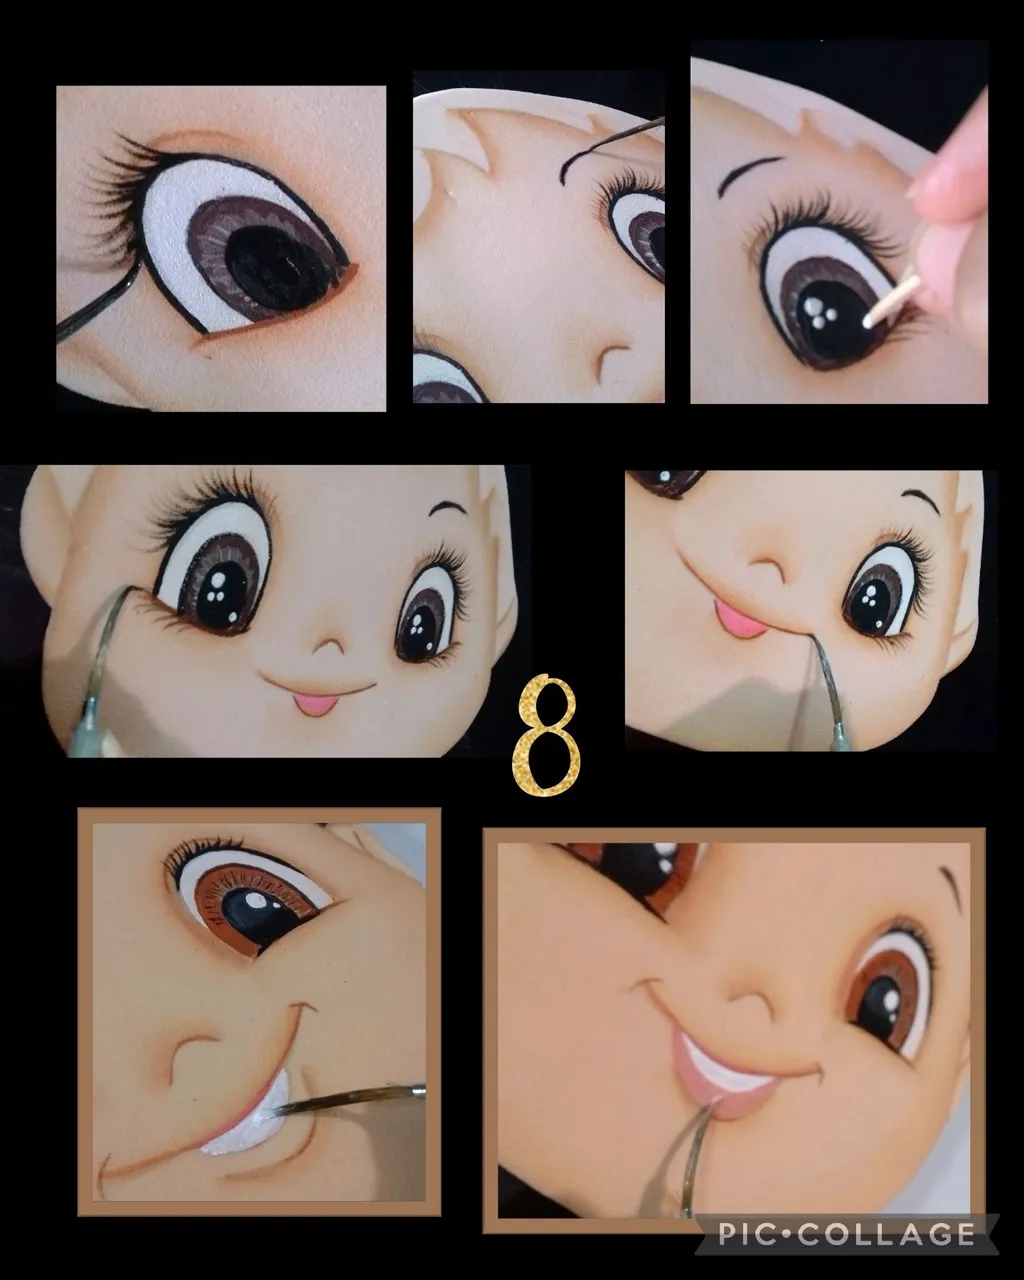
Después de pintar y delinear ojos de la cara de la muñequita, pinta las pestañas desde el borde hacia afuera tratando que queden bien pegaditas, también pinta cejas, pinta punto de luz y delinea boca y nariz con pintura Marrón claro.
Vuelve a colocar otra mano de pintura blanca en la boca (dientes) y luego rellena el labio del niño.
Paso 9:
Pegar cabellos y pintar mejillas.
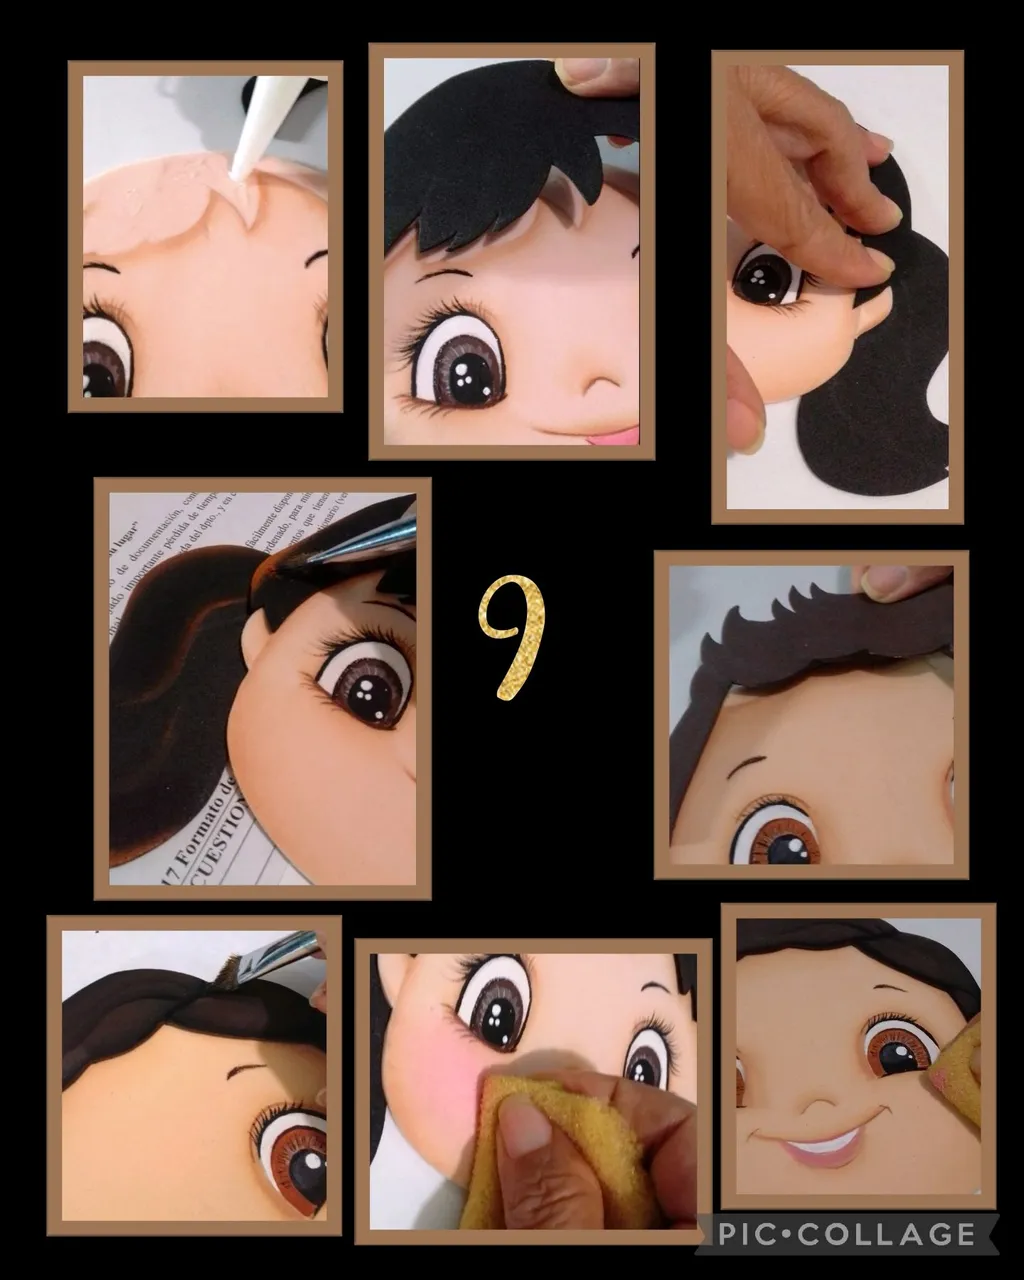
- Aplica silicón y pega los cabellos a ambas caritas, y difumina con un tono marrón y negro los cabellos de la niña y niño.
- Por último con una esponja y tiza pon un poco de color a las mejillas.
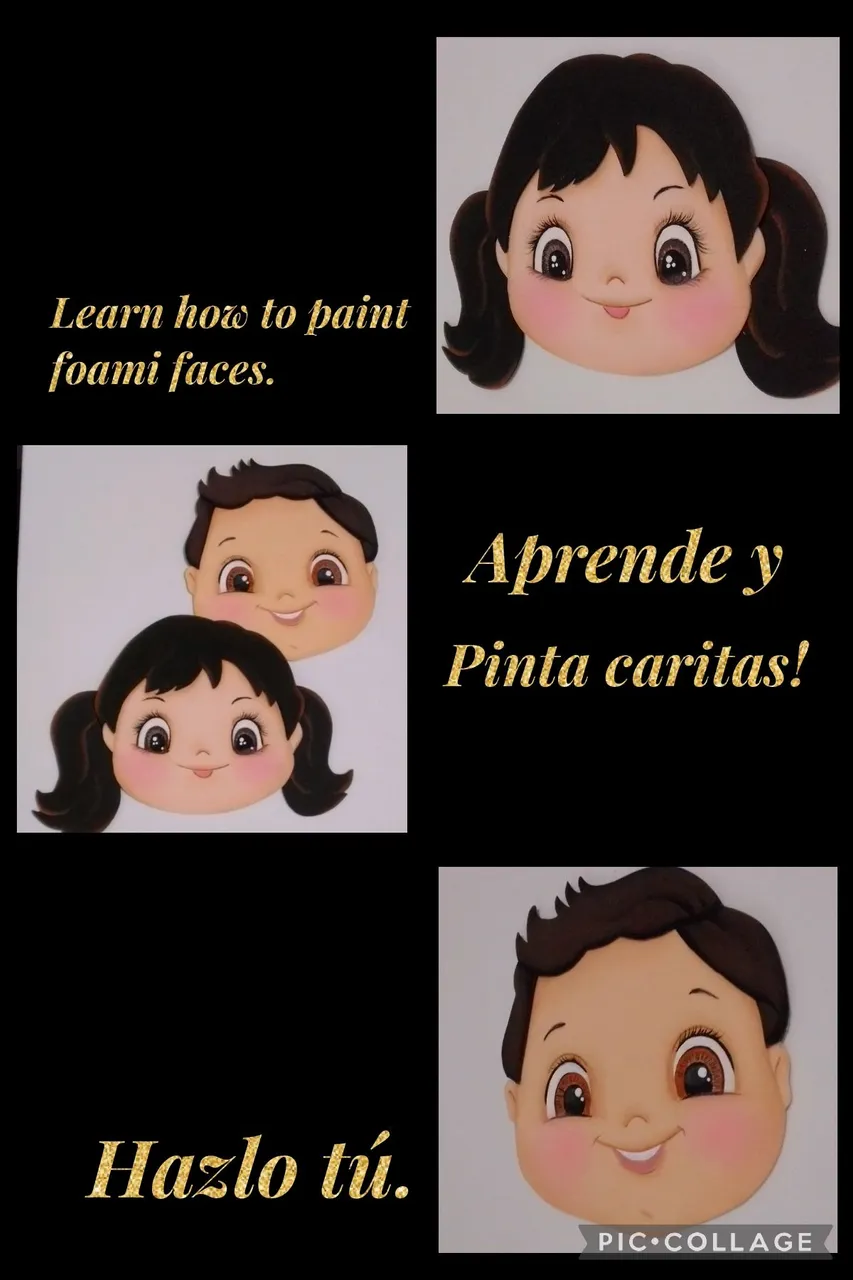
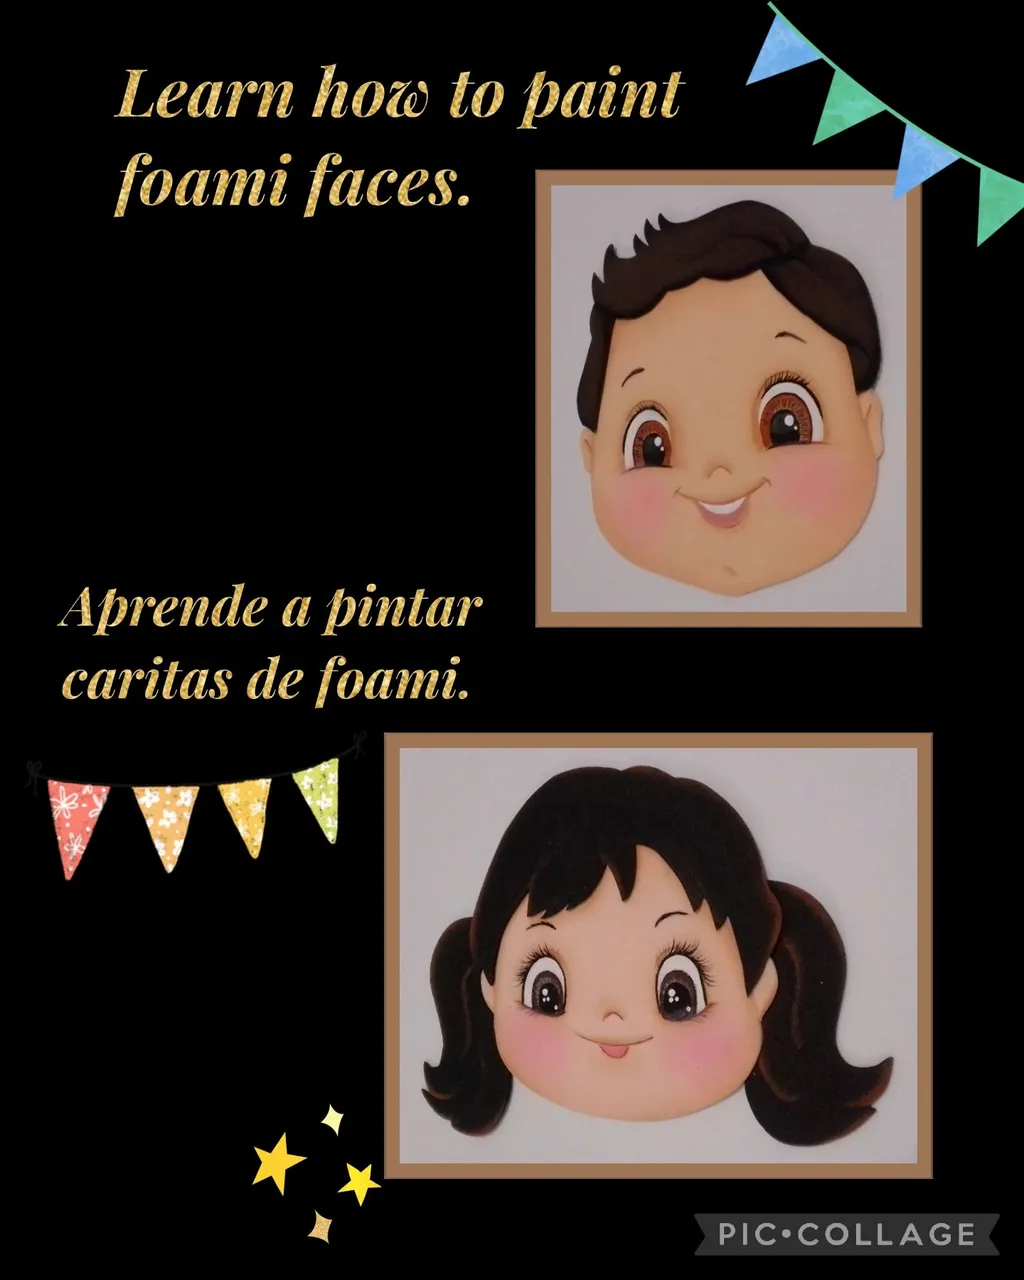
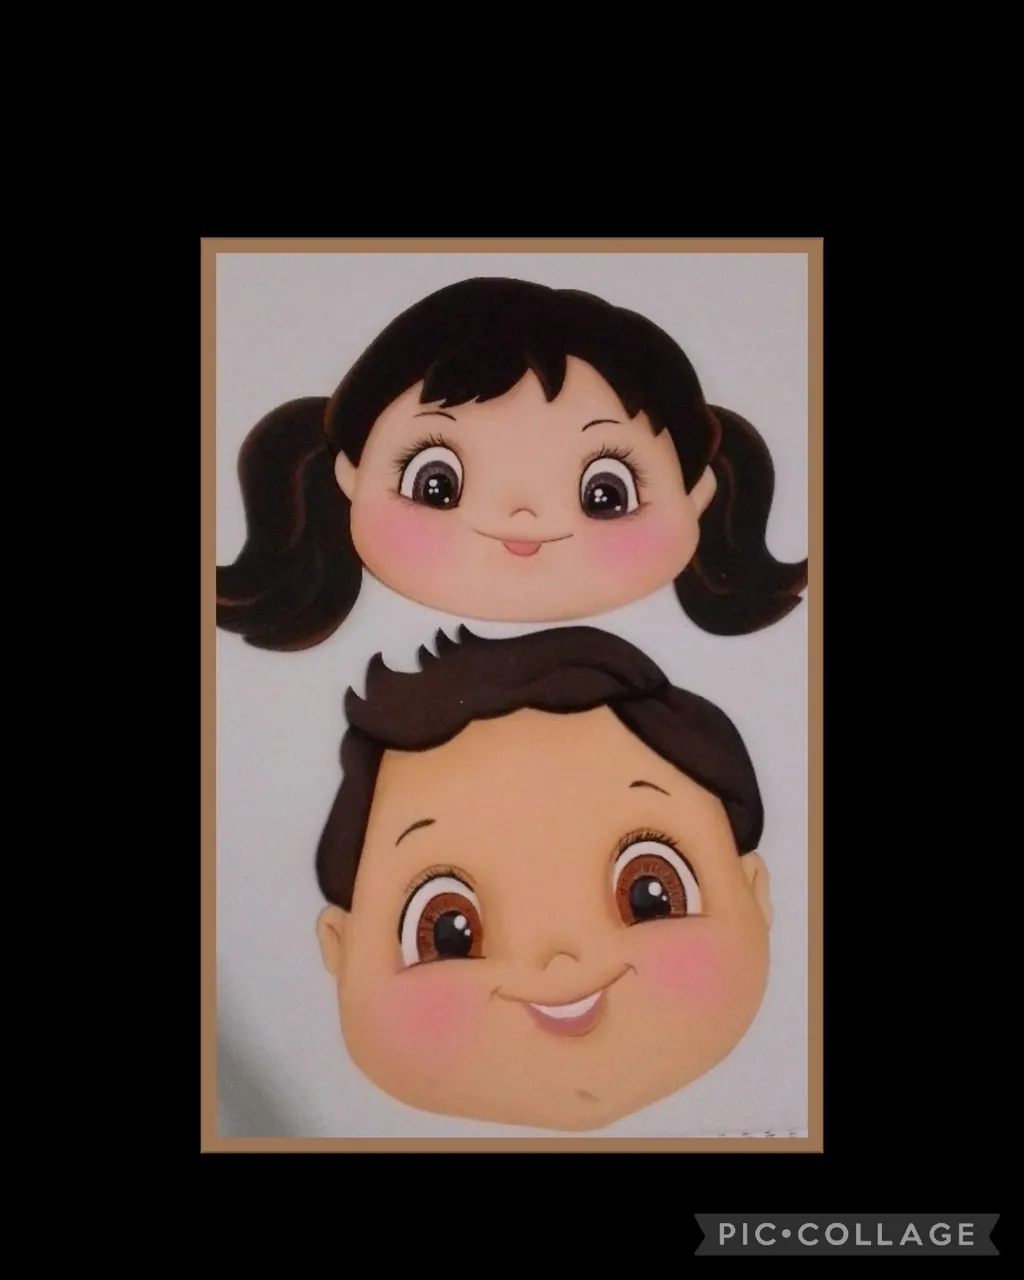
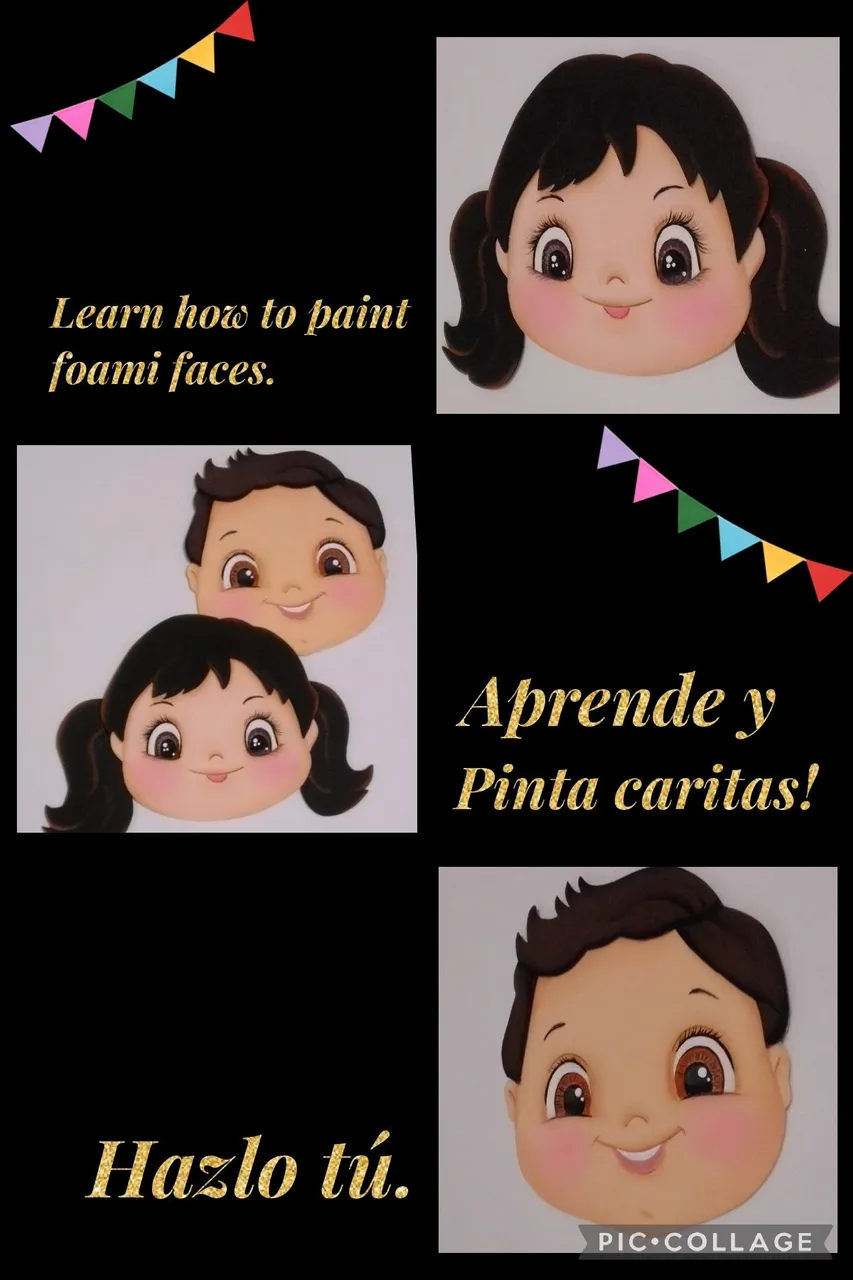
Así ya quedan terminadas estas lindas caritas.
Fuentes:


Mi publicación está traducida con DeepL, con etiquetas HTML y las fotos capturadas con mi BLU G5 y editadas con Pic Collage.
Ahora me despido feliz de haber compartido contigo este tutorial, esperando sea de tu agrado y utilidad, y si tienes alguna duda estoy a tu orden.
Gracias por tu visita, comentario y apoyo.
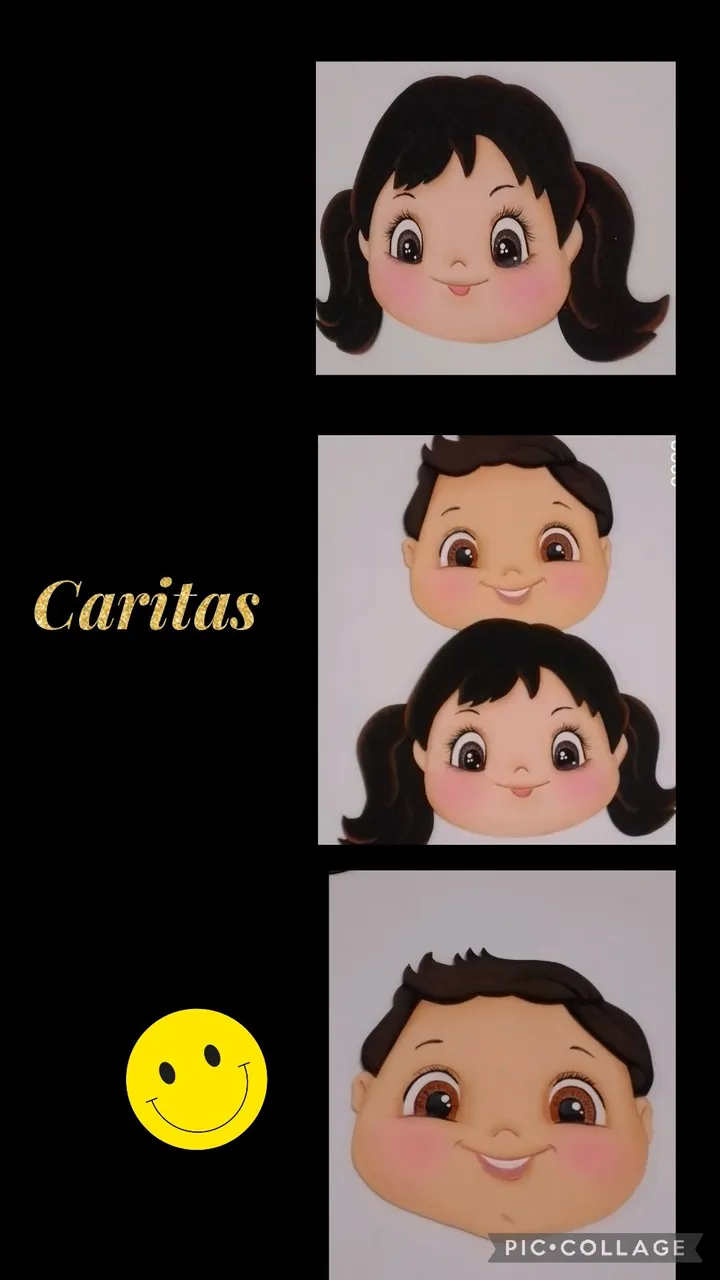
Aquí te dejo otras fotos de mis caritas.

Saludos.
English:


Good evening dear friends.
Welcome to my Blog.
Now I invite you to join me to see the process.
To do this you will need the following materials:

| Foami matte | Cold paints and brushes |
|---|---|
| Pastel chalk or blush | Foam glue |
| Scissors | Pencil |
| Mold or drawing | Wooden stick |
| Wipes | Water |
Let's get started:
Step 1:

Transfer, cut out and paint using the angled brush:
- First outline the drawing or impression with a soft lead pencil such as HB, then to transfer the face, place the drawing on the skin colored foami, rub with the help of the scissors and cut out, the same with the hair.
- Now wet the angled brush and pass it through a tissue to remove excess water, then wet only the tip in the color of the paint you are going to use and begin to pass along the marked edge as shown in the photo.
Step 2:

- When the brush dries, repeat the procedure again and so that you don't get a line, you can wet the brush with water and pass the brush a little inwards to blur the color.
- Repeat the same on the eyes, nose and mouth.
Step 3:
Paint with a flat brush:

- As sometimes we don't have an angled brush, you can also use a flat brush to paint, blur or shade the figures or foami pieces.
Just repeat the same procedure you used with the angled brush and if you want your blurring to be wider, just dip a little more of the tip of the brush into the paint.
Step 4:

- In this step, I filled the eyes with white paint using a thin brush and then I blurred all the contour with cinnamon skin paint, as well as the nose and mouth contour.
- (As you can see in the right part of the mouth the border was too thick, and if it happens to you, to correct it, you should wash the brush, wipe it with a tissue and remove the excess of water, then pass it over the line and correct it). This procedure should be done with a slightly stiff bristle brush.
Step 5:
Paint with cloth tissue:

- Cut a piece of cotton cloth and fold it in 2 parts, wet the tip with water and then in the skin color paint and start rubbing all around the edge of the face, this method is used mostly for the edge, the features of the face do it with a brush.
My recommendation is that you practice on a piece of foami and then do it on the piece.
Step 6:

- Now fill in the eyes of the first face with white paint using a thin brush and let it dry.
- Then start to paint the iris, with brown paint and guided by the transferred drawing, then wash the brush and while the paint is still wet, dip it in the white paint and put a little on the top of the eye and start joining with the brown to tone down the color and lighten the eye.
Step 7:

- Then with white paint make lines as if you were going to paint the rays of the sun (see photo).
- Fill in the mouth and with a liner or 00 brush start to outline the eye and then take a brush and dip the back part in black paint, make the pupil turning in a round shape, this way it is easier than filling in with a brush.
- Then to the other face do the same procedure, fill in the mouth, eyes, outline eye rims, eyelashes and with another thinner brush tip place a point of light.
Step 8:

After painting and outlining the eyes of the doll's face, paint the eyelashes from the edge outwards trying to stick them well, also paint eyebrows, paint a light spot and outline the mouth and nose with light brown paint.
Put another coat of white paint on the mouth (teeth) and then fill in the child's lip.
Step 9:
Glue hair and paint cheeks.

- Apply silicone and glue the hair to both faces, and blend with a brown and black tone the hair of the girl and boy.
- Finally with a sponge and chalk put some color on the cheeks.
This way these cute little faces are finished.


Sources:


My publication is translated with DeepL, with HTML tags and photos captured with my BLU G5 and edited with Pic Collage.
Now I say goodbye happy to have shared with you this tutorial, I hope you like and useful, and if you have any questions I am at your service.
Thanks for your visit, comments and support.
Here are some more pictures of my faces.


Greetings.