Hola mis queridos amigos creativos, cómo están?
Para esto vas a necesitar:
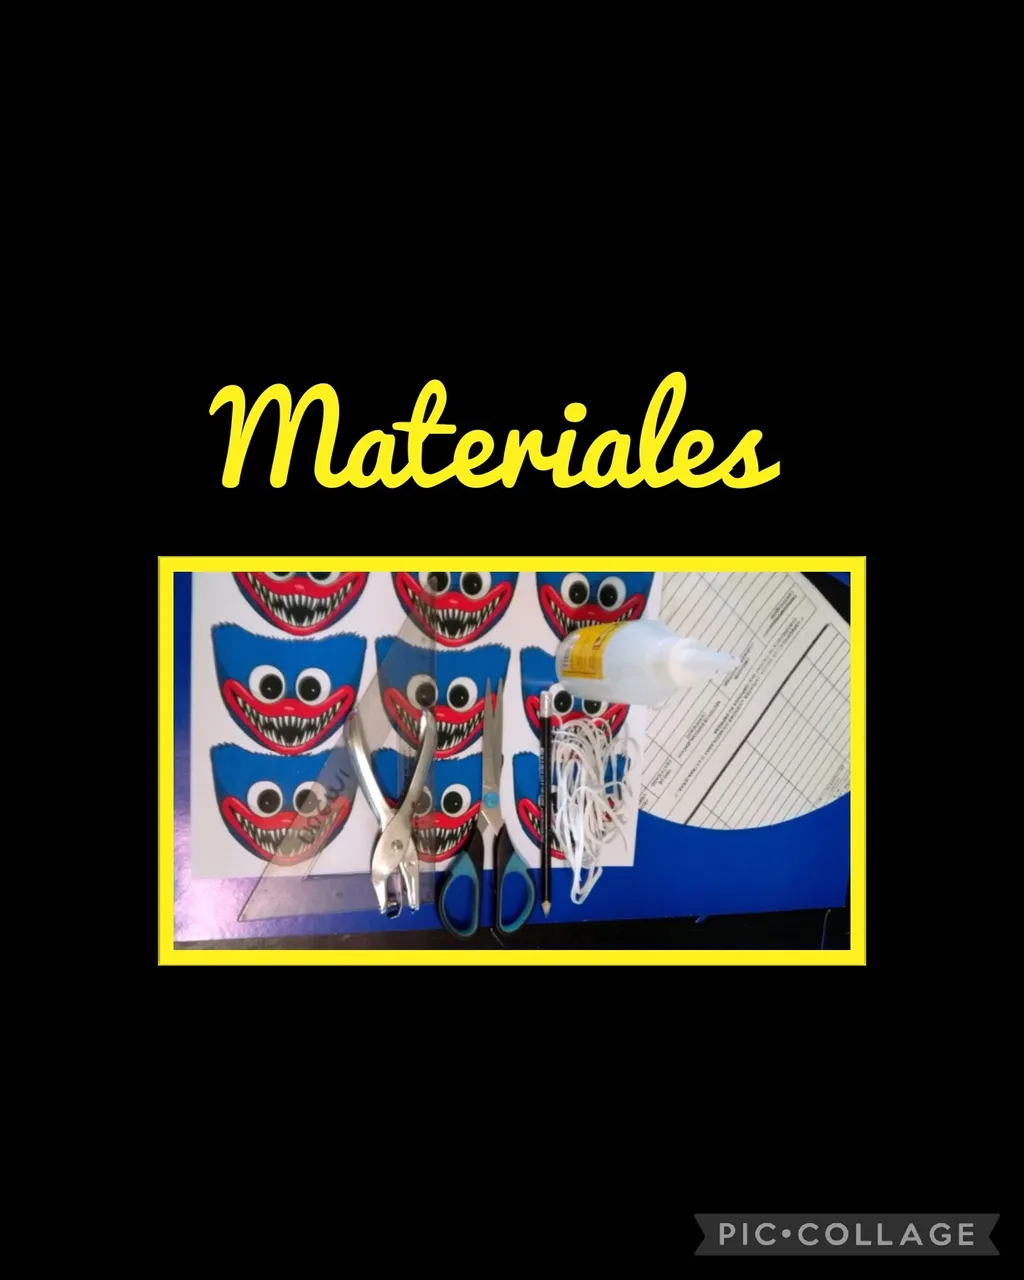
| Cartulina doble faz | Impresiones a color |
|---|---|
| Elástica | Tijera |
| Regla, lápiz | Saca bocado |
| Silicón | Molde (cono) |
Comenzaremos con el procedimiento:
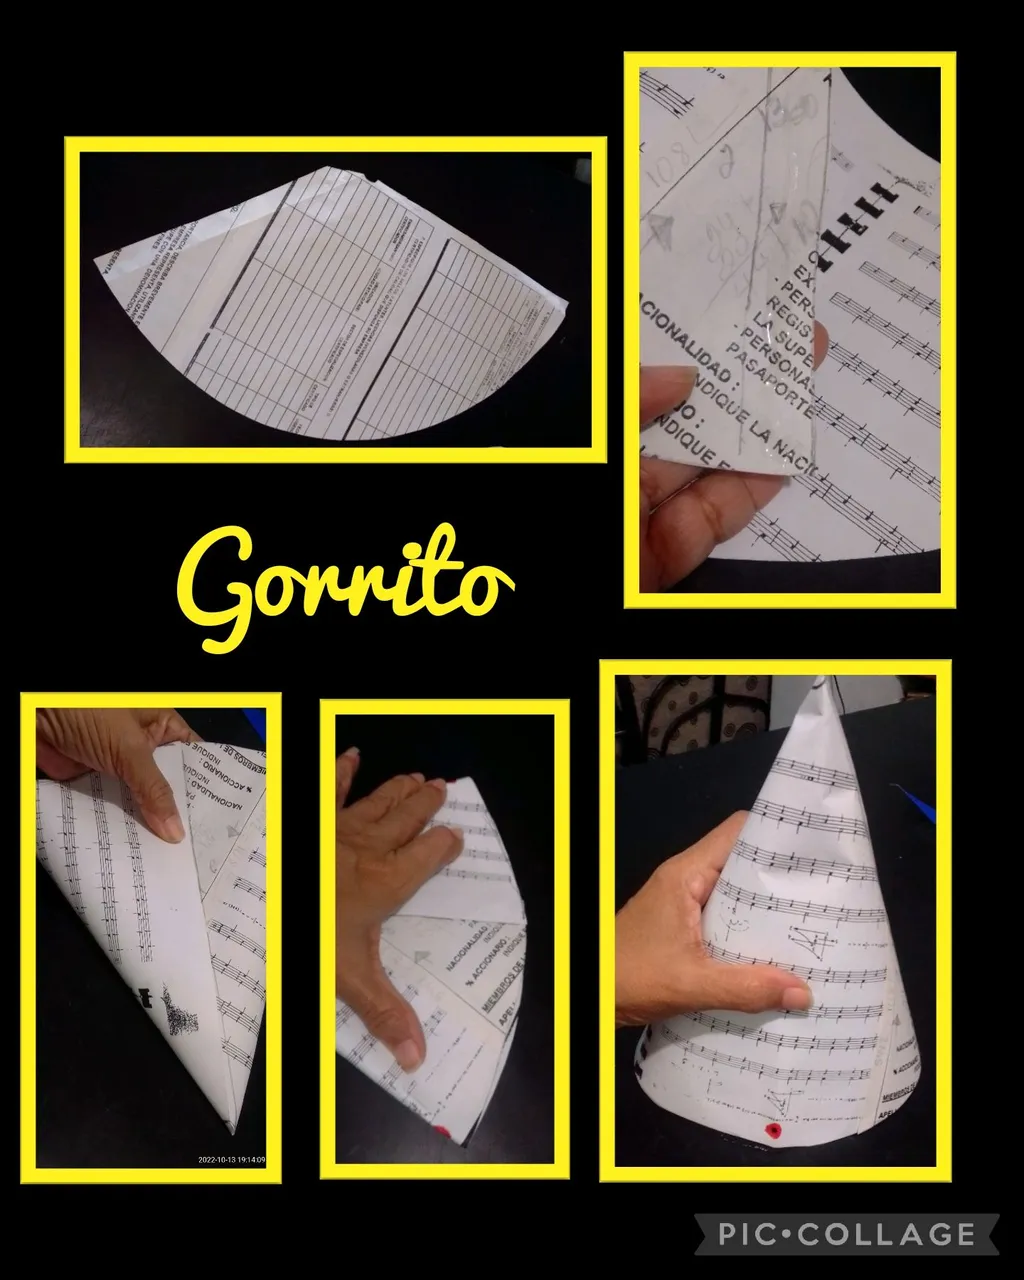
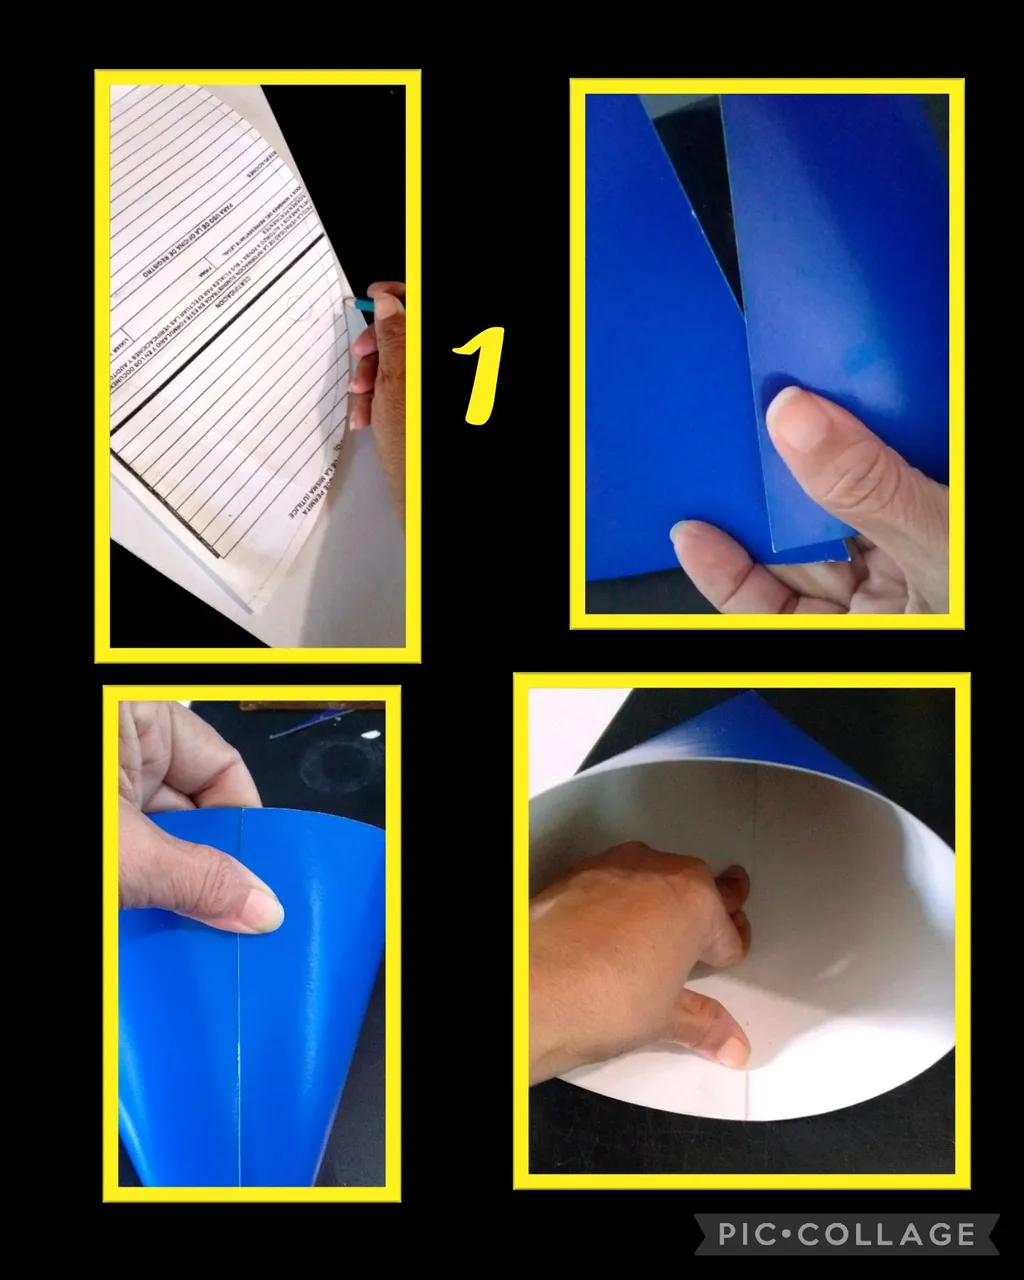
- Haz el molde dependiendo del contorno de la cabeza del niño, puedes hacer una circunferencia y dividir a la mitad. Te saldrán 2 gorros y a un lado marca una pestaña de 1,5 cms.
- Luego aplica unos puntos de silicón y cierra el gorro hasta la punta, después dobla por la mitad y marca a 1 cm de altura después del borde (punto rojo) para abrir orificios a los lados.
- Marca el molde del gorro sobre la cartulina, recorta por todo el borde y marca la pestaña luego aplica silicón a un extremo y cierra presionando fuerte hasta que pegue y luego coloca sobre la mesa y presiona nuevamente la orilla hasta pegar completamente.
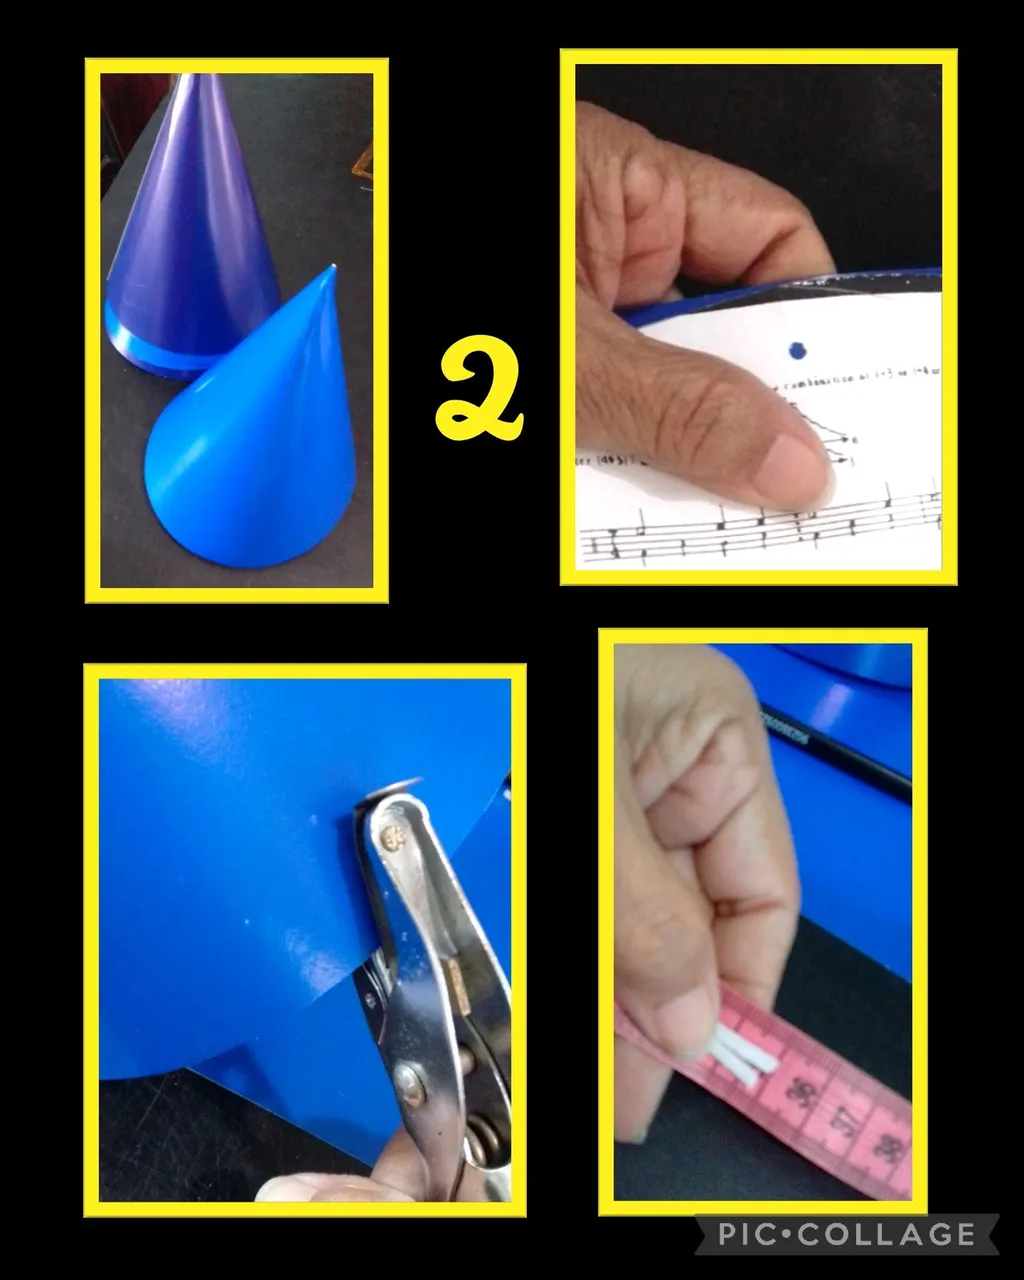
- Después de armar todos los gorritos, marca la guía del patrón para abrir los orificios a los lados y perfora con el saca bocados, aparte mide y recorta la elástica de 35cm de largo.
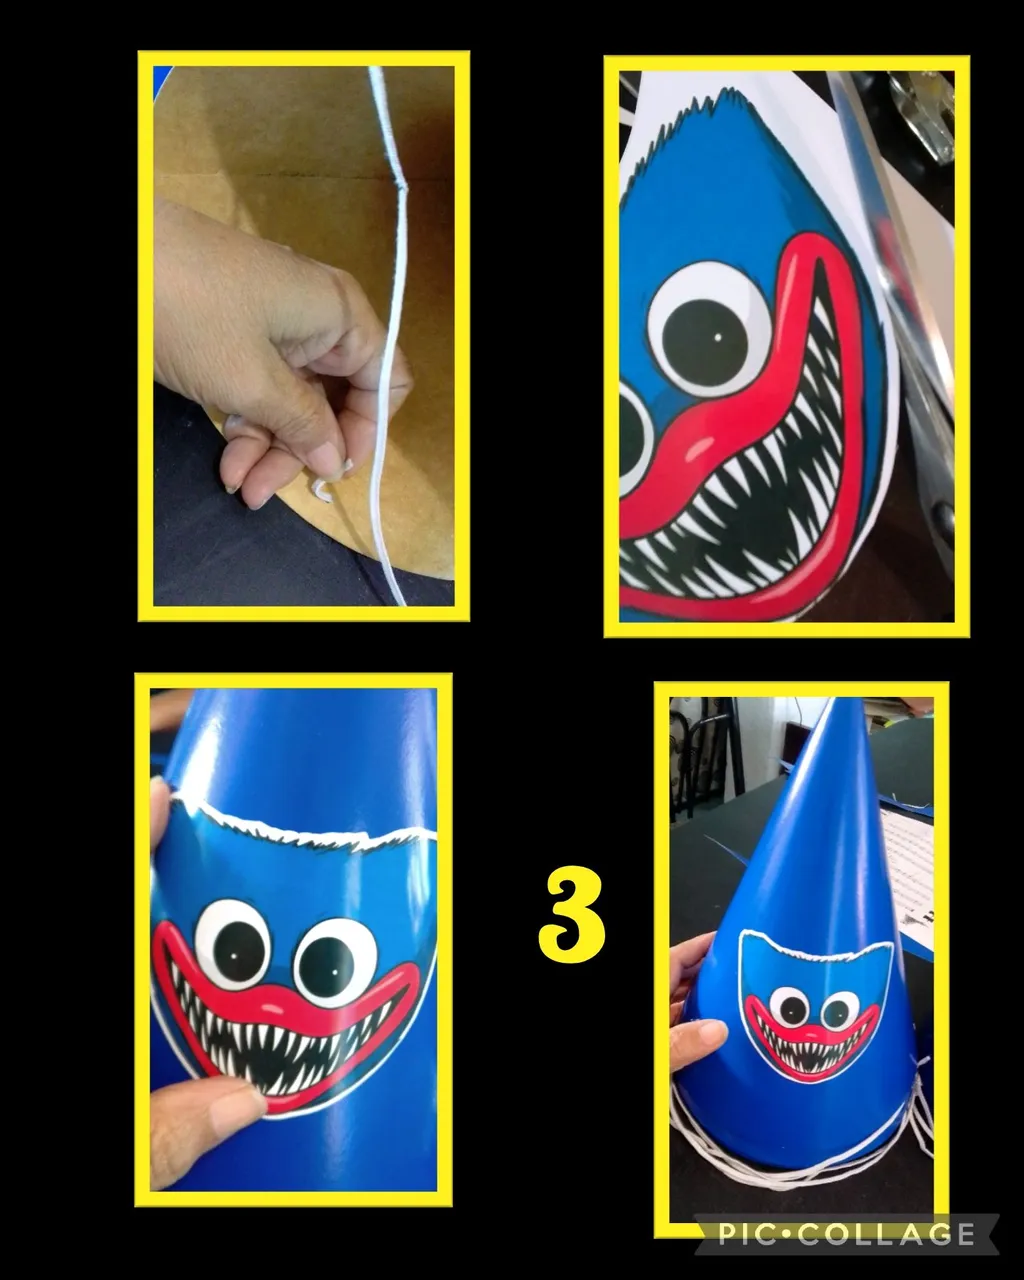
- Ahora inserta la elástica y anuda a cada extremo.
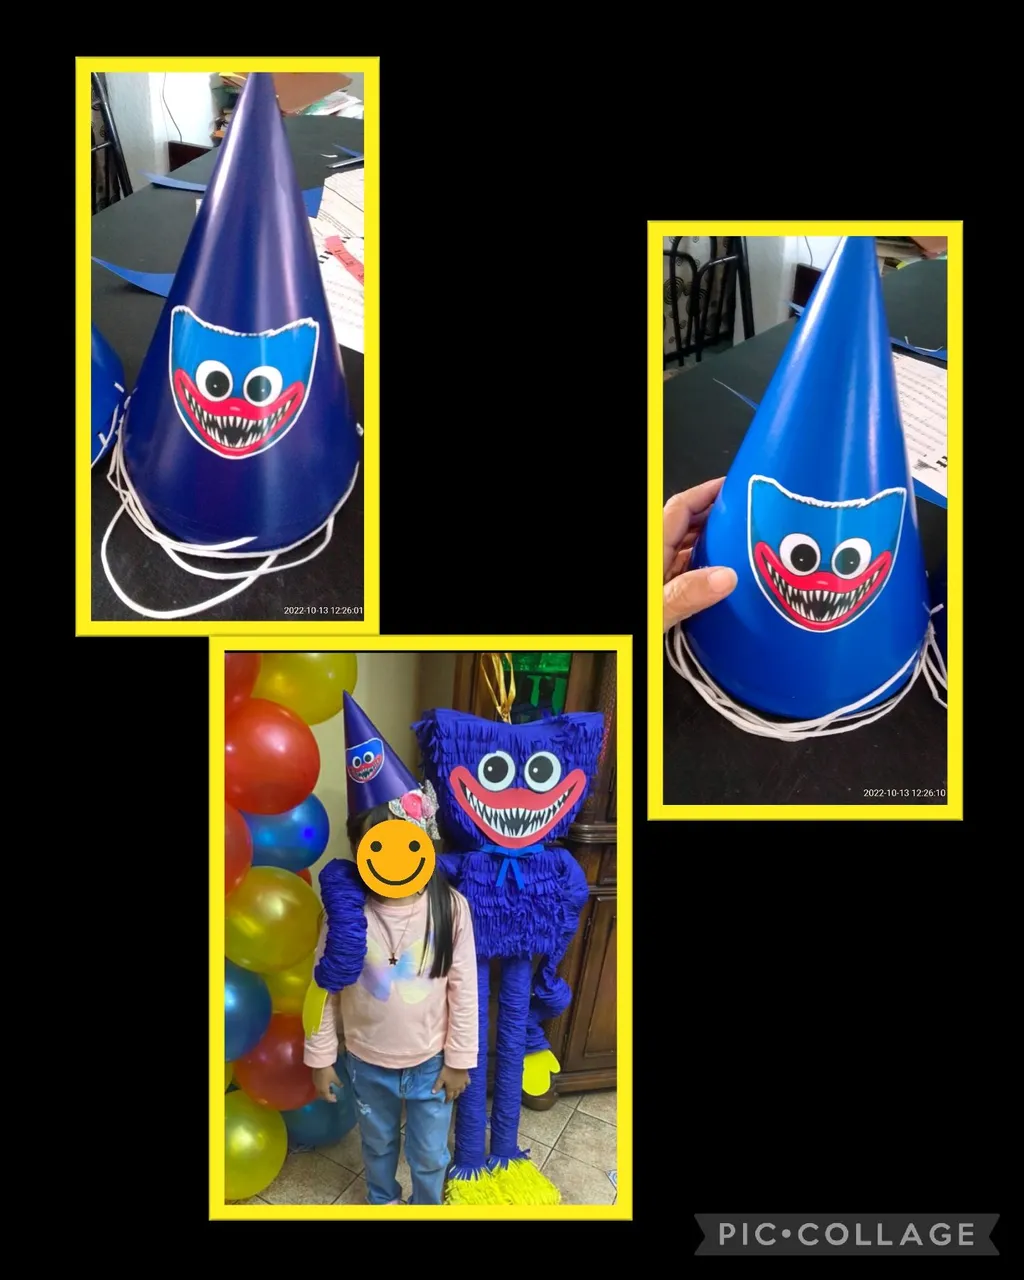
-Después recorta las impresiones dejando 1 ó 2 milímetros de borde, aplica silicón y pega al frente del gorro, así quedarán listos estos gorritos para obsequiar a cada niño.
Fuente: https://www.pinterest.es/pin/476255729356438686/
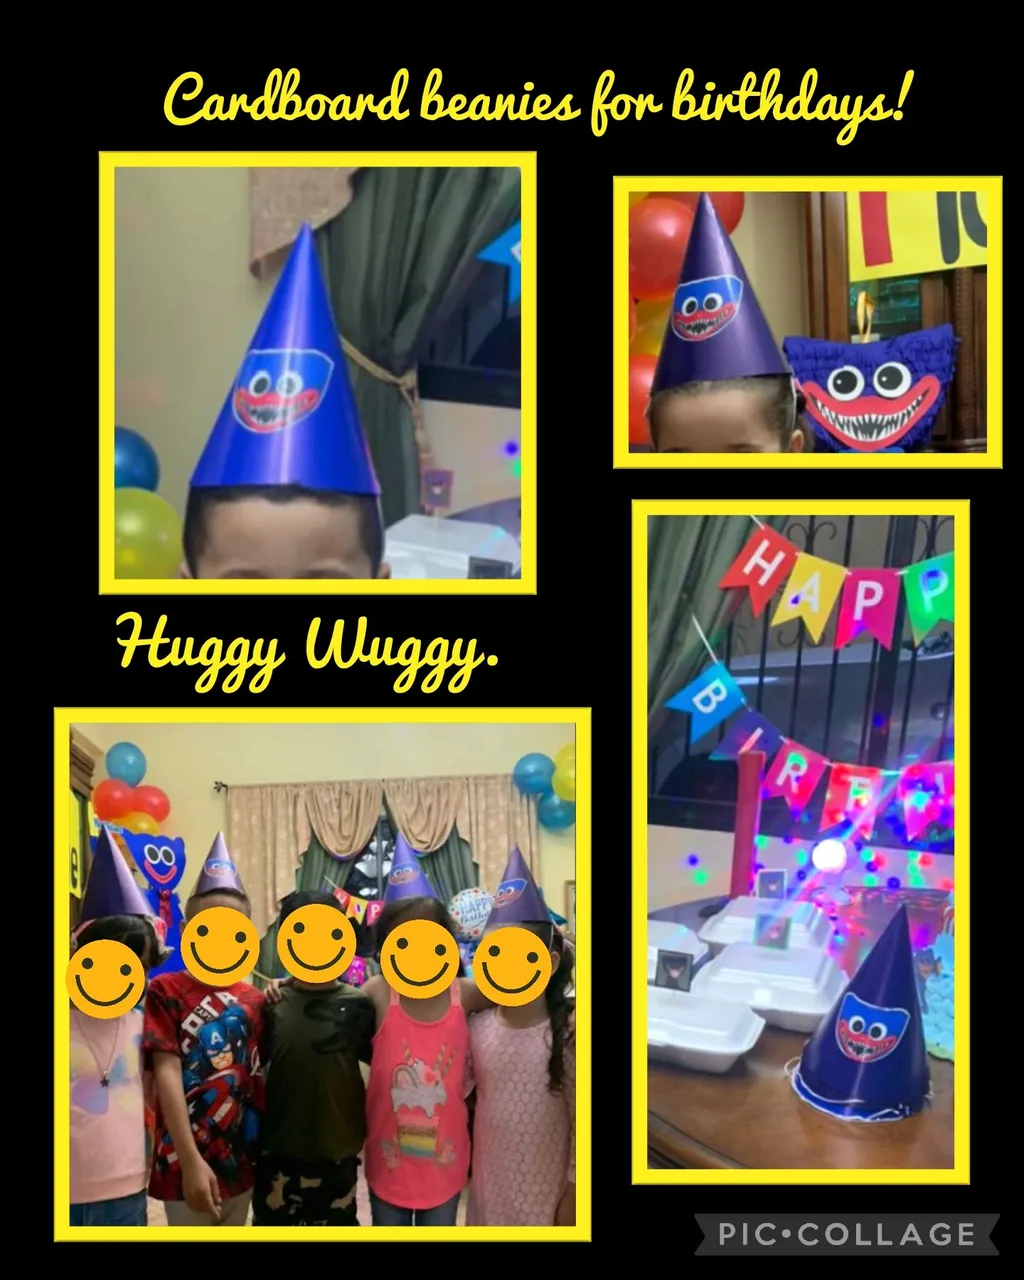
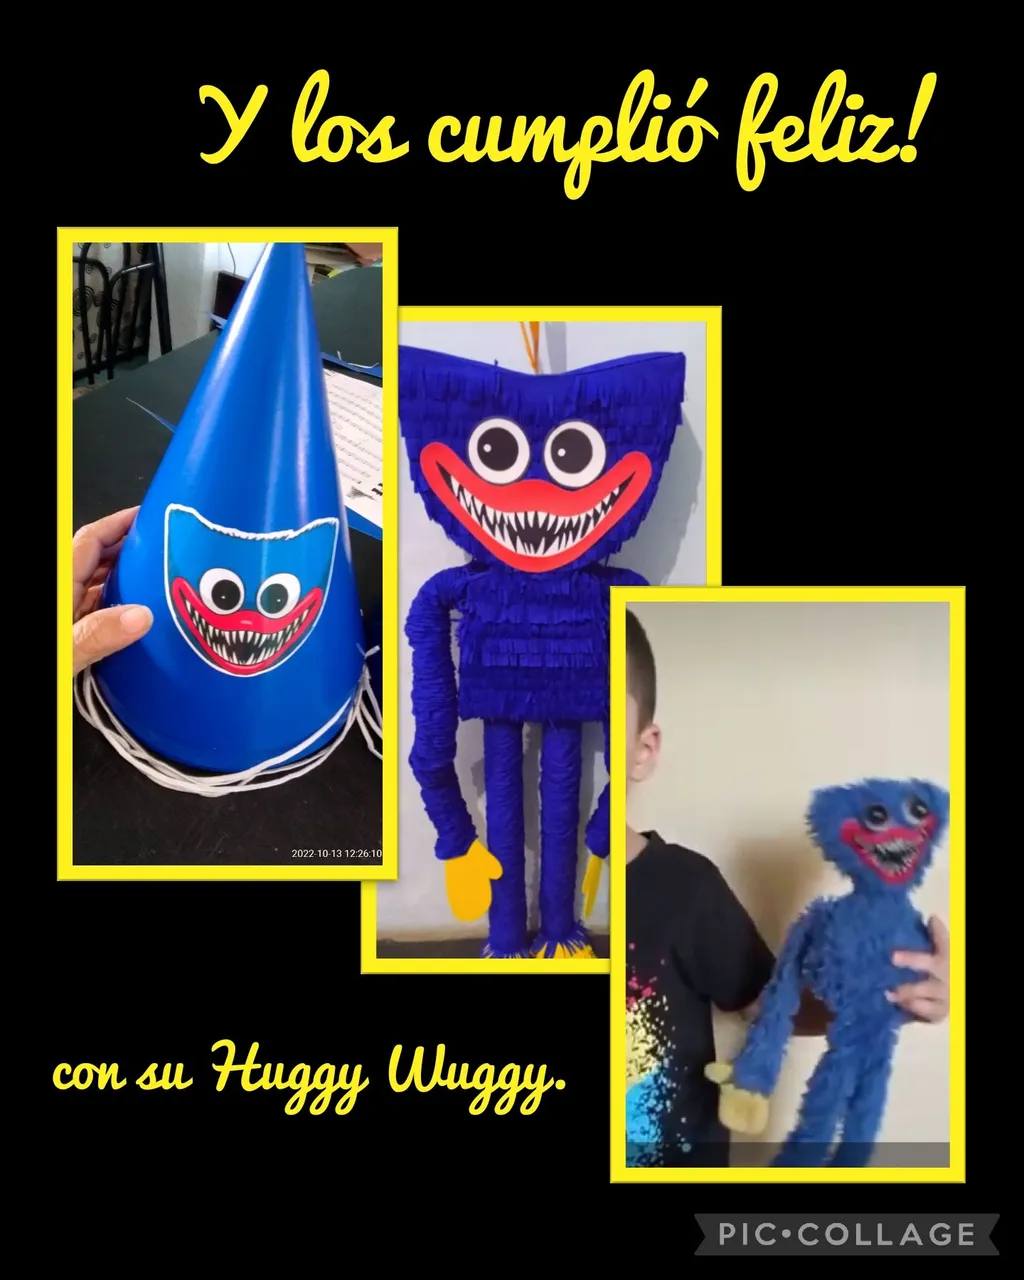
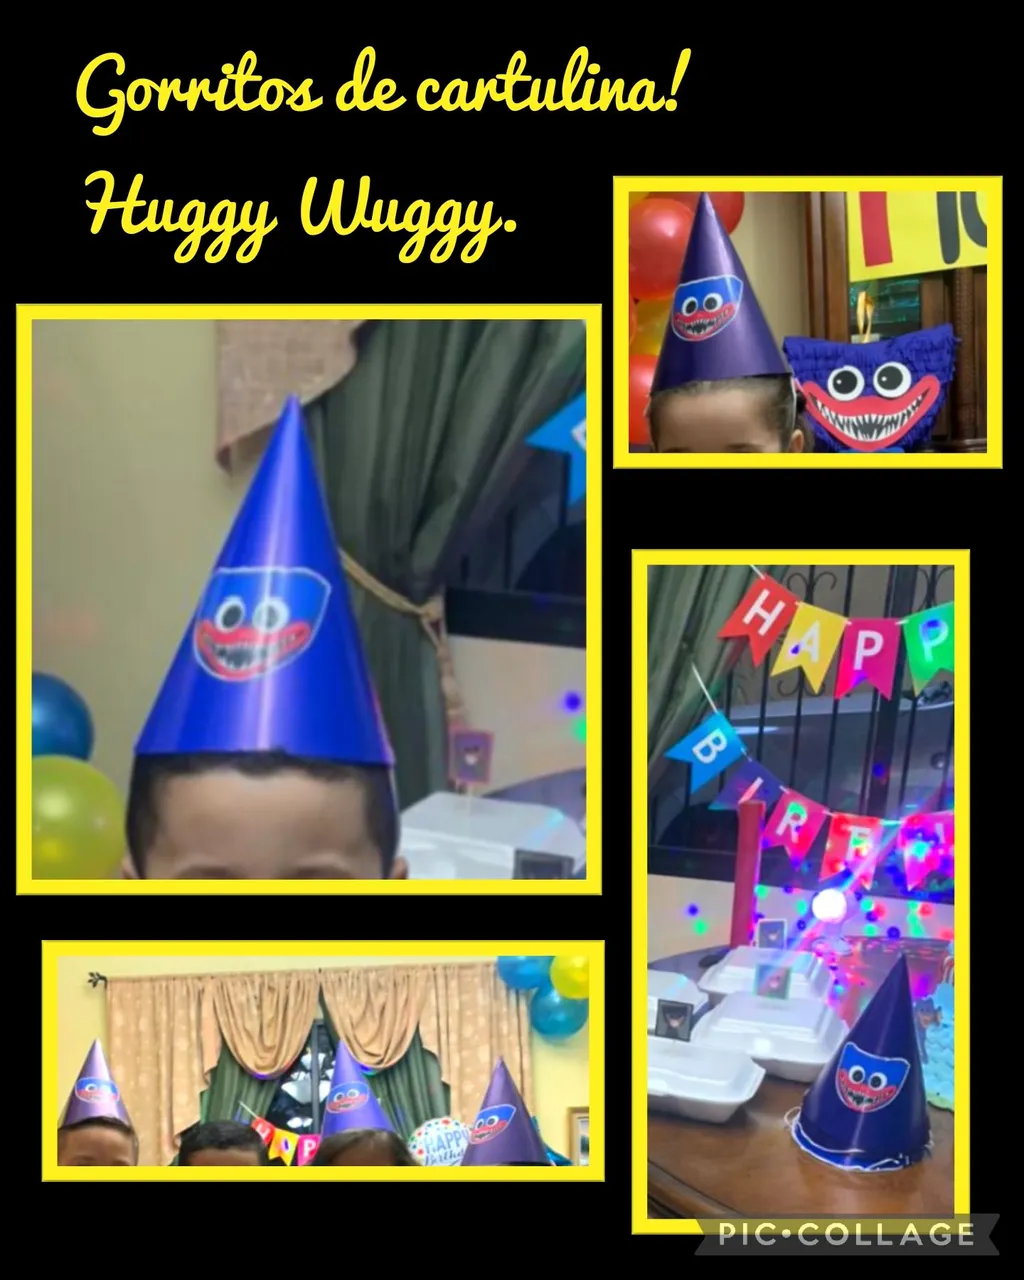
Y...espero les guste jajajaja! bueno la imagen no creo que mucho pero mi intención es que aprendan como hacerlo.
Segura si estoy que él lo pasó feliz junto a sus amiguitos.
https://files.peakd.com/file/peakd-
hive/elmundodebetty/EoAakqPdqk7GRLDjPNyv5tdhq1k1YJWBgXZoPGfZAo6FF6CSoWihVesY9zG9kBJtob3.jpg
Mi paso a paso lo edité con Etiquetas HTML, usando el traductor DeepL y las fotos las capturé con mi BLU G5 y las edité con Pic Collage.
Ahora me despido de ustedes no sin antes agradecerte la visita y el apoyo a mi publicación.
Saluditos para todos.
English:
Hello my dear creative friends, how are you?
For this you will need:
| Double-sided card stock | Colorful prints |
|---|---|
| Elastic | Scissors |
| Ruler, pencil | Mouthpiece |
| Silicone | Mold (cone) |
We will start with the procedure:
- Make the mold depending on the contour of the child's head, you can make a circumference and divide it in half. You will get 2 hats and mark a 1.5 cm flange on one side.
- Then apply a few dots of silicone and close the cap to the tip, then fold in half and mark 1 cm high after the edge (red dot) to open holes on the sides.
- Mark the cap mold on the cardboard, cut all around the edge and mark the tab then apply silicone to one end and close pressing hard until it sticks and then place on the table and press the edge again until completely glued.
- After assembling all the beanies, mark the pattern guide to open the holes on the sides and pierce with the punch, separately measure and cut the elastic 35cm long.
- Now insert the elastic and tie a knot at each end.
-Then cut out the prints leaving 1 or 2 millimeters of border, apply silicone and glue to the front of the hat, so these beanies will be ready to give to each child.
Fuente: https://www.pinterest.es/pin/476255729356438686/
And... I hope you like it hahahaha! well the image I don't think much but my intention is that you learn how to do it.
I'm sure he had a great time with his friends!
My step by step I edited it with HTML Tags, using the translator DeepL and I captured the pictures with my BLU G5 and edited them with Pic Collage.
Now I say goodbye to you not before thanking you for your visit and support to my publication.
Greetings to all of you.