Hola, hola, cómo están mis amigos?
Bienvenidos sean todos a mi Blog.
Feliz martes tengan todos.
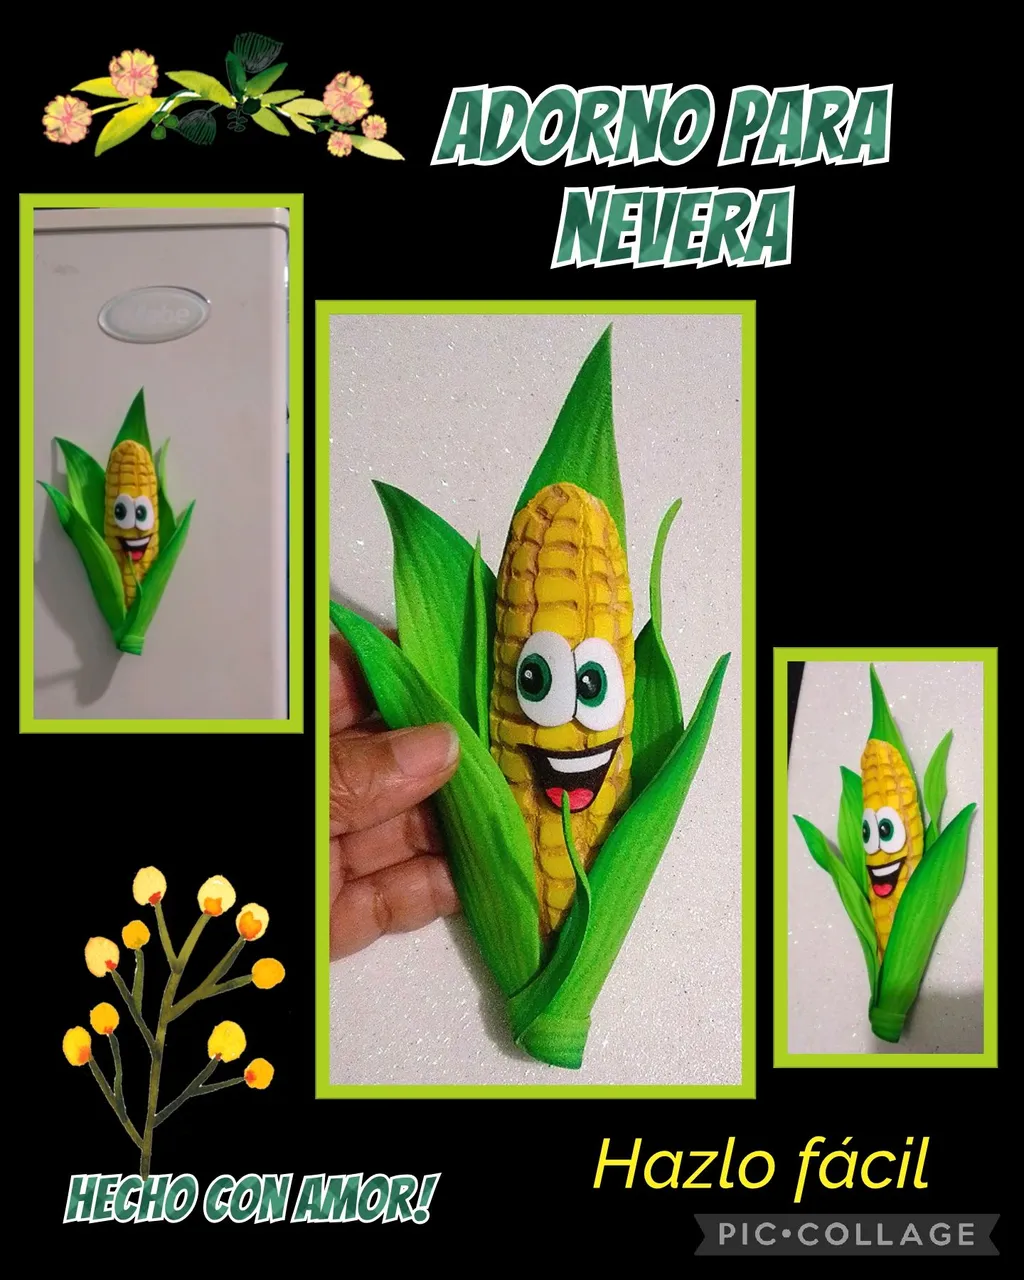
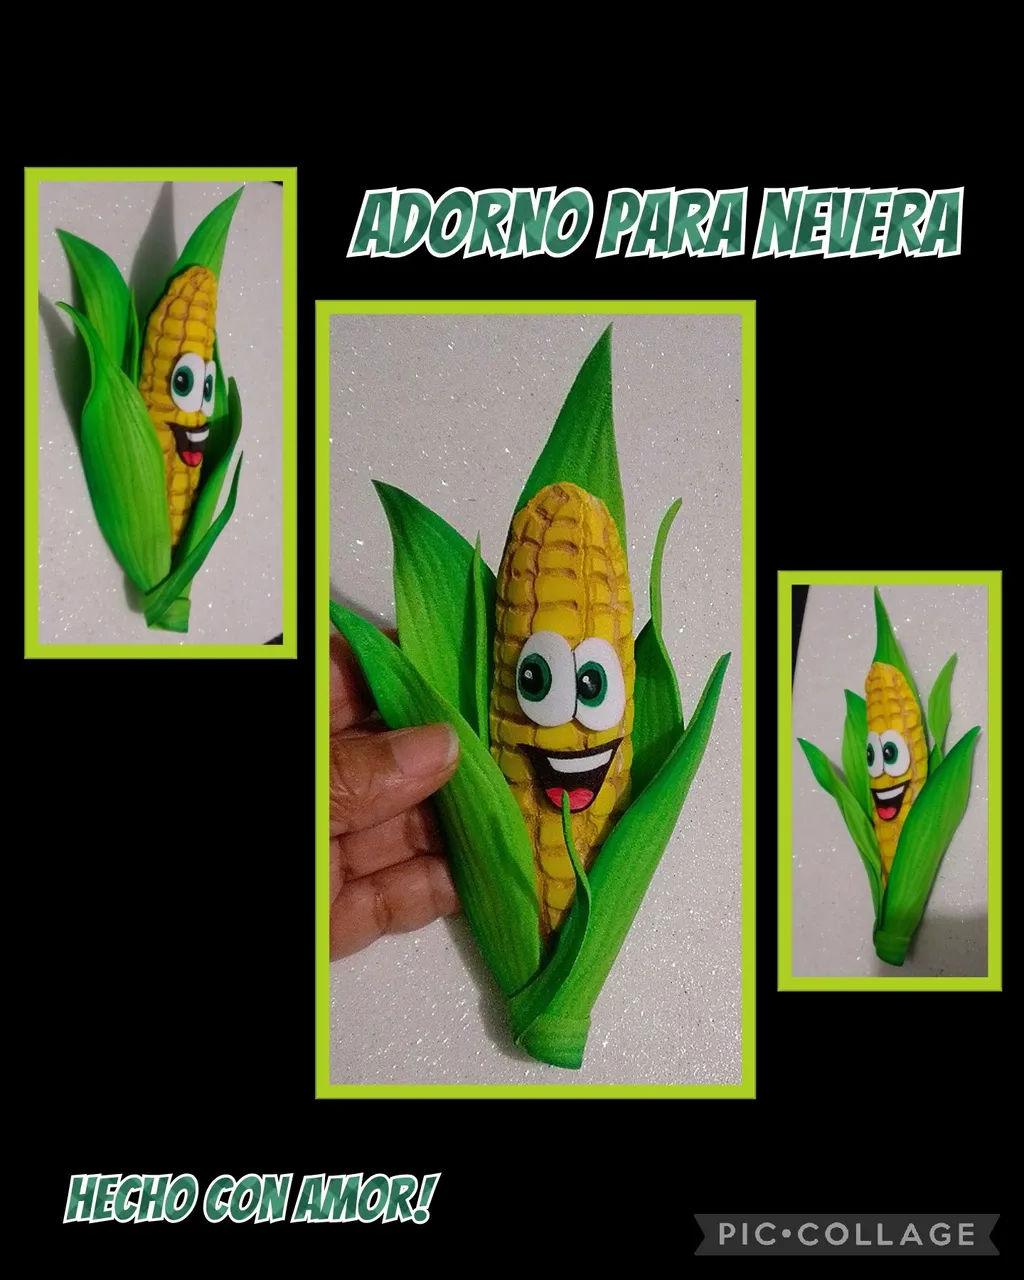
La mazorca la realicé utilizando una bandeja de anime reciclada y foami.
Entonces, no te hago esperar más!
Comencemos:
Los materiales que necesitas son:
| Bandeja de anime (reciclada) | Retazos de foami |
|---|---|
| Pinturas y pinceles | Marcador |
| Tijera | Lápiz |
| Cautín | Plancha eléctrica |
Seguimos con el procedimiento:
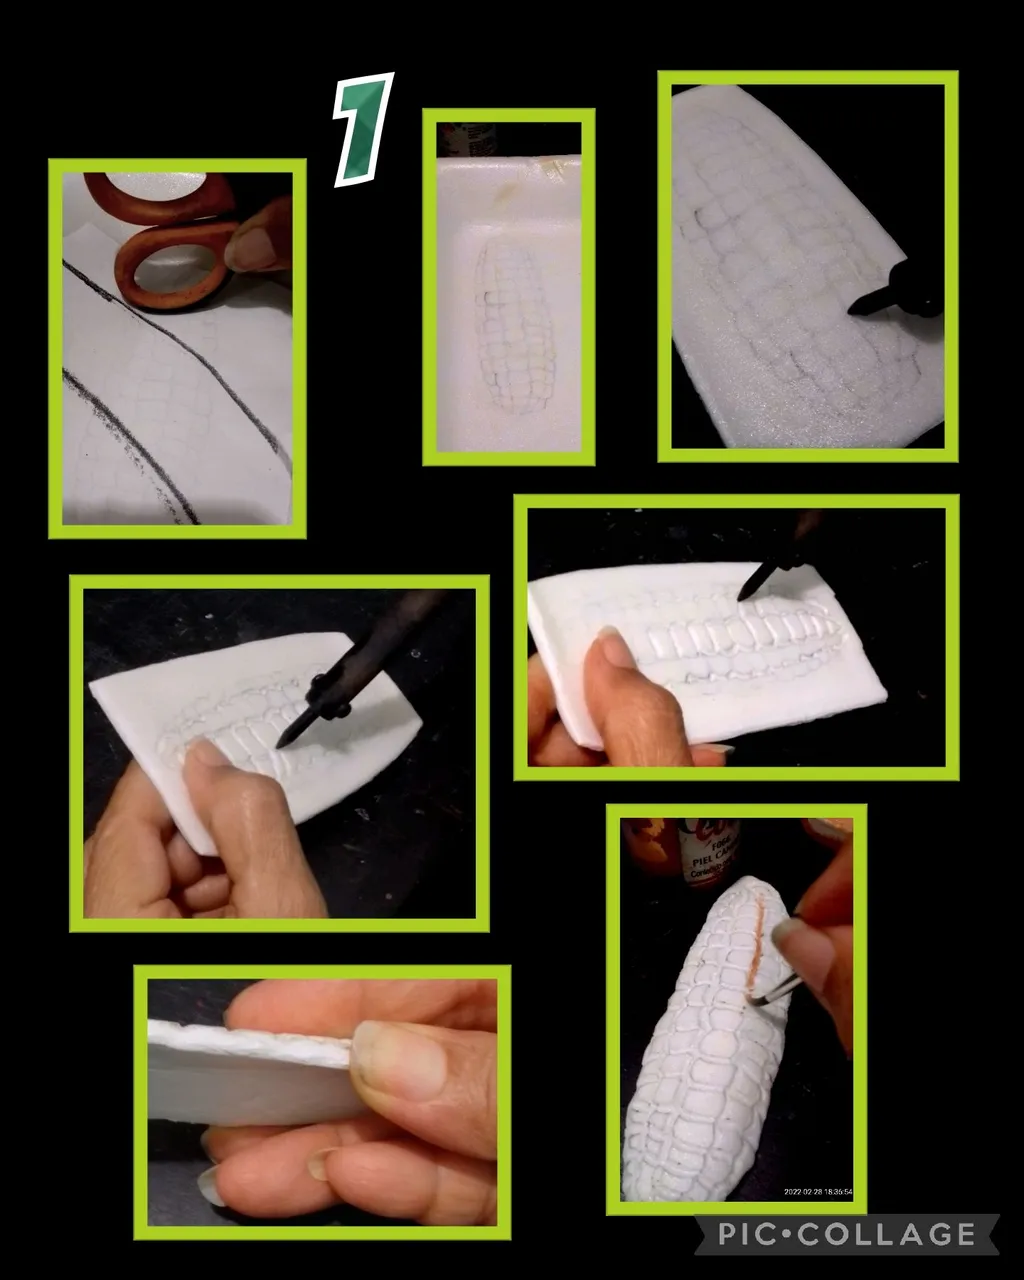
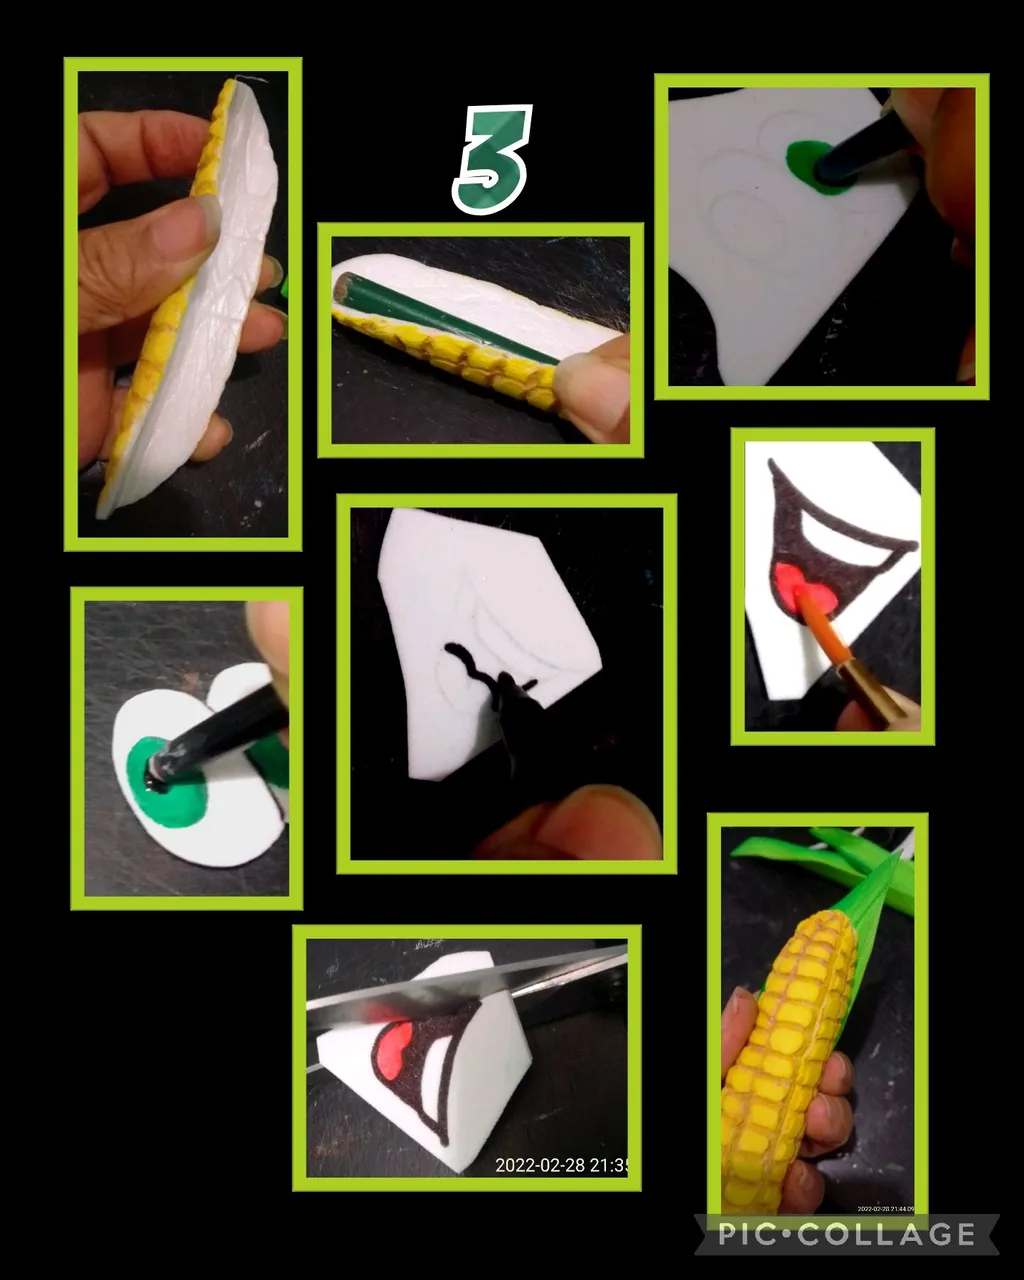
- Para comenzar, remarca el dibujo en el papel con un lápiz de mina blanda, preferiblemente HB,3B,6B, luego coloca el papel sobre la bandeja de anime y frota haciendo presión con las orejas de la tijera para que se transfiera el dibujo igual que hacemos con el foami.
- Luego calienta el cautín y comienza a pasarlo por todas las líneas formando los granos de la mazorca, si el cautín calienta mucho, puedes apagar o desenchufar por ratos para que no te rompa el anime.
- Recorta por todo el borde y trata de doblar un poco para darle forma redondeada de la mazorca y comienza a pintar con pincel delgado todas las divisiones con pintura marrón claro.
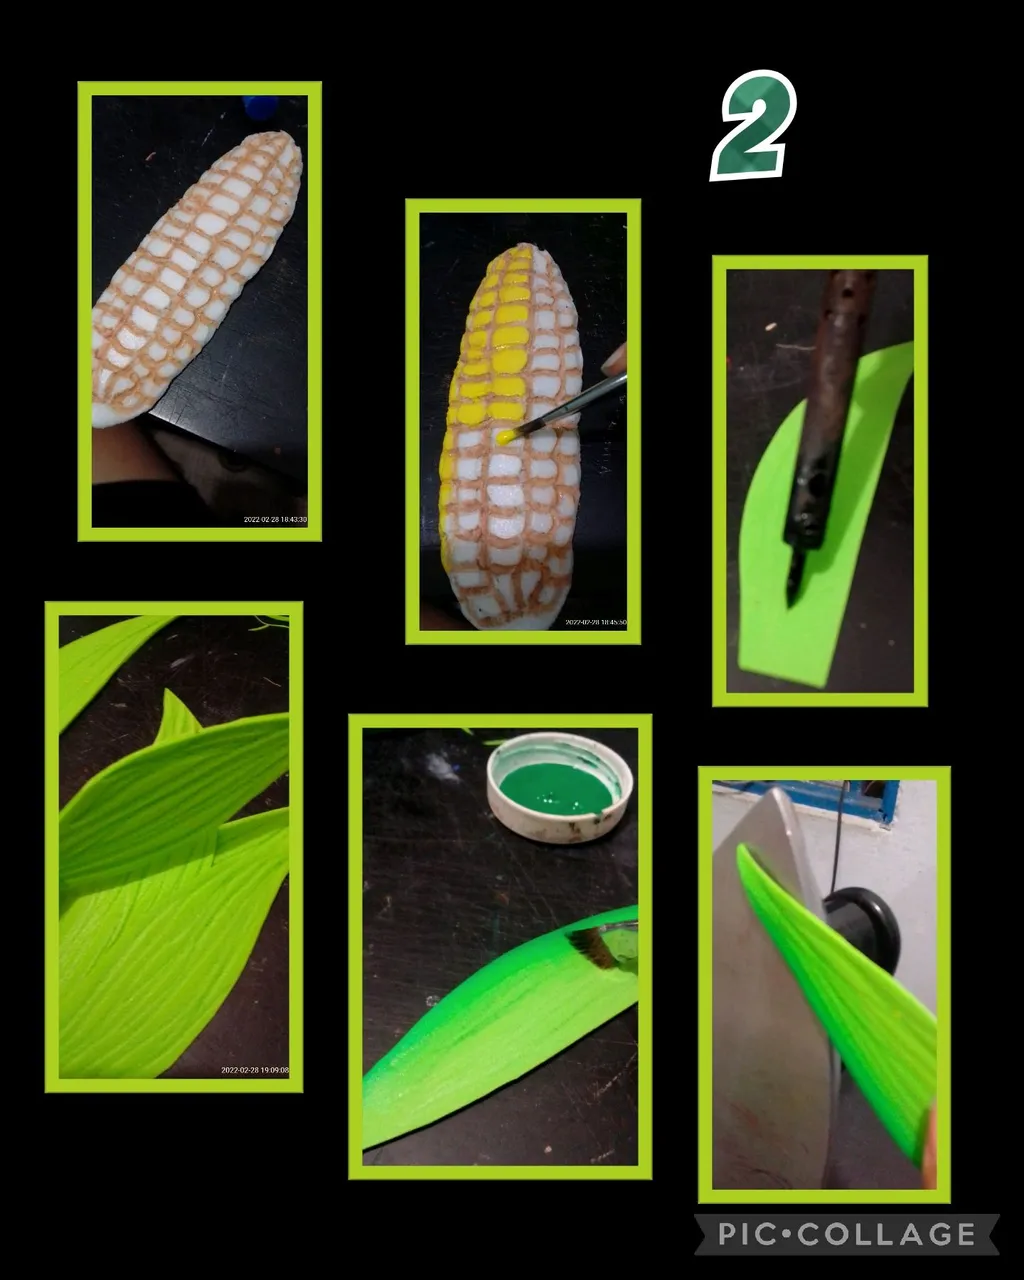
- Después de rellenar todas las divisiones, pinta los granos con color amarillo y deja secar bien.
- Aparte recorta hojas largas en foami verde manzana, calienta el cautín y haz líneas verticales semejando la textura de las hojas de la mazorca.
- Luego moja el pincel en agua, pasa por un pañito seco y deja húmedo, luego moja la punta y pinta el borde de las hojas, difumina y deja secar.
- Calienta la plancha y coloca las hojas para darles forma.
- Ahora coloca un lápiz o marcador sobre la mazorca y trata de doblar con mucho cuidado para que agarre la forma redondeada.
- En un retacito de foami blanco transfiere los ojos y boca, pinta primero el iris con la punta del pincel y deja secar, luego pinta la pupila.
- Luego con el marcador rellena la parte negra de la boca, pinta la lengua en rojo, deja secar y recorta por el borde.
- Aplica silicón por todo el borde de la mazorca y pega una hoja detrás.
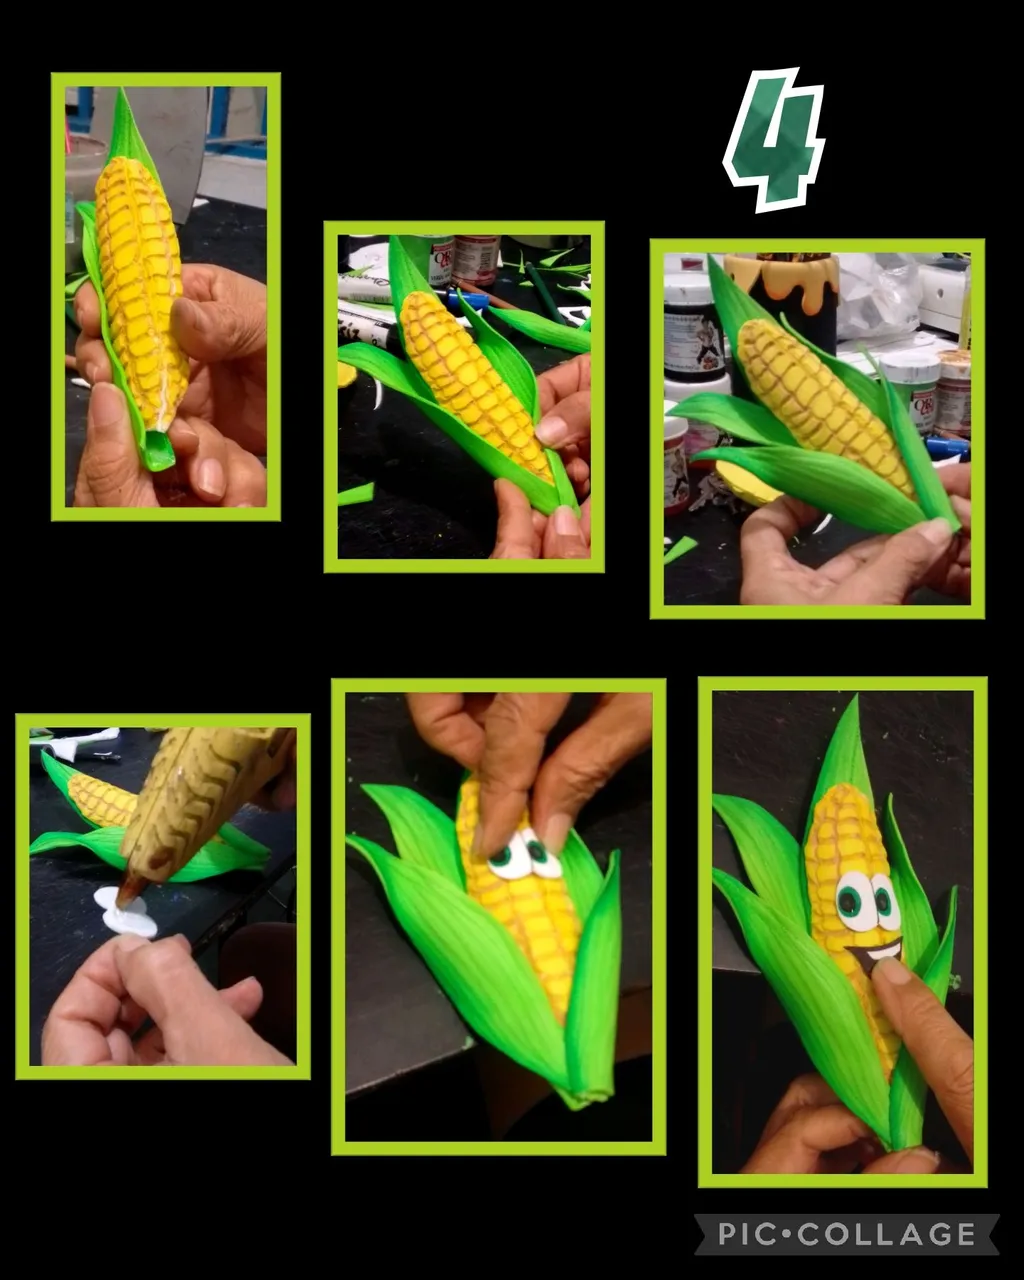
- Ahora aplica silicón caliente en las hojas y pega una a cada lado (ver foto), haciendo presión para que pegue bien y luego pega dos al frente.
- Después aplica silicón en los ojos y boca y pega.

- Recorta una hojita delgada, aplica silicón en la parte de abajo de la mazorca y pega dando una vuelta para tapar las puntas de abajo de las hojas (ver foto)
- Coloca un punto de luz en los ojos, mojando la punta de un palito de altura en pintura blanca.
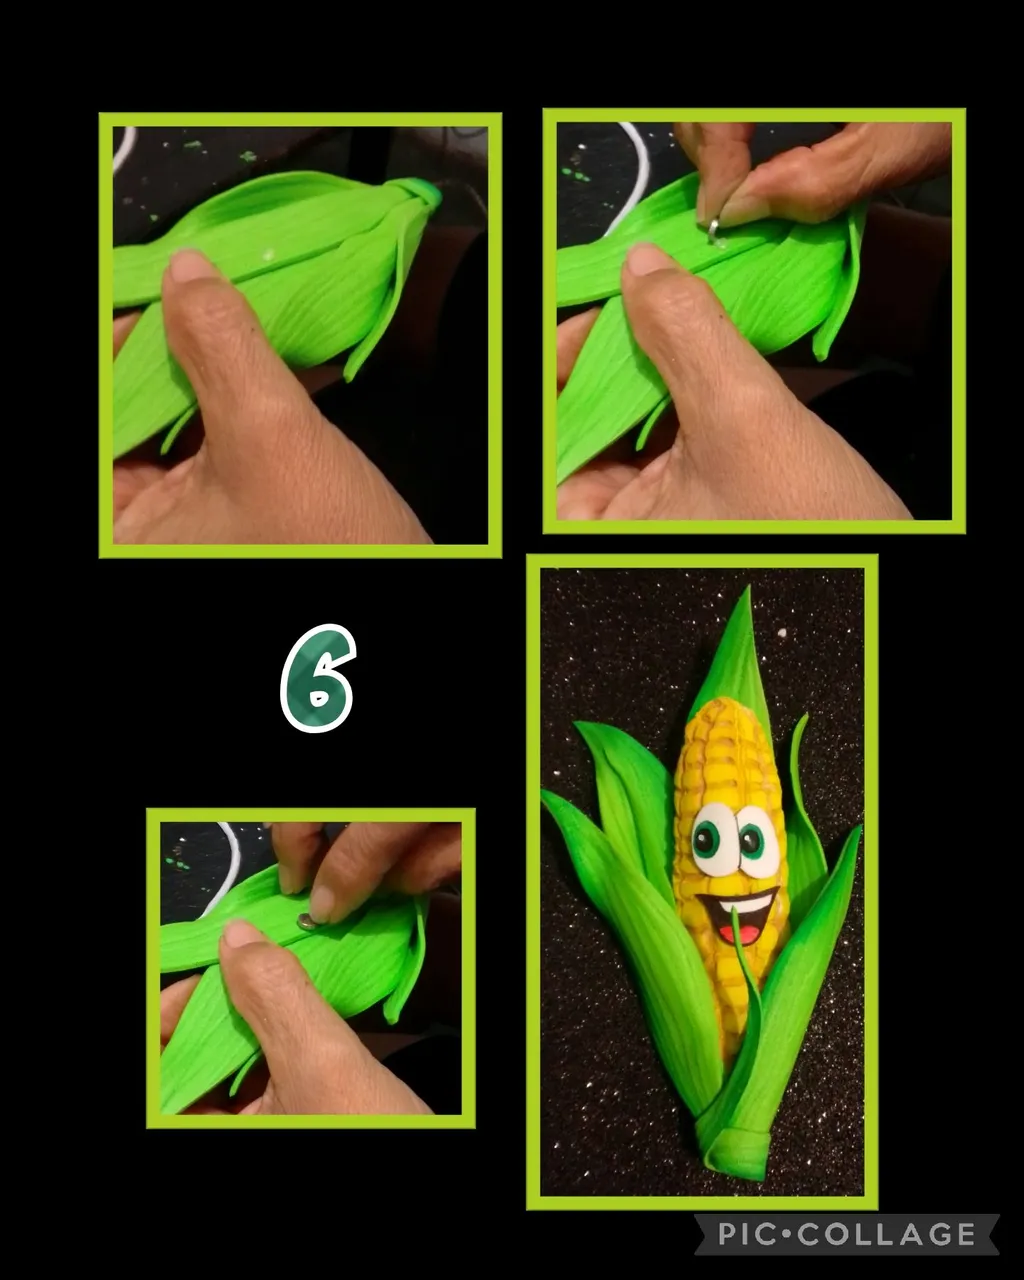
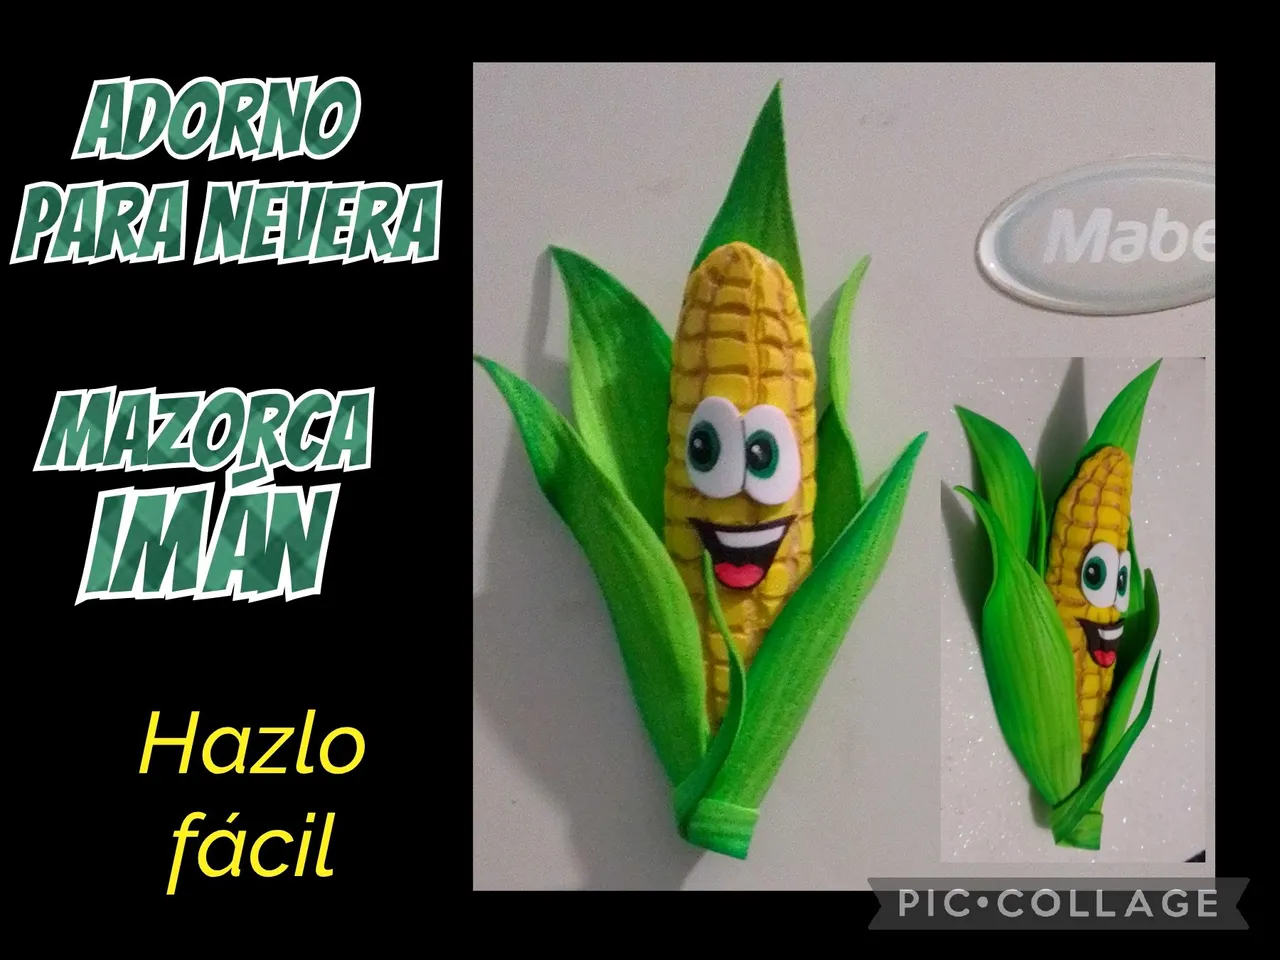
- Ahora para terminar, coloca un punto de silicón en la parte posterior de la mazorca y pega el imán. Así ya quedó lista la Mazorca.
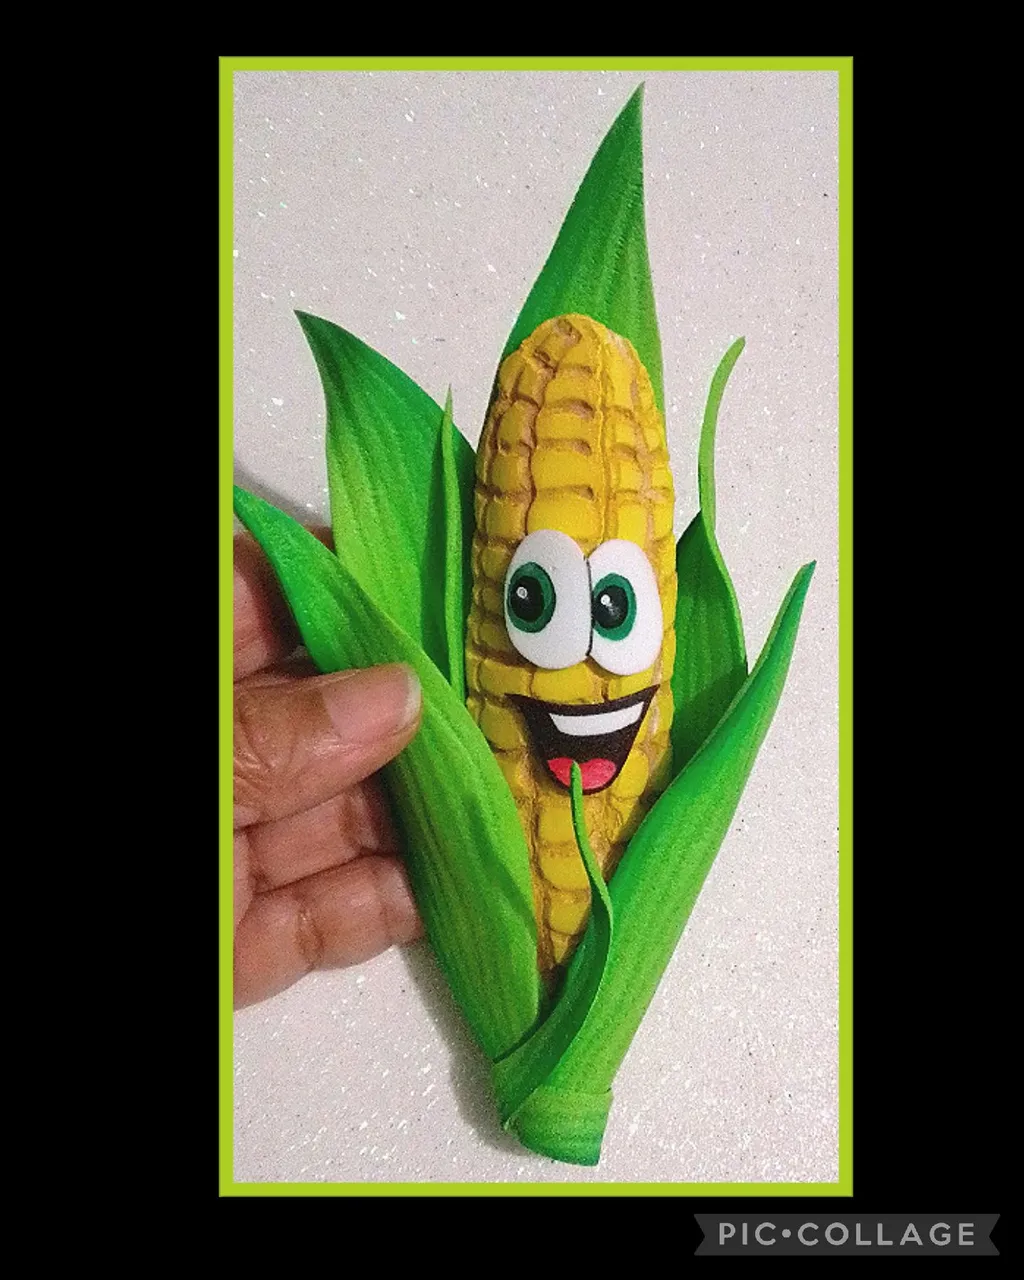
A mí me gustó mucho jajaja!, espero a ustedes también!
Les mostraré la fuente de donde me copié para hacer esta Linda y graciosa Mazorca.
https://www.freepng.es/png-7rwhxc/
Espero se animen y hagan esta linda mazorca, también la pueden hacer y la colocan sobre cartulina y le haces un marco, segura estoy que como cuadro quedará muy bonita.
Y si te gustan los adornos para la nevera, te invito a que hagas este paso a paso, como pudiste ver es muy fácil.
Aquí te la dejo, si tienes alguna pregunta, no dudes en hacerla.
Mi publicación está traducida con DeepL, editada con Etiquetas HTML y las fotos editadas con Pic Collage y capturadas con mi Blu G5.
Ahora si me toca despedirme agradecida de tu visita y esperando te guste mi paso a paso.
Si te gustó me encantará ver tu comentario.
Saludos.
English:
Hola, hola, cómo están mis amigos?
Bienvenidos sean todos a mi Blog.
Feliz martes tengan todos.
Entonces, no te hago esperar más!
Comencemos:
Los materiales que necesitas son:
| Bandeja de anime recycled | Retazos de foami |
|---|---|
| Pinturas y pinceles | Marcador |
| Tijera | Lápiz |
| Cautín | Plancha eléctrica |
Seguimos con el procedimiento:
- To begin, outline the drawing on the paper with a soft lead pencil, preferably HB,3B,6B, then place the paper on the anime tray and rub by pressing with the ears of the scissors to transfer the drawing as we do with the foami.
- Then heat the soldering iron and begin to pass it through all the lines forming the grains of the cob, if the soldering iron gets too hot, you can turn it off or unplug it for a while so it doesn't break the anime.
- Cut all around the edge and try to bend a little to give it a rounded shape of the cob and start painting with a thin brush all the divisions with light brown paint.
- After filling in all the divisions, paint the kernels with yellow color and let dry well.
- Separately cut long leaves out of apple green foami, heat the soldering iron and make vertical lines resembling the texture of the cob leaves.
- Then wet the brush in water, wipe it with a dry cloth and leave it wet, then wet the tip and paint the edge of the leaves, blur and let it dry.
- Heat the iron and place the leaves to shape them.
- Now place a pencil or marker on the cob and try to bend it very carefully so that it takes the rounded shape.
- On a small piece of white foami transfer the eyes and mouth, first paint the iris with the tip of the brush and let it dry, then paint the pupil.
- Then fill in the black part of the mouth with the marker, paint the tongue in red, let it dry and cut out the edge.
- Apply silicone all around the edge of the cob and glue a leaf on the back.
- Now apply hot silicone to the leaves and glue one on each side (see photo), pressing down so that it sticks well and then glue two to the front.
- Then apply silicone to the eyes and mouth and glue.
- Cut out a thin leaf, apply silicone to the bottom of the cob and glue around to cover the bottom tips of the leaves (see photo).
- Place a light spot on the eyes by dipping the tip of a tall stick in white paint.
- Now to finish, place a dot of silicone on the back of the cob and glue the magnet. The corncob is now ready.
I really liked it hahaha, I hope you like it too!
I will show you the source from where I copied to make this cute and funny corncob.
https://www.freepng.es/png-7rwhxc/
I hope you are encouraged and make this cute corncob, you can also make it and place it on cardboard and make a frame, I'm sure that as a picture will be very nice.
And if you like decorations for the fridge, I invite you to do this step by step, as you could see it is very easy.
Here it is, if you have any questions, do not hesitate to ask.
My publication is translated with DeepL, edited with HTML Tags and the photos edited with Pic Collage and captured with my Blu G5.
Now it's my turn to say goodbye, thank you for your visit and I hope you like my step by step.
If you liked it I will love to see your comment.
Greetings.