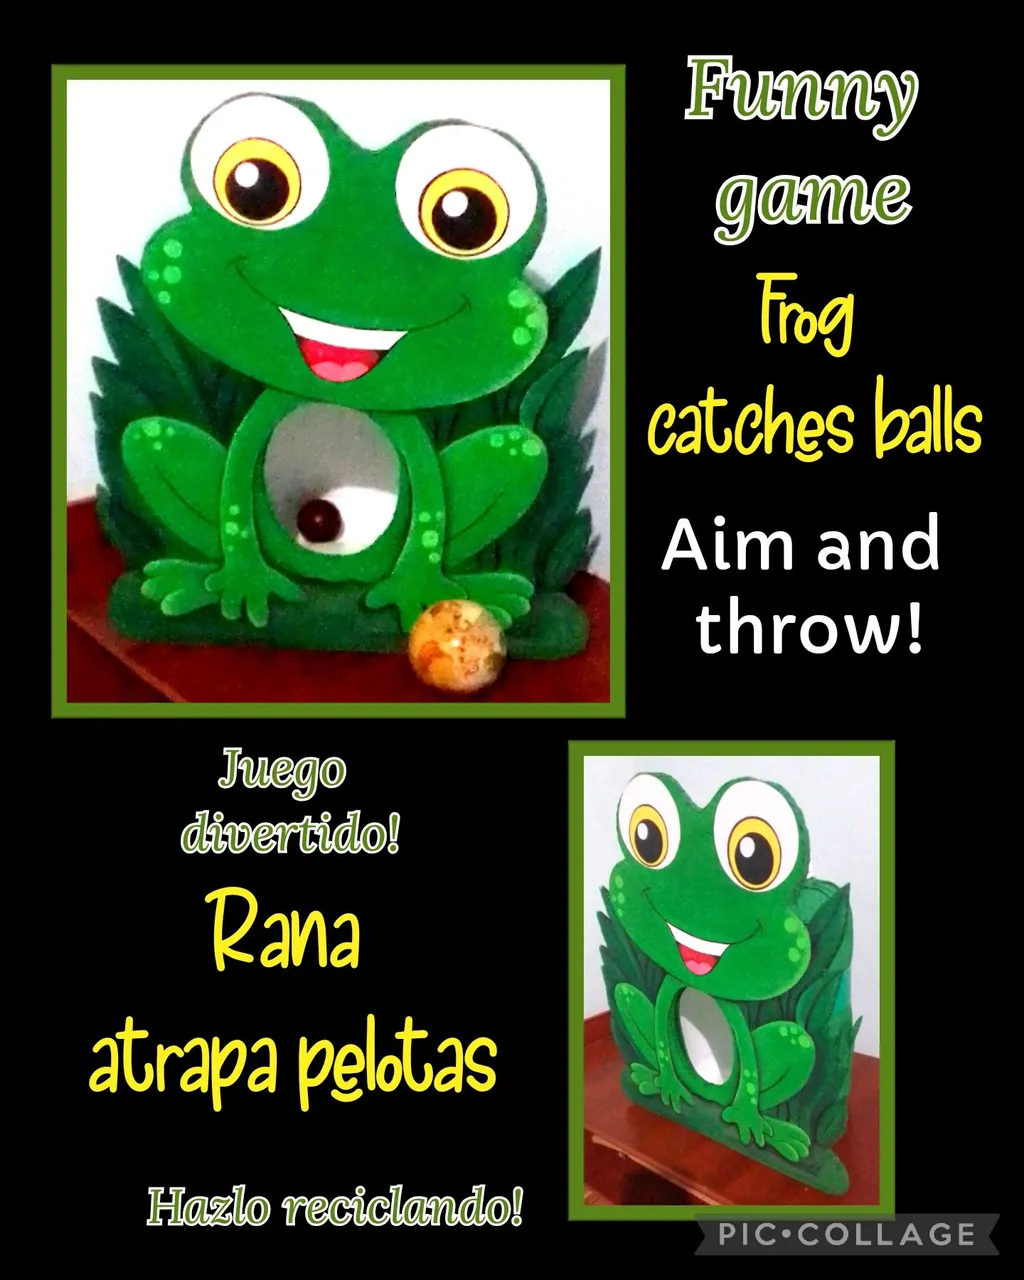
Buenas noches y bienvenidos a mi Blog.
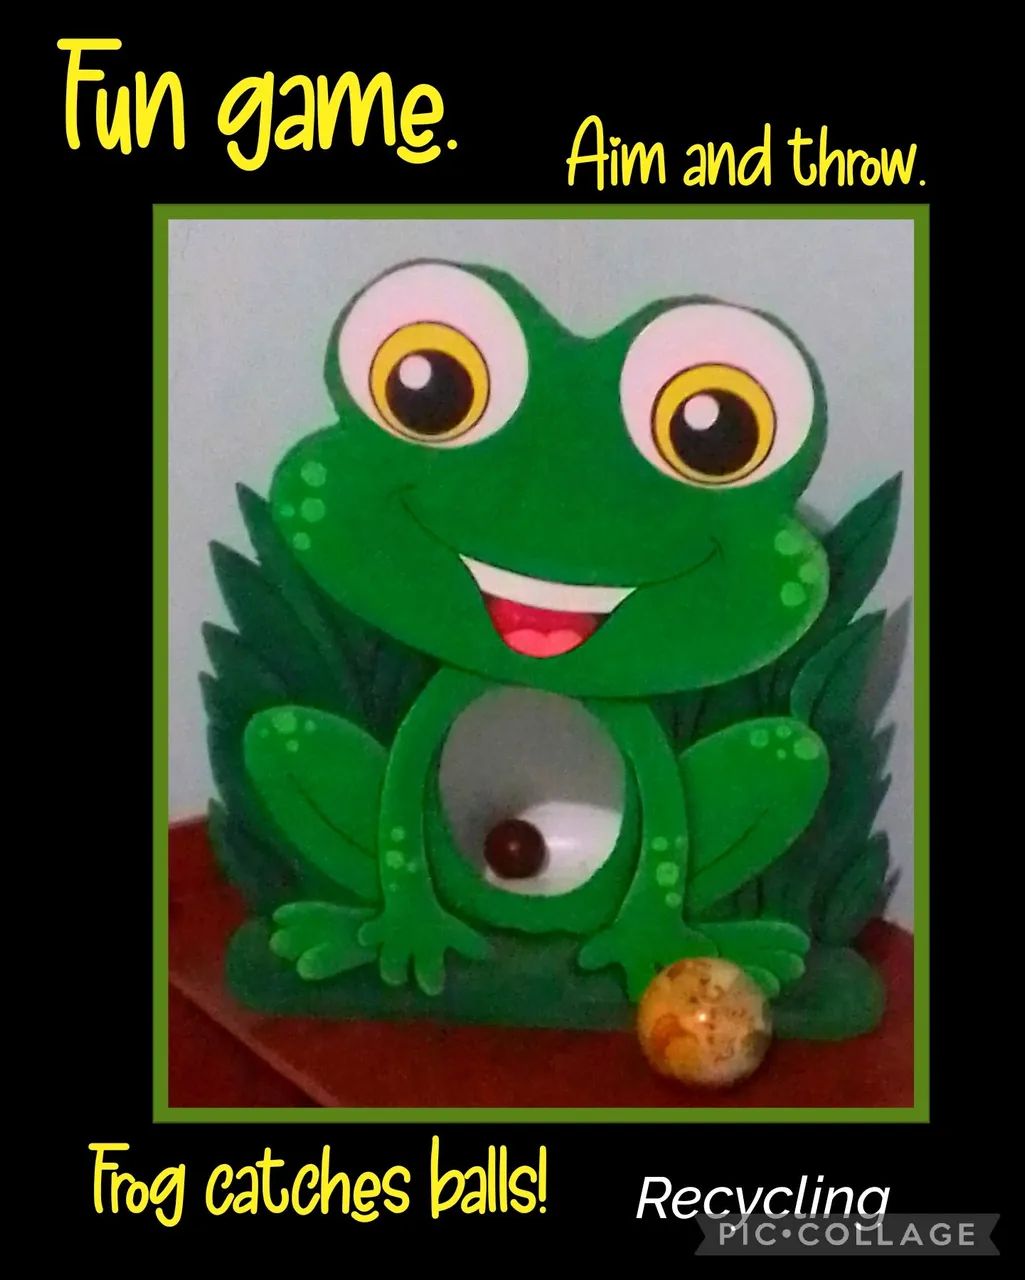
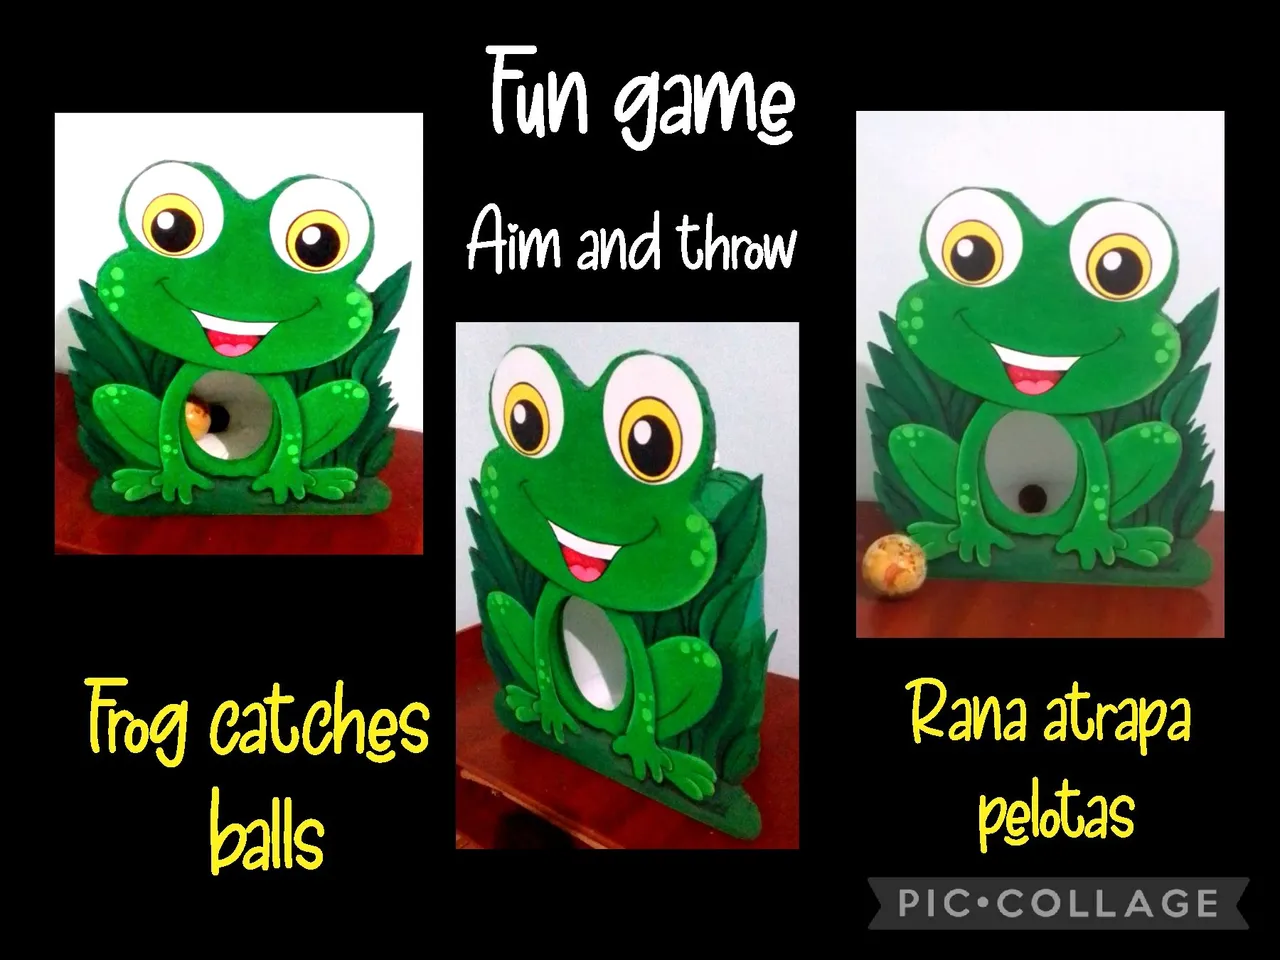
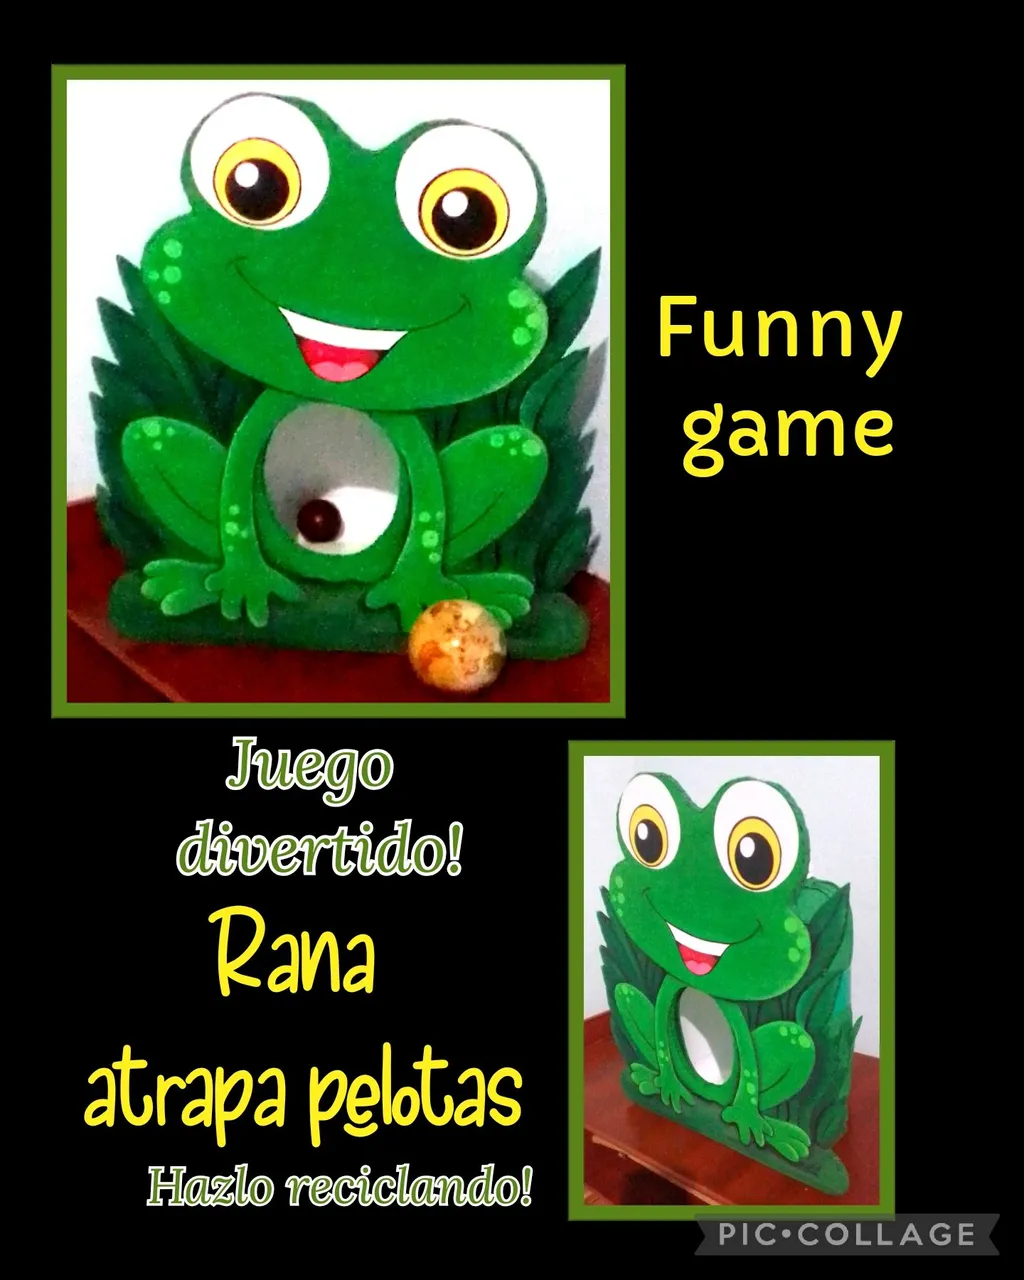
El Juego es muy sencillo, sólo tienen que mirar, apuntar y lanzar una pelota insertando en el blanco (orificio) y el ganador será el que logre meter más pelotas...Con este juego toda la familia se divertirá!. Y lo mejor es que puedes hacerlo con los materiales que tengas a mano y si son de reciclaje será fabuloso, igualmente pueden escoger la figura y llevarlo donde quiera que vayas.
Así que te invito a que me acompañes y veas el proceso.
Para esto vas a necesitar:
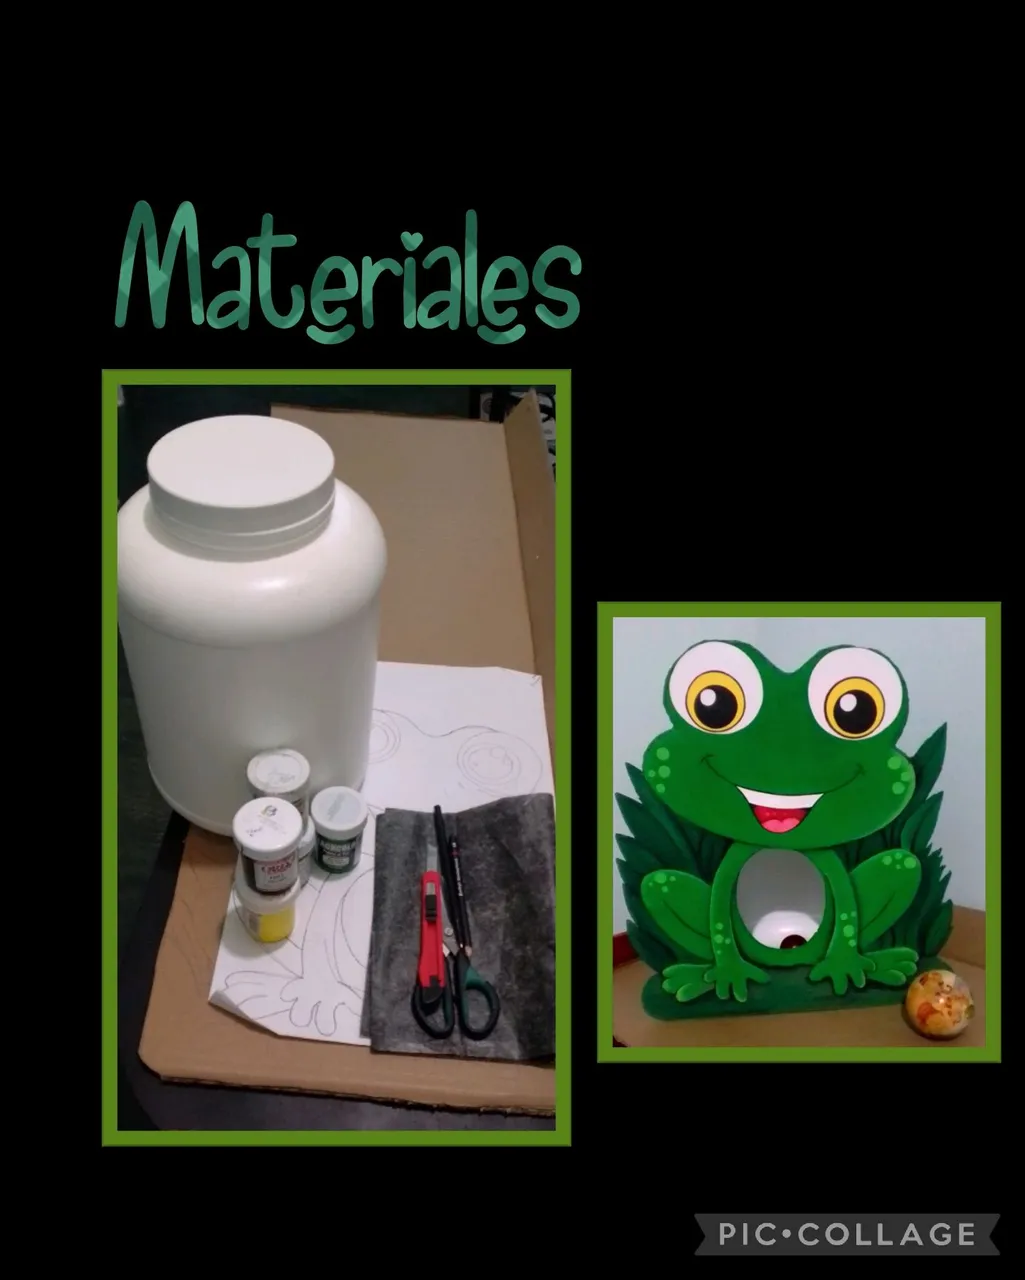
| Cartón grueso de caja | Envase plástico |
|---|---|
| Pinturas y pinceles | Tijera |
| Dibujo o impresión | Papel Carbón |
| Cuchilla | Papel crepé |
| Silicón | Cartulinas |
| Lápiz |
Comencemos:
Paso 1:
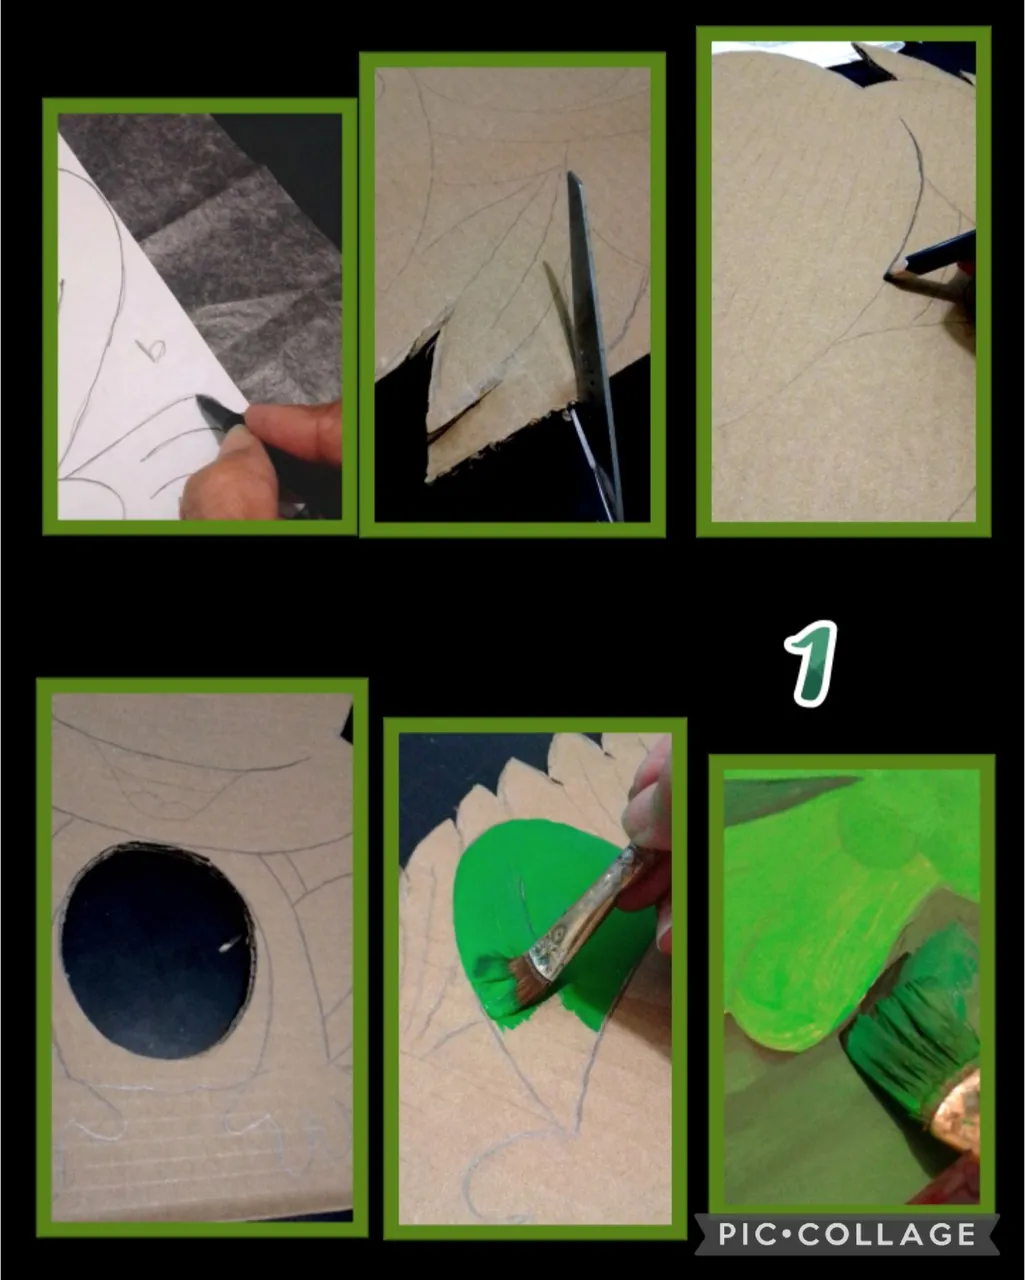
Transferir, recortar y pintar:
- Coloca sobre el cartón el papel carbón y el dibujo, luego con un bolígrafo sin tinta remarca todo el dibujo, luego recorta con tijera o cuchilla, luego remarca el dibujo y recorta el orificio y comienza pintar las partes de la rana con los colores corresponcientes, puedes dar 2 o 3 capas de pintura para que el color quede uniforme.
- Luego con pintura negra dar sombras debajo de las patas.
Paso 2
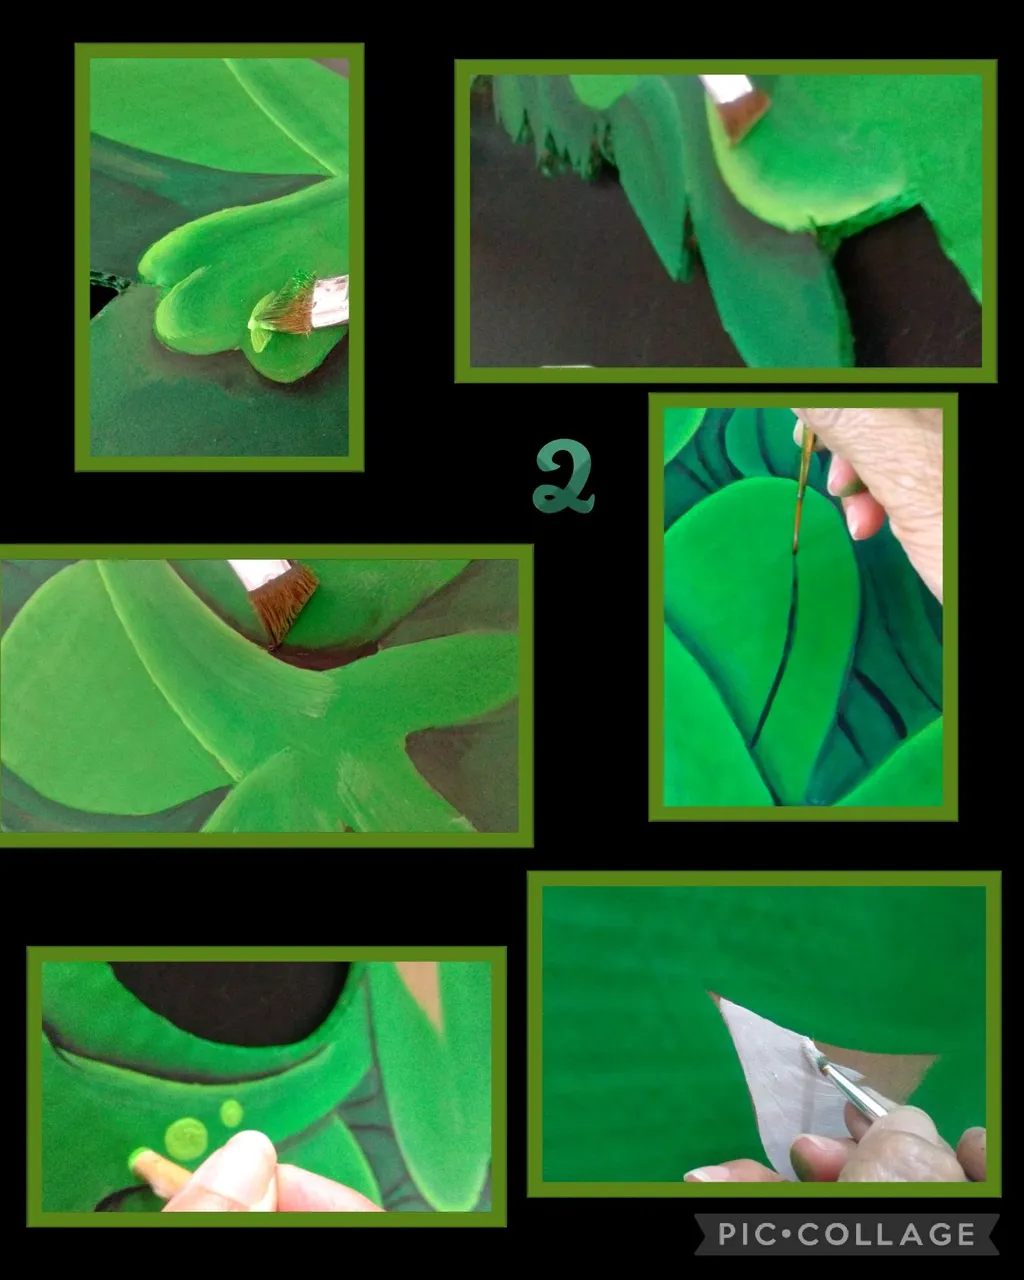
- Ahora con un pincel angular, moja en pintura verde claro y pasa para pintar en ciertas partes y da claridad al dibujo guiándote por las fotos.
- Nuevamente con el pincel angular dá sombra en las divisiones (patas delanteras).
- Luego delinea o pasa con marcador las líneas delgadas.
- Ahora moja la parte trasera de un pincel en pintura verde claro y marca puntos o manchas en la rana.
- Aplica 2 manos de pintura blanca en la boca y deja secar entre capas.
Paso 3
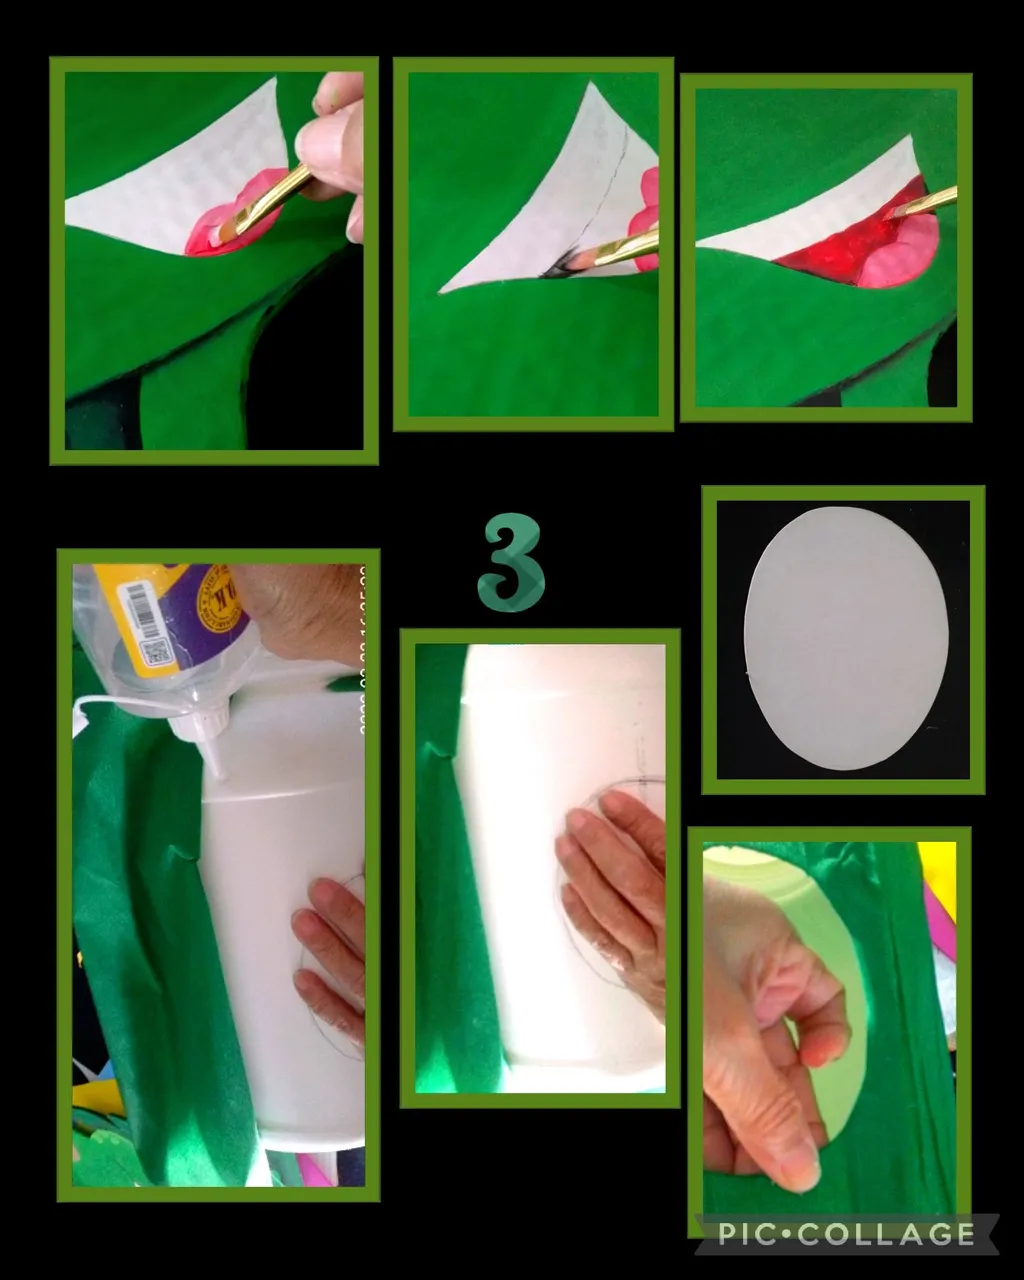
- Seca la parte blanca ahora comienza aplicando un poco de pintura roja y baja el tono a rosado usando pintura blanca hasta rellenar la lengua.
- Aplica color negro en las puntas superiores de la boca e inmediatamente aplica color rojo y difumina uniendo el negro con el rojo en los extremos y rellena el centro con rojo y deja secar.
- Ahora recorta un pedazo de papel crepé verde y comienza a pegar en la parte superior dejando sin pegar en el centro, luego con una cuchilla recorta y haz el orificio en el envase plástico y termina de forrar con el papel crepé.
Paso 4:
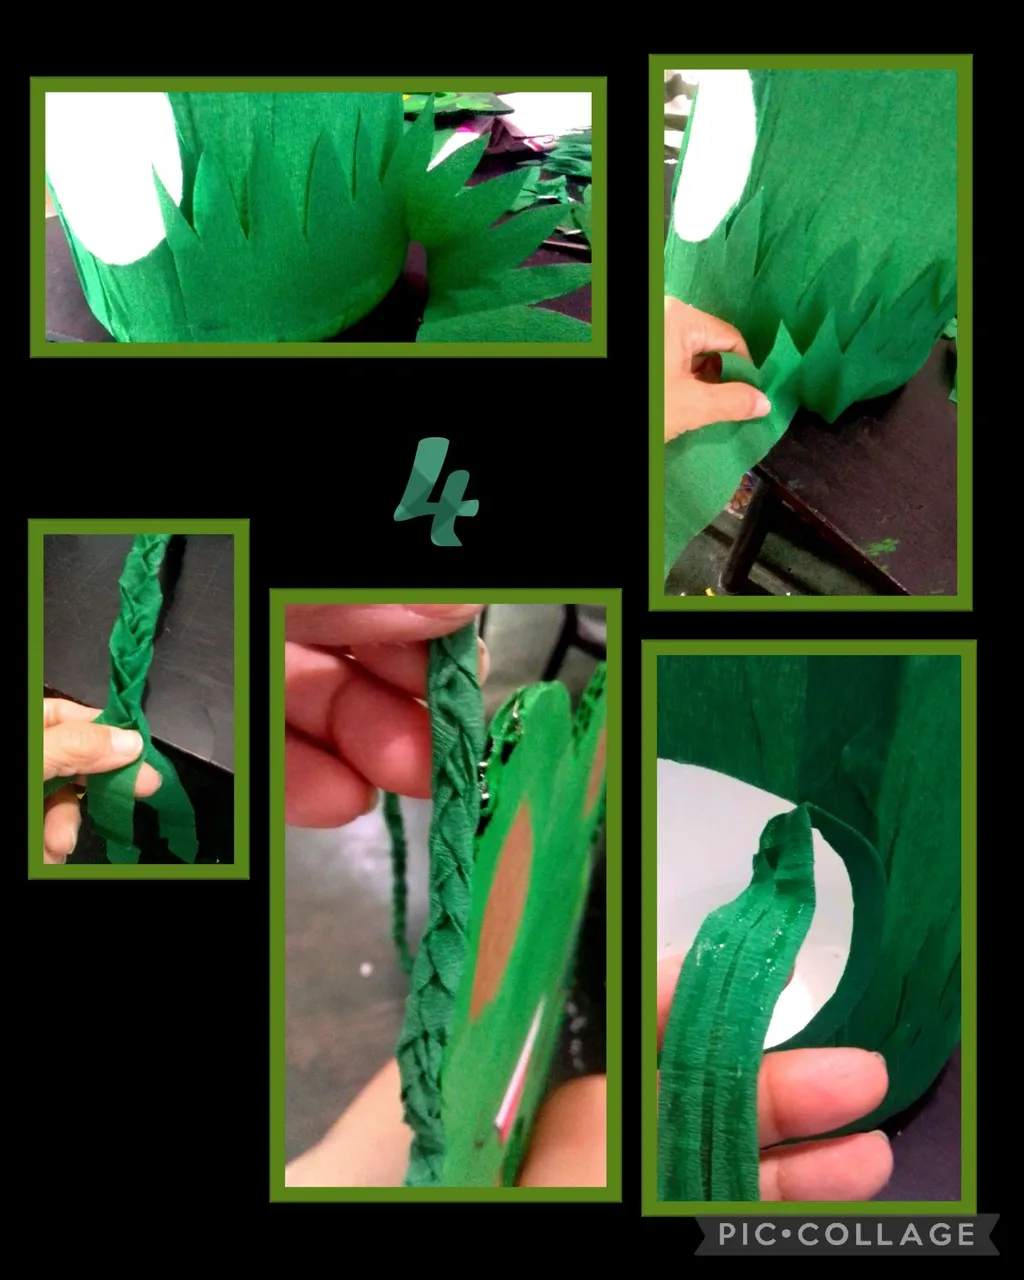
- Ahora recorta 2 tiras de papel crepé de 10cm de ancho y recorta en forma de picos y comienza a pegar la primera capa de arriba y la segunda capa en la parte de abajo.(Ver foto).
- Teje una crineja delgada y pega en el contorno superior de la rana para tapar la orilla del cartón, aparte recorta una tira de 6 cm y dobla los extremos hacia adentro haciendo especie de un sesgo y pega a la orilla del envase.
Paso 5:
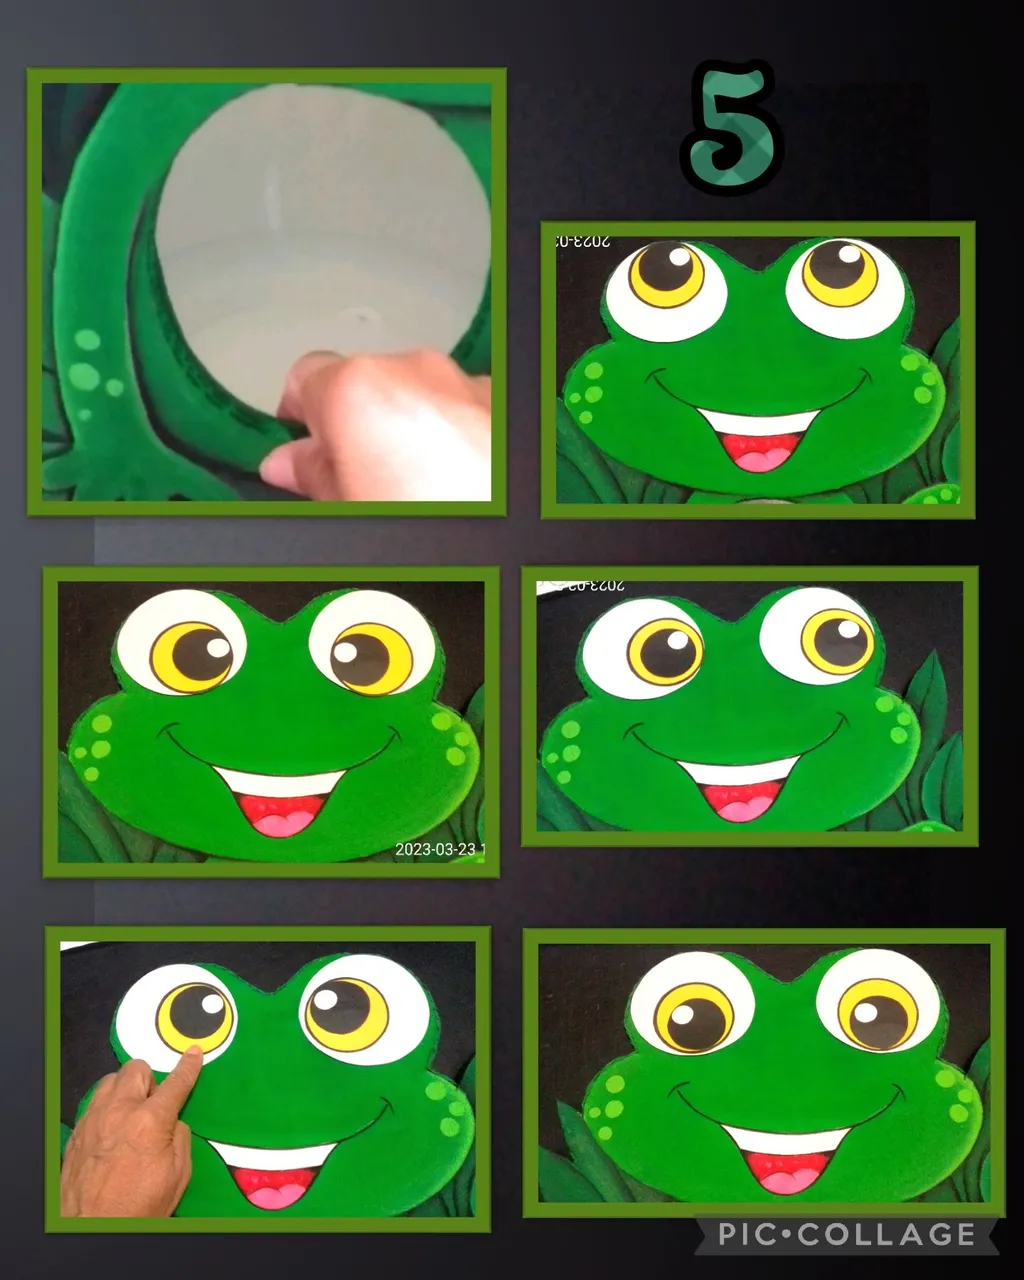
- Mide la rana junto al envase para comprobar que estén del mismo tamaño.
- Marca y recorta los ojos en cartulina
(2 círculos blancos)
(2 " amarillos)
(2 " negros) - Ahora pega los círculos negros en los amarillos y ubicalos en la posición que te guste más, aquí te dejo varias para que escojas la que te guste.
Es increíble como el rostro cambia con la posición de los ojos!
Paso 6:
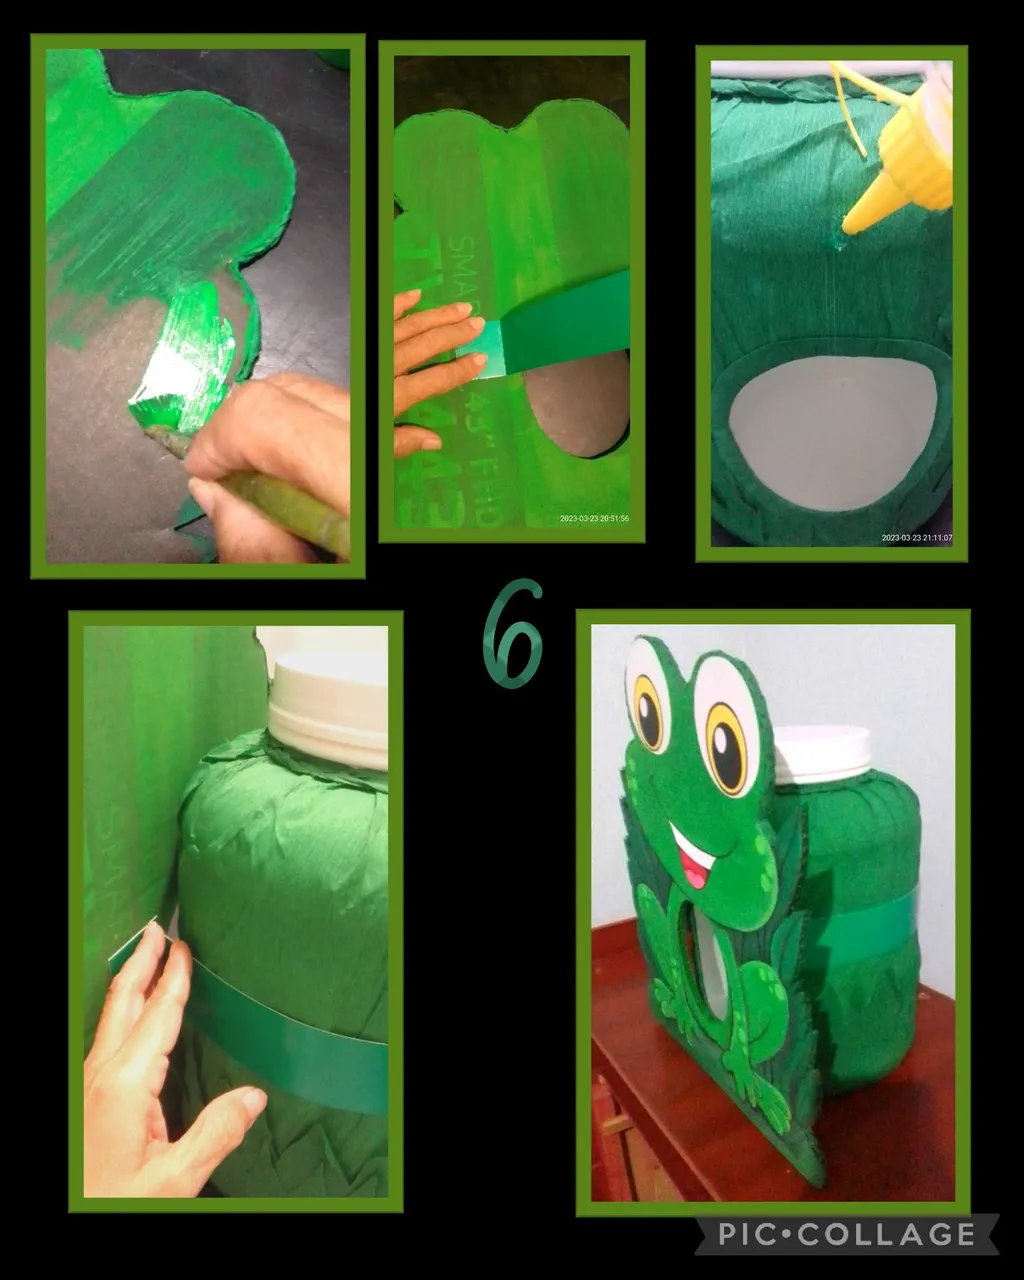
- Ahora aplica pintura en la parte trasera de la figura y deja secar.
- Recorta una tira de 4cm de ancho, mide el contorno del envase y aumenta 4cms en cada extremo para pegar a un lado del orificio, luego aplica silicón en la parte de arriba del envase, pega el envase y termina de pegar el otro extremo de la tira, haciendo especie de una correa o abrazadera.
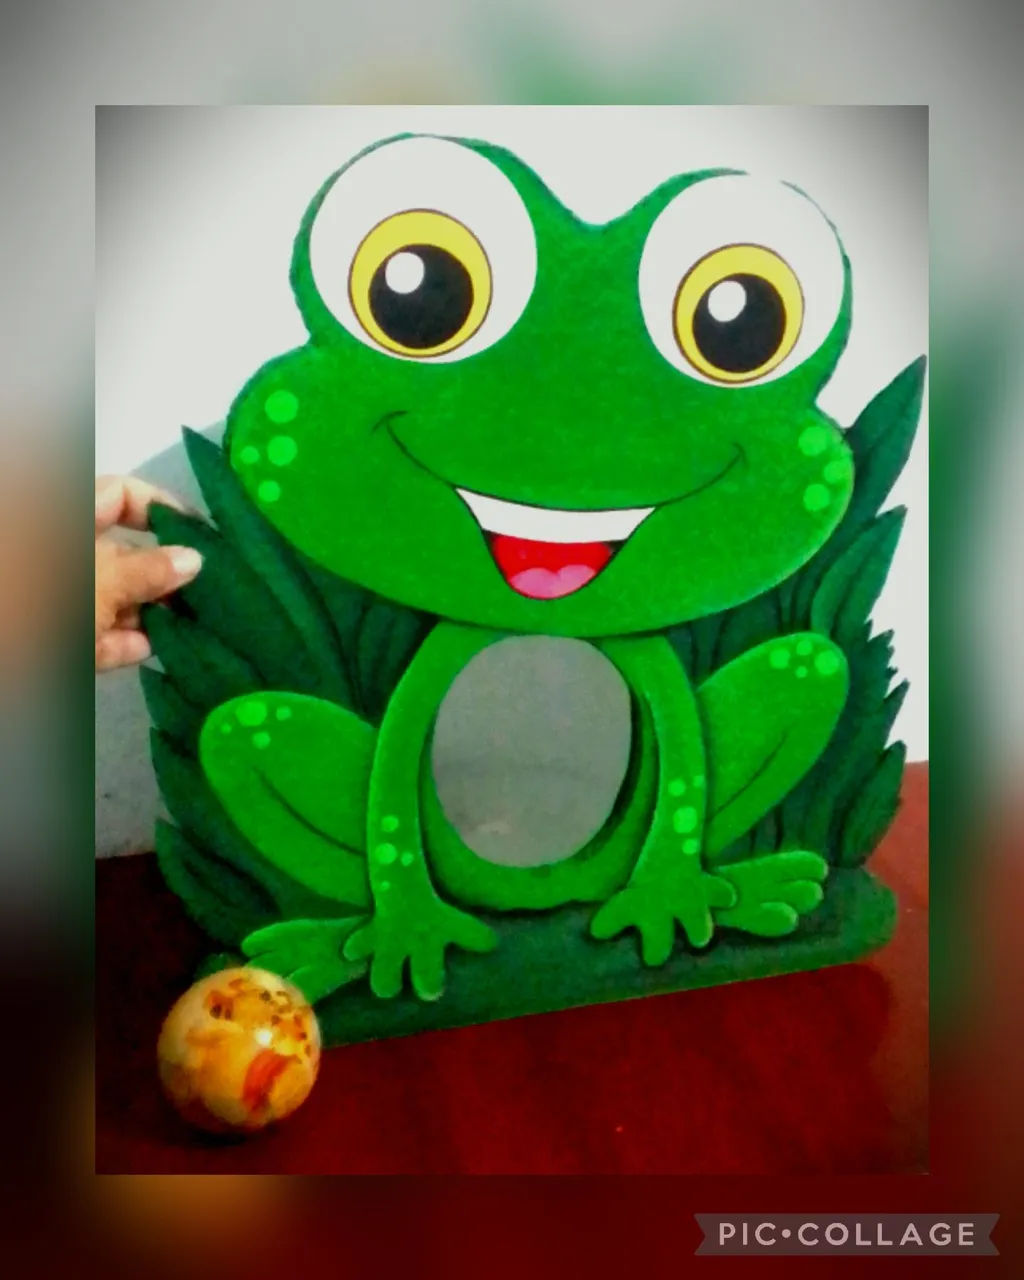
Así queda listo para jugar!
Espero te haya gustado este paso a paso y te animes a realizarlo, cualquier duda, estoy a la orden.
Saludos y muchas gracias por llegar hasta aquí.
Y no te olvides: RECICLA!
English:
Good evening and welcome to my Blog.
And the best thing is that you can do it with the materials you have at hand and if they are recycled it will be fabulous, you can also choose the figure to your liking and take it wherever you go.
So I invite you to join me and watch the process.
For this you will need:
| Thick cardboard box | Plastic container |
|---|---|
| Paints and brushes | Scissors |
| Drawing or printing | Charcoal paper |
| Knife | Crepe paper |
| Silicone | Cardboard |
| Pencil |
Let's get started:
Step 1:
Transfer, cut out and paint:
- Place on the cardboard the carbon paper and the drawing, then with a pen without ink outline the whole drawing, then cut out with scissors or blade, then outline the drawing and cut out the hole and start painting the parts of the frog with the corresponding colors, you can give 2 or 3 coats of paint so that the color is uniform.
- Then with black paint give shadows under the legs.
Step 2
- Now with an angled brush, dip in light green paint and pass to paint in certain parts and give clarity to the drawing guided by the photos.
- Again with the angled brush shade in the divisions (front legs).
- Then outline the thin lines with a marker.
- Now dip the back of a brush in light green paint and mark dots or spots on the frog.
- Apply 2 coats of white paint on the mouth and let dry between coats.
Step 3
- Dry the white part now start applying some red paint and tone it down to pink using white paint until the tongue is filled in.
- Apply black color on the upper tips of the mouth and immediately apply red color and blend by joining the black with the red at the ends and fill in the center with red and let dry.
- Now cut out a piece of green crepe paper and start gluing at the top leaving the center unglued, then with a knife cut out and make the hole in the plastic container and finish lining with the crepe paper.
Step 4
-Now cut 2 strips of crepe paper 10cm wide and cut in the shape of peaks and start gluing the first layer on the top and the second layer on the bottom (see photo).
- Weave a thin mane and glue on the top contour of the frog to cover the edge of the cardboard, separately cut a strip of 6 cm and fold the ends inwards making a kind of bias and glue to the edge of the container.
Step 5
Measure the frog next to the container to make sure they are the same size.
Mark and cut out the eyes on cardboard (2 white circles).
2 white circles
2 yellow
2 blackNow glue the black circles on the yellow ones and place them in the position you like best, here I leave several for you to choose the one you like.
It's amazing how the face changes with the position of the eyes!
Step 6
- Now apply paint on the back of the figure and let it dry.
- Cut a 4cm wide strip, measure the contour of the container and increase 4cms at each end to glue to one side of the hole, then apply silicone on the top of the container, glue the container and finish gluing the other end of the strip, making a kind of strap or clamp.
So it is ready to play!
I hope you liked this step by step and I encourage you to do it, any questions, I am at your service.
Greetings and thank you very much for getting here.
And don't forget: RECYCLE!