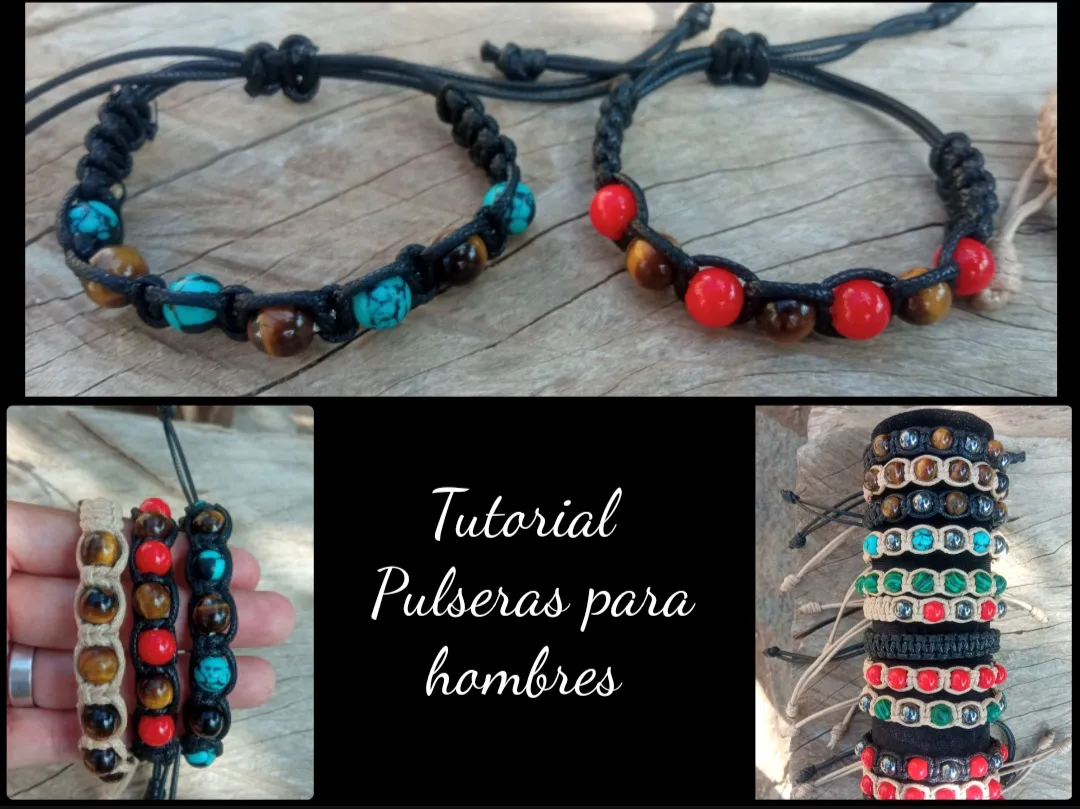
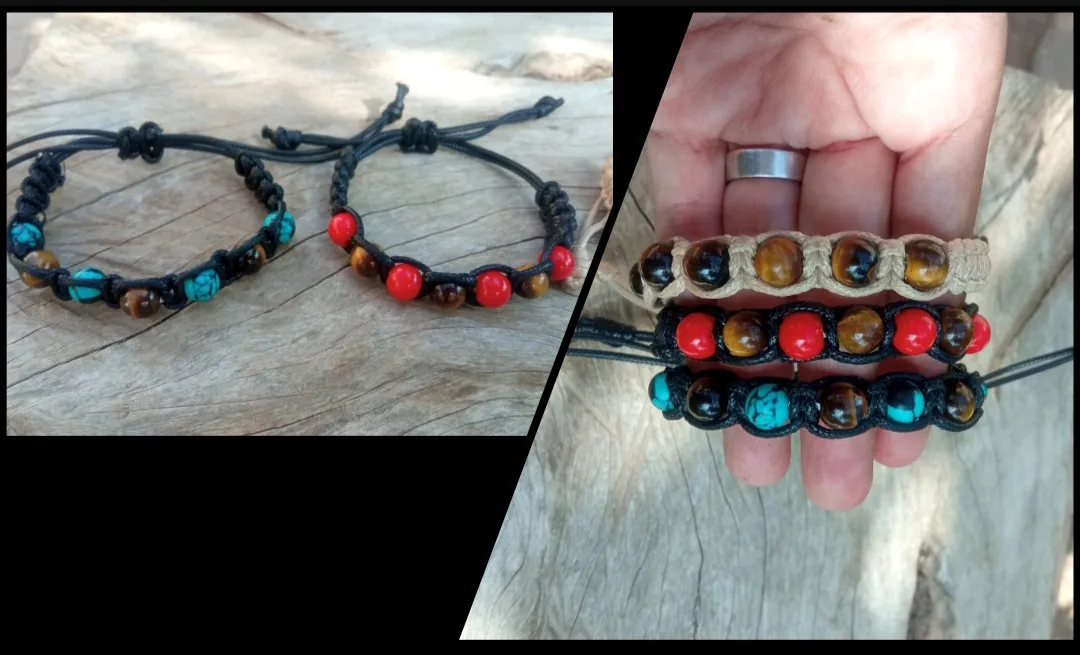
Feliz y bendecido día tengan todos ustedes, espero todos tengan una excelente semana en esta oportunidad paso por esta hermosa comunidad para compartir con todos ustedes un muy sencillo tutorial para la elaboración de hermosas pulseras para hombres, un accesorio muy casual, que puede ser usado por chicos de todas las edades. Además son súper fácil de elaborar y muy duraderas ya que podemos colocarlas para el trabajo pues No atienden a dañarse fácilmente si las mojamos.
Happy and blessed day to all of you, I hope you all have an excellent week. On this occasion I stop by this beautiful community to share with all of you a very simple tutorial for making beautiful bracelets for men, a very casual accessory, which can be used by kids of all ages.
They are also super easy to make and very durable since we can place them for work because they do not tend to get damaged easily if we get them wet.
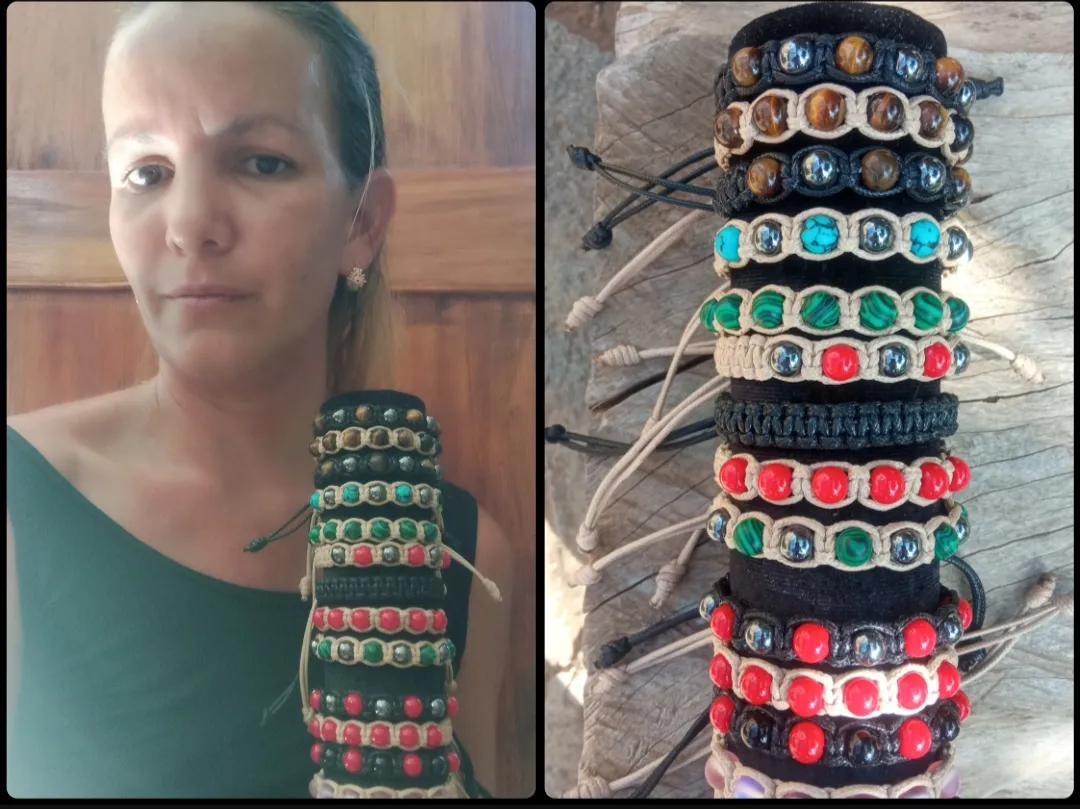
For all of you I have prepared this step by step so that we can learn together how to make these beautiful bracelets that would be a beautiful detail for that special being. I invite you to join me below.
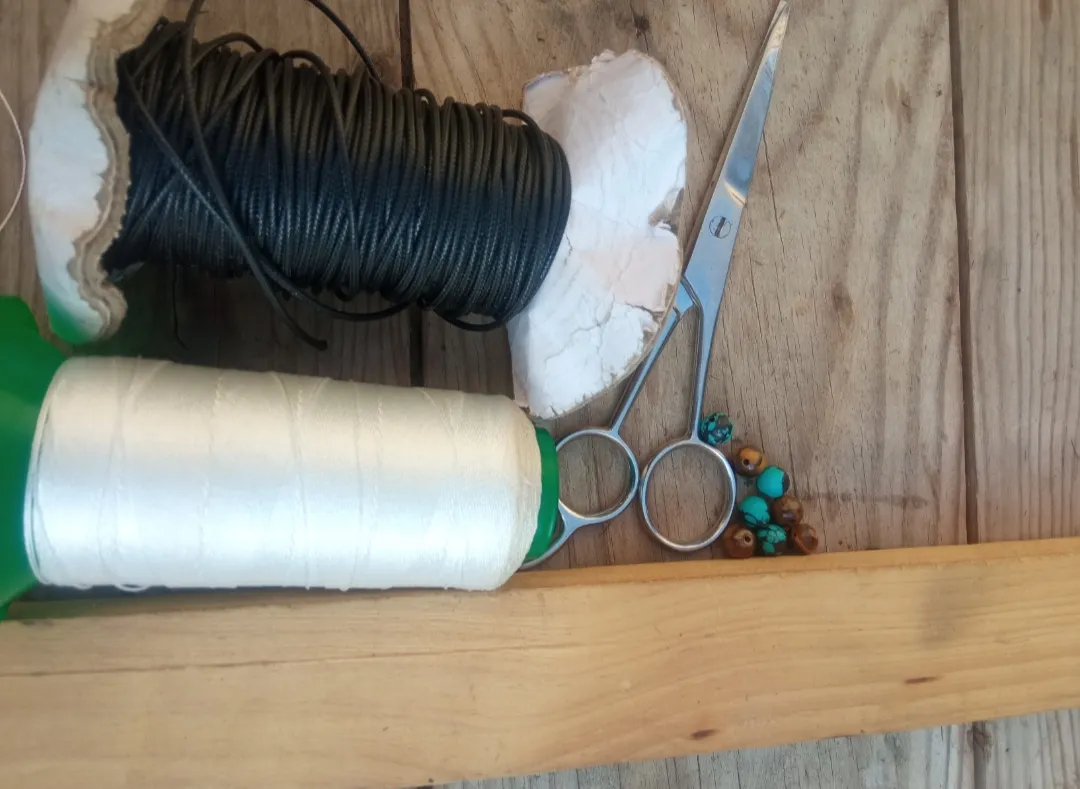
- hilo ( piel de serpiente negra)
- hilo de nylon blanco.
- piedras redondas medianas verdes y marrones.
- tijera y yesquero
- thread (black snake skin)
- white nylon thread.
- green and brown medium round stones.
- scissors and tinderbox
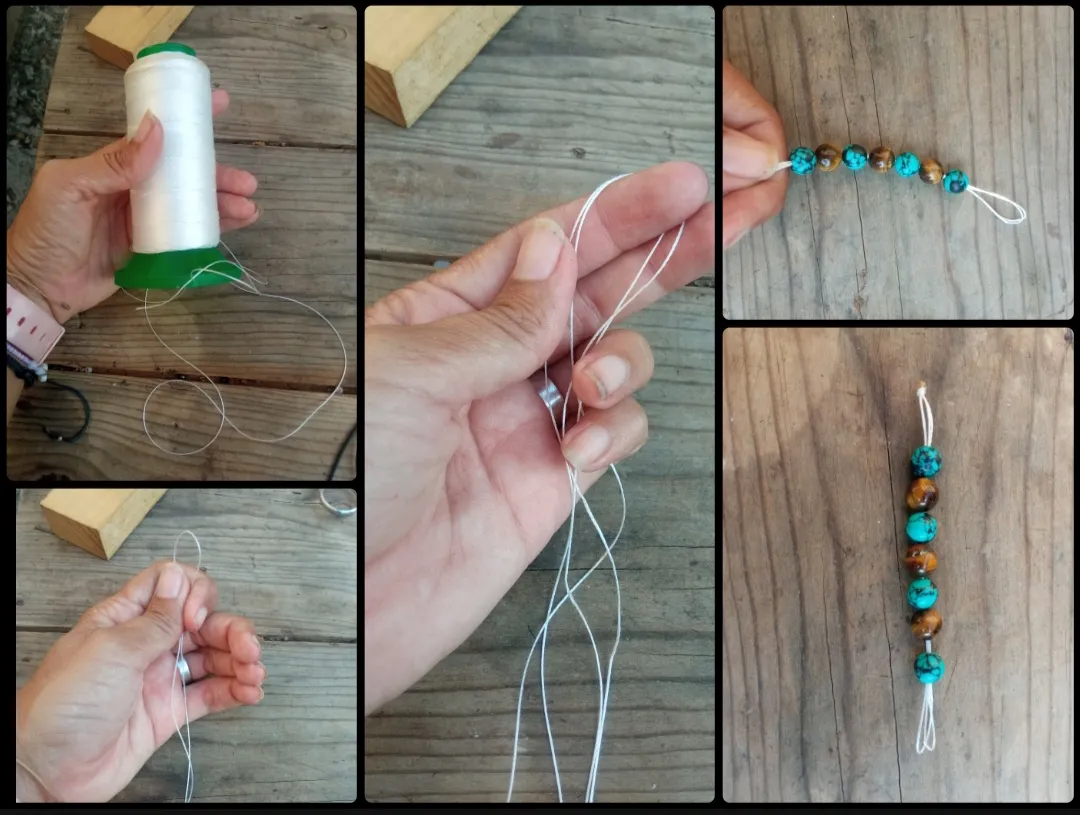
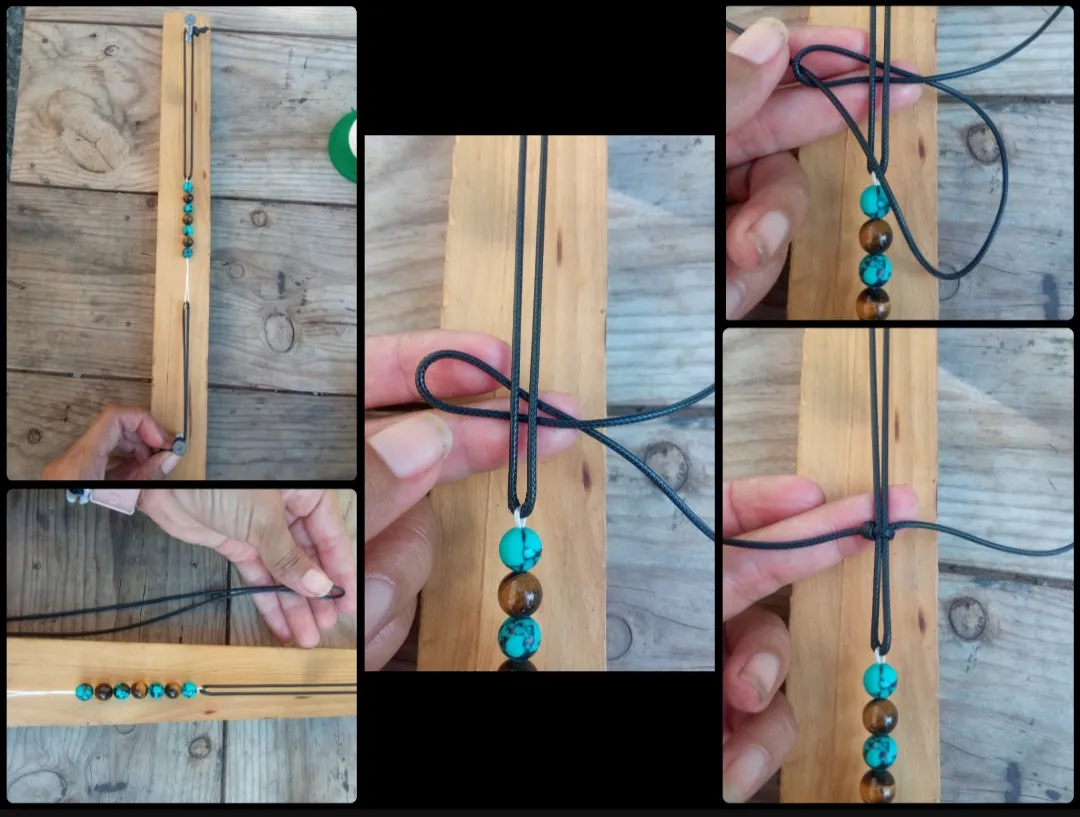
⭐ Paso 1: para iniciar la elaboración de están lindas pulseras lo primero que debemos hacer es tomar el hilo de nylon y cortaremos un pedazo de 30 cm aproximadamente lo cual lo doblaremos a la mitad y después lo volveremos a doblar una vez más a la mitad lo cual nos quedarán cuatro hebras de nylon. Seguidamente iniciaremos a introducir la pedrería intercaladas una verde una marrón una verde un marrón Y así sucesivamente. Yo las elaboró con siete piedras por lo que podrán ver que tenemos cuatro piedras verdes y tres marrones intercaladas entre estas verdes y una vez tengamos las siete piedras realizaremos un pequeño nudo en el extremo del hilo.
⭐ Step 1: to start making these beautiful bracelets, the first thing we must do is take the nylon thread and we will cut a piece of approximately 30 cm, which we will fold in half and then we will fold it again halfway which we will have four strands of nylon left.
Next we will begin to introduce the rhinestones interspersed, one green, one brown, one green, one brown And so on.
I made them with seven stones so you can see that we have four green stones and three brown stones interspersed between these green ones and once we have the seven stones we will make a small knot at the end of the thread.
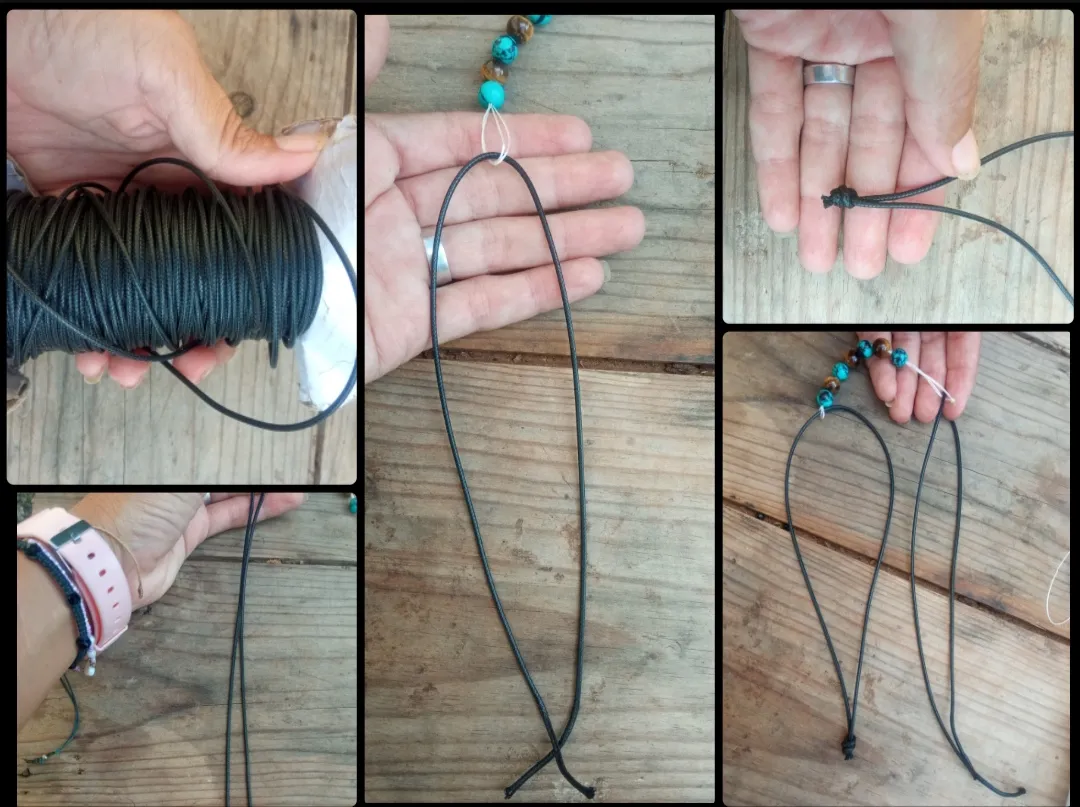
⭐ Paso 2: seguidamente tomaremos la piel de serpiente y cortaremos dos hebras de 30 cm cada una, tomaremos la primera de ellas y la introduciremos por el doblez en los en el hilo de nylon y llevándolo hasta la mitad uniremos las dos puntas de la piel de serpiente y allí realizaremos un pequeño nudo normal de la misma manera los realizaremos en la segunda punta del hilo de nylon para que así nos quede de cada lado un pedazo de pierde serpiente doble.
⭐ Step 2: next we will take the snake skin and cut two strands of 30 cm each, we will take the first of them and introduce it through the fold in the nylon thread and taking it halfway we will join the two ends of the snake skin and there we will make a small normal knot in the same way we will make them in the second end of the nylon thread so that we have a piece of double snake loose on each side.
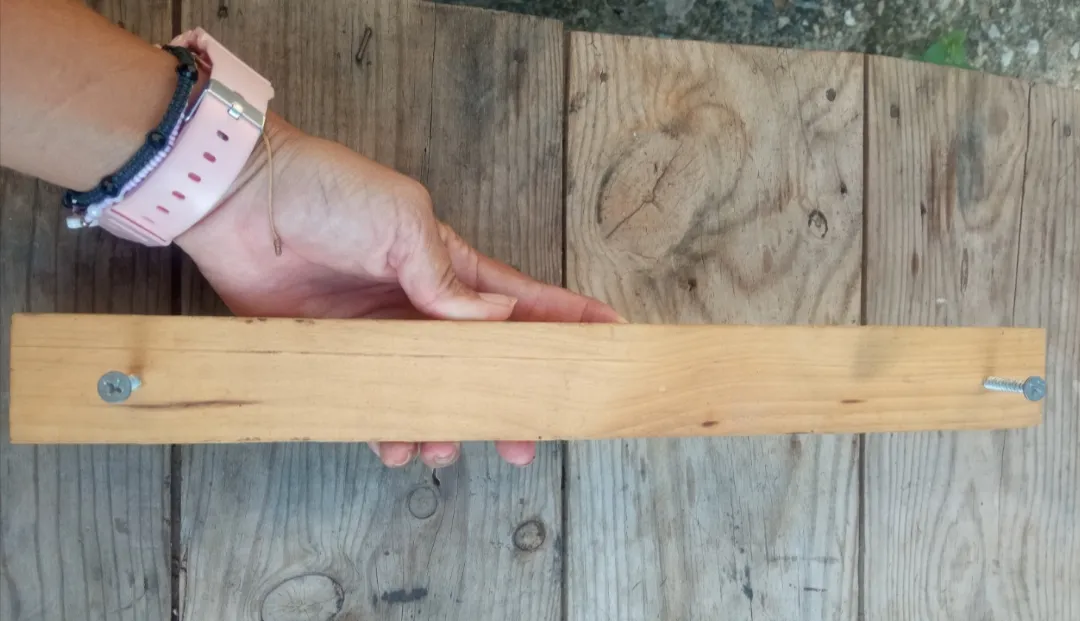
⭐ Paso 3: para continuar debemos comenzar con el tejido y Para mayor facilidad mi esposo me ha elaborado esta base para realizar las pulseras con una pequeña tabla de madera y en cada punta les colocó un tornillo por este tornillo yo introduzco la punta del hilo pierde serpiente y la otra del otro extremo de la base en el otro tornillo si es un poco más larga que la base doy varias vueltas y los sujeto con un gancho de ropa Pero si ustedes no poseen esta pieza que es elaborada manualmente pueden realizarlo con cualquier cosa que les permita sujetar un extremo de esta pulsera para que no se confundan en el momento de realizar el tejido. Ahora cortaremos un pedazo de piel de serpiente de e iniciaremos el tejido doblando la hebra de piel de serpiente a la mitad y la punta donde está el dobles lo introduciremos por debajo de la base de la pulsera a unos pocos centímetros de la parte donde están las piedras, luego de las dos hebras de hilo de serpiente del lado izquierdo tomaremos la de arriba la pasaremos por debajo de la segunda hebra y la cruzaremos al otro lado introduciendola en el dobles, luego jalamos y así tenemos el primer nudo del tejido.
⭐ Step 3: to continue we must start with the weaving and for greater ease my husband has made me this base to make the bracelets with a small wooden board and on each end he placed a screw.
Through this screw I insert the tip of the thread loses the snake and the other from the other end of the base in the other screw if it is a little longer than the base I make several turns and attach them with a clothes hanger But if you do not have this piece that is made manually you can do it with anything that allows them to hold one end of this bracelet so that they do not get confused when weaving.
Now we will cut a piece of snakeskin and we will start the weaving by folding the strand of snakeskin in half and we will introduce the tip where the double is located under the base of the bracelet a few centimeters from the part where the stones, after the two strands of snake thread on the left side we will take the top one, pass it under the second strand and cross it to the other side, introducing it into the double, then we pull and thus we have the first knot of the fabric.
⭐ Paso 4: para continuar el tejido volvemos a cruzar el piel de serpiente ahora de de izquierda a derecha y la hebra de la derecha la pasaremos por encima de esta y por debajo de la base sacándola por el dobles de la izquierda. Esto lo realizaremos tres veces más hasta llegar a la parte del hilo de nylon.
⭐ Step 4: to continue weaving we cross the snakeskin again, now from left to right and we will pass the right strand over it and under the base, taking it out through the double strand on the left. We will do this three more times until we reach the nylon thread part.

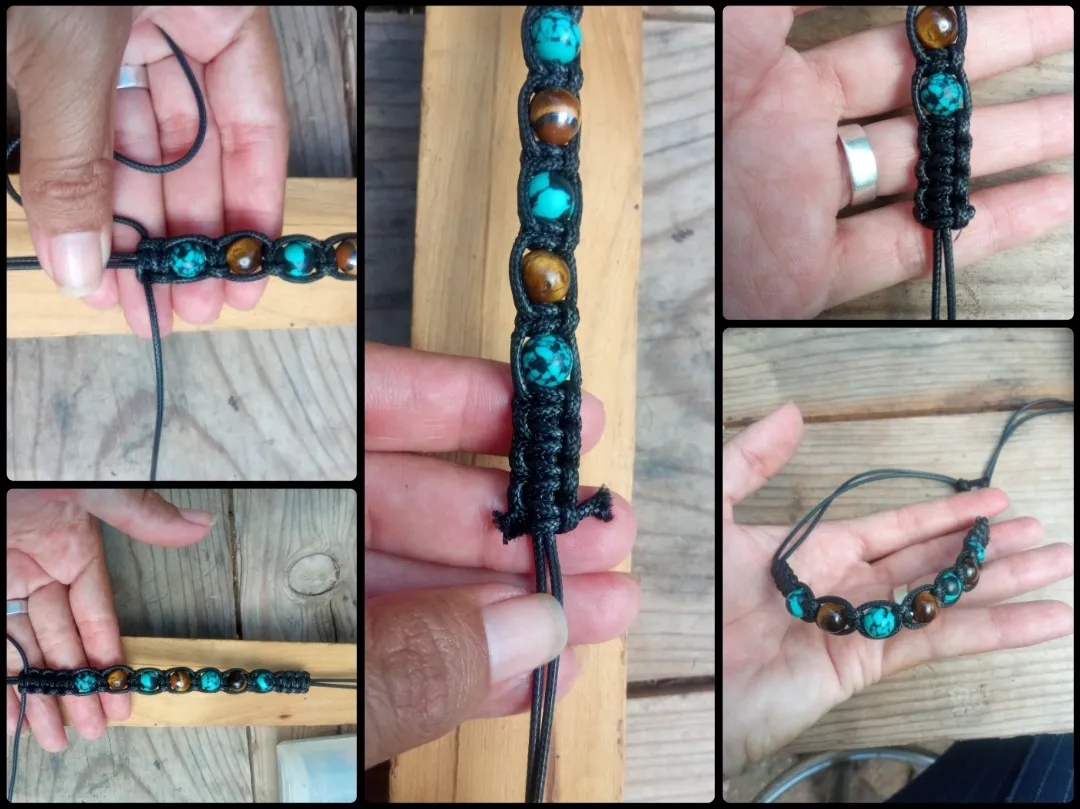
⭐ Paso 5: llevaremos la primera piedra y la uniremos con el tejido y pasando las hebras de piel de serpiente por cada lado de la piedra realizaremos dos nudos del mismo tejido debajo de esta, y así sucesivamente iremos uniendo las piedras al tejido hasta llegar a la última y allí realizaremos solo el tejido igual al del principio. Aquí cortaremos el exceso del piel de serpiente y quemaremos las puntas con el yesquero.
⭐ Step 5: we will take the first stone and join it with the fabric and passing the strands of snakeskin on each side of the stone we will make two knots of the same fabric under it, and so on we will join the stones to the fabric until we reach the last one and there we will only make the fabric equal to the one at the beginning.
Here we will cut off the excess snakeskin and burn the tips with the tinderbox.

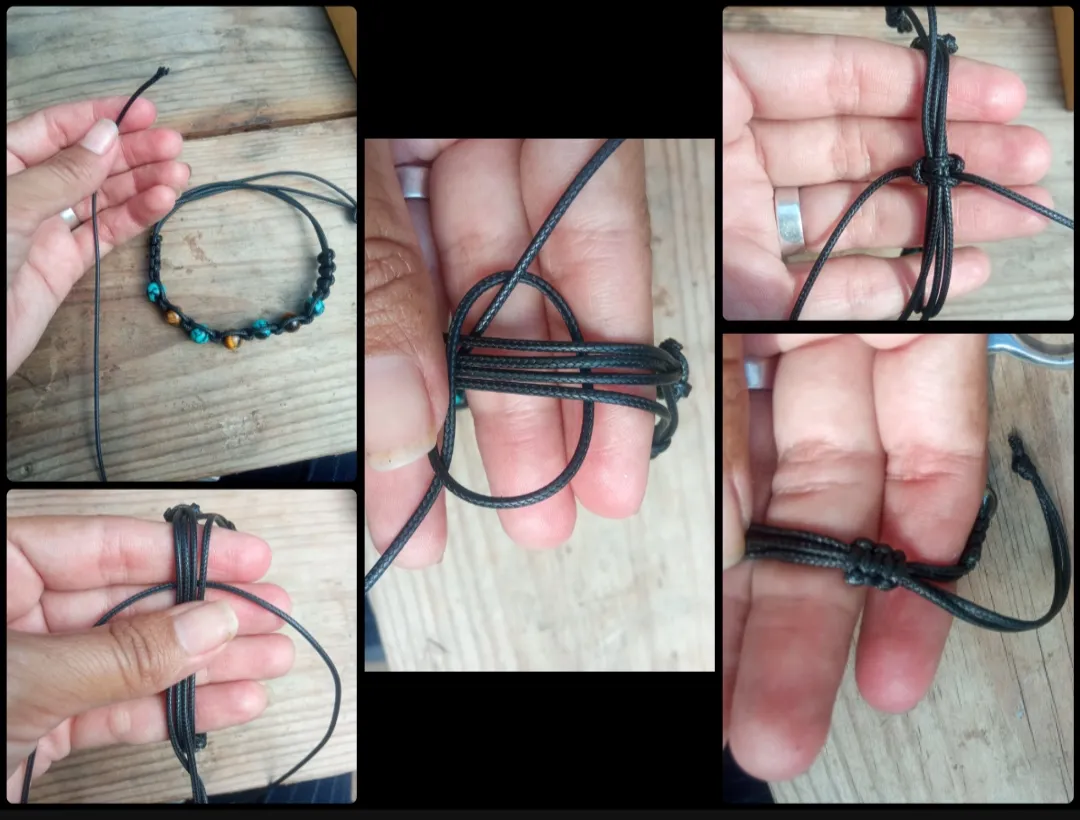
⭐ Paso 6: para culminar picaremos un pedazo de 10cm de alambre de bisutería y elaboraremos uniendo los dos extremos de nuestra pulsera un tejido corredizo.
⭐ Step 6: to finish, we will cut a 10cm piece of jewelry wire and create a sliding fabric by joining the two ends of our bracelet.
Todas las Fotos son de mi autoría y fueron tomadas con mi Celular Redmi 9.And thus we will achieve the creation of beautiful casual bracelets, which can be worn by both ladies and gentlemen.
Dear friends, this has been my preparation today for all of you, I say goodbye, grateful for your visit, it will be until a new opportunity.
All Photos are my authorship and were taken with my Redmi 9 Cellphone