

Greetings my dear ones...
I had the need to make a witch broom for my next publication and I ended up meeting the needs of some followers, beginners in design.
As I mentioned before I needed a witch broom image to turn it into a text separator as you can see in this blog and so use it in my next publication, but I remembered that several of my followers on Youtube asked me, will show how to work or make designs with the use of the mouse, because as you know, I draw through a graphics tablet, but it turns out that for this design applies to all, that is, not only for those who use the mouse to draw, but for those who use graphics tablet as well as those who have the program in android technology.
That's why I show you the video and this step by step, so you know the Medibang tools and you can do it yourself.
I explain in a simple, relaxed way, as always without so many detours, in a basic language, because many of us complain about those who speak too technical and become incomprehensible when watching their tutorials and we are in the same.

Saludos mis queridos...
Tenía la necesidad de hacer una escobita de bruja para mi siguiente publicación y termine atendiendo necesidades de algunos seguidores, principiantes en el diseño.
Cómo mencioné antes necesitaba una imagen de escoba de bruja para convertirla en un separador de texto como pueden apreciar en este blog y así utilizarlo en mi siguiente publicación, pero recordé que varios de mis seguidores en Youtube me solicitaron, mostrará cómo trabajar o hacer diseños con el uso del ratón, ya que como saben, dibujo a través de una tableta gráfica, pero resulta que para este diseño aplica para todo, es decir, no solo para quienes usan el ratón para dibujar, sino para quienes usan tableta gráfica así como los que tienen el programa en tecnología androide.
Es por eso que te muestro el vídeo y este paso a paso, para que conozcas las herramientas de Medibang y puedas hacerlo tú mismo.
Te explico de una forma sencilla, relajada, como siempre sin tantos rodeos, en un lenguaje básico, pues muchos nos quejamos de aquellos que hablan demasiado técnico y se hacen incomprensibles a la hora de ver sus tutoriales y quedamos en las mismas.
I love Medibang, it is a very user friendly design program, I downloaded for the second time the Adobe Illustrator design program with the intention of buying it, thank goodness I downloaded the demo version and tried it, I still don't like it. It doesn't have a variety of brushes and using the graphic tablet here is a wasted, it's already vital for me, so it's difficult for me to go back to the geometric figures mode.
But if you start in design with that program or Photoshop, the other design programs will be a piece of cake, it may happen to you like me, my beginnings were with Corel Draw, then Photoshop, but when I tried Medibang, the comfort made me forget the operation of the others.
Of course, the difference in quality between the two is notorious at the end of a drawing, because in Medibang the images will always be pixelated.
You may wonder why if I use a graphic tablet I still use Medibang's tools?
The answer is simple: My pulse is disastrous, because I drank a lot of coffee. The tools help me to make neater strokes.
I'll explain it now, but if you want to know more, you can watch the video at the end of the post.
Amo Medibang, es un programa de diseño muy amigable, descargué por segunda vez el programa de diseño Adobe Ilustrator con la intención de comprarlo, menos mal que descargue la versión demo y lo probé, sigue sin gustarme. No tiene variedad de pinceles y usar la tableta gráfica aquí es un wasted, ya mara mí se hizo vital ella, por lo que me es difícil regresar al modo, figuras geométricas.
Pero si inicias en diseño con ese programa o Photoshop, los demás programas de diseño serán pan comido, puede que te pase como a mí, mis inicios fueron con Corel Draw, luego Photoshop, pero cuando probé Medibang, la comodidad hizo que me olvidara el funcionamiento de los demás.
Claro está, que la diferencia de calidad entre ambos es notoria al final de un dibujo, pues en Medibang las imágenes siempre se pixelaran.
Te preguntarás ¿Por qué si uso una tableta gráfica sigo usando las herramientas de Medibang?
La respuesta es sencilla: Mi pulso es desastroso, pues bebía mucho café. Las herramientas me ayudan a realizar trazos más prolijos.
Ven que ahora te explico, aunque si gustas más puedes ver el vídeo al final del post.
Paso a paso. / Step by Step
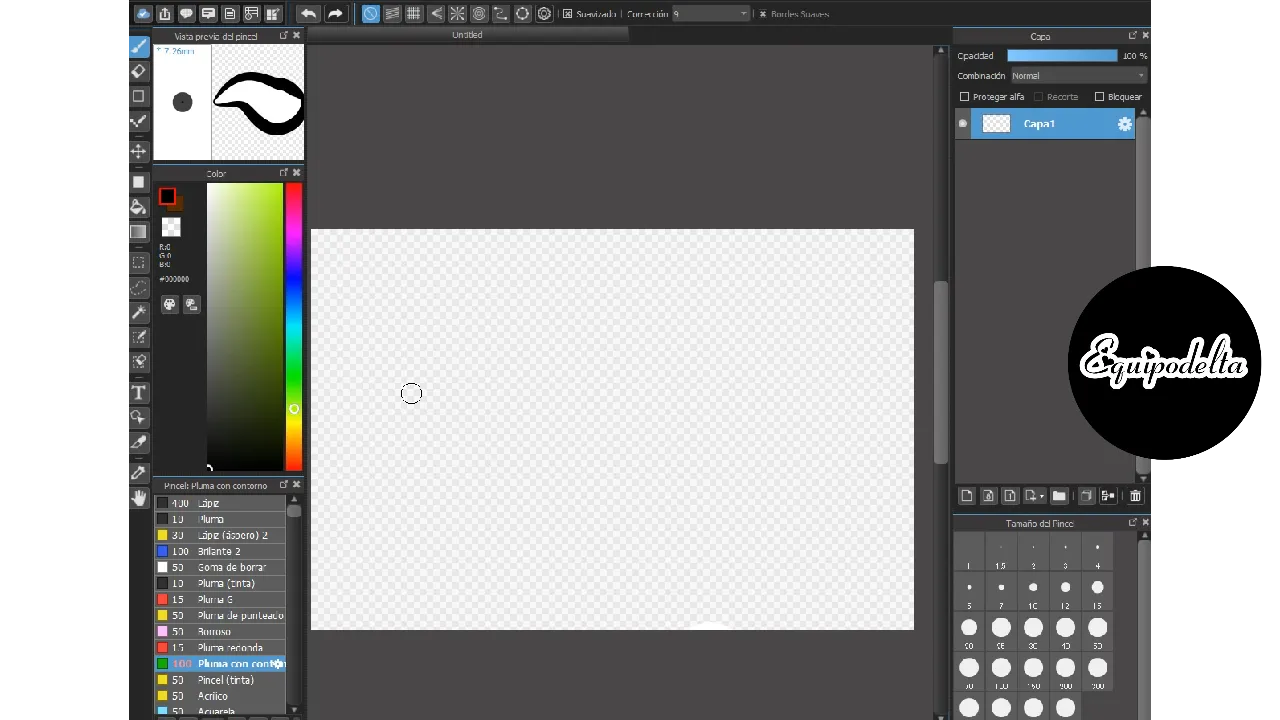
Open your program, and in the right panel you will see the first layer.
Abre tu programa, y en el panel derecho visualizarás la primera capa.

 --->
--->
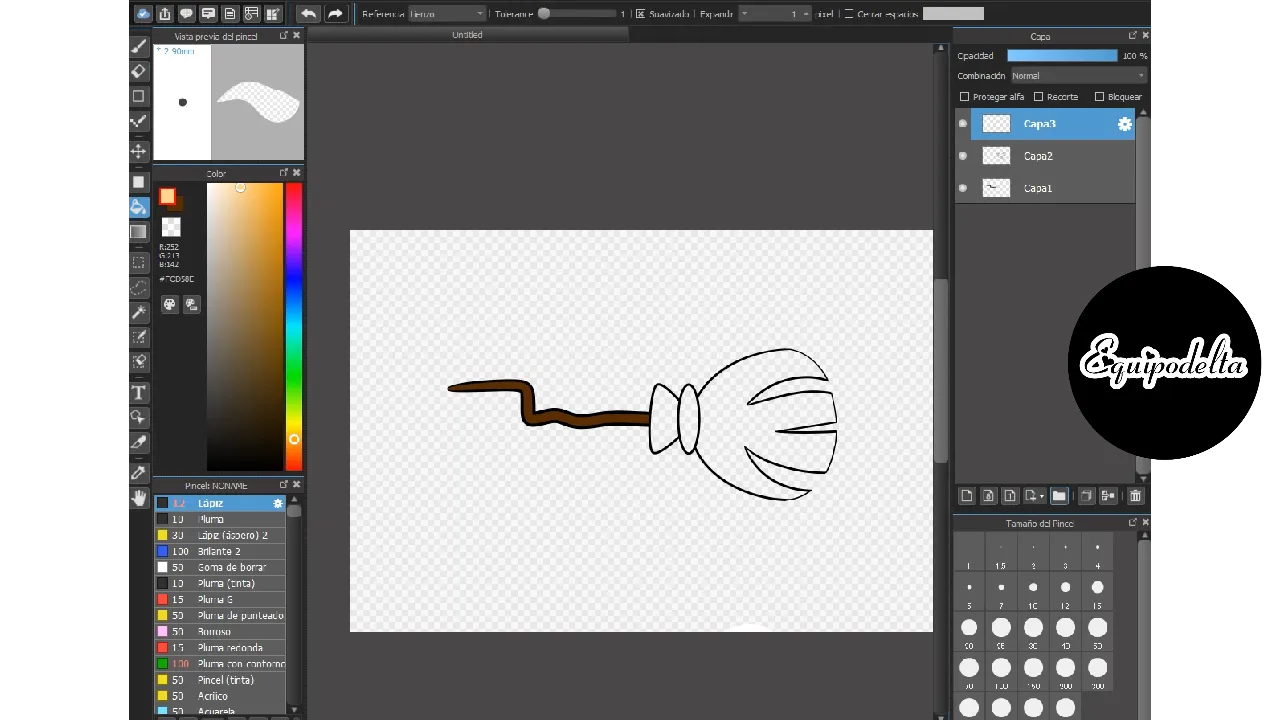
With the Pen brush with contour, draw the first stroke of the freehand broom, it doesn't have to be perfect, just resemble a badly shaped tree stick.
With the Pen brush and the Ellipse tool, draw a half oval.
With the Curve tool we draw a line joining each end of what will be the bristles of the broom.
Con el pincel Pluma con contorno, realiza el primer trazo de la escoba a mano alzada, no tiene que ser perfecta, solo semejar un palo de árbol todo mal formado.
Con el pincel Pluma y la herramienta Elipse, trazamos un semi óvalo.
Con la herramienta Curva trazamos una línea uniendo cada extremo de lo que serán las cerdas de la escoba.

 --->
--->
With the Ellipse tool, on a new layer, we help ourselves by making the rounded edges of the broom.
Erase the lines that get in the way of each other and join the layers to form a whole.
On a new layer, draw some lines that will be the bristles of the broom. Then erase the excess.
Con la herramienta Elipse, en una capa nueva, nos ayudamos haciendo los bordes redondeados de la escoba.
Borra las líneas que se interpongan unas con otras y une las capas que formen un conjunto.
En una capa nueva, traza unas líneas que serán las cerdas de la escoba. Luego borra los excedentes.
 --->
--->
In a new layer and with the tool Geometric shapes/circle, we draw an oval, then with the same tool Geometric shapes/Curve, we draw the upper part of the bristles. Then erase the excess lines.
We finish with the bristles of the broom, making freehand lines, of course in a new layer, then we erase the surplus and join all the layers that form a whole.
En una nueva capa y con la herramienta Figuras geométricas/ circulo, trazamos un ovalo, luego con la misma herramienta figuras geométricas/Curva, trazamos la parte de arriba que conforman las cerdas. Luego borra las líneas excedentes.
Terminamos con las cerdas de la escoba, haciendo líneas a mano alzada, por supuesto en una capa nueva, luego borramos los excedentes y unimos todas las capas que conforman un conjunto.
 --->
--->
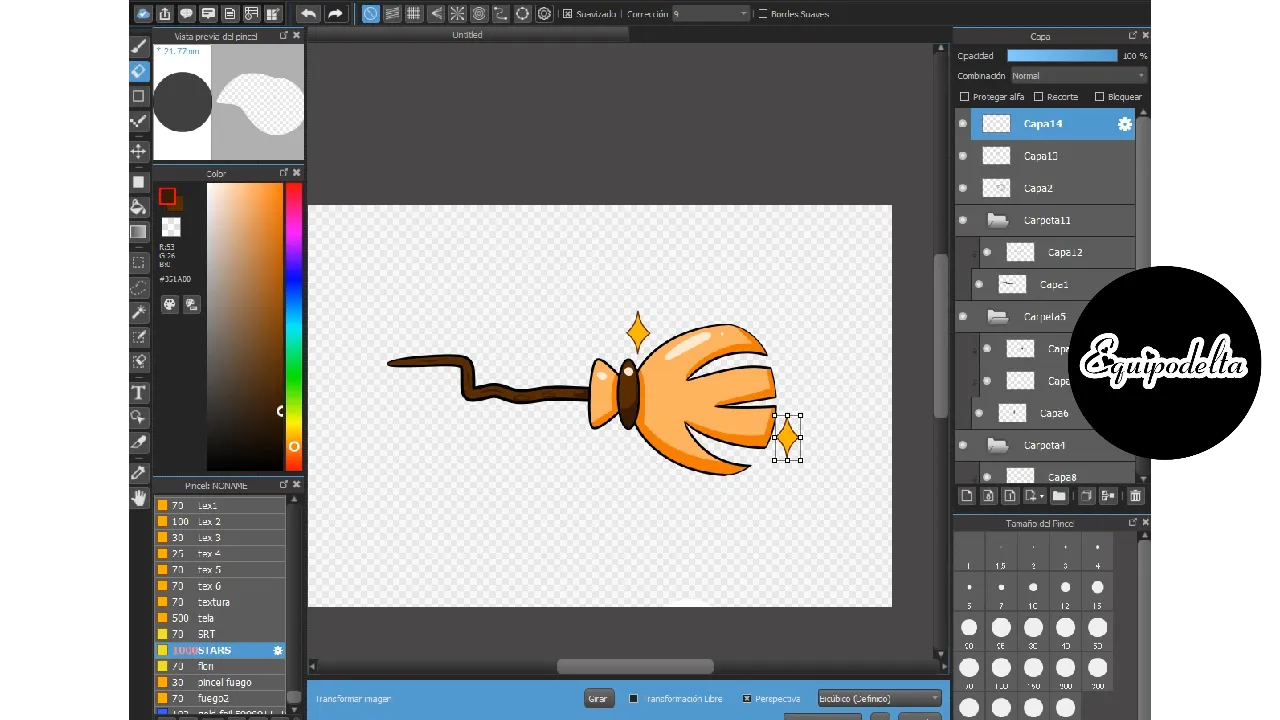
Now comes the fun part, let's color the design. In the right pane open a folder, inside it open a new layer and use the paint bucket tool to color the corresponding section.
Open another folder to fill it with another color.
After that you position yourself in the corresponding color folder and start applying light and shading details. To do this open a new layer in that folder and select the crop option, you will be able to work without leaving the margins.
That's all, I hope you like this tutorial and know how to use Medibang tools in any of its versions.
Ahora viene la parte divertida, vamos a colorear el diseño. En el panel derecho abre una carpeta, dentro de ella abrimos una nueva capa y usamos la herramienta bote de pintura para dar color a la sección correspondiente.
Abre otra carpeta para rellenar de otro color.
Luego de ello te posiciones en la carpeta de color correspondiente y comienza a aplicarle los detalles de luz y sombreado. Para ello abre una nueva capa en esa carpeta y selecciona la opción recorte, podrás trabajar sin salirte de los márgenes.
Listo, es todo, espero te guste este tutorial y conozcas cómo usar las herramientas de Medibang en cualquiera de sus versiones.
Resources / Recursos
Time lapse: 2 Hours
Program: MediBang Paint Pro.
Graphics tablet: Huion (Usb Pen Tablet). Model 420.
Used Medibang brushes:
- Aerógrafo.
- Pluma (gruesa).
- Pluma.
- Pluma tinta.
- Pluma redonda
- Simetría rotacional.
- Pluma con contorno.
Used Medibang tools:
- Borrador.
- Texto.
- Línea curva
- Herramienta relleno.
- Carpetas / recorte.
- Ajuste entrecruzado.
- Herramienta figuras geométricas rectángulo - curva -Zig / Zag.
- Línea curva (elipse, curva)
- Opciones de capas: Carpetas, recorte.
Graphite pencil, notebook, eraser.
PNG FORMAT

Video process
I'm a contributor of royalty-free images
Soy contribuyente de imágenes libres de derechos de autor

My youtube channel - game Play
My youtube channel - arts and crafts

Hacks, DIY, Crafts, handmade arts Community
Discord


![]() 👉
👉 ![]() 👉
👉 ![]() 👉
👉  👉
👉 ![]() 👉
👉