
Greetings creative friends hoping you are well healthy and blessed every day.
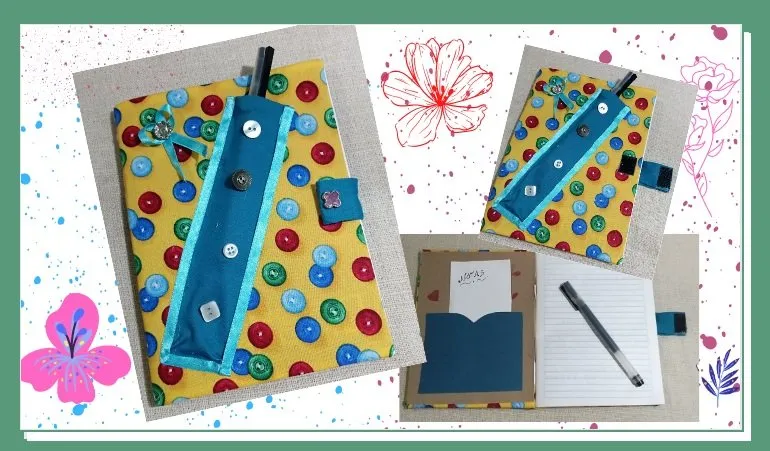
This time I want to show you how I covered a notebook, with fabric, this will be my notebook especially for sewing. This is a simple notebook of those schoolchildren.
Since we always have that friend or family member who wants some alteration in clothes or make a curtain so to speak. and we have to go to your house, so it is good to have that notebook handy to take notes, and not a piece of paper that can be lost.
This is my intention, to have my new notebook, where to take my sewing notes, where it is well organized.
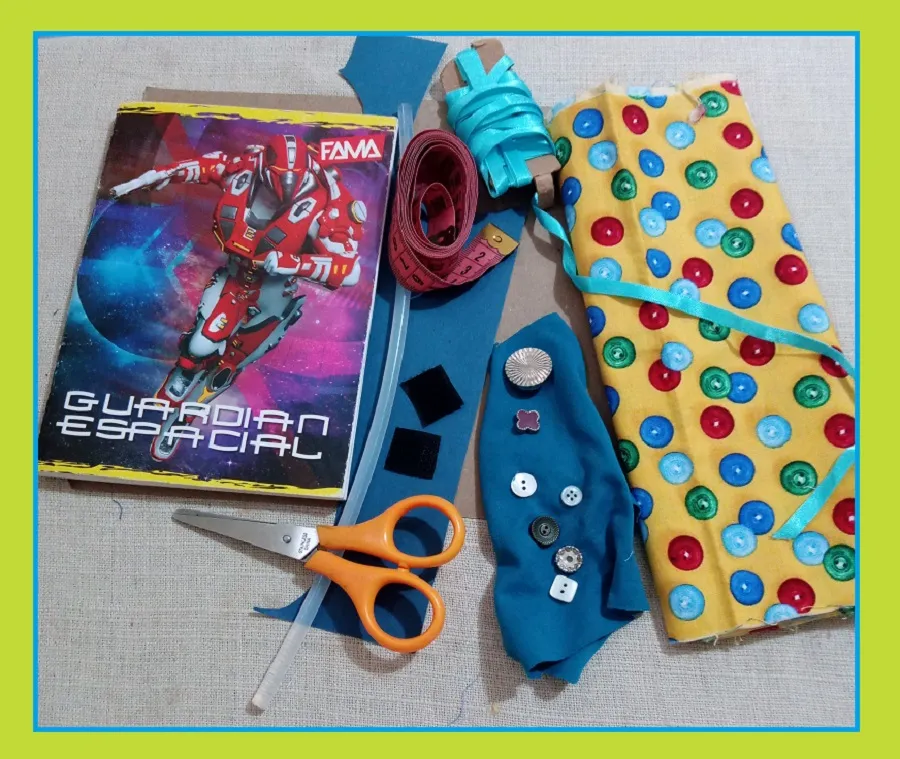
Now I'll show you the materials I used.
My materials:
1 notebook.
Printed fabric to taste.
Lace.
Buttons.
Magic closure.
Measuring tape.
Cardboard.
Silicone gun.
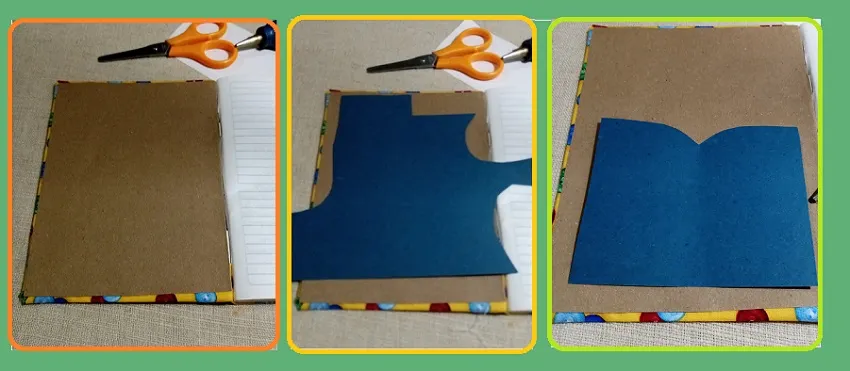
First step I take the measurements of the notebook, it measures cm by cm.
I cut the fabric leaving 2cm more, for the fold that goes inside.
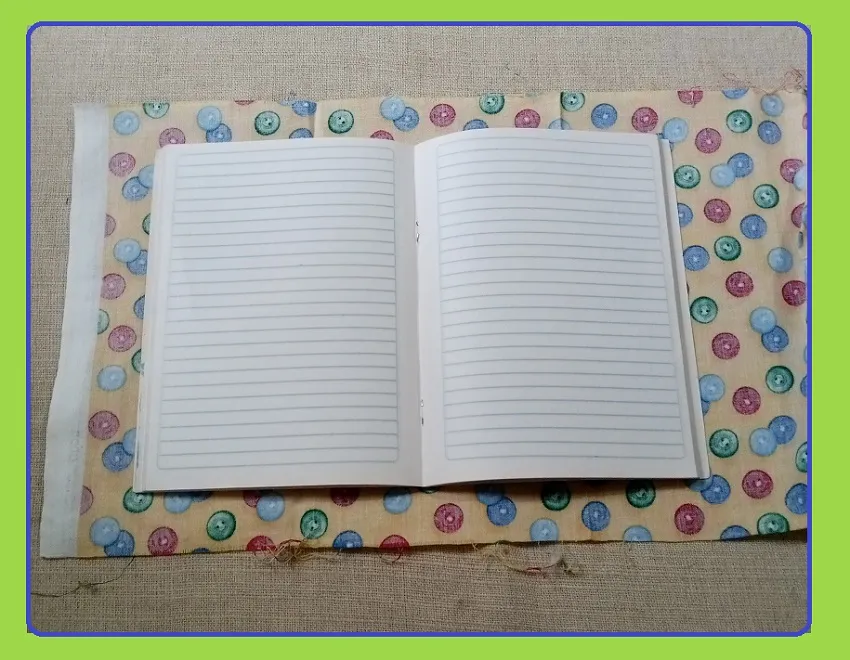
I also cut the cardboard that goes inside the width and length of the notebook
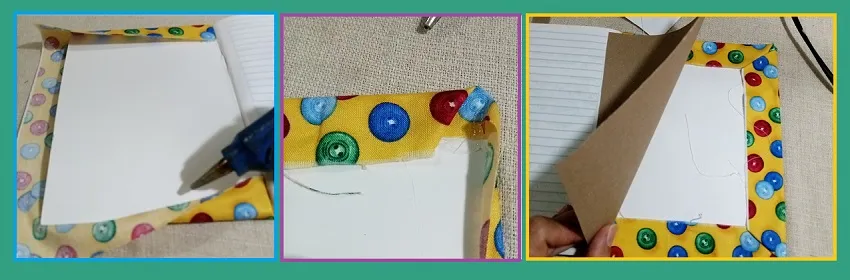
I proceed to stick it with hot silicone,
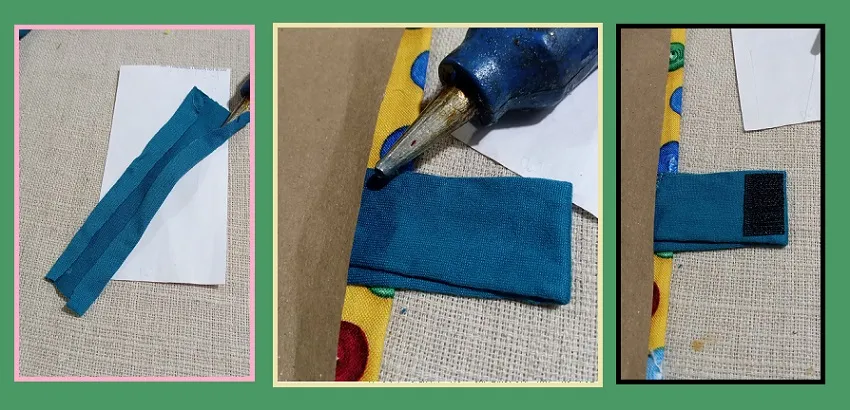
and with a long strip of 6cm by 3cm wide I place it on the back cover in the middle. Here I paste the magic closure that will press the notebook when it is closed.
Then I glue the cardboard on both sides, so it will cover the part where the fabric of the edges is folded.
In the part inside the cover I made a cardboard pocket to keep notes.
With another square of the fabric of approximately 17cm by 4cm, I make a small pocket, it will be outside, ideal to have the pencil. In the opening I also glue a little magic closure so that the pencil does not come out.
I put satin ribbon around it.

I glued some decorative buttons and a bow, with the same ribbon, to give it another personal touch.

My friends I hope you liked how it turned out, I really liked the result, now give it the necessary use.
Thanks for reading my blog, until the next presentation, have a nice day.
The photos are my own, with my Tecno Spark go cell phone.
Translator deepl.
Canvas design.
The photos are my own, with my Tecno Spark go cell phone.
Translator deepl.
Canvas design.

Saludos amigos creativos esperando se encuentren bien saludables y bendecidos cada dia.
En esta oportunidad quiero mostrarles como forré un cuaderno, con tela, este será mi cuaderno de notas en especial para costuras. Este es un cuarderno sencillo de esos escolares.
Ya que siempre tenemos esa amiga o familiar que quiere algun arreglo en ropa o hacer una cortina por decirlo así. y tenemos que trasladarnos a su casa, por eso es bueno tener a la mano esa libreta donde tomar notas, y no en un papelito que se pueda perder.
Esta es mi entencion, tener mi nuevo cuaderno, donde tomar mis notas de costura, donde este bien ordenado.
Ahora bien te enseño los materiales que utlicé.
Mis materiales:
1 cuaderno.
Tela estampada al gusto.
Encaje.
Botones.
Cierre mágico.
Cinta métrica.
Cartulina.
Pistola de silicon.
Primer paso tomo las medidas del cuaderno, este mide cm por cm.
La tela la corto dejando 2cm más,para el doblez que va por dentro.
Tambien corto la cartulina que va por dentro del ancho y largo del cuaderno.
Procedo a pegarlo con el silicon caliente, y con una tira larga de 6cm por 3cm de ancho la coloco en la contra portada en el medio. Aqui le pego el cierre magico que prensará el cuaderno cuando esté cerrado.
Luego pego la cartulina en ambos lados, así tapara la parte donde está doblada la tela de las orillas.
En la parte dentro de la portada le hice un bolsillo de cartulina como para guardar notas.
Con otro cuadro de la tela de aproximadamente 17cm por 4cm, le hago un pequeño bolsillo, éste quedara por fuera, ideal para tener el lápiz. En la abertura tambien le pego un poquito de cierre mágico para que no se salga el lápiz.
En su alrededor le coloco cinta de razo.
Le pegué unos botones de adorno y un lazo, con la misma cinta, para darle otro toque personal.

Mis amigos espero les haya gustado como quedó, a mi me gustó mucho el resultado, ahora darle el uso necesario.
Gracias por leer mi blog, hasta la próxima presentación, que sigan teniendo bello día.

Las fotos son de mi autoria, con mi celular Tecno Spark go.
Traductor deepl.
Diseño canva.
The photos are my own, with my Tecno Spark go cell phone.
Translator deepl.
Canvas design.