
A big greeting to the community, hoping you are very well enjoying the week with good health and harmony.
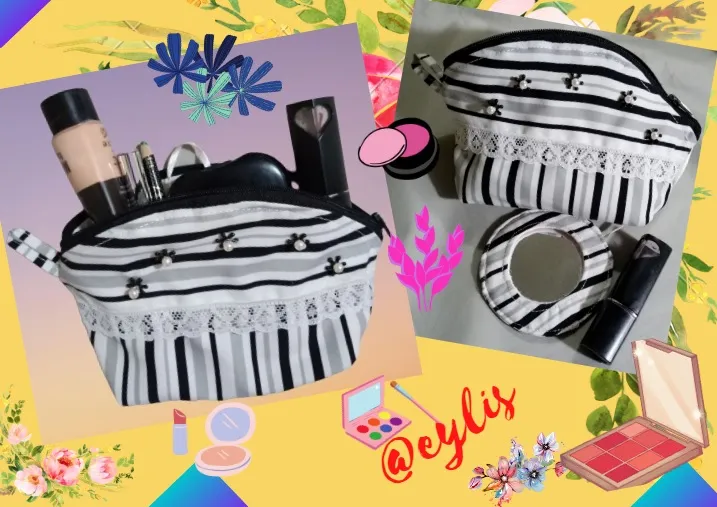
Today I want to show you how I made a cosmetic bag with scraps of fabric in a semi-circular shape on the top and with its mirror included. Once I had a case with a mirror which I liked a lot but over time it got ugly, and today I decided to make one with a different style but with the same function.
Many times when we go out we keep our makeup, some bring mirrors, others don't, that's why the idea was to do it with its mirror that can be removed, but it will always be pressed inside the cosmetic bag with a ribbon.
Come and I'll show you the steps.
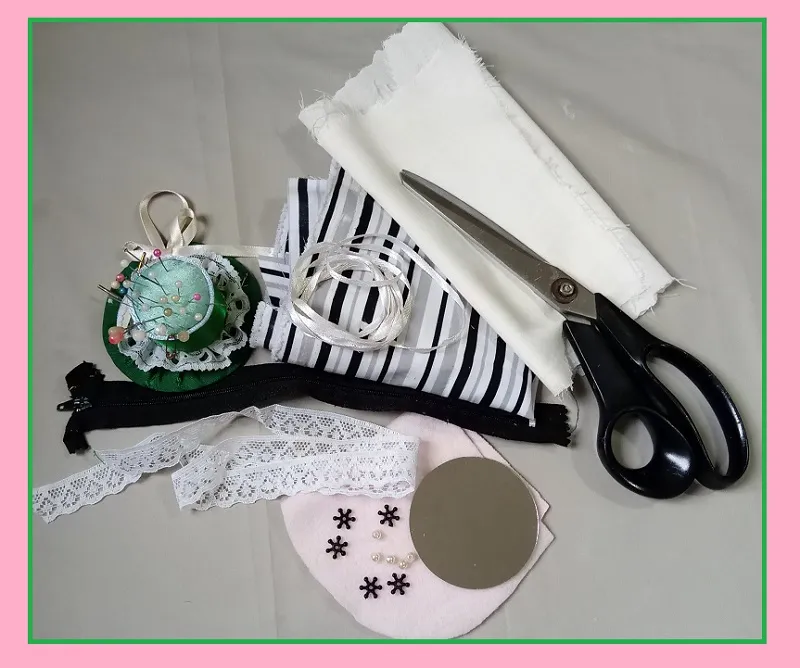
My materials:
🔹 Scraps of black and white striped cotton fabric.
🔹 Piece of fabric for the lining.
🔹 1 20 cm closure.
🔹 Lace, ribbon, and jewelry ornaments.
🔹 Threads, needles, tape measure and sewing machine.
I draw a pattern to the desired size or depending on the fabric I have.
I cut the striped fabric and tie it with horizontal and vertical stripes, I cut the white lining fabric, and I also cut a square for the pocket that will go inside.


Once these parts are cut, I proceed first to sew the pocket that goes inside, to make it easier for me to glue it, I measure and sew.

Then I glued the closure, pressing with pins first on the stripe fabric and then I placed the lining fabric on the other side, leaving the closure in the middle.

I put a lace on the front part, as an ornament, which I sewed between the vertical and horizontal stripes.

Now before closing the bag, I start by lining the mirror with the stripe fabric and another one that goes inside I used blanket fabric, to give the mirror better support.
I mark the measurement of the mirror and cut the fabric two centimeters larger than the mark, here I place the striped fabric above and the lining fabric below.
Then I pass the seam about half a centimeter from the mark, but inwards. Once sewn I cut it short and remove this part and make some small cuts on the edge, to turn and pass an overseam.


Then I place the stripe fabric together with the lining and sew but at the same time I put the tape on it once, so I turn it over and I also make an overseam along its edge.
Now I put the mirror inside and it won't come out.


To close the bag I place it inside out and on the part of the lining fabric I put the mirror tape that has to be sewn at once.
I sewed on both sides but first I made a 1/2 cm wide strip which I placed at one end of the zipper.

When turning, I passed a seam in the opening to leave everything well closed.

Here I have this part ready and see that the mirror is kept in your pocket, so it does not roll or break.


And to give it a special touch I placed some jewelry that I had as an adornment, sewing them by hand each one, they look like little flowers with their pearls.

The finished case and how I wanted it, ready to use at all times.
Thank you very much for your visit, hoping it has been to your liking, since I did it with a lot of patience and affection.
Until another chance, bye!


Un gran saludo a la comunidad, esperando esten muy bien disfrutando la semana con buena salud y armonia.
Hoy quiero mostrarles como hice un portacosmeticos con retazos de tela en forma semi circular en la parte de arriba y con su espejop incluido. Una vez tenia un estuche con su espejo el cual me gustó mucho pero con el tiempo se puso feo, y hoy decidi hacer uno con otro estilo pero con la misma función.
Muchas veces cuando salimos guardamos nuestro maquillaje, algunos traen espejos otros no, por eso fue la idea de hacerlo con su espejo que se puede sacar, pero siempre estará prensado dentro del portacosmeticos con una cinta.
Ven y te enseños los pasos realizados.
Mis materiales:
🔹Retazos de tela de algodon de rayas blanco y negro.
🔹Retazo de tela para el forro.
🔹1 cierre de 20cm.
🔹Encanje, cinta, y adornos de bisuteria.
🔹Hilos, agujas, cinta métrica y máquina de coser.
Saco un patron a la medida deseada o dependiendo de la tela que tengo.
Corto la tela de rayas y la empate con rayas en horizontal y vertical, corté la tela blanca de forro, y tambien corté un cuadrito para el bolsillo que irá por dentro.
Una vez cortados estas partes, procedo primero a coser el bolsillo que va por dentro, para que se me haga más fácil pegarlo, mido y coso.
Luego pego el cierre, prensando con alfileres primero en la tela de raya y despues coloco la tela de forro del otro lado, quedando el cierre en el medio.
Le puse un encaje en la parte del frente, como adorno, el cual lo cosi entre las rayas vertical y horizontal.
Ahora antes de cerrar el bolsito, empiezo forrando el espejo con la tela de raya y otra que va por dentro usé tela de cobija, para darle mejor soporte al espejo.
Marco la medida del espejo y corto la tela a dos centimetros mas grande de la marca, aqui coloque la tela de raya arriba y la de forro abajo.
Luego paso la costura como a medio centimetro de la marca, pero hacia dentro. Una vez cosido le hago corto y quito esta parte y le hago unos pequeños cortes en el borde, para voltear y pasar una sobre costura.
Luego coloco la tela de raya junto con la del forro y coso pero al mismo tiempo le coloque la cinta de una vez, asi volteo y tambien le hago una sobre costura por su borde.
Ahora coloco el espejo dentro y éste no se saldrá.
Para cerrar el bolso lo coloco al revez y en la parte de la tela de forro le pongo la cinta del espejo que tiene que quedar cosida de una vez.
Cosí de los dos lados pero antes le hice una tira de 1/2 cm de ancho la cual coloque en un extremo del cierre.
Y al coser dejé una abertura para poder voltear. Antes en sus esquina las cosi dejando 2cm y pasé la costura, esto es para la base del estuche.

Al voltear le pasé una costura en la abertura para dejar todo bien cerrado.
Aqui listo esta parte y vean que el espejo se guarda en su bolsillo, así no se rueda o rompe.
Y para darle un toque especial le coloqué unas bisuteria que tenia como adorno cosiendolas a mano cada una, parecen unas florecitas con sus perlas.
El estuche terminado y cómo lo queria, ya listo para usar en todo momento.
Muchas gracias a ustedes por su visita, esperando haya sido de buen agrado, ya que lo hice con mucha paciencia y cariño.
Hasta otra oportunidad, chau!

Las fotos son de mi autoria, con mi celular Tecno Spark go.
Traductor deepl.
Diseño canva.
The photos are my own, with my Tecno Spark go cell phone.
Translator deepl.
Canvas design.