Buen día a todos los maravillosos lectores y creadores de contenido de esta comunidad como también a los nuevos miembros de la comunidad.
Good morning to all the wonderful readers and content creators of this community as well as new members of the community.
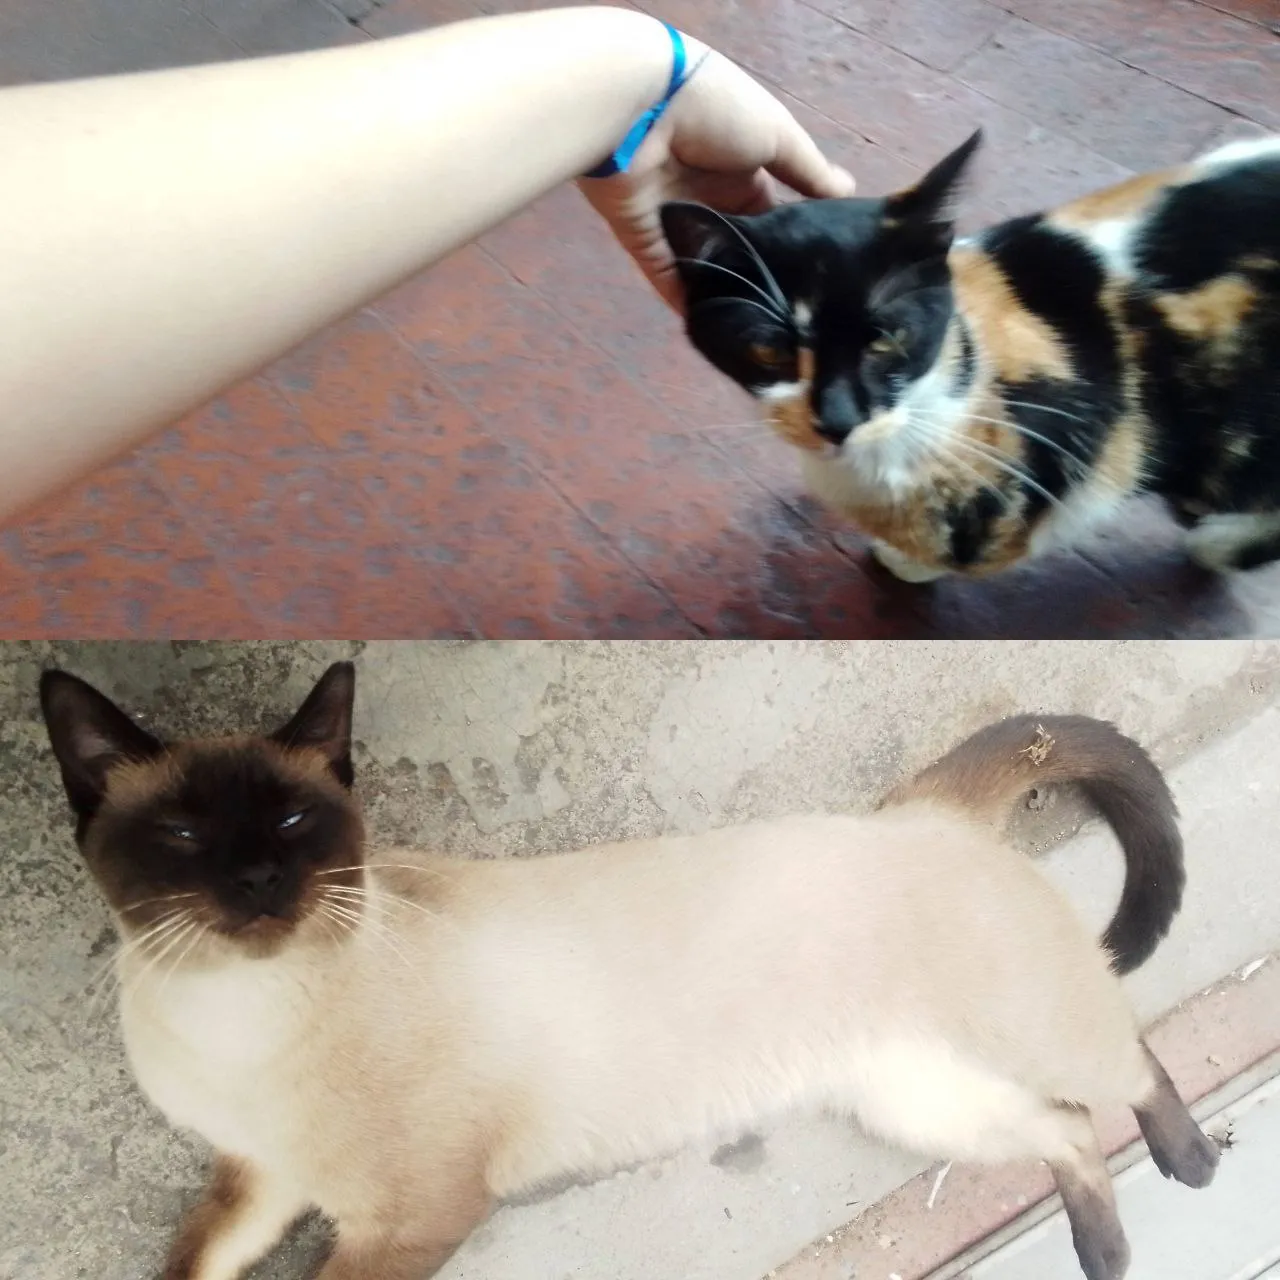
Para comenzar este domingo les presento mi nueva creación titulada (El Gato Que Se Robó Un Filete) mi mayor inspiración proviene de los gatos que me encuentro en mi comunidad cada uno de ellos tiene un color, un carácter y forma de comportarse totalmente distinta, como los humanos ellos también son únicos, muchos de ellos se encuentran en la calle a la espera de ser adoptados para tener un techo, cariño y comida de forma regular a ellos, a ellos les dedico mi tutorial.
To start this Sunday I present my new creation entitled (The Cat That Stole A Steak) my greatest inspiration comes from the cats that I meet in my community, each one of them has a totally different color, character and way of behaving, like humans are also unique, many of them are on the street waiting to be adopted to have a roof, love and food on a regular basis for them, I dedicate my tutorial to them.
PASO A PASO | STEP BY STEP
PRIMER PASO:
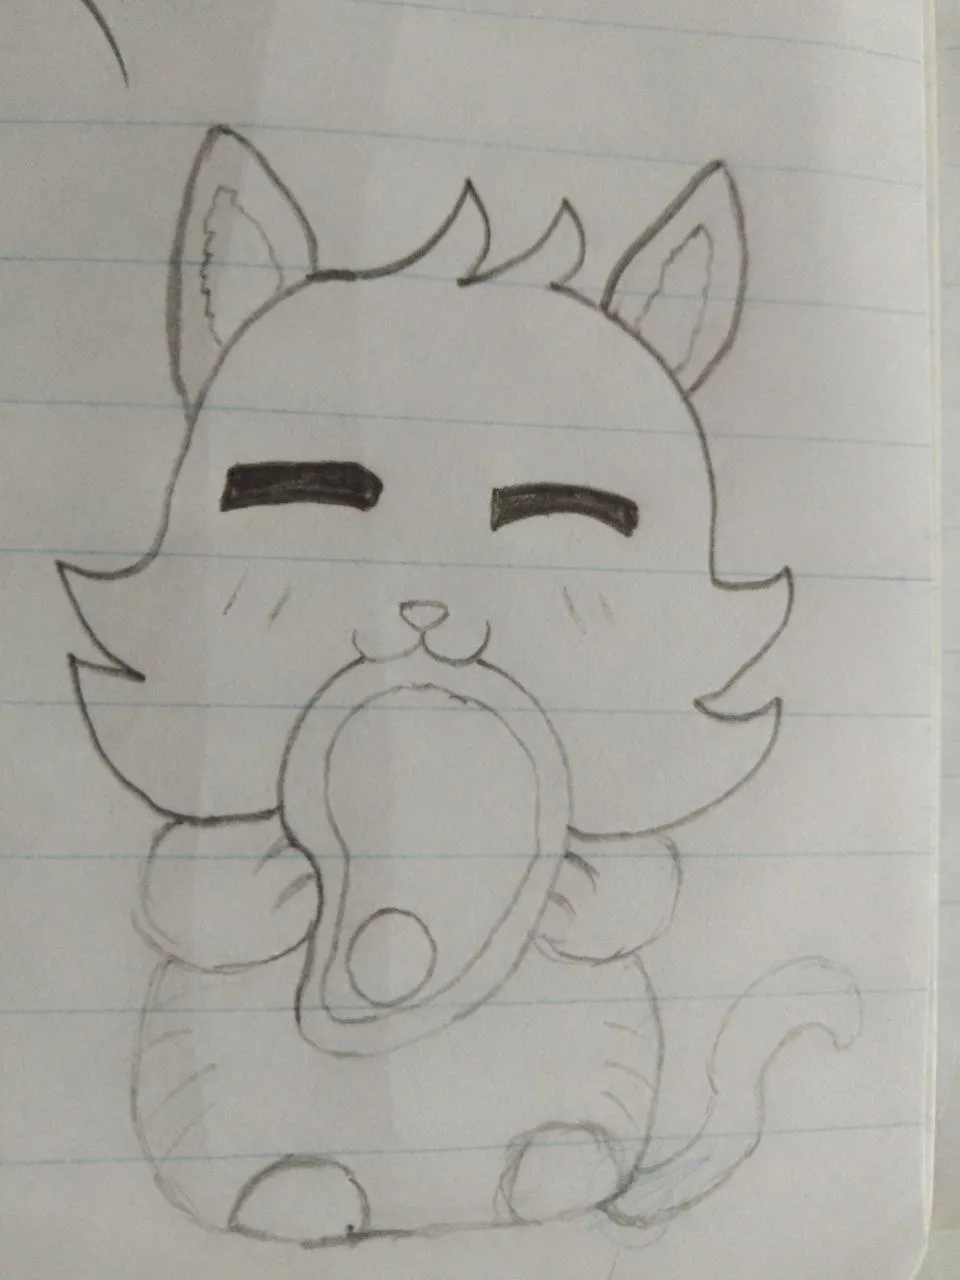
El primer paso consiste en dejar llevar tu imaginación ya que quieras realizar este modelo o solo leas el tutorial viendo sus rasgos para realizar tu propio gato, mi mayor consejo es llevar todas esas ideas al papel hasta obtener una idea clara de lo que buscas hacer.
FIRST STEP:
The first step is to let your imagination run wild since you want to make this model or just read the tutorial seeing its features to make your own cat, my best advice is to put all those ideas on paper until you get a clear idea of what you want to do.
PASO DOS:
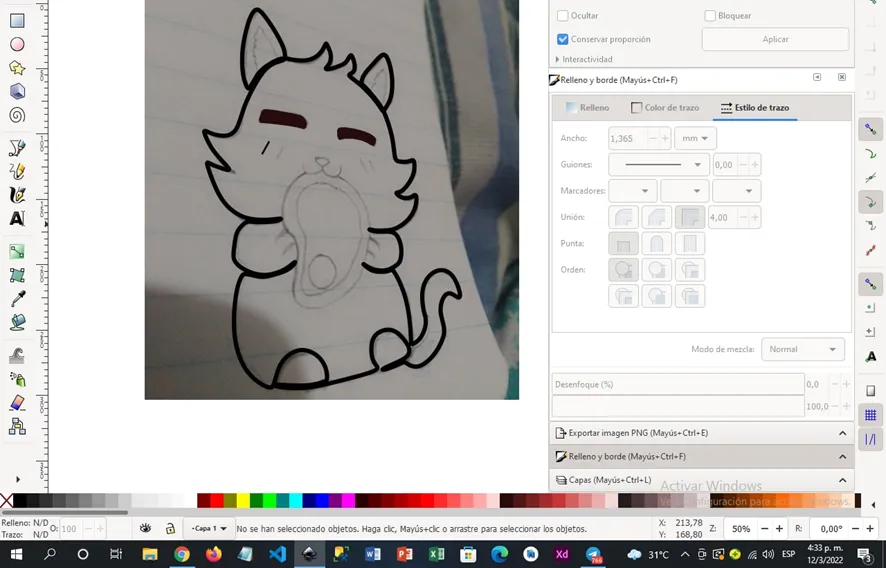
Ya teniendo el dibujo realizado abres el programa de Inkscape, puedes comenzar a dibujar viendo tu dibujo o llevar el boceto al programa, es decir le tomas una foto a tu dibujo desde tu teléfono lo mandas a tu mismo correo y lo guardas en la computadora luego en el programa te vas a la parte superior donde dice ARCHIVO y luego buscas la opción donde diga importar buscas la carpeta donde guardaste la imagen y automáticamente tendrás tu boceto en la hoja de Inkscape.
STEP TWO:
Once you have the drawing done, you open the Inkscape program, you can start drawing by seeing your drawing or take the sketch to the program, that is, you take a picture of your drawing from your phone, send it to your own email and save it on the computer later. in the program you go to the top where it says FILE and then you look for the option where it says import you look for the folder where you saved the image and you will automatically have your sketch in the Inkscape sheet.
PASO TRES:
Ajustas tu boceto a la hoja de Inkscape y comenzamos a realizar las líneas que conformaran las figuras, se comienza por crear una capa, identificar la capa con la parte del cuerpo que vamos a realizar, en este caso la capa estará titulada como Cola.
STEP THREE:
You adjust your sketch to the Inkscape sheet and we begin to make the lines that will make up the figures, we start by creating a layer, identifying the layer with the part of the body that we are going to make, in this case the layer will be titled Tail.
PASO CUATRO:

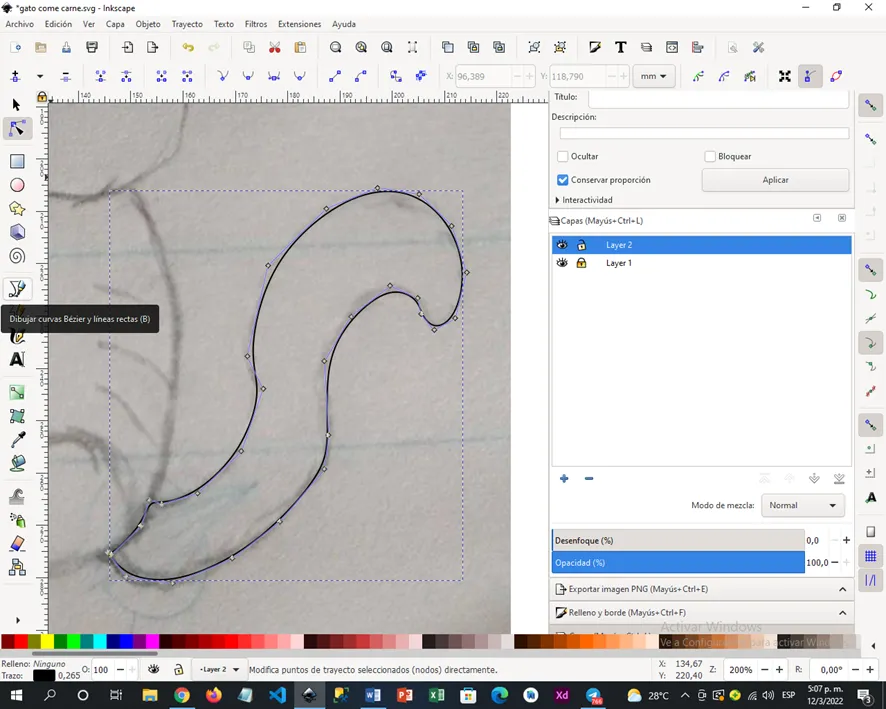
Seguimos creado capas para identificar cada parte del cuerpo de nuestro gato, en el caso de las orejas se crea 1 capa con dicho nombre y a la hora de realizar los trazos se crean las dos orejas del gato.
Nota: Para realizar las orejas, cola y cuerpo se hace uso de la herramienta del lado izquierdo del lápiz verde, esta herramienta dos otorga la facilidad de crear líneas rectas y curvas.
En el caso de las orejas identificamos dos líneas curvas a los lados y una línea recta inferior.
En el caso de la barriga de nuestro gato observamos dos líneas rectas dos partes curvas y 1 sola línea inferior recta.
STEP FOUR:
We continue to create layers to identify each part of our cat's body, in the case of the ears, 1 layer is created with that name and when making the lines, the two ears of the cat are created.
Note: To make the ears, tail, and body, use the tool on the left side of the green pencil. This tool gives you the ease of creating straight and curved lines.
In the case of the ears we identify two curved lines on the sides and a lower straight line.
In the case of our cat's belly, we observe two straight lines, two curved parts and 1 single lower straight line.
PASO CINCO:
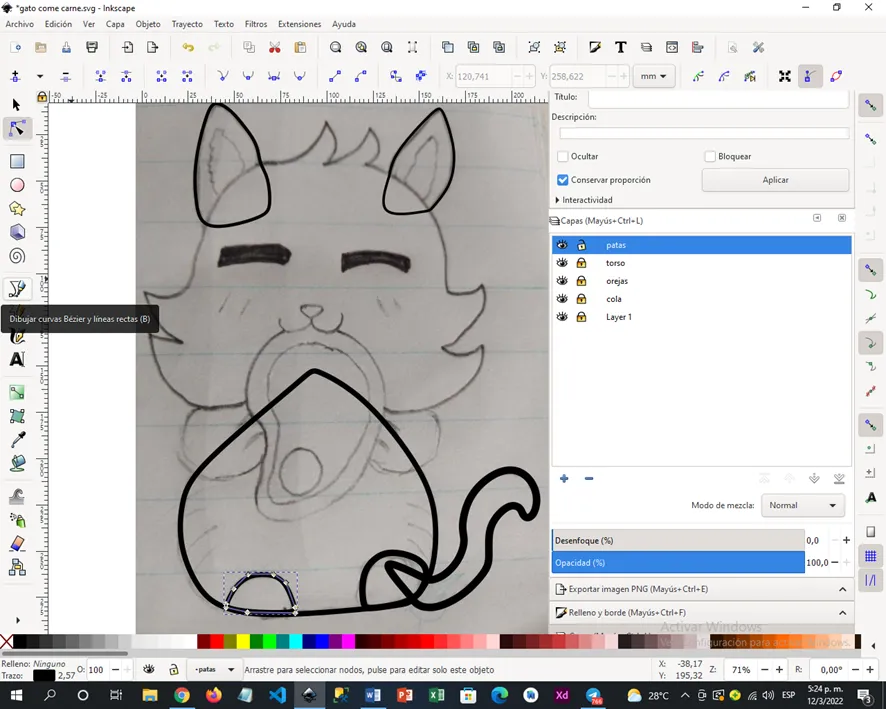

Ya realizado el cuerpo, cola y orejas vamos realizando la parte de los pies, cabeza completa y ojos.
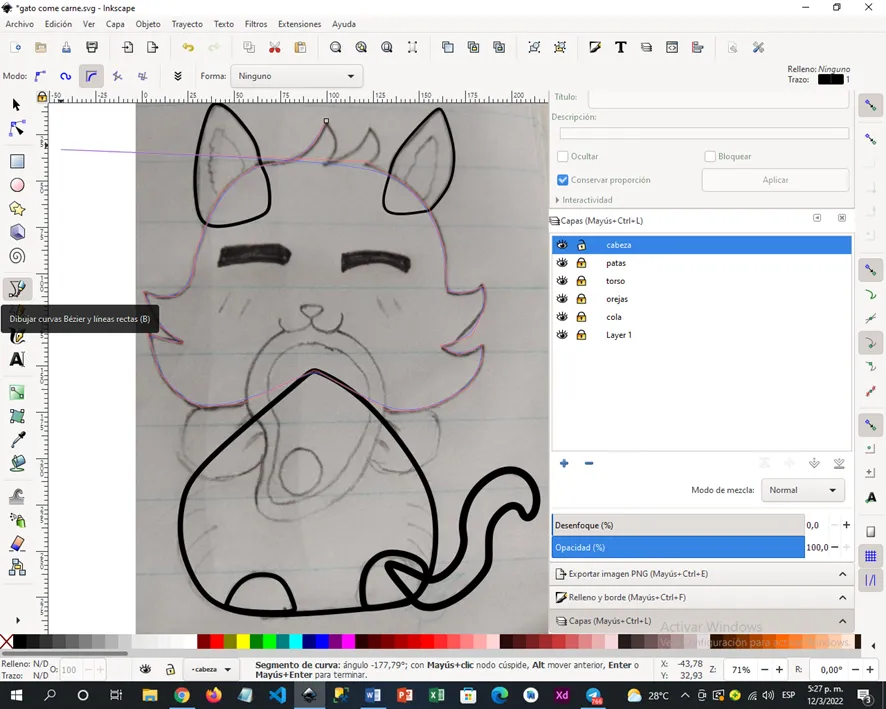
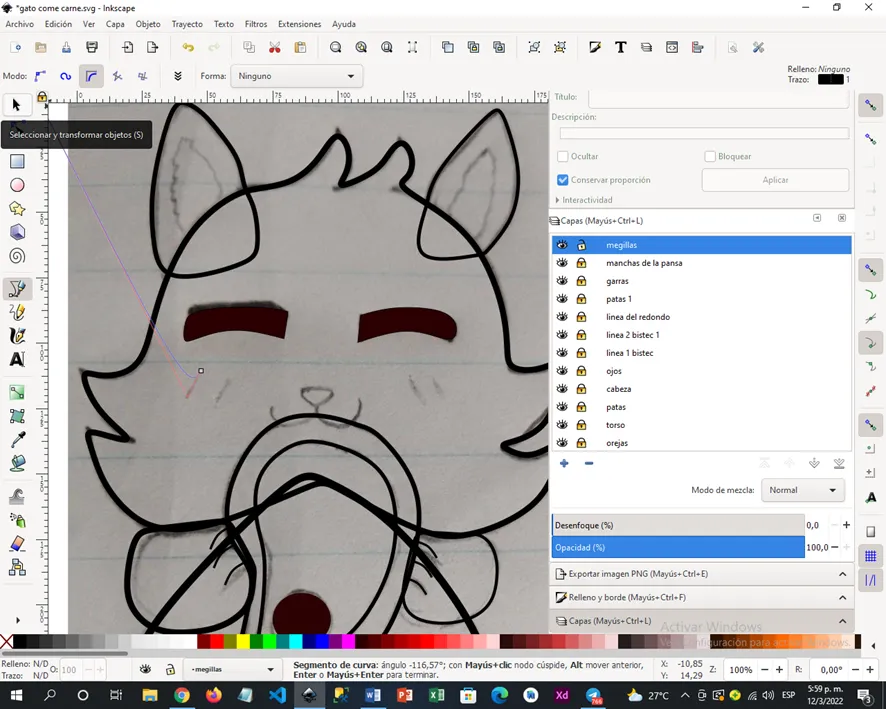
Vemos que se comienza a colocar complicado por la figura que tiene el cabello del gato que corresponde a líneas curvas y rectas, para este caso mi consejo es seguir nuestro boceto colocar tantos nodos como sea necesario, luego terminada la figura cerramos y le damos clic a la herramienta de la flecha con los tres puntos azules que se encuentra al lado izquierdo esta herramienta nos permite observar cada nodo realizado y modificar según nuestra necesidad, es decir observemos la imagen necesitamos que solo una parte sea curva, para lograr dicho parte nos vamos a la parte superior y seleccionamos dando clic a la opción que diga Autosuavizar los nodos seleccionados.
Como lo indica el nombre suaviza las líneas curvas, las perfecciona haciendo que nuestro dibujo se vea más prolijo como uniforme.
Para la parte del cabello observamos que se tiene un pico para realizar dicha línea nos vamos a la parte superior a la opción que diga:
Convertir en esquinas los nodos seleccionados.
Solamente es necesario seleccionar 1 nodo para obtener la forma de esquina o pico que requerimos por el modelo de dibujo.
STEP FIVE:
Once the body, tail and ears have been made, we are making the part of the feet, complete head and eyes.
We see that it begins to be complicated by the figure that has the cat's hair that corresponds to curved and straight lines, for this case my advice is to follow our sketch, place as many nodes as necessary, then when the figure is finished we close and click on the arrow tool with the three blue dots that is on the left side this tool allows us to observe each node made and modify according to our need, that is, let's observe the image we need only one part to be curved, to achieve said part we are going to the upper part and select by clicking on the option that says Autosmooth the selected nodes.
As the name indicates, it softens the curved lines, perfects them making our drawing look more neat and uniform.
For the part of the hair we observe that there is a peak to make said line, we go to the upper part to the option that says:
Convert selected nodes to corners.
It is only necessary to select 1 node to obtain the corner or peak shape that we require by the drawing model.
PASO SEIS:

Llegamos a la parte de los ojos esta parte es un poco más sencilla haciendo uso de la herramienta del lápiz verde para realizar líneas curvas y rectas solo debemos seguir la figura para luego rellenar, en este caso nos dirigimos a la parte inferior donde veremos una paleta extensa de colores se puede utilizar desde un color negro oscuro o un marrón oscuro ya saben cómo el café.
STEP SIX:
We arrive at the part of the eyes, this part is a little easier by using the green pencil tool to make curved and straight lines, we only have to follow the figure and then fill in, in this case we go to the lower part where we will see a palette Extensive of colors can be used from a dark black color or a dark brown you know how coffee.
PASO SIETE:


Ahora toca realizar el filete, este en particular tiene tres tipos de figuras la primera línea que vamos a realizar es la del fondo como contorno, luego realizamos por dentro una imagen similar a la primera que identifique que es un filete y por ultimo añadimos un circulo que pueden colocar de cualquier color ya que todavía no entramos a la fase de la pintura.
STEP SEVEN:
Now it's time to make the fillet, this one in particular has three types of figures, the first line that we are going to make is the bottom line as a contour, then we make an image similar to the first one inside that identifies that it is a fillet and finally we add a circle that you can place any color since we have not yet entered the painting phase.
PASO OCHO:

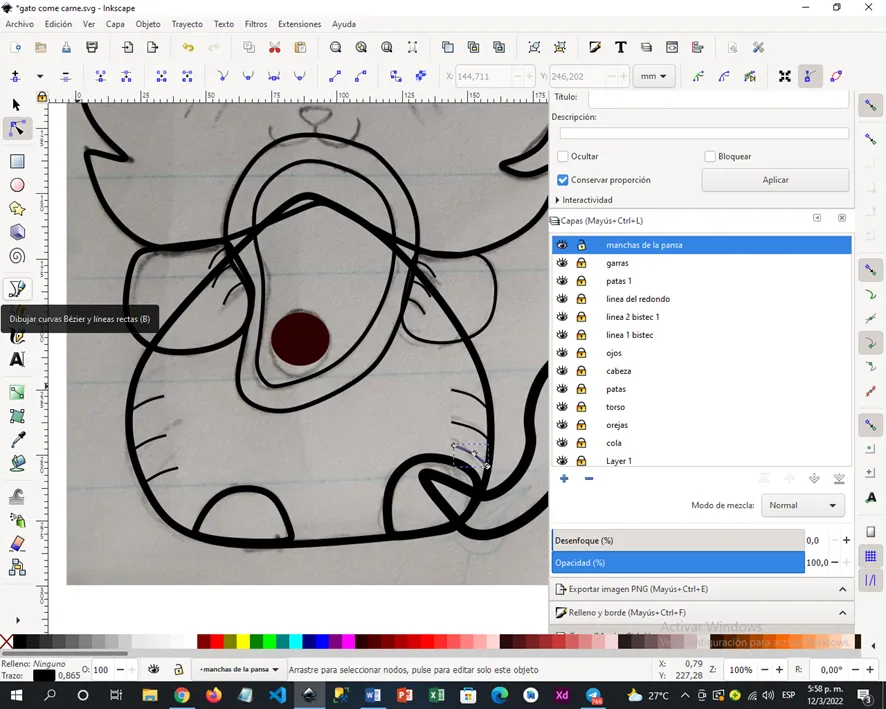
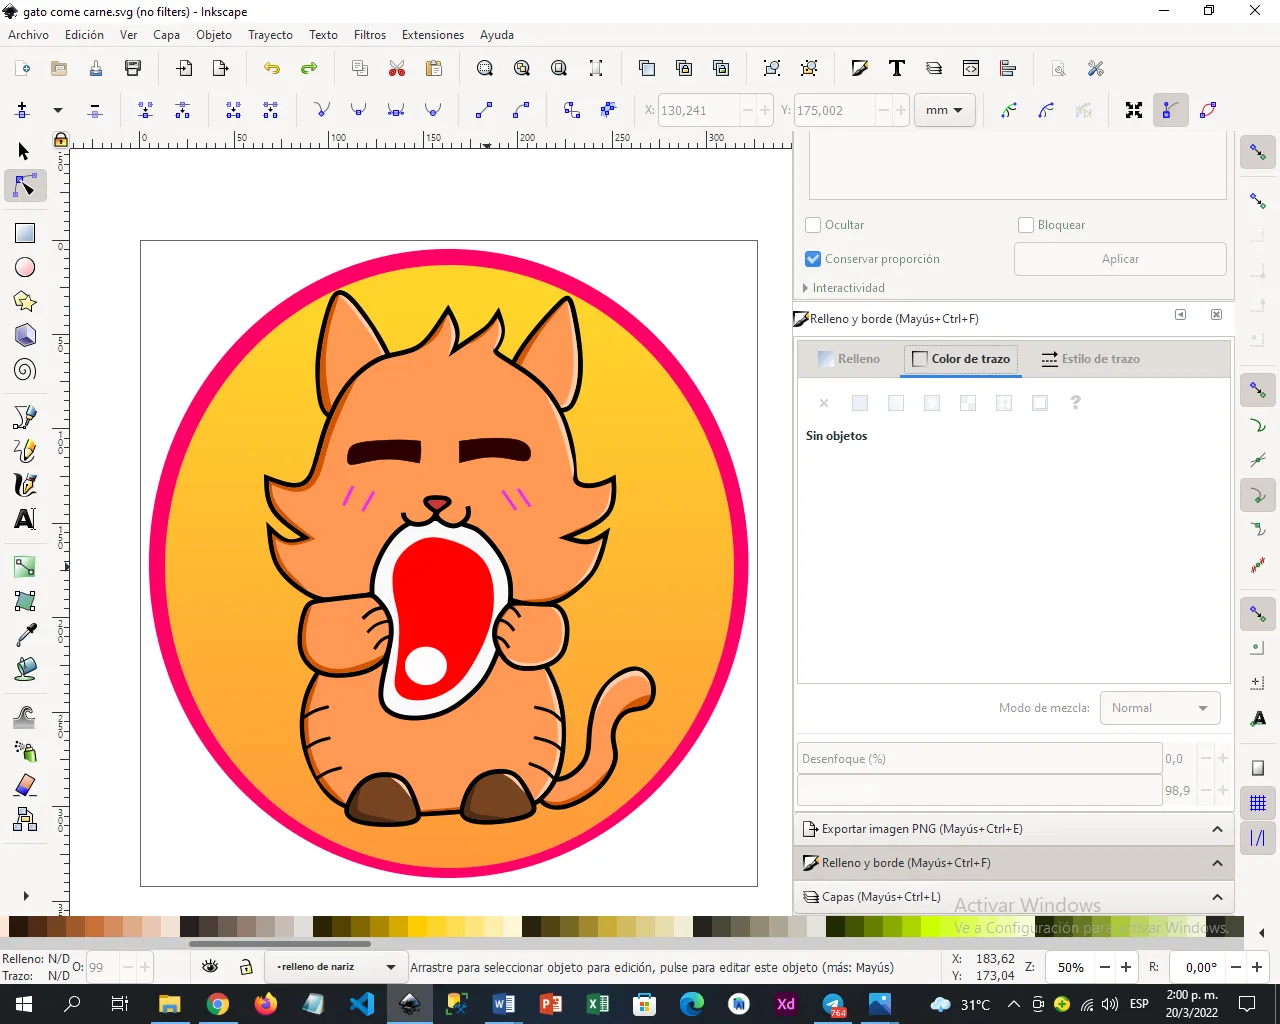
Procedemos a realizar la parte de las manos del gato, sus garras y las manchas de la parte de la barriga para darle más identidad, en el caso de las garras realizamos líneas cortas que posteriormente vamos a modificar su grosor justamente en la parte derecha donde dice: Relleno y borde, al dar clic podemos observar que nos sale la opción de modificar relleno, color del trazo y estilo del trazo, en la última opción cambiamos el ancho de las líneas para este modelo el ancho fue de (1,645) .
STEP EIGHT:
We proceed to make the part of the cat's hands, its claws and the spots on the part of the belly to give it more identity, in the case of the claws we make short lines that later we are going to modify its thickness precisely on the right part where it says : (Fill and border) when clicking we can see that we get the option to modify the fill, stroke color and stroke style, in the last option we change the width of the lines for this model the width was (1,645).
PASO NUEVE:
En esta parte realizamos la parte de las mejillas que de igual forma son líneas cortas dos de cada lado para ser exactos y luego faltaría la parte de la boca conjuntamente con la nariz realizados con la herramienta del lápiz verde.
STEP NINE:
In this part we make the part of the cheeks, which are also short lines, two on each side to be exact, and then the part of the mouth would be missing together with the nose made with the green pencil tool.
PASO DIEZ:
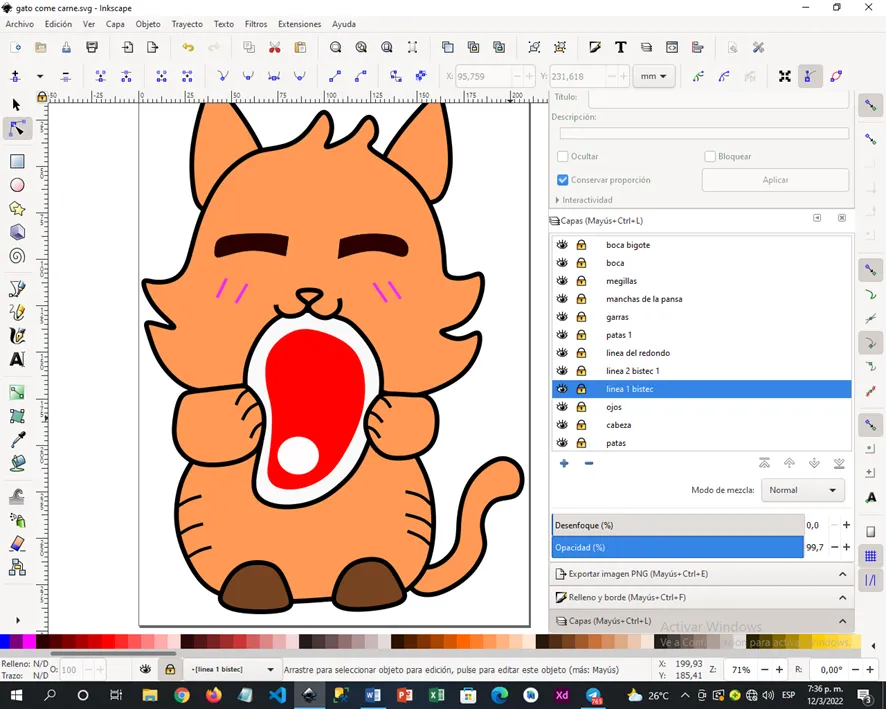


COLOR: Aunque se vea sencillo el tema, la idea es elegir el mejor color que le de la personalidad al gato, si recordamos en la calle podemos ver fácilmente los distintos colores que pueden tener en su pelaje un gato gris con rallas grises hasta uno de múltiples manchas combinadas de blanco, gris, negro y amarillo, gatos que solo tienen dos colores, mitad del cuerpo de un color negro y la otra mitad de blanco.
En este caso particular utilice un color naranja, recordemos que en la parte inferior tenemos la paleta de colores de cada uno de los colores, en el caso del naranja utilice uno de tonalidad más oscura y los tonos del naranja claro serán utilizados para dar iluminación al dibujo, la tonalidad de naranja más oscuro será utilizado para darle sombra y profundidad al dibujo.
Para los zapatos un marrón oscuro, para la iluminación un marrón más claro casi tirando al blanco, para la parte del bistec observamos que se aumentó el ancho de cada línea, la parte de fondo es blanca, la parte de en medio es roja como si el filete fuera recién cortado totalmente fresco y la parte del circulo blanca, eliminando el color del trazo para que solo se vea la parte del color del relleno.
STEP TEN:
COLOR: Although the theme looks simple, the idea is to choose the best color that gives the cat personality, if we remember on the street we can easily see the different colors that a gray cat with stripes can have on its fur grays to one of multiple combined patches of white, gray, black and yellow, cats that have only two colors, half of the body of a black color and the other half of white.
In this particular case use an orange color, remember that in the lower part we have the color palette of each of the colors, in the case of orange use one of a darker hue and the light orange tones will be used to illuminate the drawing, the darker shade of orange will be used to give the drawing shadow and depth.
For the shoes a dark brown, for the lighting a lighter brown almost white, for the part of the steak we observe that the width of each line has been increased, the bottom part is white, the middle part is red as if the fillet was freshly cut totally fresh and the part of the circle was white, eliminating the color of the stroke so that only the part of the fill color is visible.
PASO ONCE:
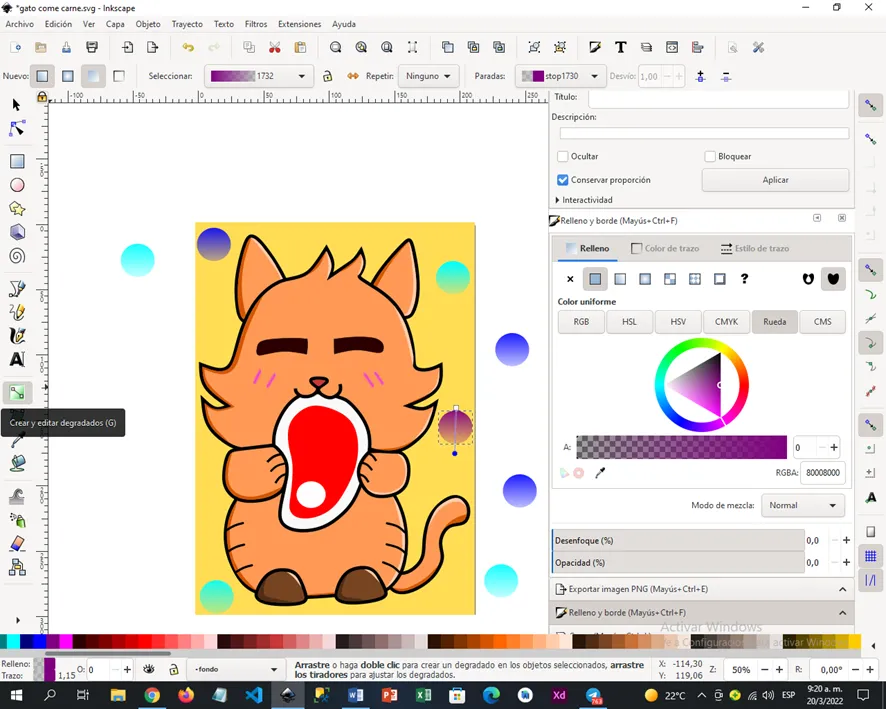
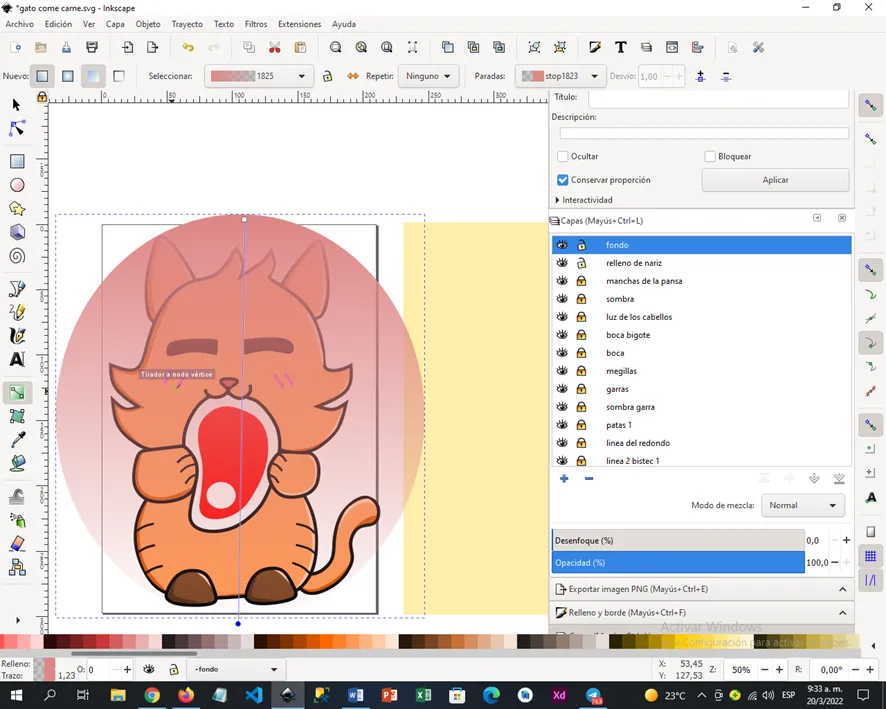
Terminado la elección de colores para cada sombra, figura y su respectiva iluminación seguimos con el fondo pueden colocar un cuadrado del color que quieran con múltiples figuras o realizar un circulo, yo pase como pueden observar por las dos fases, mi corazón y cerebro se decidieron por el circulo.
Debo aclarar que son dos círculos uno de fondo de color rosado y otro más pequeño que tiene degradado.
Nota: El degradado lo pueden realizar si se van a la parte izquierda verán un cuadrado con dos nodos, esa herramienta crea degradados y a la vez los puede editar según las necesidades del diseñador.
STEP ELEVEN:
Finished the choice of colors for each shadow, figure and its respective lighting, we continue with the background, you can place a square of the color you want with multiple figures or make a circle, I went through the two phases, as you can see, my heart and brain decided for the circle.
I must clarify that there are two circles, one with a pink background and a smaller one that has a gradient.
Note: The gradient can be done if you go to the left you will see a square with two nodes, this tool creates gradients and at the same time you can edit them according to the needs of the designer.
ASÍ TERMINAMOS ESTE GATICO QUE FELIZ SE ESTÁ COMIENDO SU FILETE | THIS IS HOW WE FINISHED THIS KITTEN THAT IS HAPPY EATING HIS STEAK
