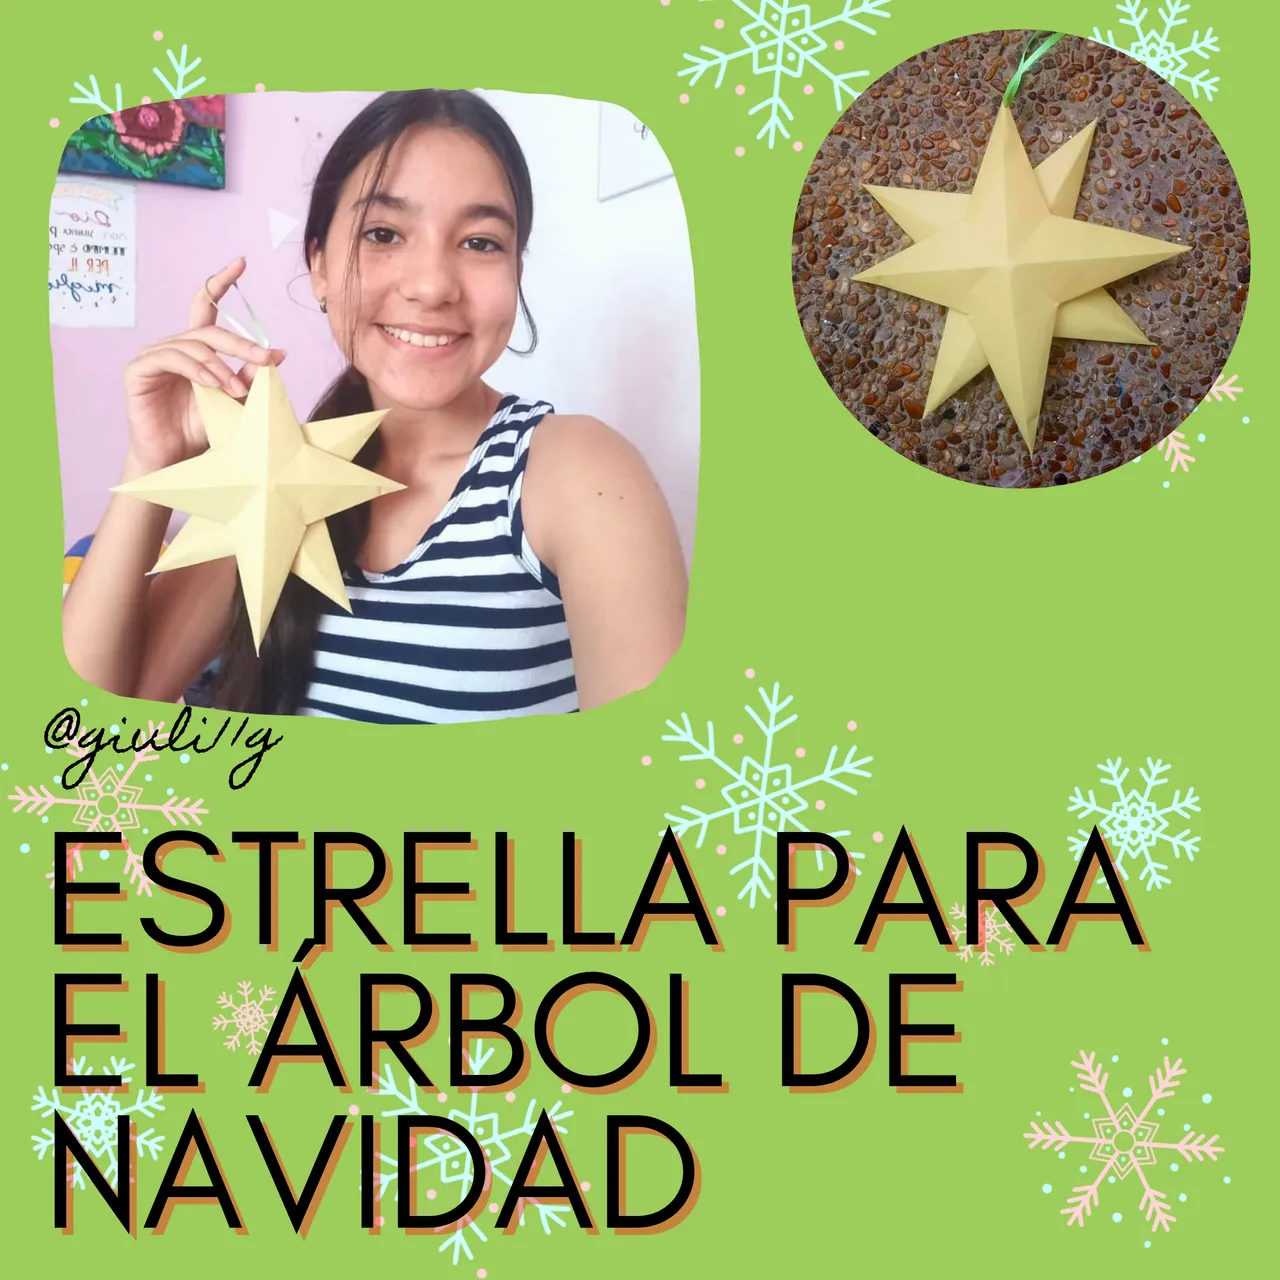
Hola chicos, cuéntenme ¿Cómo la están pasando en esta Navidad?, espero que bien. En estas fechas siempre es necesario la decoración de nuestro arbolito o nacimiento,pero quizás las esferas y moños ya están pasados un poco de moda ¿no lo creen?, así que hoy para decorar su arbolito les muestro como elaborar esta hermosa estrella estrella navideña,con pocos materiales y muy sencilla de realizar.
Hi guys, tell me how you are doing this Christmas, I hope you are doing very well. At this time it is always necessary to decorate our tree or crib, but perhaps the spheres and bows are already a little out of fashion, do not you think? so today to decorate your tree I show you how to make this beautiful Christmas star, with few materials and very easy to do.

Necesitaremos los siguientes materiales:
- Cartulina
- Pega en barra (o la que tengas en casa)
- Tijeras
- Cinta o hilo
The following materials will be needed:
- Cardboard
- Glue stick (or whatever you have at home)
- Scissors
- Tape or thread
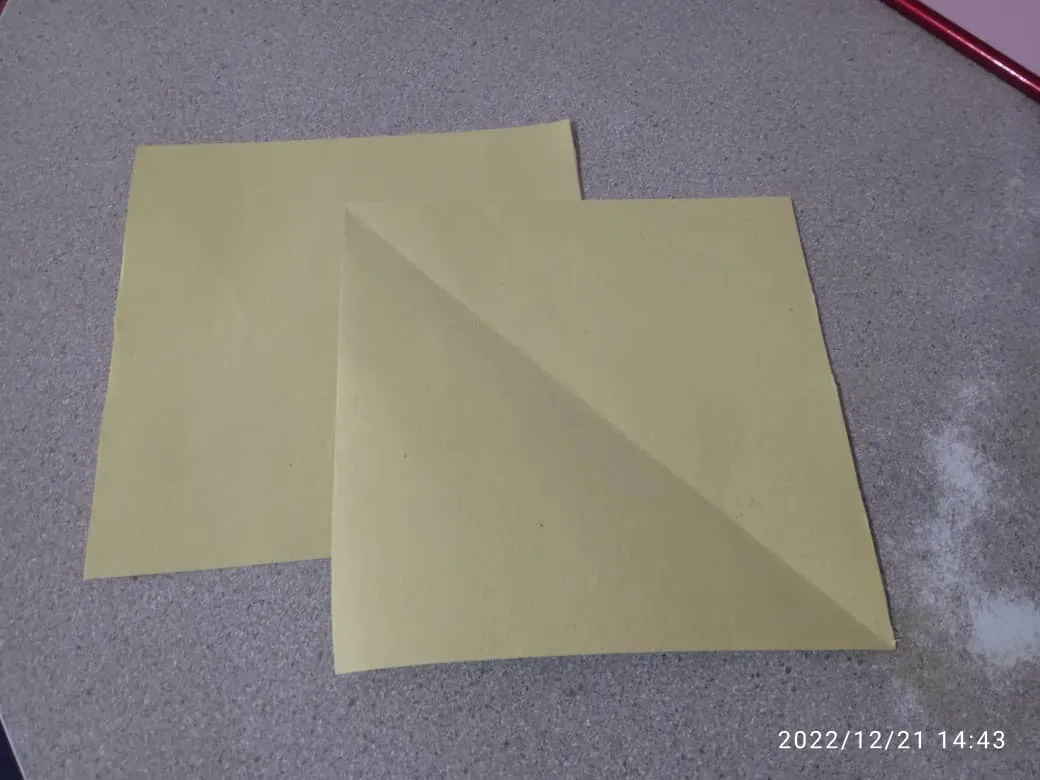
Paso 1
Con la cartulina del color de tu preferencia en mi caso use amarilla corté 2 cuadrados de 15X15 Cm.
Step 1
With the cardboard of the color of your preference, in my case I used yellow, I cut 2 squares of 15X15 Cm.
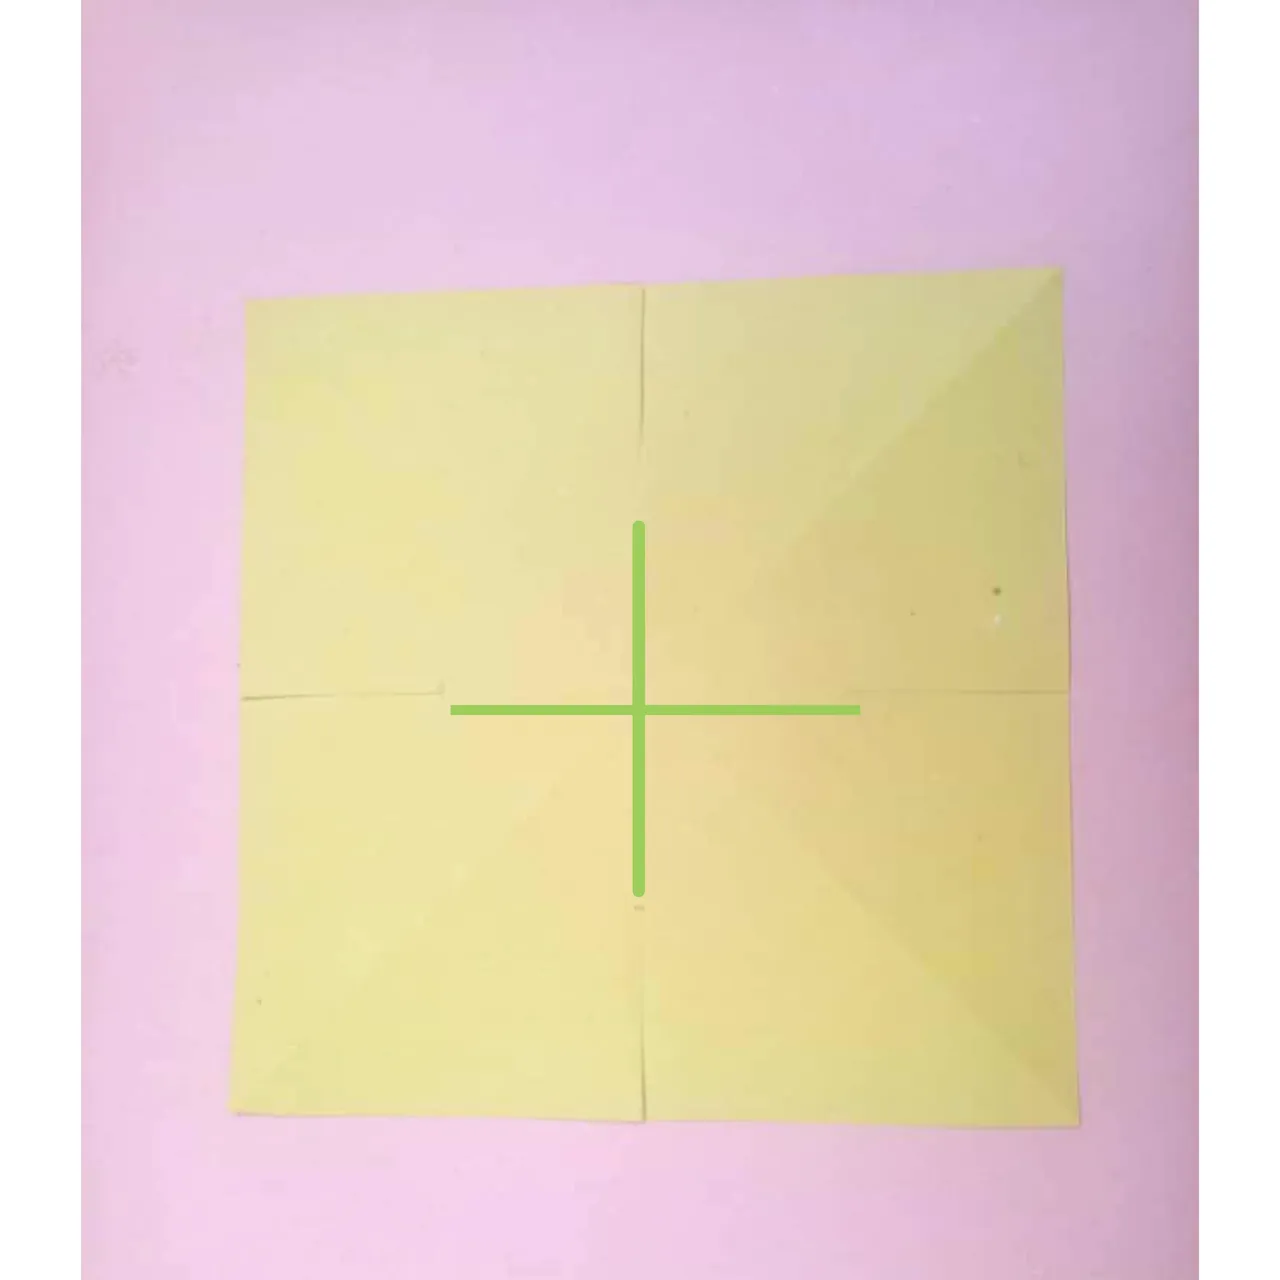
Paso 2
Tome uno de los cuadros doblándolo a la mitad por los dos lados y diagonalmente por los dos lados también, quedando con los pliegues que se ven en la imagen.
Step 2
Take one of the squares and fold it in half on both sides and diagonally on both sides as well, leaving the folds as shown in the image.
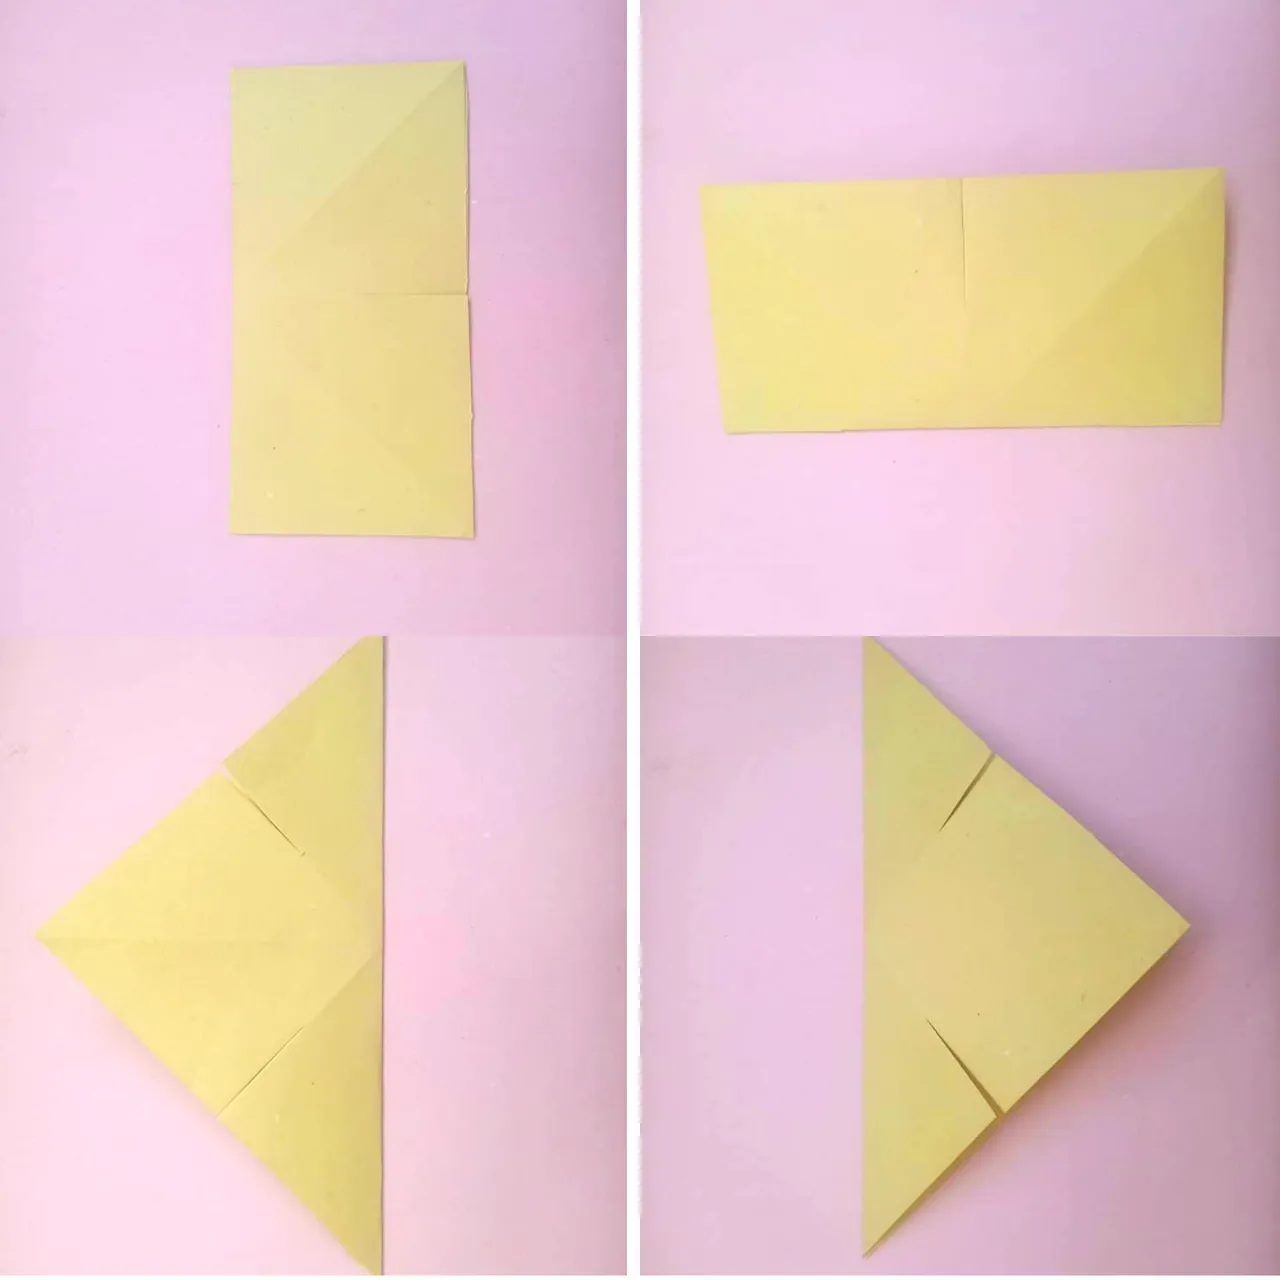
Paso 3
Donde se formas una cruz en el cuadrado hacemos unos cortes sin llegar al centro.
Step 3
Where a cross forms in the square we make some cuts without reaching the center.
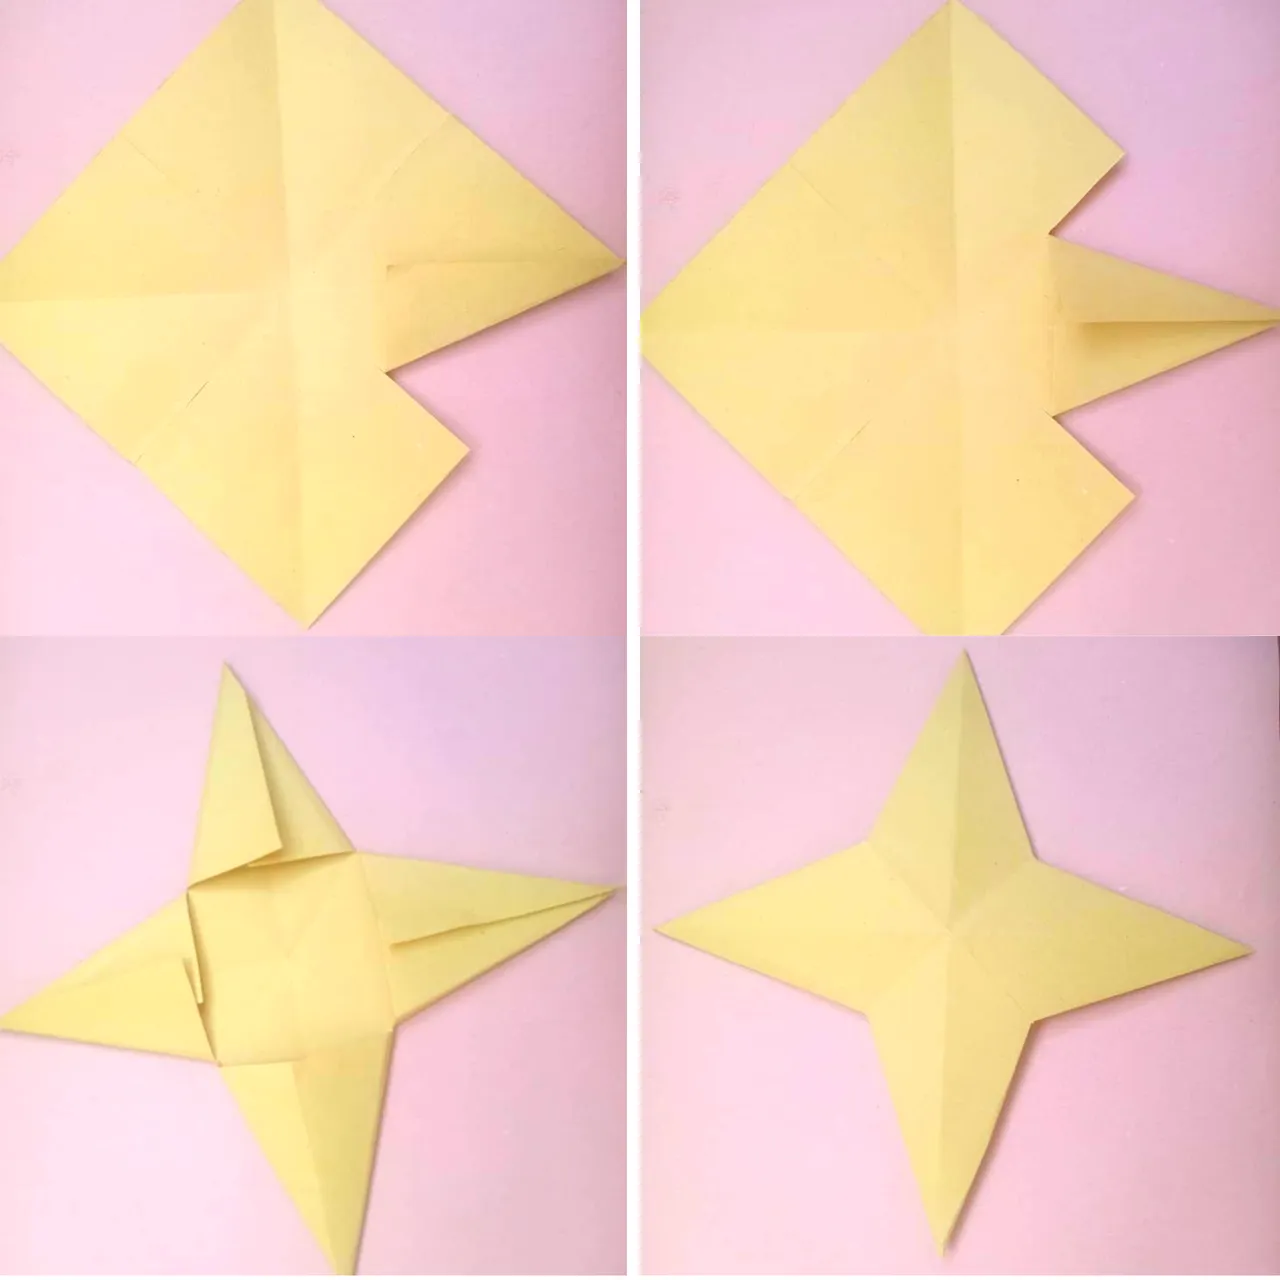
Paso 4
Con ayuda de los pliegues y los cortes que hicimos vamos a doblar hacia al centro los dos lados del corte formando 4 triángulos.Y de esta forma pegamos todos los triángulos y realizamos el mismo proceso con el otro cuadrado de cartulina
Step 4
With the help of the folds and the cuts we made we will fold to the center the two sides of the cut forming 4 triangles and in this way we glue all the triangles and do the same process with the other square of cardboard.
Paso 5
Por ultimo pegamos los dos juntos de forma intercalada y le colocamos la cinta o el hilo para colgarlo.
Step 5
Finally we glue the two together and place the ribbon or thread to hang it.

¿Te gustó esta idea? Déjamelo saber en los comentarios.
Todas las fotos fueron tomadas con el teléfono Umidigi S3pro, editadas en canva y traducidas con DeepL.
¡Hasta la próxima!
Did you like this idea? Let me know in the comments.
All photos were taken with the Umidigi S3pro phone, edited in canva and translated with DeepL.
See you next time!
