Saludos amantes de las manualidades!
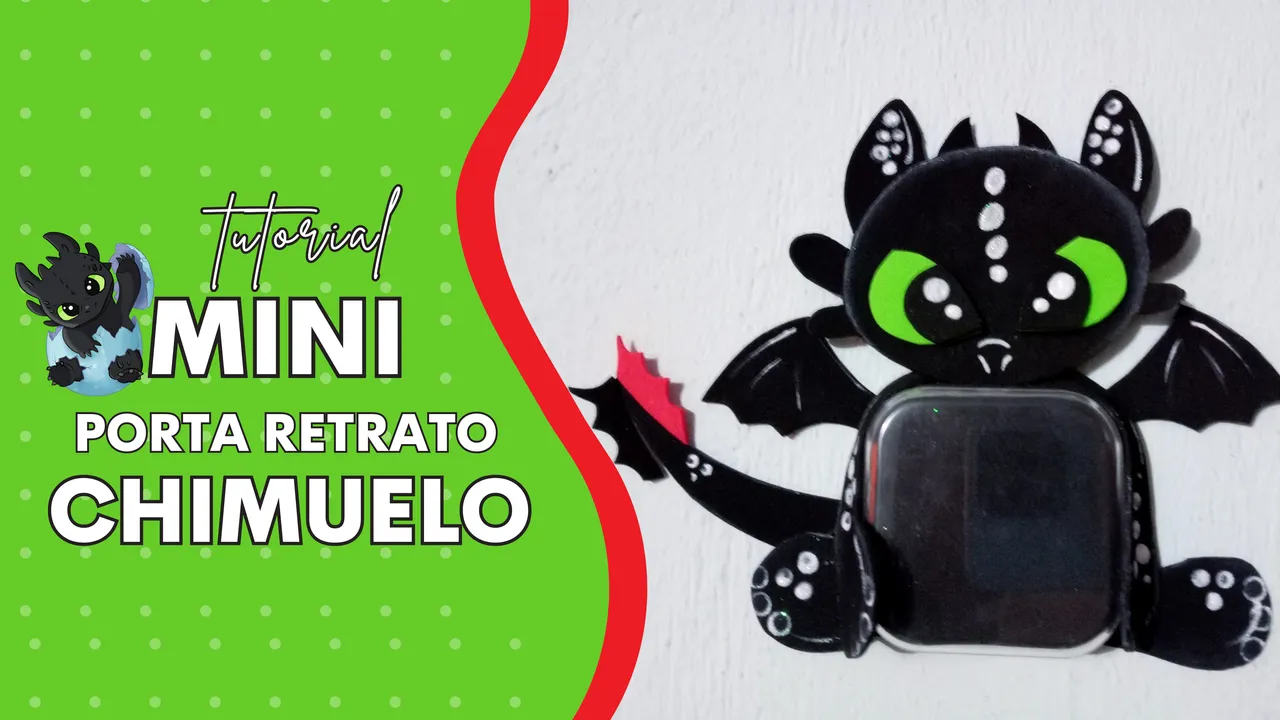
¿A quién no le gustan los dragones? Siempre tengo un gran aprecio a estas criaturas mágicas, y en esta ocasión les comparto un tutorial para realizar un mini porta retrato, inspirado en la película "Cómo entrenar a tu dragón" y el personaje "Chimuelo", el cual es un dragón "fuego oscuro".
Espero que les guste.
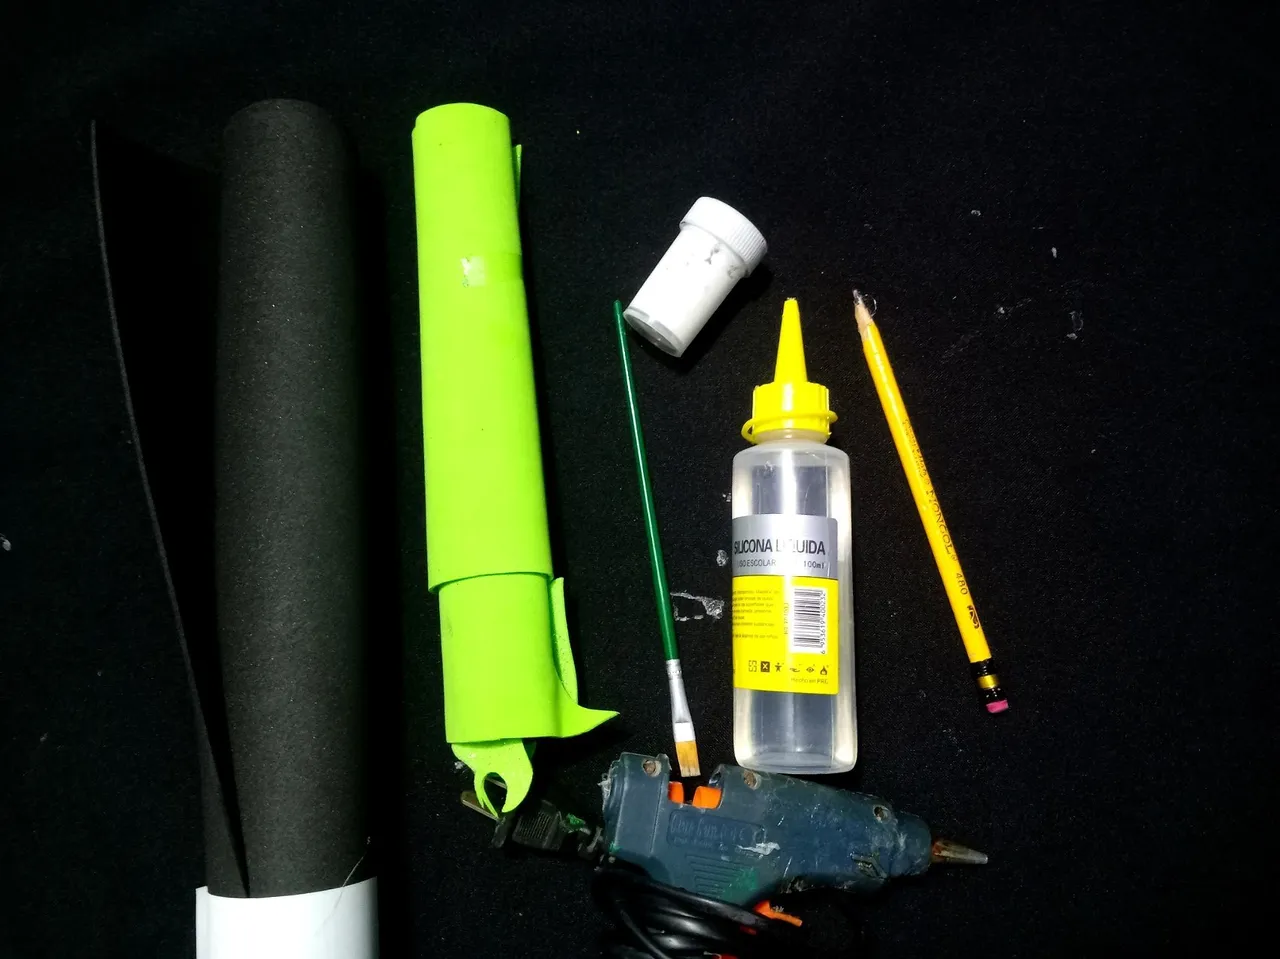
Materiales
- Lápiz, Goma de borrar.
- Tijeras.
- Pistola de Silicon o Silicon frío.
- Fomais de color negro.
- Foami de color verde.
- Foami de color rojo (para la cola).
- Pintura blanca
- Pincel punta fina
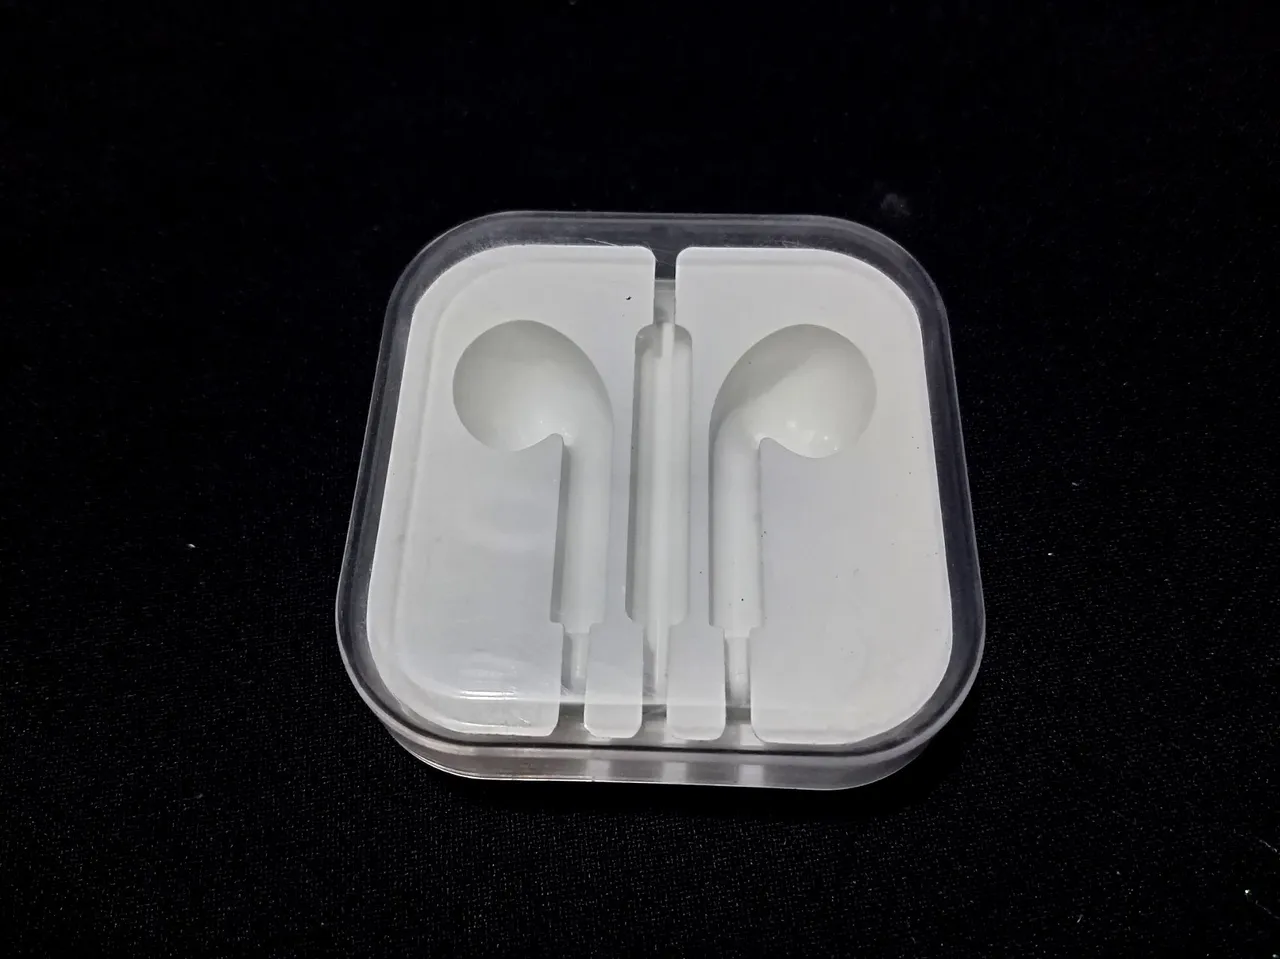
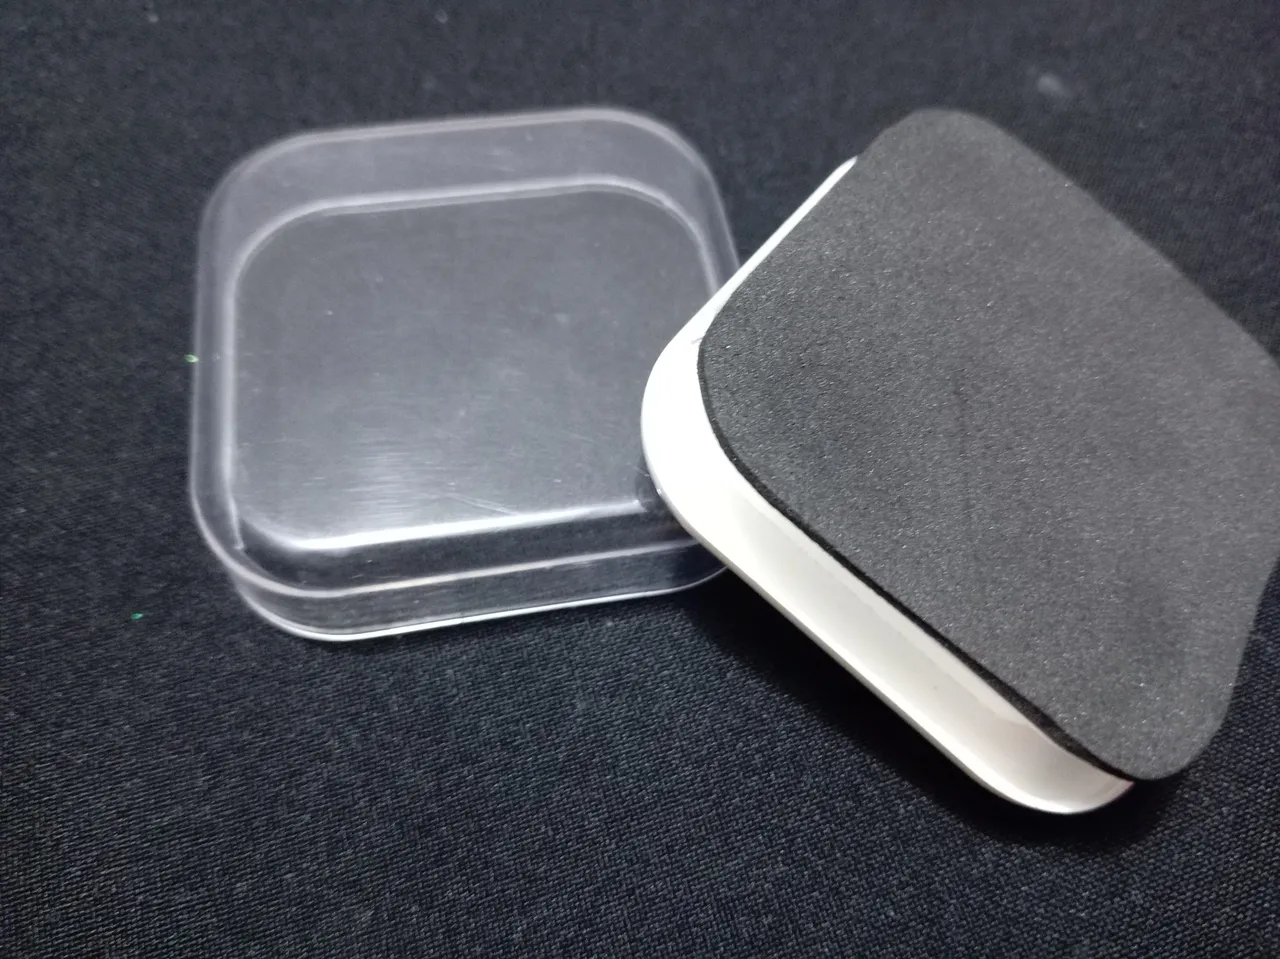
- Caja de audios.
 |  |
|---|
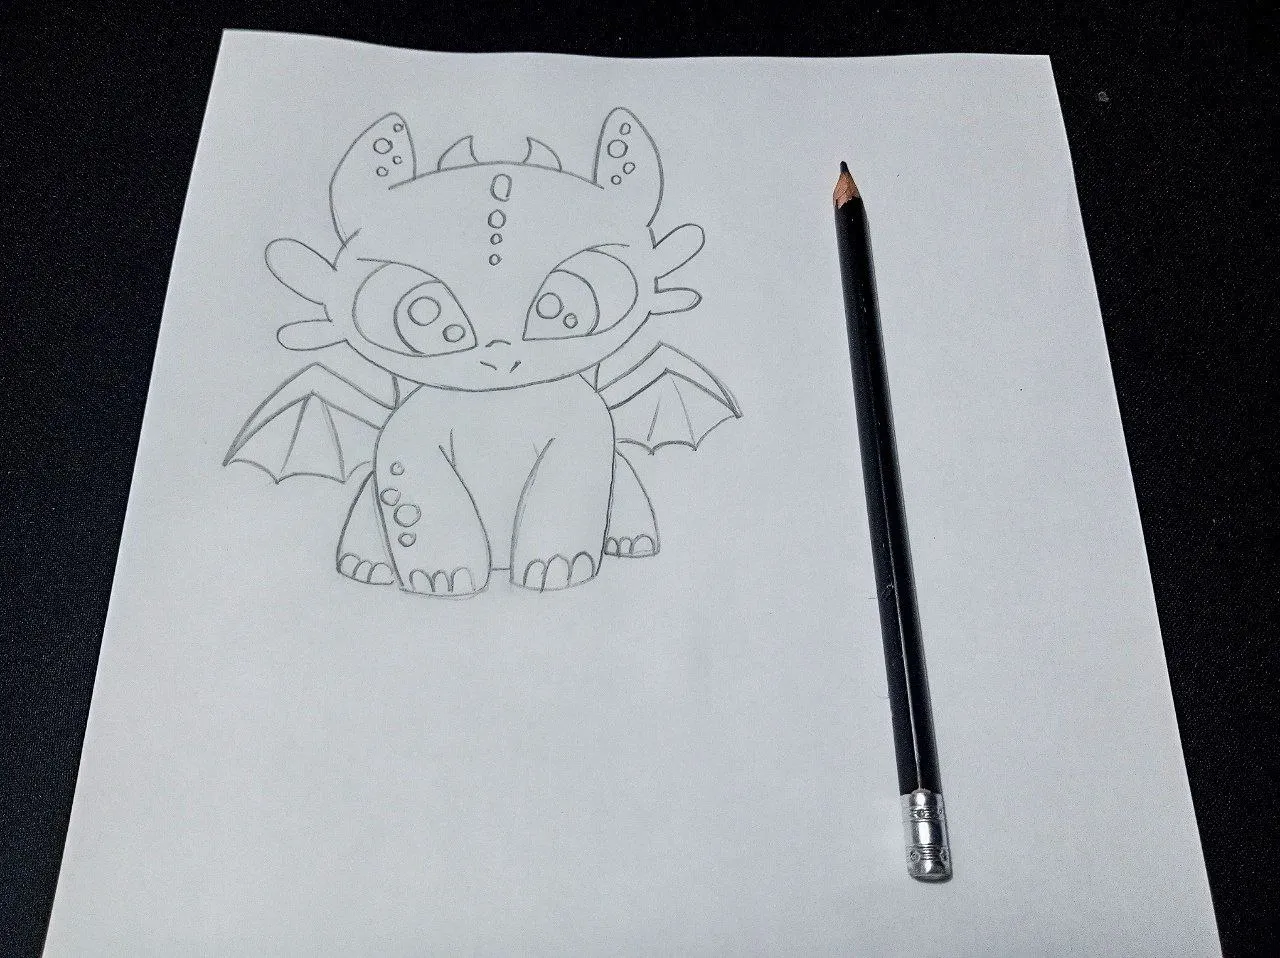
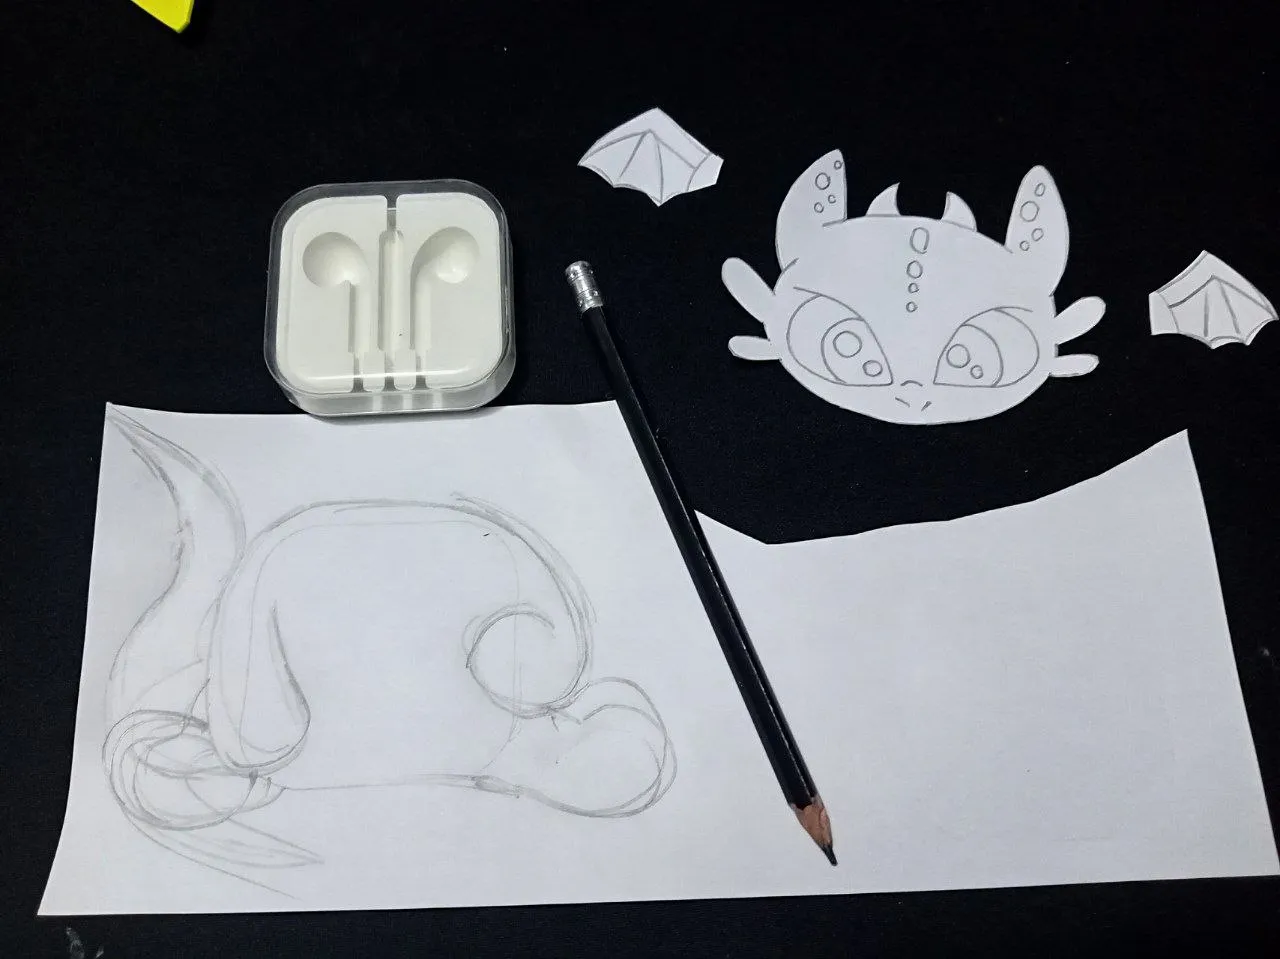
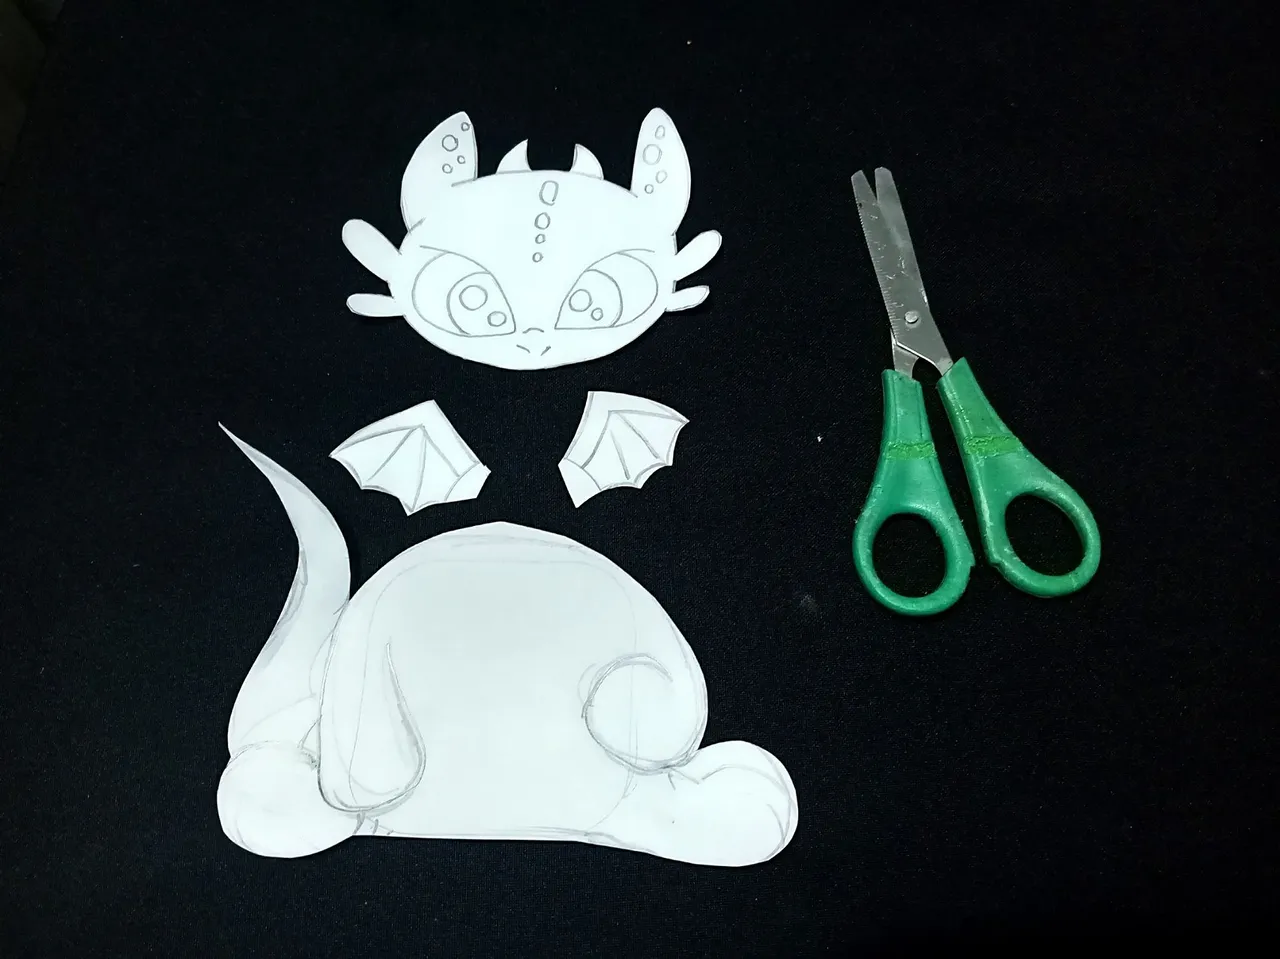
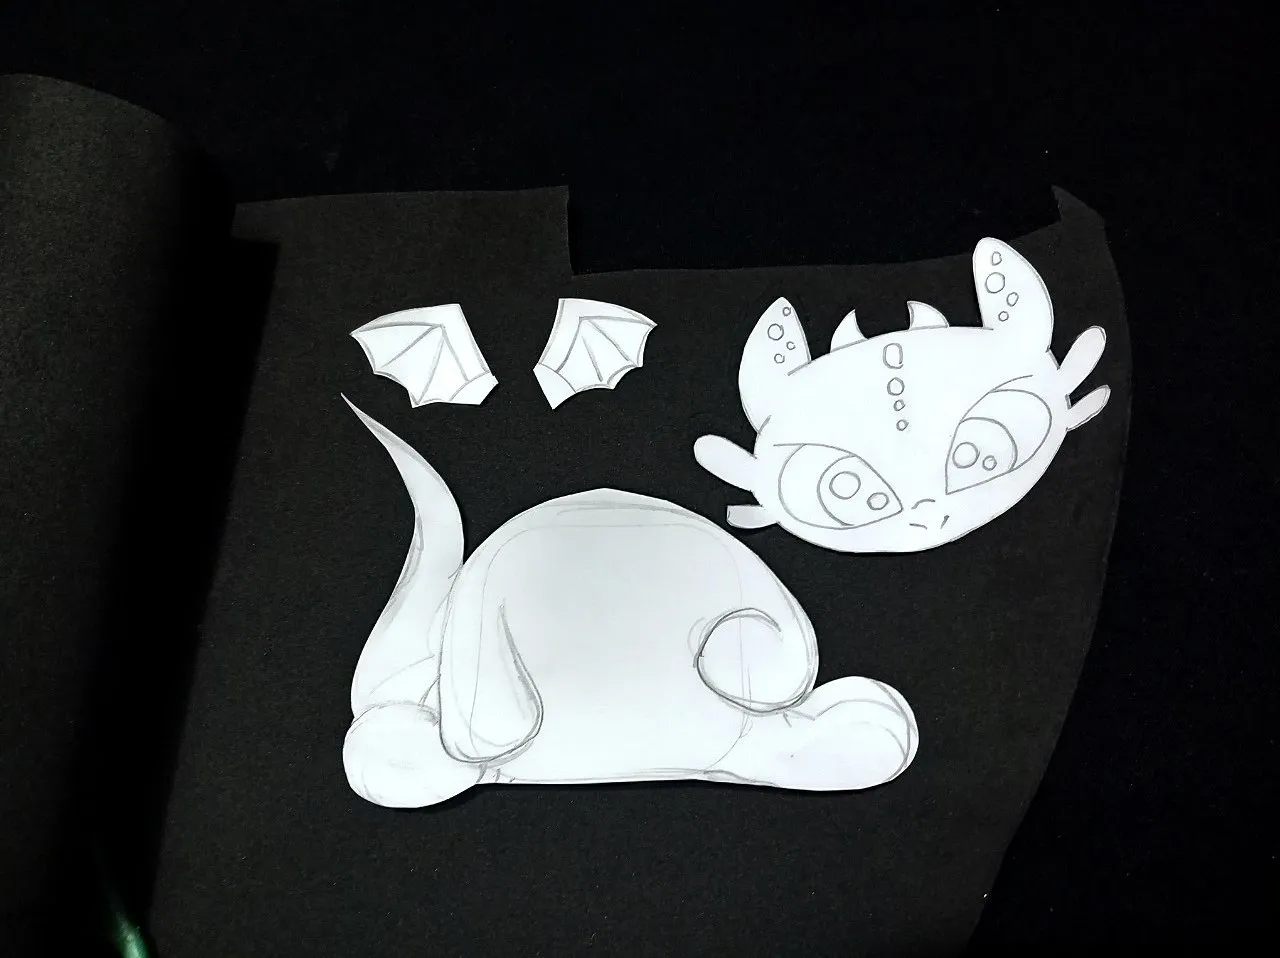
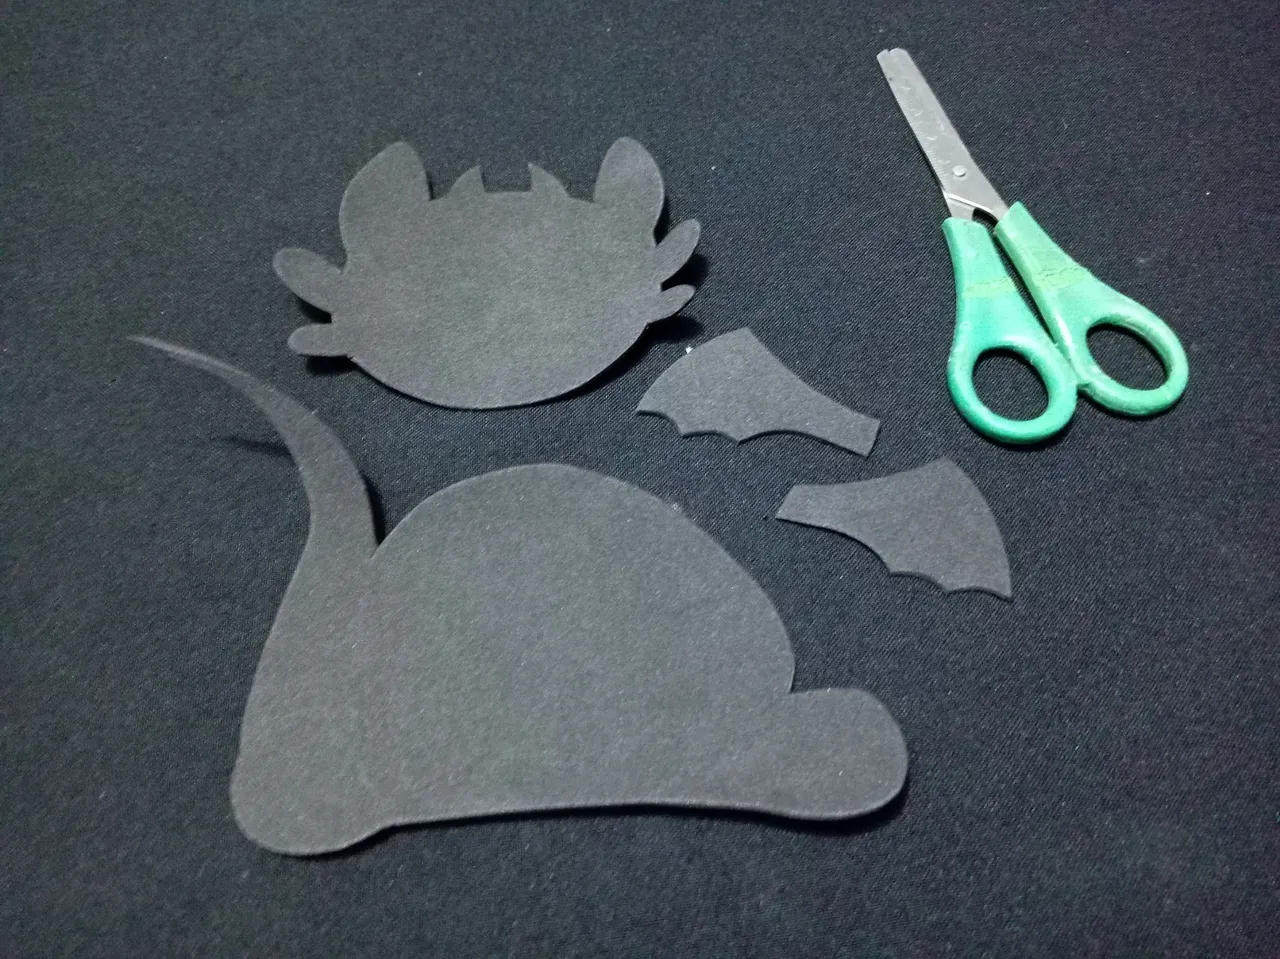
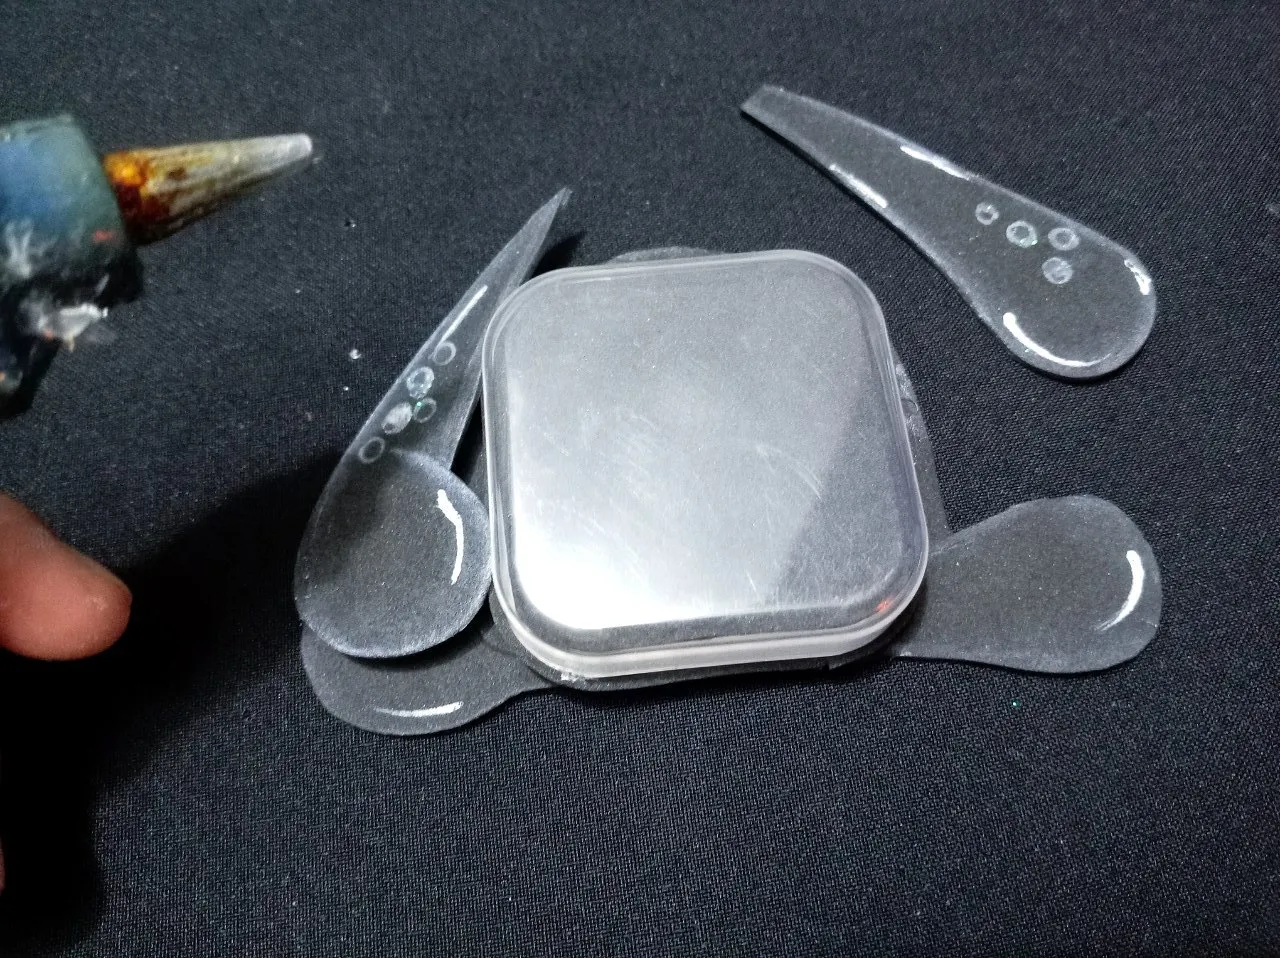
Paso 1: Para comenzar, busca una imagen de referencia en internet del dragón que más te guste. Para este diseño, usé esta imagen de Pinterest. Con base en esa imagen, dibuja un boceto. En este caso, haremos una modificación en el cuerpo del dragón para adaptarlo al diseño que tenemos en mente. Una vez que tengas el dibujo final, recorta cada una de las piezas para usarlas como patrones.
 |  |  |
|---|
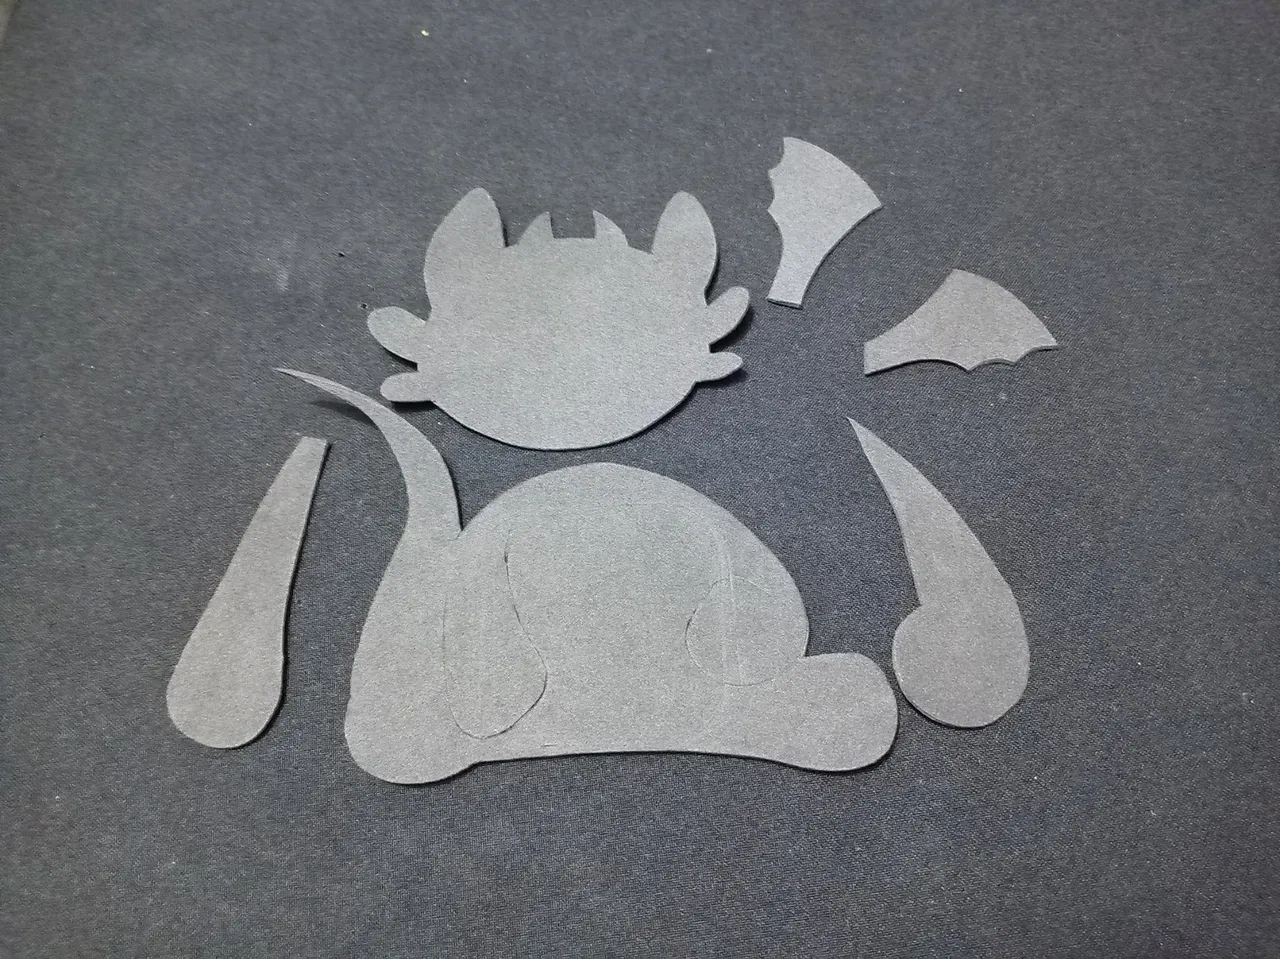
Paso 2: Toma el Foami principal, que es de color negro. Usando un lápiz o un palillo de brocheta, marca el contorno de cada patrón sobre el material. Después, con unas tijeras, recorta todas las piezas que dibujaste: el cuerpo, la cabeza, las alas y los brazos.
 |  |  |
|---|
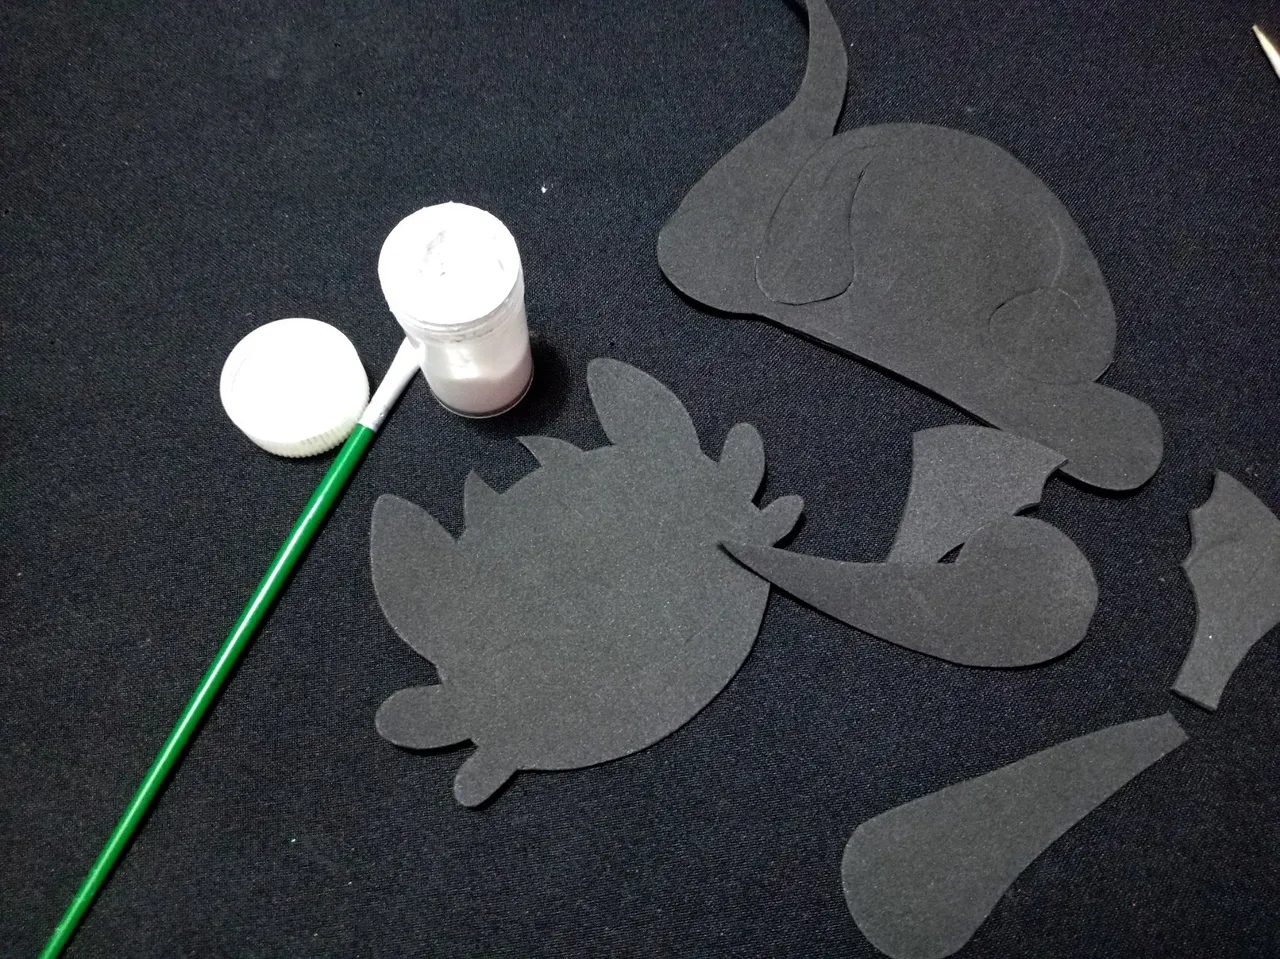
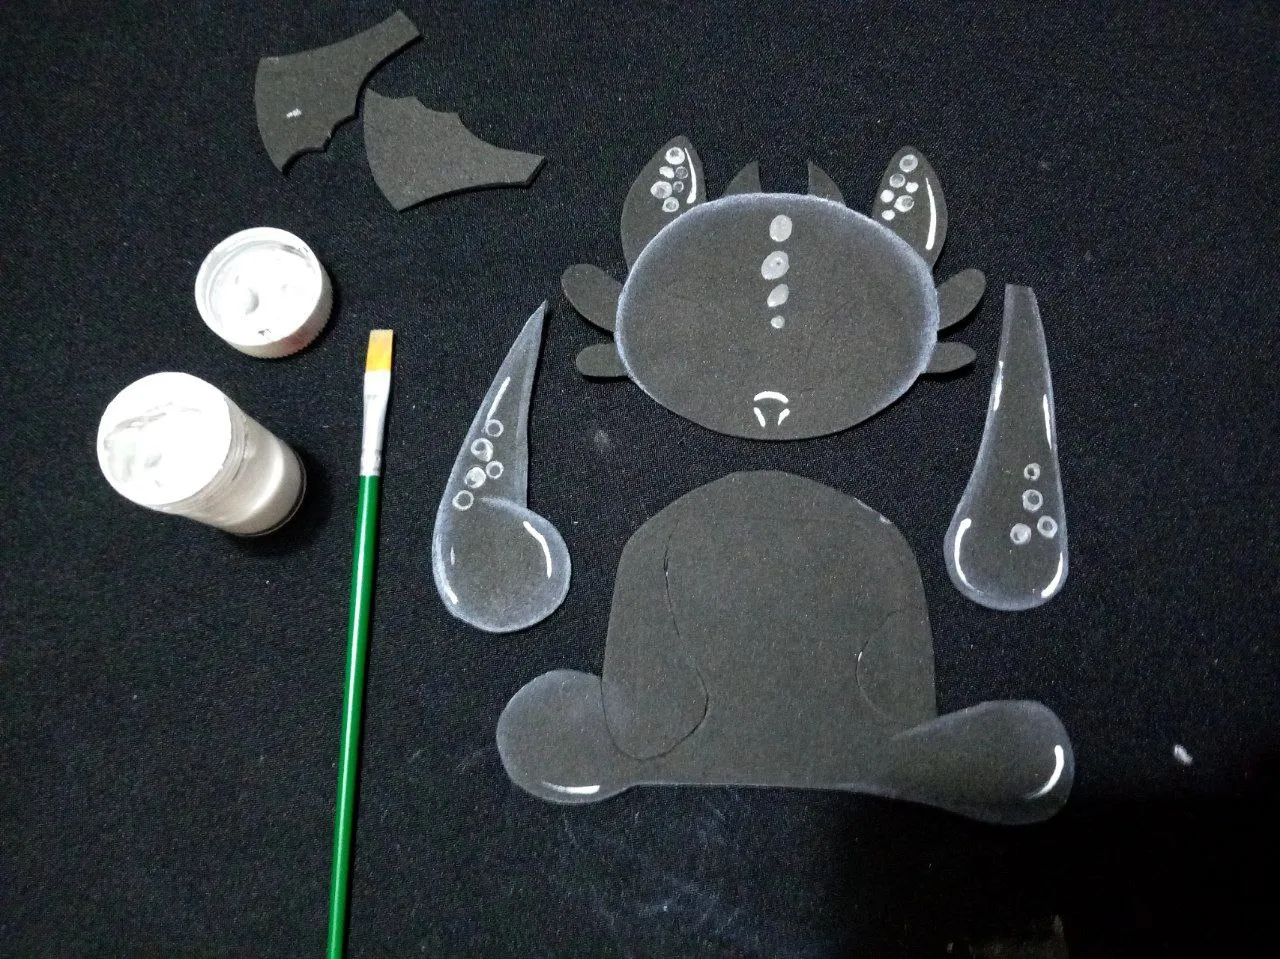
Paso 3: Detalles y decoración
Antes de ensamblar las piezas, es momento de decorarlas. Con un pincel fino y pintura blanca, añade iluminación a cada pieza y dibuja las escamas tal como se aprecian en la imagen de referencia.
 |  |
|---|
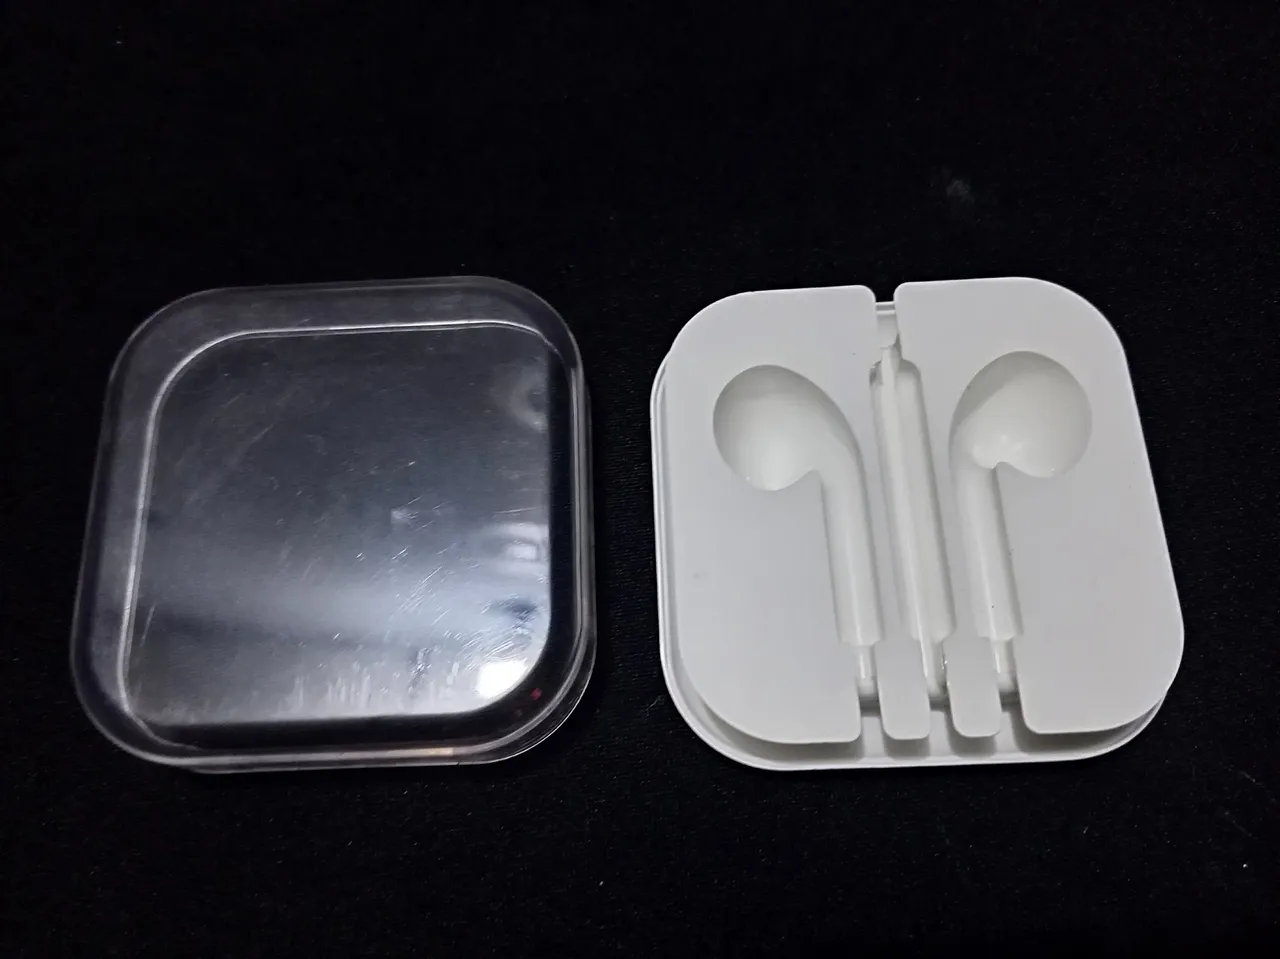
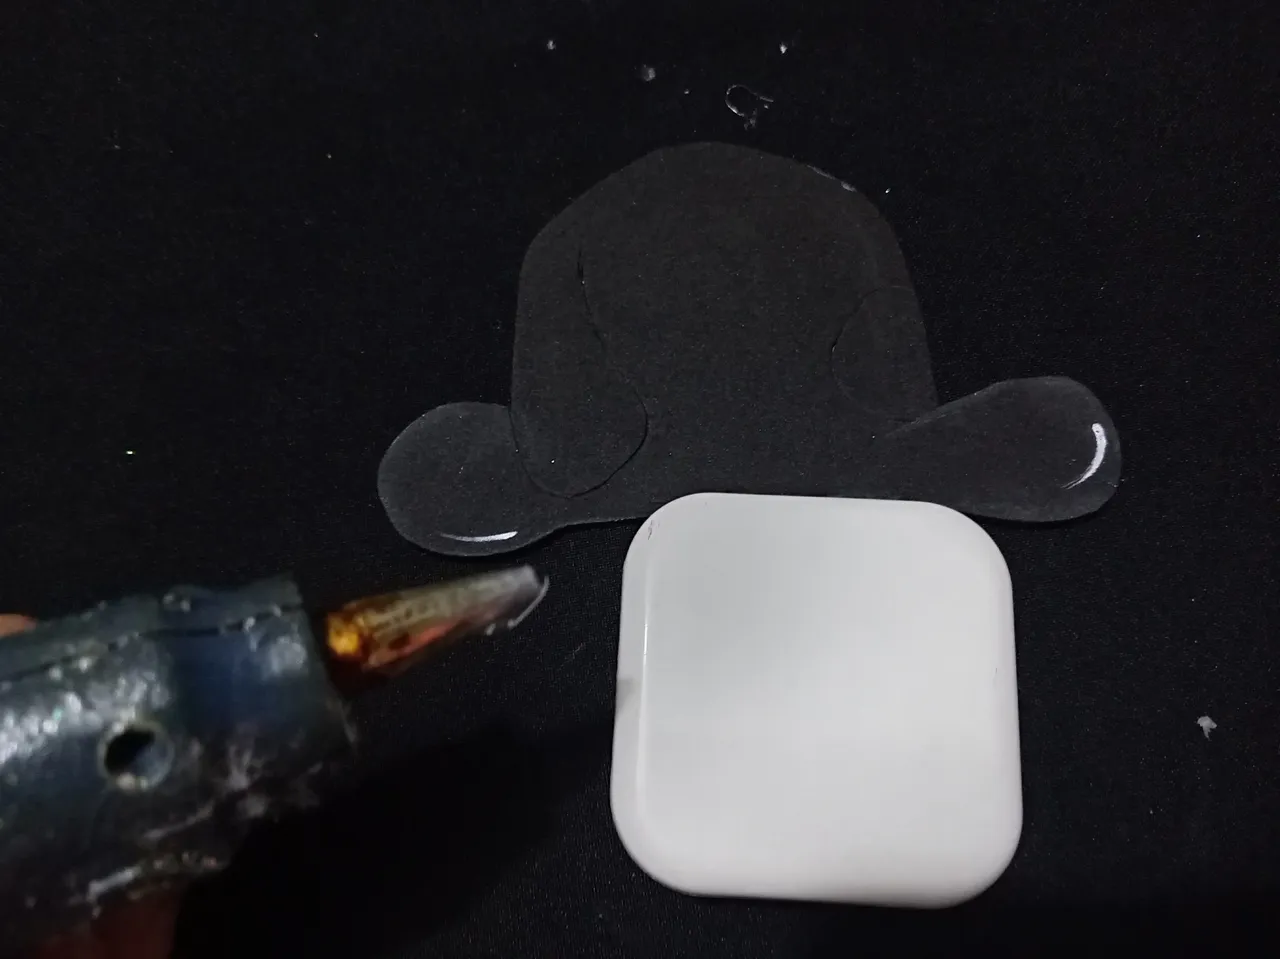
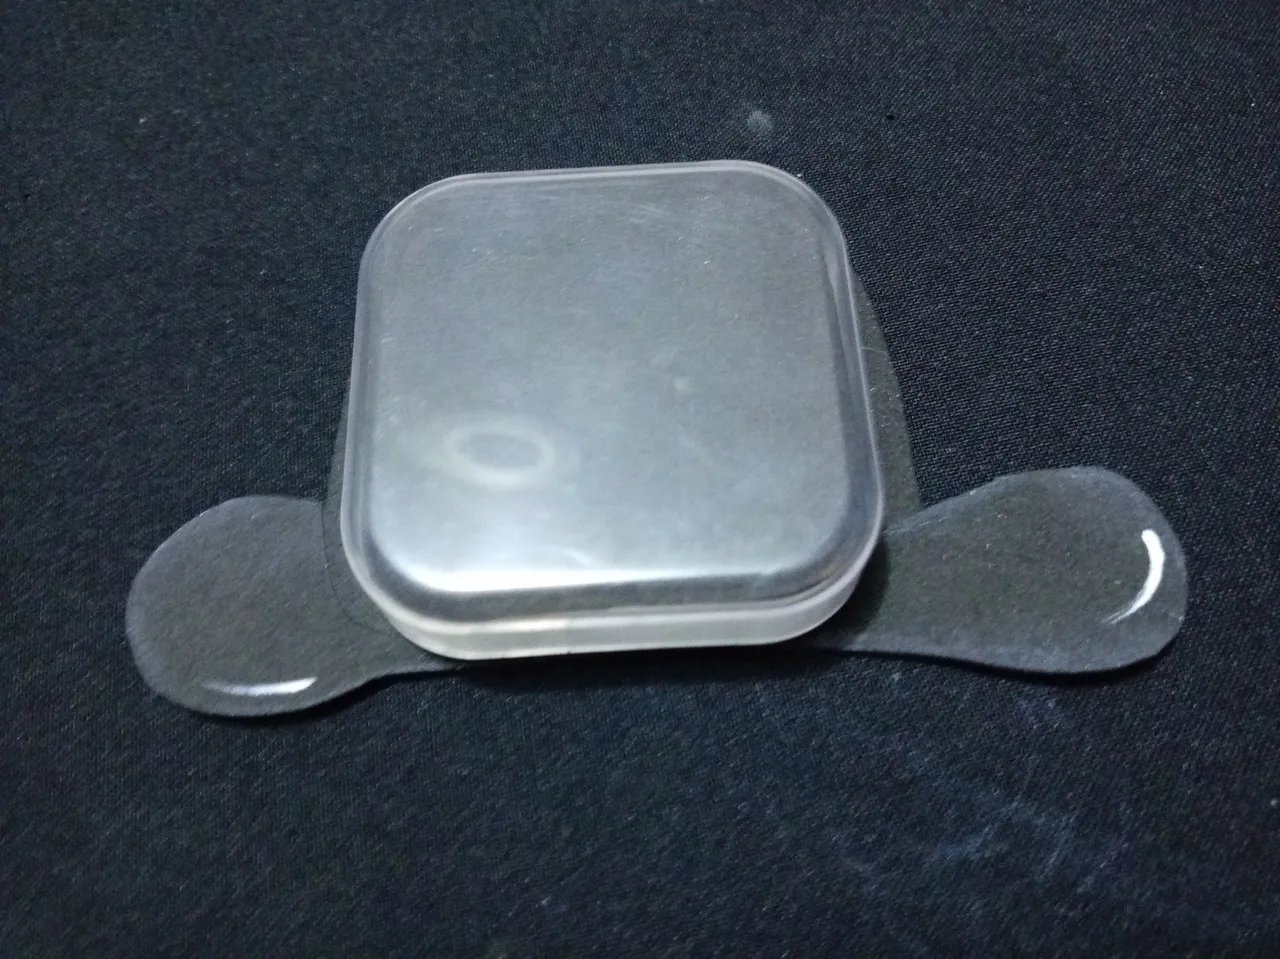
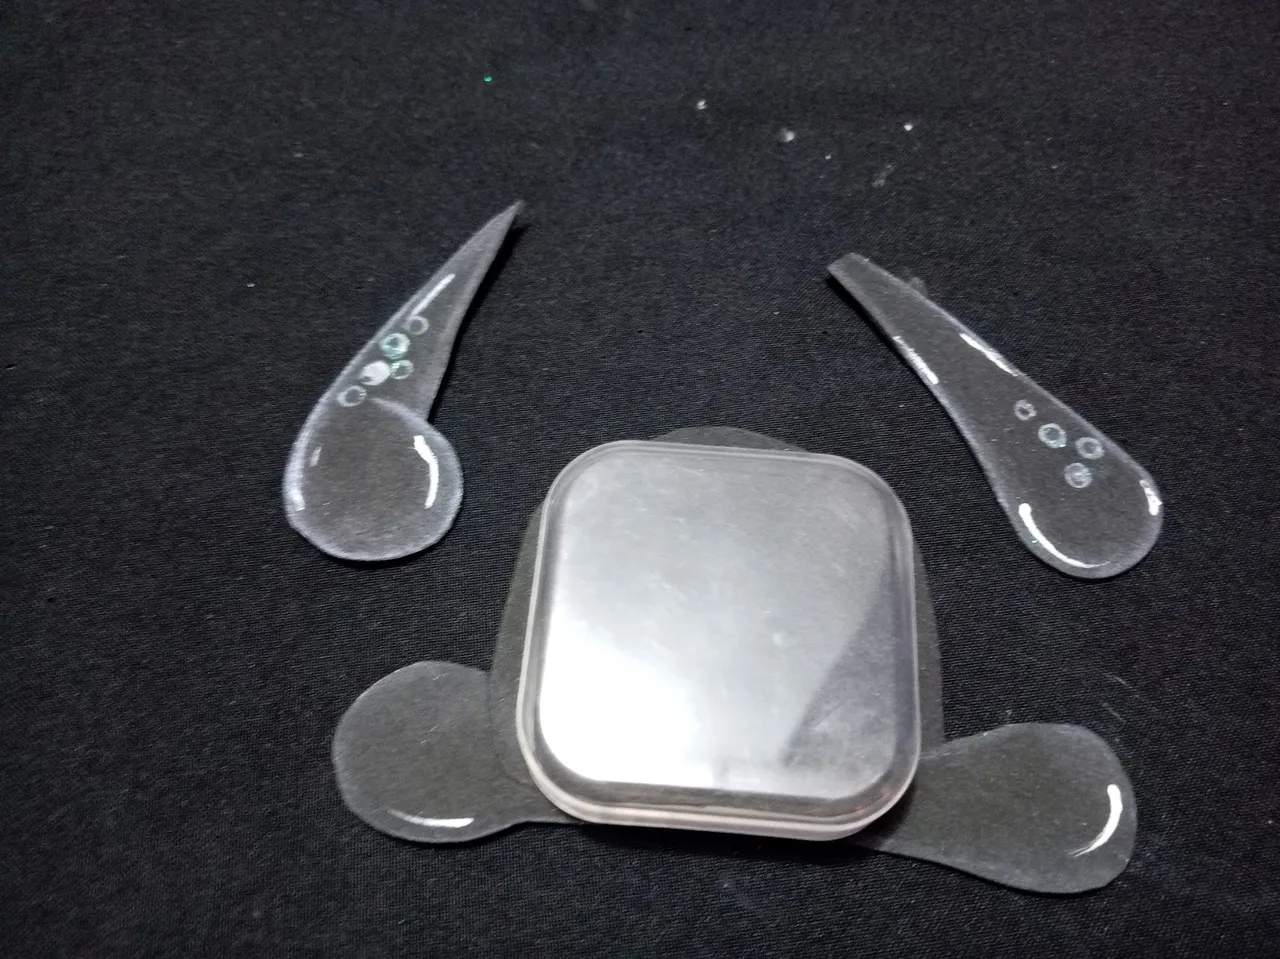
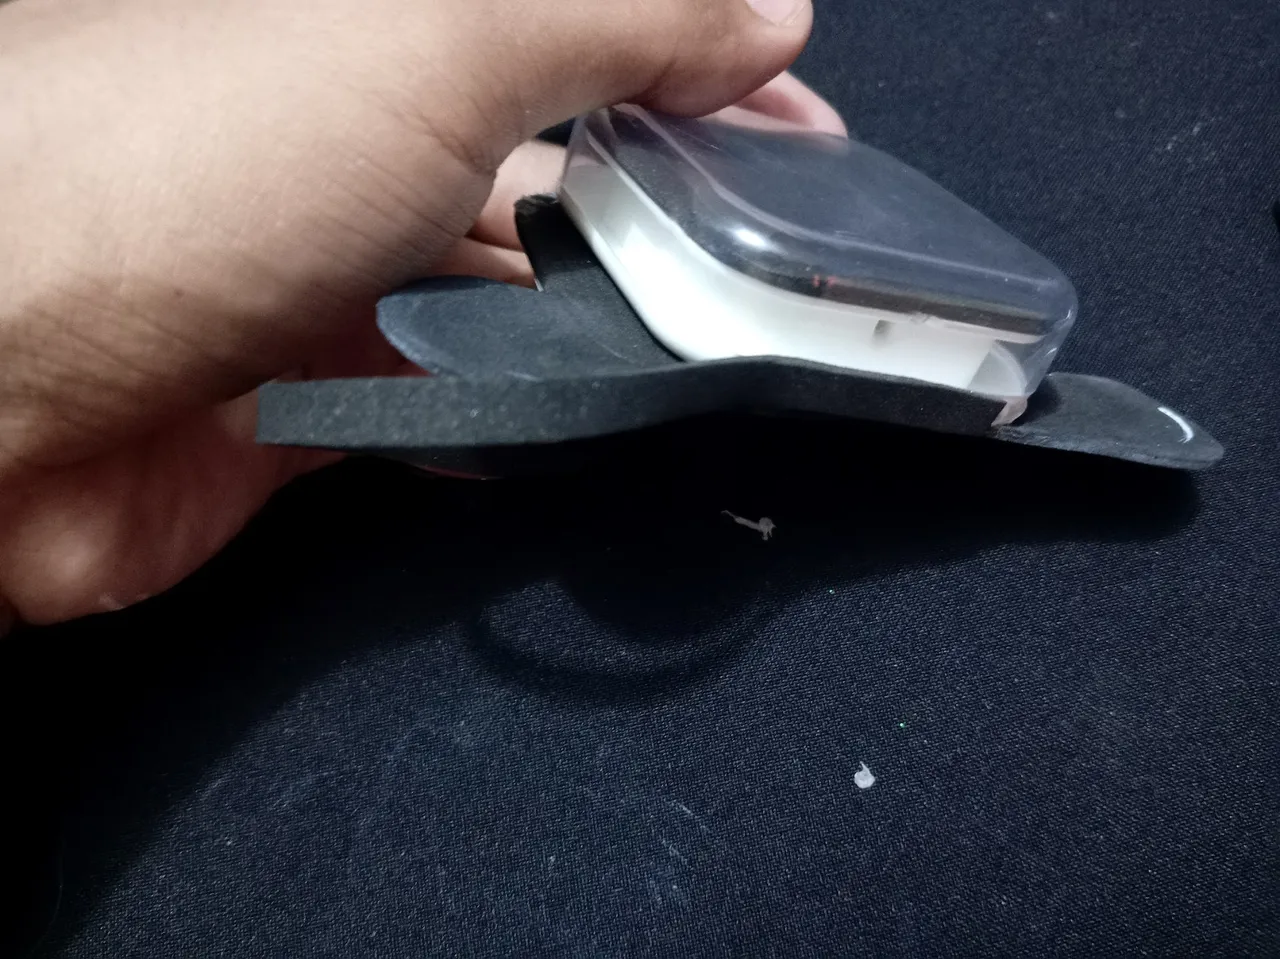
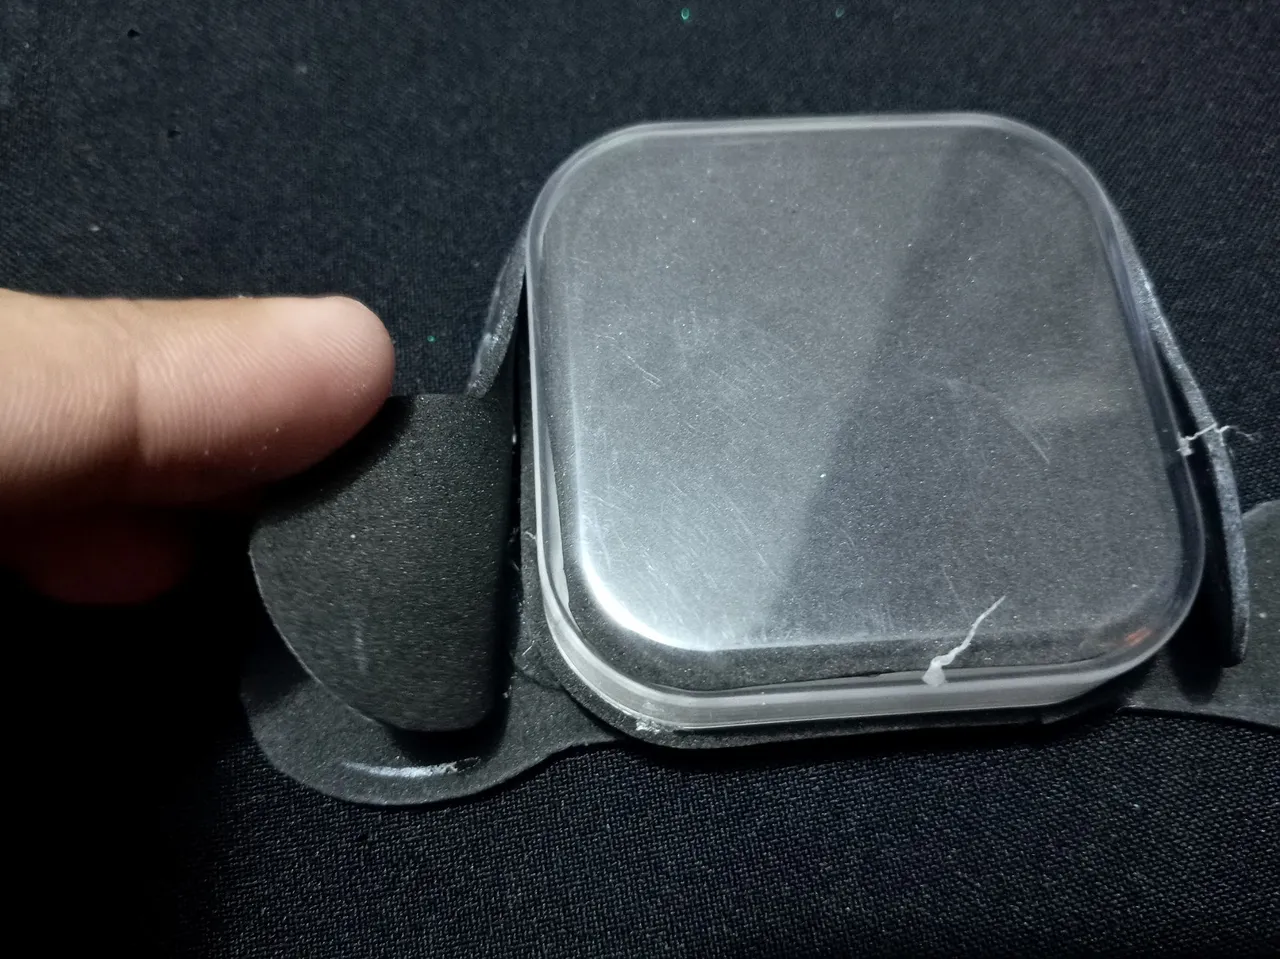
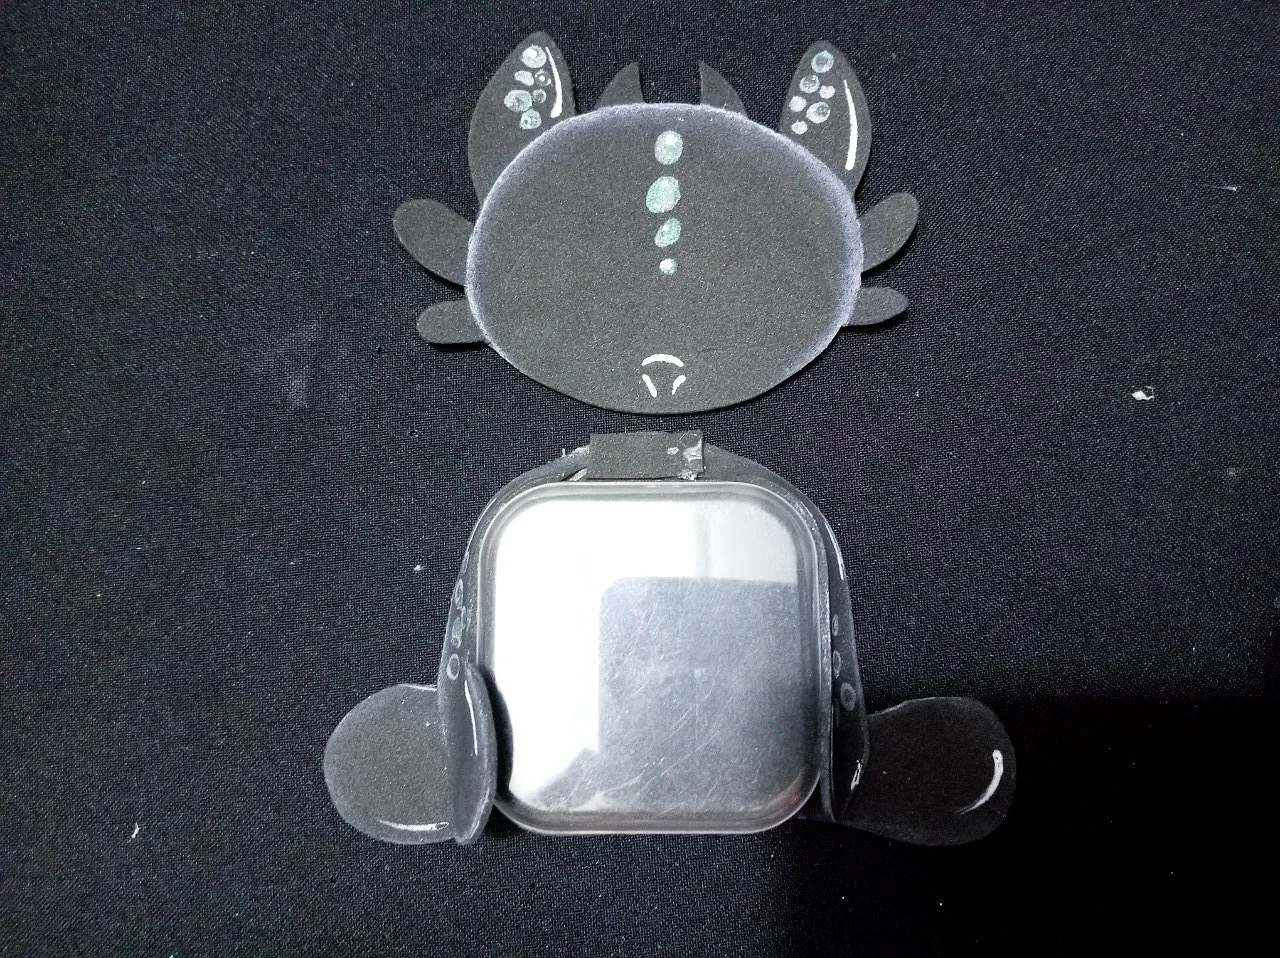
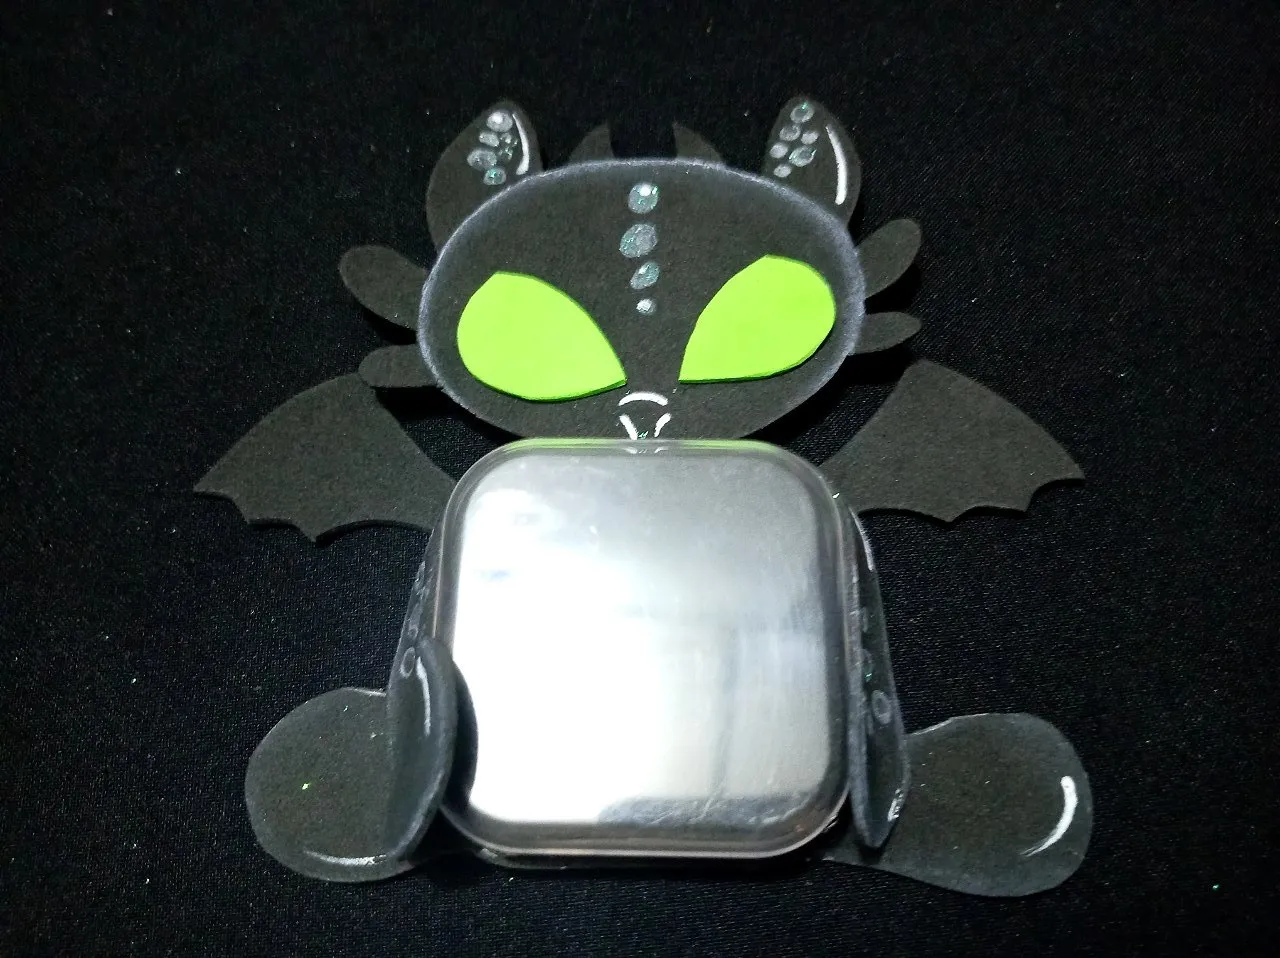
Paso 4: Toma la caja de los audífonos y pega un trozo cuadrado de Foami negro en su interior para tapar los orificios y la parte blanca. Luego, pega esta caja en el cuerpo del dragón, justo en la zona de la panza. Para finalizar este paso, pega una tira de Foami negro de aproximadamente 1 cm alrededor del borde blanco de la caja, asegurándote de no pegarla a la tapa transparente.
 |  |  |
|---|
 |  |
|---|---|
 |  |
Paso 5: Ensamblaje del dragón
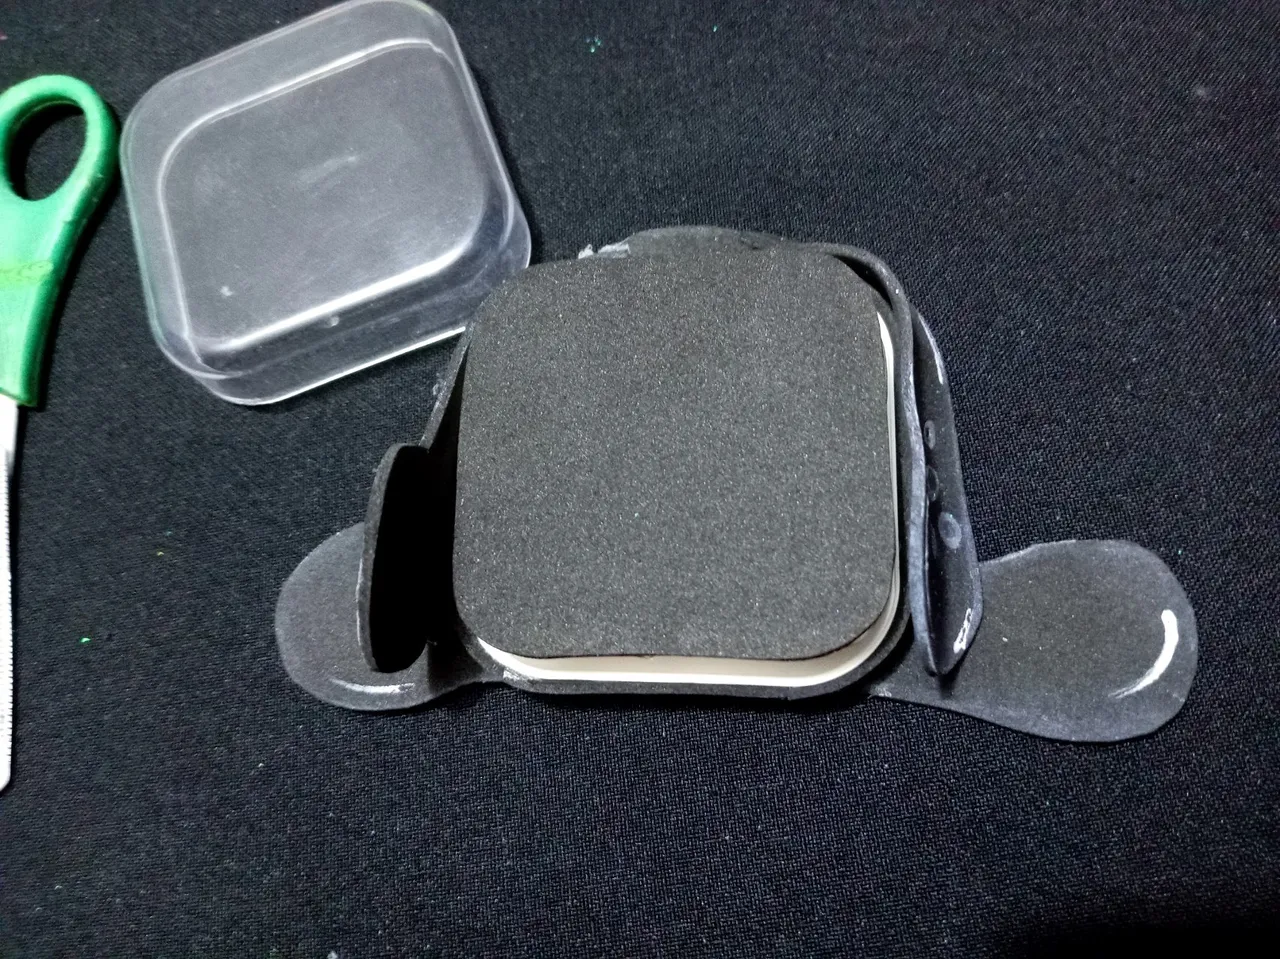
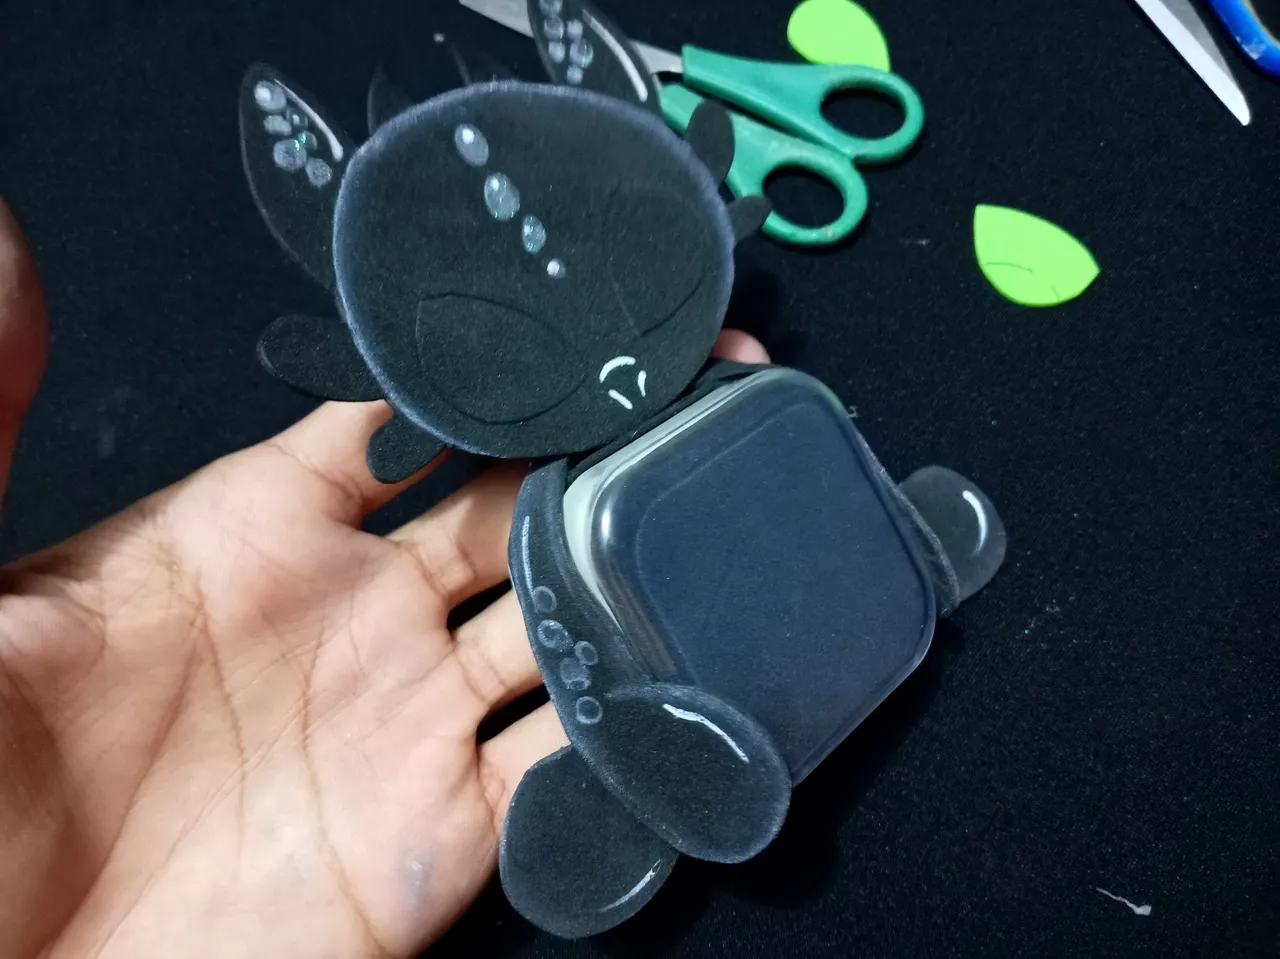
Ahora que tenemos la caja pegada, es hora de ensamblar el resto del cuerpo. Primero, pegamos los brazos alrededor de la caja, fijándolos a la base del cuerpo del dragón (es importante que no los pegues a la tapa transparente). Después, pega la cabeza.
 |  |
|---|---|
 |  |
Paso 6: Creación de los ojos
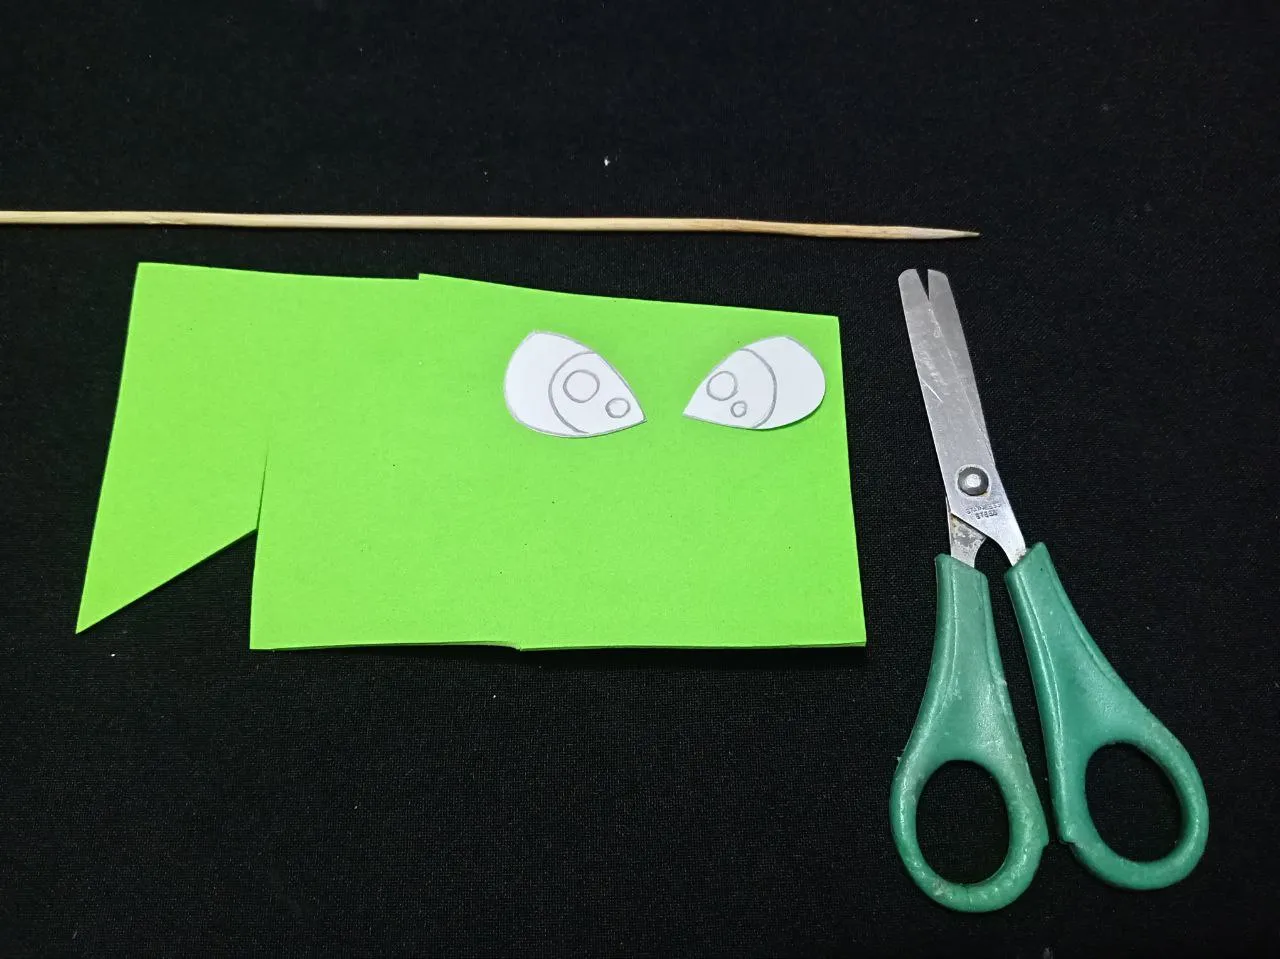
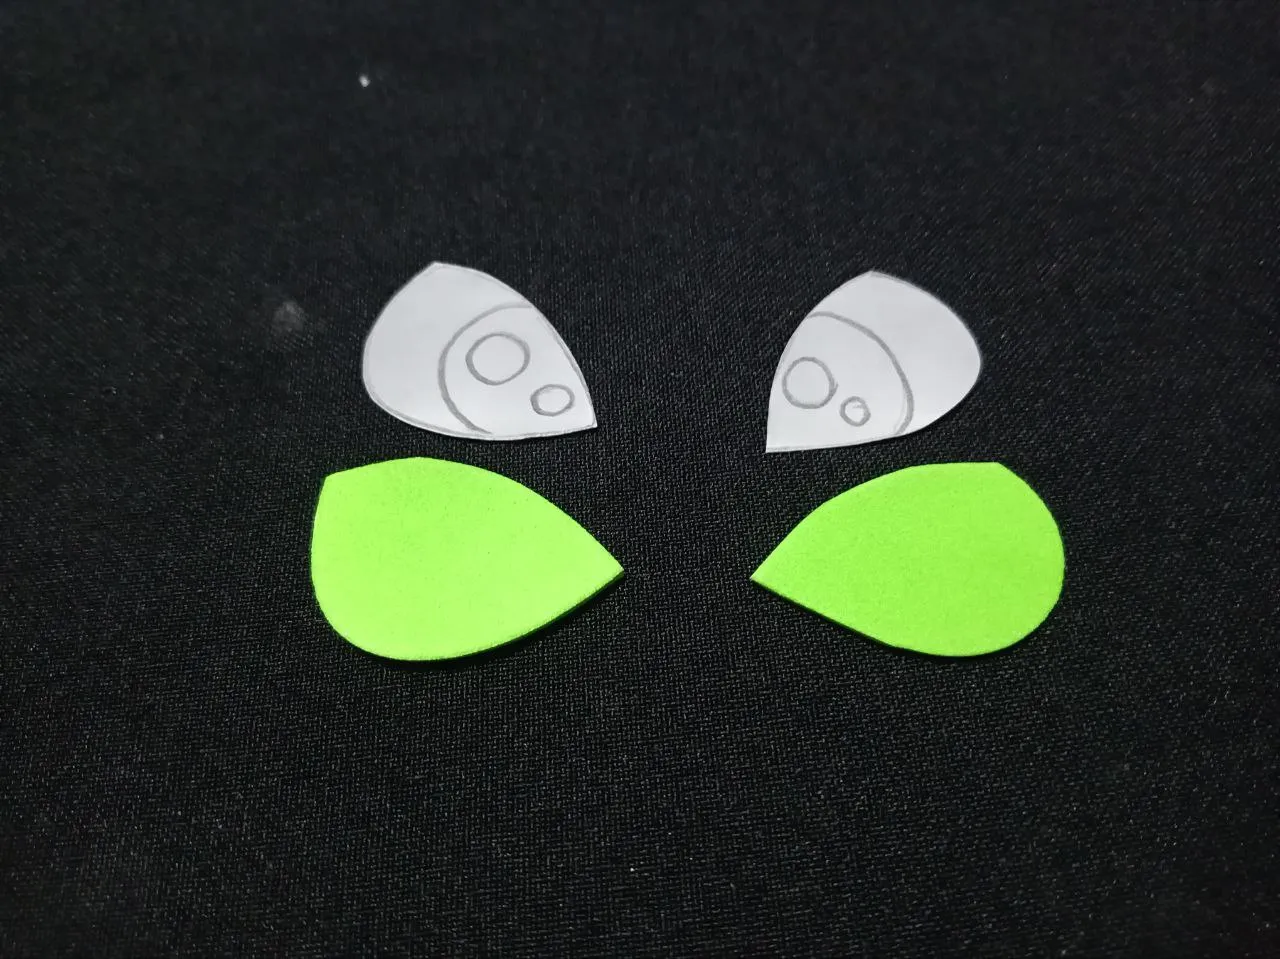
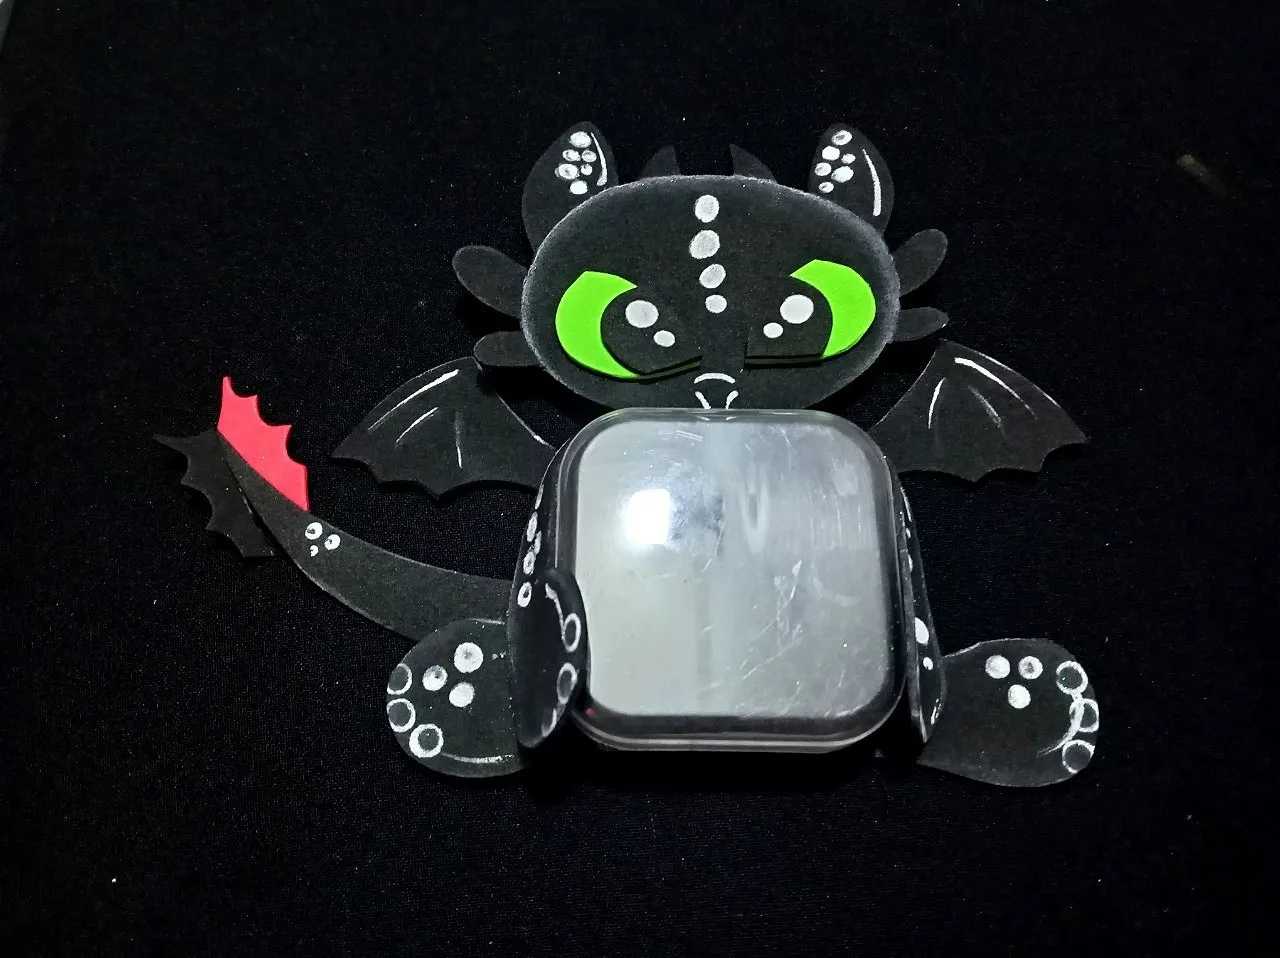
Usando el mismo patrón de la cara, marca y recorta los ojos en Foami de color verde. Después, recorta las pupilas de Foami negro y pégalas sobre los ojos verdes. Con un poco de pintura blanca, añade puntos de brillo a cada ojo para darles vida. Finalmente, pega los ojos terminados en la cara del dragón.
Para la cola, recorta dos piezas de Foami en forma de aleta, una de color rojo y otra de color negro. Pégalas en el extremo de la cola del dragón para completar la creación.
 |  |
|---|---|
 |  |
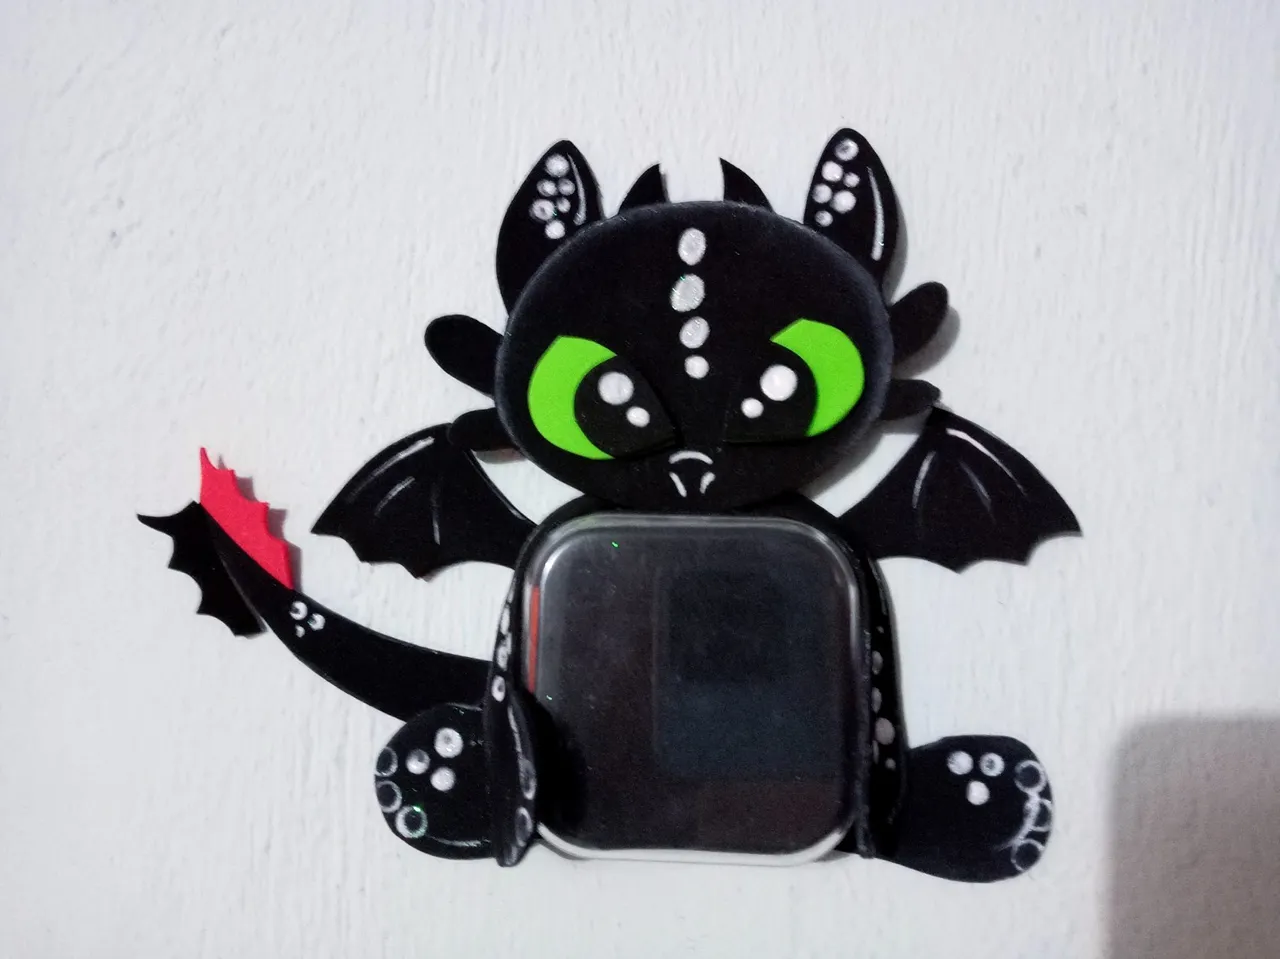
Y así queda nuestro mini porta retrato inspirado en el dragón Chimuelo. Este diseño puede servirte mucho como una pieza decorativa, aún más si te gusta la película o coleccionas objetos de este tipo.
Espero se animen a realizarlo y este tutorial les sea de gran utilidad.
¡Nos vemos en la próxima!
English
Click Here
Greetings, craft lovers!
Who doesn't love dragons? I've always had a deep appreciation for these magical creatures, and this time I'm sharing a tutorial for making a mini picture frame, inspired by the movie "How to Train Your Dragon" and the character "Toothless," who is a "dark fire" dragon.
I hope you like it.
Materials
- Pencil, Eraser.
- Scissors.
- Hot glue gun or cold glue.
- Black foam.
- Green foam.
- Red foam (for the tail).
- White paint.
- Fine-tip paintbrush.
- Audio box.
| |
|---|
Step 1: To start, find a reference image of the dragon you like best online. For this design, I used this image from Pinterest. Based on that image, draw a sketch. In this case, we'll modify the dragon's body to adapt it to the design we have in mind. Once you have the final drawing, cut out each of the pieces to use as patterns.
| | |
|---|
Step 2: Take the main Foami, which is black. Using a pencil or a skewer, trace the outline of each pattern onto the material. Then, using scissors, cut out all the pieces you drew: the body, head, wings, and arms.
| | |
|---|
Step 3: Details and Decoration
Before assembling the pieces, it's time to decorate them. Using a fine brush and white paint, add highlights to each piece and draw the scales as shown in the reference image.
| |
|---|
Step 4: Take the headphone box and glue a square piece of black foam inside to cover the holes and the white part. Next, glue this box to the dragon's body, right in the belly area. To finish this step, glue a strip of black foam, approximately 1 cm long, around the white edge of the box, making sure not to glue it to the clear lid.
| |
|---|
| | |
|---|
| |
|---|---|
| |
Step 5: Assembling the dragon
Now that we have the box glued together, it's time to assemble the rest of the body. First, glue the arms around the box, securing them to the base of the dragon's body (it's important not to glue them to the clear lid). Then, glue the head.
| |
|---|
| |
|---|---|
| |
Step 6: Creating the Eyes
Using the same pattern as the face, mark and cut out the eyes from green foam. Next, cut out the pupils from black foam and glue them over the green eyes. Using a little white paint, add glitter dots to each eye to give them life. Finally, glue the finished eyes onto the dragon's face.
For the tail, cut out two fin-shaped pieces from foam, one red and one black. Glue them to the end of the dragon's tail to complete the creation.
| |
|---|---|
| |
And so it is, our mini picture frame inspired by the dragon Toothless. This design can be very useful as a decorative piece, even more so if you like the movie or collect objects of this type.
I hope you're inspired to try it and that this tutorial is very useful.
See you next time!