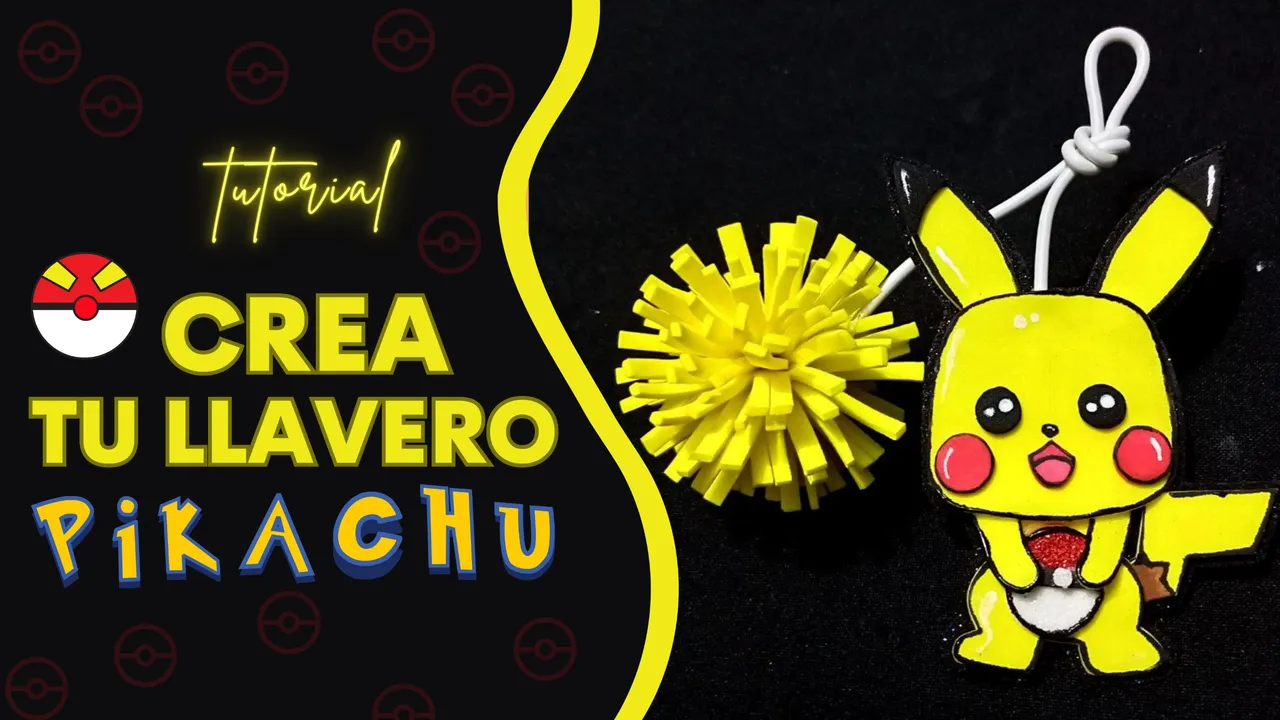
¡Hola amantes de las manualidades!
Tenía mucho tiempo ideando una forma de crear un llavero con la temática de Pokémon, y sobre todo, inspirado en mi personaje favorito "Pikachu". La universidad no me permitía tener tiempo libre para organizar mis ideas, pero, ya que estoy más libre, decidí retornar a mi blog para seguir compartiendo con ustedes mis ideas, y que puedan ponerlas en práctica.
Hoy aprenderás a hacer un llavero de Pikachu sencillo, con materiales que puedes tener en casa. ¡Espero les guste!
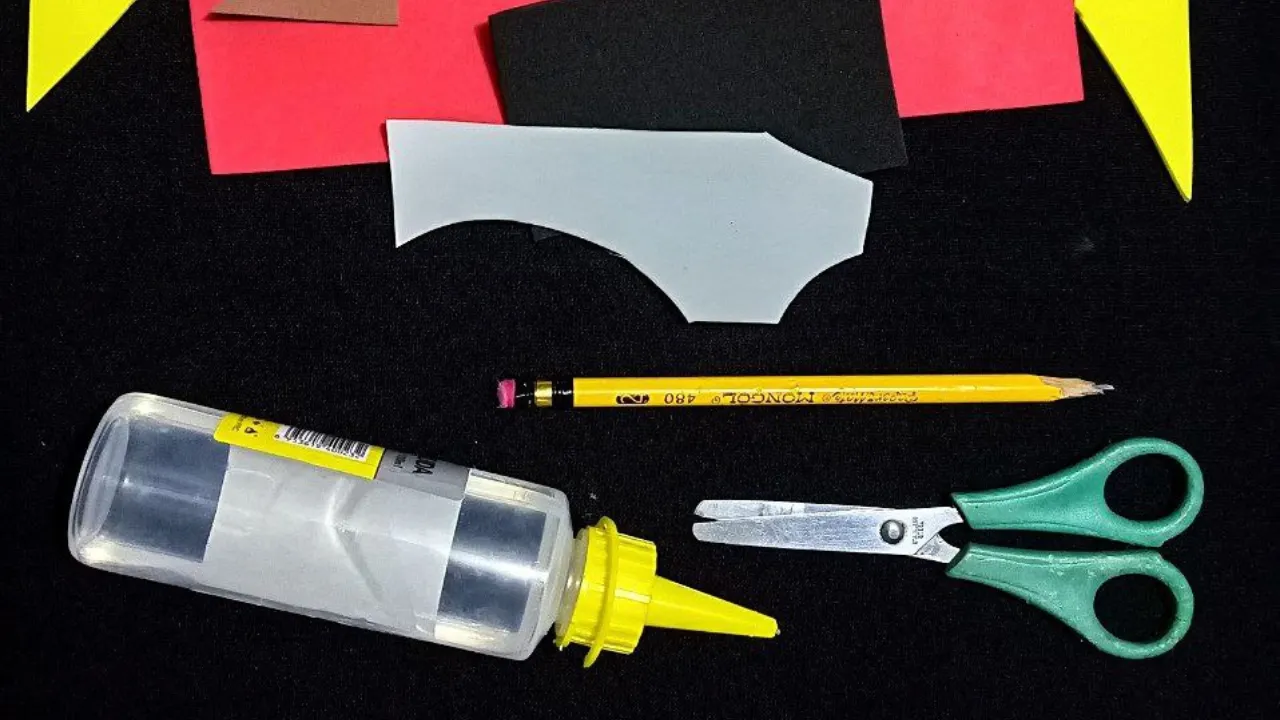
Materiales
- Foamys color ( amarillo, rojo, negro, marrón)
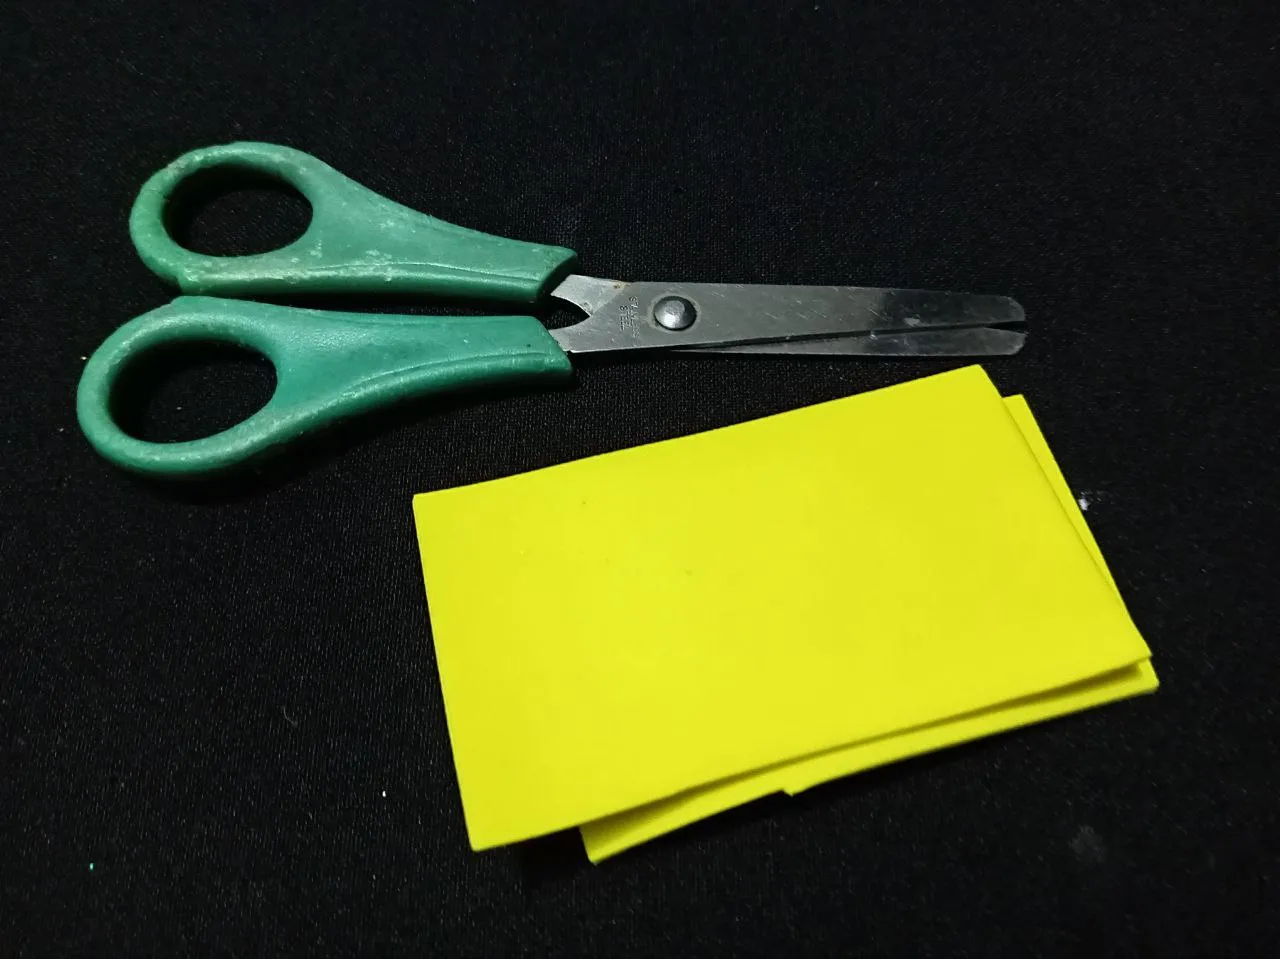
- Silicon líquido o pistola.
- Tijeras.
- Lápiz.
- Hoja de papel.
- cinta, cuerda o en este caso un trozo de cable blanco.
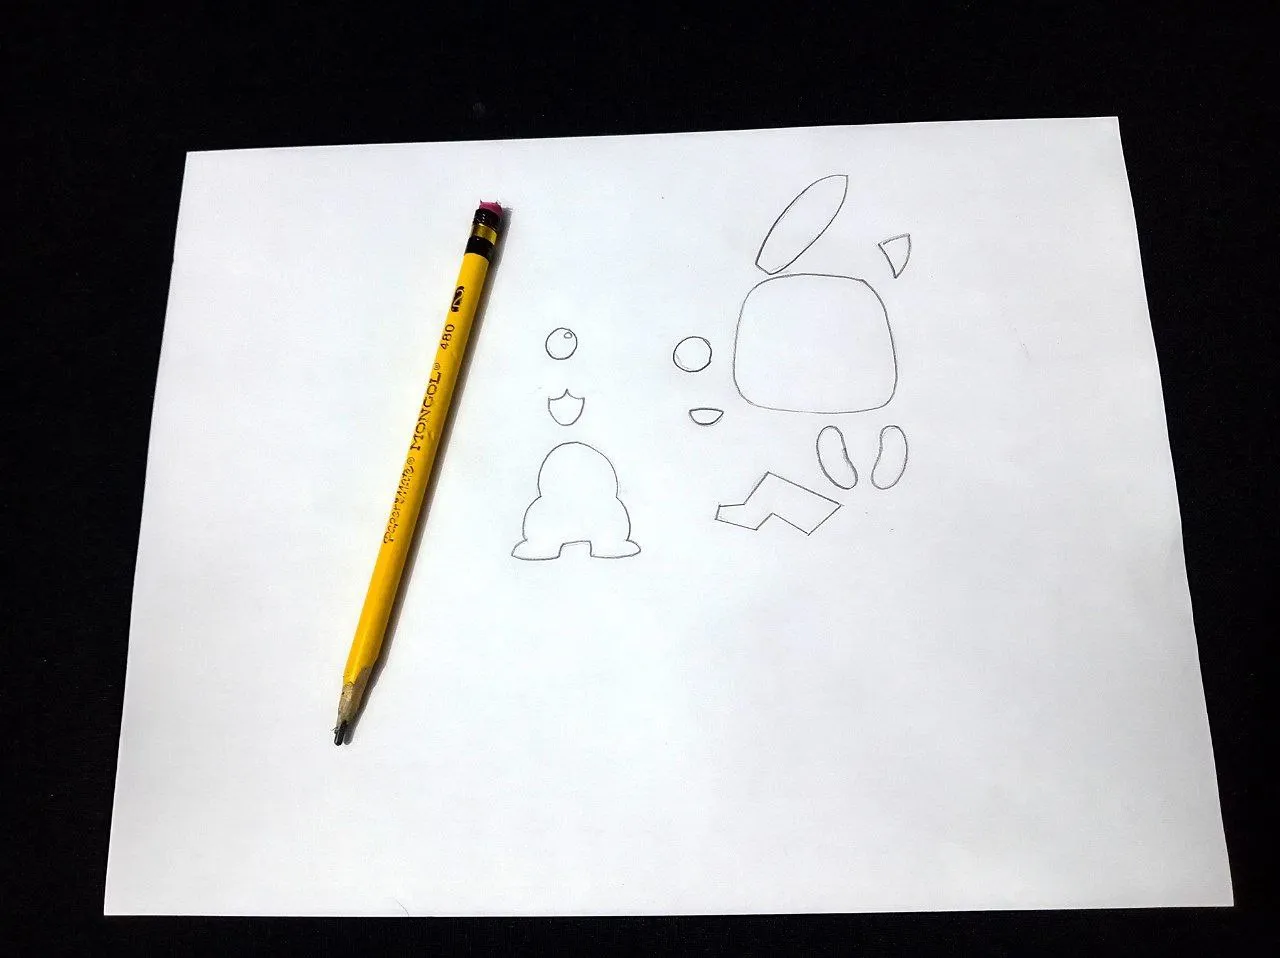
Iniciamos realizando el boceto.
Primero buscamos una referencia de imágenes de Pikachu, el que más nos guste, y en diferentes poses: su forma, sus orejas puntiagudas, sus mejillas redondas y su cola en zigzag. Seguidamente, en una hoja de papel, comenzamos a dibujar a Pikachu. No te preocupes por la perfección, concéntrate en las formas básicas de nuestra referencia. La cabeza, orejas, cuerpo, manos, la cola, ojos, boca, mejillas y las puntas negras de las orejas. Para este diseño, usé esta referencia de Pinterest.
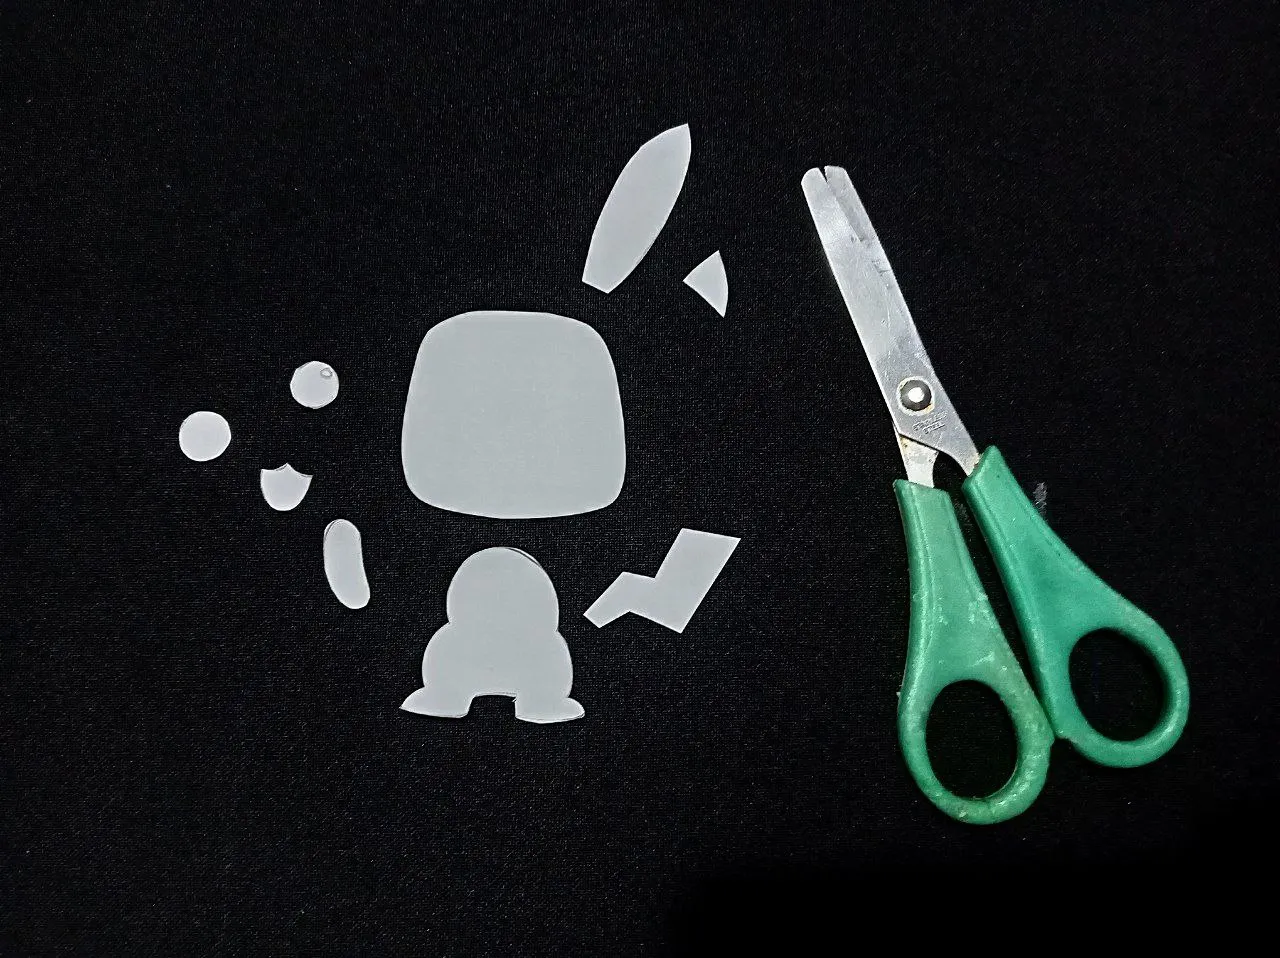
Preparación de los patrones
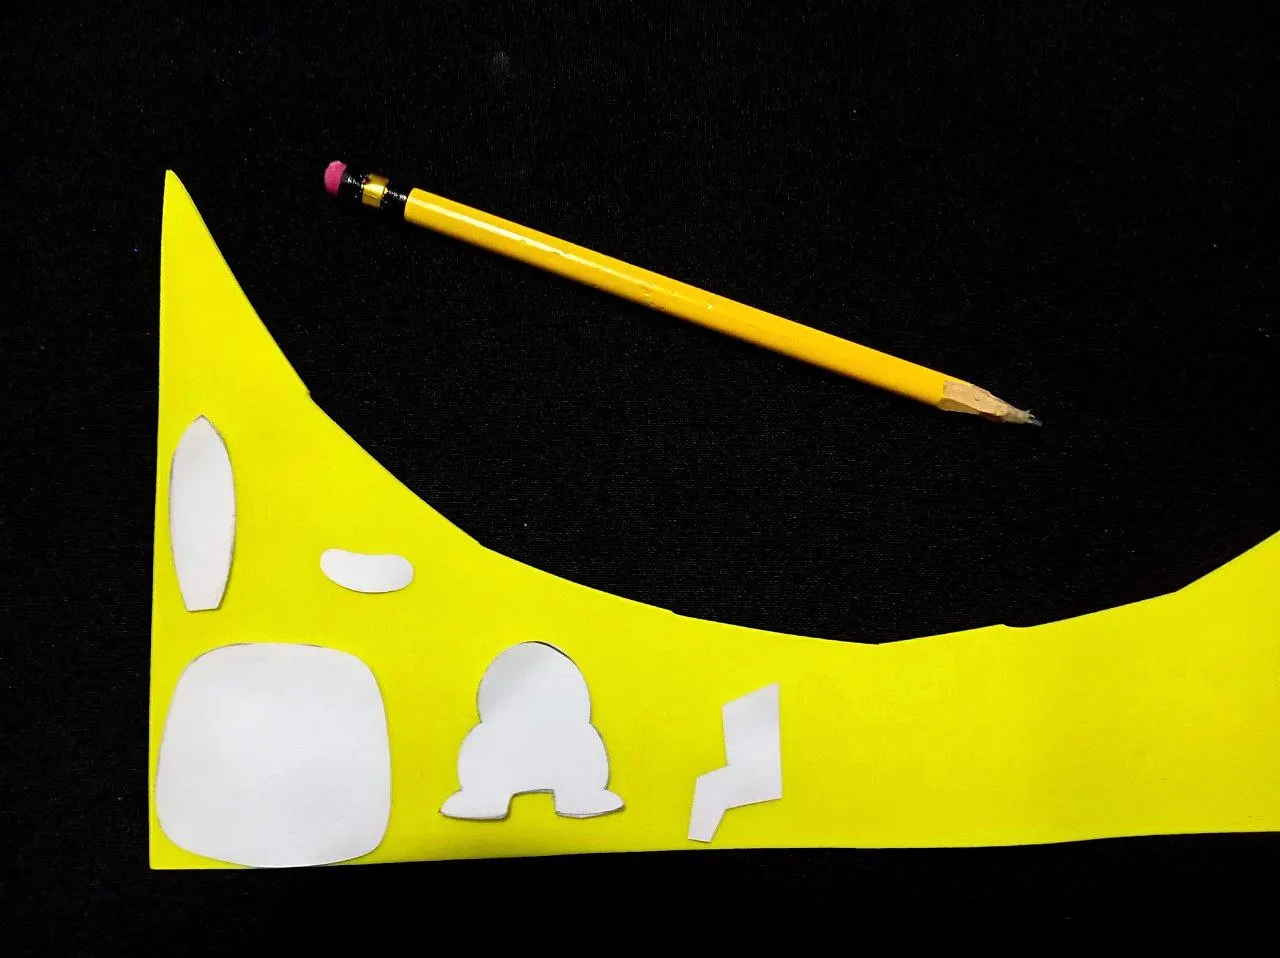
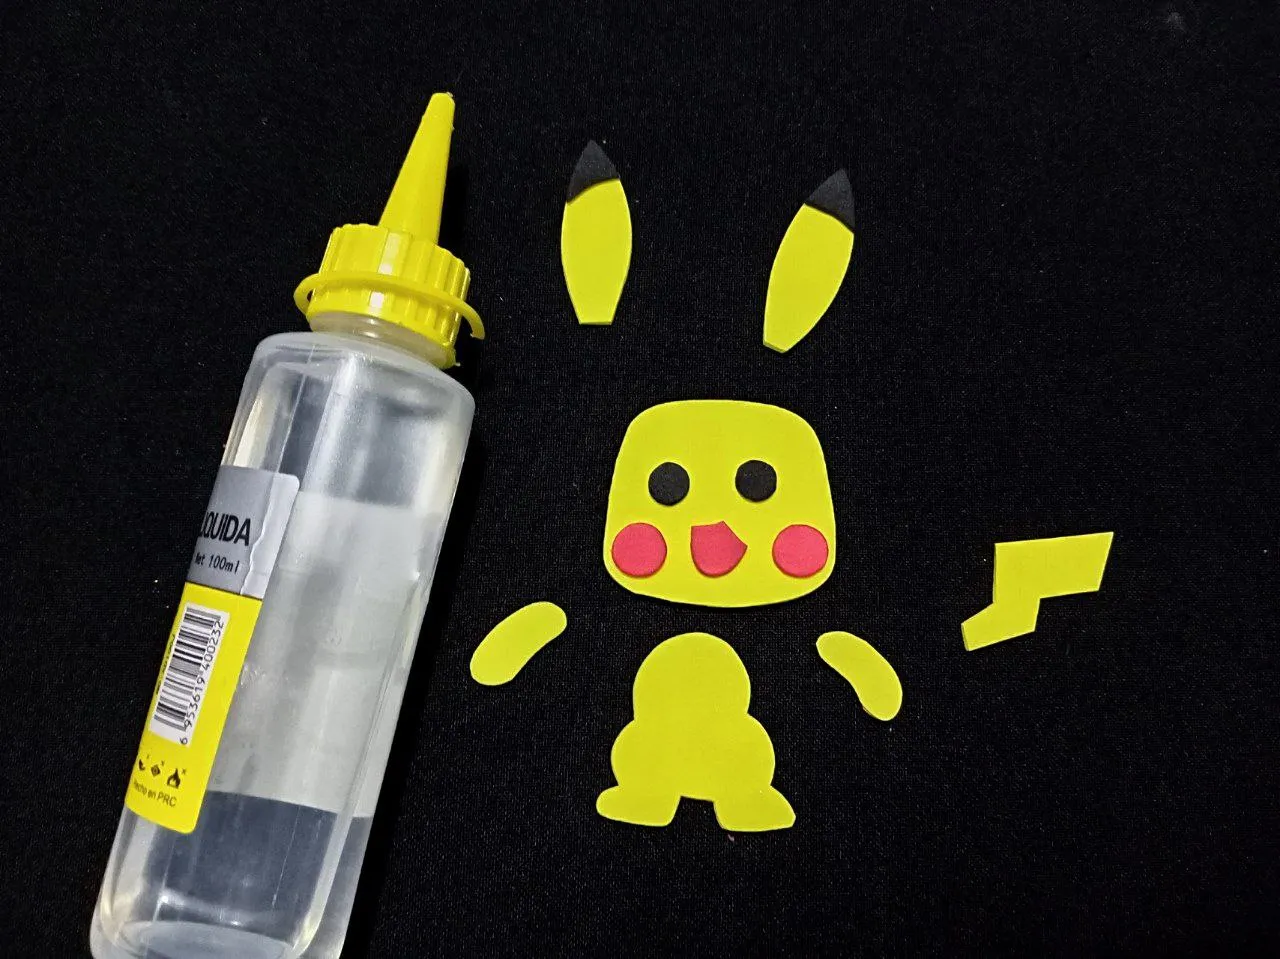
Una vez que tengamos los bocetos listos, ahora procedemos recortar cada una de las piezas. Seleccionamos el foamy. Este Pikachu necesitará principalmente los siguientes colores:
- Amarillo: Para el cuerpo principal, cabeza, orejas, brazos, y cola.
- Rojo: Para las mejillas.
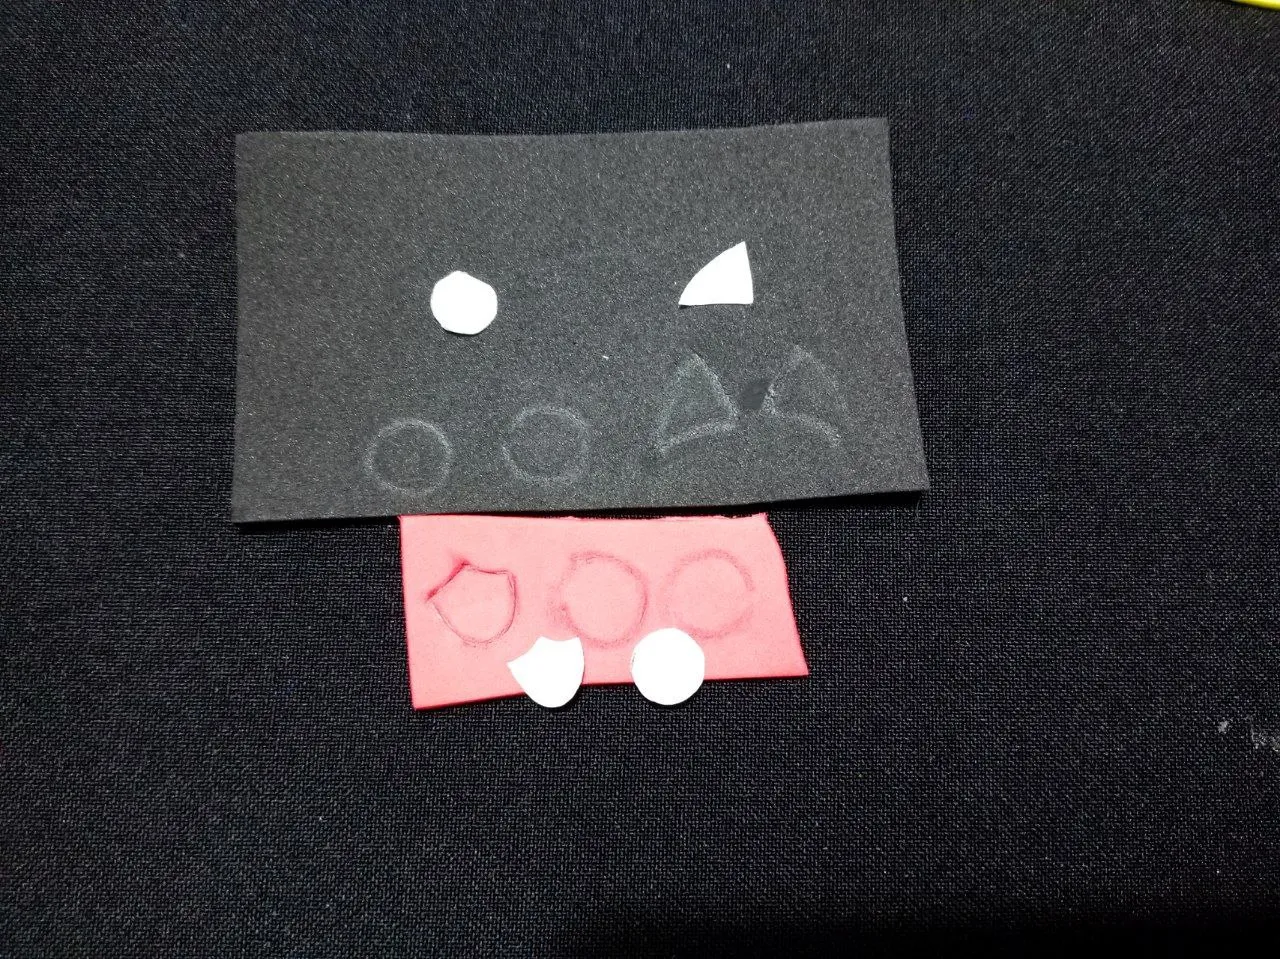
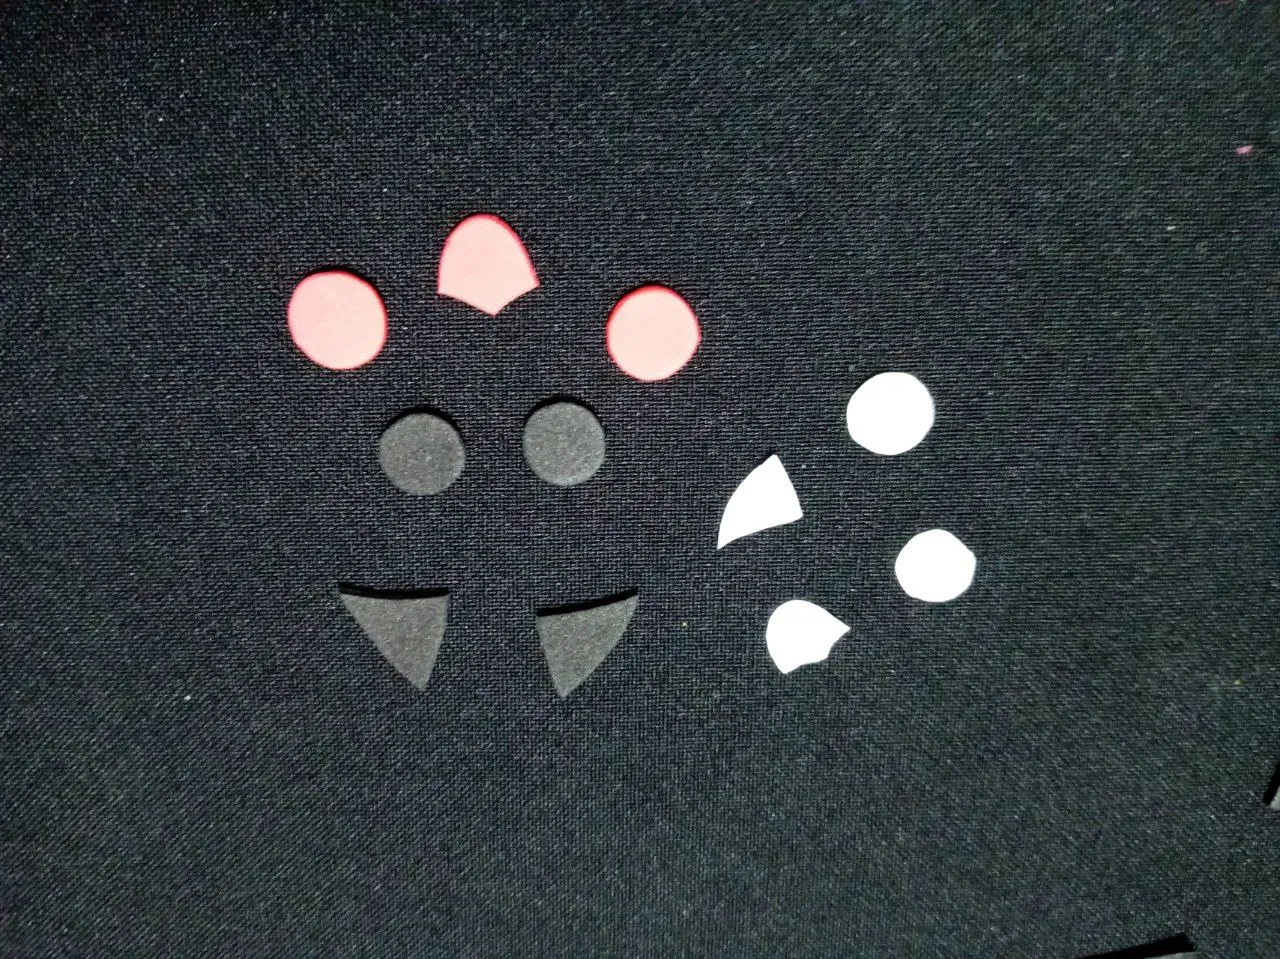
- Negro: Para los ojos, la nariz, y las puntas de las orejas.
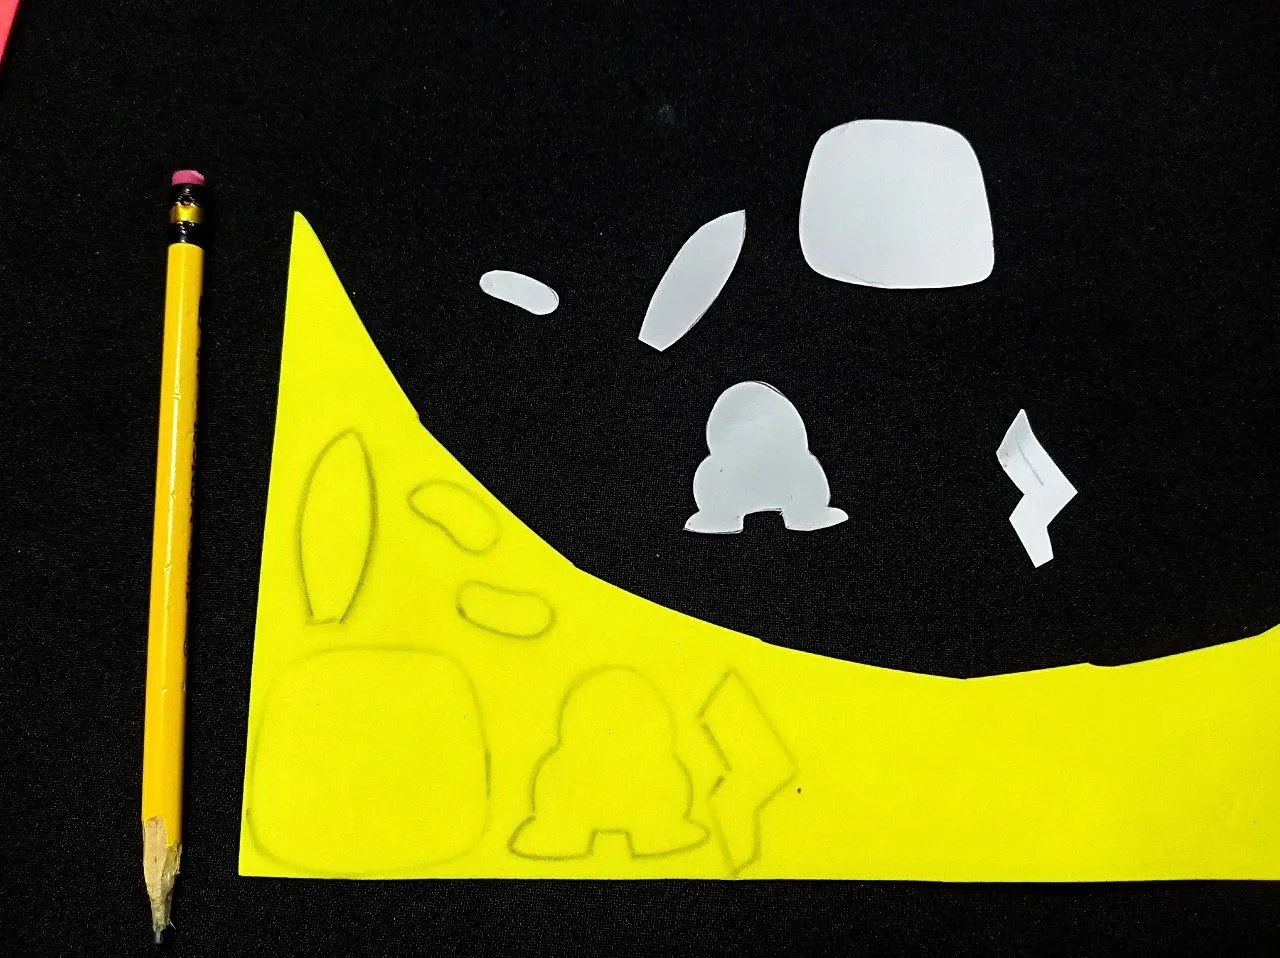
- Marrón: Para las franjas en la base de la cola (opcional, si quieres un Pikachu más detallado). Coloca tus moldes de papel sobre el foamy del color correspondiente. Con un lápiz o un palillo, traza suavemente el contorno de cada pieza sobre el foamy.
Con las tijeras afiladas, recorta cuidadosamente las piezas. Intenta que los bordes sean limpios y precisos.
 |  |  |  |
|---|
 |  |  |
|---|
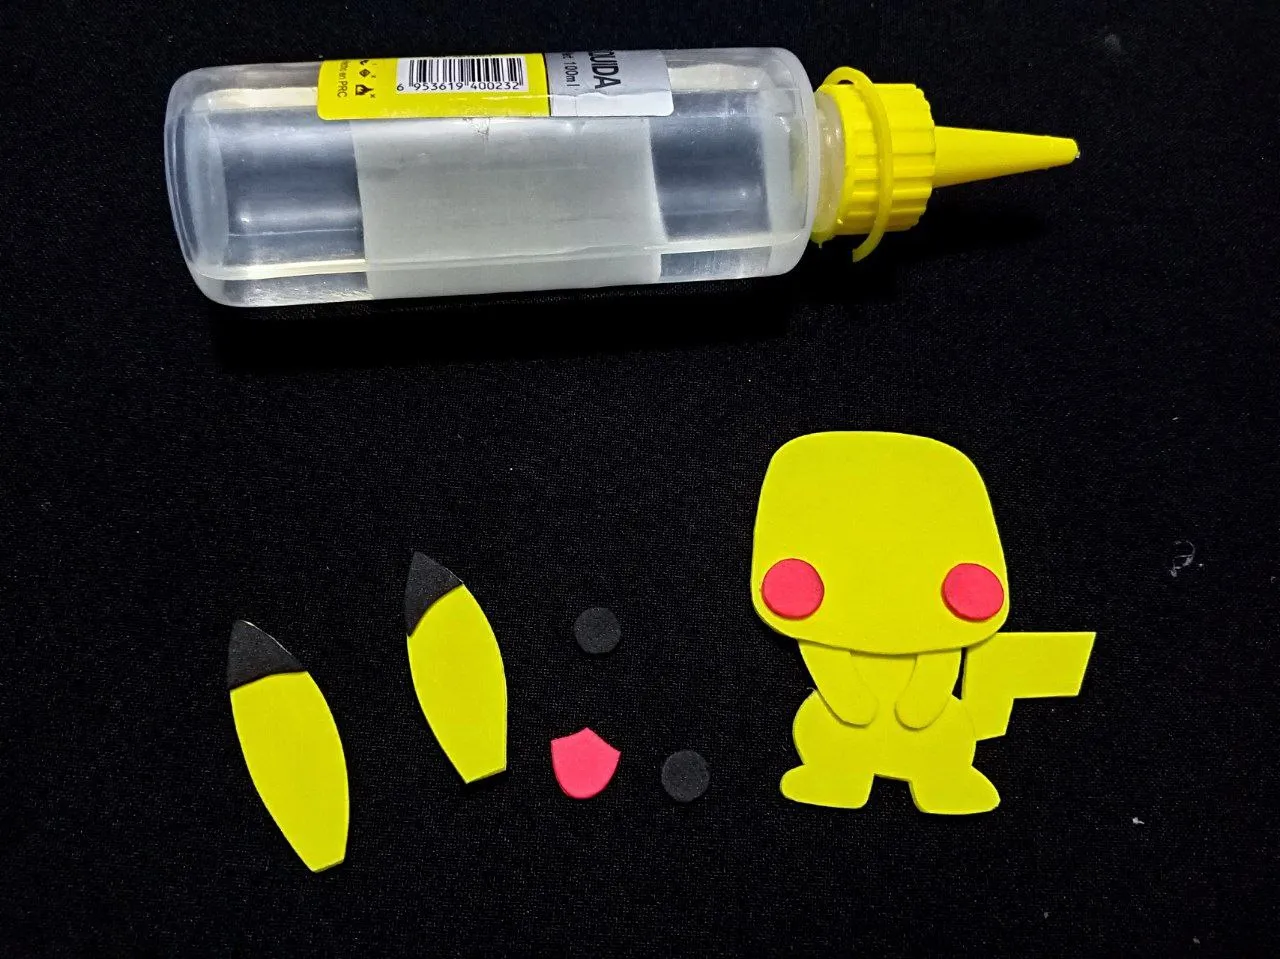
Unión de Piezas
Este es el momento de unir todas las piezas.
Antes de pegar, organizamos todas las piezas sobre la superficie plana para ver cómo encajan. Esto nos ayudará a visualizar el resultado y evitar errores.
Utilizamos el silicón líquido. Pegamos las piezas más grandes, previamente pegamos los brazos al cuerpo, luego la cabeza y finalmente la cola en zigzag al cuerpo. Los detalles faciales, Pegamos los círculos rojos de las mejillas, los ojos y la boca.
Pega las puntas negras en la parte superior de las orejas amarillas.
 |
|---|
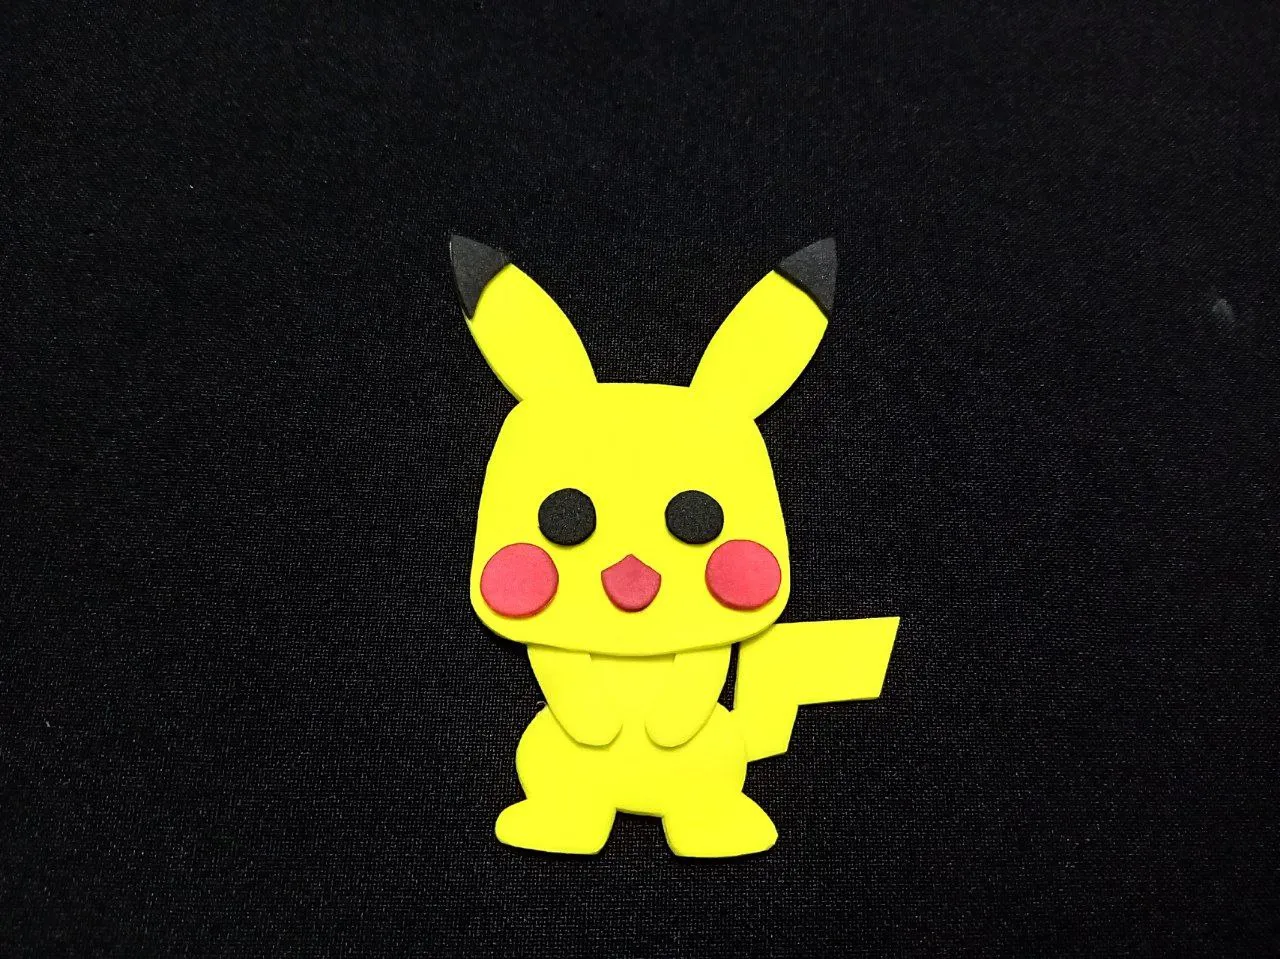
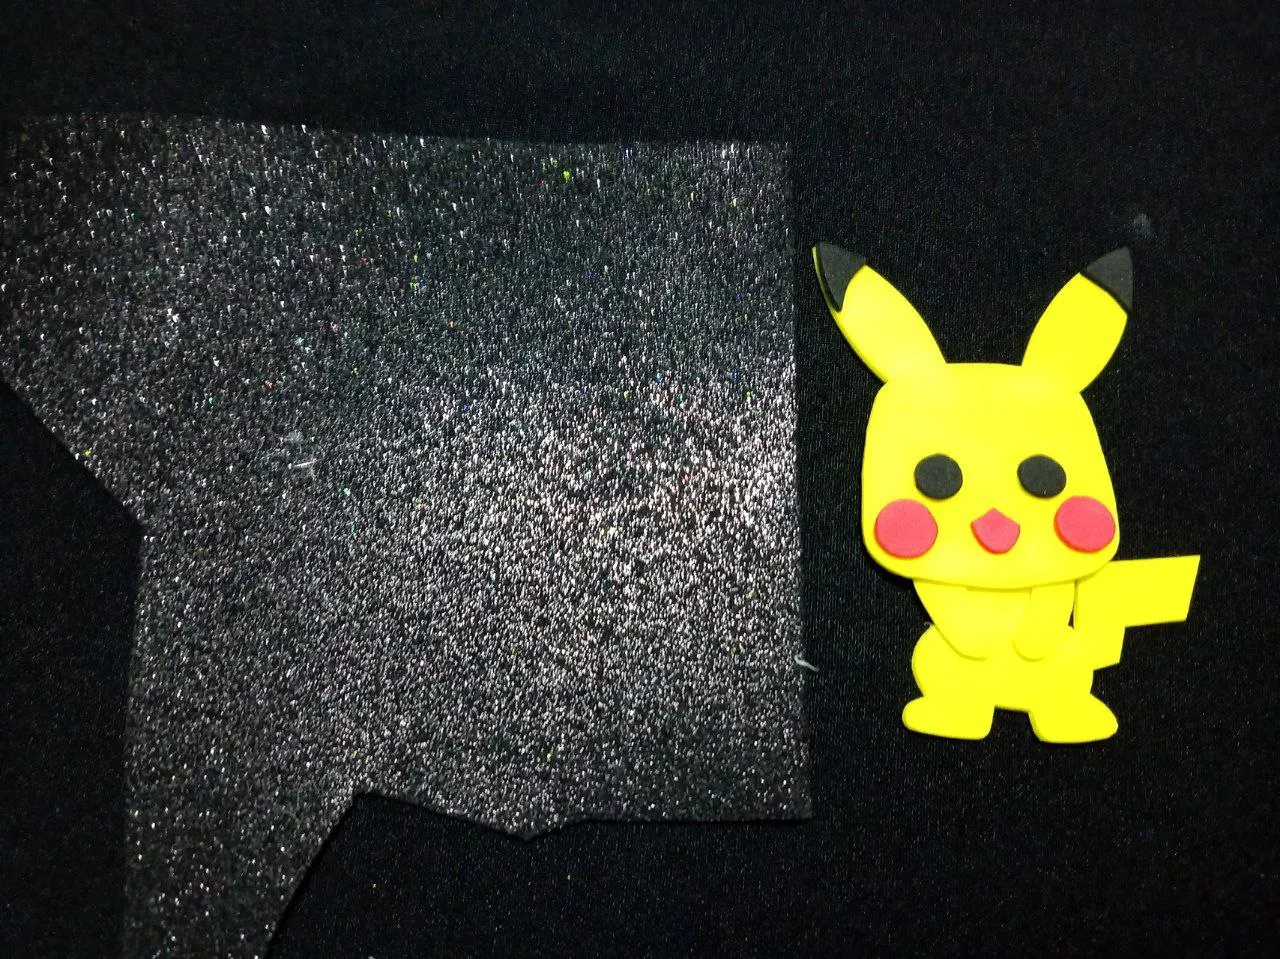
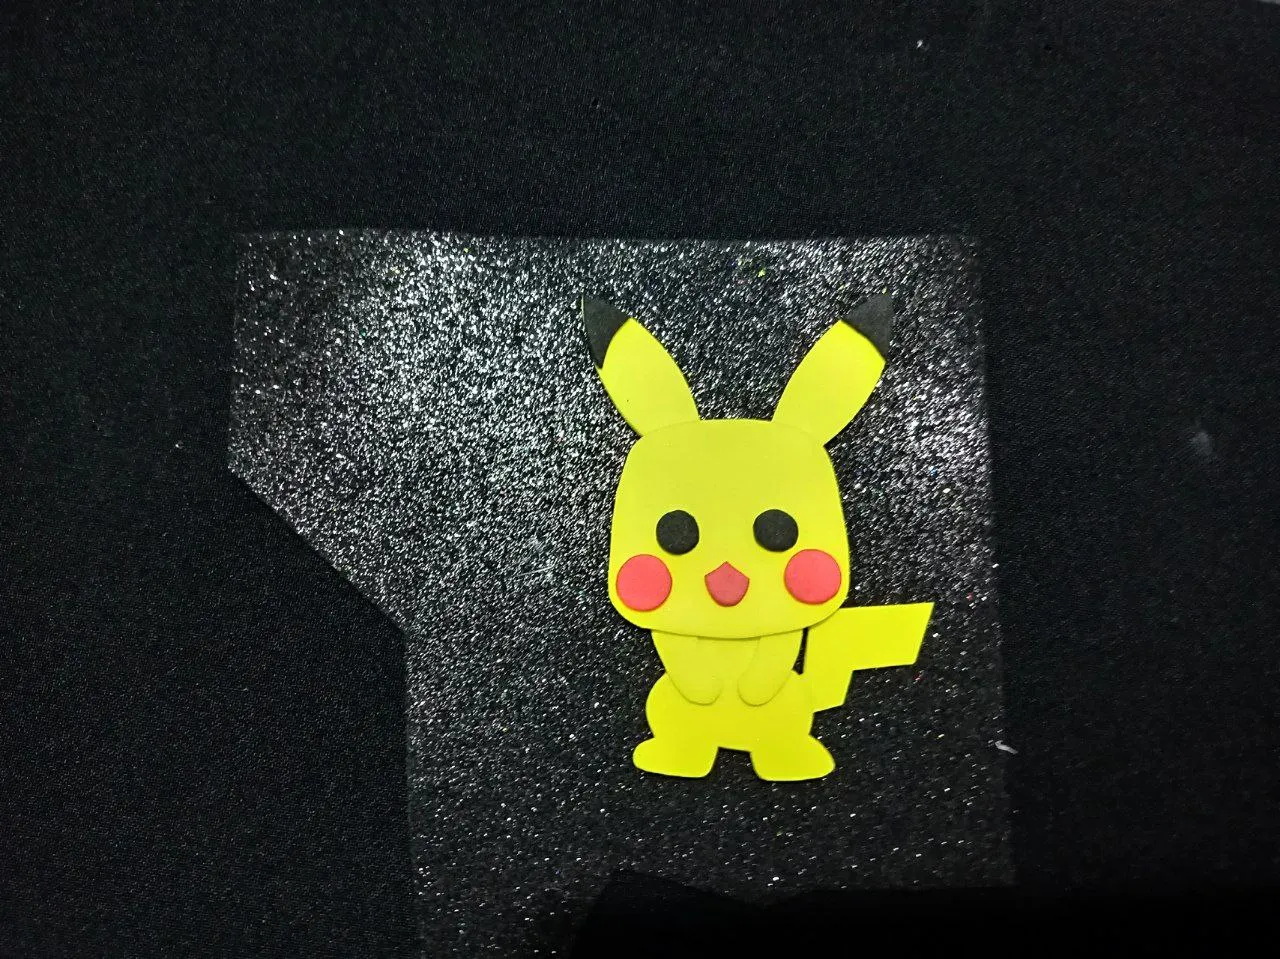
Ya con todas las piezas unidas del Pikachu, tomamos el foamys negro y lo pegamos. Así darle más resistencia y un borde para el realce de la figura. Cortamos dejando un margen de 0.5 cm.
 |  |  |
|---|---|---|
 |  |  |
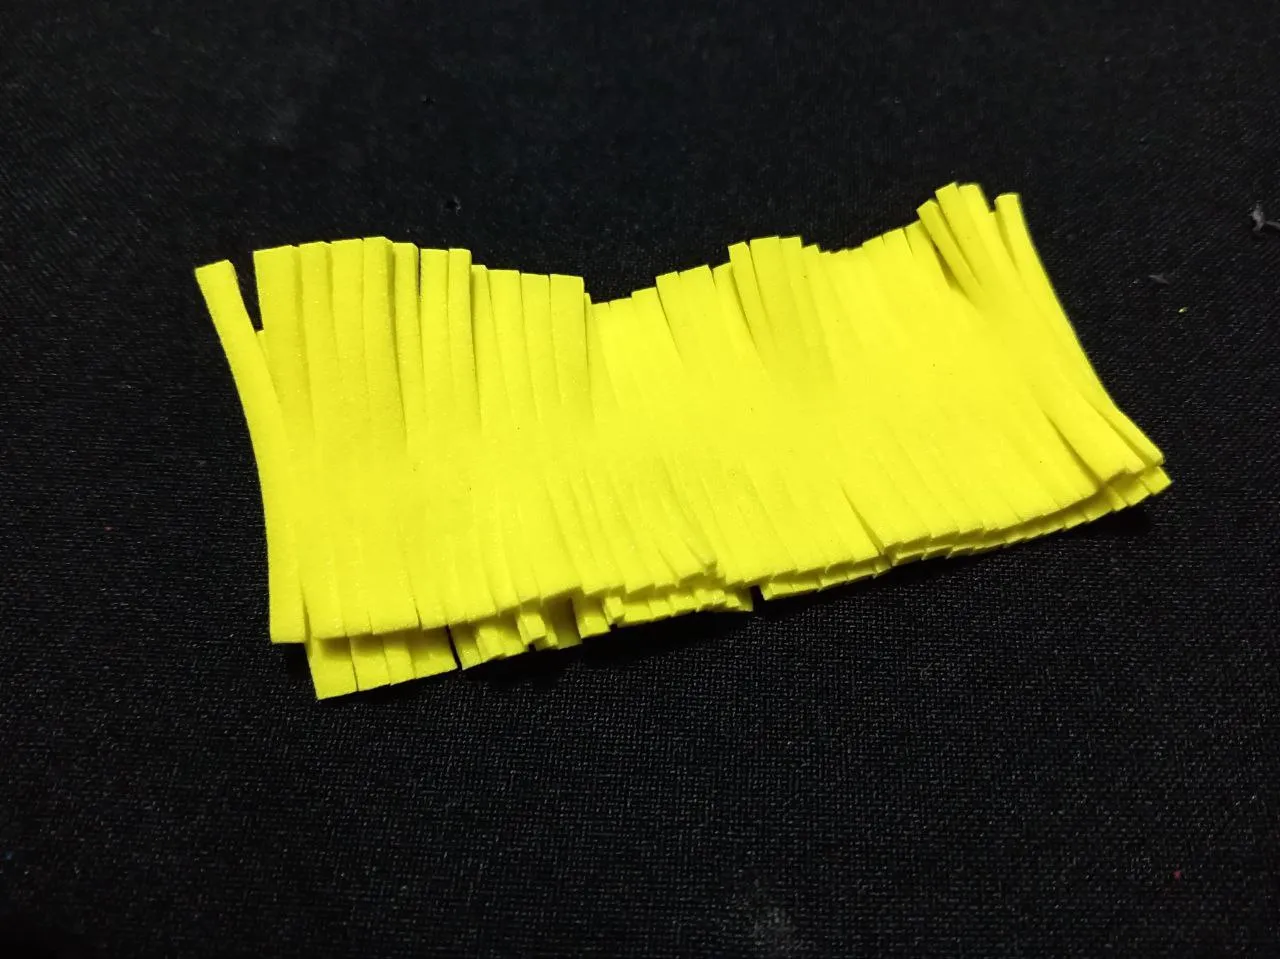
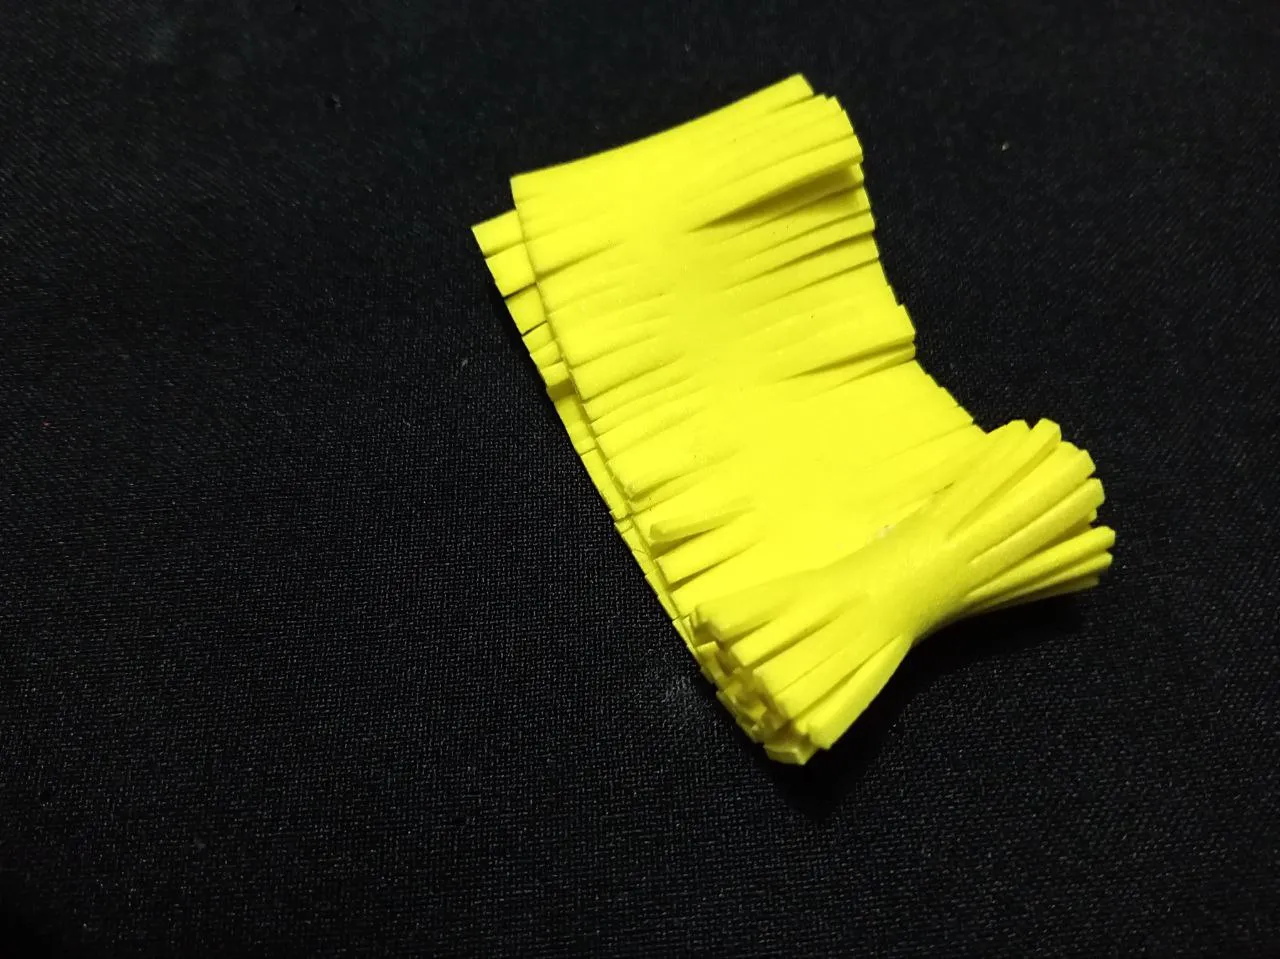
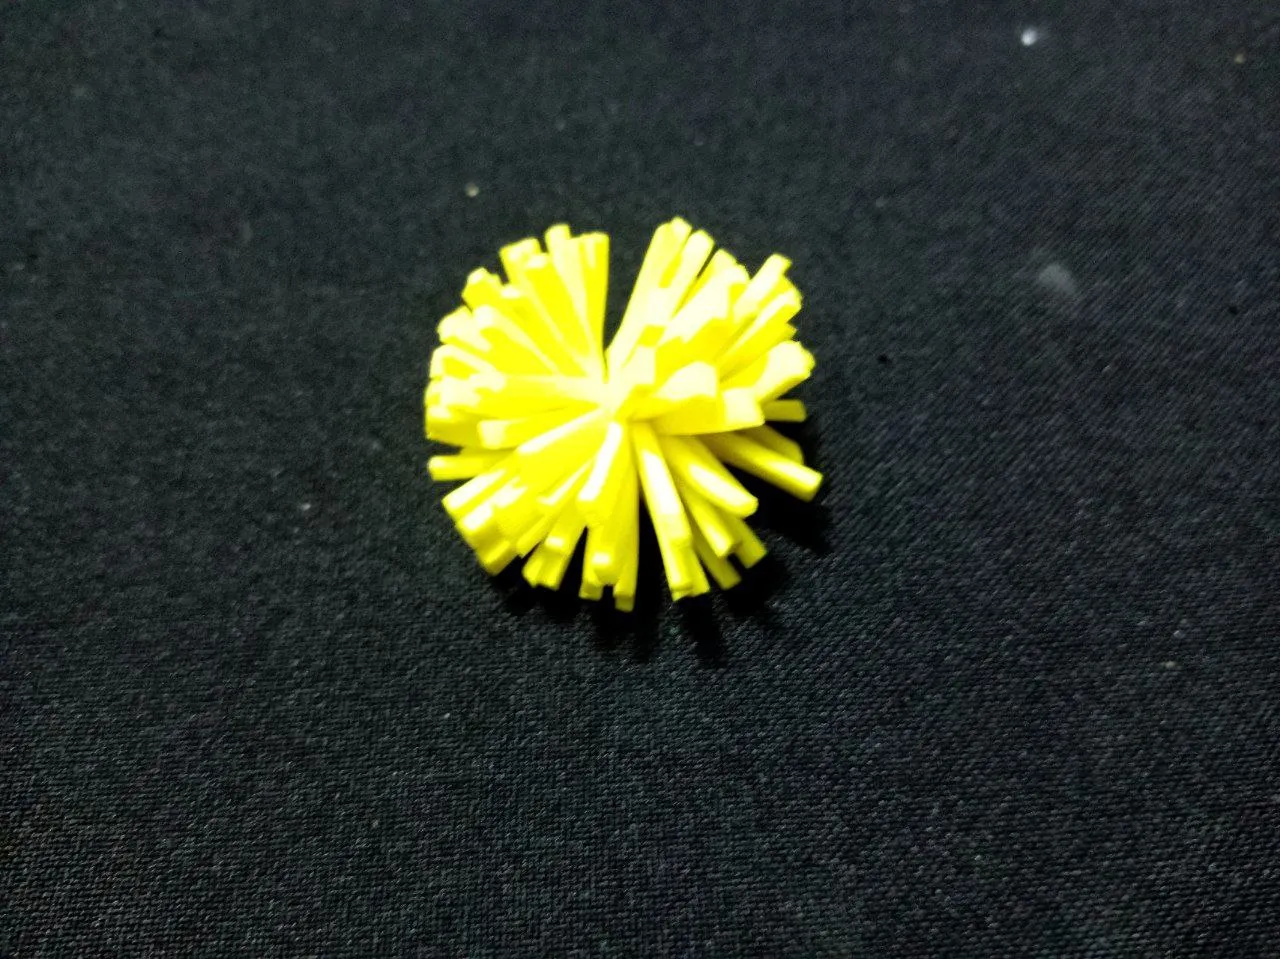
Para hacer el pompón, cortamos 2 tira de foamys amarillo de 8x5cm aproximadamente o a tu preferencia. Colocamos un foamys uno sobre el otro y con las tijeras hacemos cortes de ambos lados, hacia la mitad. Enrollamos las tiras de foamys y pegamos al terminar el rollo. Con una cinta o hilo colocamos a la mita de rollo del foamys cortado y hacemos un amarre con fuerza y quede apretado, hasta que el pompón se forme.
 |  |
|---|---|
 |  |
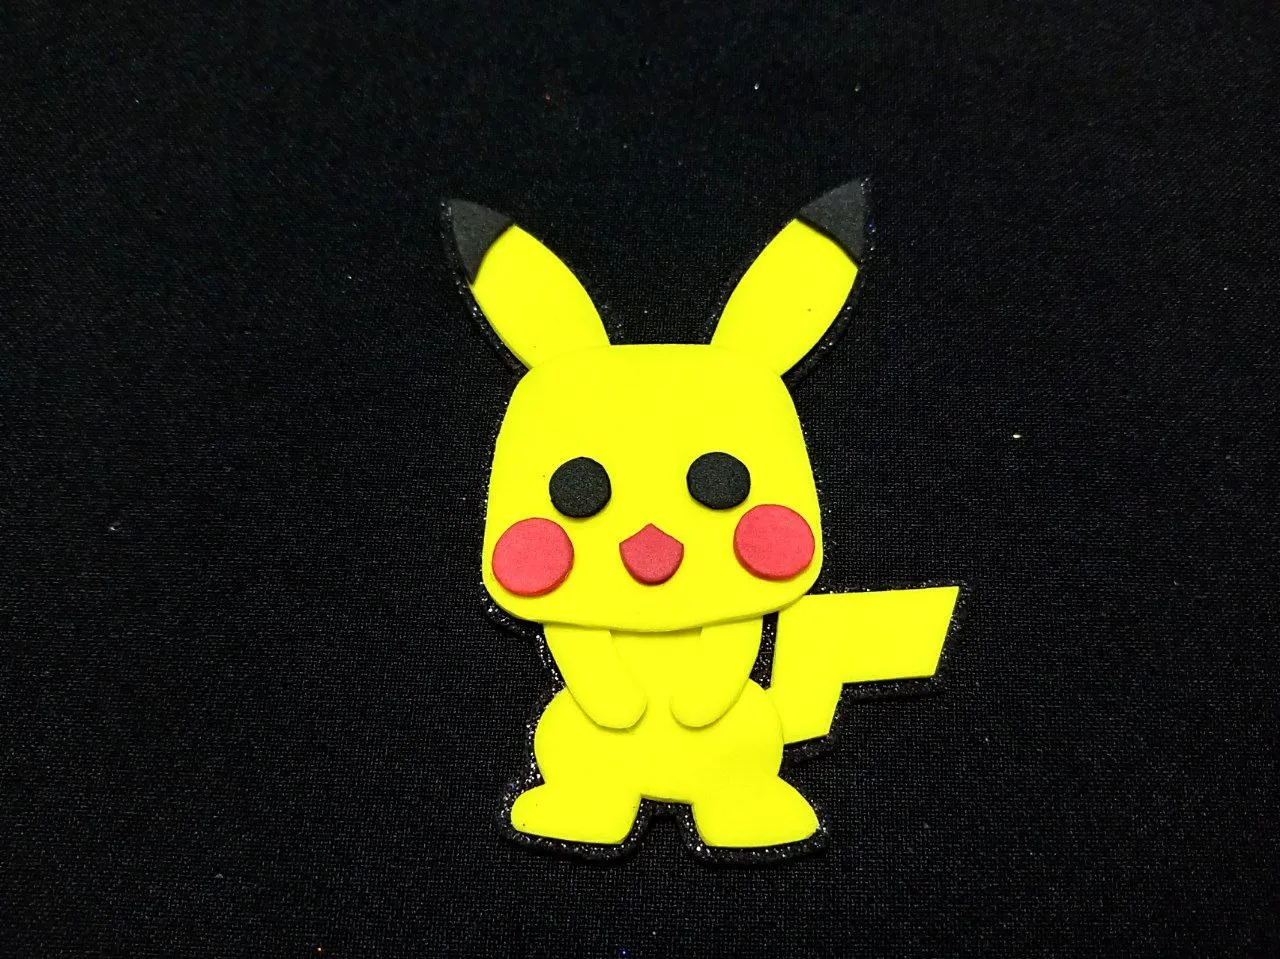
Le damos los últimos detalles a nuestra figura de Pikachu, con pintura, negra y blanca.
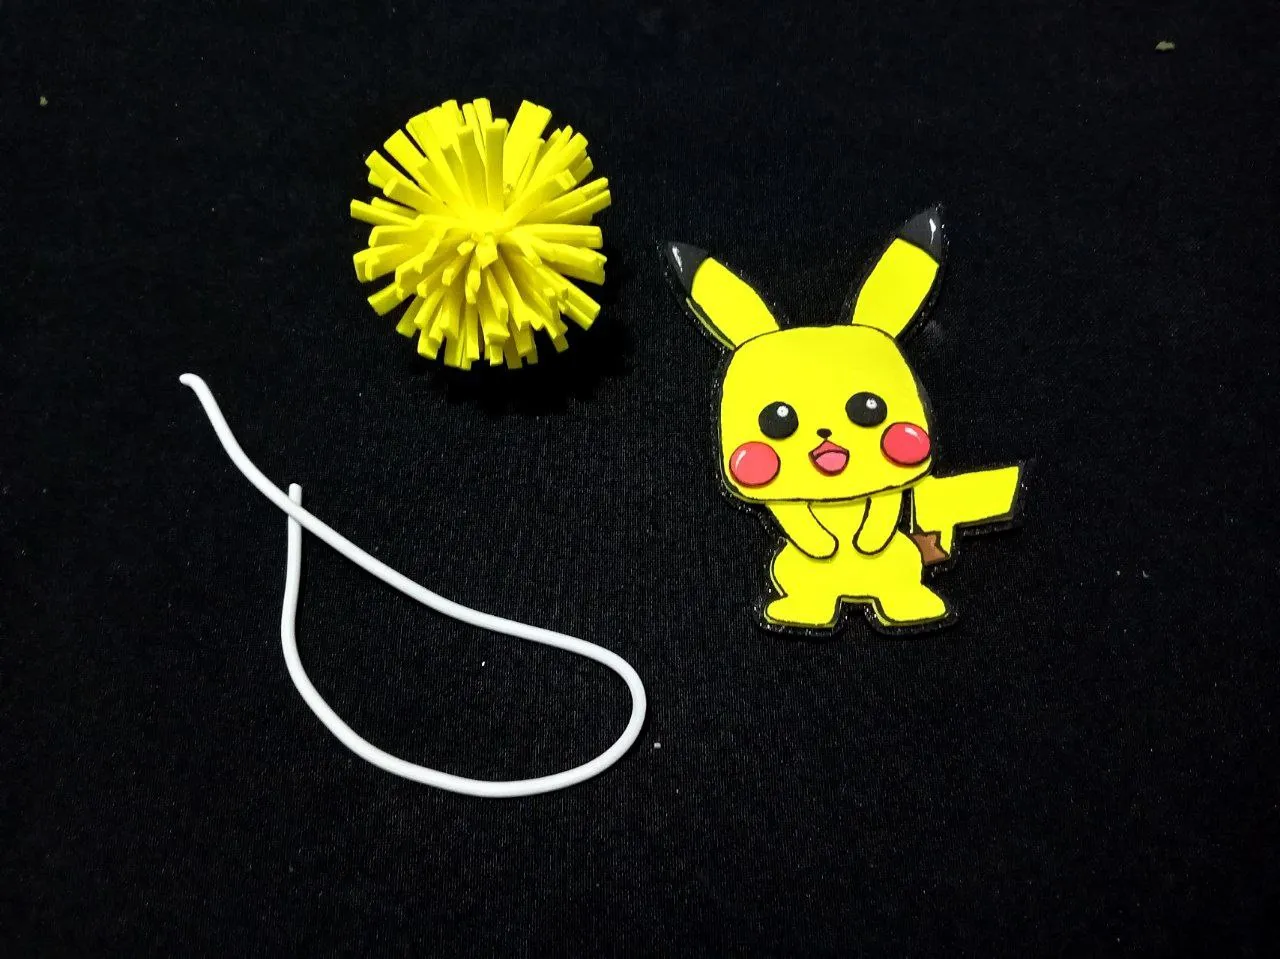
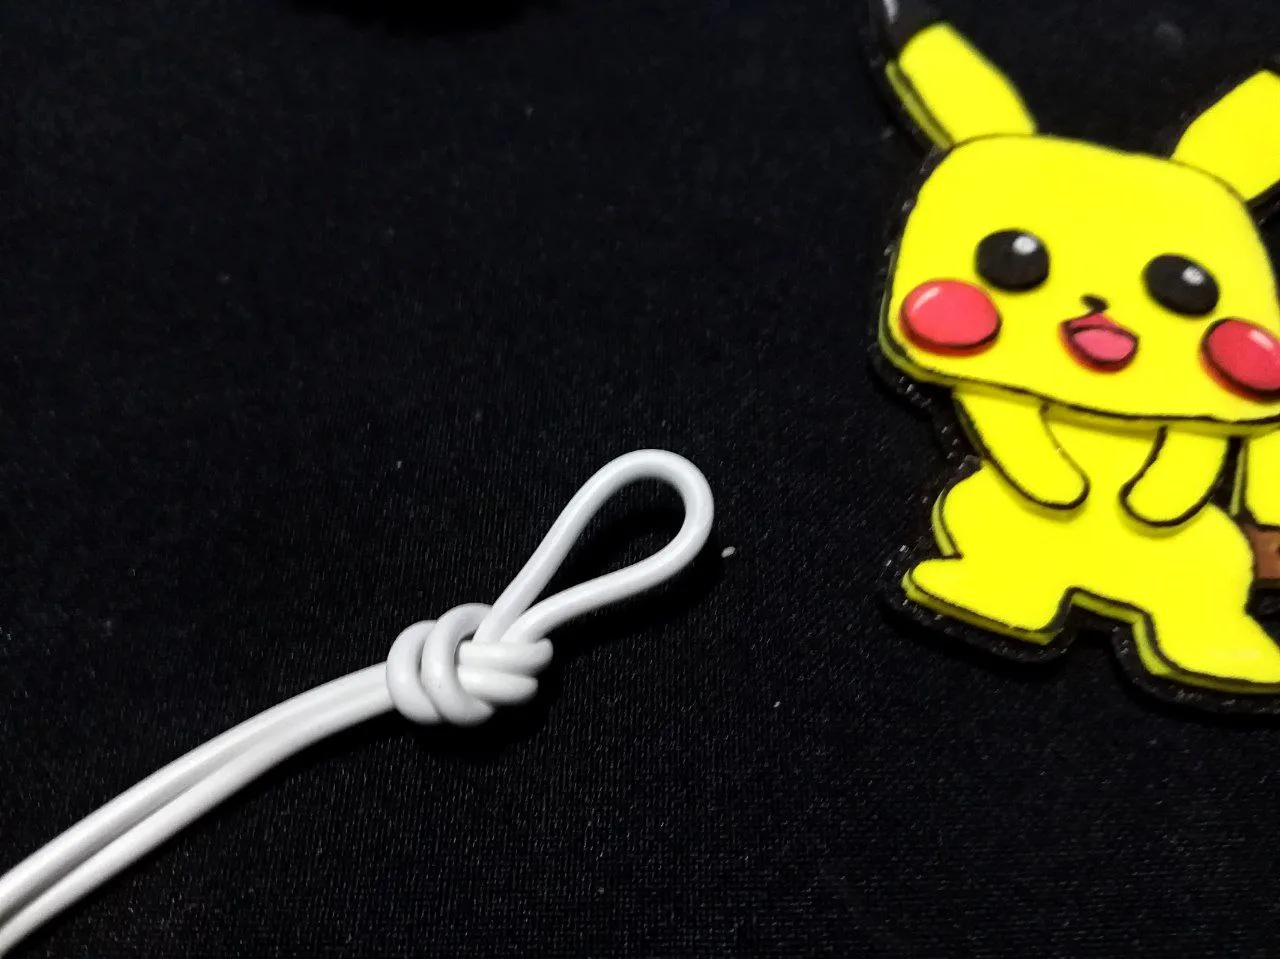
Para completar el llavero solo hace falta el corgon, para que pueda ser usado como llavero. En este caso usé un trozo de cable blanco de uno 20cm aproximadamente, le hacemos un nudo, de modo que dejemos un aro y 2 tira para cada figura.
 |  |  |
|---|
Una vez tenemos todas las piezas listas, terminamos de ensamblar el llavero.
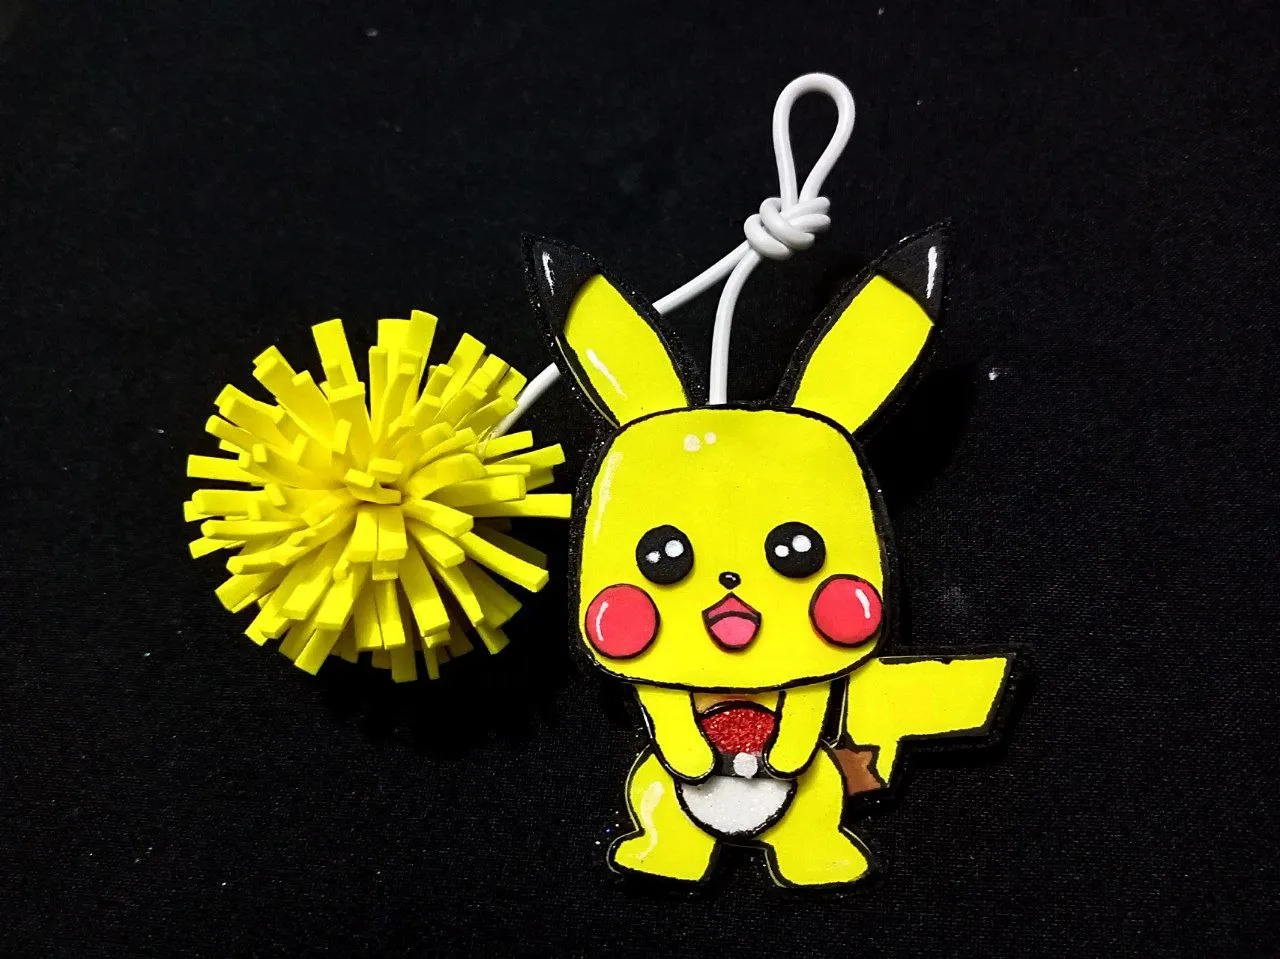
Y de esta forma, obtienes un llavero Pikachu que puedes usar para anclarlo a las llaves de tu casa, tu auto, o incluso hasta en tu mochila. Espero de corazón que les haya gustado y que, además, este tutorial pueda servirle de ayuda para que también hagan sus llaveros Pikachu.
¡Nos vemos luego!
English
Click Here
Hello craft lovers!
I've been thinking for a long time about how to create a Pokémon-themed keychain, especially one inspired by my favorite character, Pikachu. College didn't allow me any free time to organize my ideas, but since I have more free time, I decided to return to my blog to continue sharing my ideas with you, so you can put them into practice.
Today you'll learn how to make a simple Pikachu keychain, using materials you may have at home. I hope you like it!
Materials
- Colored foams (yellow, red, black, brown)
- Liquid hot glue or glue gun.
- Scissors.
- Pencil.
- Sheet of paper.
- Ribbon, string, or in this case, a piece of white wire.
Let's start by sketching.
First, we look for a reference of images of Pikachu, the one we like the most, and in different poses: its shape, its pointy ears, its round cheeks, and its zigzag tail. Next, on a piece of paper, we begin to draw Pikachu. Don't worry about perfection; focus on the basic shapes of our reference: the head, ears, body, hands, tail, eyes, mouth, cheeks, and the black tips of the ears. For this design, I used this reference from Pinterest.
Preparing the Patterns
Once we have the sketches ready, we now proceed to cut out each of the pieces. We select the foam. This Pikachu will mainly need the following colors:
- Yellow: For the main body, head, ears, arms, and tail.
- Red: For the cheeks.
- Black: For the eyes, nose, and ear tips.
- Brown: For the stripes at the base of the tail (optional, if you want a more detailed Pikachu). Place your paper molds on the foam of the corresponding color. Using a pencil or toothpick, gently trace the outline of each piece onto the foam.
Using sharp scissors, carefully cut out the pieces. Try to keep the edges clean and precise.
| | | |
|---|
| | |
|---|
Joining Pieces
Now is the time to join all the pieces together.
Before gluing, we arrange all the pieces on the flat surface to see how they fit together. This will help us visualize the result and avoid mistakes.
We use liquid silicone. Glue the larger pieces together. We previously glued the arms to the body, then the head, and finally the zigzag tail. For the facial details, glue the red circles for the cheeks, eyes, and mouth.
Glue the black tips to the top of the yellow ears.
|
|---|
With all the Pikachu pieces together, take the black foam and glue it down. This gives it more strength and a border to enhance the figure. Cut, leaving a 0.5 cm margin.
To make the pom-pom, cut two strips of yellow foam, approximately 8x5cm (3.1x2.1in), or to your liking. Place one foam on top of the other and use scissors to cut both sides, halfway down the middle. Roll the foam strips together and glue them together when the roll is finished. Use ribbon or thread to place the cut foam halfway down the roll and tie tightly until the pom-pom is formed.
| |
|---|---|
| |
We're putting the finishing touches on our Pikachu figure with black and white paint.
To complete the keychain, all you need is the corgon, so you can use it as a keychain. In this case, I used a piece of white wire about 20cm long. We knotted it, leaving a loop and two strips for each figure.
| | |
|---|
Once we have all the pieces ready, we finish assembling the keychain.
And this way, you have a Pikachu keychain that you can use to attach to your house keys, your car keys, or even your backpack. I sincerely hope you liked it and that this tutorial can help you make your own Pikachu keychains.
See you later!