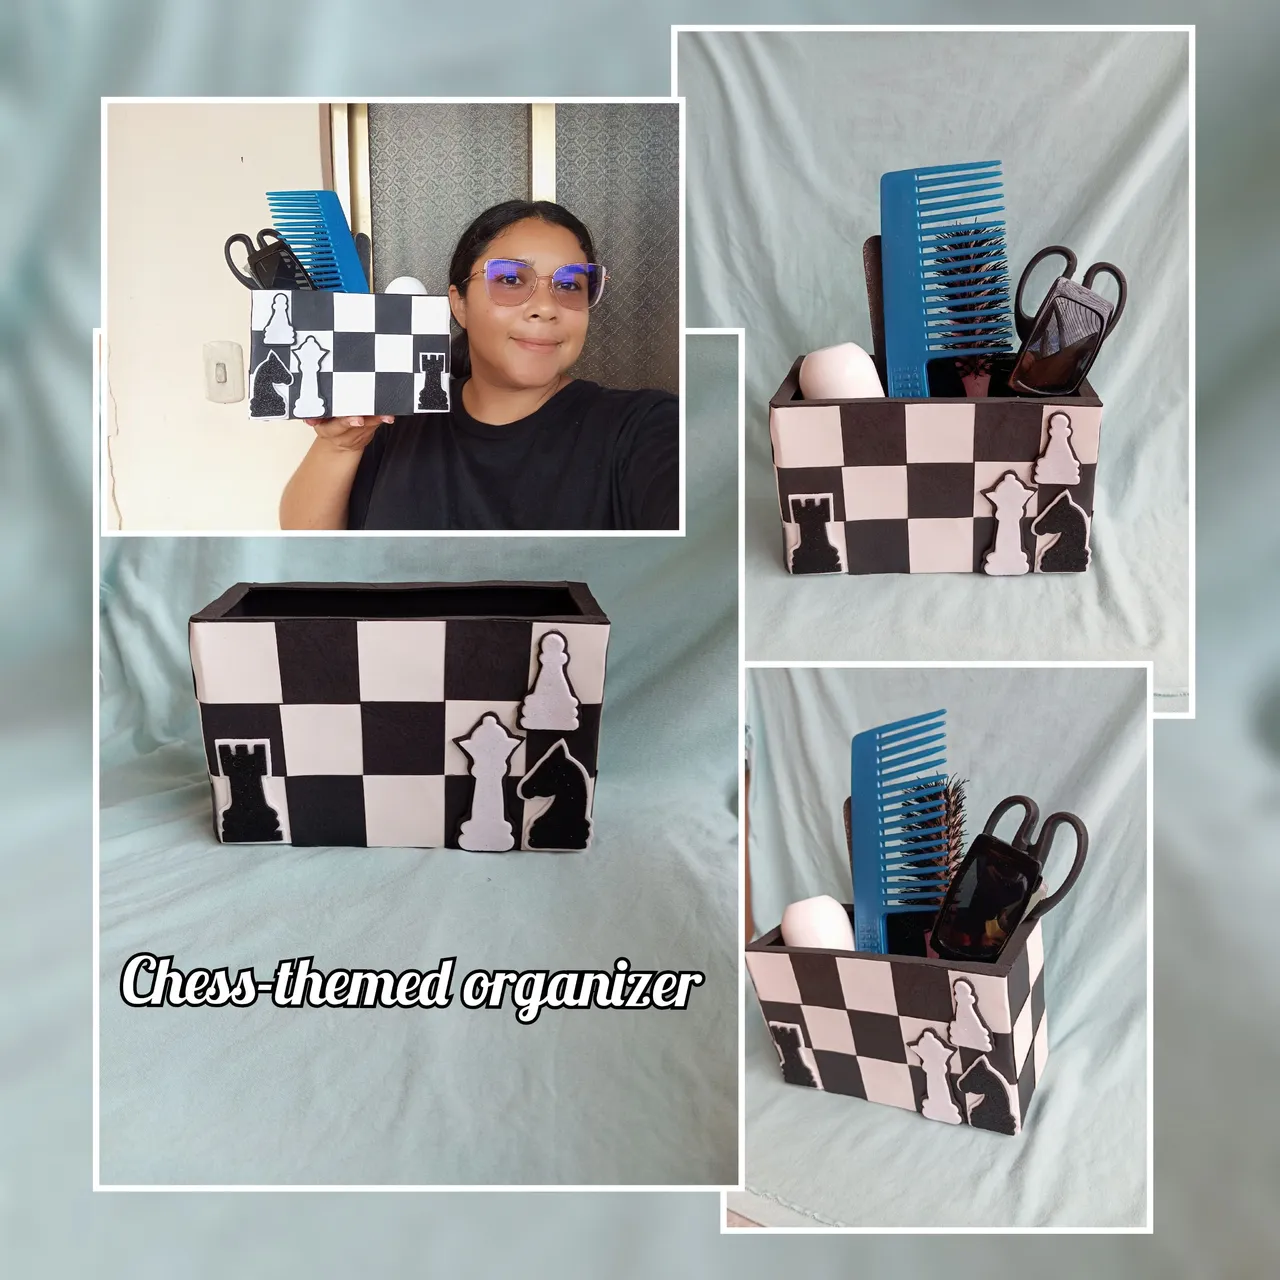
Hola feliz noche tengan todos , espero de corazón que se encuentren bien, hoy les quiero compartir un organizador con temática de ajedrez el cual realicé con mucho cariño para una persona especial que le encanta el ajedrez, es muy sencillo y fácil de realizar
Hello, everyone, I hope you are all doing well. Today I want to share with you a chess-themed organizer that I made with love for a special person who loves chess. It is very simple and easy to make.
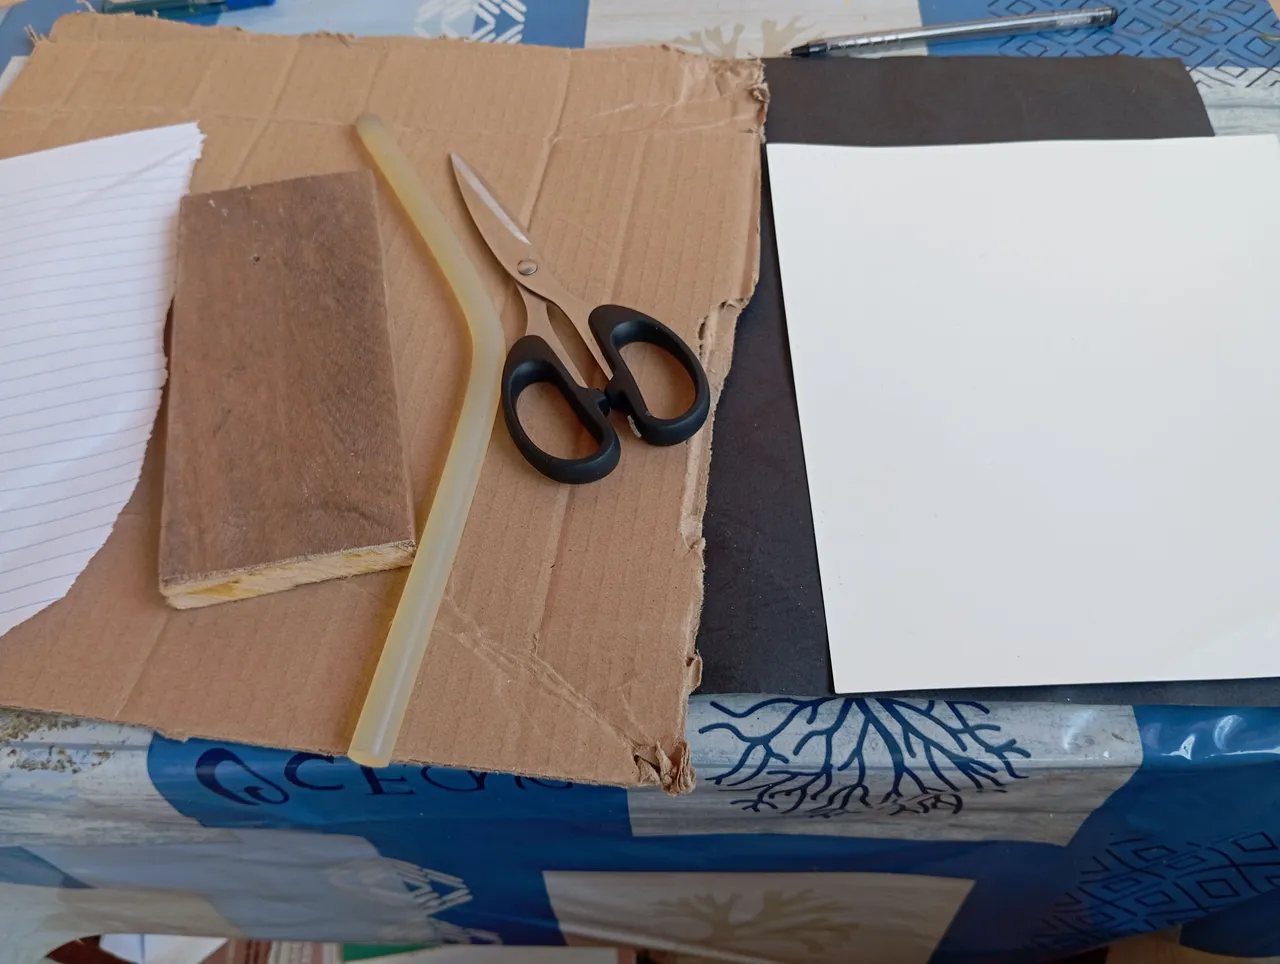
Materiales qué utilice para realizar mi organizador:
-Tablita de madera
-Carton
-Cartulina
-Foamis
-Tijera
-Silicon
Materials I used to make my organizer:
-Small wooden board
-Cardboard
-Cardstock
-Foam
-Scissors
-Silicone
A continuación los pasos a seguir:
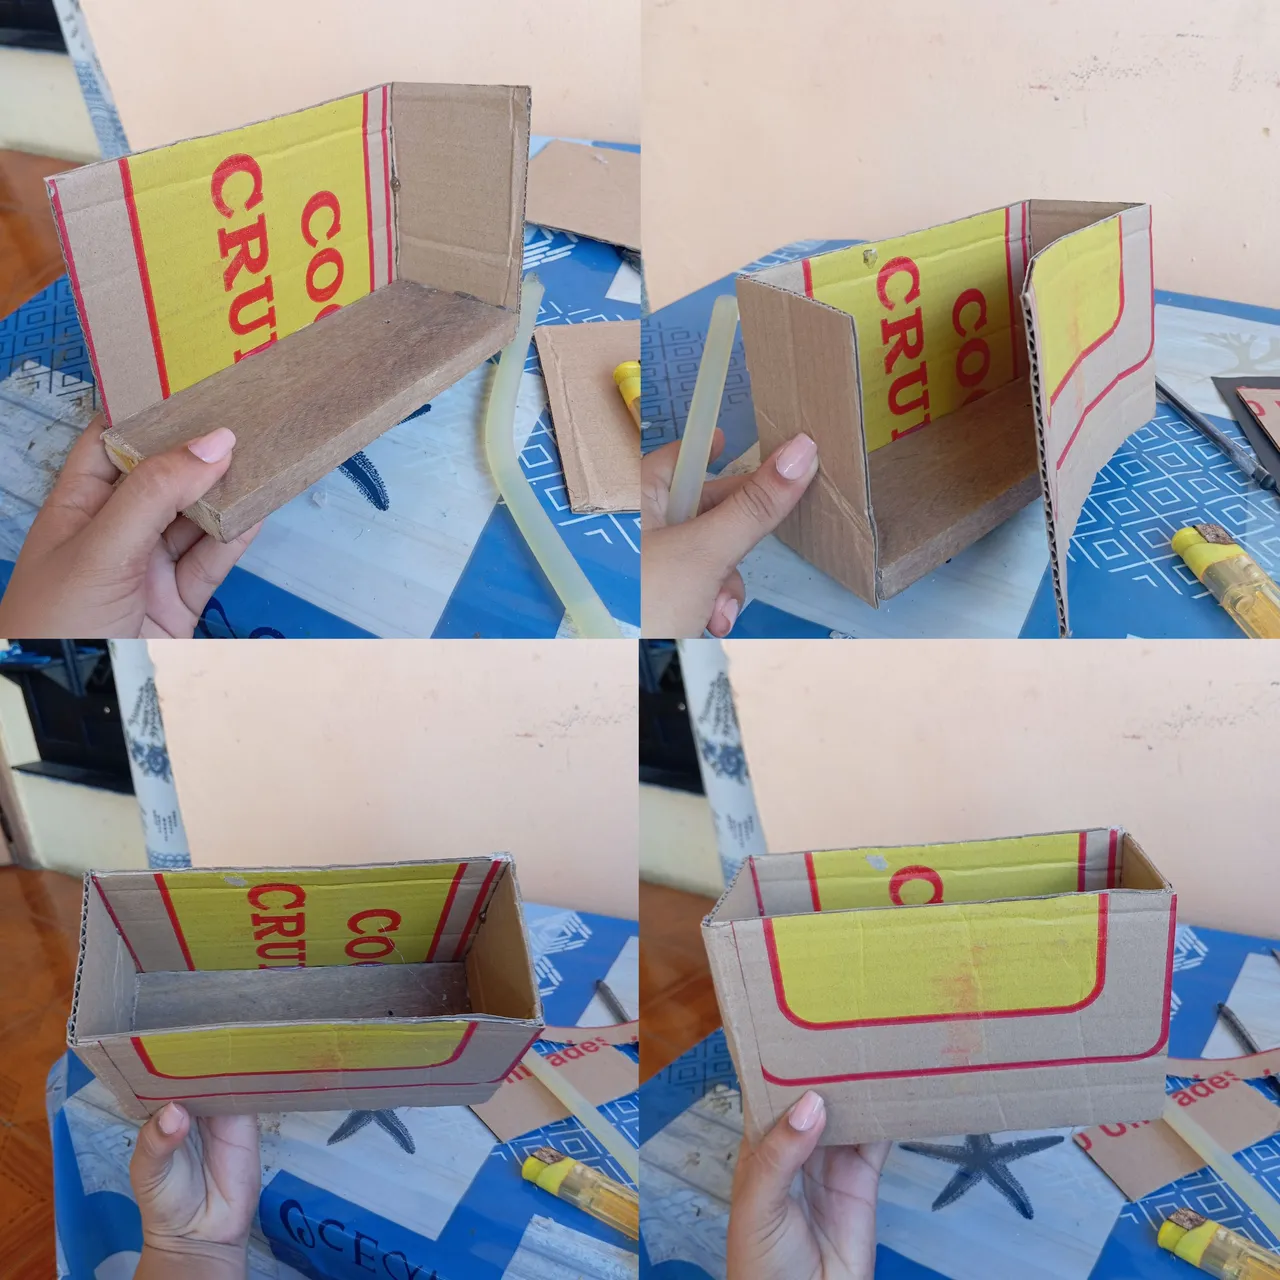
Iniciaremos primeramente recortando 4 piezas de cartón para armar la cajita con la base de madera , de esta manera será más resistente el organizador, las medidas de cartón deben ser iguales que las de la tabla de madera tanto como largo , como ancho. De altura será a nuestro gusto en esta ocasión 14 centímetros
Here are the steps to follow:
First, we will start by cutting out four pieces of cardboard to assemble the box with the wooden base. This will make the organizer more sturdy. The cardboard pieces should be the same size as the wooden board in both length and width. The height will be up to us; in this case, we will use 14 centimeters.

Una vez que recortamos nuestras 4 piezas , vamos a continuar tomando nuestra base de madera y procederemos a pegar por todo el borde , hasta armar nuestra caja como pueden apreciar
Once we have cut out our 4 pieces, we will continue by taking our wooden base and gluing it around the entire edge to assemble our box, as you can see.
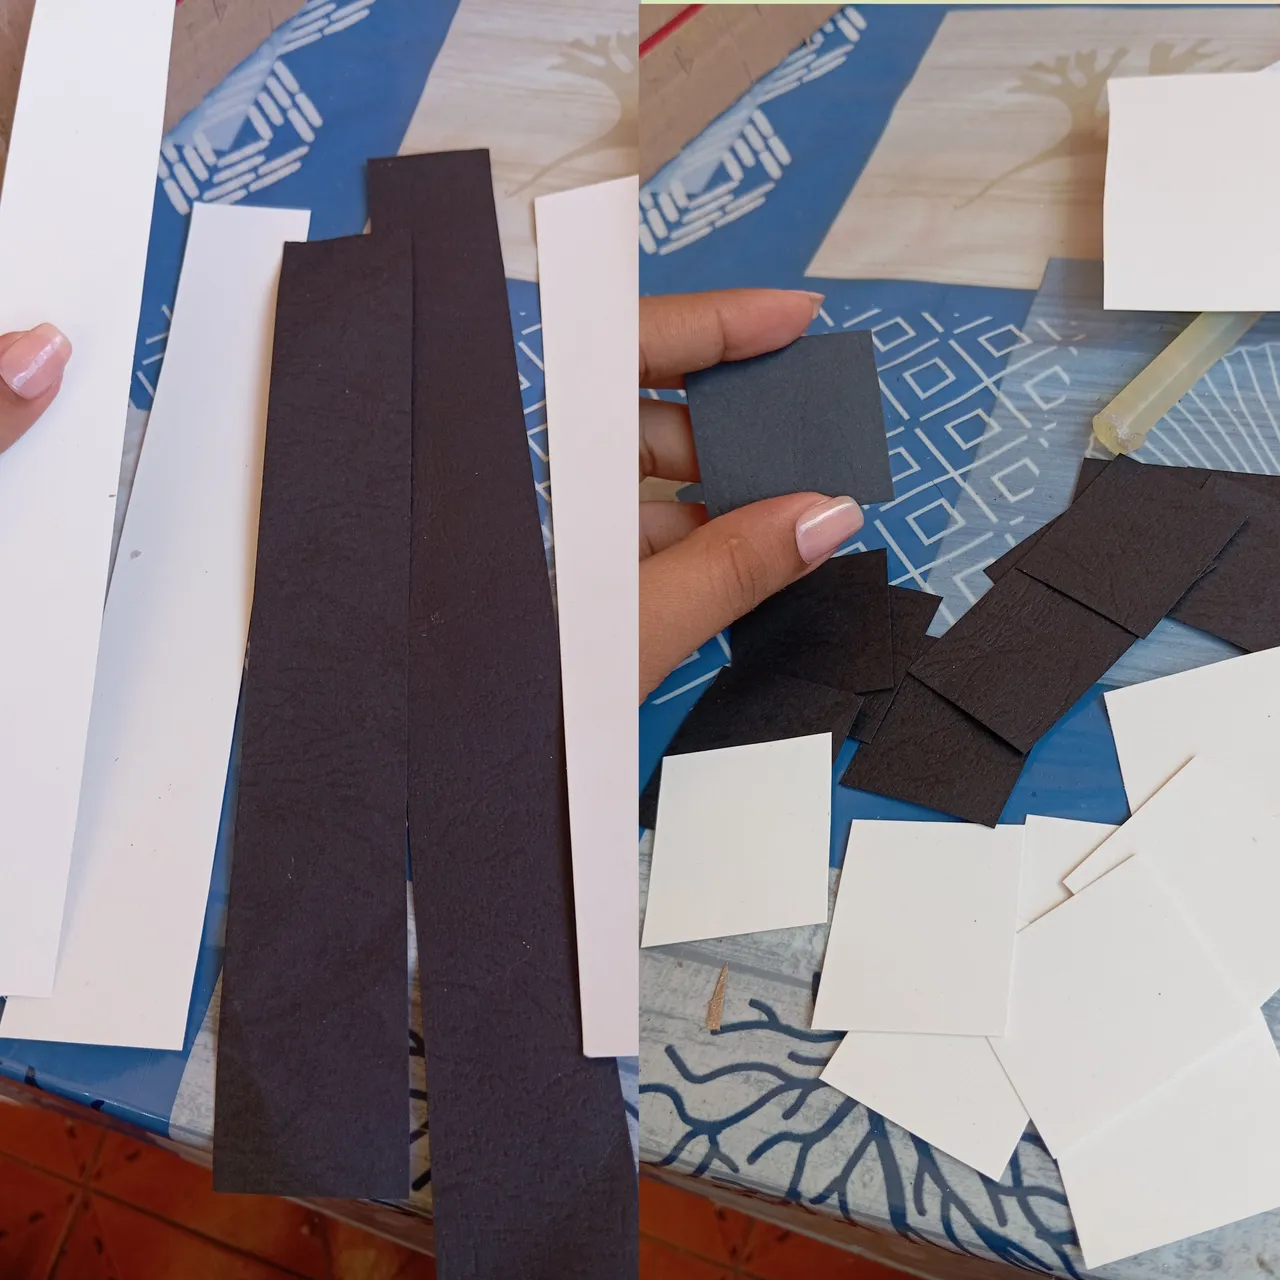
Seguidamente vamos a continuar tomando las cartulinas color negro y blanco , continuaremos recortando varias tiras , luego estás tiras las vamos a recortar en forma de cuadro , aseguremos que nuestros cuadros tengan el mayor posible tamaño para que quede bien
Next, we will continue by taking the black and white cardboard and cutting out several strips. Then, we will cut these strips into squares, making sure that our squares are as large as possible so that they fit well.
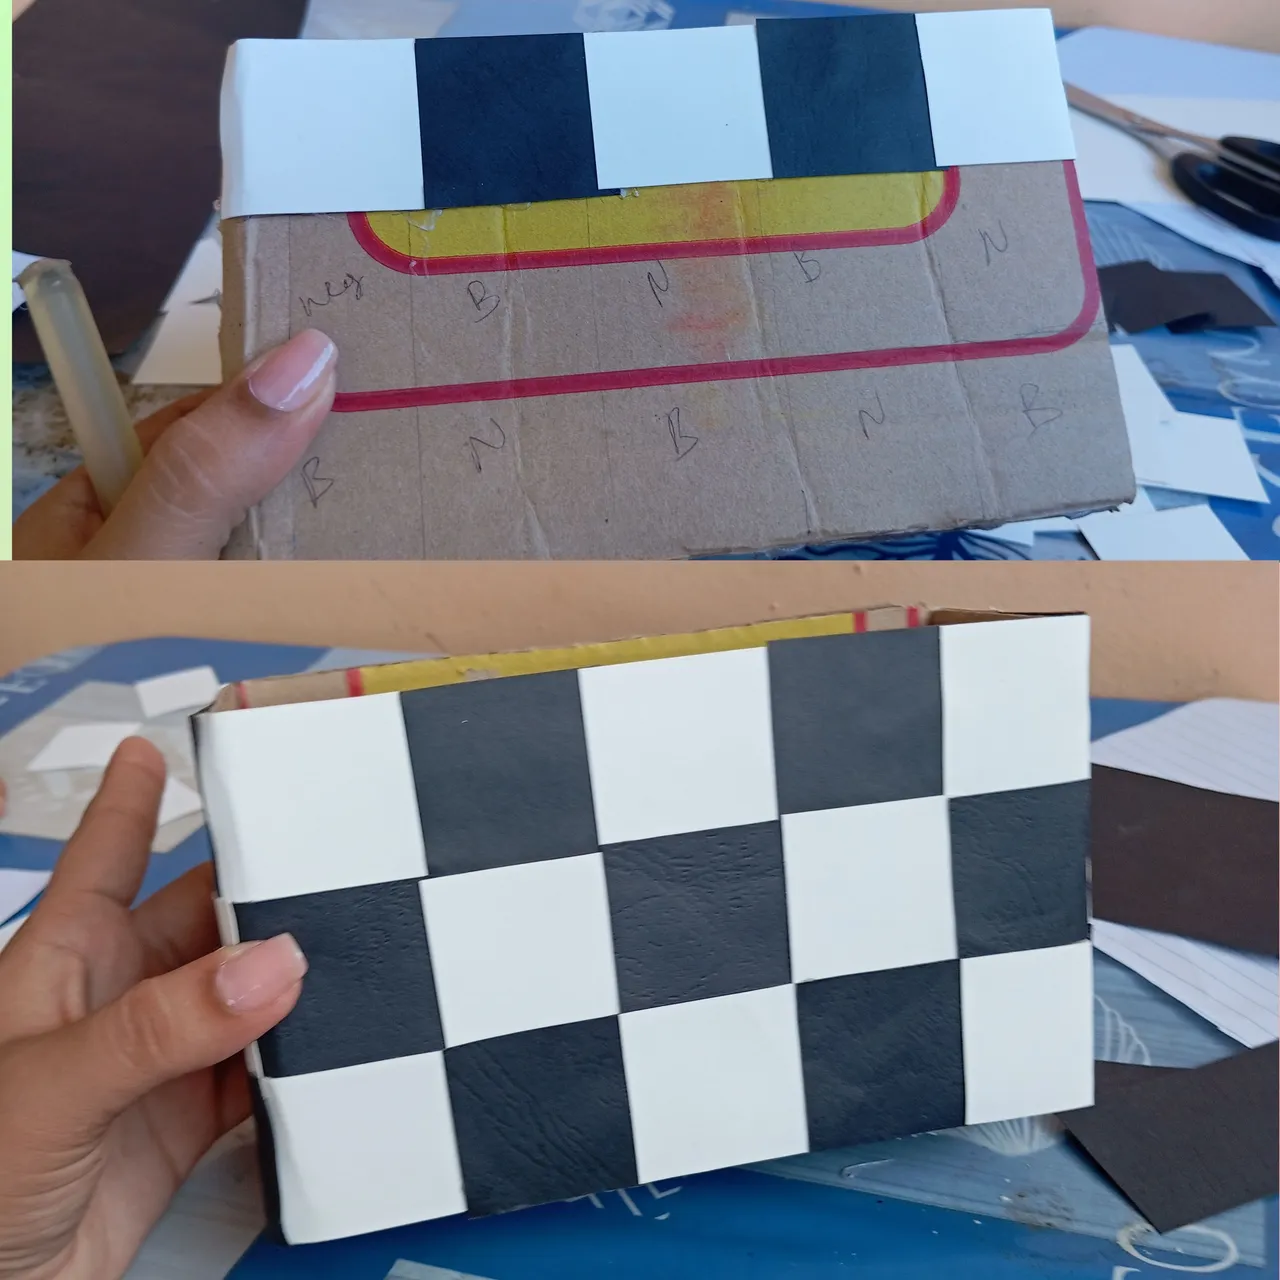
Una vez que tengamos los cuadros blancos y negros , vamos a continuar marcando con un lápiz en la caja para que no haya confusión cada color en el cuarto indicado ,luego empezamos pegando el cuadro blanco, seguidamente el negro y luego el blanco y así sucesivamente hasta cubrir la caja , debemos pegar con cuidado para que no se repita ningún color sino que quede entre metido
Once we have the black and white squares, we will continue marking the box with a pencil so that there is no confusion about each color in the indicated square. Then we will start by gluing the white square, followed by the black one, then the white one, and so on until the box is covered. We must glue carefully so that no color is repeated but rather remains tucked in.
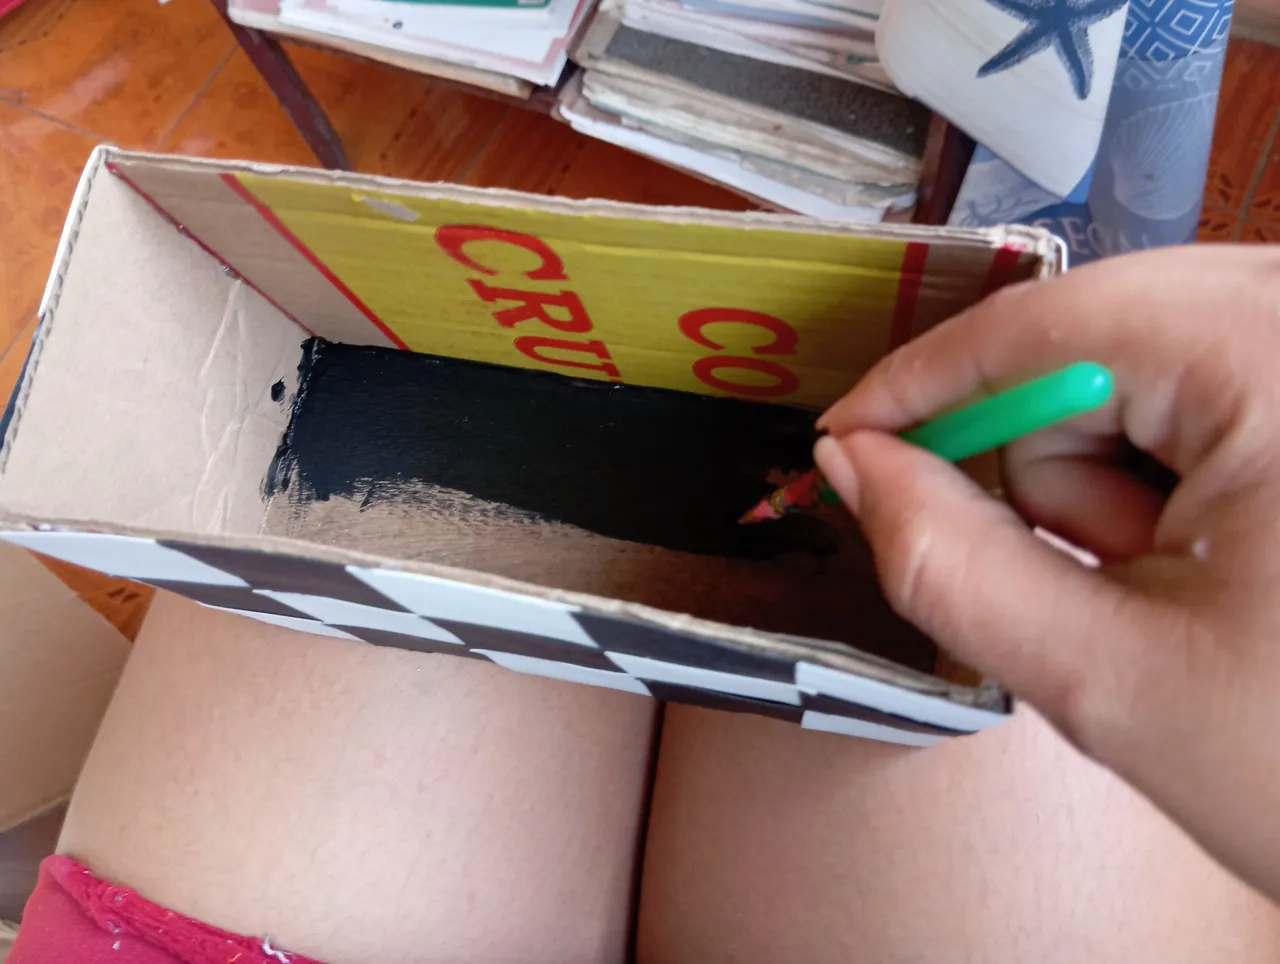
Luego que la caja se encuentre decorada, vamos a continuar tomando una pintura negra y la aplicaremos por dentro de la caja de esta manera se cubrirá el cartón , así también va a resaltar
Once the box is decorated, we will continue by taking some black paint and applying it to the inside of the box. This will cover the cardboard and also make it stand out.
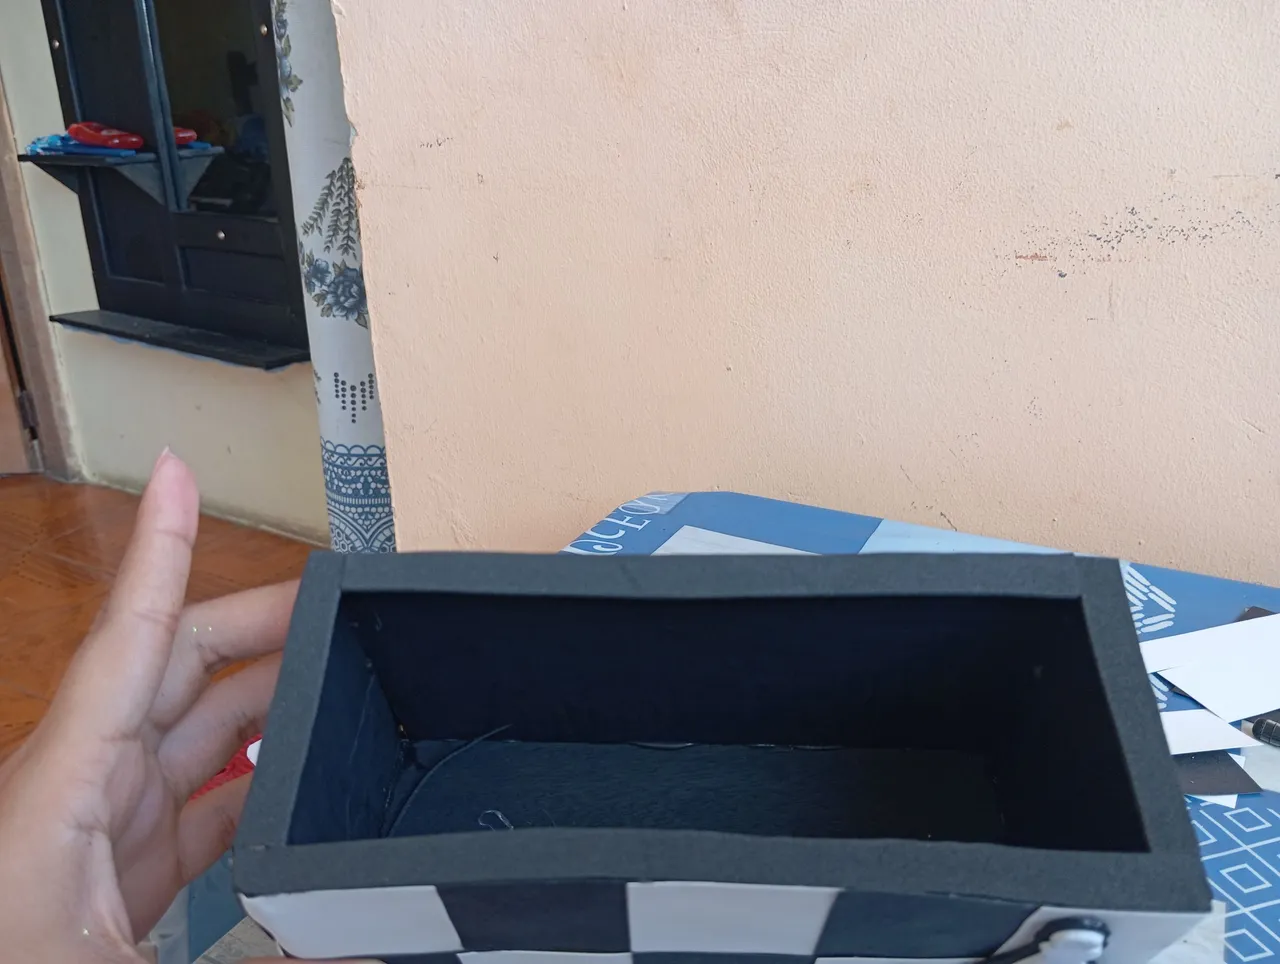
En este siguiente paso continúe pegando una tira delgada color negro por todo el alrededor de la parte de arriba de el organizador, para que de esta manera no se vea cartón por ningún lado y quede bien pegado
In the next step, continue sticking a thin black strip all around the top of the organizer so that no cardboard is visible and it is well stuck
Luego continúe realizando un patrón con 4 piezas de ajedrez, con la finalidad de realizar los con foamis y adornar el alrededor
Then continue making a pattern with 4 chess pieces, with the aim of making them out of foam and decorating the edges.
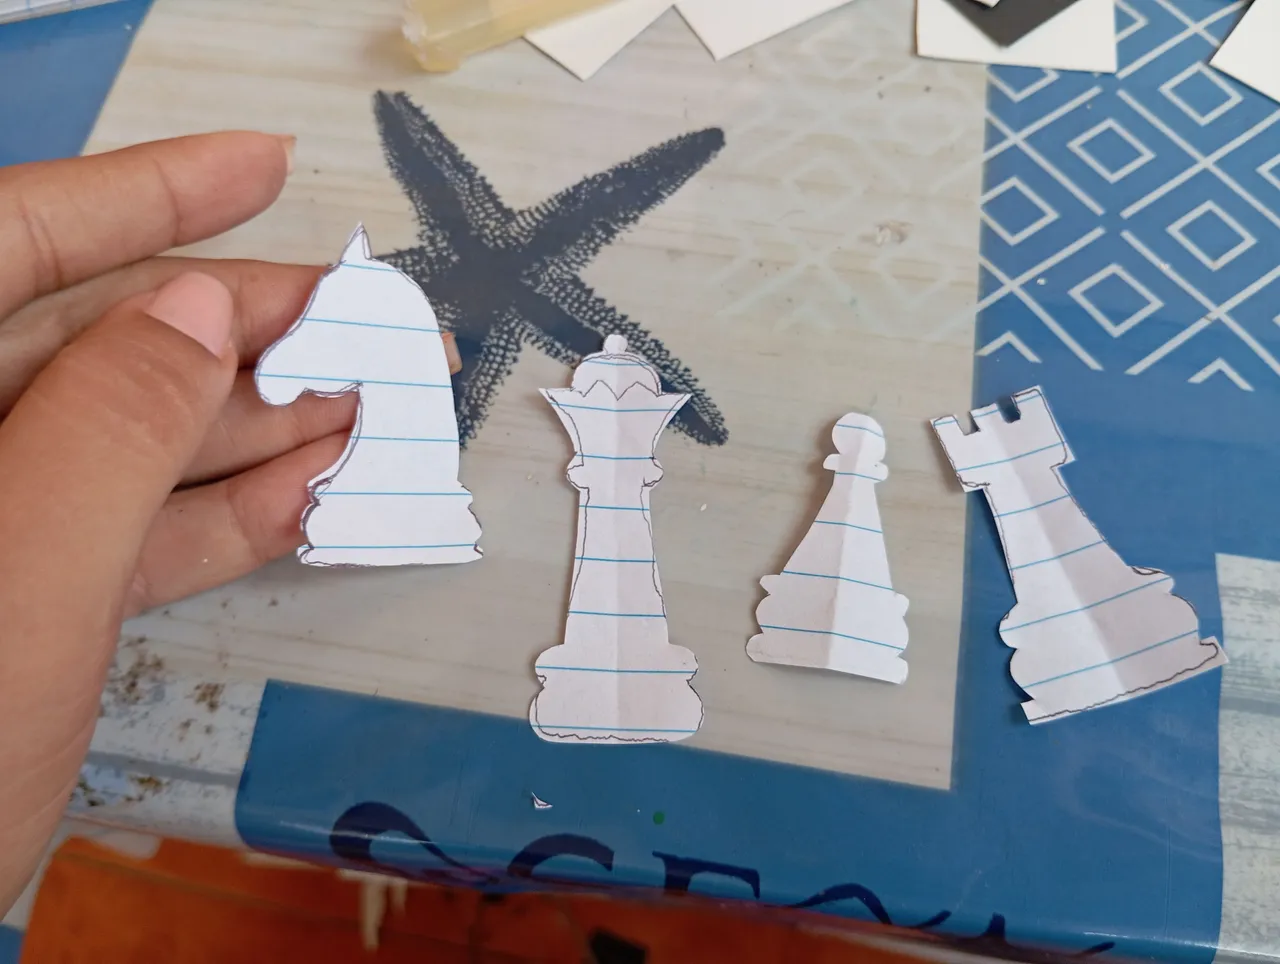
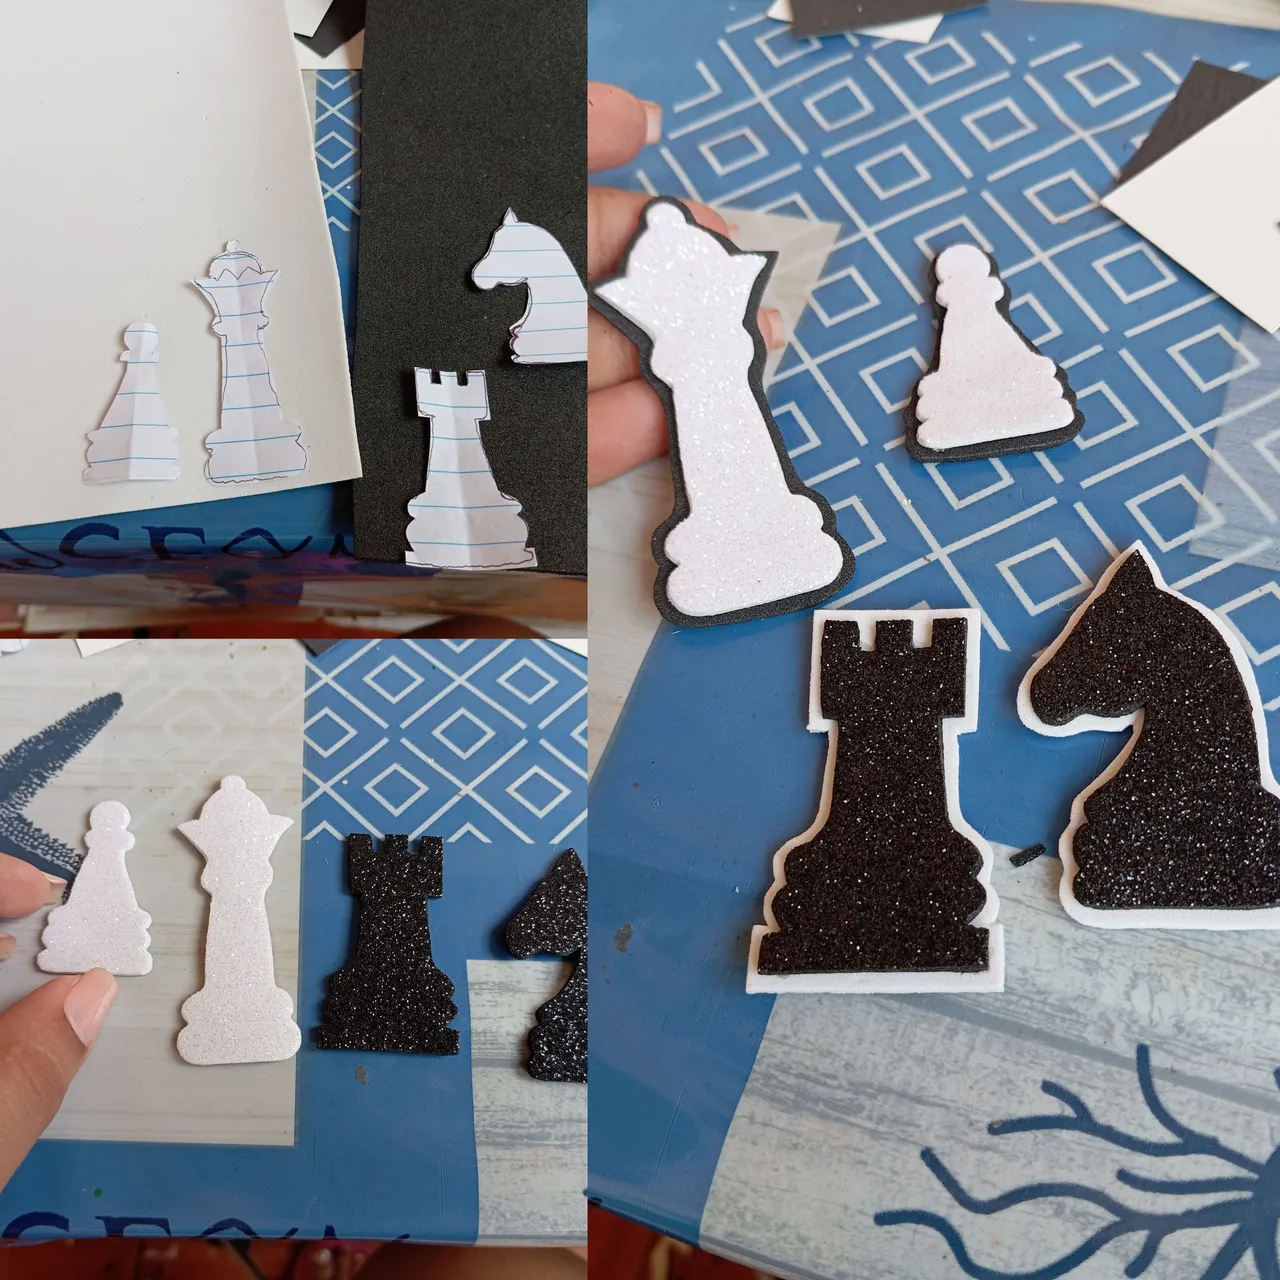
Seguidamente vamos a continuar marcando nuestras piezas , dos serán blancos y dos negros , luego continuamos recortando con nuestra tijera, para que resalten las piezas continúe pegando un borde blanco para las piezas negras y uno negro para las piezas blancas como pueden apreciar
Next, we will continue marking our pieces, two will be white and two will be black. Then we will continue cutting with our scissors. To make the pieces stand out, continue gluing a white border for the black pieces and a black border for the white pieces, as you can see.
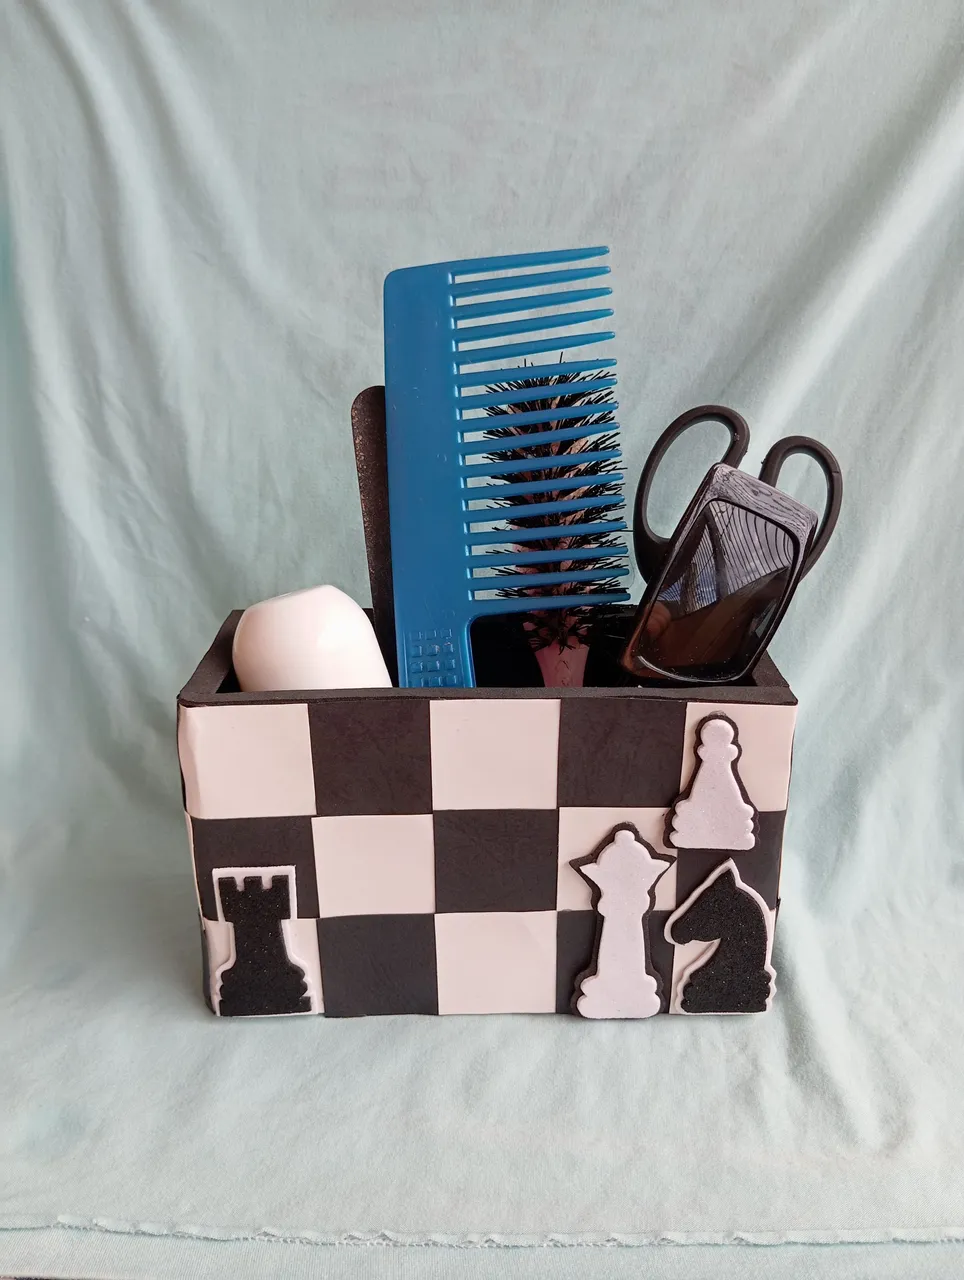
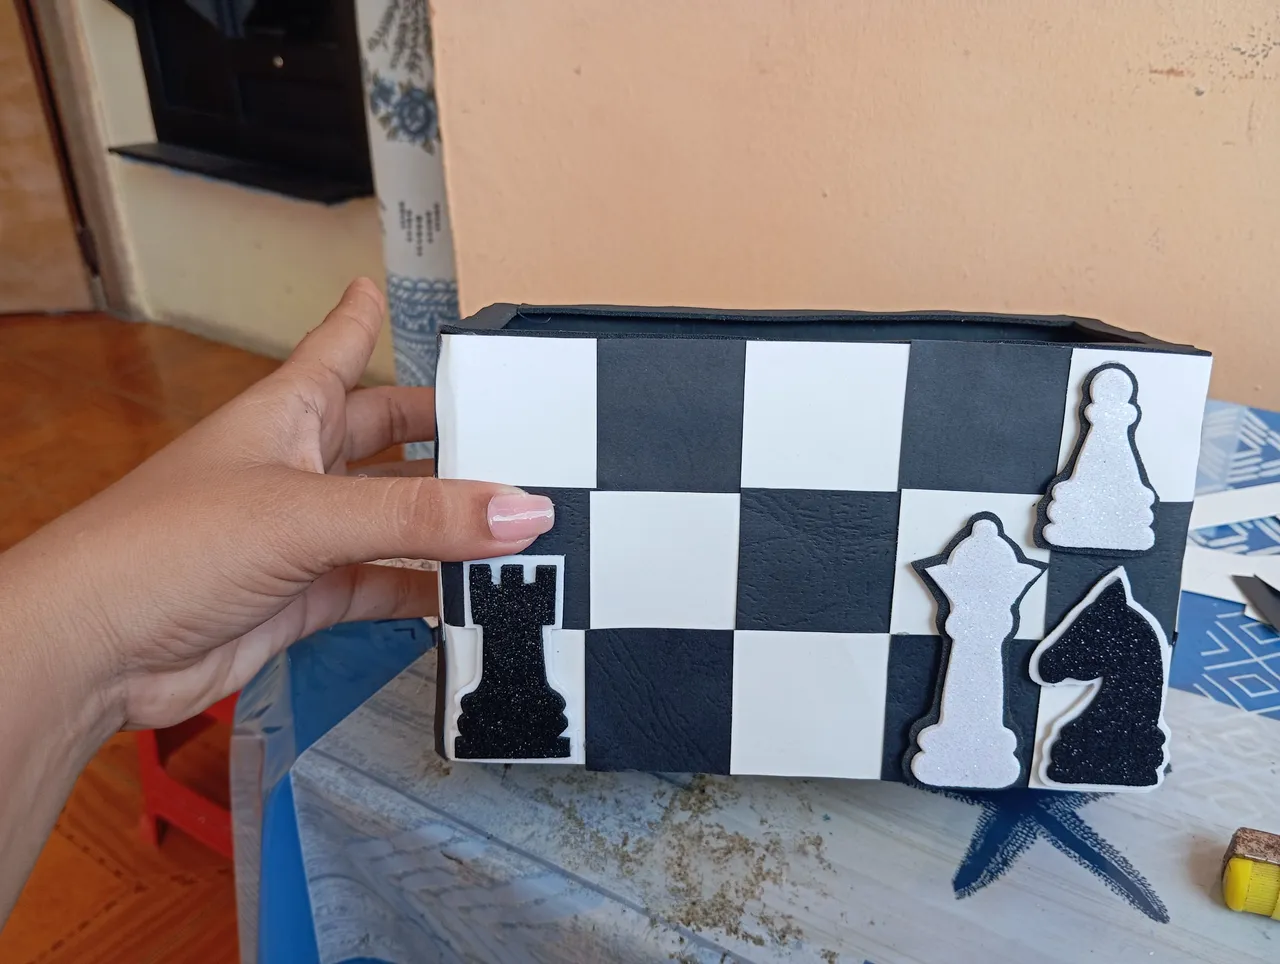
Por último continúe pegando las piezas de ajedrez en la parte frontal del organizador como pueden apreciar ,finalizando así
Finally, continue gluing the chess pieces to the front of the organizer, as you can see, thus finishing it.
Así fue como realicé mi hermoso organizador con temática de ajedrez
Créditos: las fotos las tomé con mi redmi 12 , el collage lo realicé con la aplicación GridArt versión gratuita, traduje los textos con el traductor deepl, feliz noche
That's how I made my beautiful chess-themed organizer.
Credits: I took the photos with my Redmi 12, I made the collage with the free version of the GridArt app, and I translated the texts with the Deepl translator. Have a good night!