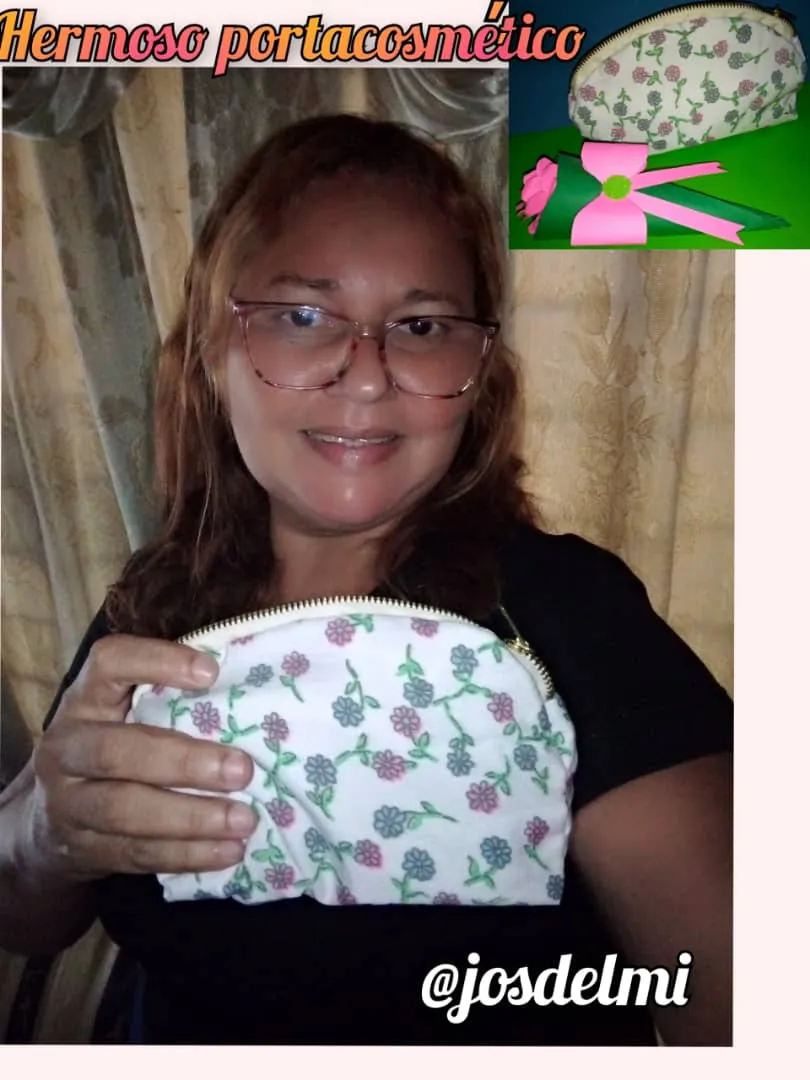
Hola , comunidad #hive, deseo que todos estén bien,
El día de hoy, quiero unirme al nuevo concurso de la comunidad #hiveDiy , moderado por @equipodelta , en donde deben realizar una "portacosmético".
Me gustó mucho la idea, coser es uno de mis pasatiempo, aunque no lo hago a la perfección , le pido a Dios que me de la sabiduría para aprender aun más.
Hice este portacosmético a manos. Es sencillo sin ningún grado de dificultad, cualquiera lo puede hacer.
¡Sin mas a trabajar!
Hello, #hive community, I wish you all well,
Today, I want to join the new contest of the community #hiveDiy , moderated by @equipodelta , where you must make a "cosmetic carrier".
I really liked the idea, sewing is one of my hobbies, although I do not do it perfectly, I ask God to give me the wisdom to learn even more.
I made this cosmetic holder by hand. It is simple without any degree of difficulty, anyone can do it.
Let's get to work!
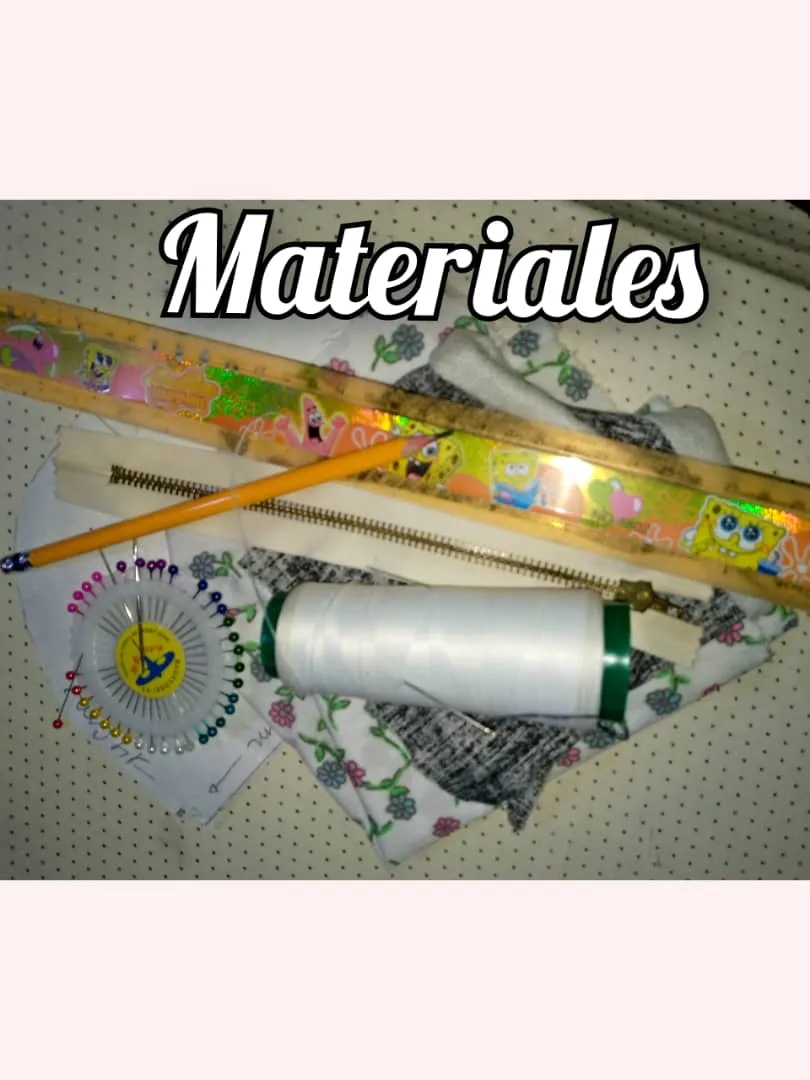
Materiales :
60 centímetros de tela: de flores y gris.
Un cierre de 26 centímetros.
Una regla.
Lápiz.
Hilo blanco con su aguja.
Alfiler aguanta telas.
Materials :
60 centimeters of fabric: floral and gray.
A 26 centimeters zipper.
A ruler.
Pencil.
White thread with needle.
Fabric pin.
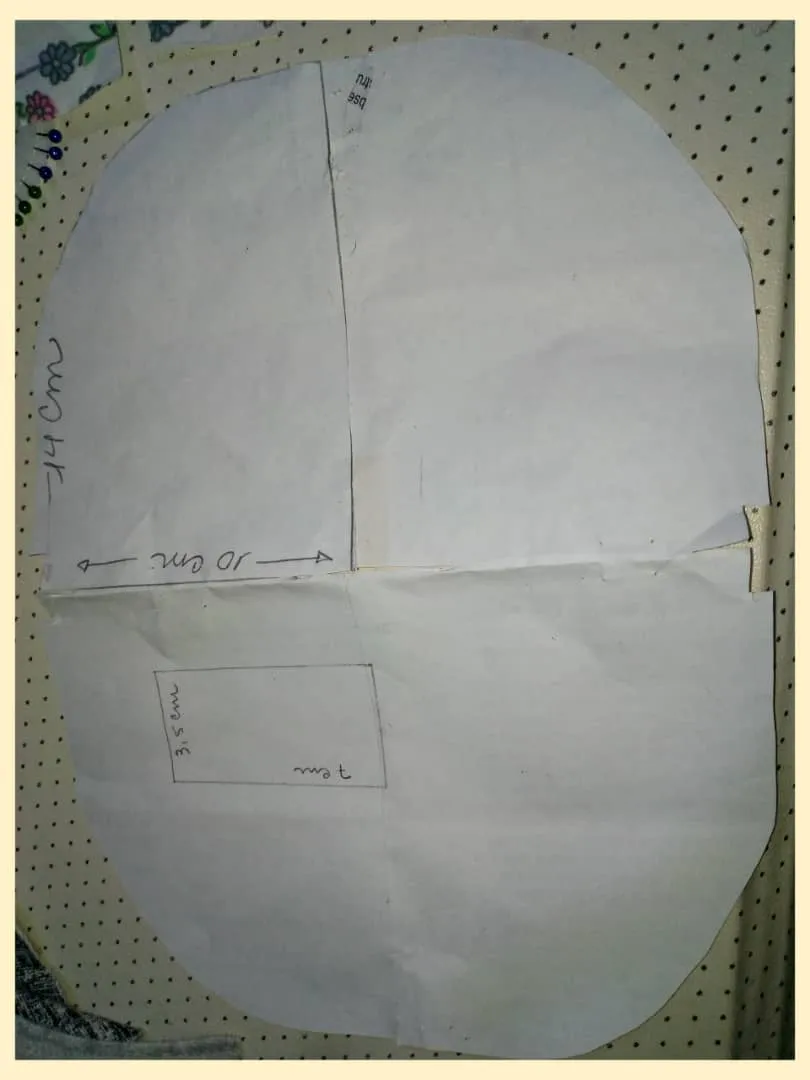
Procedimiento:
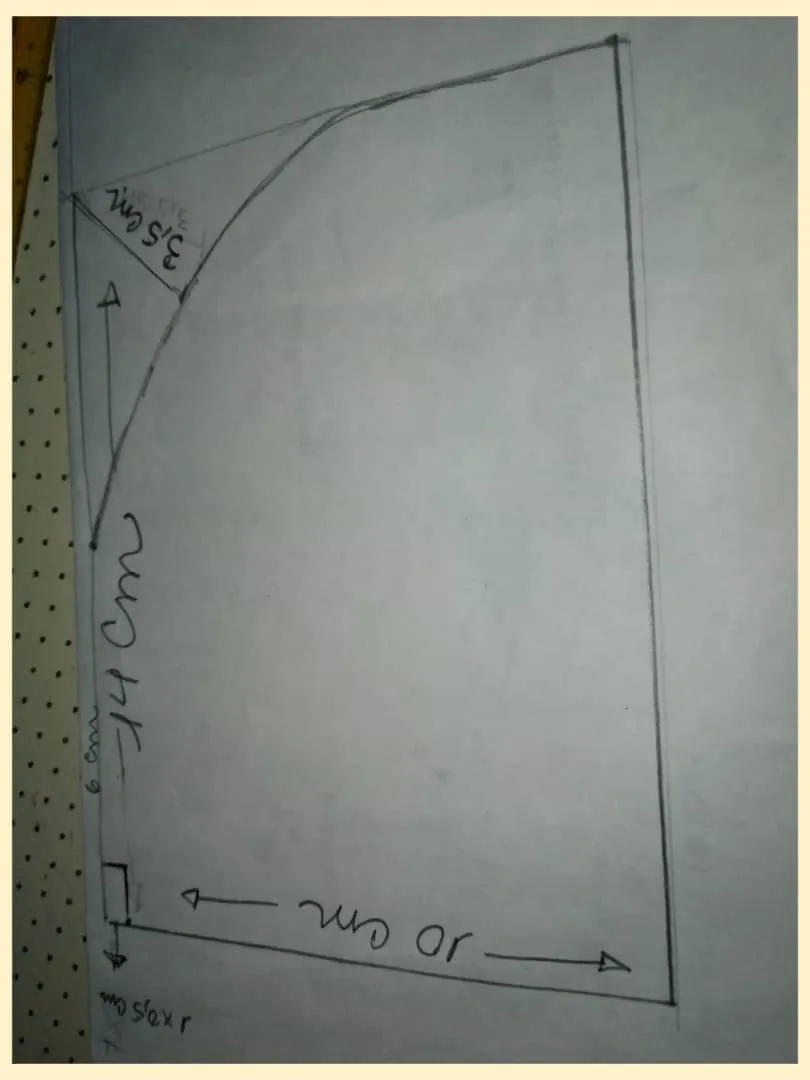
Realiza el patrón, en papel.
Doblas el papel en dos.
Marca con una regla un rectángulo de 10 cm x 14 cm.
Pueden guiarse por la imagen.
Procedure:
Make the pattern, on paper.
Fold the paper in two.
Mark with a ruler a rectangle of 10 cm x 14 cm.
You can be guided by the image.
Así debe quedar el patrón.
This is how the pattern should look.
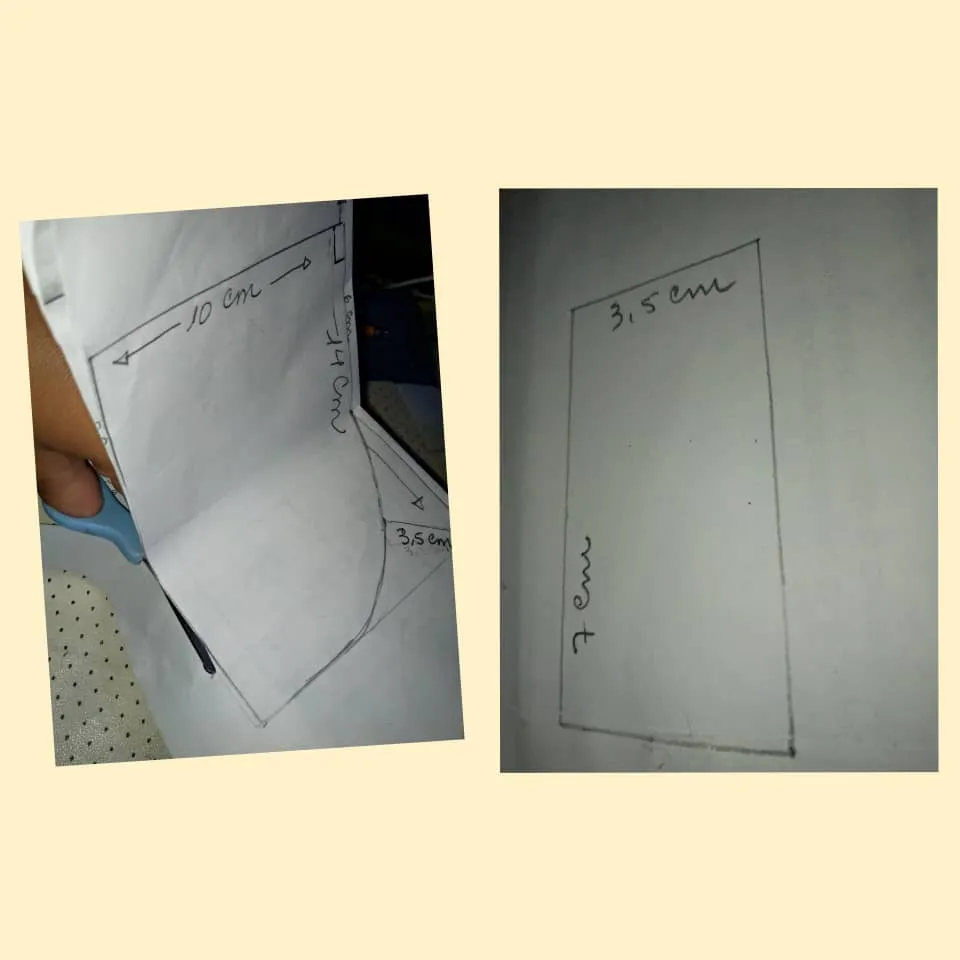
Recortas con unas tijeras.
Para los laterales debes marcar un rectángulo de 7 x 3,5 cm.
Cut out with scissors.
For the sides you should mark a rectangle of 7 x 3.5 cm.
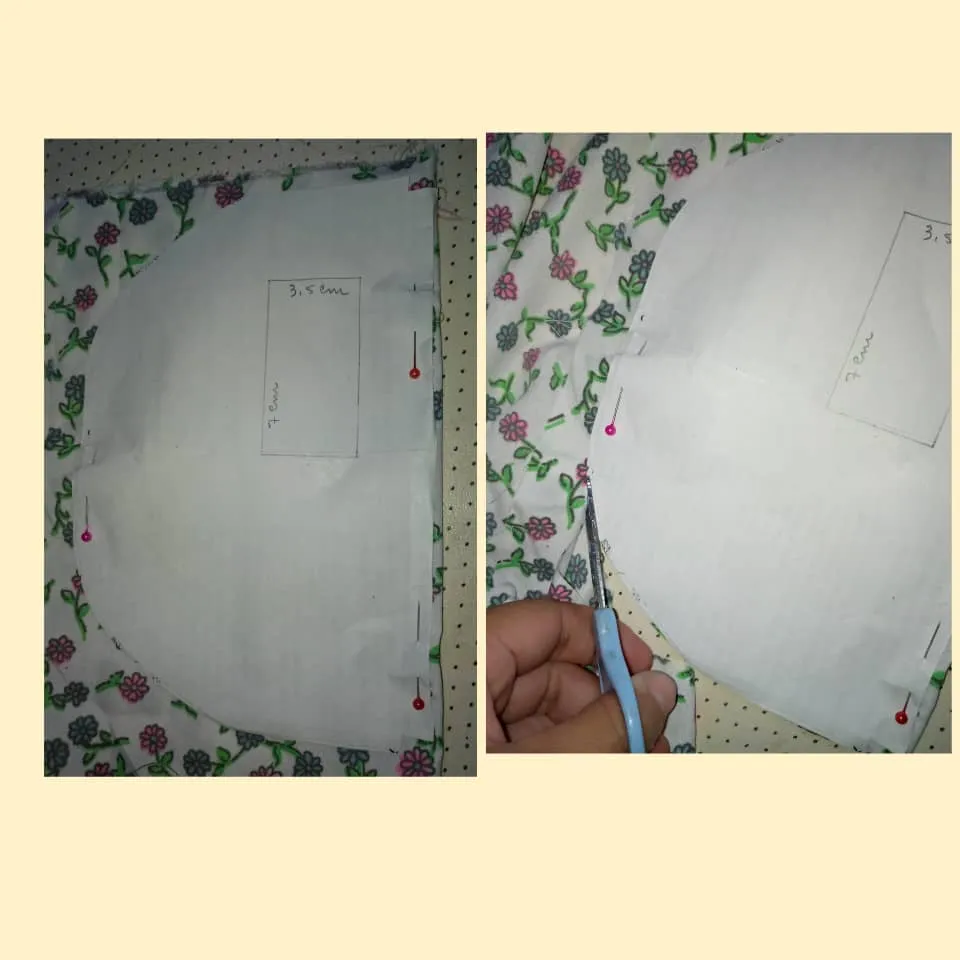
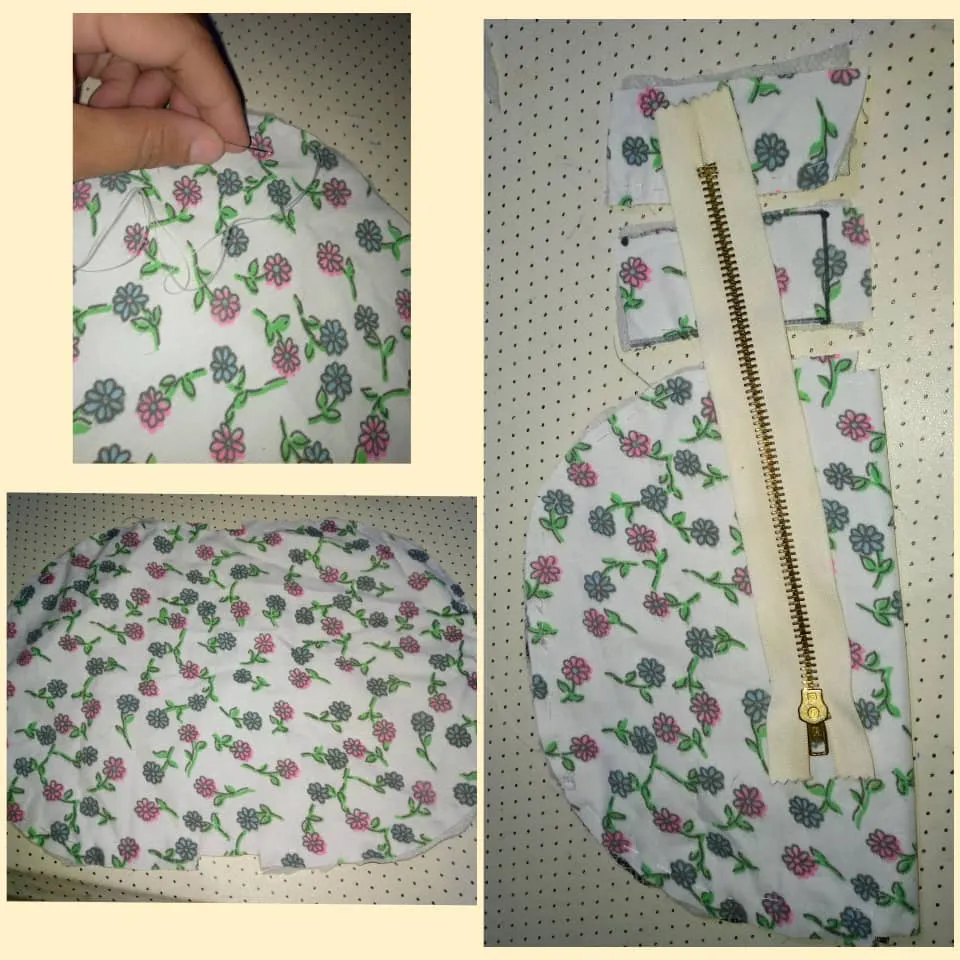
Ahora coloca el patrón sobre la tela , colocas los alfileres sujeta tela y cortas con una tijera.
Now place the pattern on the fabric, place the fabric pins and cut with scissors.

Ahora corta un rectángulo de 7 x 3,5 cm, es para realizar los laterales , en donde va pegado el cierre.
Now cut a rectangle of 7 x 3.5 cm, this is to make the sides, where the zipper will be glued.
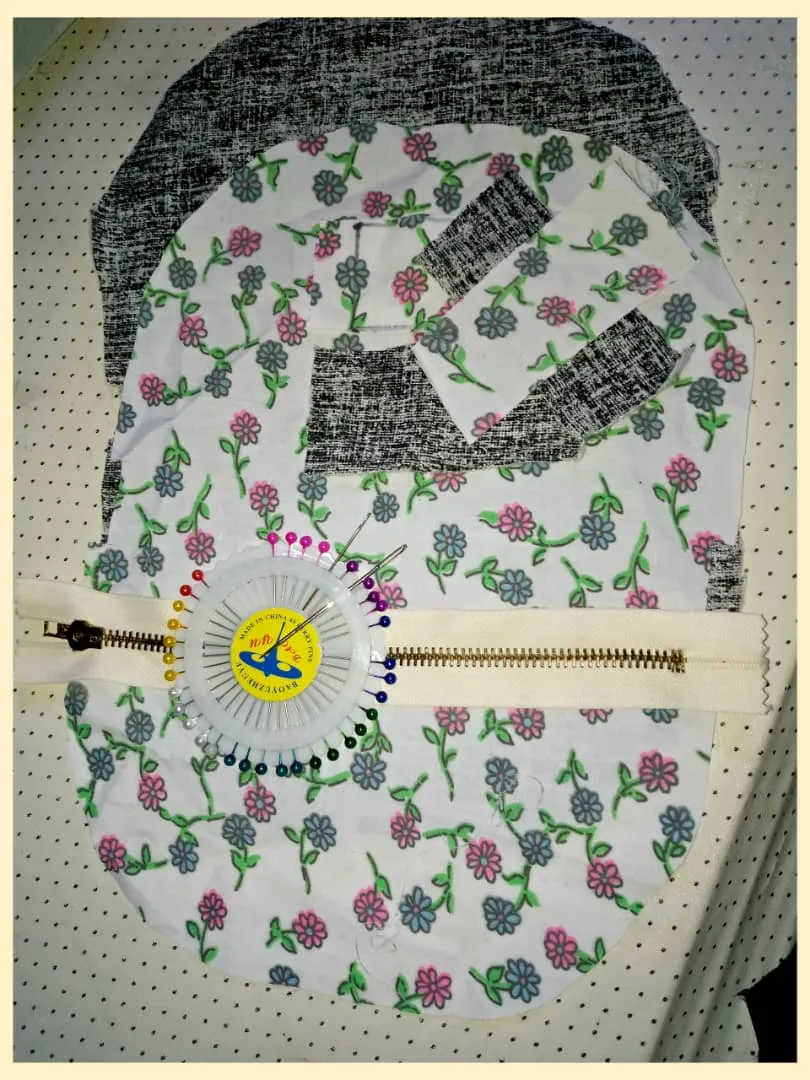
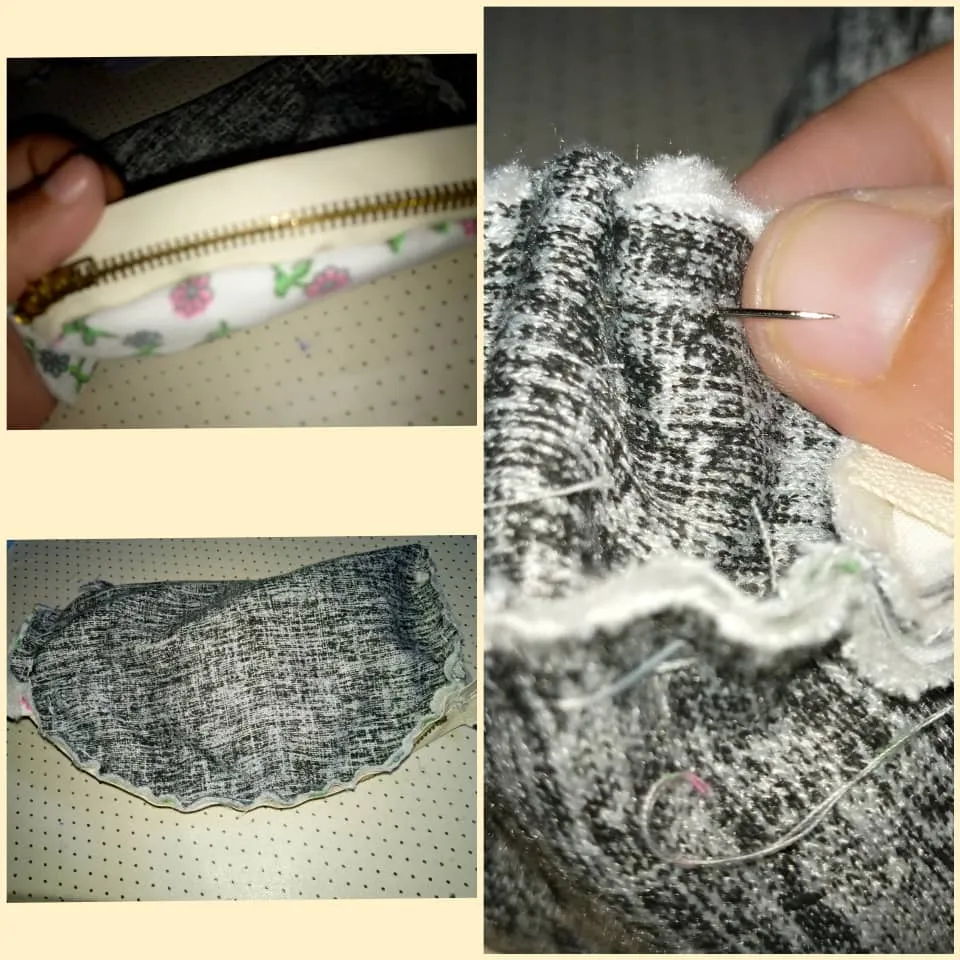
Todo los materiales listos, para comenzar a coser.
All materials ready to start sewing.
Coser las dos telas por las orillas o los bordes.
Así de esa manera cose lo que va a aguantar el cierre.
Sew the two fabrics together along the edges.
That way you sew what will hold the zipper.
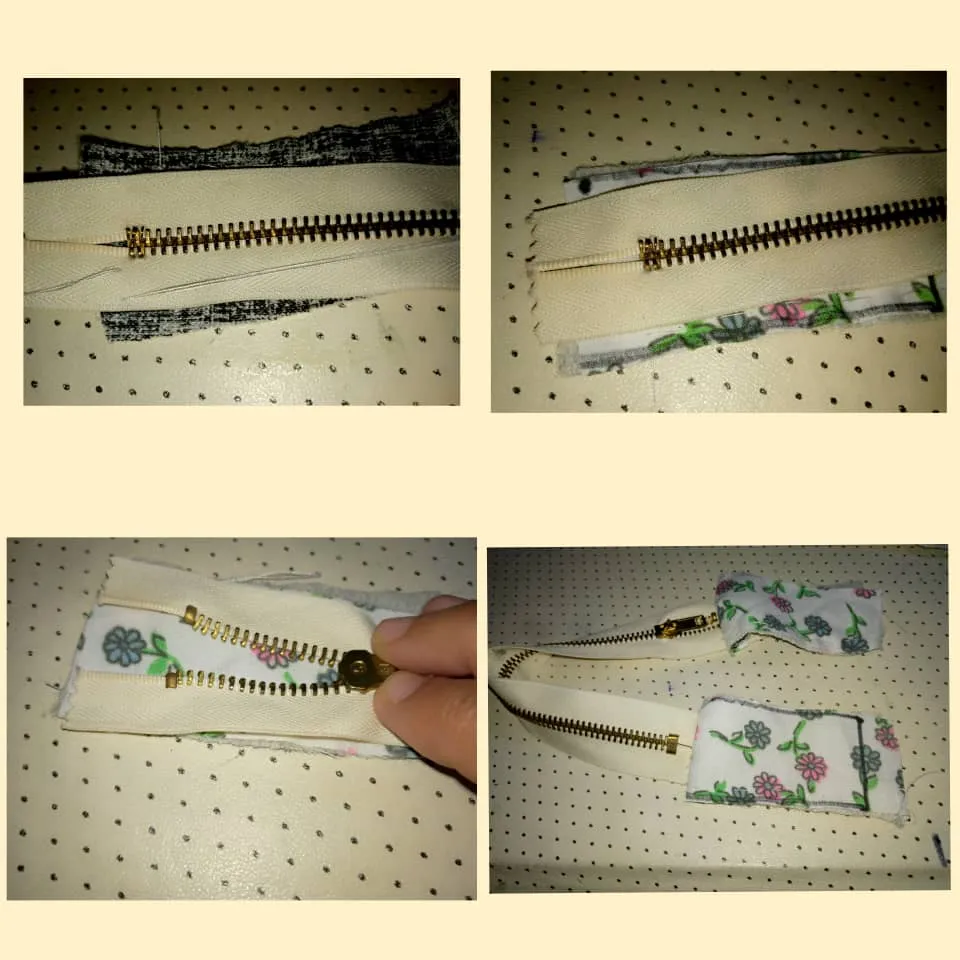
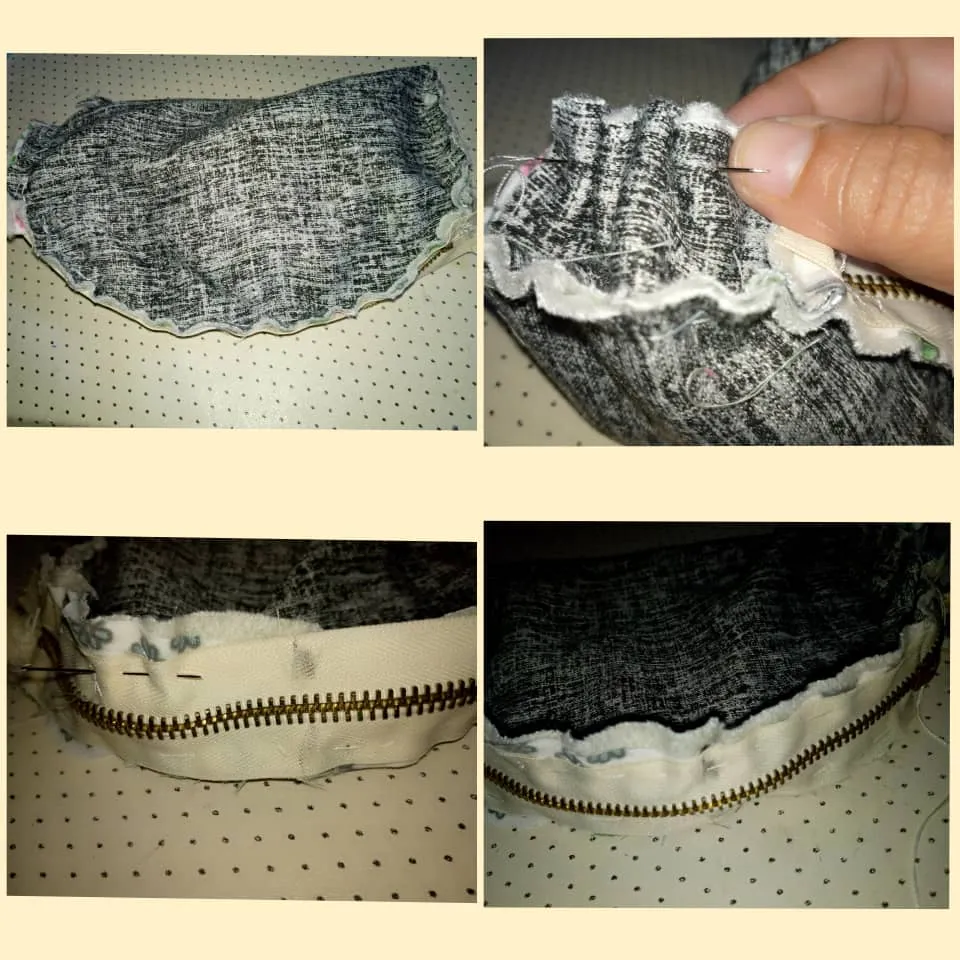
Ahora coloca derecho con derecho para coser la parte de arriba del cierre.Como se muestra en la imagen.
Igual se va hacer para con la parte inferior del cierre.
Now place right sides together to sew the top of the zipper, as shown in the picture.
The same will be done for the bottom part of the zipper.
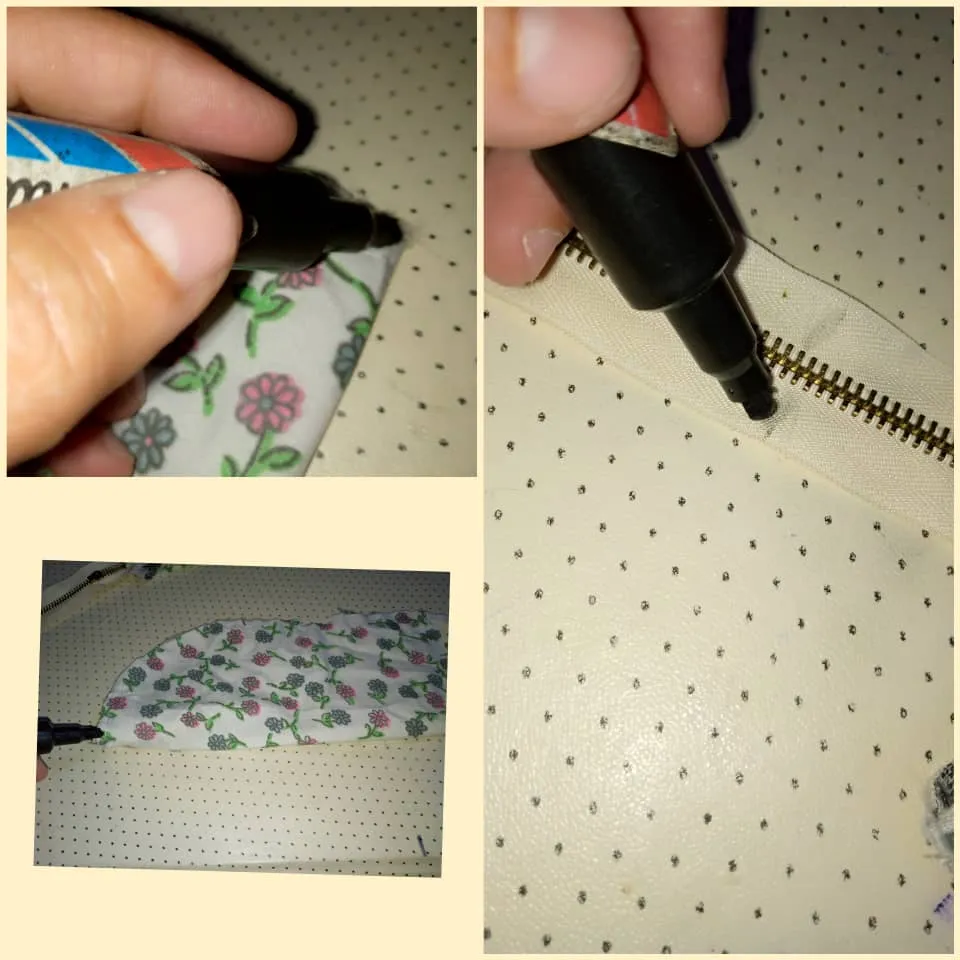
Luego se marcan las mitades del portacosmético con un marcador
Then the halves of the cosmetic holder are marked with a marker.
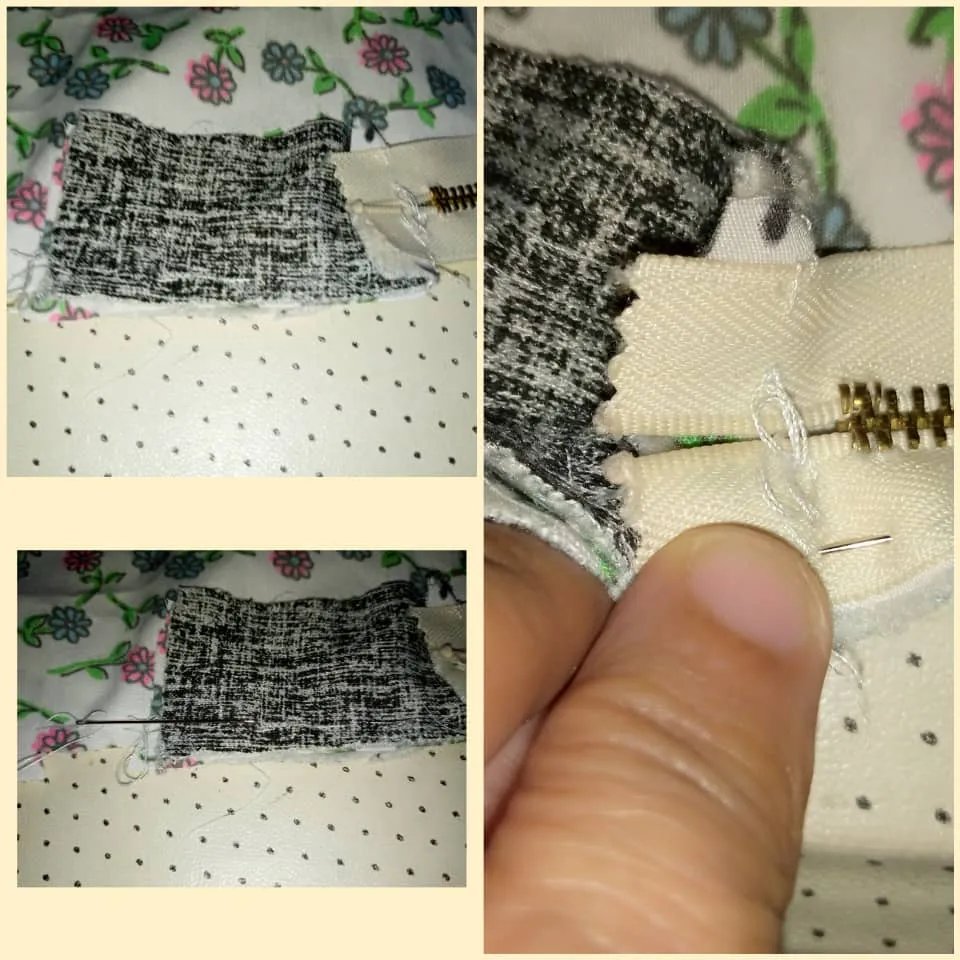
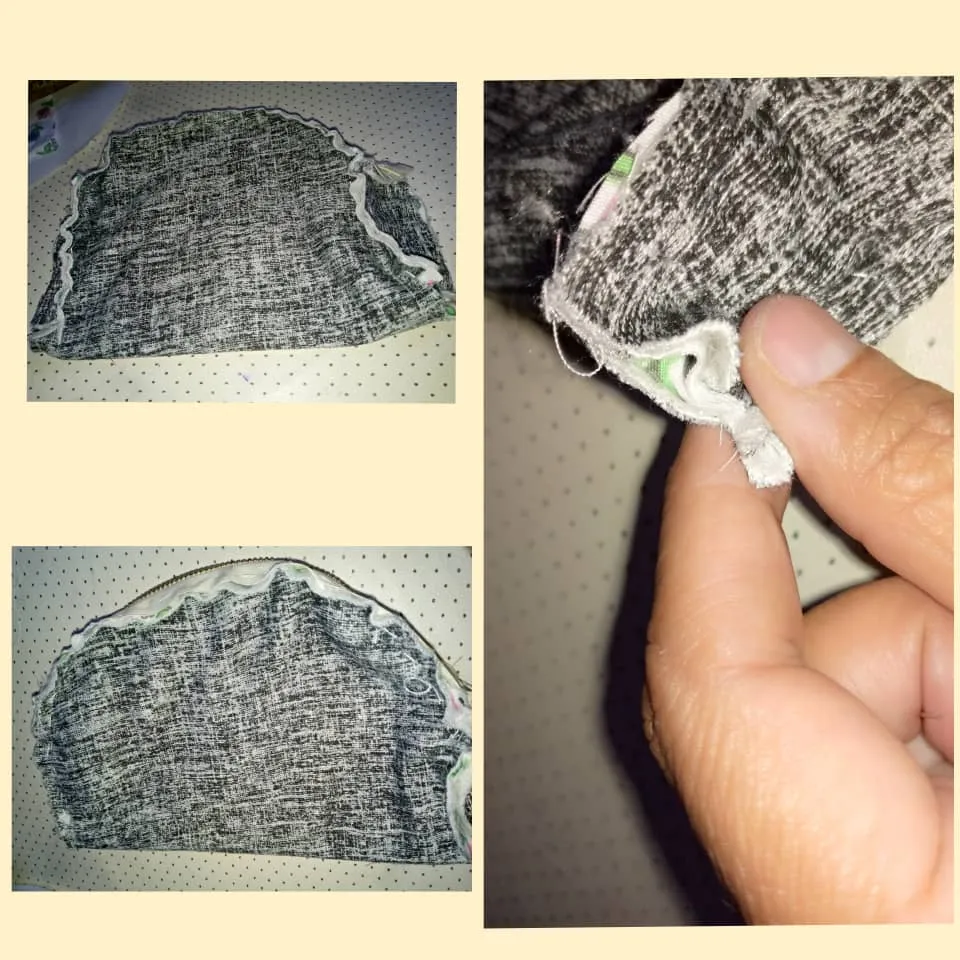
Después que se tenga pegado el cierre, con los dos pedazos de tela, procedemos a coser por toda la orilla del portacosmético.
El punto para comenzar a coser, es donde se dejó el espacio de 1x 0,5 cm.
Cuando se termine de coser toda la orilla, está listo.
Pero faltan las esquinas por coser.
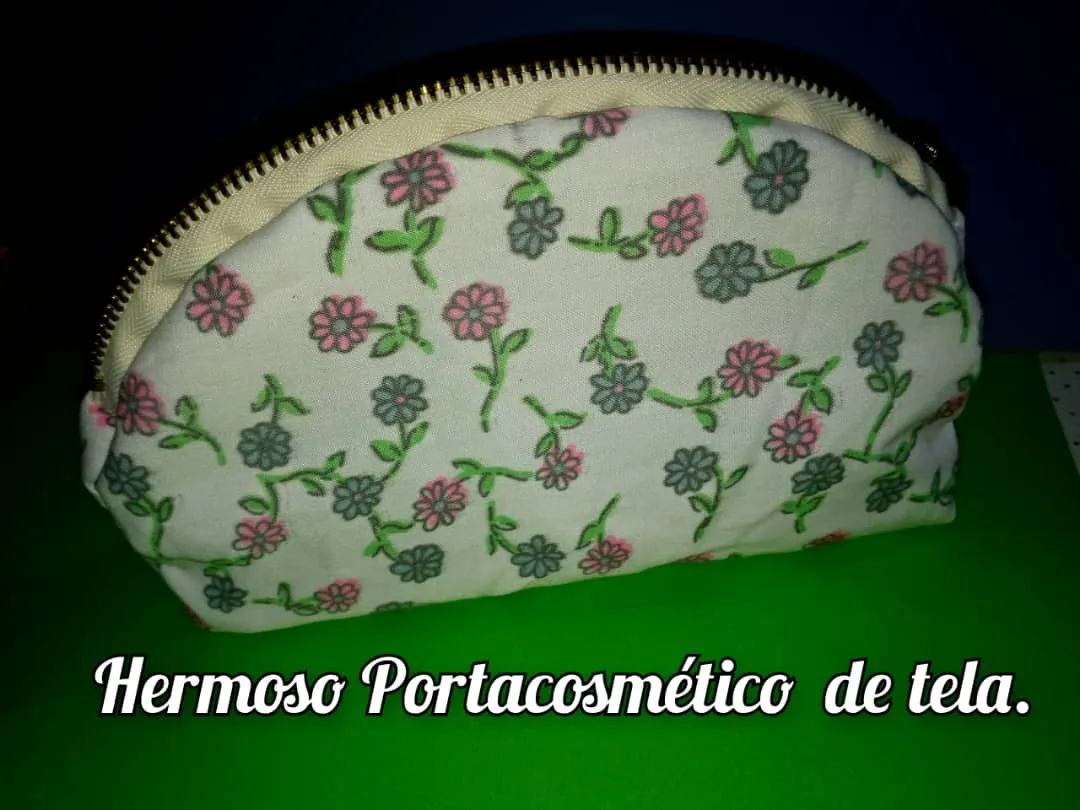
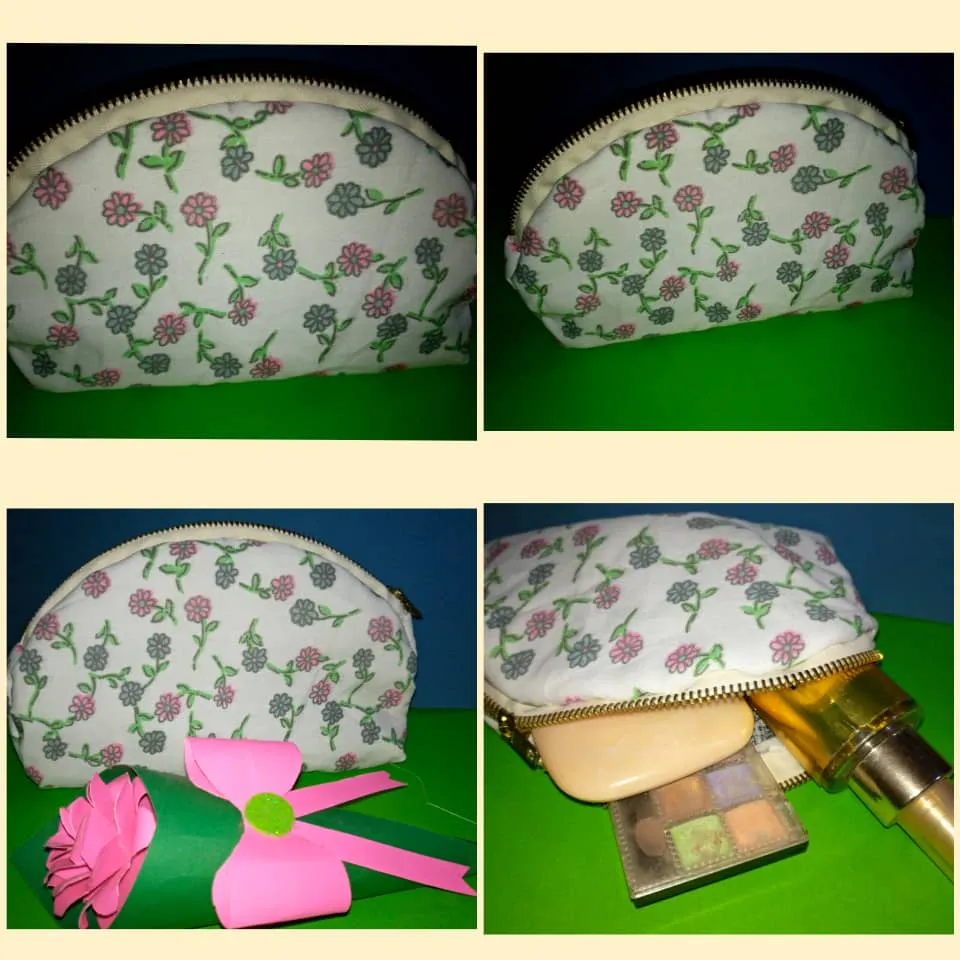
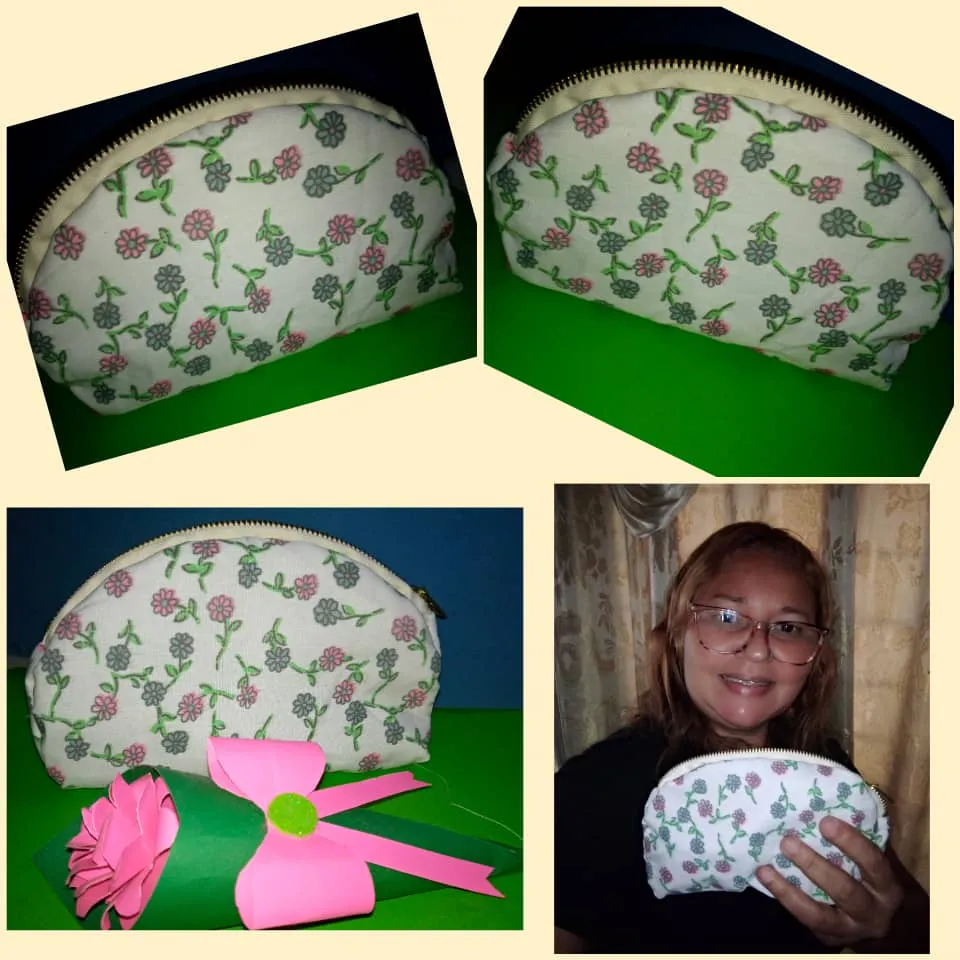
Ahora se voltea y podemos ver lo hermoso que queda "el portacosmético"
After the zipper is glued with the two pieces of fabric, we proceed to sew all around the edge of the cosmetic holder.
The point to start sewing is where the space of 1x 0.5 cm was left.
When you finish sewing the entire edge, it is ready.
But there are still the corners to be sewn.
Now flip it over and we can see how beautiful "the cosmetic holder" looks.
Aprovecho la oportunidad, para invitar a mi amiga @zoraida01 , para que participe.
I take this opportunity to invite my friend @zoraida01 to participate.
Gracias por leer, espero les haya gustado, Dios les bendiga
Thank you for reading, I hope you liked it, God bless you.

 Las fotos son de mi autoría, capturadas con telefono Samsung y editadfa con incollage.
   Traducido con DEEPL.

The photos are my own, captured with Samsung phone and edited with incollage.
   Translated with DEEPL.