¡Bienvenido a mi blog!
Buenos días queridos amigos que forman parte de esta linda comunidad #hivediy , deseo que todos estén bien. Que el Espíritu Santo los guíe siempre por el camino del bien. Dios Todopoderoso les provea todo lo que le haga falta y lo alabemos siempre.
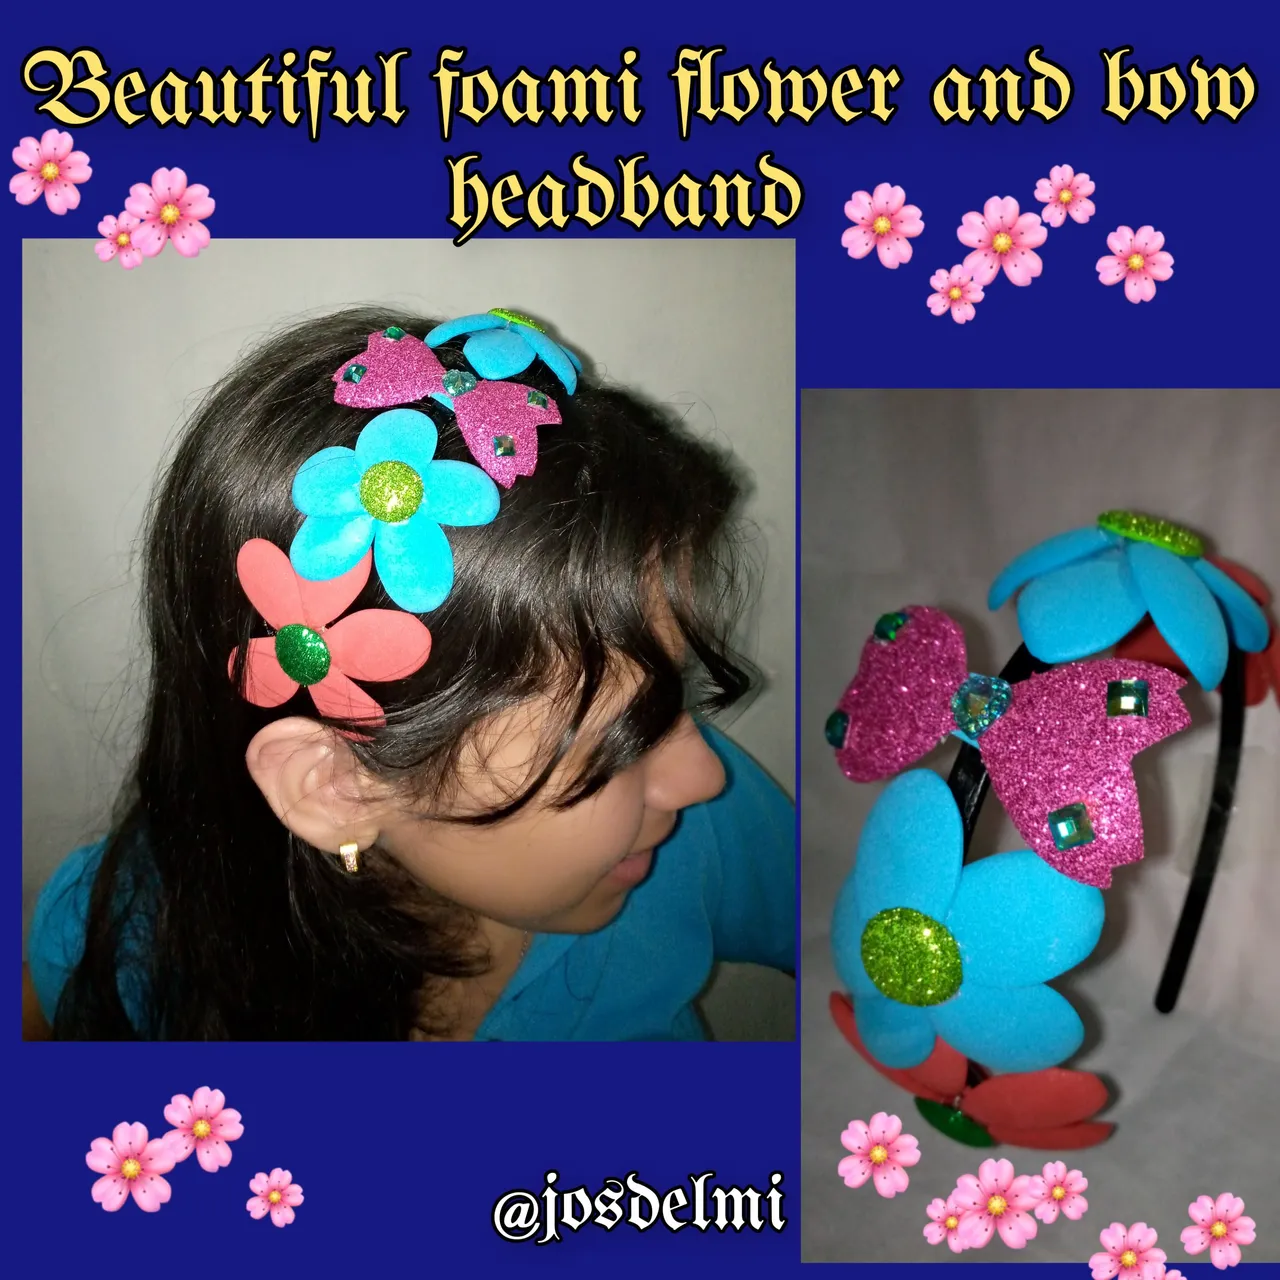
El día de hoy quiero compartir con ustedes,un tutorial de cómo realizar un hermoso cintillo , elaborado con foami o goma Eva en forma de lazo y flores de unos colores llamativos. Es fácil de hacer y es económico, además luce mucho, en este caso lo realicé para mi sobrina Omi a quien quiero mucho. Cuando lo estaba realizando le dije que me ayudara a hacerlo , me preguntó para quien era le dije : para la hija de una amiga, entonces me dijo que quería uno igual , le dije , para después lo hago. Cuál fue su sorpresa que después que estaba listo, le dije que se lo pusiera para ver cómo le quedaba, si le quedaba bien a ella a la hija de mi amiga también. Total que se lo puse y le quedó hermoso , hasta que le dije es tuyo , te lo regalo, no lo podía creer , así que me sentí feliz de alegrar a mi sobrina con este lindo cintillo.
Pueden realizar las flores y el lazo del color de su preferencia. ¡Sin más , manos a la obra!
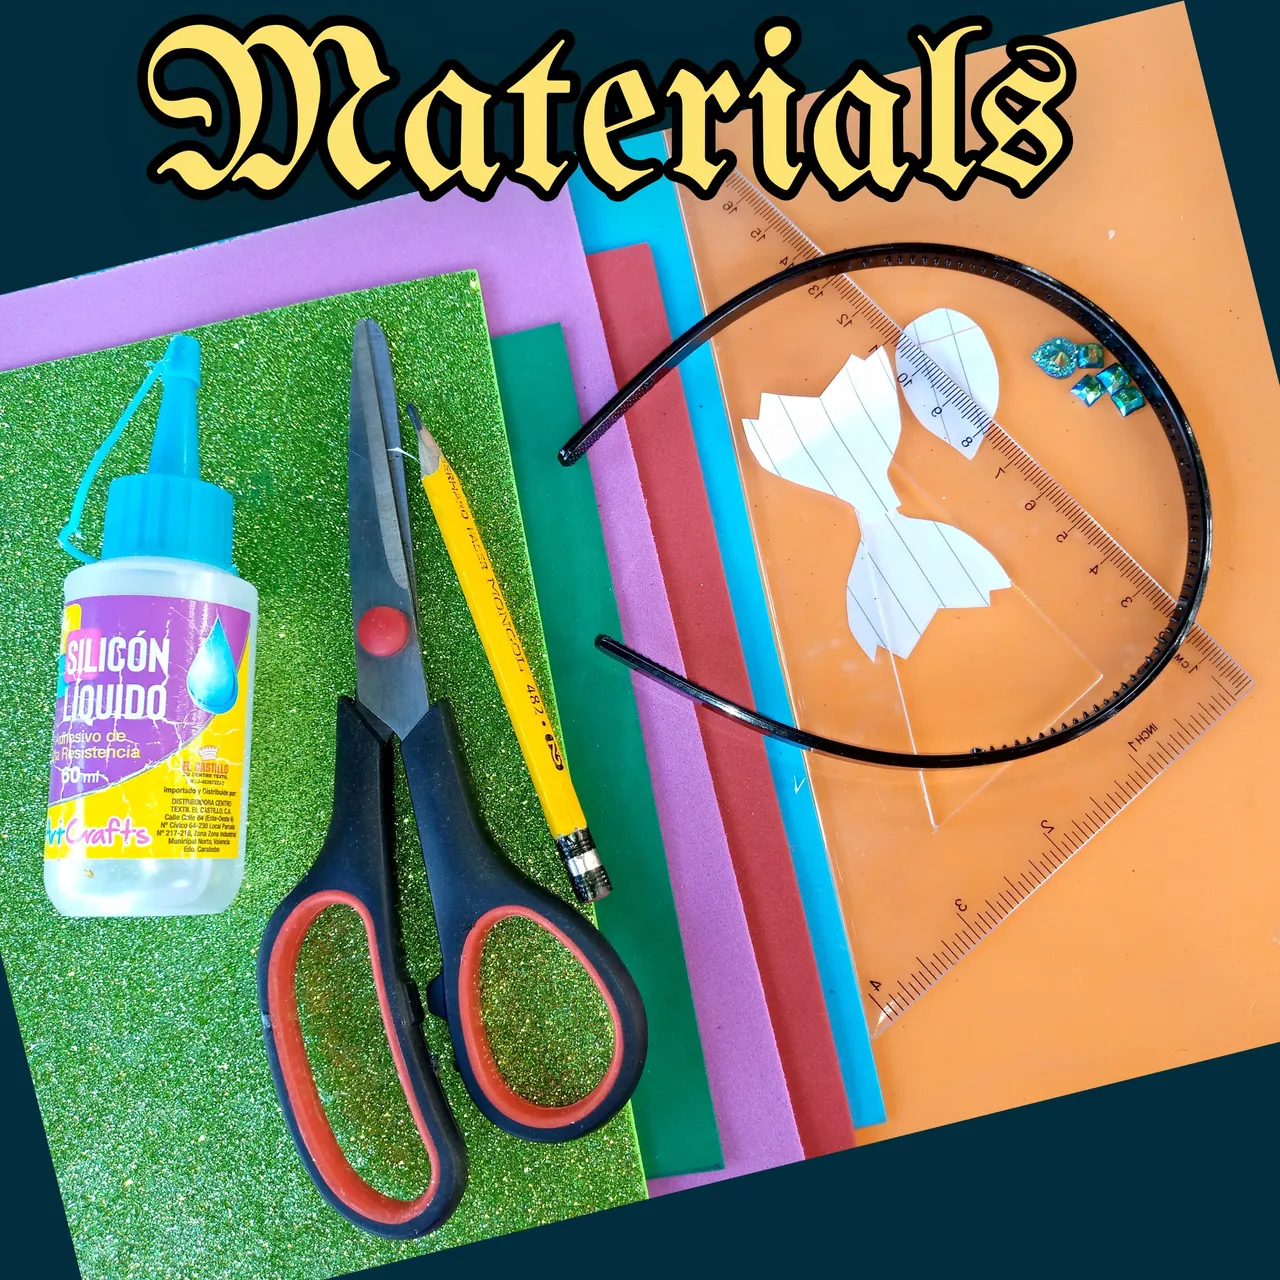
Materiales para la realización del hermoso cintillo de flores y lazo elaborado con foami o goma Eva:
- Foami o goma Eva escarchado: verde claro , verde oscuro y morado.
- Foami o goma Eva de color rojo y azul.
- Silicona líquida.
- Tijera.
- Lápiz.
- Regla.
- 4 piedras cuadradas de azul tornasol.
- 1 piedra en forma de corazón.
- Cintillo.
- Patrón del lazo y de los pétalos de la flor.
Pasó a paso para la elaboración del cintillo elaborado con foami o goma Eva:
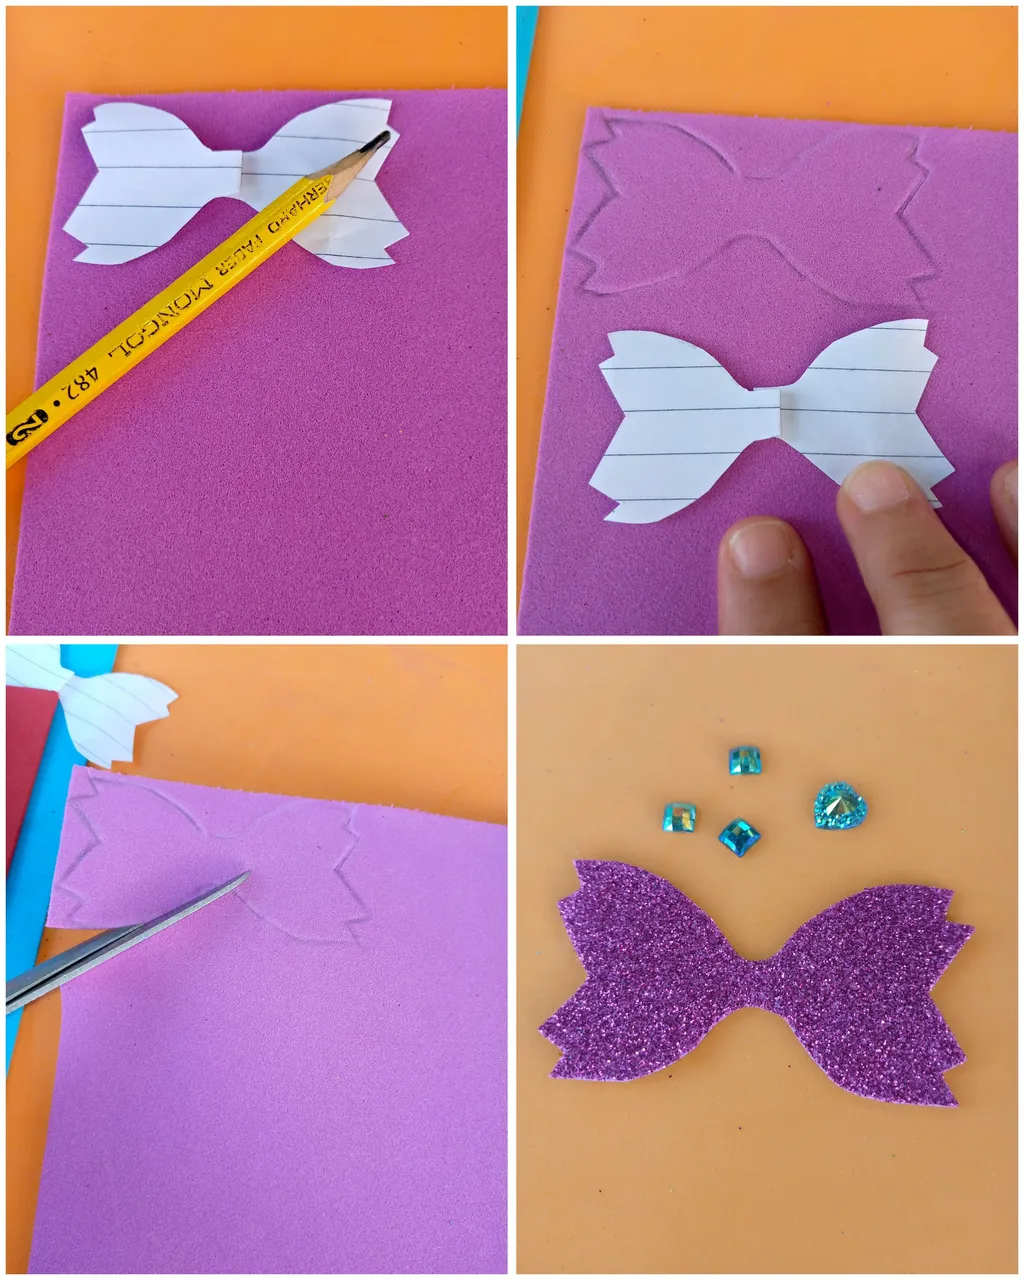
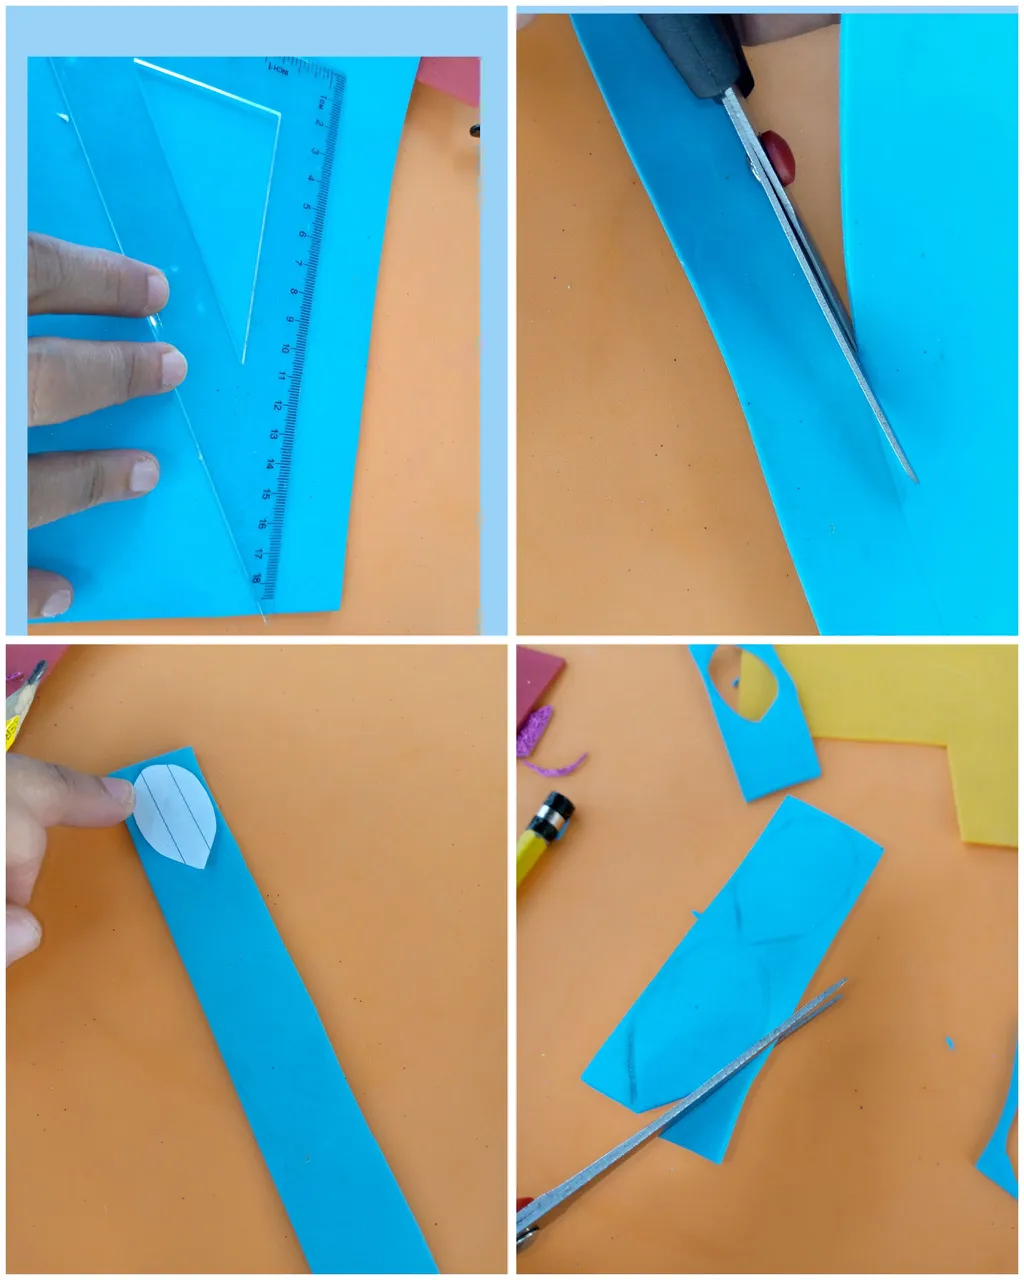
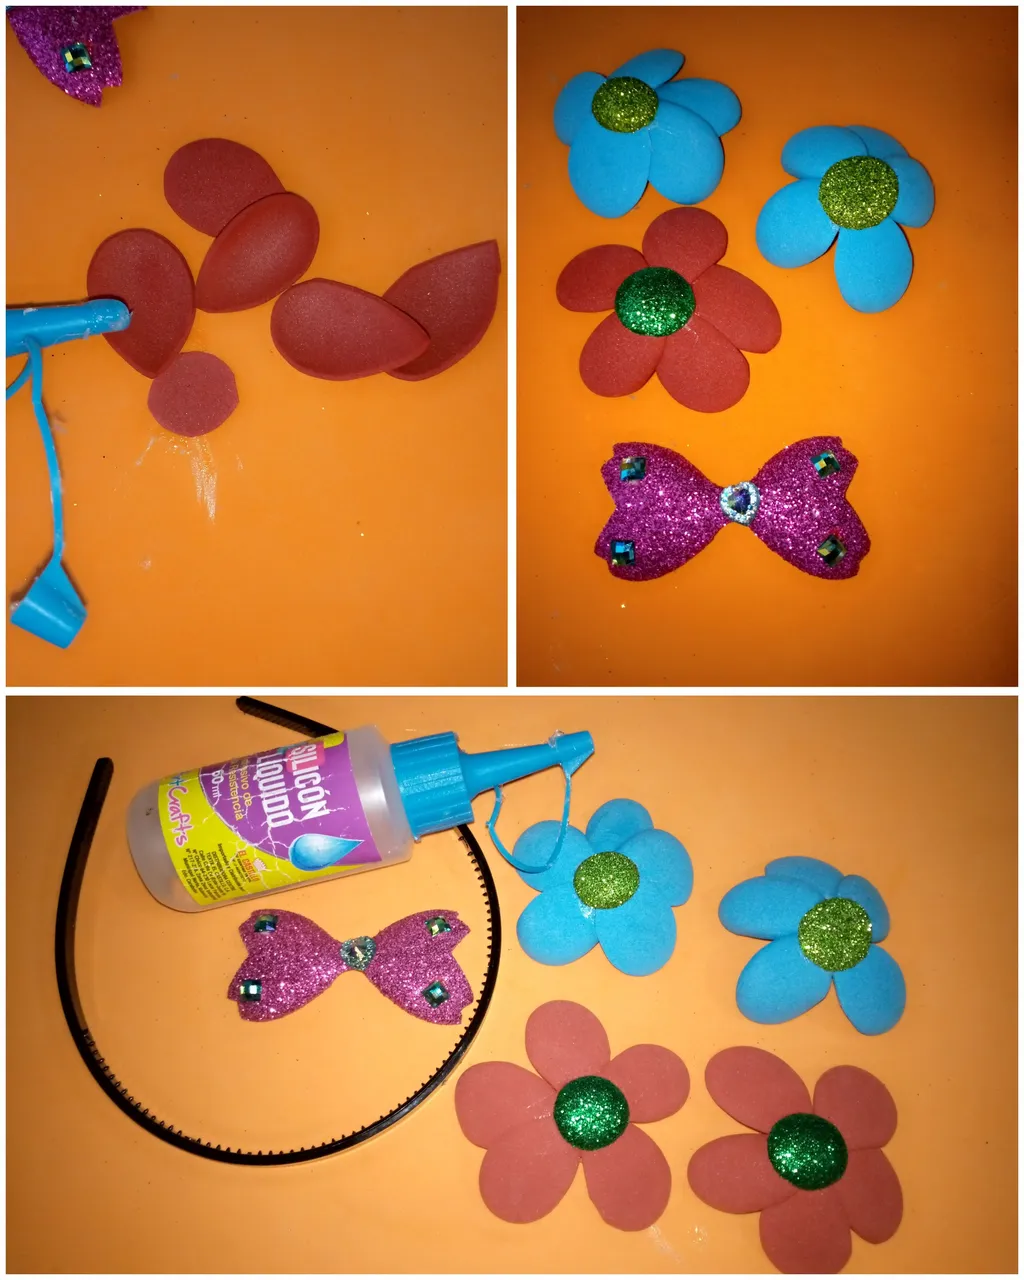
- Lo primero que haremos, es marcar con un lápiz ,el patrón del lazo sobre el foami morado escarchado, para luego recortar con las tijeras.
- Ahora con el foami azul y la regla marcamos dos rectángulo de 2 x 15 centímetros, de aquí sacamos dos tiras, esto es para los pétalos de la flor.
- Después de recortar con unas tijeras las tiras de 2 x 15 centímetros , procedemos a marcar con el patrón de pétalo sobre el foami, la flor lleva cinco pétalos. - Debemos sacar 10 pétalos para dos flores . Además sacar dos redondos que van a la base de las flores.
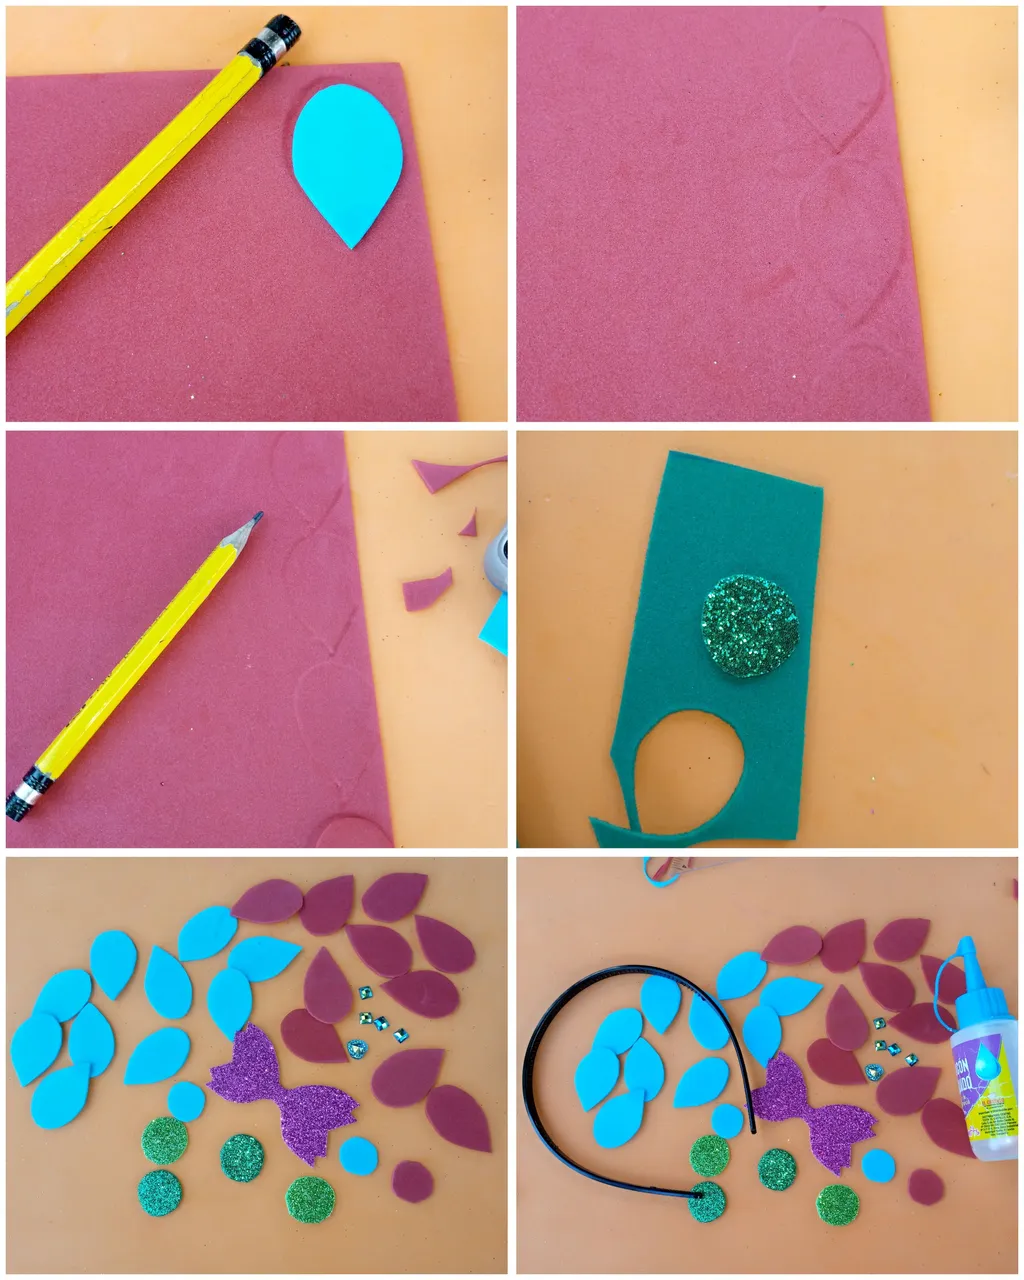
- Igualmente con el foami rojo hacemos el mismo procedimiento que con el foami azul , sacando 10 pétalos. Y dos redondo del mismo color.
- Aquí podemos observar los materiales ya recortados para proceder a pasar por la plancha
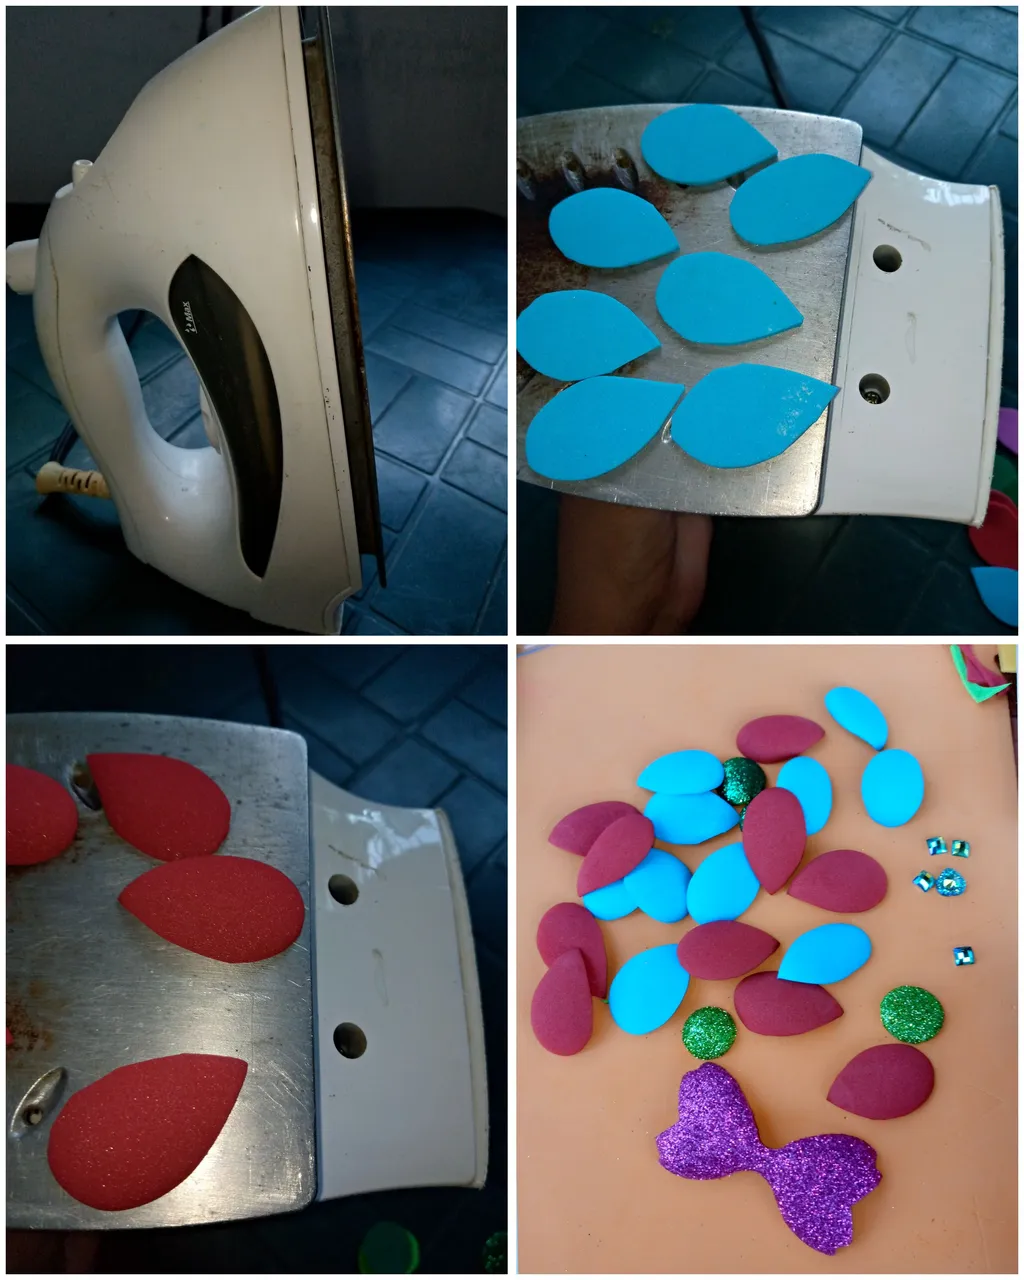
- Ahora encendemos una plancha de ropa, lo ponemos en minimo ,esperar un rato a qué caliente, colocamos sobre de la plancha los pétalos de flores de color rojo y azul,esperamos a que se levantén, eso lo hacemos con cuidado para no quemarnos.
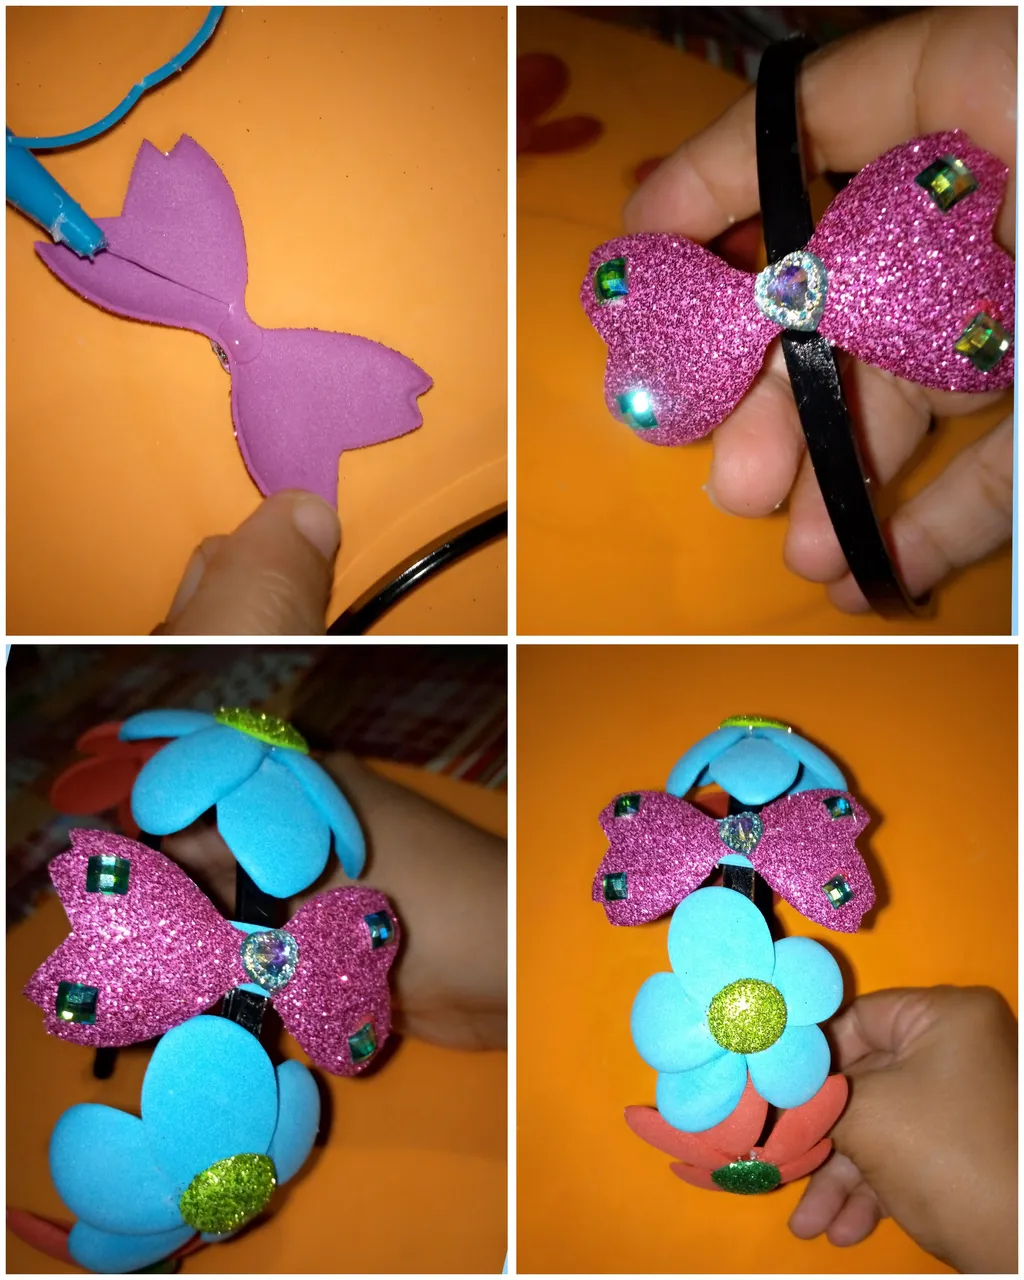
- Ya teniendo listo procedemos a ir armando el cintillo.
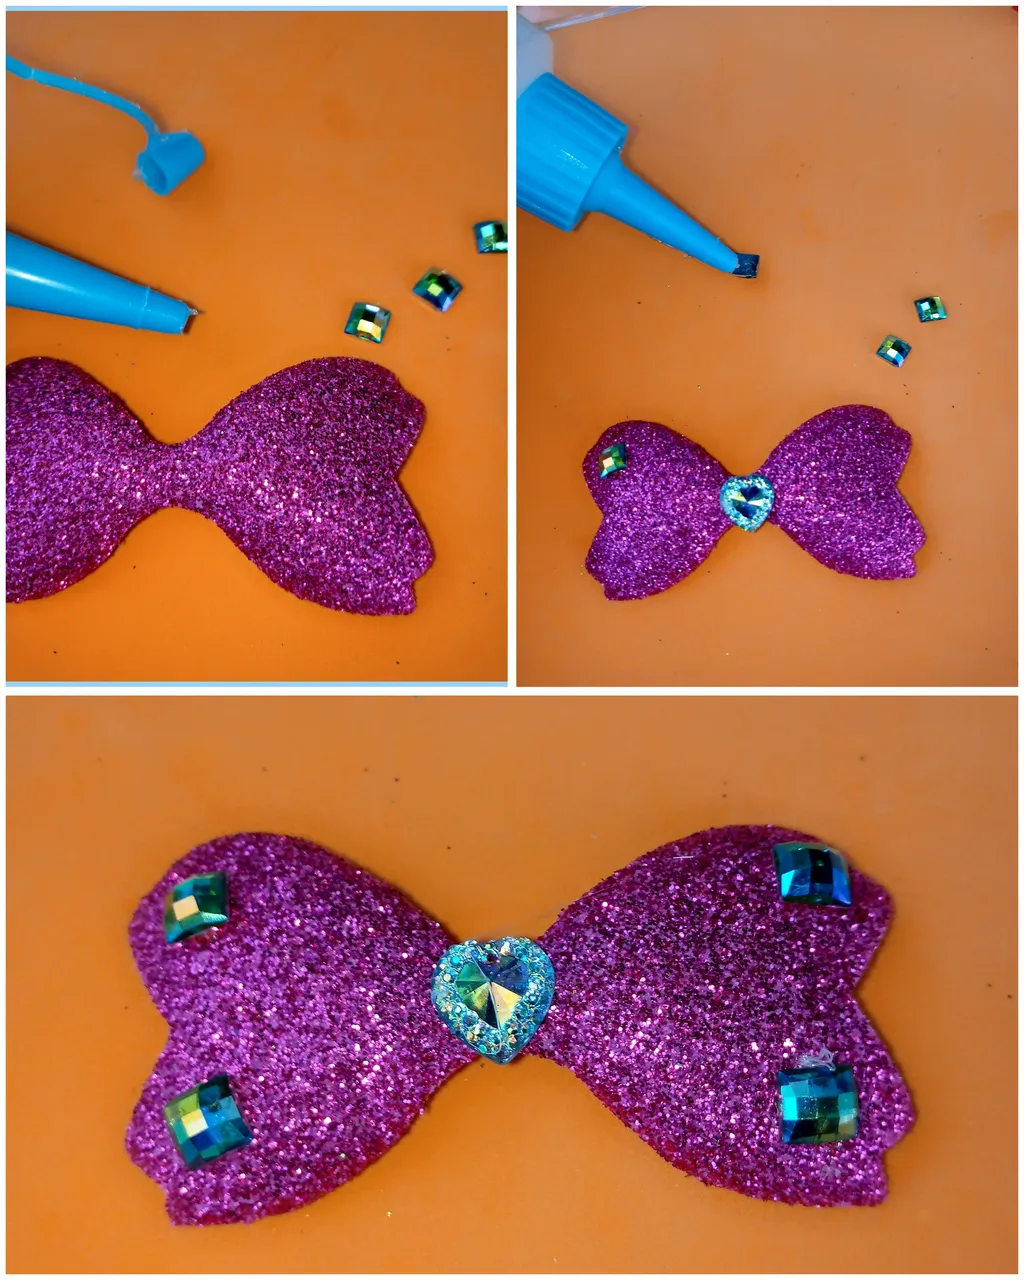
- Continuamos pegando las piedras cuadradas tornasol con silicona liquida en cada extremos del lazo y en el medio la piedra en forma de corazón.
- Ahora armaremos las flores, comenzamos con las azules, agregamos silicona a la base redonda del mismo color y vamos colocando cada pétalo hasta completar la flor de cinco y en el centro echamos silicón líquido al redondo verde escarchado y lo pegamos.
- Así mismo haremos para realizar la flor roja.
- Pegar del cintillo con silicón líquido el lazo y las flores a cada lado.
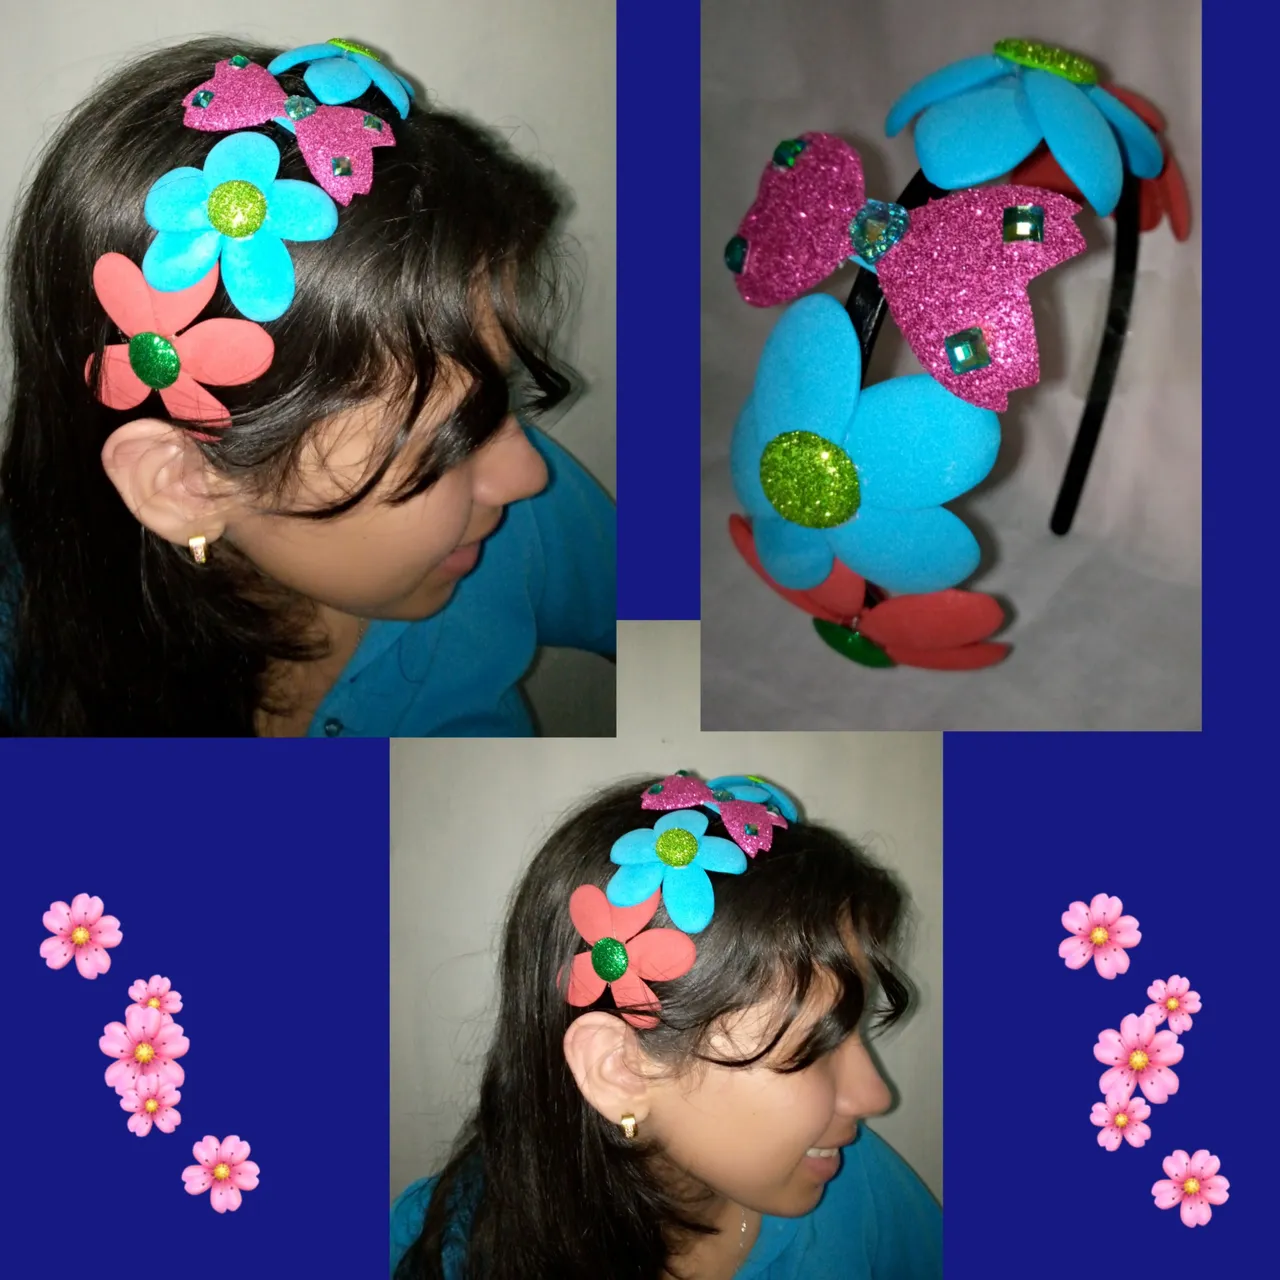
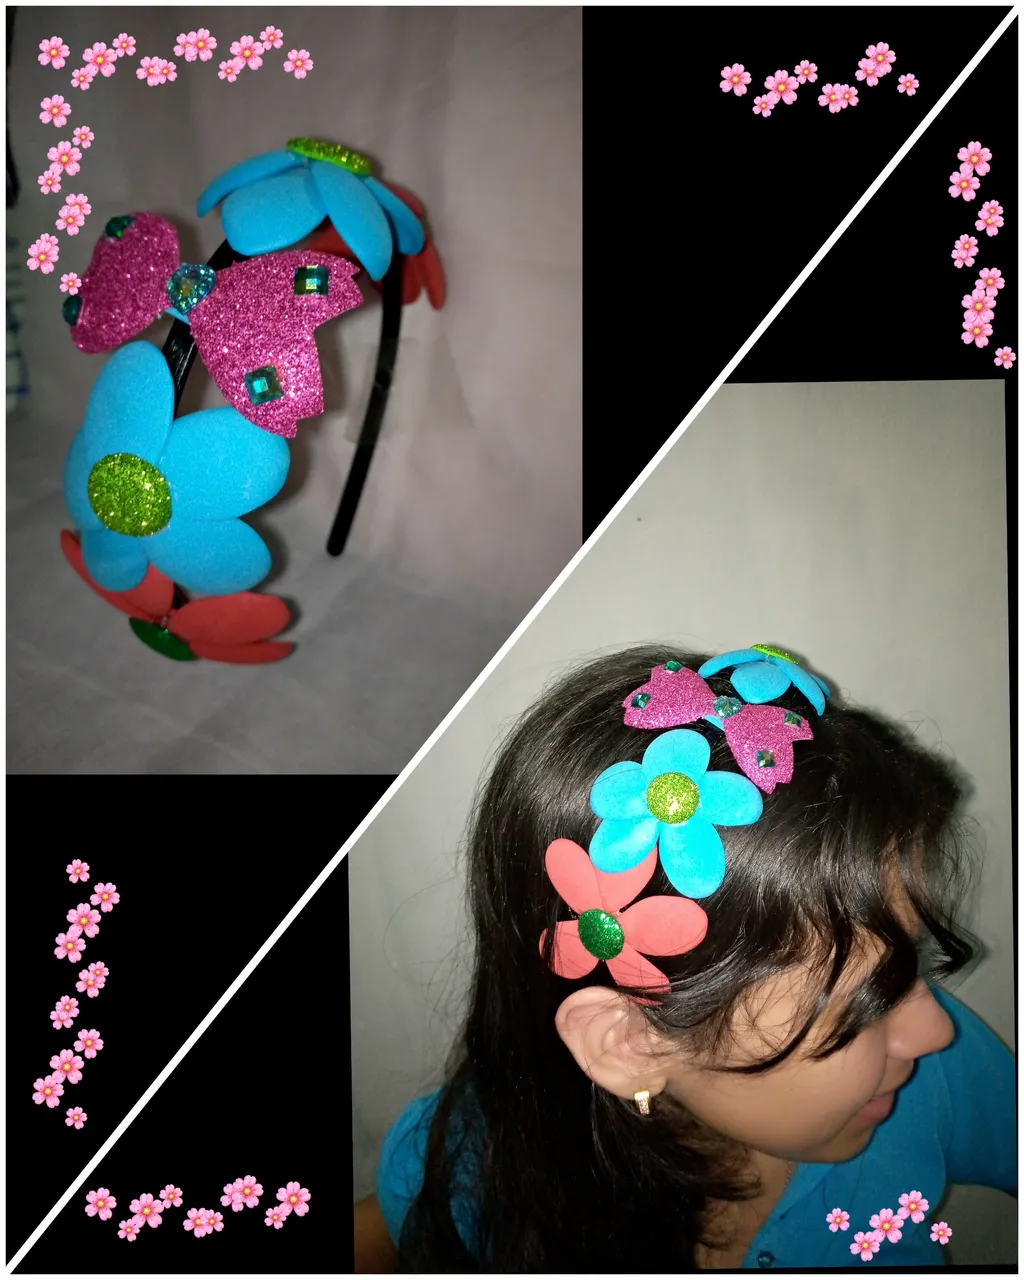
Aquí podemos observar el resultado final del hermoso cintillo de flores y lazo hecho con foami.
Espero que sea de su agrado , hasta la próxima, muchas bendiciones.
Las fotos son mías tomadas con teléfono Infinix editadas con incollage y traducida con Deepl.
ESPAÑOL
Welcome to my blog!
Good morning dear friends who are part of this nice community #hivediy , I wish you all well. May the Holy Spirit guide you always on the path of good. May Almighty God provide you with everything you need and may we praise Him always.
Today I want to share with you, a tutorial on how to make a beautiful headband, made with foami or Eva rubber in the form of a bow and flowers of bright colors, it is easy to make and is economical, also looks great, in this case I made it for my niece Omi whom I love very much. When I was making it I asked her to help me make it, she asked me who it was for, I told her: for the daughter of a friend, then she told me she wanted one just like it, I told her, I'll make it later. To her surprise, after it was ready, I told her to put it on to see how it looked on her, if it looked good on her, it looked good on my friend's daughter too. I put it on her and it looked beautiful, until I told her it was yours, I could not believe it, so I was happy to make my niece happy with this beautiful headband.
You can make the flowers and the ribbon in the color of your choice. Without further ado, let's get to work!
Materials for the realization of the beautiful headband of flowers and bow made with foami or Eva gum:
- Frosted foami or eva rubber: light green , dark green and purple.
- Red and blue foami or eva rubber.
- Liquid silicone.
- Scissors.
- Pencil.
- Ruler.
- 4 square stones of litmus blue.
- 1 heart-shaped stone.
- Headband.
- Pattern of the ribbon and flower petals.
Step by step for the elaboration of the headband made with foami or Eva rubber:
- The first thing we will do, is to mark with a pencil, the pattern of the bow on the frosted purple foami, and then cut with scissors.
- Now with the blue foami and the ruler we mark two rectangles of 2 x 15 centimeters, from here we take two strips, this is for the petals of the flower.
- After cutting with scissors the 2 x 15 centimeters strips, we proceed to mark with the petal pattern on the foami, the flower has five petals. - We must make 10 petals for two flowers. Also take out two round ones that go to the base of the flowers.
- Likewise with the red foami we do the same procedure as with the blue foami , taking out 10 petals. And two round ones of the same color.
- Here we can see the materials already cut to proceed to pass through the plate.
- Now we turn on a clothes iron, we put it on minimum, wait a while to what hot, we put on the iron on the flower petals of red and blue, we hope that rise, we do this carefully so as not to burn.
- Already having ready we proceed to go assembling the headband.
- We continue gluing the square litmus stones with liquid silicone at each end of the bow and in the middle the heart-shaped stone.
- Now we will assemble the flowers, we start with the blue ones, we add silicone to the round base of the same color and we place each petal until we complete the flower of five and in the center we pour liquid silicone to the frosted green round and glue it.
- We will do the same to make the red flower.
- Glue from the headband with liquid silicone the ribbon and the flowers on each side.
Here we can see the final result of the beautiful flower and bow headband made with foami.
I hope it is to your liking , until next time, many blessings.
The photos are mine taken with Infinix phone edited with incollage and translated with Deepl.