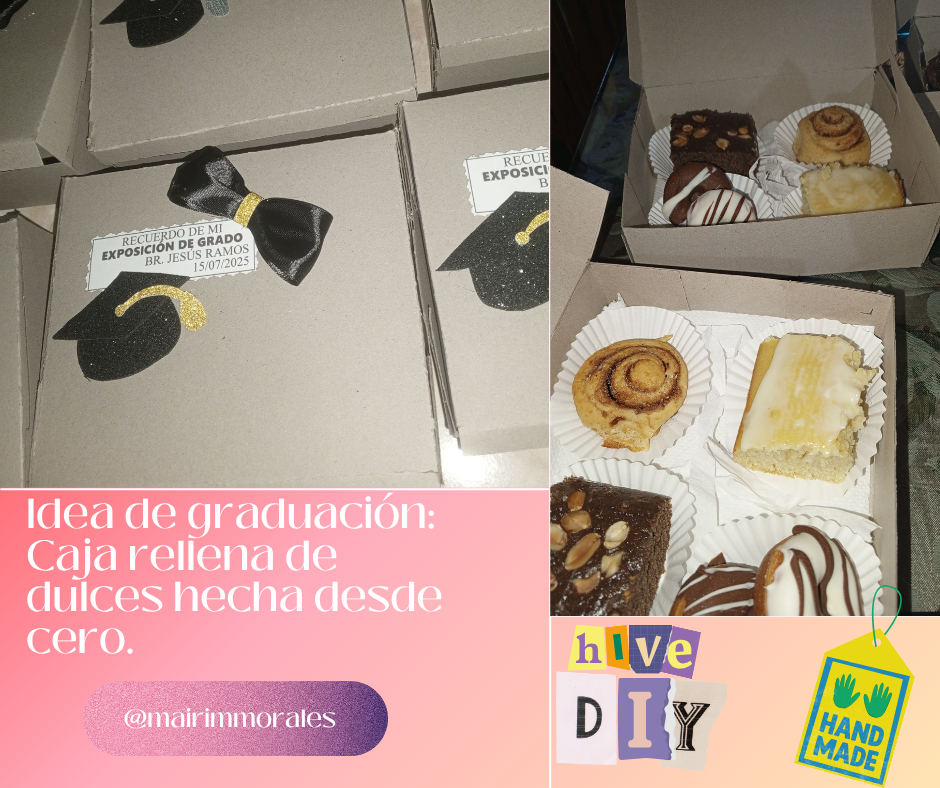
Muy buenas tardes compañeros de #diy. Hace una semana atrás fue la exposición de tesis de mi novio, por tal motivo, le pedí que, me dejara hacerme cargo de los recuerdos que daría como detalle por haber ido a su exposición de grado a jurados, coordinadores, asesor y familiares. Recordé, que en mi momento obsequie algo muy parecido, y debido a que, de alguna forma soy extremadamente creativa, e intento bajar los costos de cualquier cosa que hago, entonces quise apoyarlo en esta idea.
Good afternoon, fellow DIYers. A week ago, my boyfriend's thesis presentation was held, so I asked him to let me take care of the souvenirs he would give as a token of appreciation for attending his thesis presentation to the judges, coordinators, advisors, and family. I remembered that I had given something very similar as a gift before, and since I'm extremely creative and try to keep the costs down on everything I make, I wanted to support him with this idea.
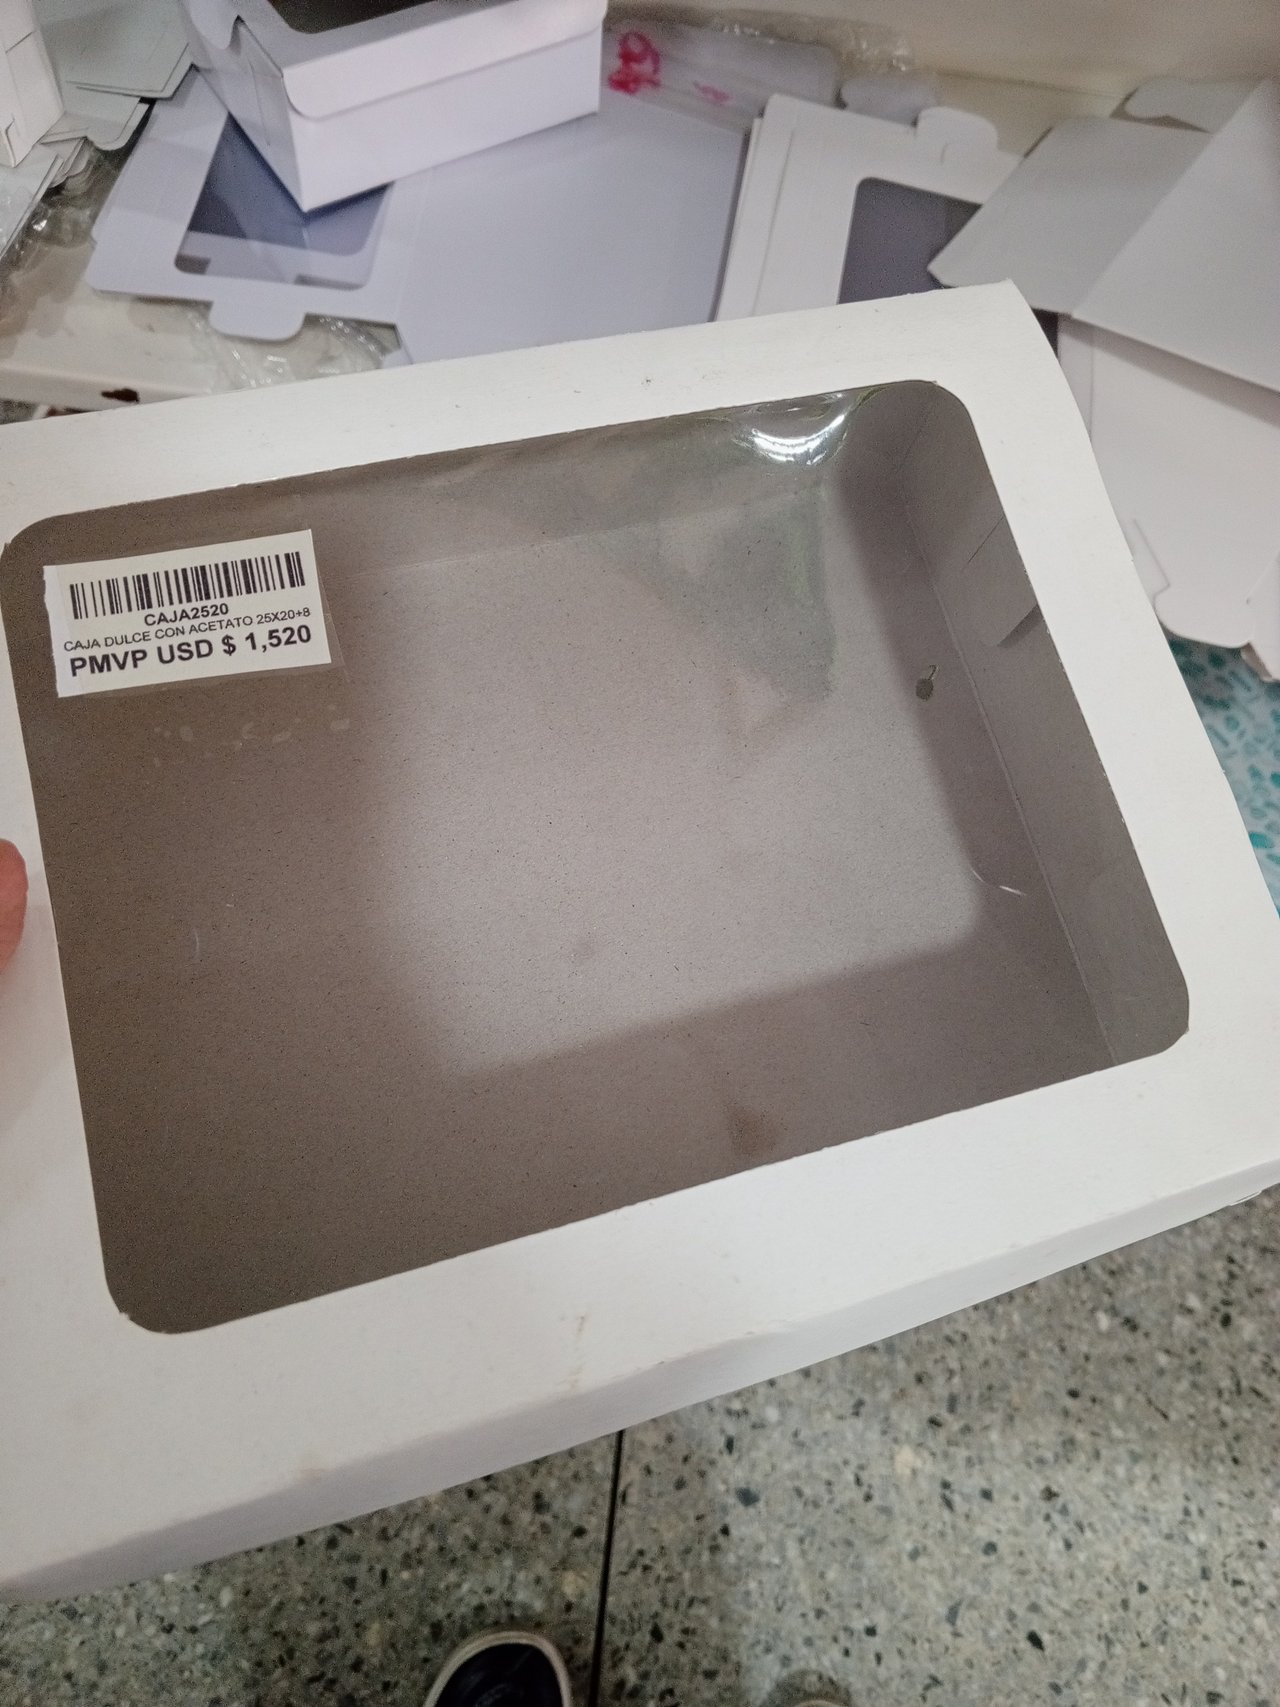
Vale destacar que, mi primera idea fue hacer cajitas rellenas de dulces personalizadas, así mismo, cuando escogí hacerlo, quise ver cuanto costaban las cajas armadas y listas (aquí abajo le anexo la foto), de esta manera, bajar el estrés de hacer caja por caja a mano, en este caso 1,52$ fue el precio por caja sin nada de relleno/dulces. Po lo tanto, me dirigí a una papelería y pregunté por el precio del cartón 3 en kilo, 1,9$, salían 5 cajas por cada cartón, así que, esa fue mi elección; hacerlas desde cero, y aquí te muestro el paso a paso:
It's worth noting that my first idea was to make personalized candy-filled boxes. When I decided to do it, I wanted to see how much the boxes cost when assembled and ready (I've attached the photo below). This way, I could reduce the stress of making box by box by hand. In this case, $1.52 was the price per box without any filling or candy. So, I went to a stationery store and asked for the price of a 3-kilo carton, $1.90, 5 boxes were coming out for each cardboard, So, that was my choice. make them from scratch, and here I show you the step by step:
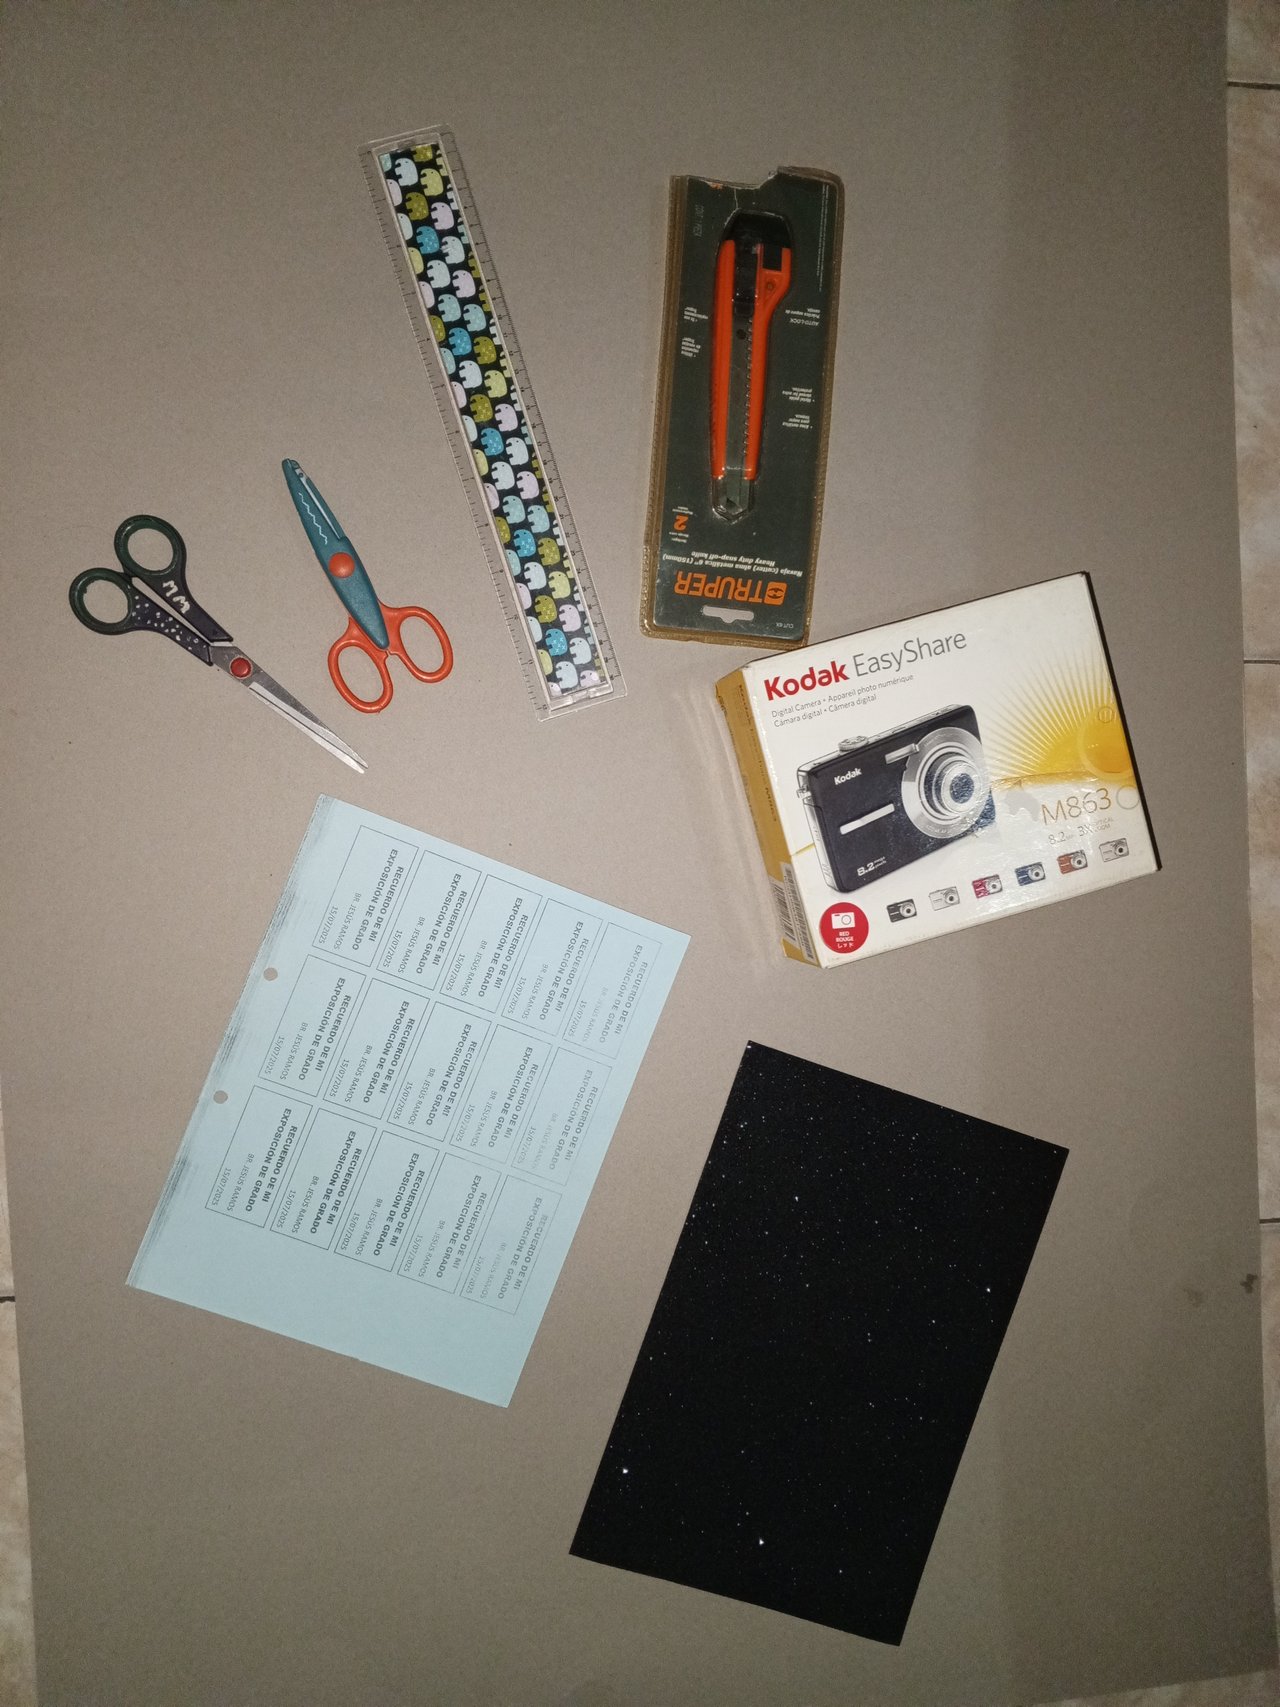
Materiales: / Materials:
Cartón 3 en kilo
Tijera
Regla
Exacto
Lápiz o lapicero
Pistola de silicón y barra de silicón
Caja con tamaño para patrón
Etiquetas personalizadas
Foami negro escarchado
Retazos de cartulina escarchada dorada y/o plateada
Cinta de tela negra de 3 cm
3k cardboard
Scissors
Ruler
Cutter
Pencil or pen
Hot glue gun and glue stick
Box sized for pattern
Custom labels
Black frosted foam
Gold and/or silver frosted cardstock scraps
3 cm black fabric ribbon
Procedimiento: / Procedure:
Marcar con ayuda de un lápiz y una regla el patrón de la caja de tamaño escogido, anexando los bordes, que harán de paredes y tapa de la caja.
Using a pencil and a ruler, mark the pattern of the box of the chosen size, adding the edges, which will serve as the walls and lid of the box.
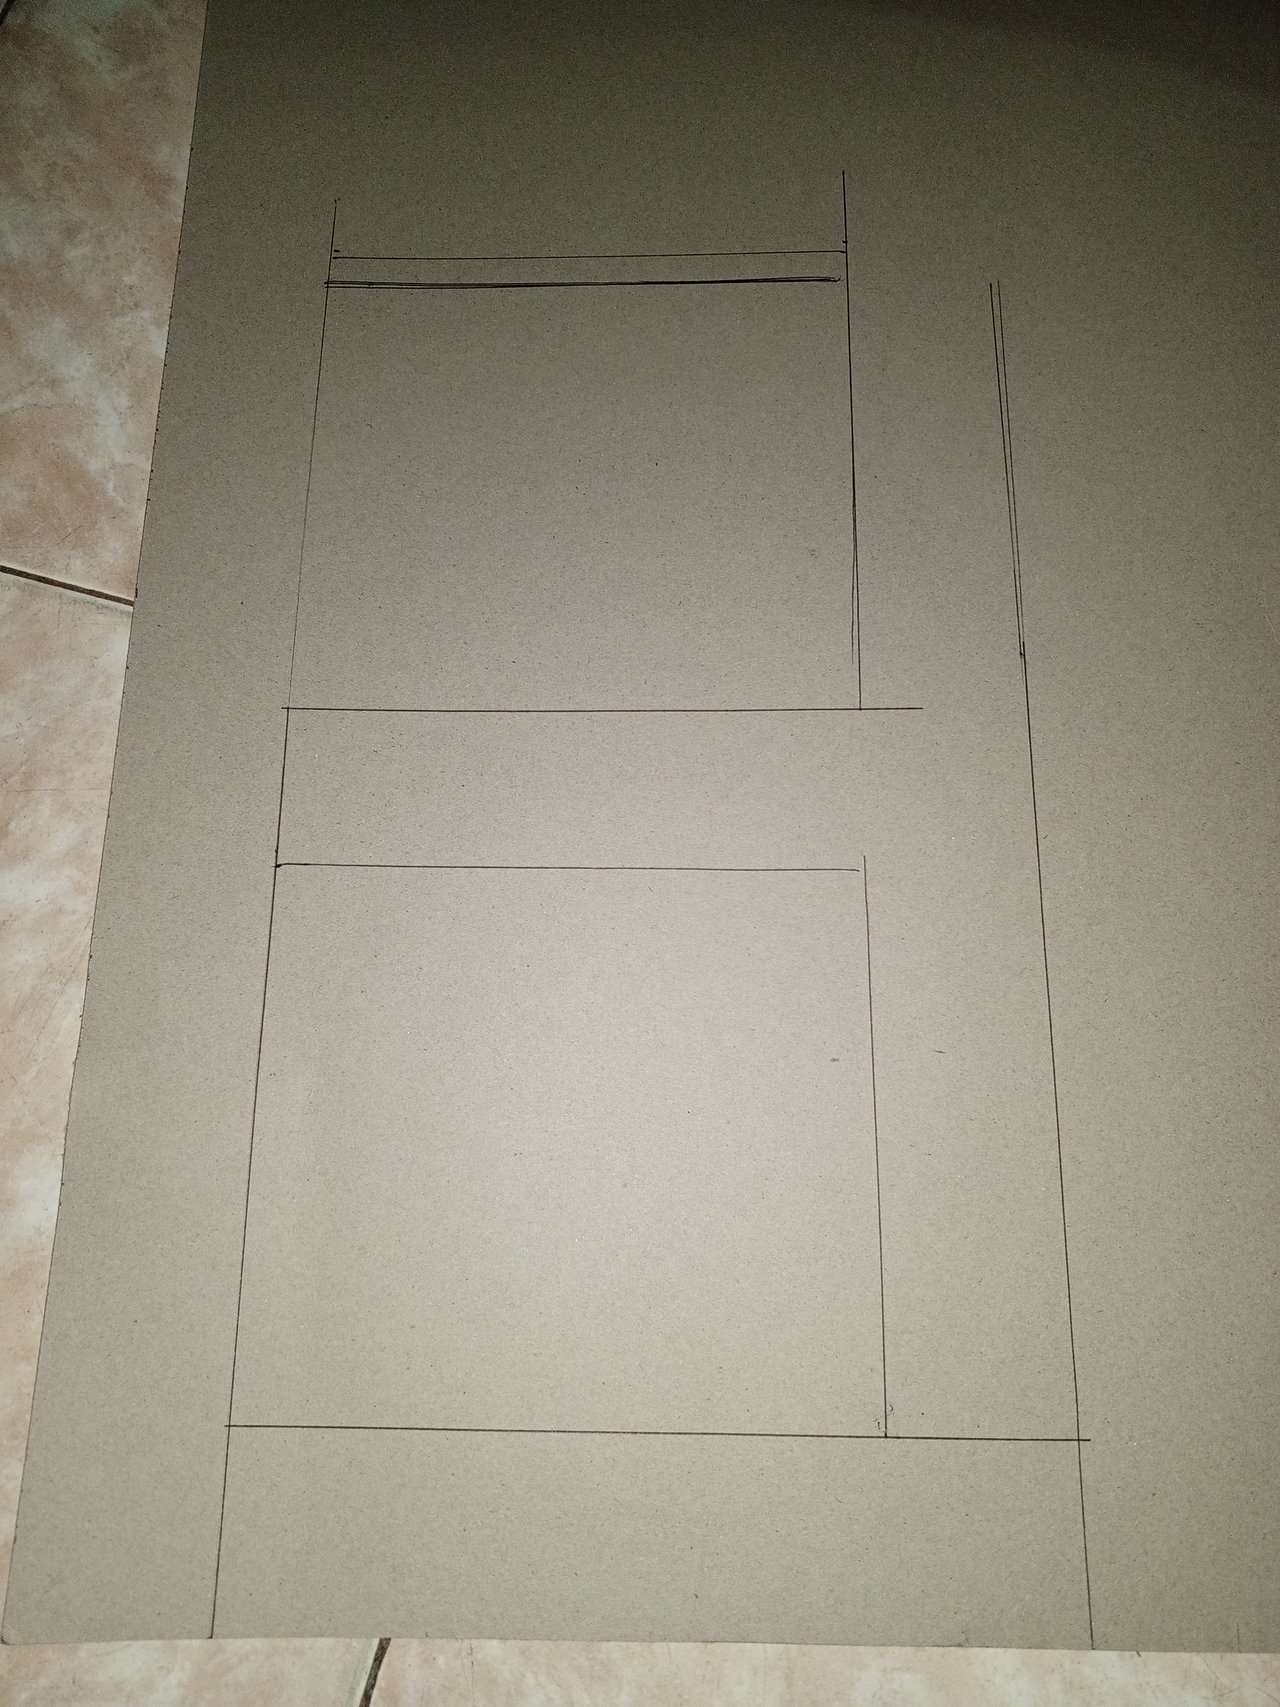
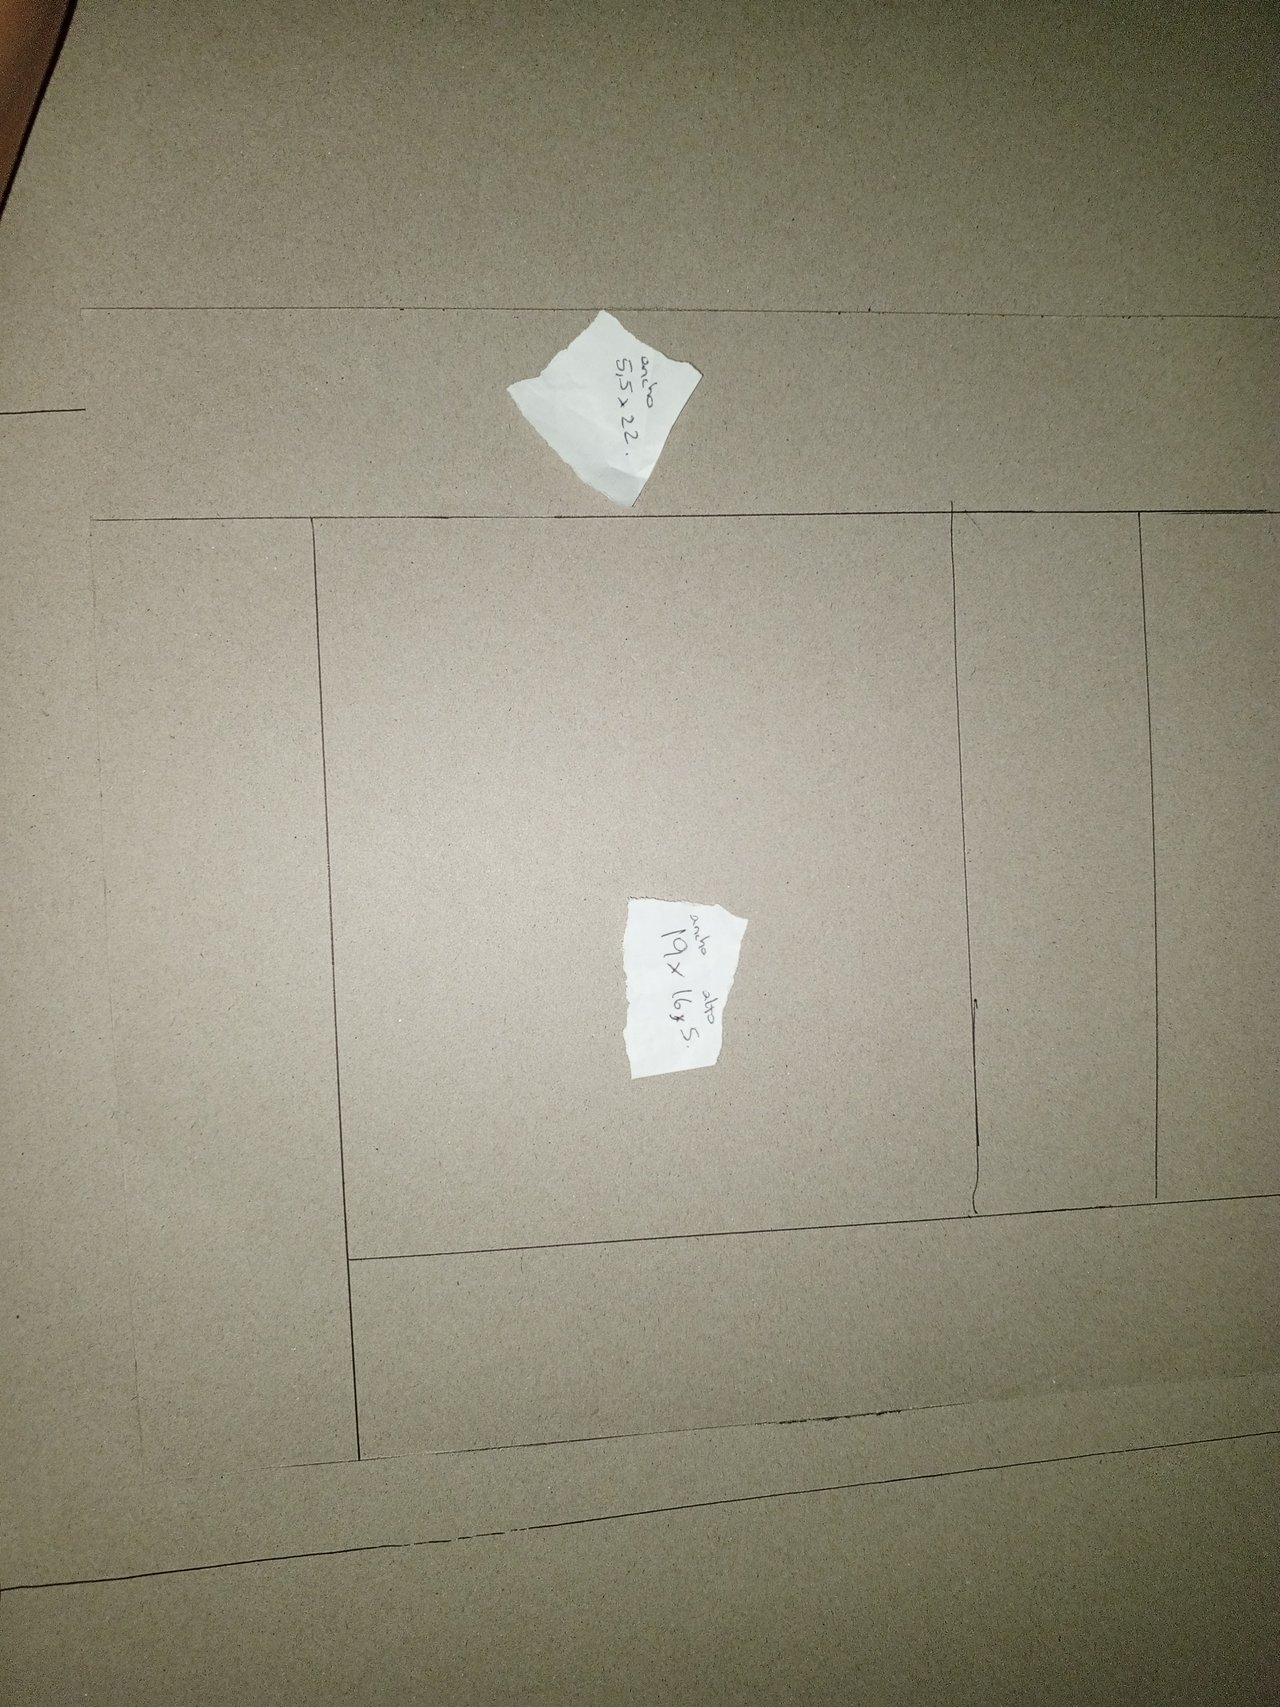
En la imagen le muestro las medidas de marcaje de mi caja patrón o modelo, para que tengan una idea. Recordar que estas medidas deben ser duplicadas para hacer la parte de la tapa de la caja.
In the image, I show you the marking measurements for my standard box, so you can get an idea. Remember that these measurements must be doubled to make the lid of the box.
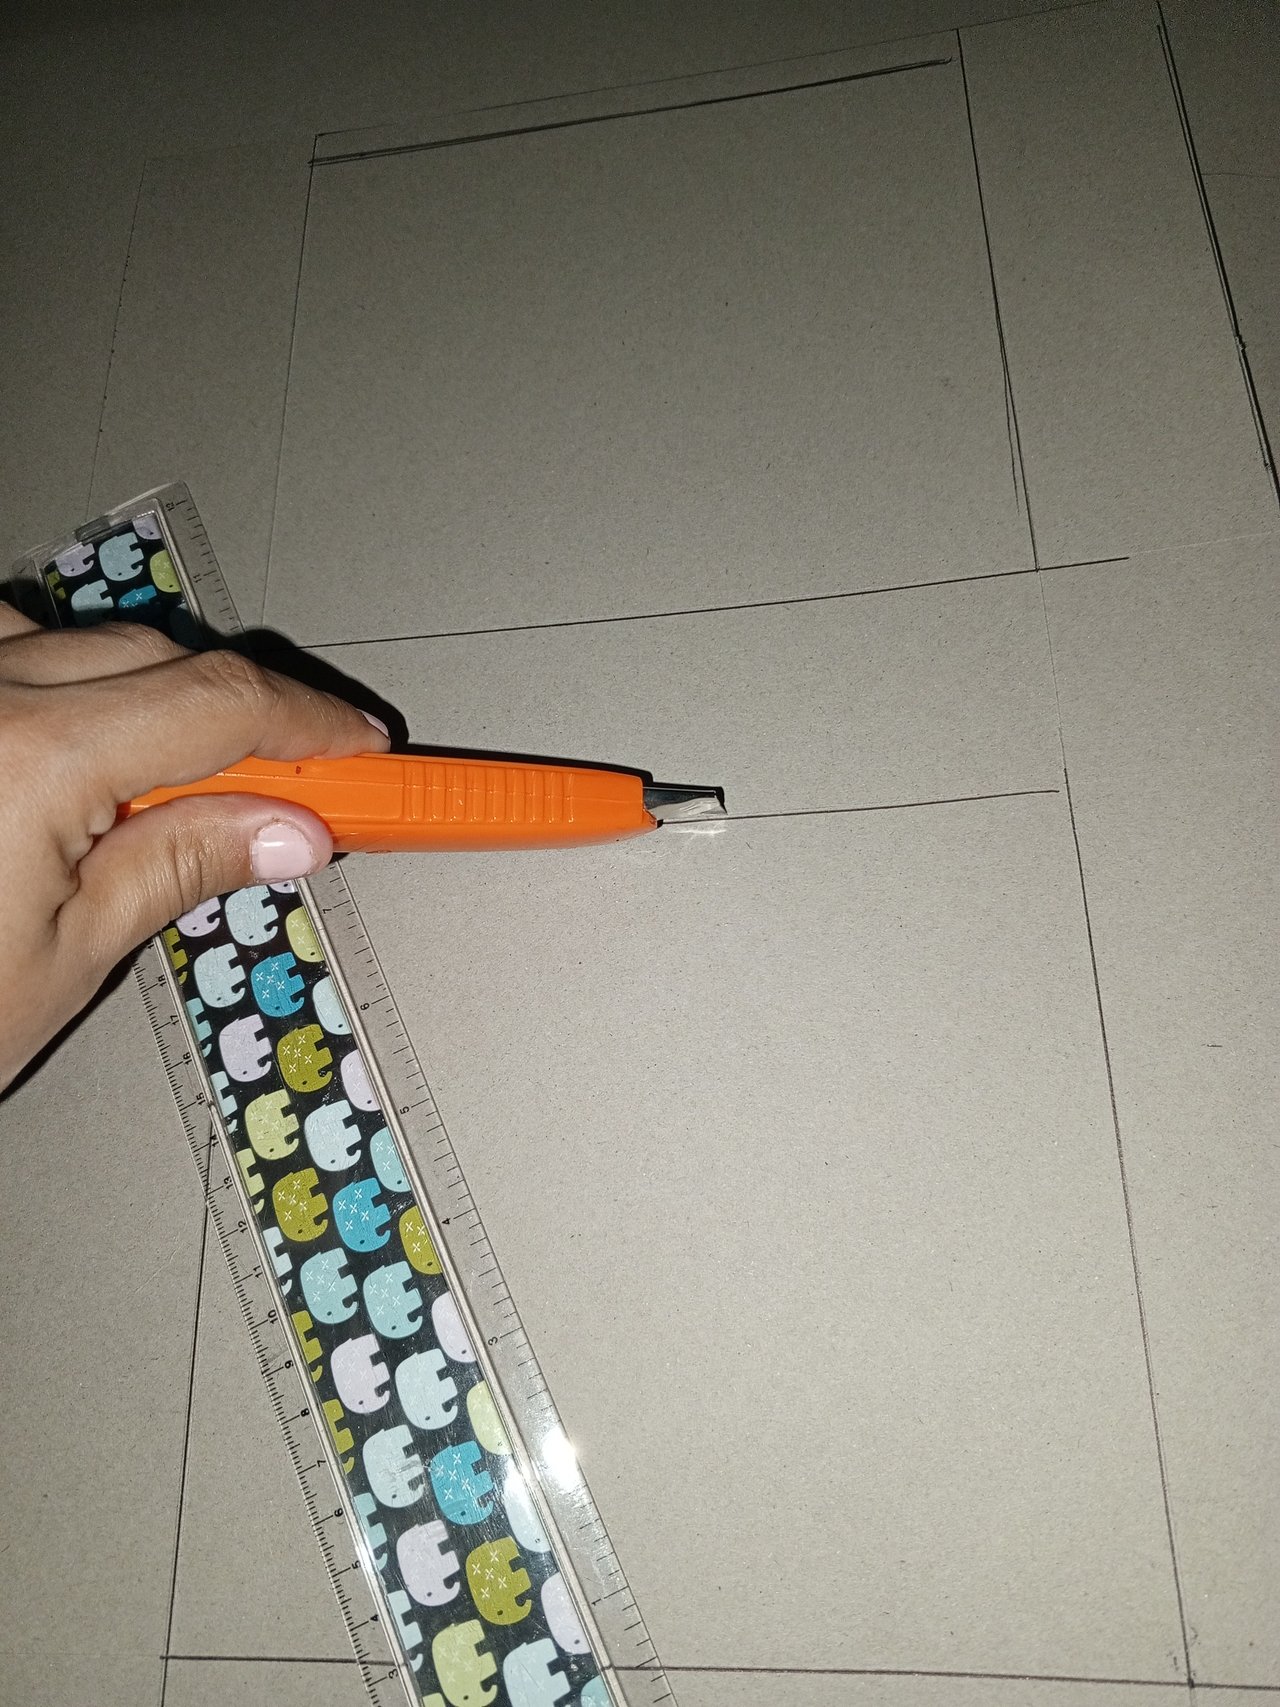
Con el exacto y la regla ir tallando, sin asentar mucho, la hojilla al cartón, para que no se rompa el cartón.
Using the exact knife and the ruler, carve the blade against the cardboard without pressing it too hard, so that the cardboard does not break.
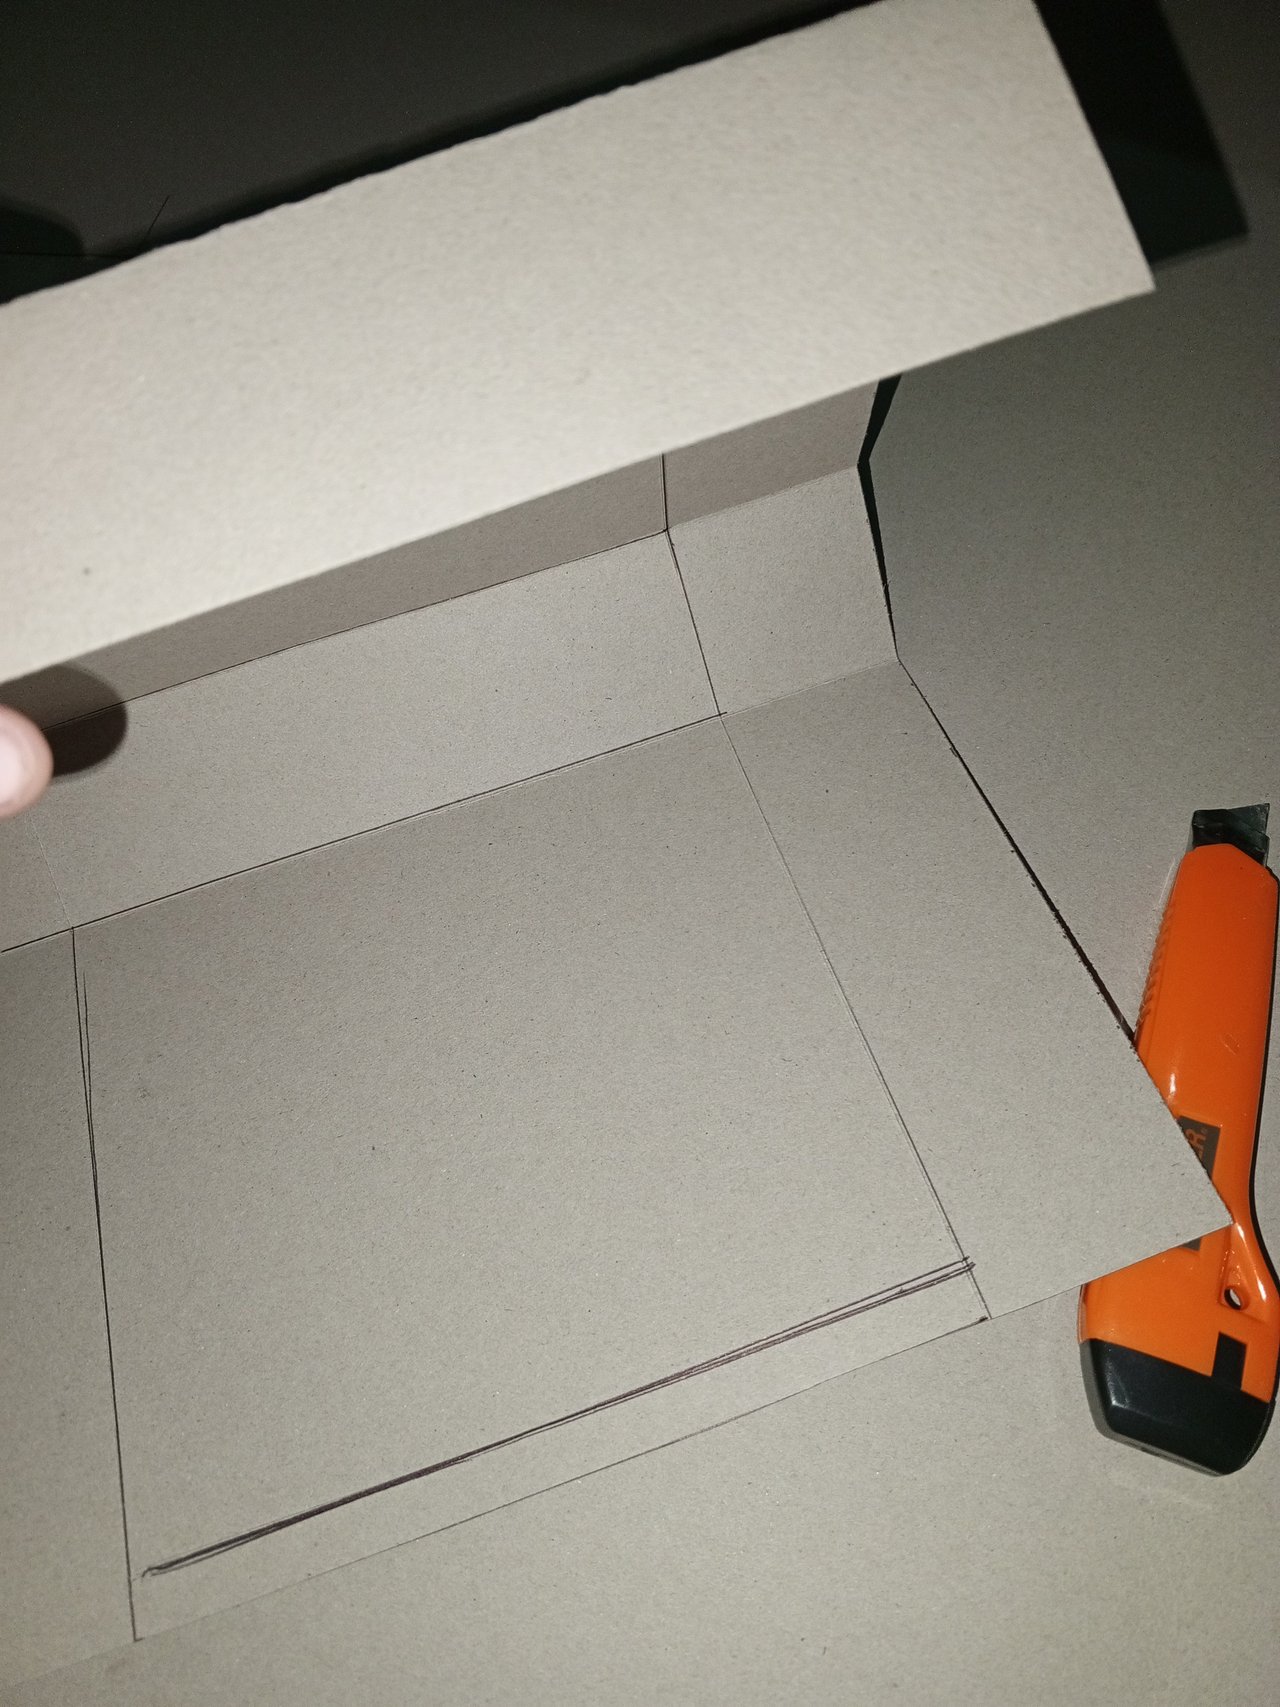
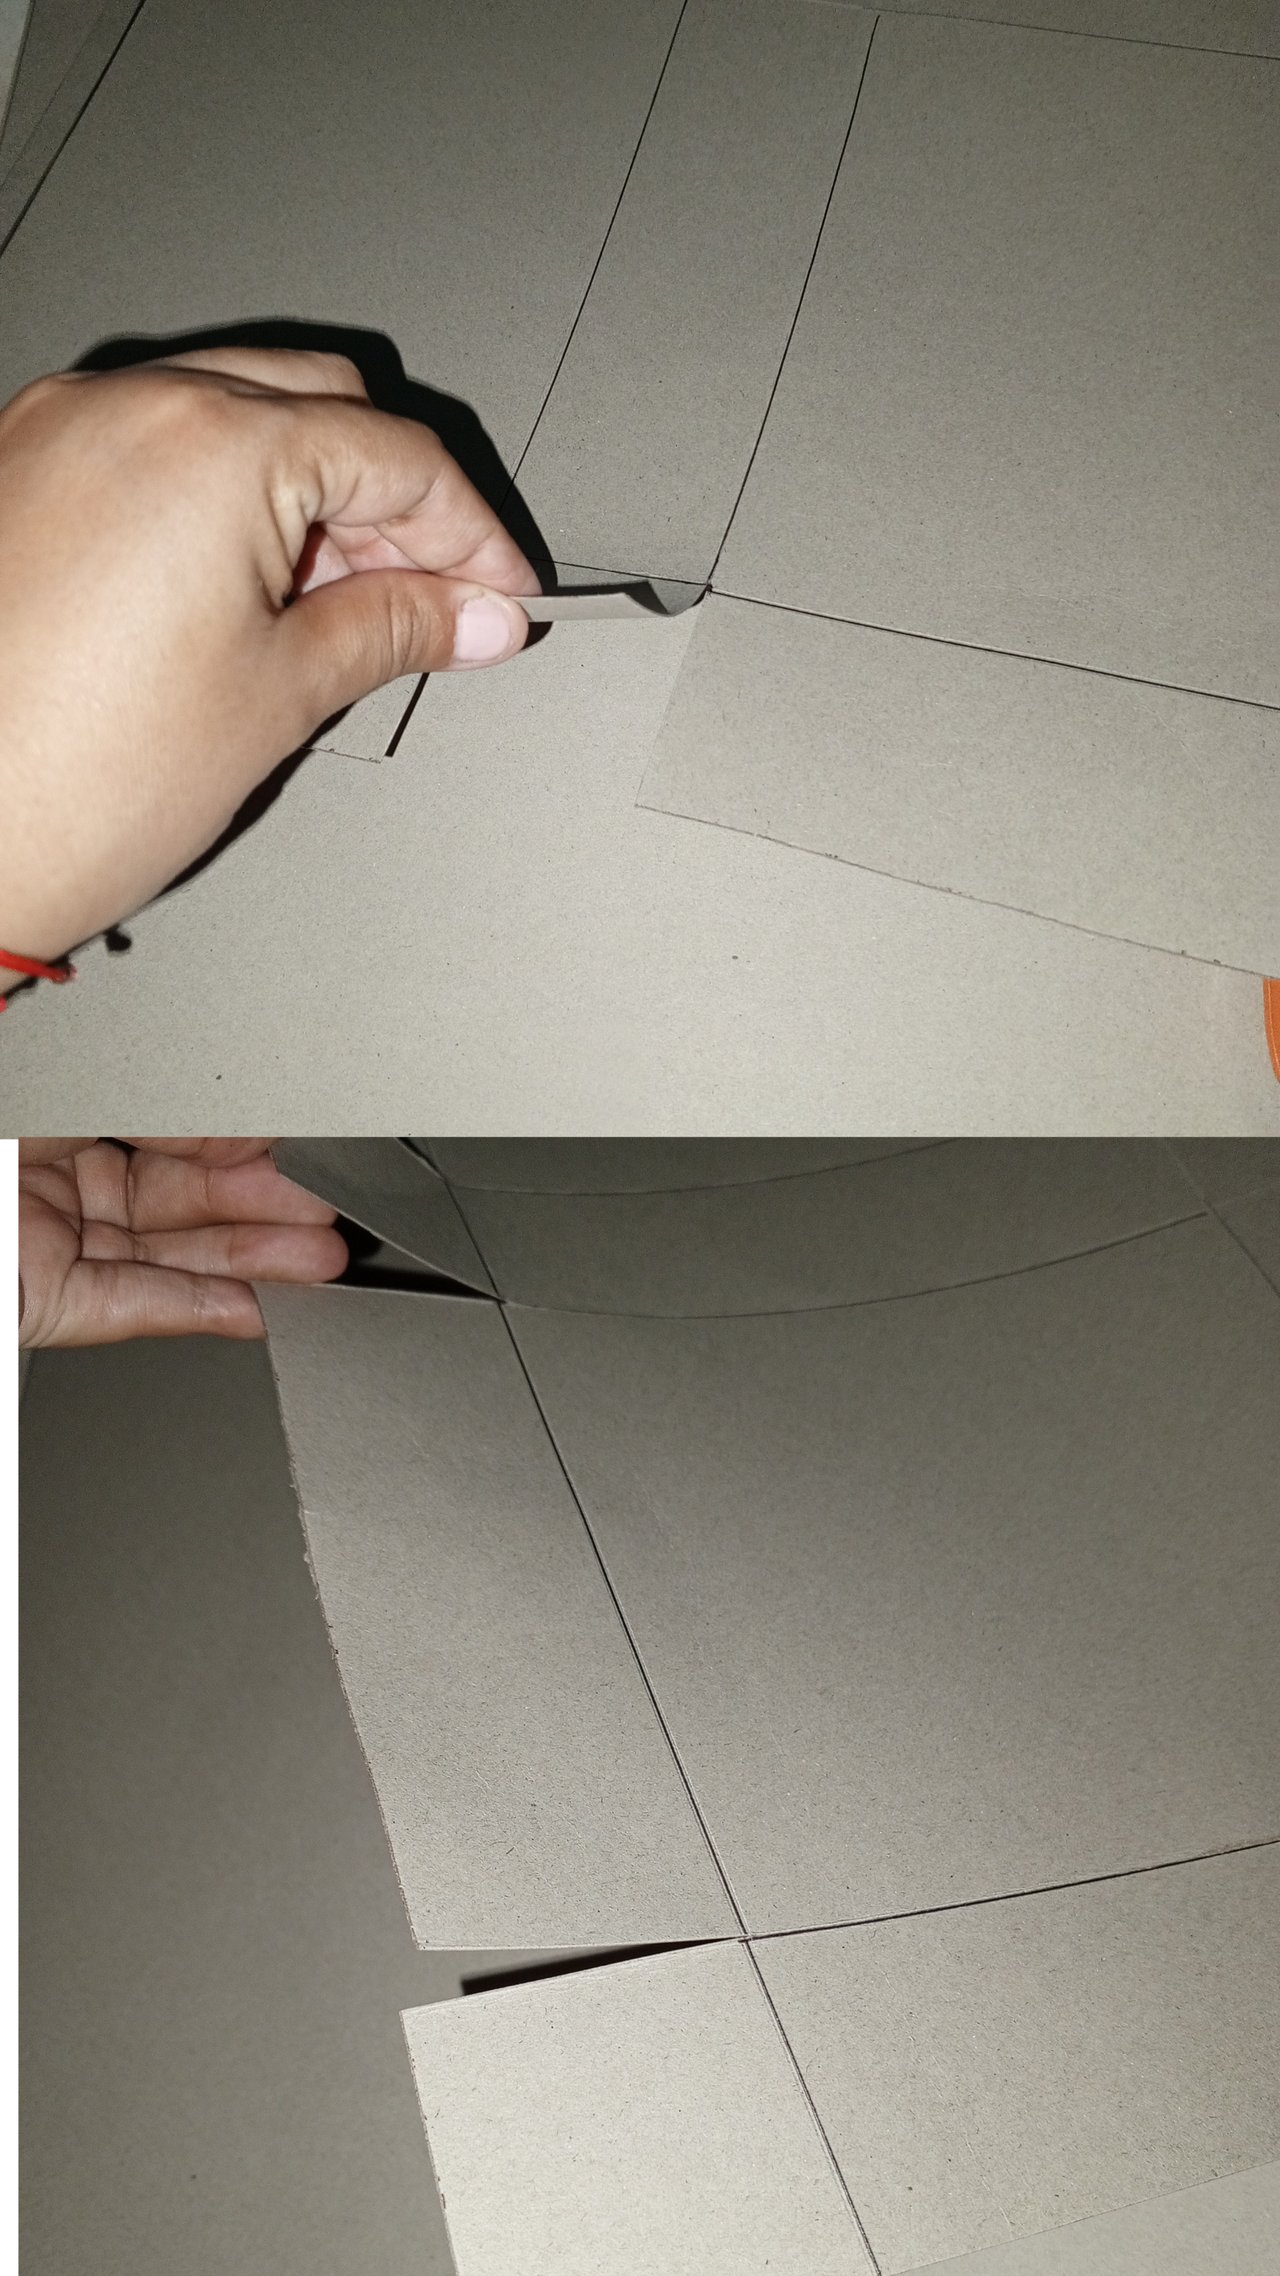
Ir doblando para que el cartón vaya tomando la forma de caja.
Fold the cardboard so that it takes the shape of a box.
Cortar los laterales con la tijera para mejorar el aspecto de la caja, laterales que se pegaran con silicón caliente.
Cut the sides with scissors to improve the appearance of the box, sides that will be glued with hot silicone.
Para decorar, recortamos especie de un birrete en el foami, y pegamos las dos partes con silicón.
To decorate, we cut out a kind of mortarboard shape from the foam and glued the two parts together with silicone.
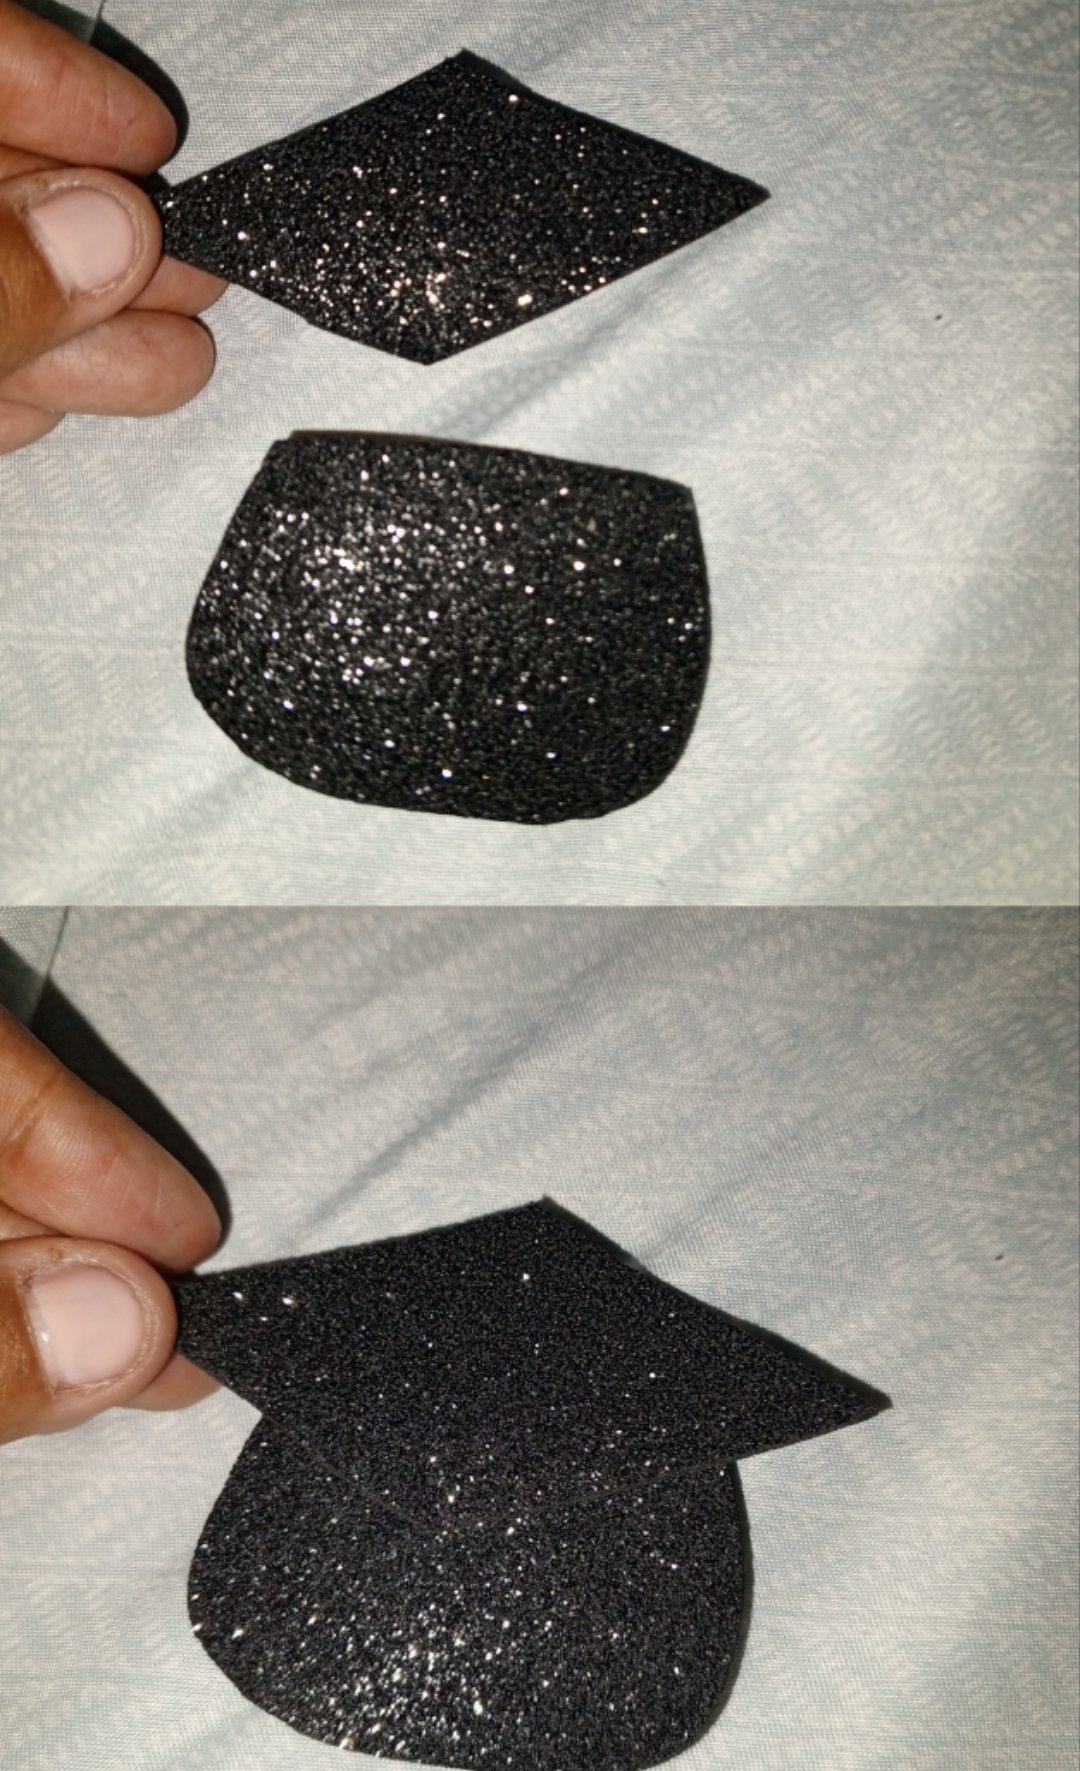
Añadir con cartulina dorado y/o plateada, especie del cordón que cae a un lado del birrete.
Add with gold and/or silver cardboard, a kind of cord that falls on one side of the cap.
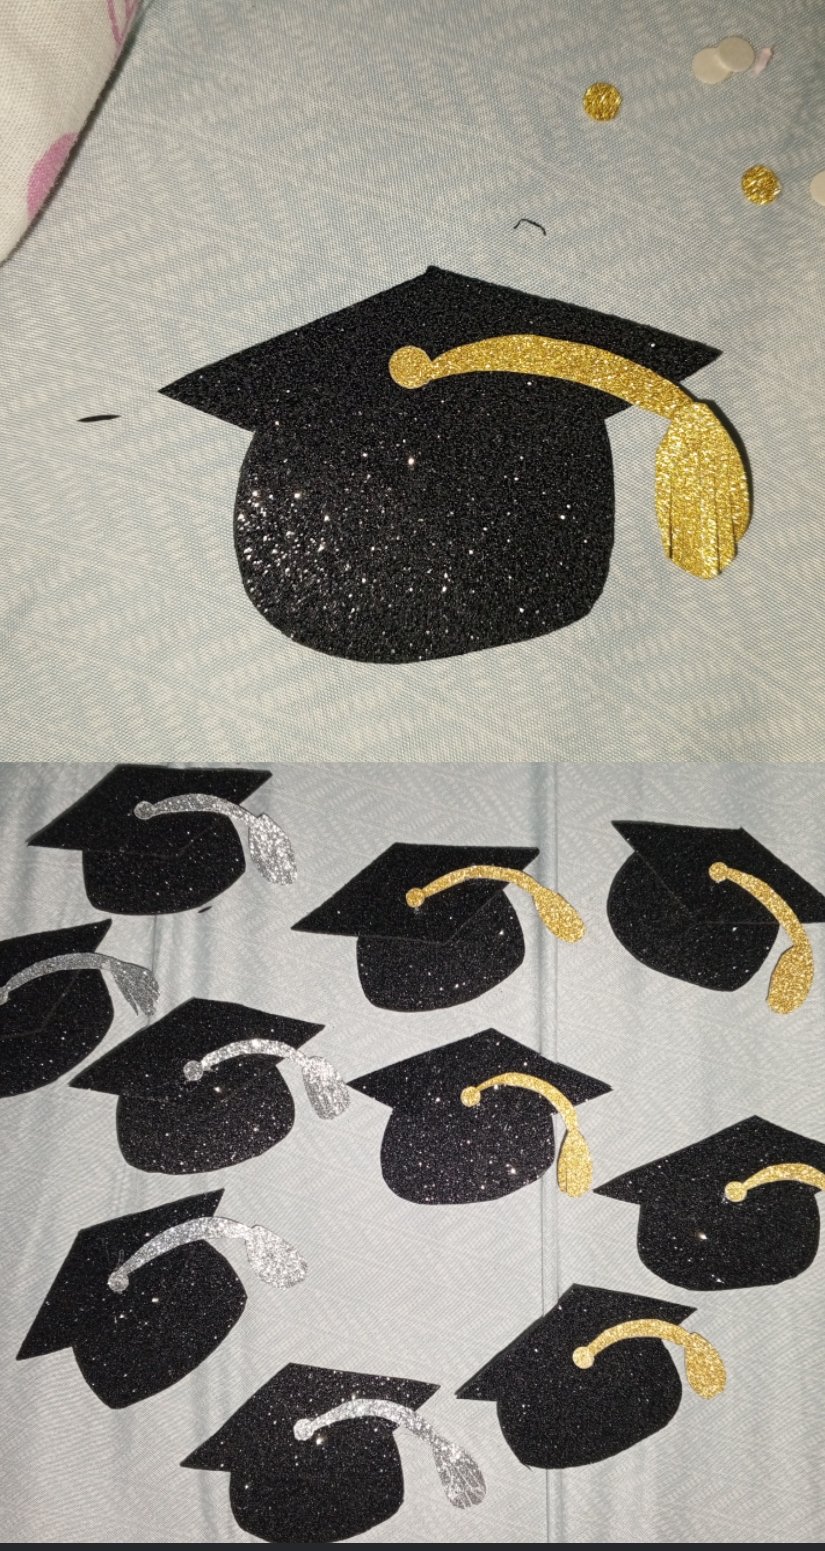
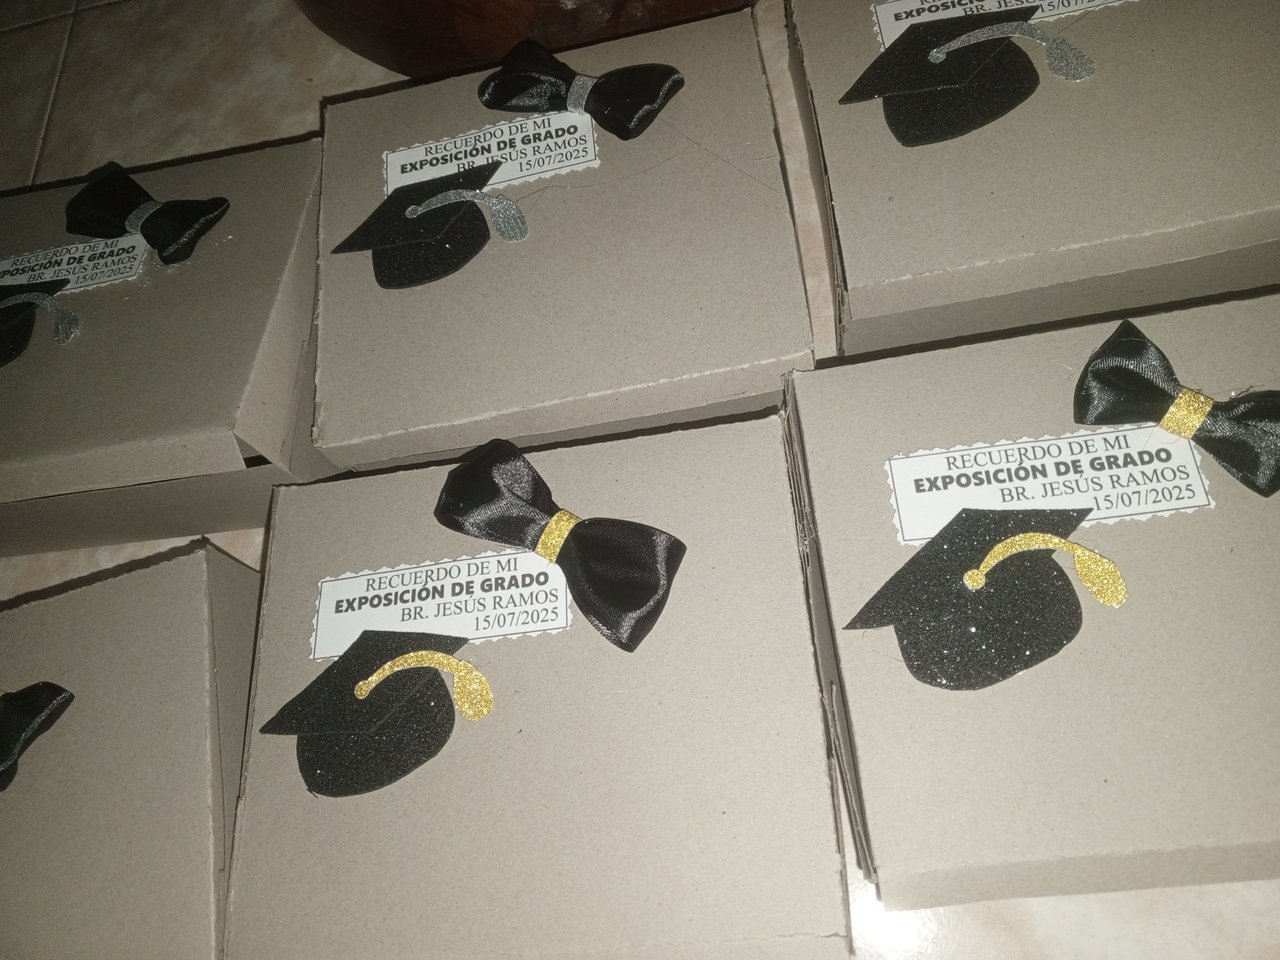
De igual forma, con la cinta de tela negra, hacer lazos sencillos, y cerrar con los retazos de cartulina del mismo color del cordón del birrete, en mi caso hice 10 cajas, 5 con detalles plateadas y 5 doradas.
Similarly, with the black fabric ribbon, make simple bows, and close with the cardboard scraps of the same color as the cap cord. In my case, I made 10 boxes, 5 with silver details and 5 with gold details.

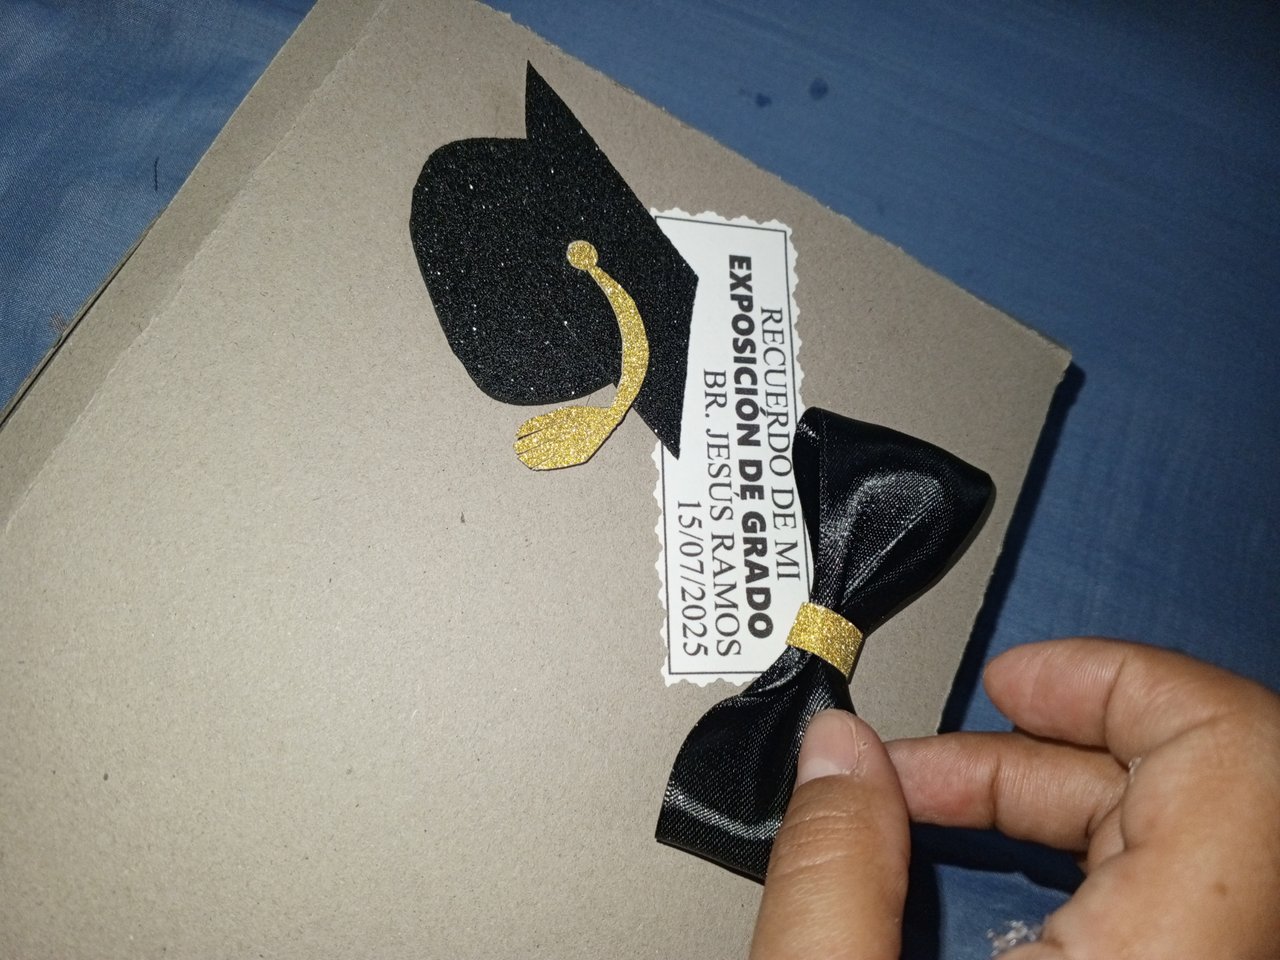
Sacar a impresora etiquetas para personalizar cada caja.
Print labels to personalize each box.
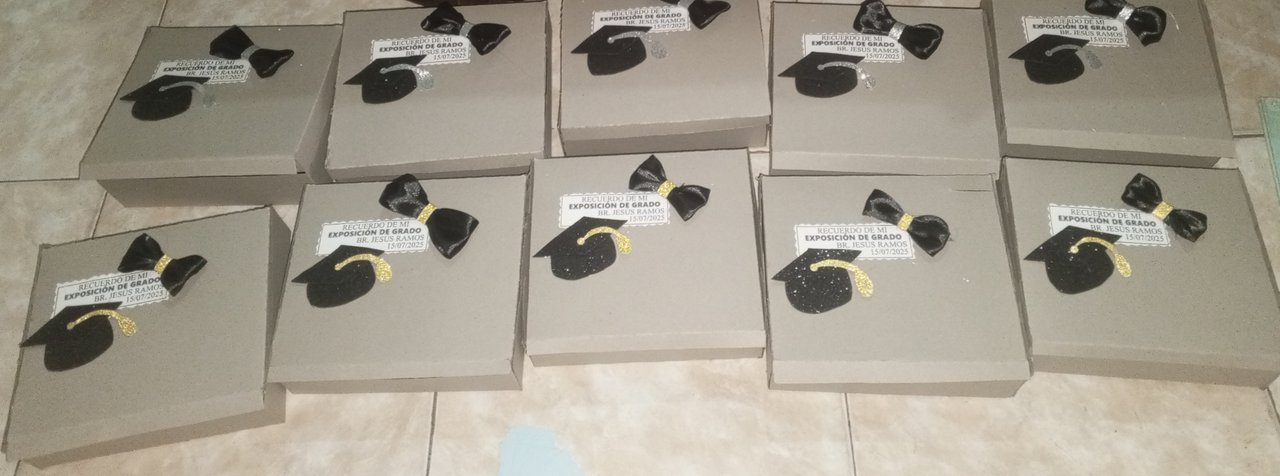
Montar en cada caja los detalles de decoración, birrete de foami, lazo y etiqueta.
Assemble the decorative details, foam cap, bow and label on each box.
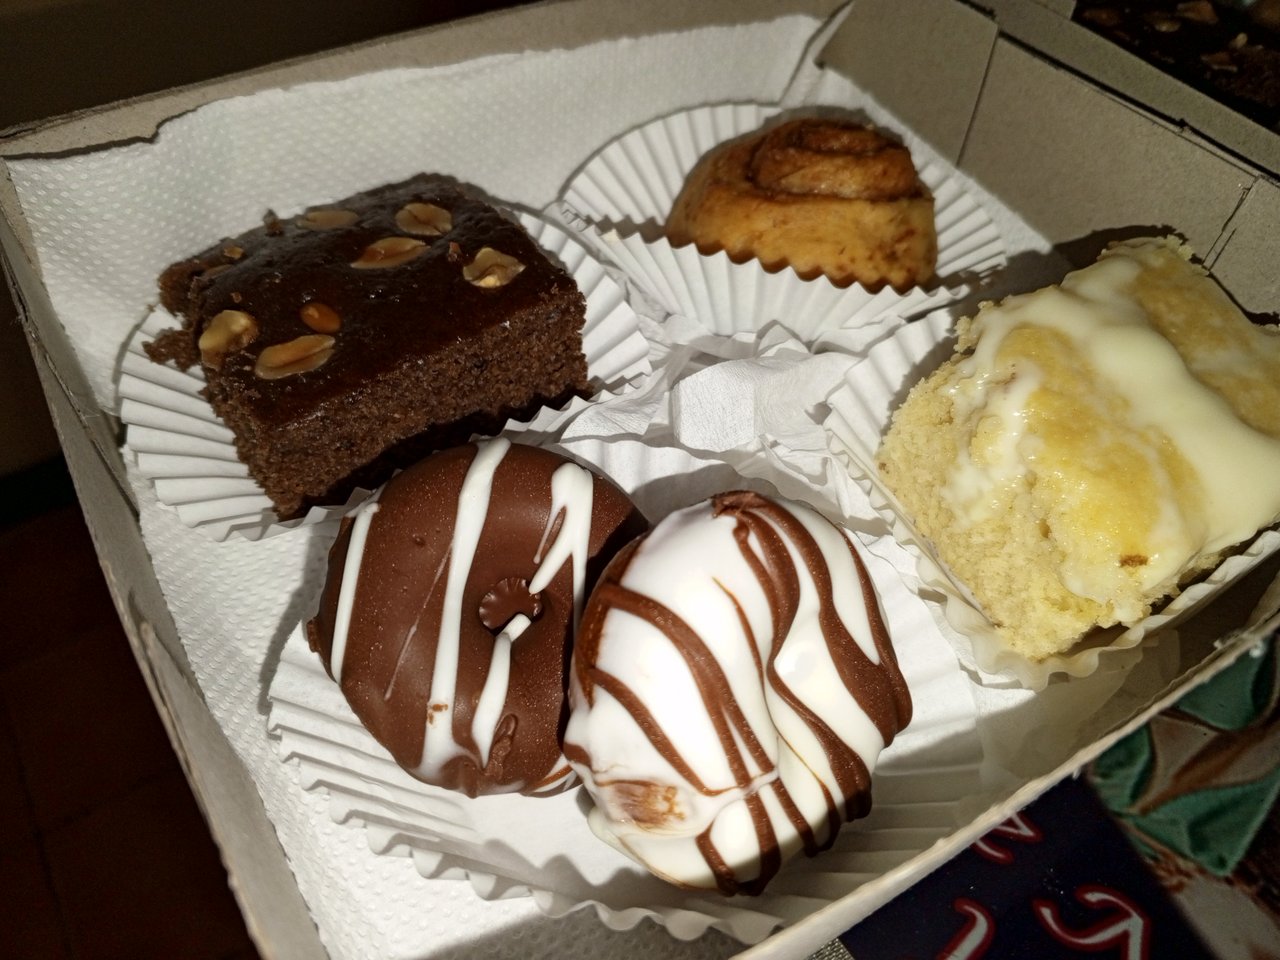
Añadir los dulces a cada caja (brownie, rol de canela, roscas cubiertas en chocolate y biscocho de limón), previamente anexando una servilleta, y capacillos para colocar cada dulce, y mantener la estética.
Add the sweets to each box (brownies, cinnamon rolls, chocolate-covered donuts, and lemon sponge cake), previously attaching a napkin and cupcake liners to hold each sweet, and maintaining the aesthetics.
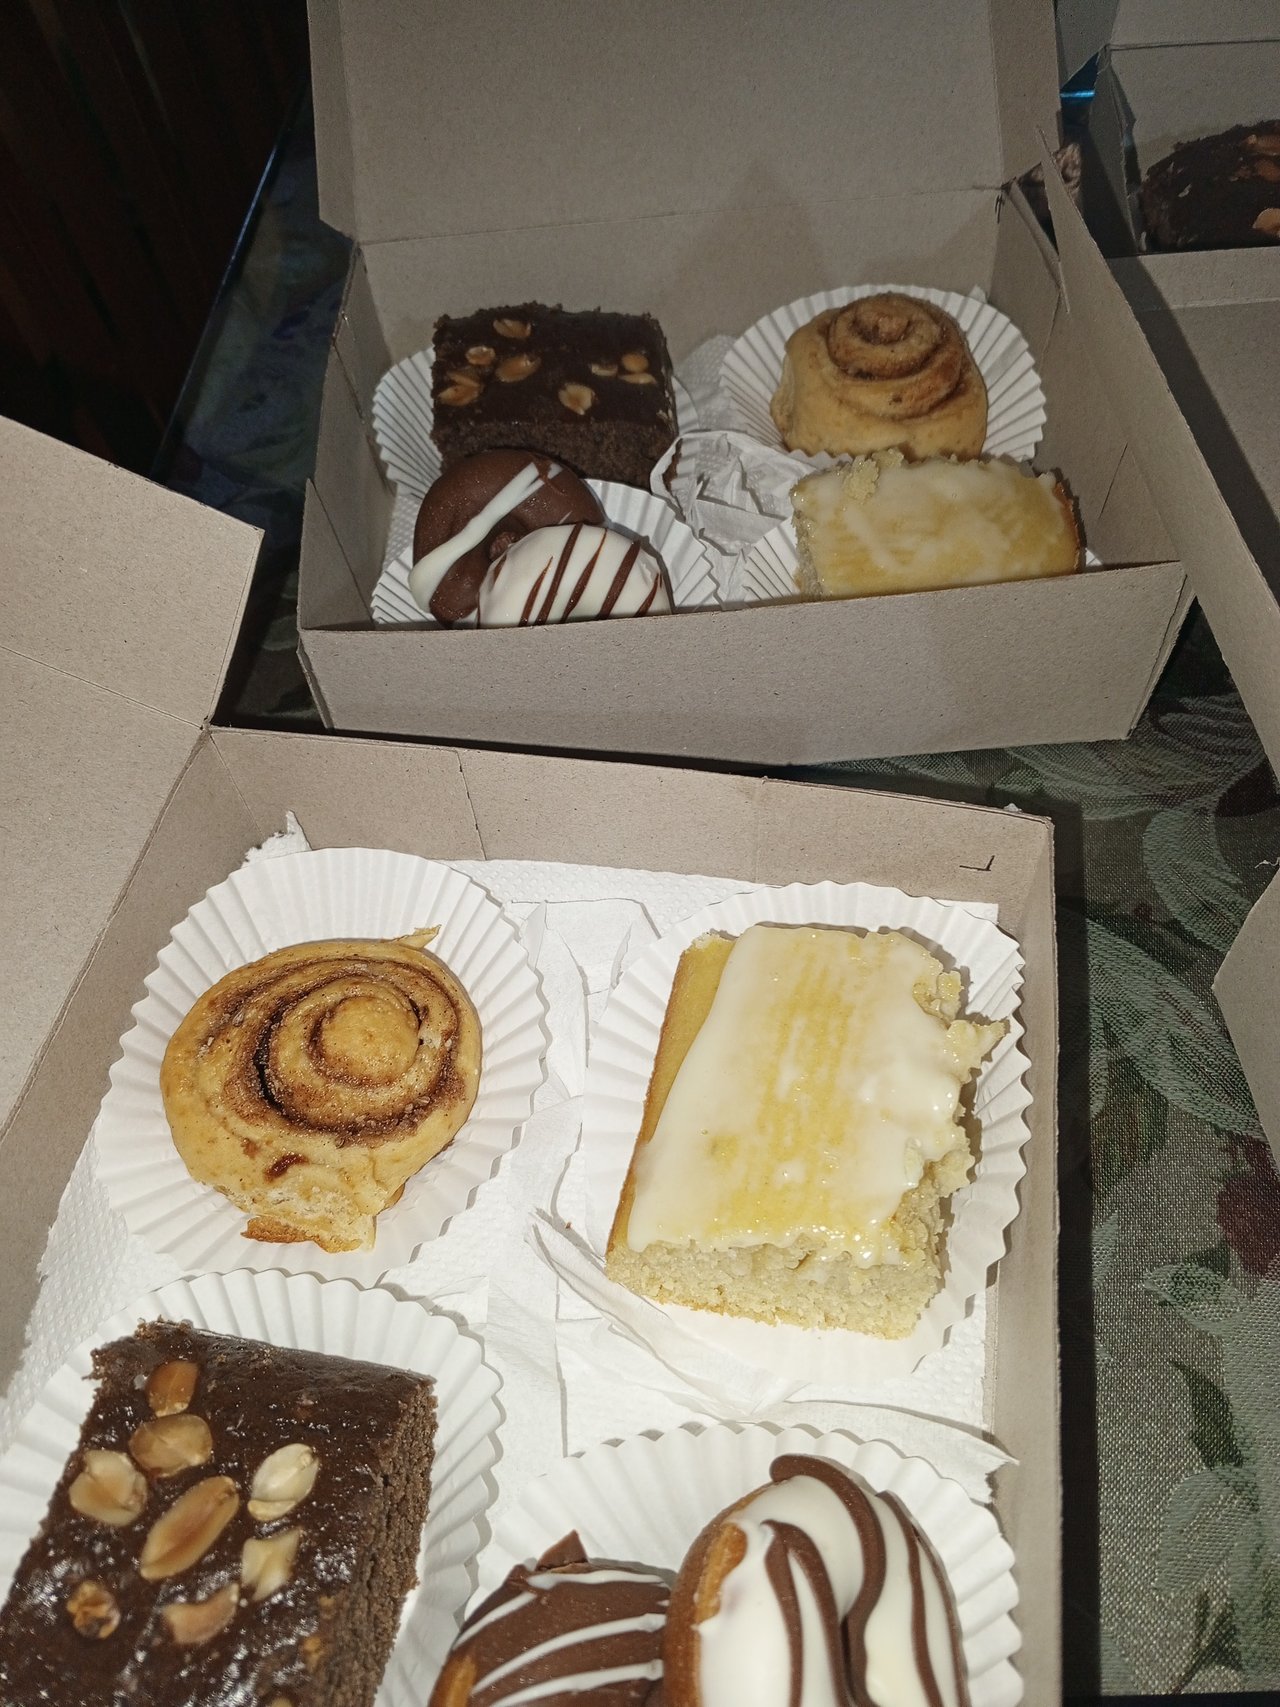
Y listo, aquí les muestro el resultado. Espero que les guste y se animen a hacer las cosas desde cero.
And that's it, here I show you the result. I hope you like it and are inspired to try making things from scratch.
Fotografía por | Photography by: @mairimmorales, Tecno Spark 10 PRO.
Banner by | Banner por Photoroom.
Collage by | Collage por Canva.
Translated with | Traducido por https://translate.google.com