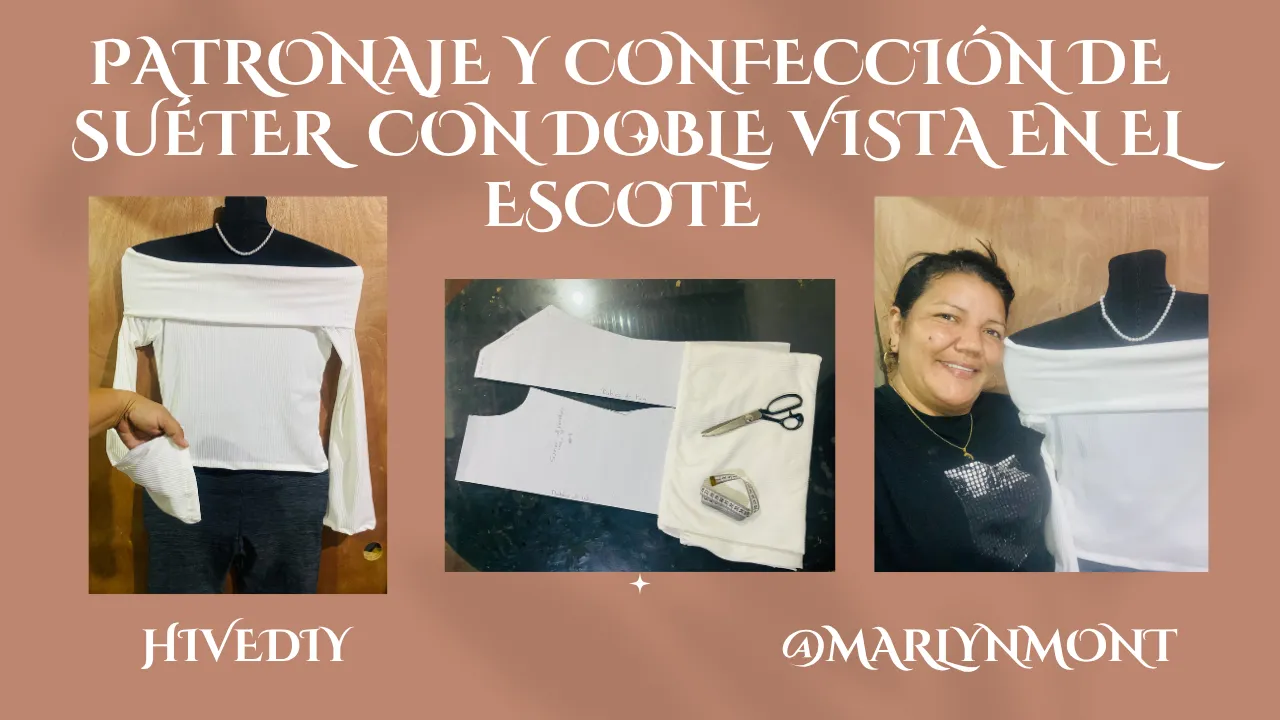
Saludos queridos amigos de HIVE DIY, espero tengan un maravilloso día 🪡🧵✂️ 🥰❤️
Hoy quiero compartir con ustedes el patronaje y confección de un lindo suéter de hombros descubiertos y con doble vista en el escote,hace unos días compartí uno parecido igual con hombros descubiertos, pero esta vez me lo pidieron con esta modificación y te muestro una manera para hacer muy fácil el patrón a mi manera, acompáñame y te comparto el paso a paso:
Greetings, dear friends of HIVE DIY, I hope you have a wonderful day 🪡🧵✂️ 🥰❤️
Today I want to share with you the pattern and construction of a cute off-the-shoulder sweater with a double-needle neckline. A few days ago, I shared a similar one with off-the-shoulders, but this time you asked me to make it with this modification, and I'm showing you a very easy way to make the pattern my way. Join me as I share the step-by-step instructions:
MATERIALES
MATERIALS
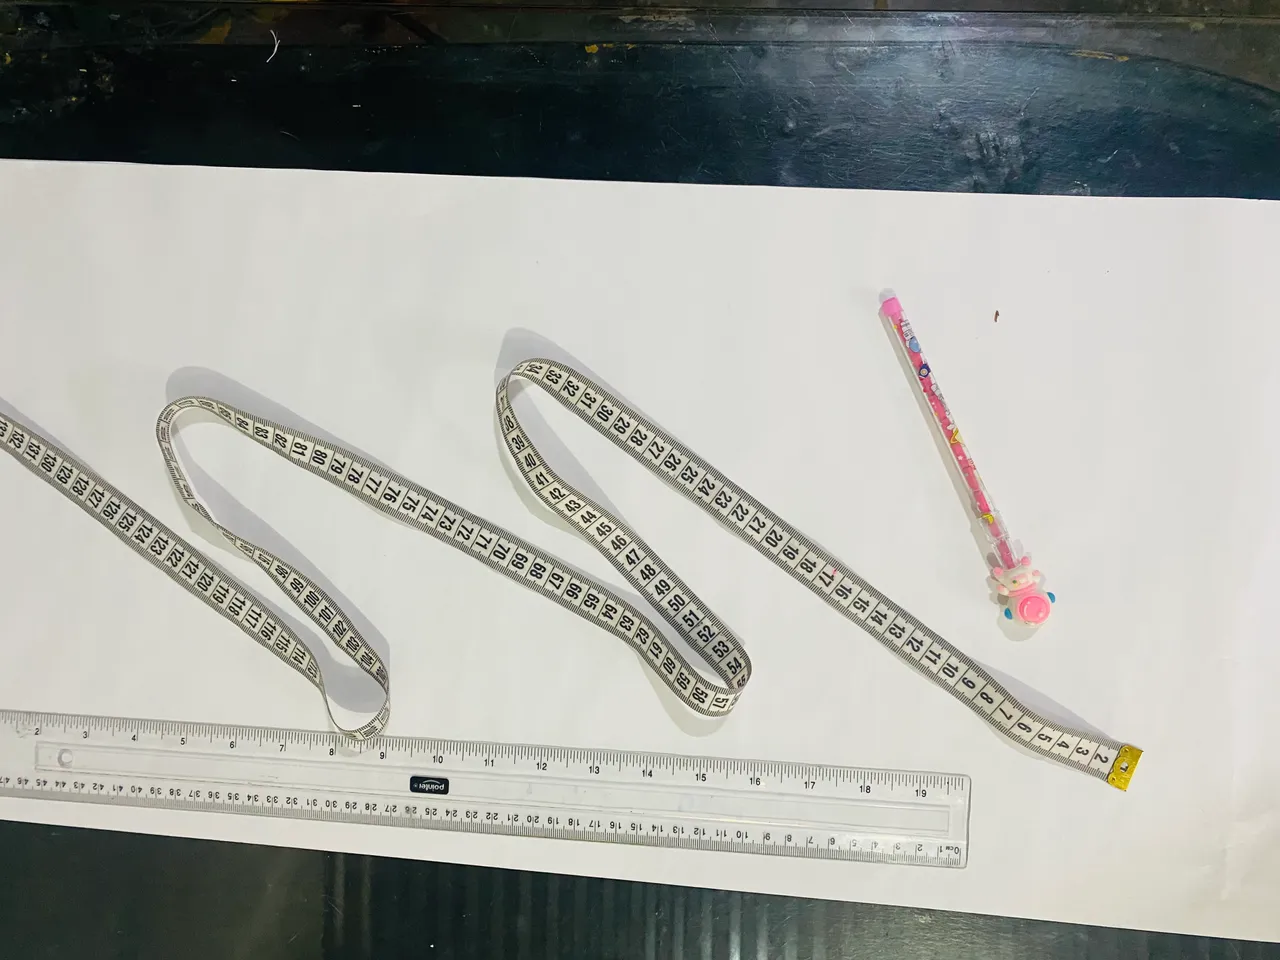
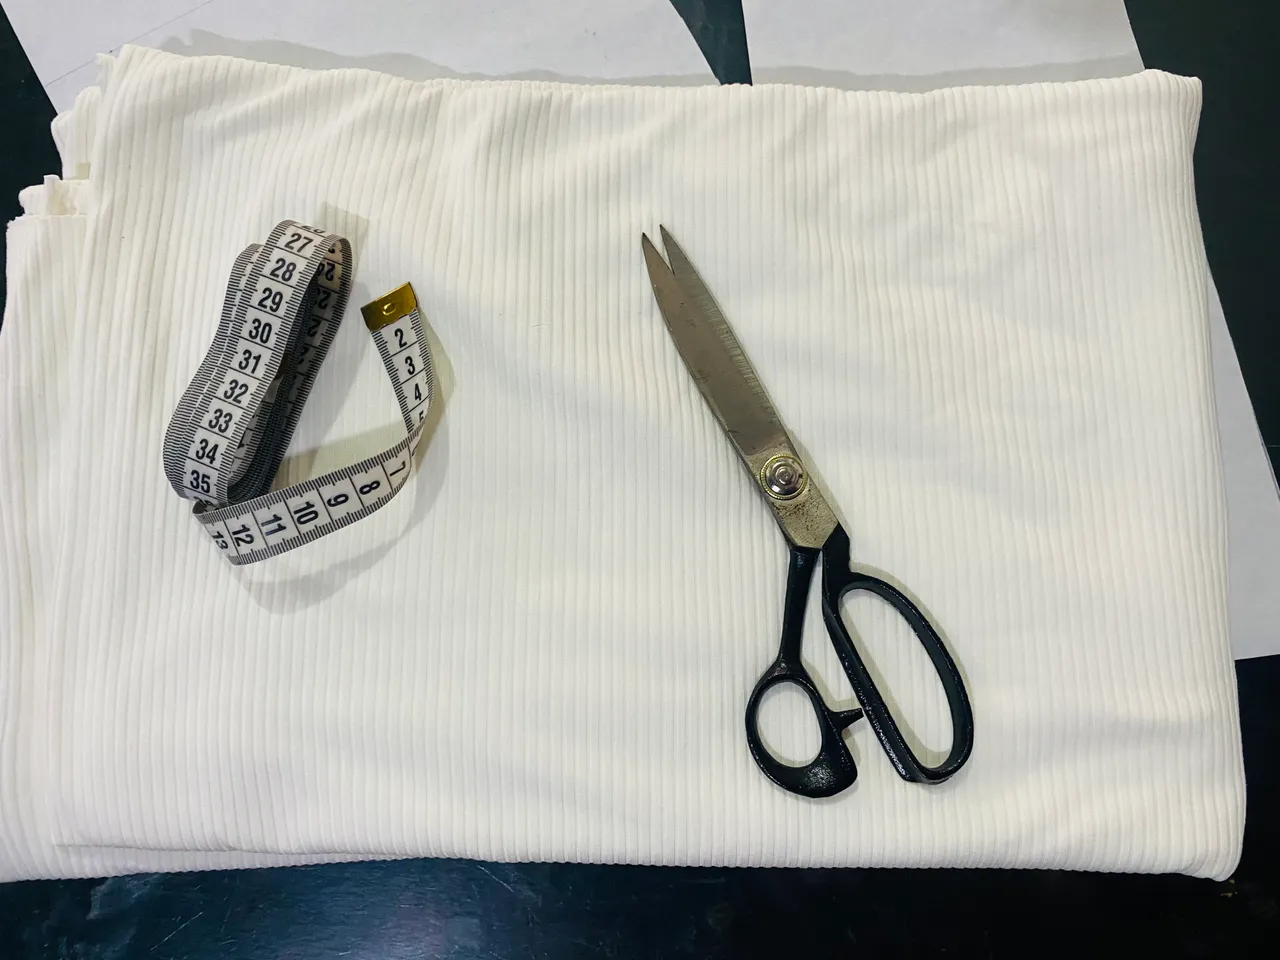
Quieres aprender a hacer este patrón, aquí te voy a mostrar paso a paso cómo hacerlo desde cero, para el patronaje y la confección de este suéter me voy a guiar con las medidas de mi hija, ella viene siendo un aproximado a la talla M, el patrón lo hago con mis conocimientos y con estas medidas puedes ajustarlo a la talla que desees, aclaro que es un aproximado en las medidas y es para telas Stretch, ya que para tela rígida es un poco más difícil y el patrón debe ser más preciso, voy a utilizar la tela Rib la cual está muy de moda y en lo personal me gusta mucho trabajar con esta tela ya que es bastante elástica y se adapta muy bien al cuerpo sin deformarse, aquí te dejo la lista de materiales a utilizar:
- 1, 25 m de tela Rib
- tijeras para tela y tijeras para papel
- Un pliego de papel Bond
- Lápiz
- Cinta métrica
- Regla
- Hilo
- Máquina de coser
You want to learn how to make this pattern, here I will show you step by step how to do it from scratch, for the pattern and the making of this sweater I will be guided by the measurements of my daughter, she is approximately size M, I make the pattern with my knowledge and with these measurements you can adjust it to the size you want, I clarify that it is an approximate measurement and it is for Stretch fabrics, since for rigid fabric it is a little more difficult and the pattern must be more precise, I am going to use the Rib fabric which is very fashionable and personally I really like to work with this fabric since it is quite elastic and adapts very well to the body without deforming, here is the list of materials to use:
- 1.25 m of ribbed fabric
- Fabric scissors and paper scissors
- A sheet of bond paper
- Pencil
- Tape measure
- Ruler
- Thread
- Sewing machine
 |  |
|---|
PASO A PASO
STEP BY STEP
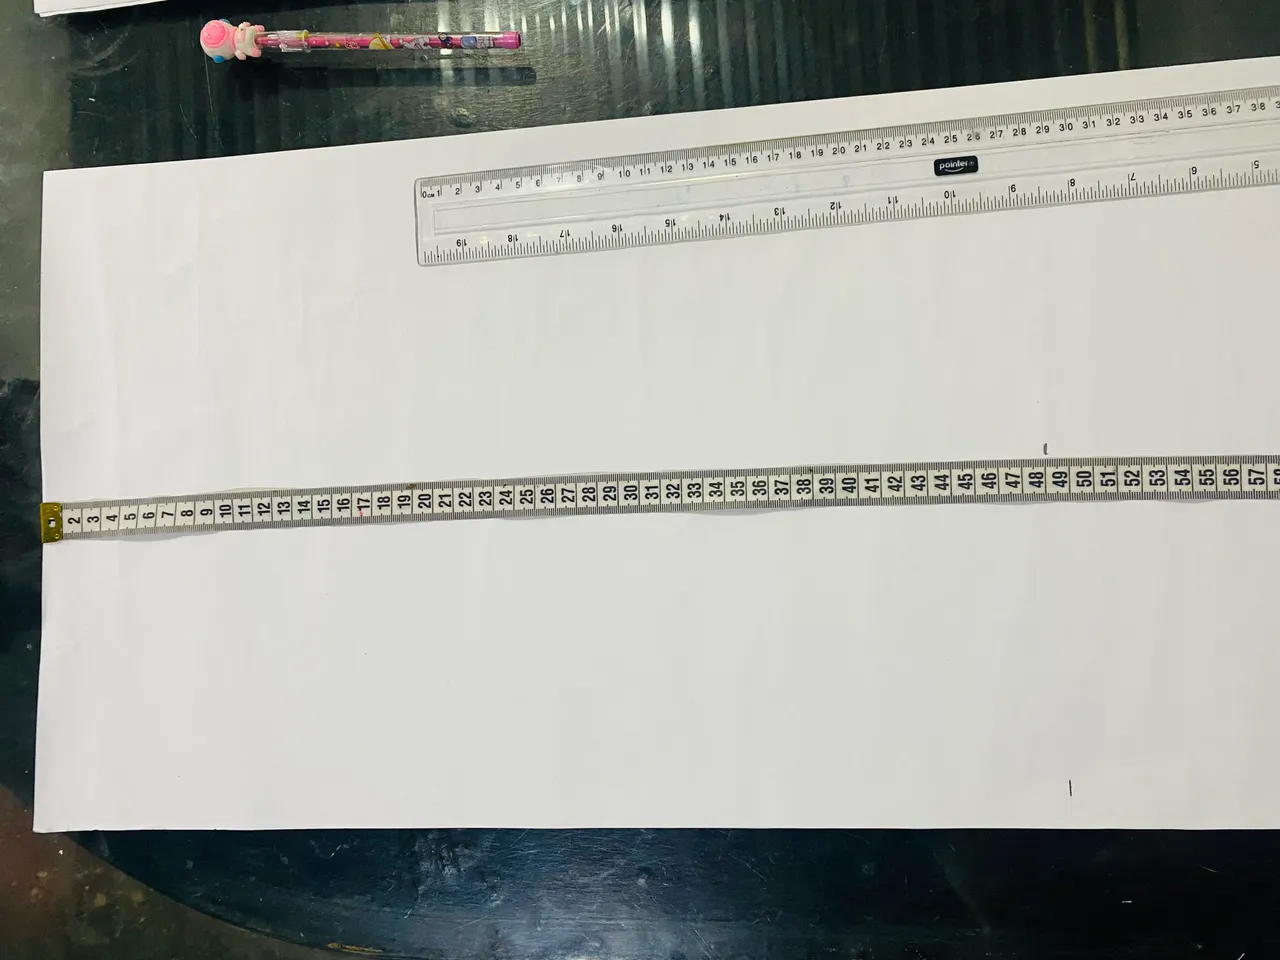
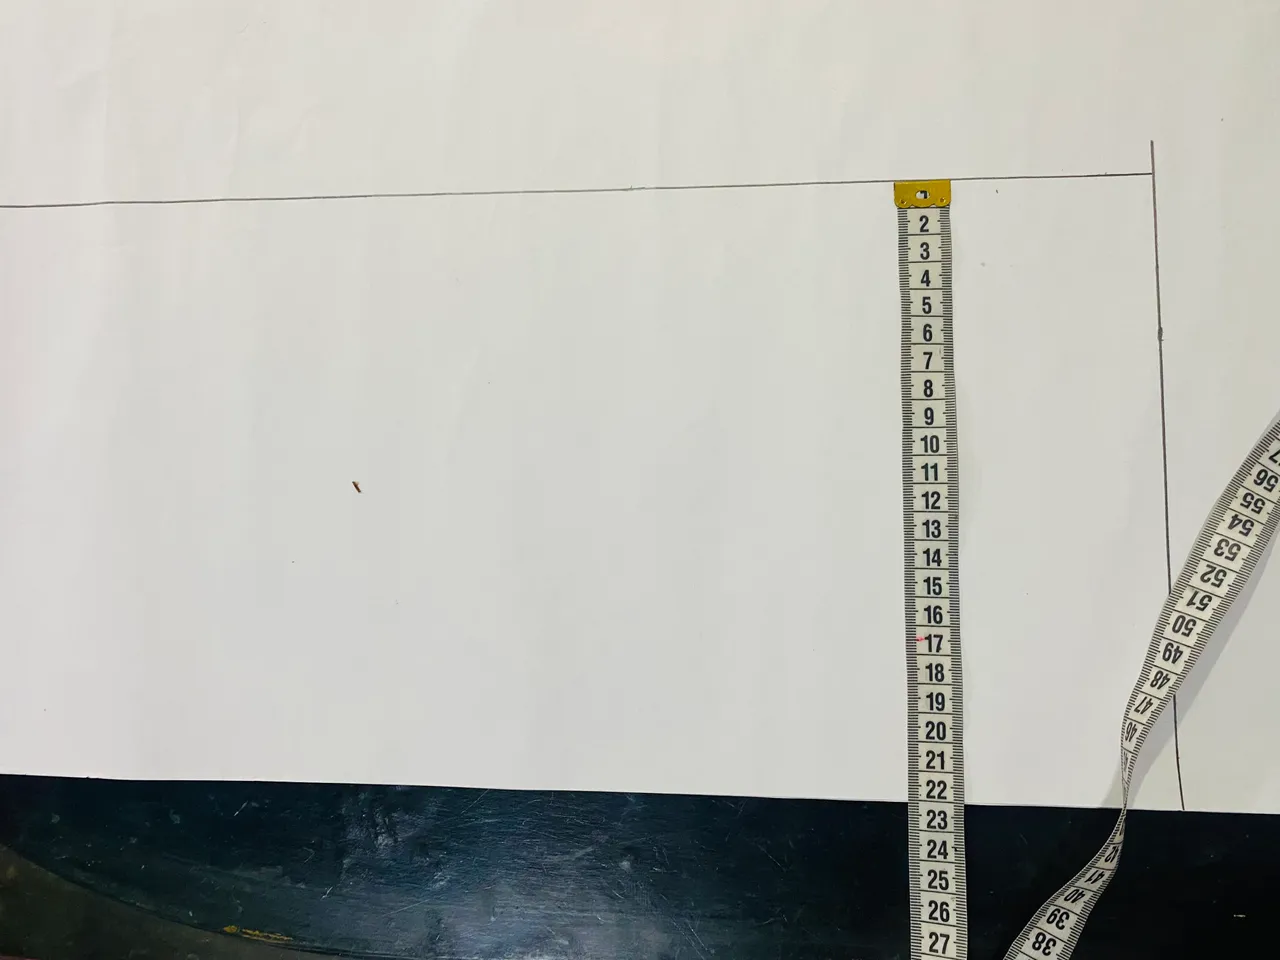
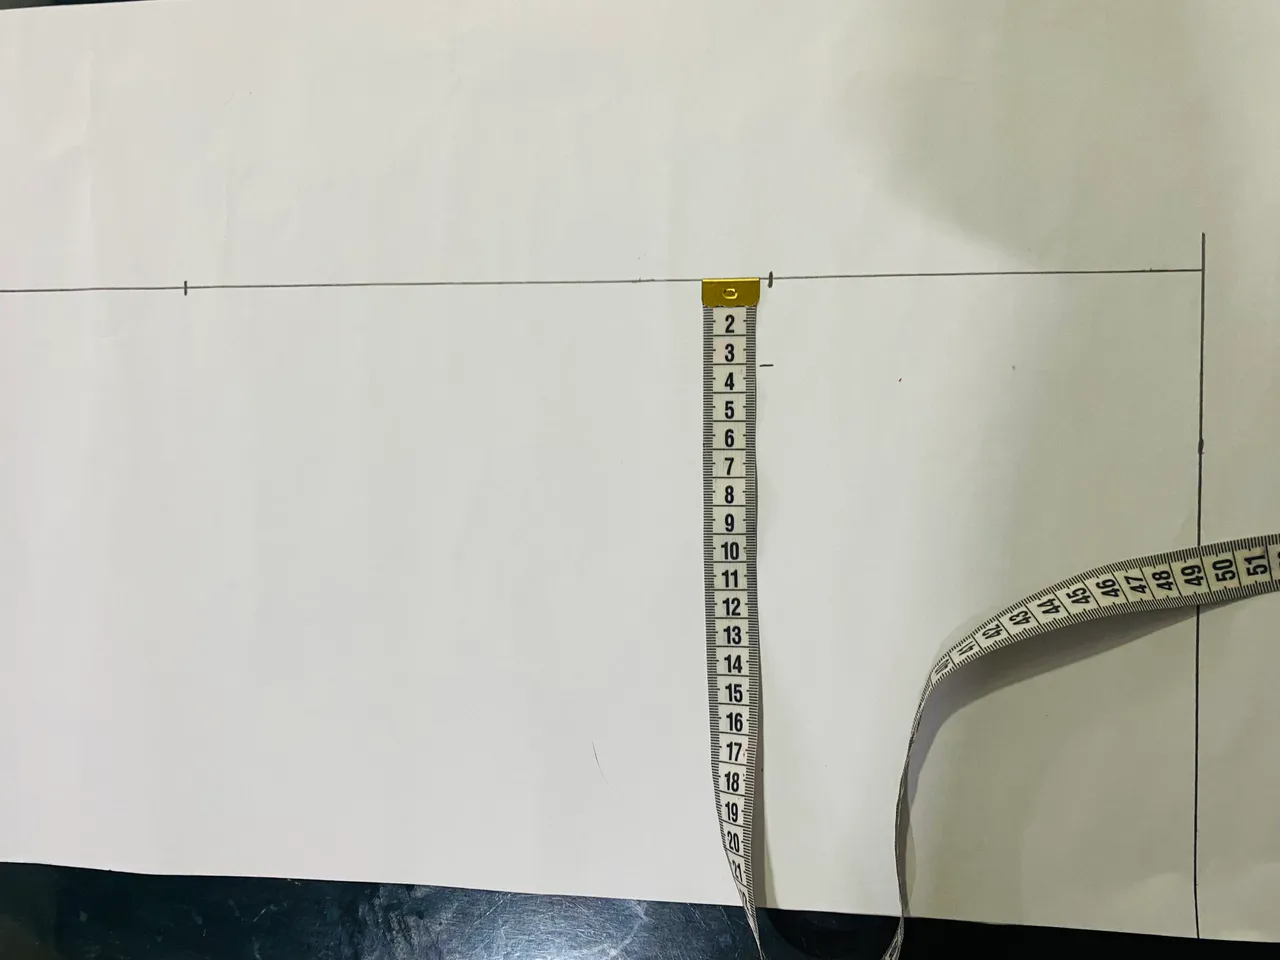
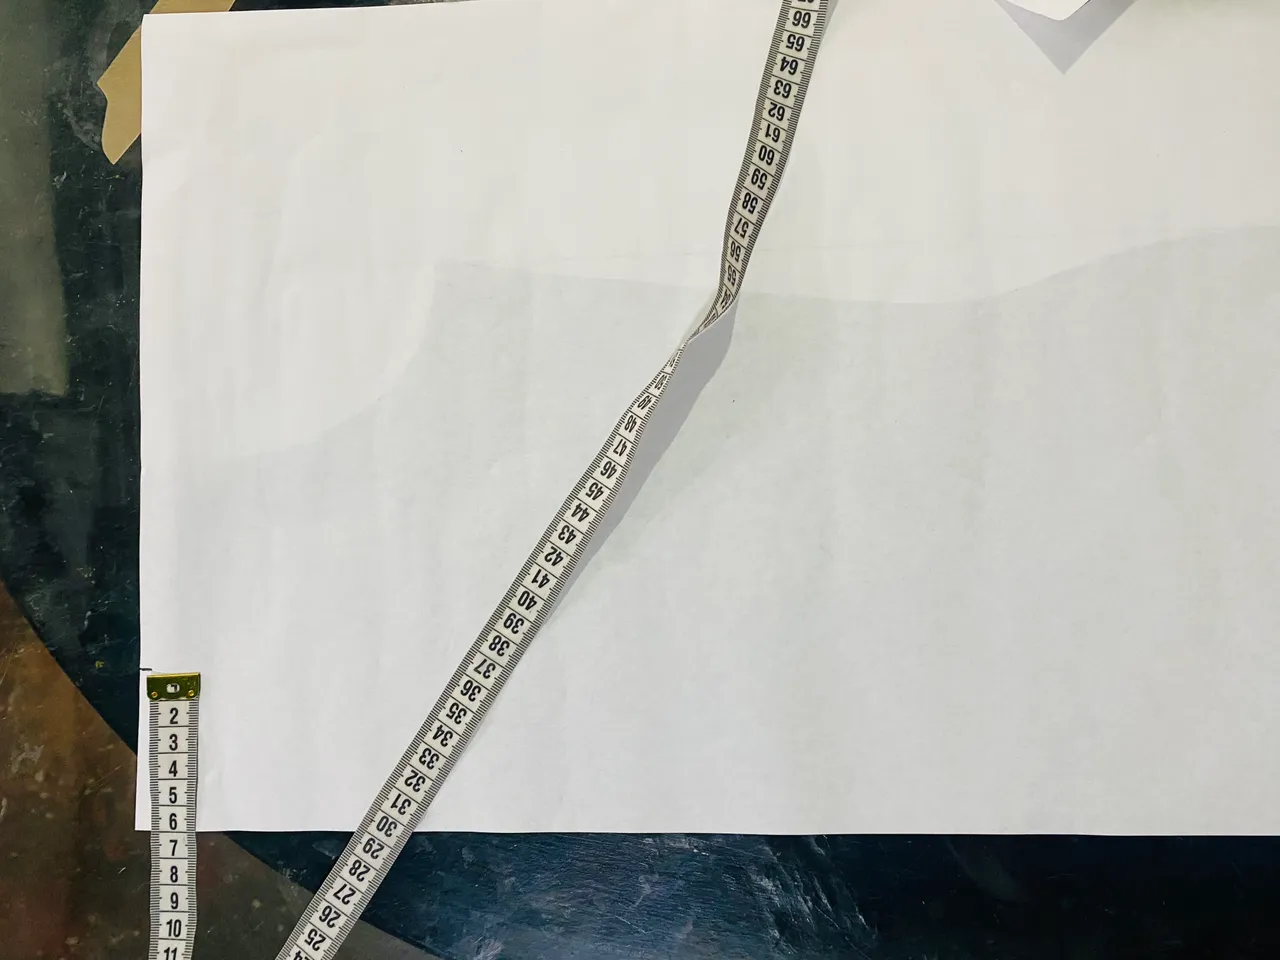
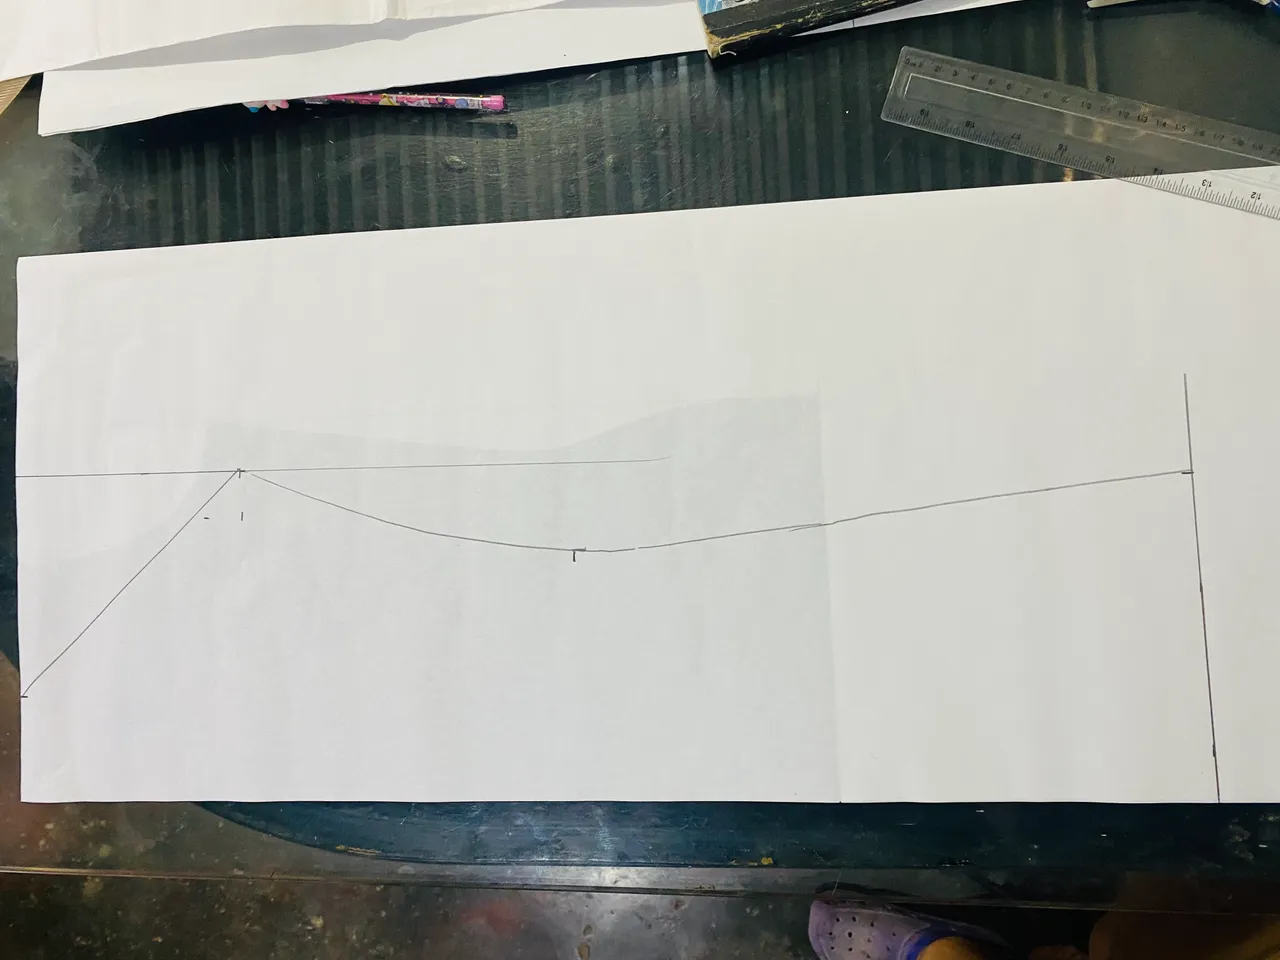
Primero lo primero, así que primero vamos a hacer el patrón 😊, vamos a doblar nuestro pliego de papel bond en forma horizontal, colocamos sobre una mesa lisa con las orillas hacia tu cuerpo, así nos vamos a guiar, vamos a marcar desde la orilla superior hasta donde nos dé la medida de 48 cm, trazamos una línea, esta será la medidaes para el largo del suéter.
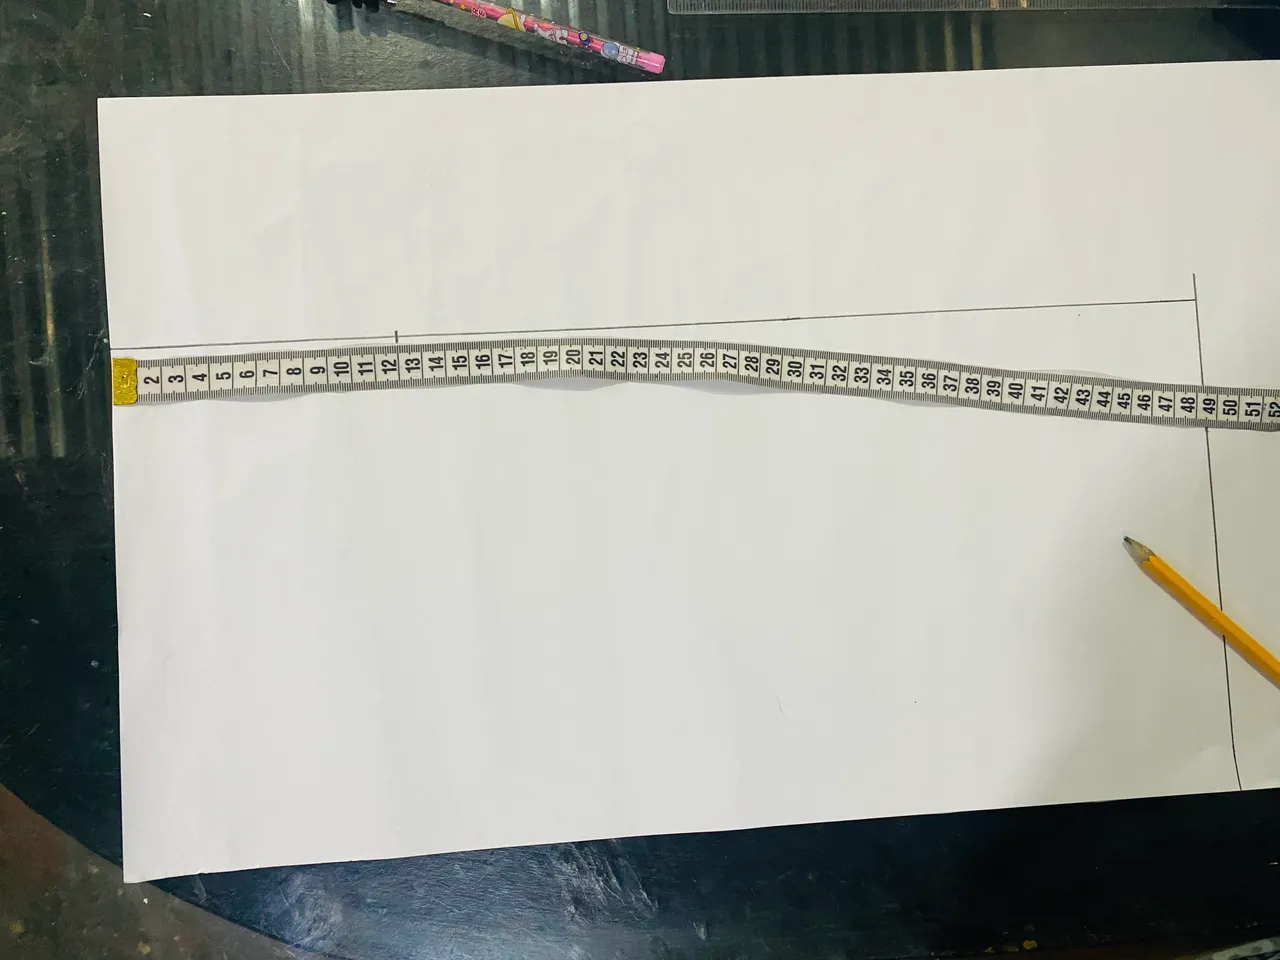
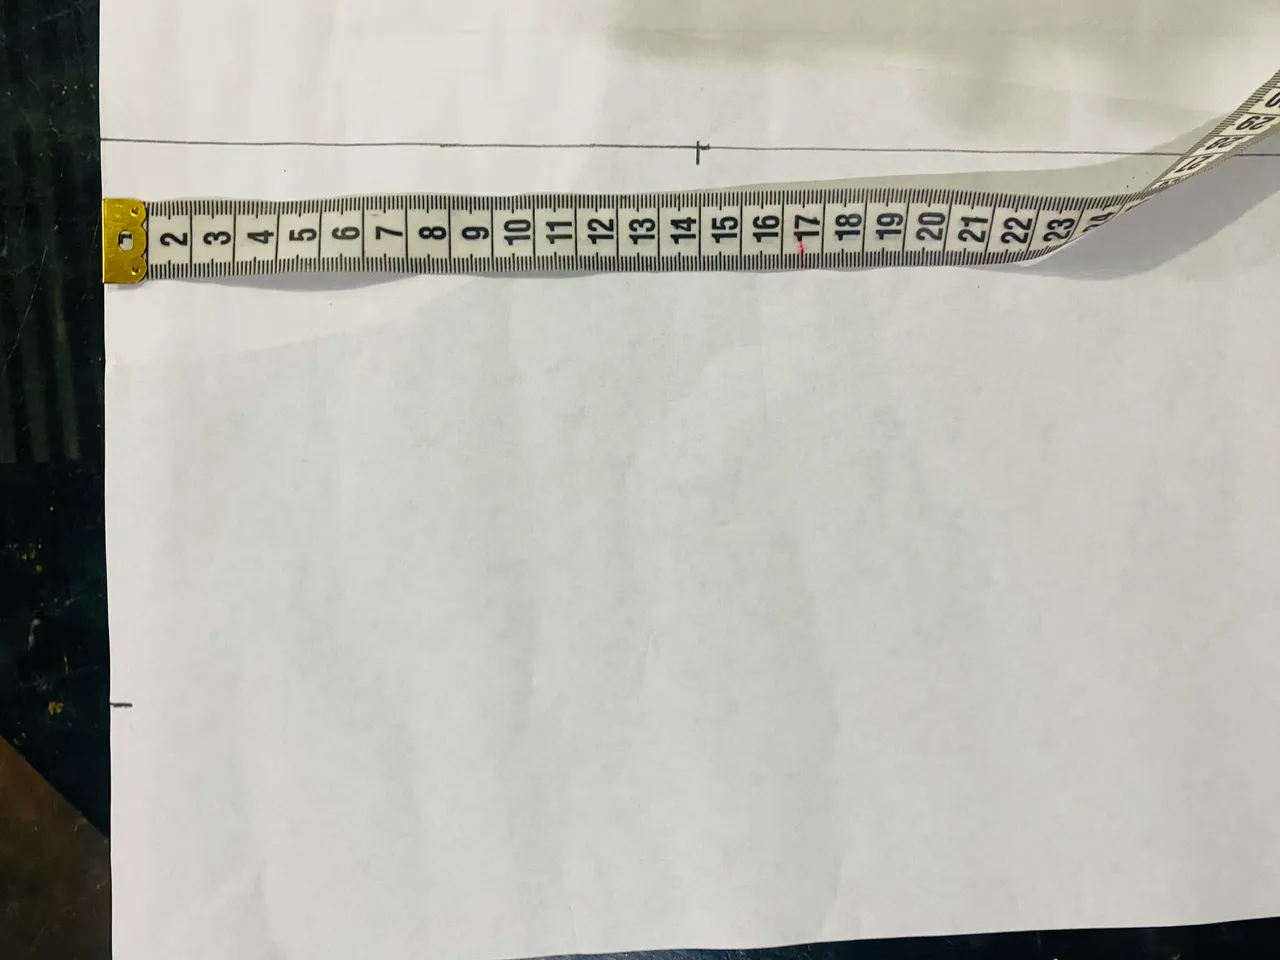
Ahora vamos a marcar 22 cm para el ancho trazamos una línea formando un rectángulo, luego marcamos en la orilla superior derecha 12cm hacia abajo, de la orilla superior izquierda marcamos 14cm y unimos esos dos puntos con una semi curva.
First things first, so let's make the pattern 😊. We're going to fold our sheet of bond paper horizontally. Place it on a flat table with the edges facing your body. This will guide us. We're going to mark from the top edge to where we get the measurement of 48 cm. Draw a line. This will be the measurement for the length of the sweater.
Now, we're going to mark 22 cm for the width. Draw a line forming a rectangle. Then, mark 12 cm down from the top right edge. From the top left edge, mark 14 cm and join those two points with a semi-curve.
 |  |
|---|---|
 | 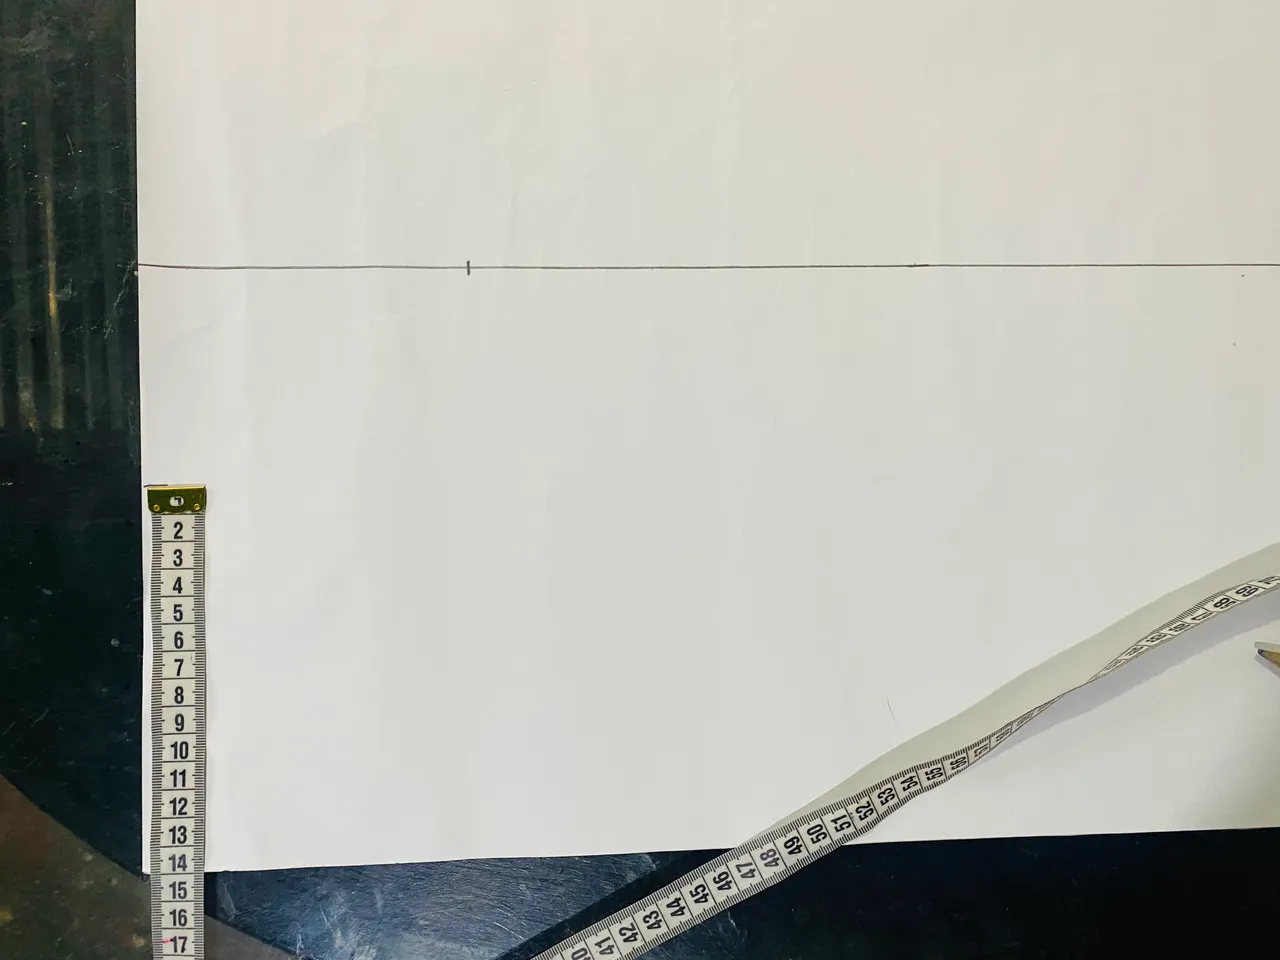 |
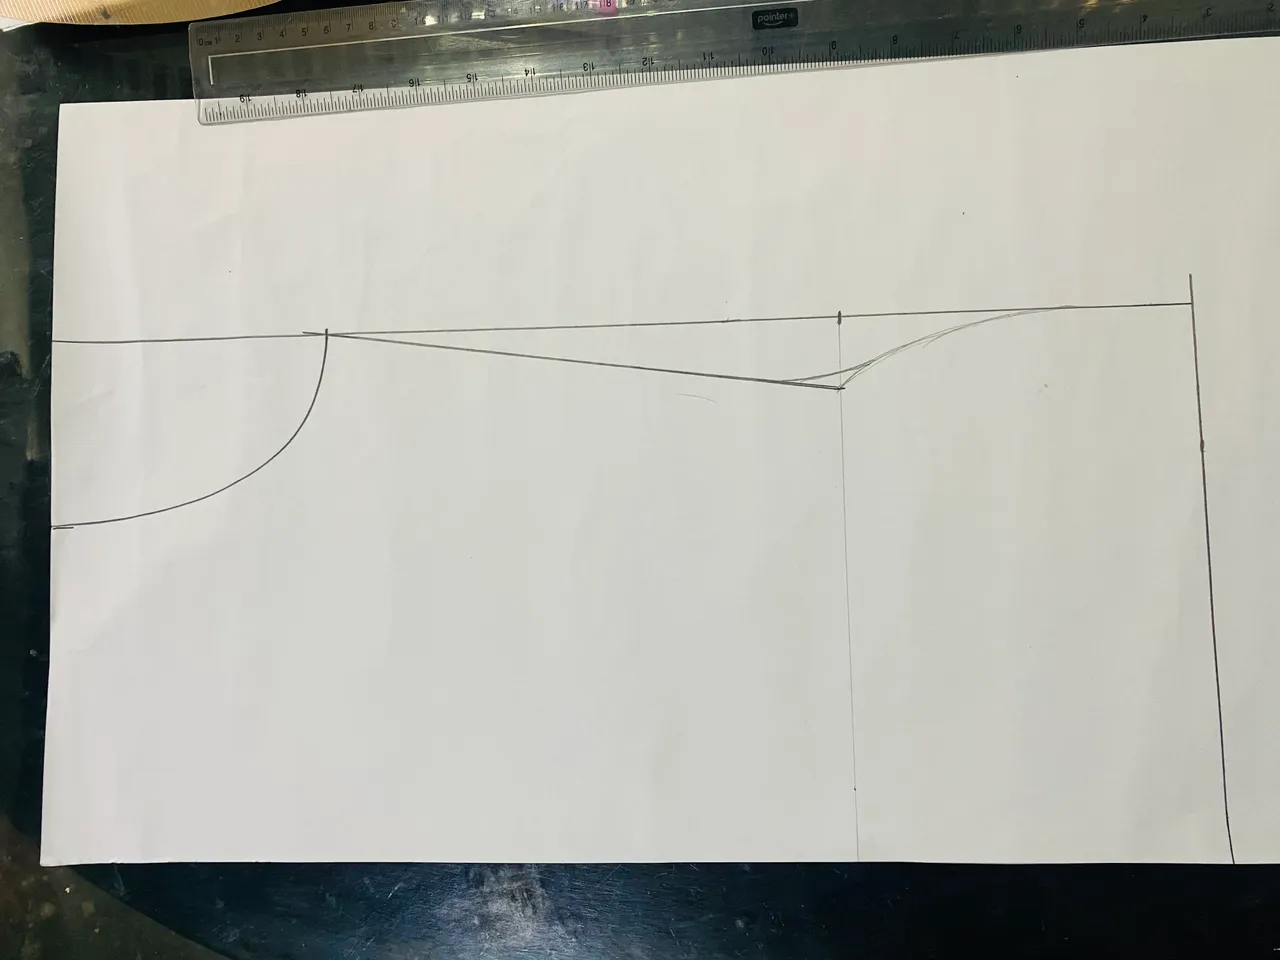
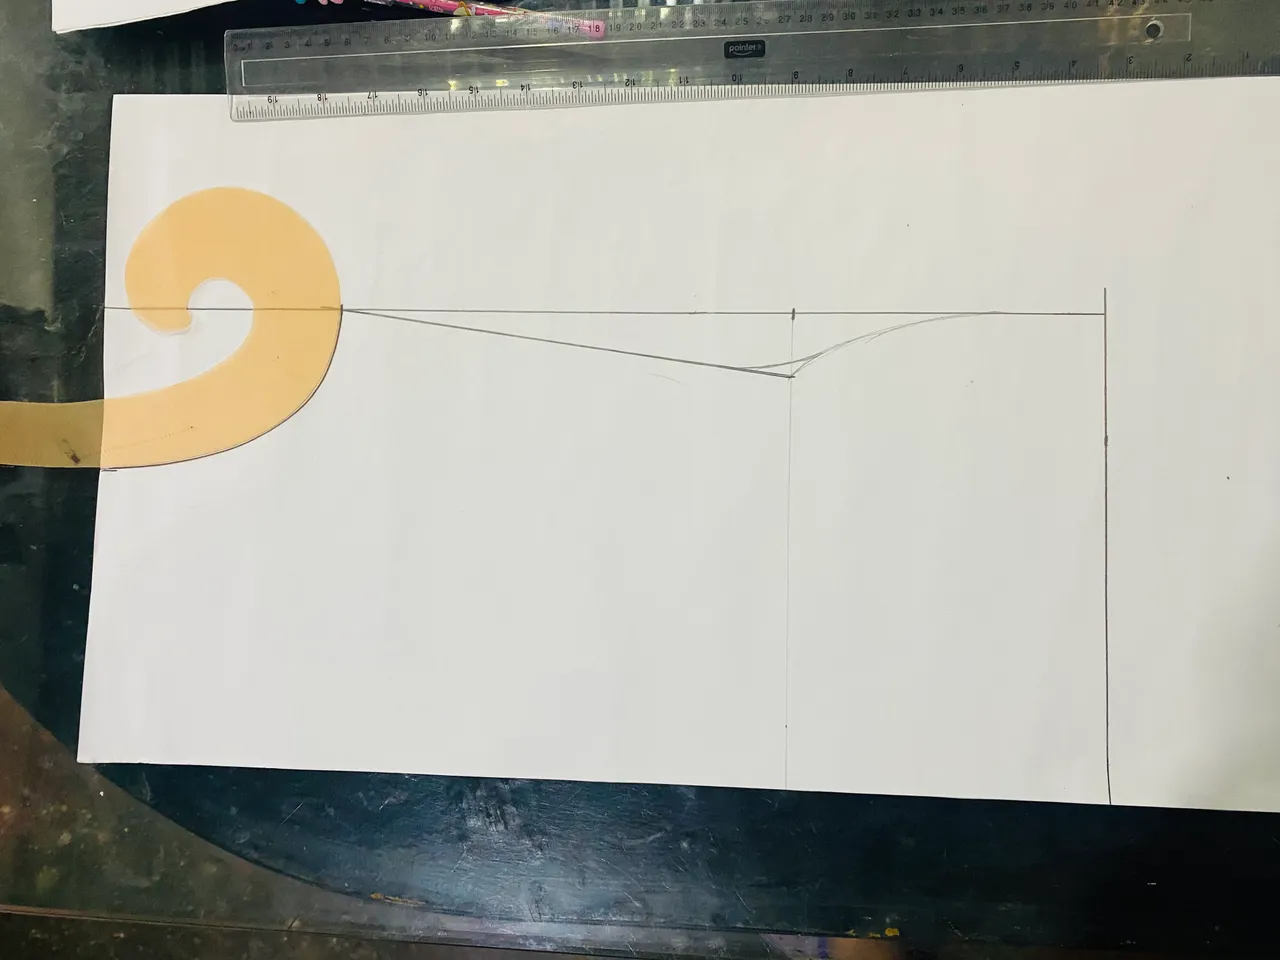
En cada foto les muestro como debemos hacer cada medida, seguimos, vamos a marcar 22 cm hacia abajo guiándonos desde donde está la medida de 12 cm , allí vamos a hacer una marca hacia adentro de 3 cm, unimos con una línea recta desde el contorno de busto (donde marcamos 12cm), hasta la marca de 3 cm para darle forma a la cintura luego unimos con una semi curva hasta la punta inferior del rectángulo, con esto ya le damos la forma a nuestro patrón, cortamos y ya tenemos la primera parte, con esta pieza podemos cortar la parte delantera y trasera ya que en este tipo de blusa no tiene modificación.
In each photo I show you how to take each measurement, we continue, we are going to mark 22 cm down guided by where the 12 cm measurement is, there we are going to make a mark inwards of 3 cm, we join with a straight line from the bust contour (where we marked 12 cm), to the 3 cm mark to give shape to the waist then we join with a semi curve to the lower tip of the rectangle, with this we already give shape to our pattern, we cut and we already have the first part, with this piece we can cut the front and back since in this type of blouse it has no modification.
 |  |
|---|---|
 |  |
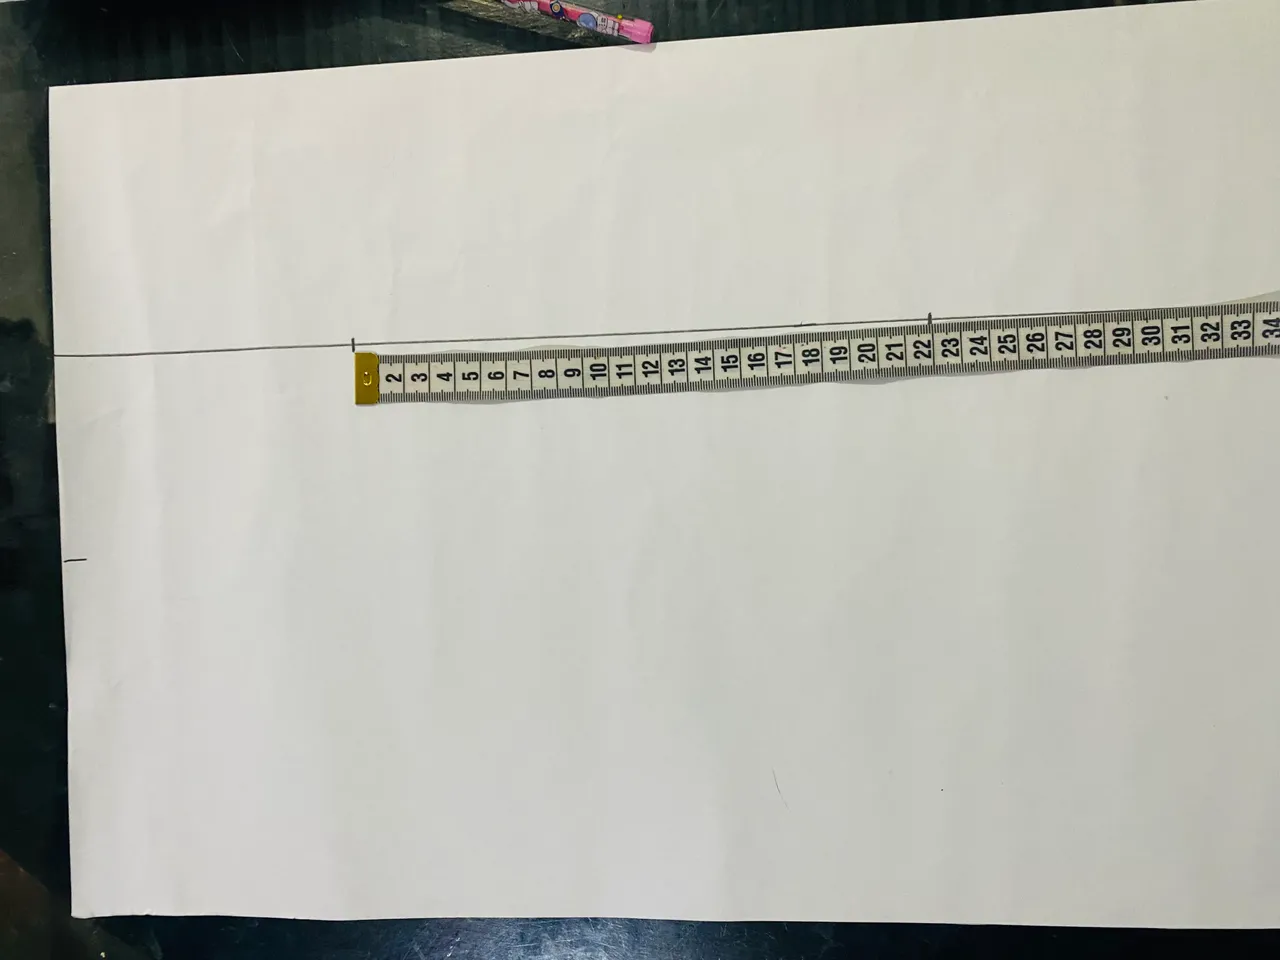
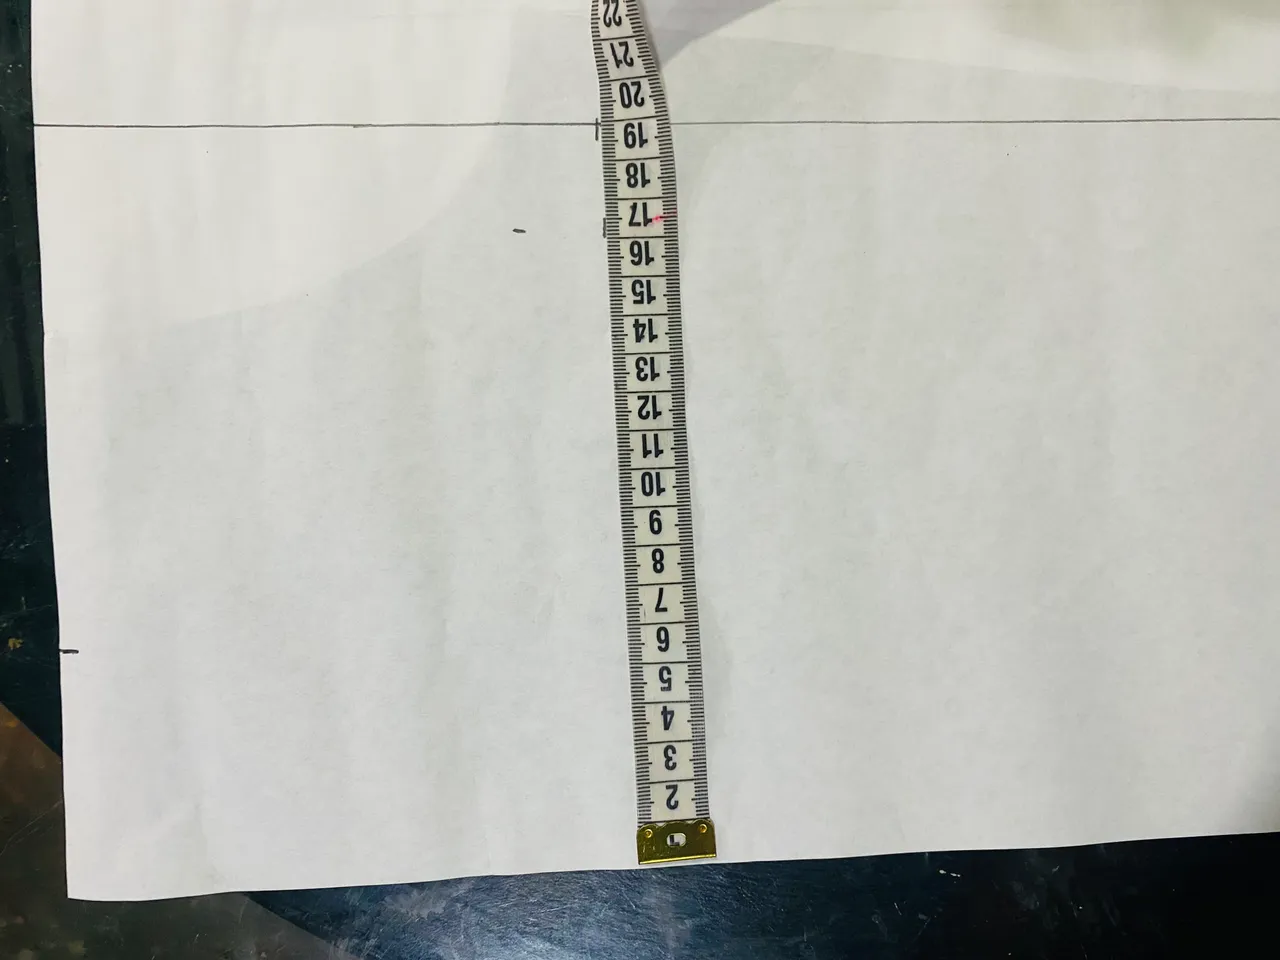
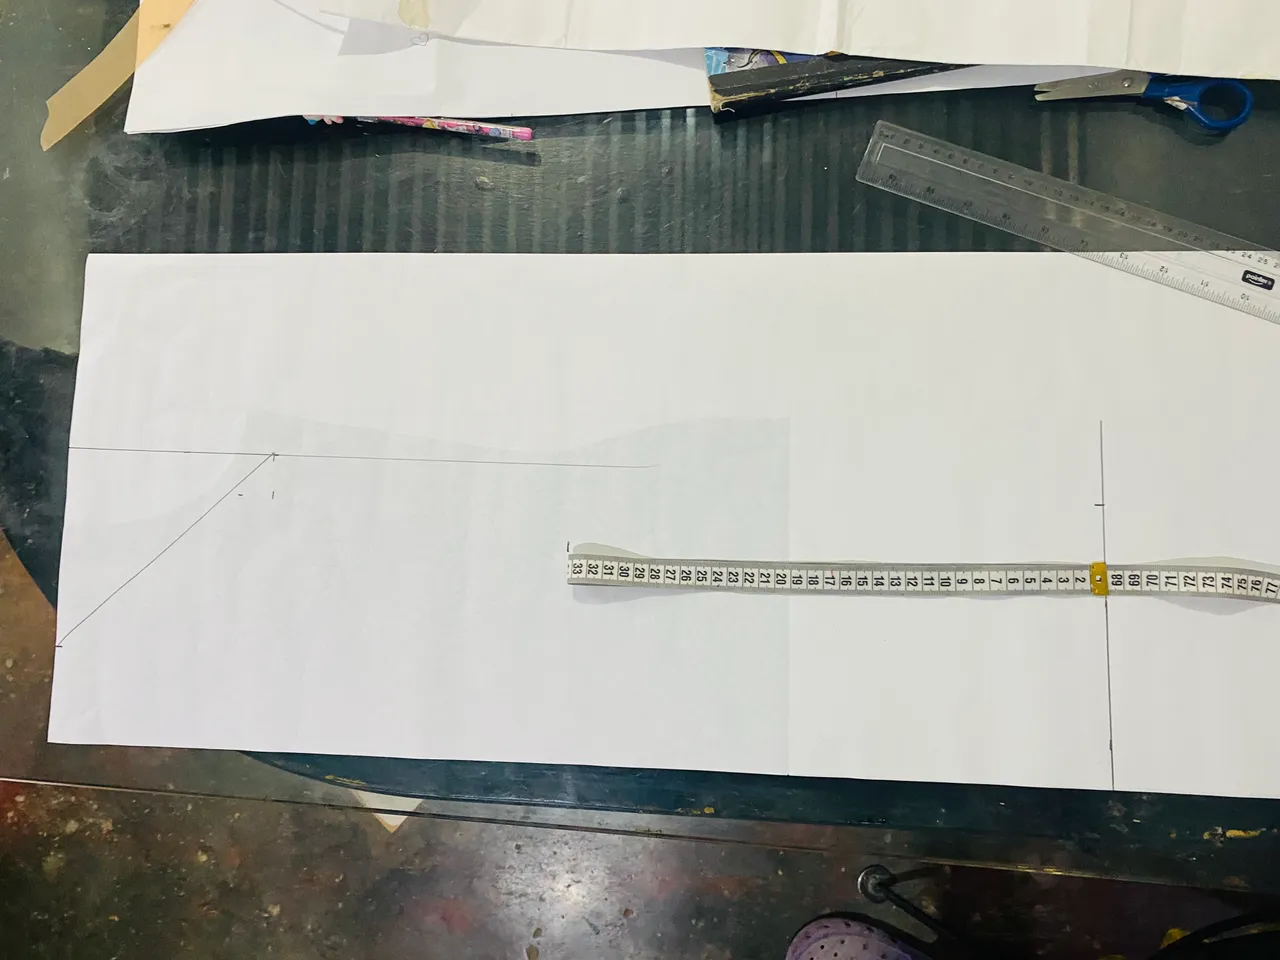
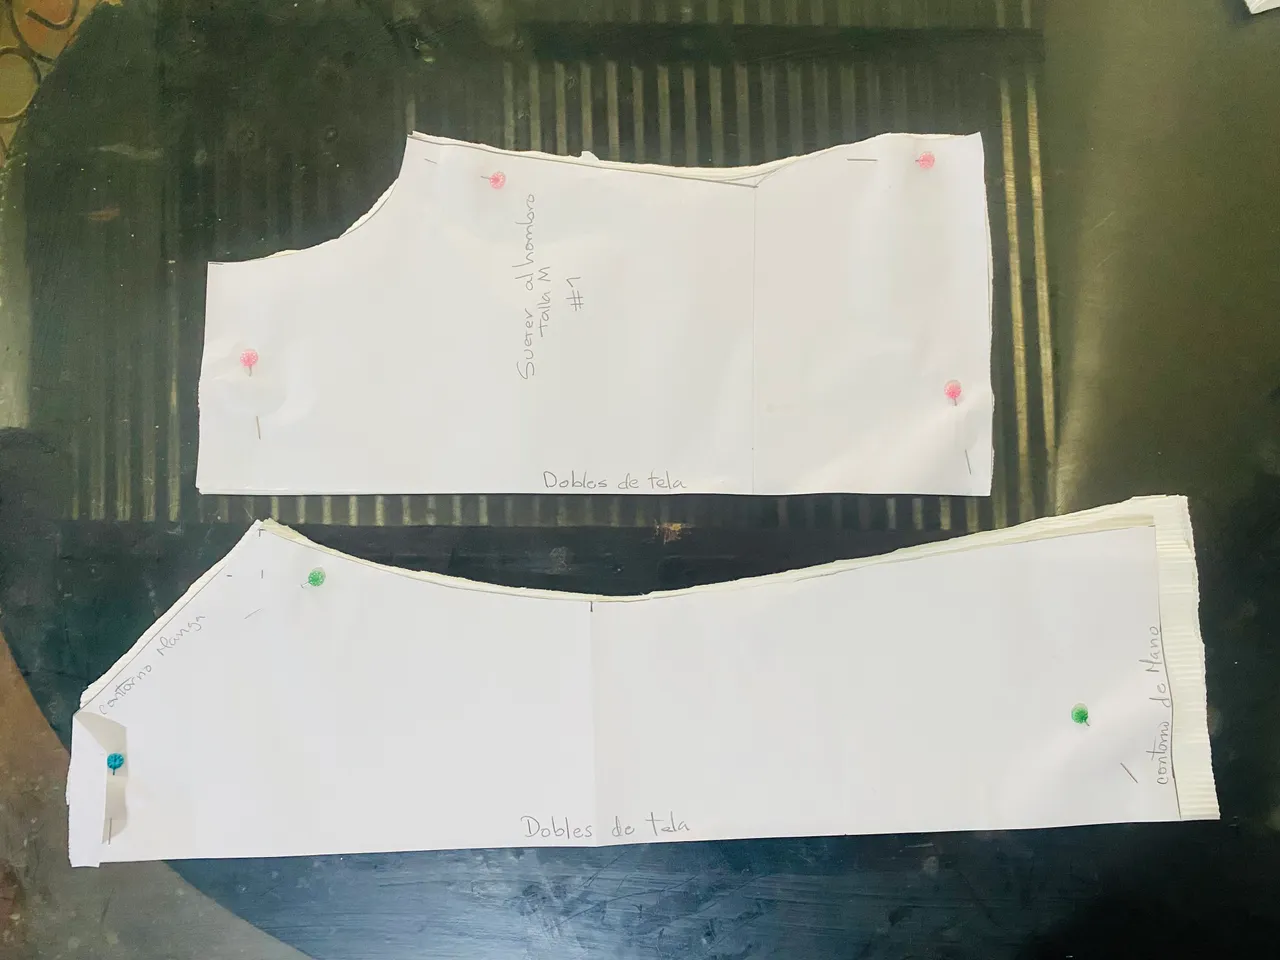
En este paso vamos a hacer el patrón para la manga, esta manga es acampanada, hacemos un rectángulo de 67 cm de largo por 19 cm de ancho , el ancho en la orilla inferior puede ser de 17 cm esto dependerá de cuán ancha la quieres, en la orilla superior izquierda vamos a marcar 6 cm, en la orilla superior derecha vamos a marcar 14 cm hacia abajo y unimos ese punto con el que ya habíamos marcado de 6 cm con una línea recta.
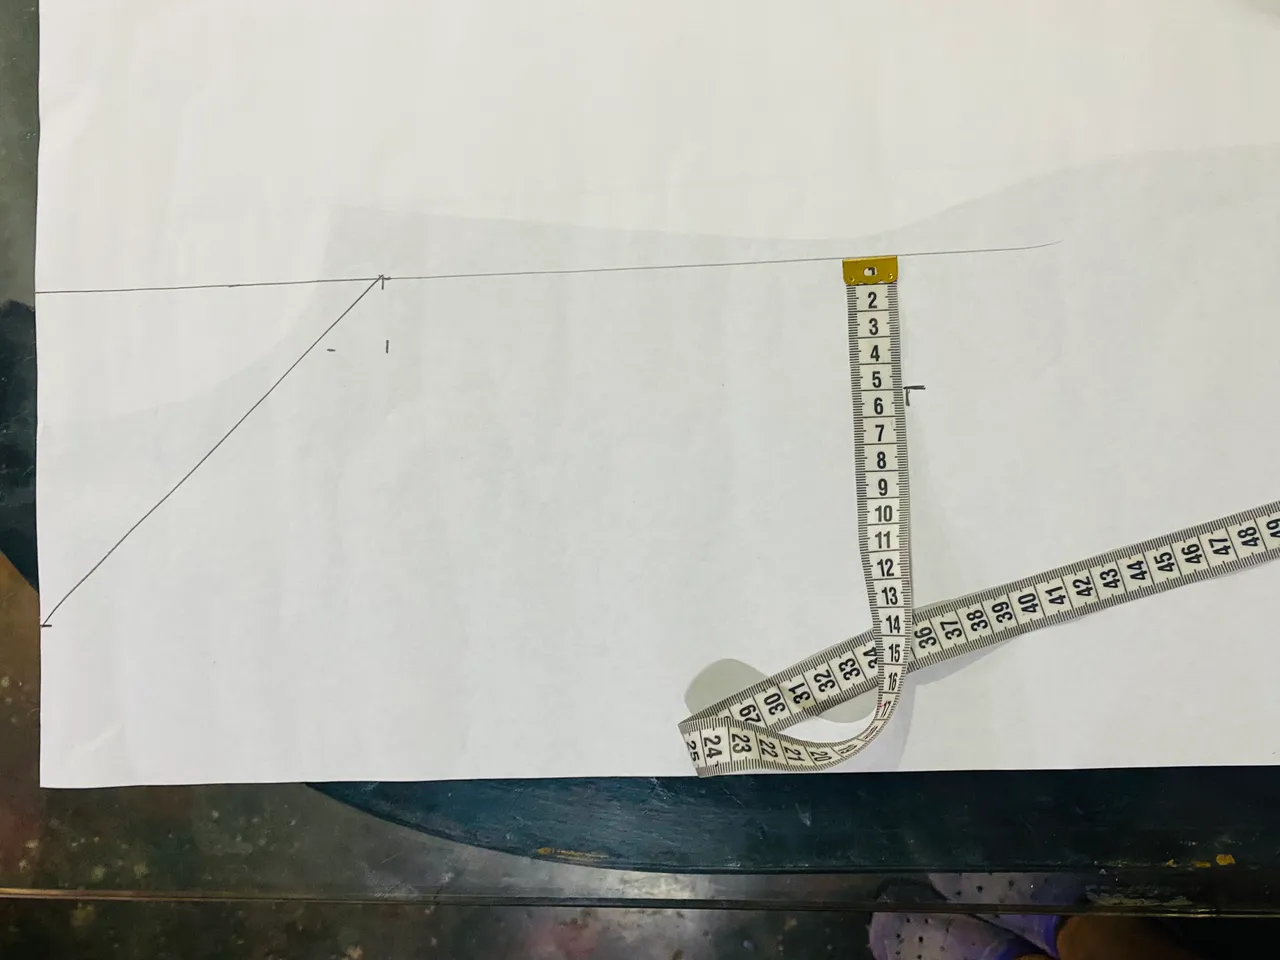
Ayudándonos con nuestra cinta métrica vamos a colocarla desde la orilla superior y vamos a doblar hasta la medida que hicimos de 67 cm, hacemos una marca, desde la orilla del patrón vamos a marcar 5 cm hacia adentro y le damos la forma a nuestra manga haciendo semi curva, cortamos y así ya tenemos el patrón para la manga de nuestro suéter.
In this step, we're going to make the pattern for the sleeve. This sleeve is flared. We'll make a rectangle measuring 67 cm long by 19 cm wide. The width at the bottom edge can be 17 cm, depending on how wide you want it. On the top left edge, we're going to mark 6 cm. On the top right edge, we're going to mark 14 cm down, and we'll join that point with the 6 cm we already marked with a straight line.
Using our measuring tape, we're going to place it from the top edge and fold it to the measurement we made, 67 cm. We'll make a mark. From the edge of the pattern, we're going to mark 5 cm inward. We'll shape our sleeve, making a semi-curved shape. We cut it out, and that's it: the pattern for our sweater sleeve.
 |  |
|---|---|
 |  |
| --- | --- |
 |  |
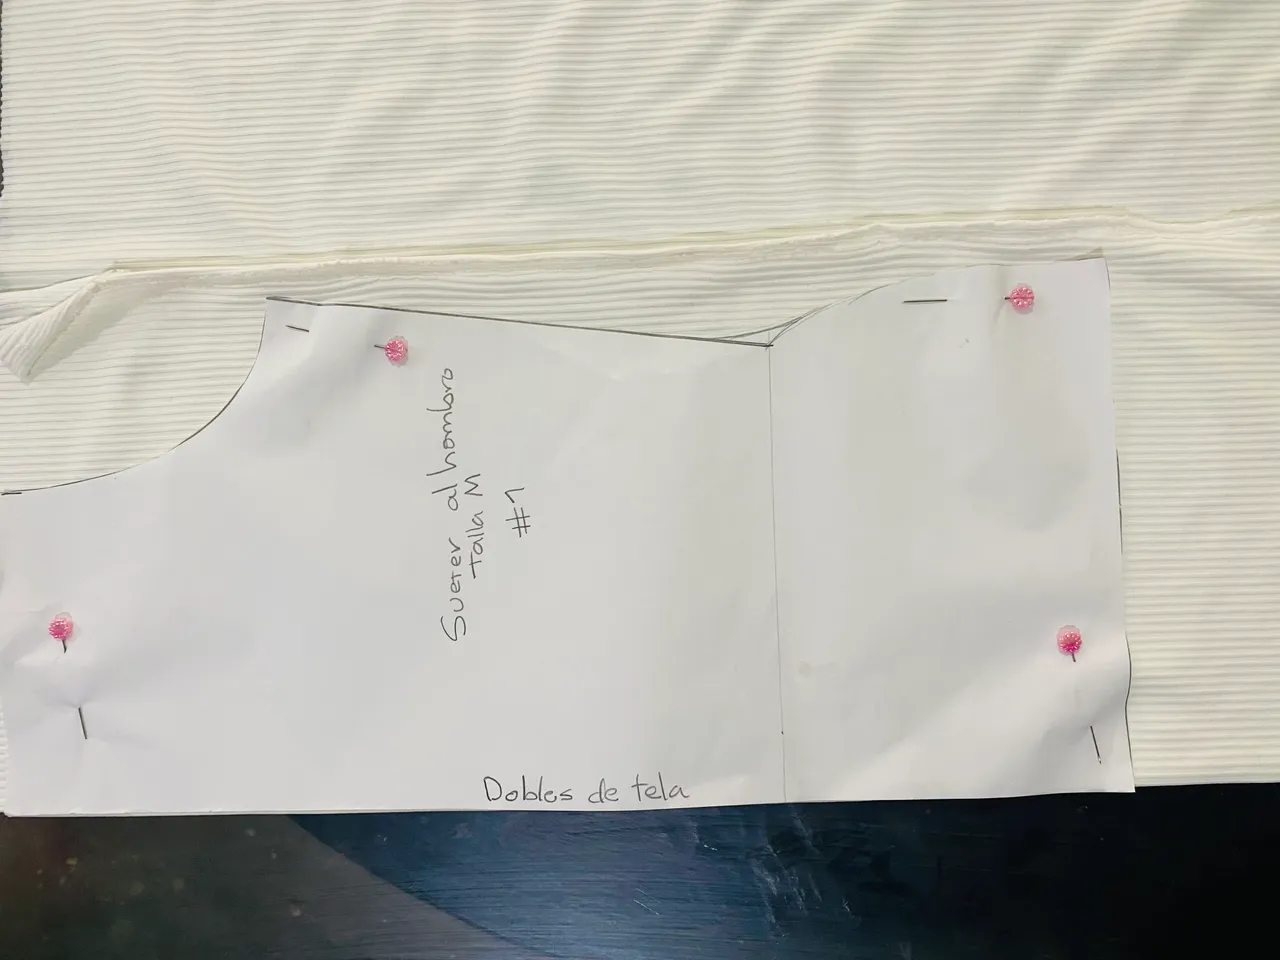
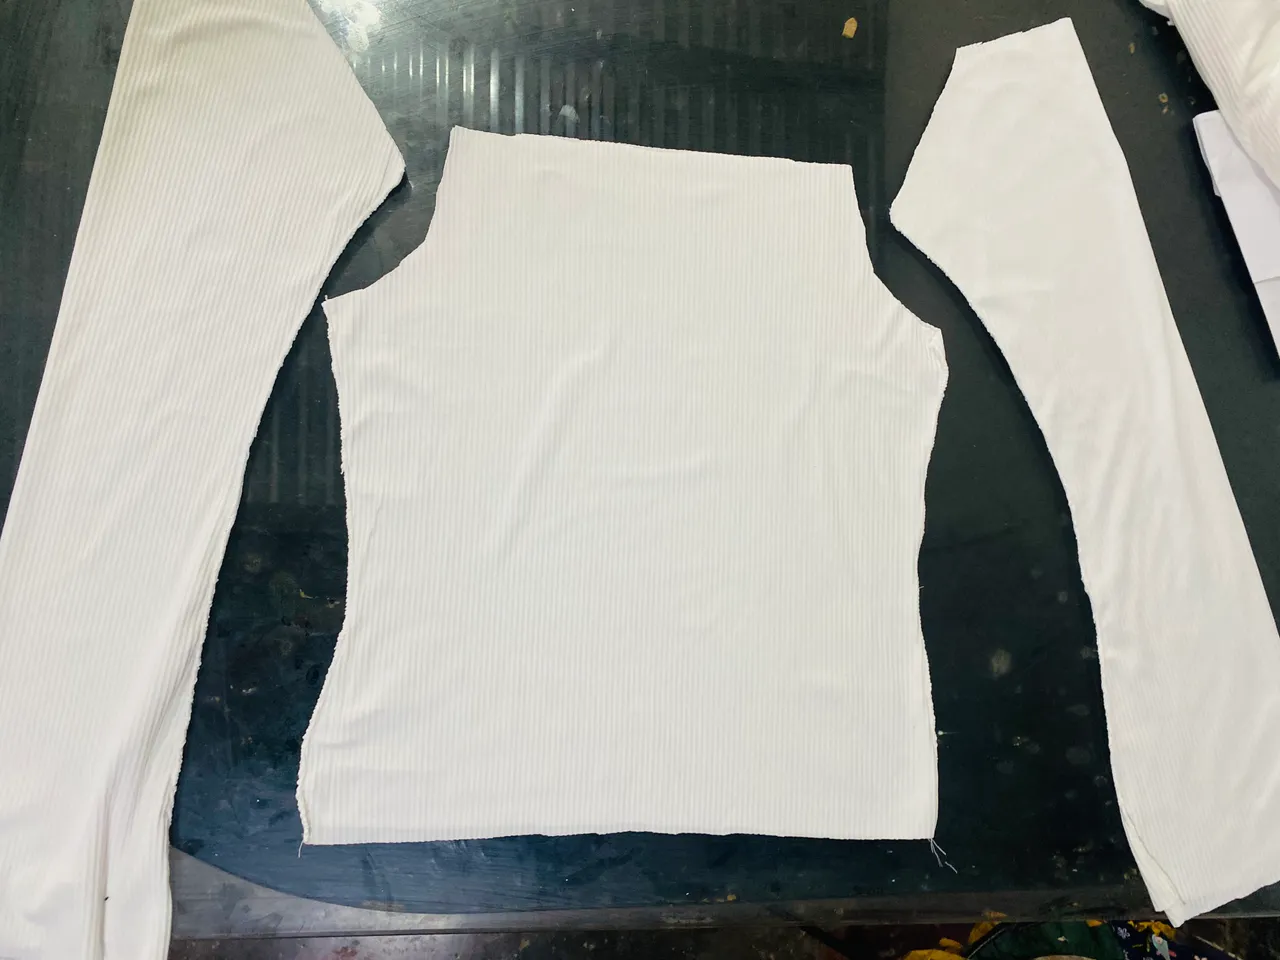
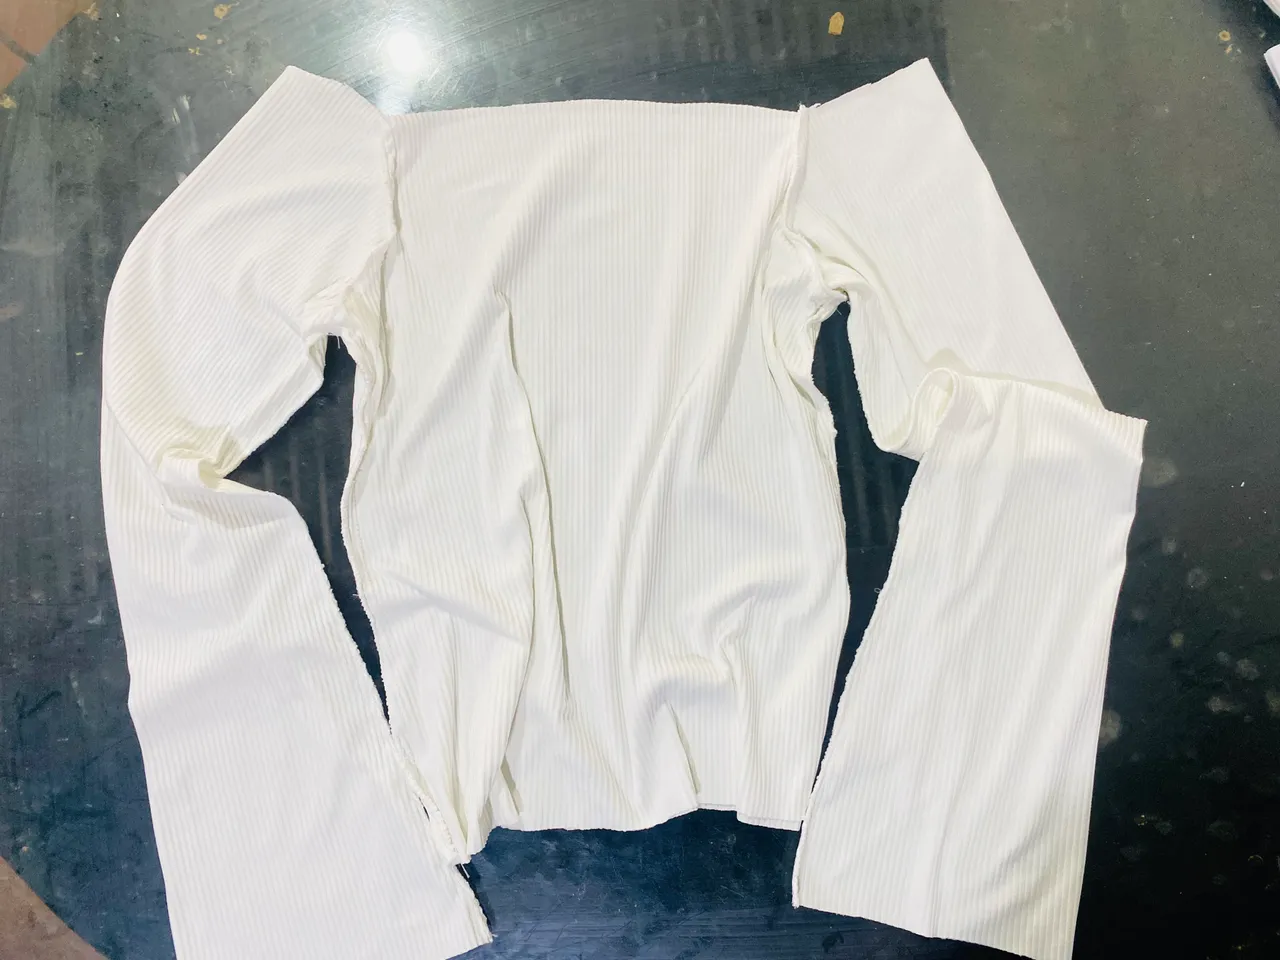
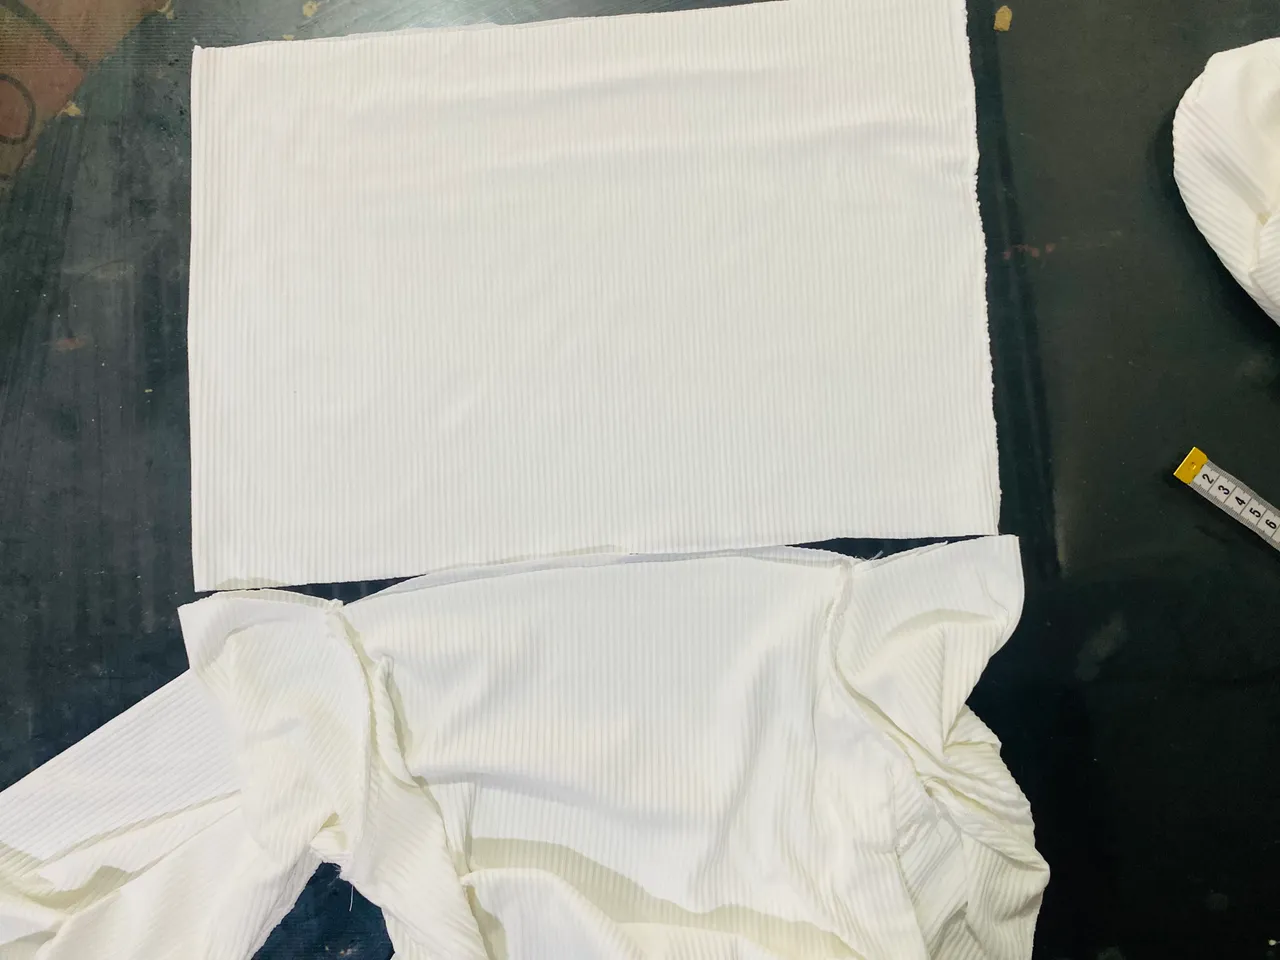
Una vez listo nuestro patrón vamos a cortar la tela, ponemos la tela doble para cortar las piezas delantera y de atrás al mismo tiempo, colocamos el patrón sobre la tela, fijamoscon alfileres y cortamos por todo el alrededor del patrón, para cortar la manga le disminuí 1 cm en la orilla superior ya que me quedó un poco largo, y le dejé 1 cm más para el ruido ya que la chica me pidió que le quede largo para que le cubra un poco la mano, luego cortamos por todo el alrededor de nuestro patrón.
Este patrón es un aproximado para la talla M, si quieres una talla más grande puedes aumentar algunos centímetros en las orillas y obtendrás tallas más grandes, éste está hecho a la medida incluida para las costuras.
Once our pattern is ready, we'll cut the fabric. We'll double the fabric to cut the front and back pieces at the same time. We'll place the pattern on the fabric, pin it, and cut all the way around the pattern. To cut the sleeve, I decreased 1 cm at the top edge since it was a little long, and I left 1 cm more for the hem since the girl asked me to make it long so it would cover her hand a little. Then we cut all the way around our pattern.
This pattern is approximate for size M. If you want a larger size, you can add a few centimeters at the edges and you'll get larger sizes. This pattern is made to measure, including the seam allowances.
 |  |
|---|
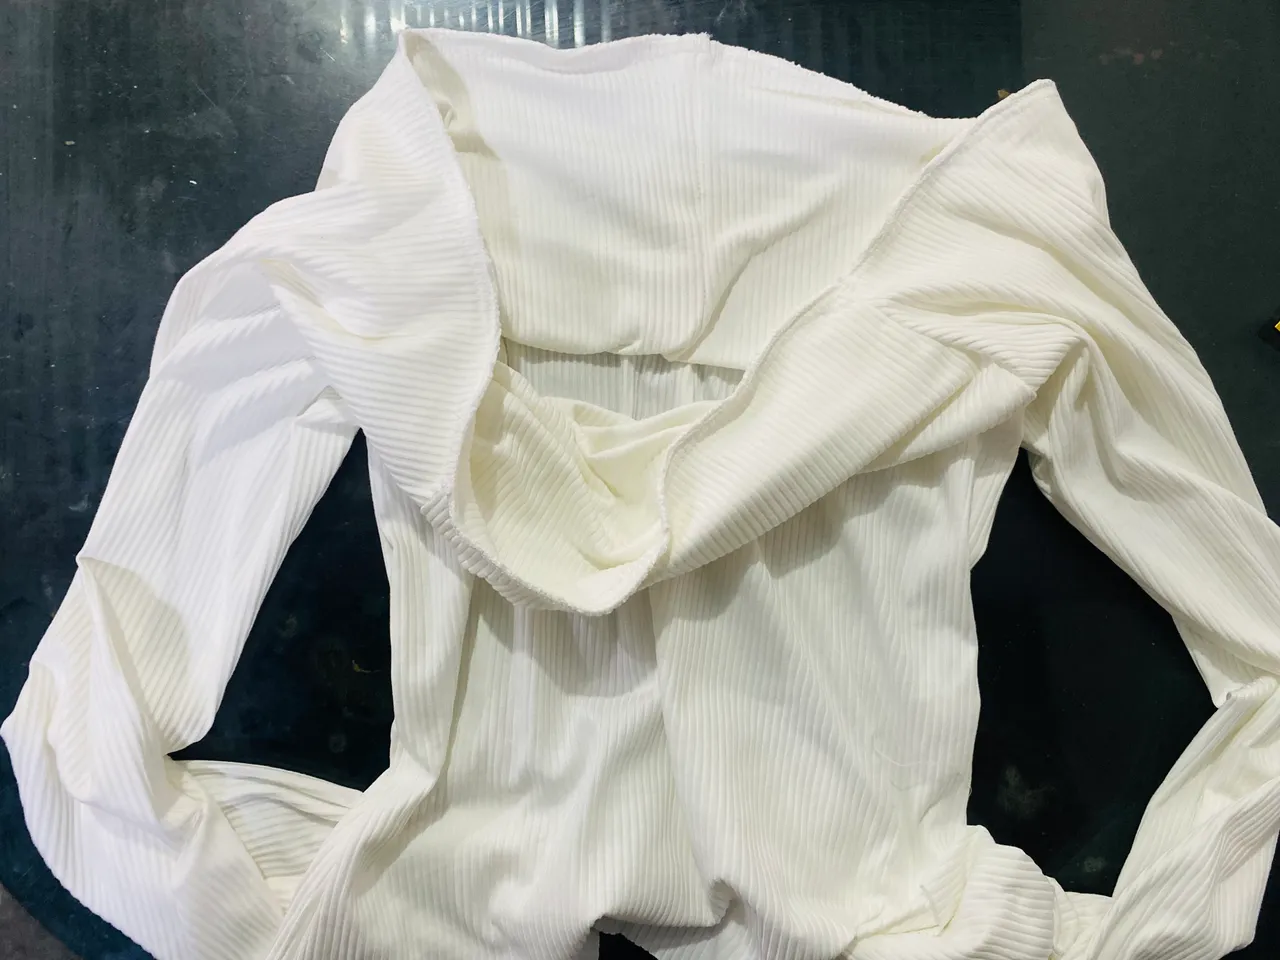
En el siguiente paso vamos a comenzar con las costuras 🧵 , vamos a unir por los lados la pieza delantera y la de atrás de la blusa, aparte unimos por los lados con costura la manga, luego vamos a unir a la pieza principal de la blusa, aquí ya tenemos armada nuestra blusa, ahora vamos a sacar la medida del ancho de hombros para hacerle la doble vista que lleva en el escote de hombros.
Está tiene 46 cm de ancho y vamos a cortarlo de 30 cm de alto y al doblarlo a la mitad nos quedará de 15 cm, unimos esta pieza de tela por la orilla doblamos a la mitad y luego unimos a nuestra blusa colocándolo por la parte interna para que la costura quede al frente de manera que al doblar la vista tape la costura.
In the next step, we'll start with the seams 🧵 . We'll join the front and back pieces of the blouse together along the sides. Separately, we'll sew the sleeve together along the sides. Then, we'll join them to the main piece of the blouse. Our blouse is now assembled. Now, we'll measure the shoulder width to make the double-sided edge that covers the shoulder neckline.
This piece is 46 cm wide, and we'll cut it 30 cm high. When folded in half, it will be 15 cm long. We join this piece of fabric along the edge, fold it in half, and then join it to our blouse, placing it on the inside so that the seam is at the front and, when folded, the facing hides the seam.
 |  |
|---|---|
 |  |
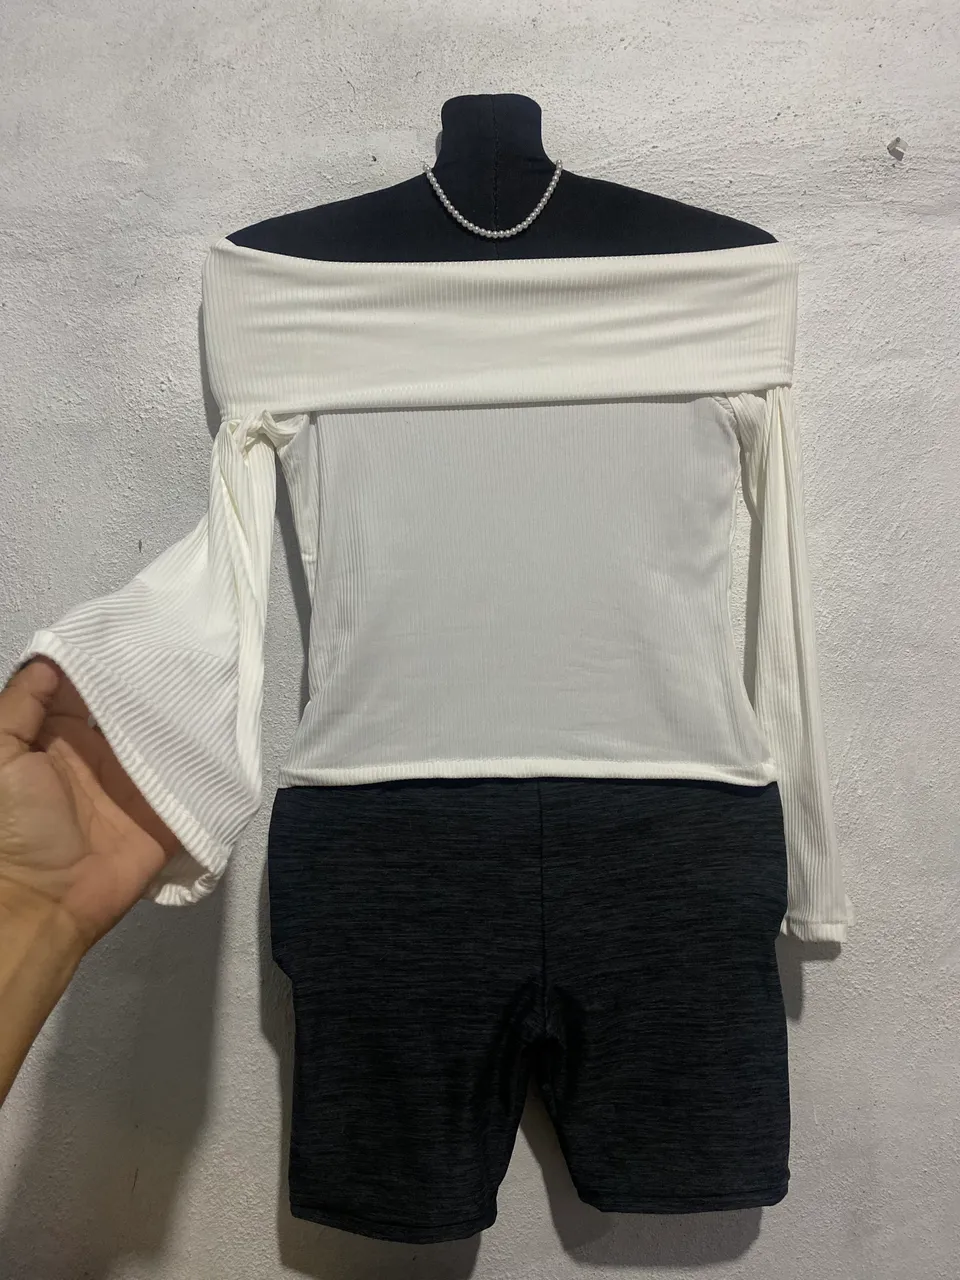
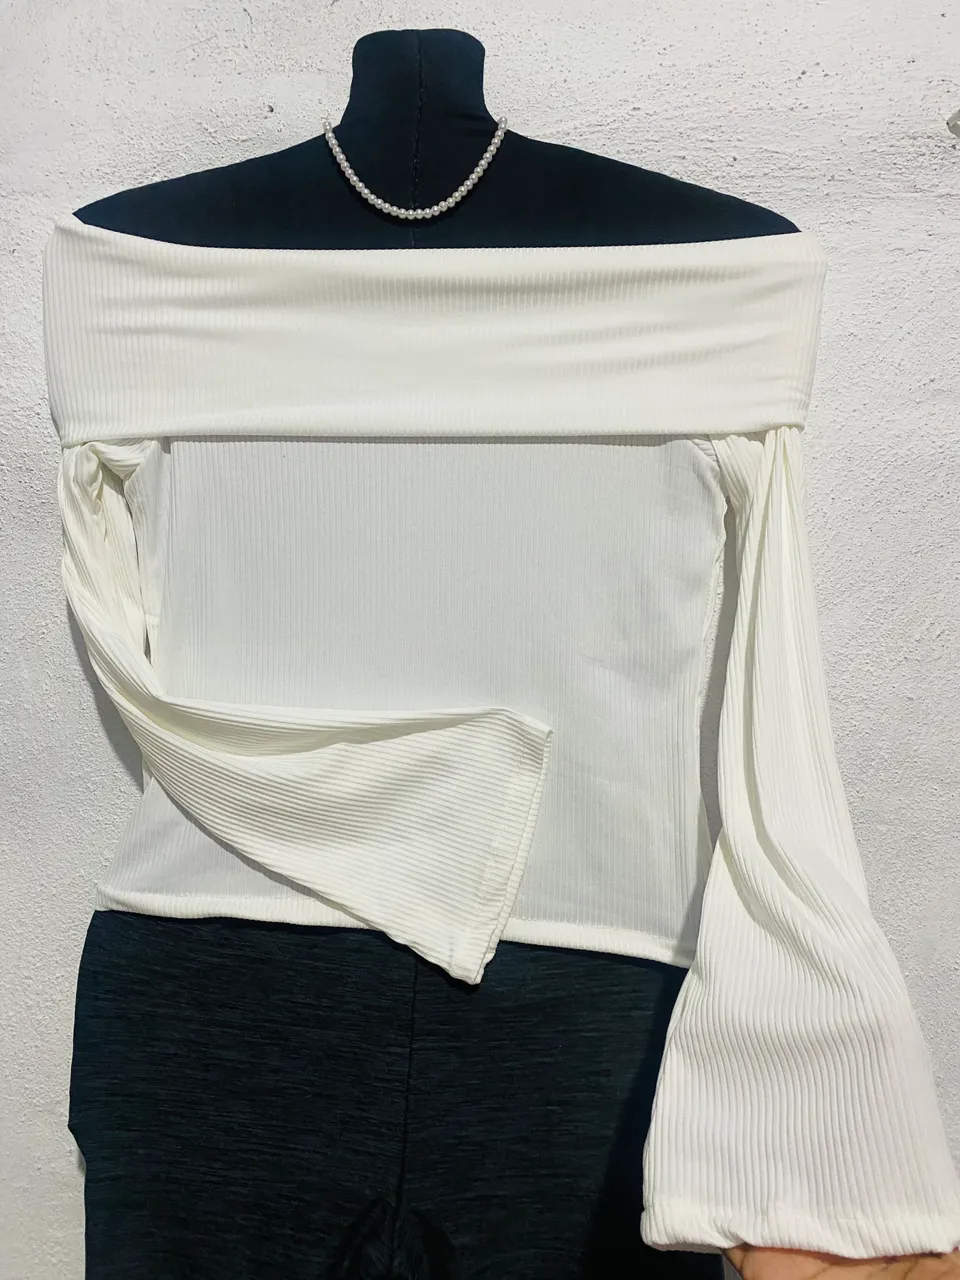
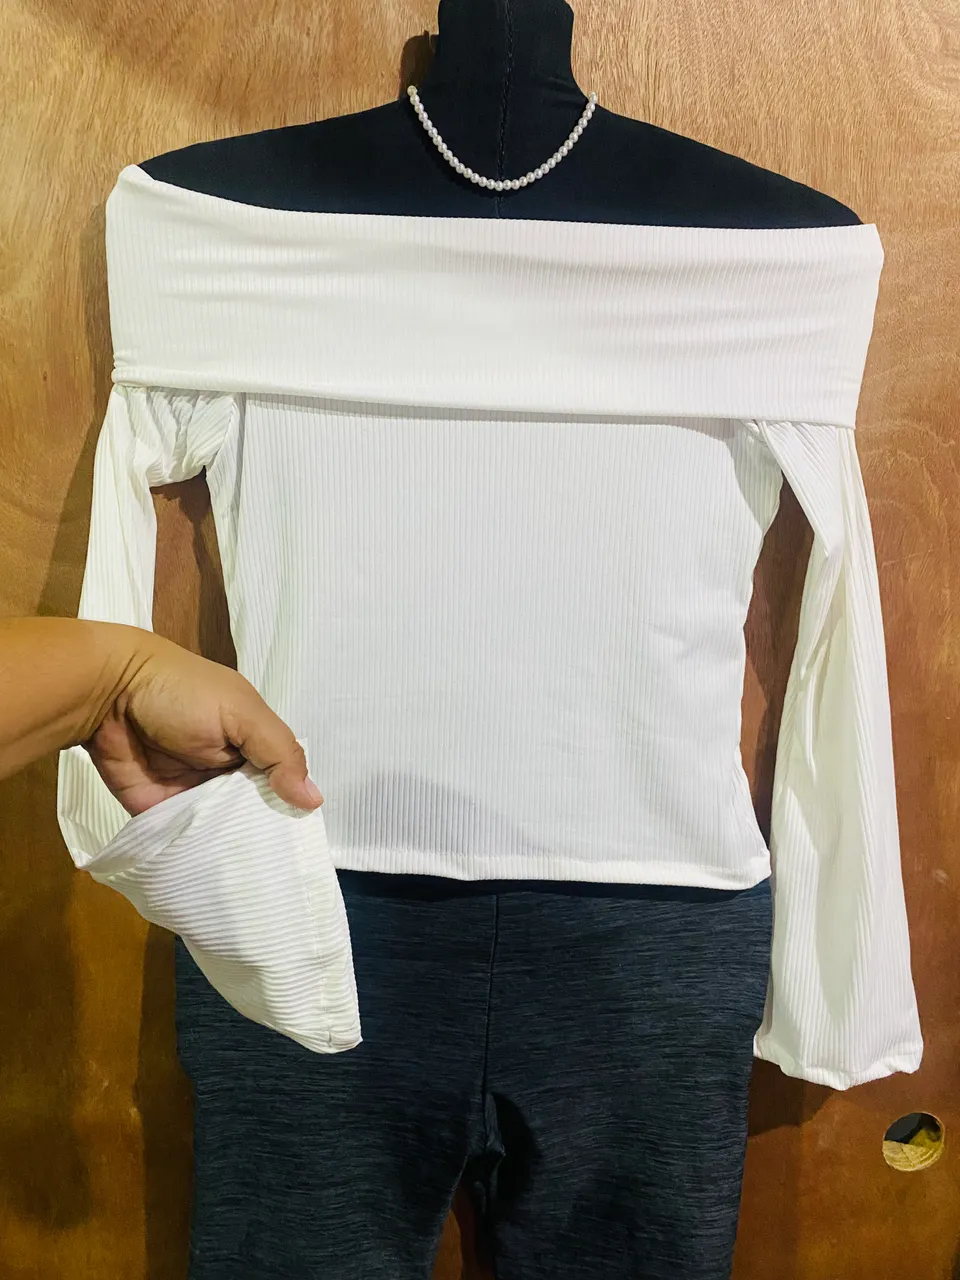
Para finalizar con la confección de este hermoso sueter, vamos a hacerle ruedo en las mangas y en la orilla inferior de la blusa, luego de esto ya tendremos lista esta blusa tipo suéter con hombros descubiertos, doble vista en el escote y mangas acampanadas , espero hayan entendido mi explicación y les pueda servir de guía para que puedan hacer este modelo de blusa 😊
To finish making this beautiful sweater, we are going to hem the sleeves and the bottom edge of the blouse. After this, we will have this sweater-style blouse ready with bare shoulders, a double-faced neckline, and flared sleeves. I hope you understood my explanation and that it can serve as a guide so you can make this blouse model 😊
 |  |
|---|
Una de las satisfacciones más grandes que podemos tener en la vida es confeccionar nuestras propias prendas, amo practicar la costura y me encanta confeccionar y crear, el resultado de este suéter me ha encantado me gusta mucho el modelo que escogió la chica espero que le quede muy bien y que quede a gusto con el resultado, eso es todo por hoy me despido deseándoles muchos éxitos y bendiciones, hasta otra oportunidad 🥰
One of the greatest satisfactions we can have in life is making our own clothes, I love to practice sewing and I love to make and create, I loved the result of this sweater, I really like the model that the girl chose, I hope it fits her very well and that she is happy with the result, that's all for today I say goodbye wishing you much success and blessings, until another opportunity 🥰

las fotos aquí compartidas son de mi propiedad tomadas con mi teléfono iPhone 11, la edición fue hecha en Canva, para la traducción del inglés utilice el traductor de Google