
✨🩷✨🩷✨🩷✨🩷✨🩷✨🩷✨🩷✨🩷✨
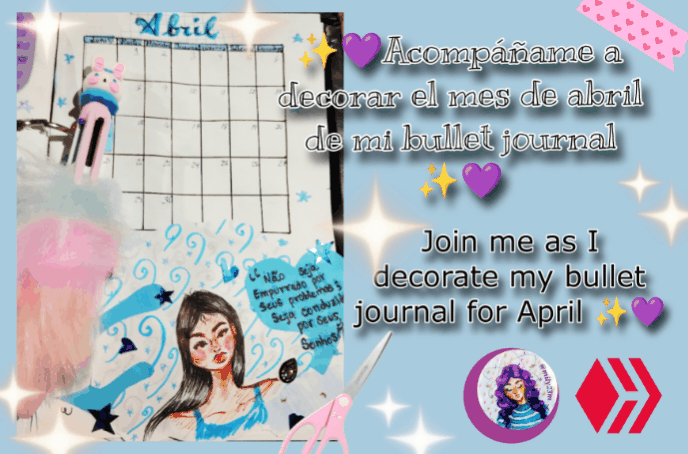
Hola comunidad de artesanos y amantes de las manualidades , con el comienzo de un nuevo mes de este año , trae una nueva decoración de bullet journal ✨ 🩷, organizando el mes de abril, y haciendo un collage único para decorar el calendario,este mes me toca organizarme bien porque tendré muchos gastos y estoy tratando de organizarme bien para ahorrar lo más posible, aquí les dejo el paso a paso de como lo hice.

🩷Hoja blanca
🩷 Reglas y tijeras
🩷 Papeles decorativos y recortes
🩷 Resaltadores y marcadores de colores
🩷 Pega blanca
🩷 Marcador negro punta fina y punta mediana
Manos a la obra
English Version
✨🩷✨🩷✨🩷✨🩷✨🩷✨🩷✨🩷✨🩷✨🩷✨
Hello community of artisans and craft lovers, with the beginning of a new month of this year, brings a new bullet journal decoration ✨ 🩷, organizing the month of April, and making a unique collage to decorate the calendar, this month I have to organize myself well because I will have many expenses and I am trying to organize myself well to save as much as possible, here I leave you the step by step of how I did it.
🩷White paper
🩷Rulers and scissors
🩷Decorative paper and scraps
🩷Highlighters and colored markers
🩷White glue
🩷Black marker, fine and medium tip
Let's get to work

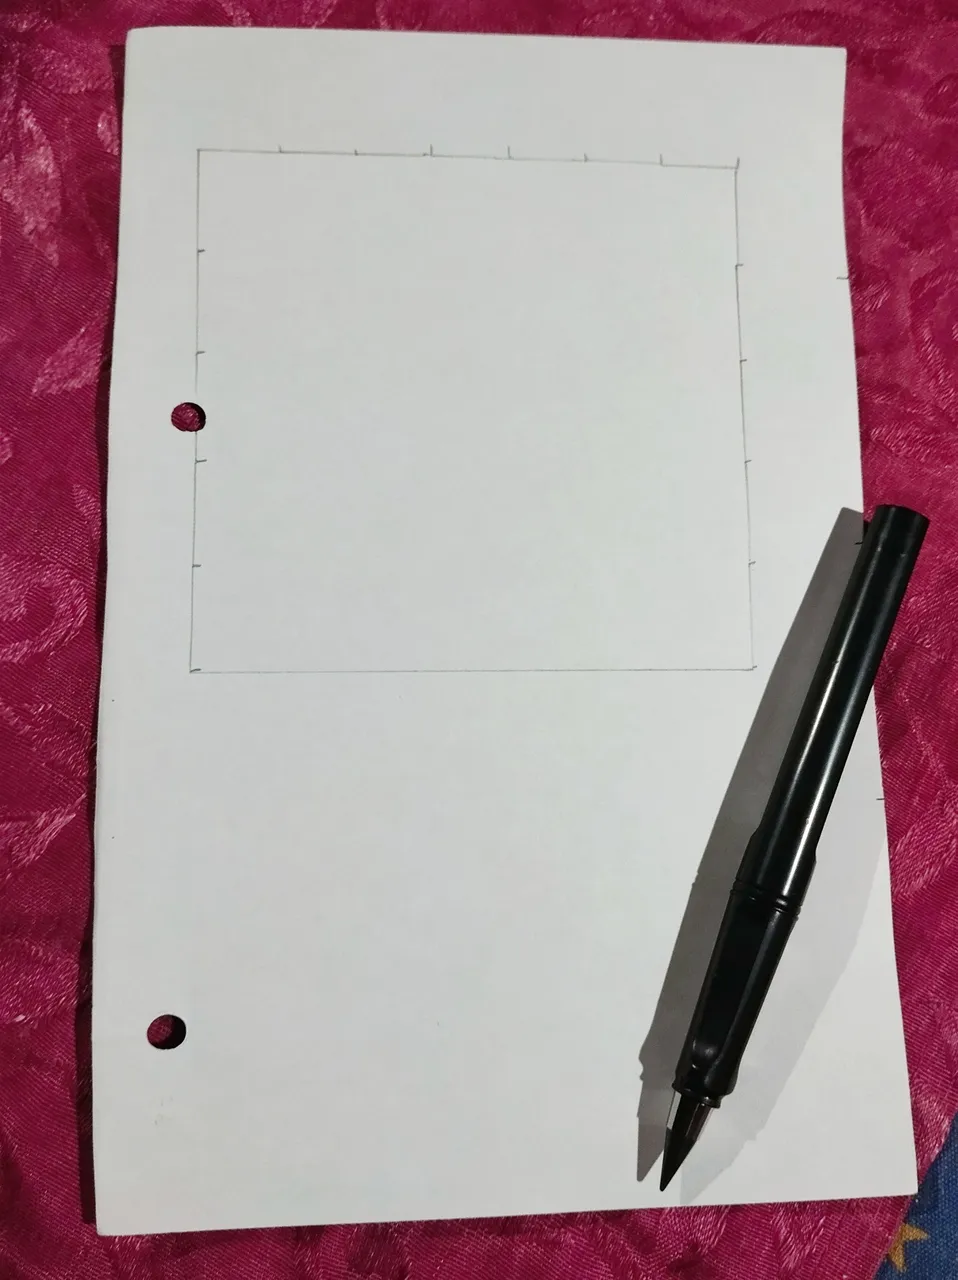 | 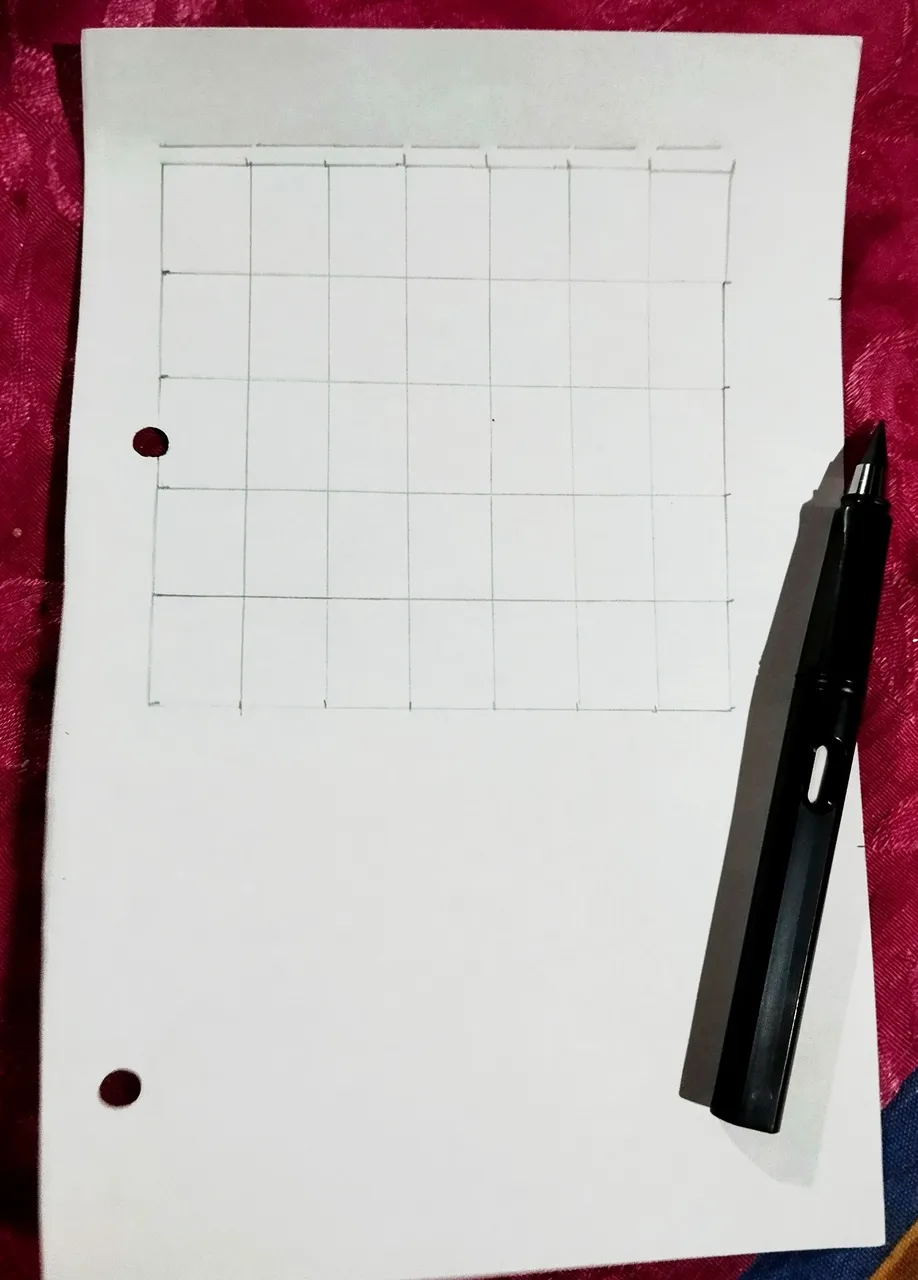 |
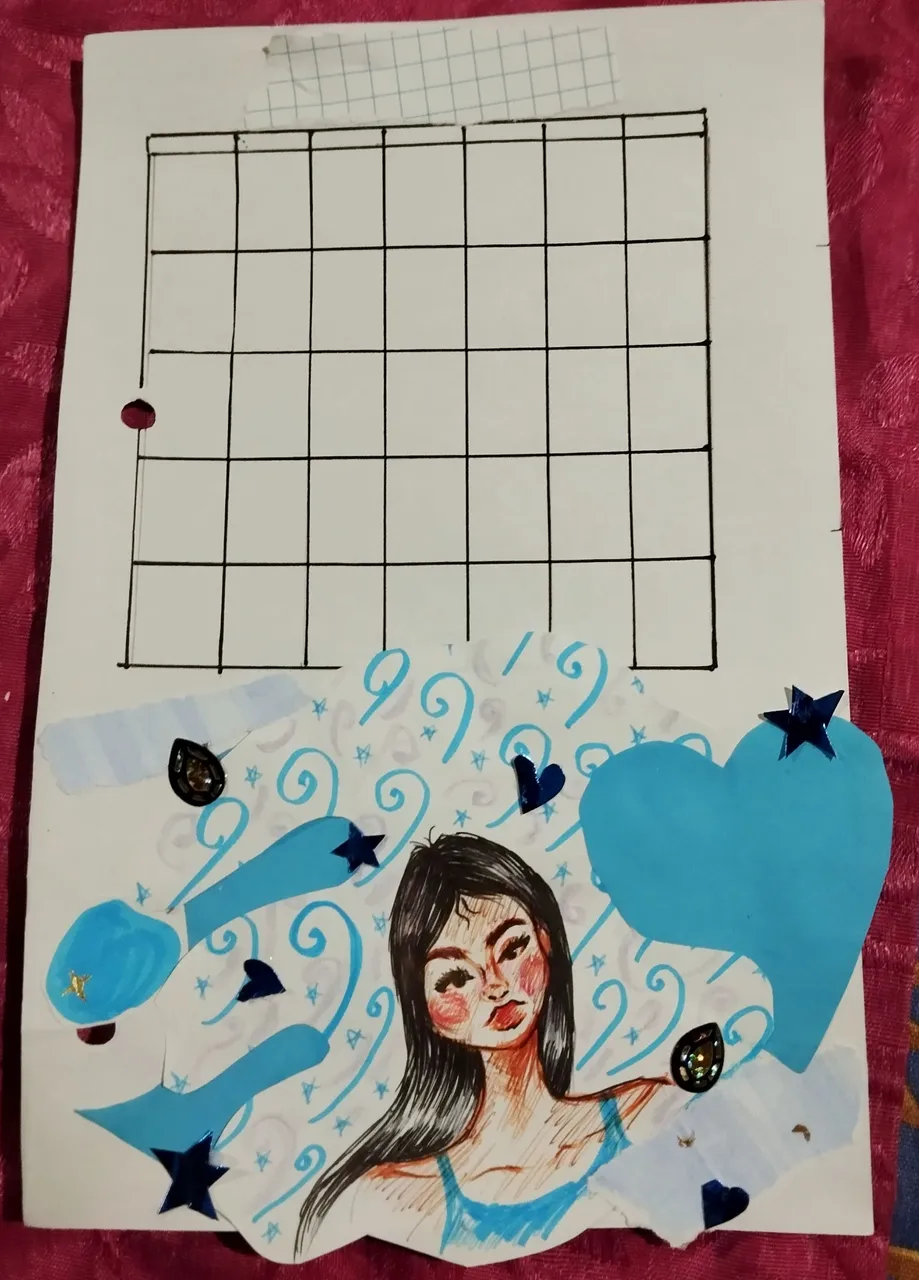
#1 El primer paso como siempre lo haremos creando el formato de la hoja blanca, yo uso la mitad de una hoja,y le agujereo los orificios para las anillas, y para el formato de calendario usé un lápiz ✏️ para el boceto, haciendo 7 casillas de 1,5 CM de largo ,que serán los días , y 5 filas de bajo de estás para las semanas , marqué los puntitos y cree el formato de las rejillas para calendario, y en la parte de arriba deje un espacio de 0,5 CM para poner los días.Luego con marcador punta fina negra hice todas las líneas.
English Version
#1 The first step as always we will do it creating the format of the white sheet, I use half of a sheet, and I make the holes for the rings, and for the calendar format I used a pencil ✏️ for the sketch, making 7 boxes of 1.5 CM long, which will be the days, and 5 rows below these for the weeks, I marked the dots and created the format of the calendar grids, and at the top I left a space of 0.5 CM to put the days. Then with a black fine-tip marker I made all the lines.
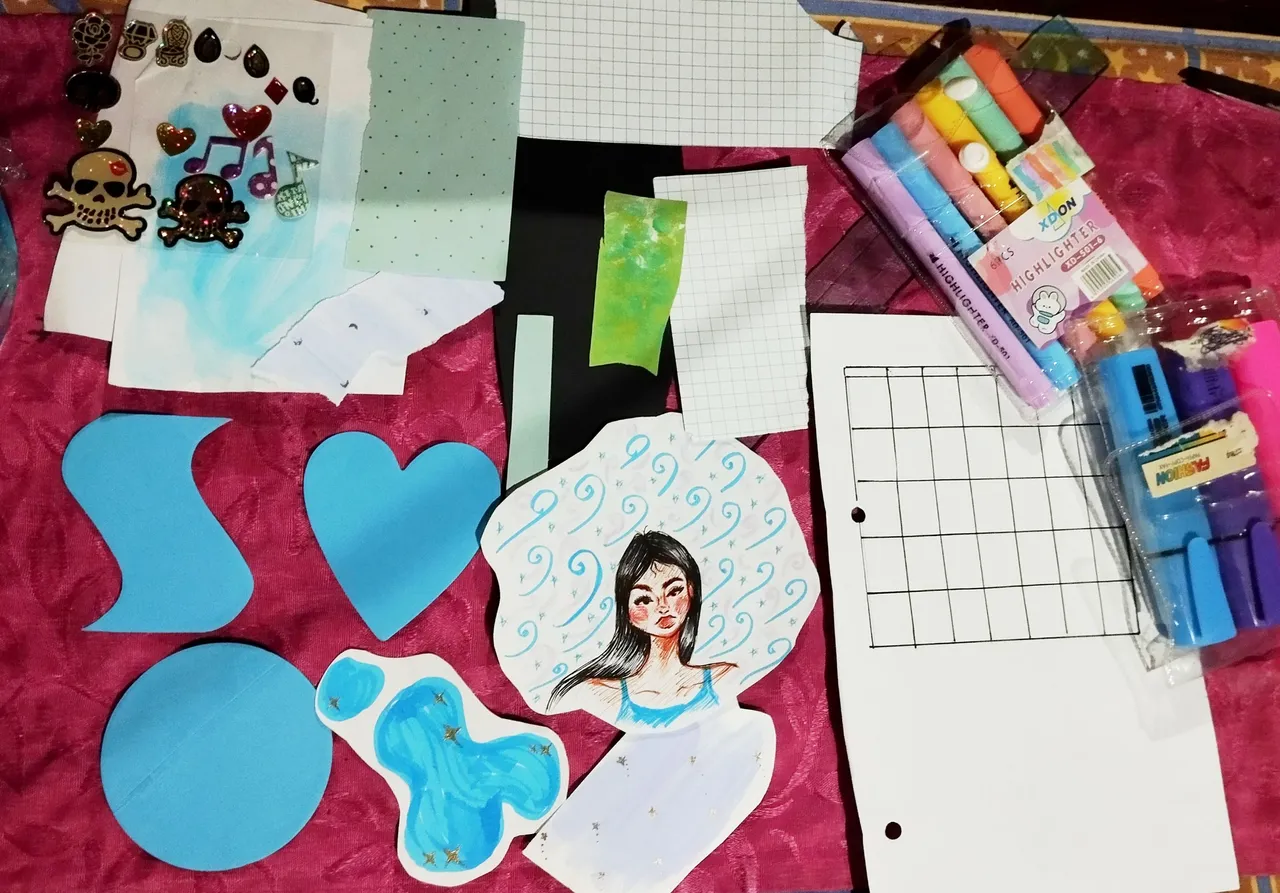 | 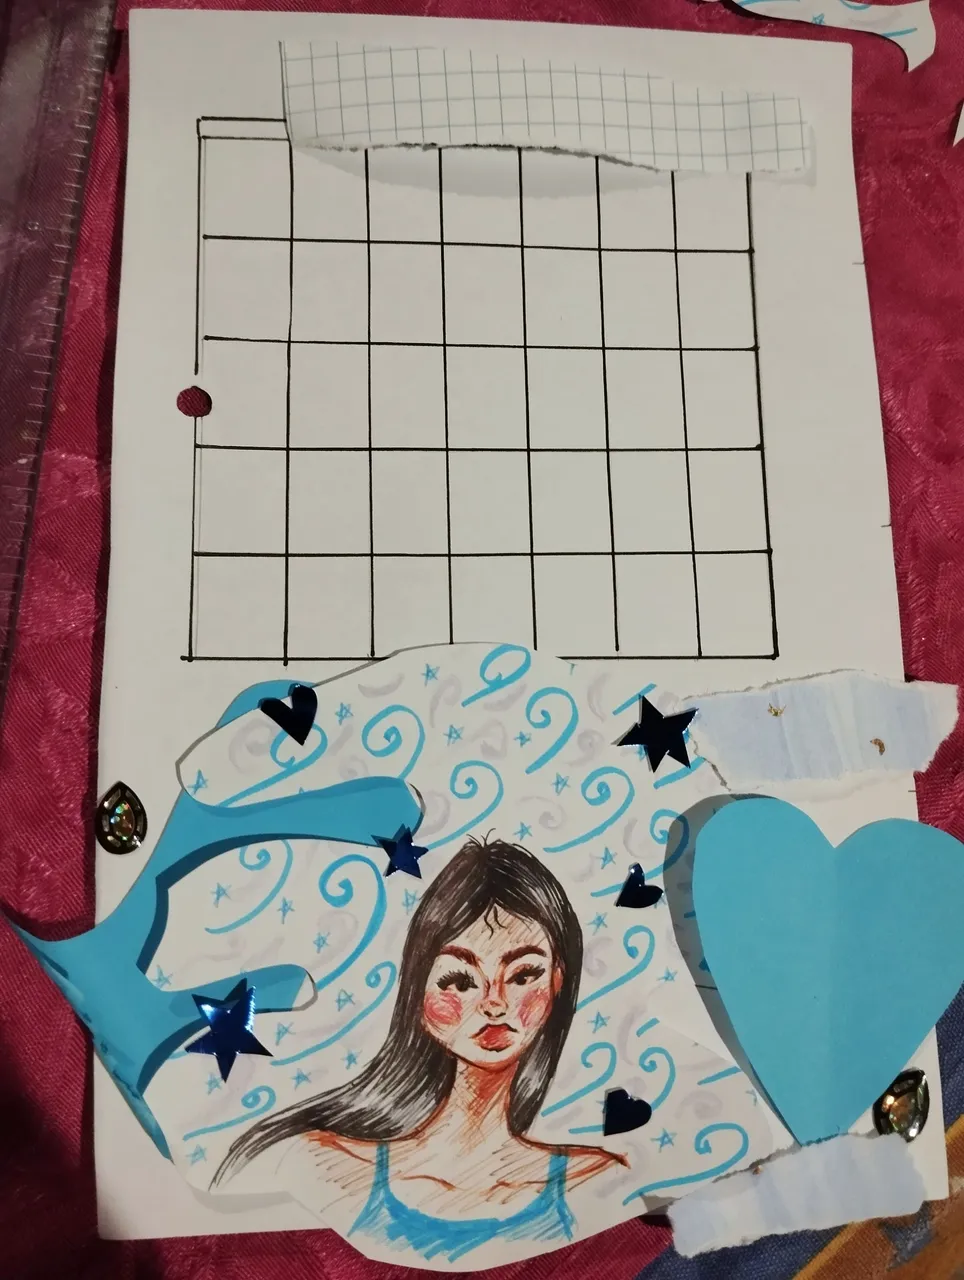 |  |
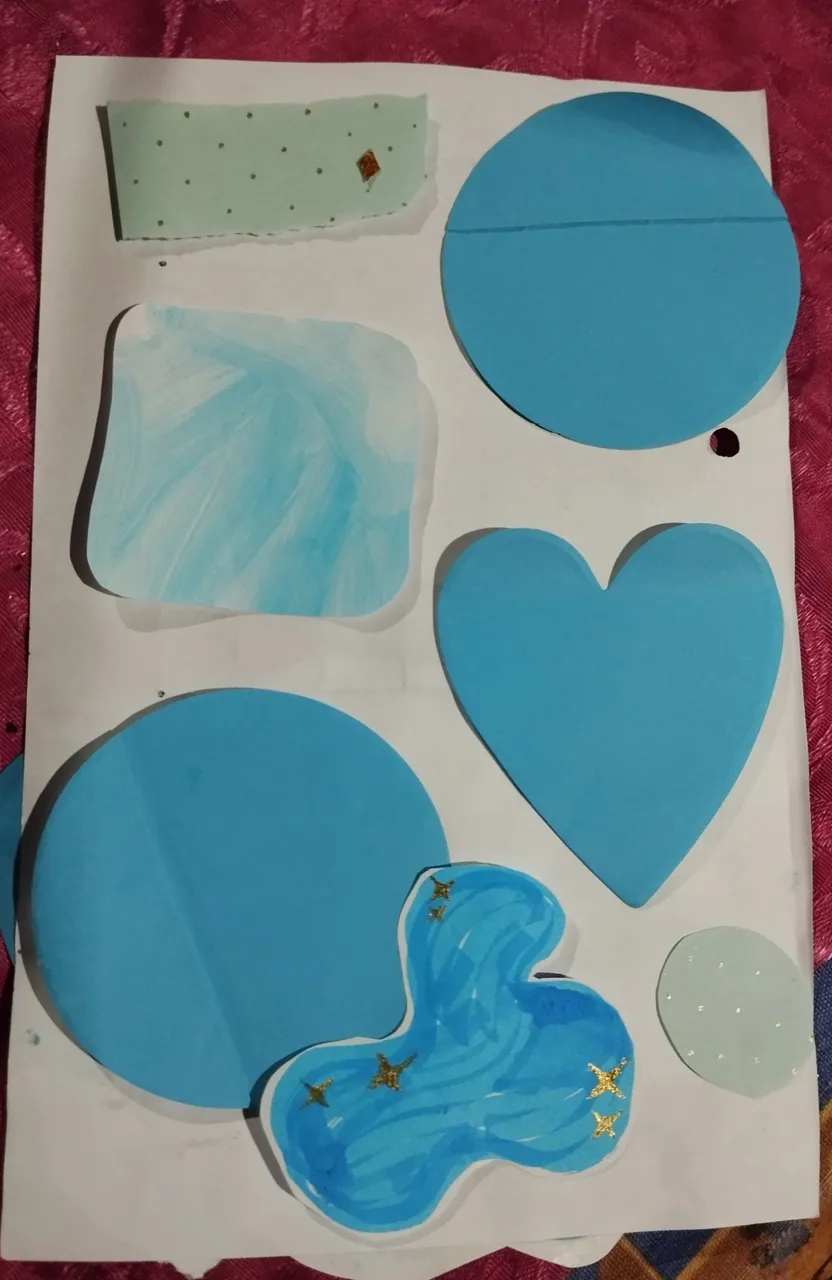
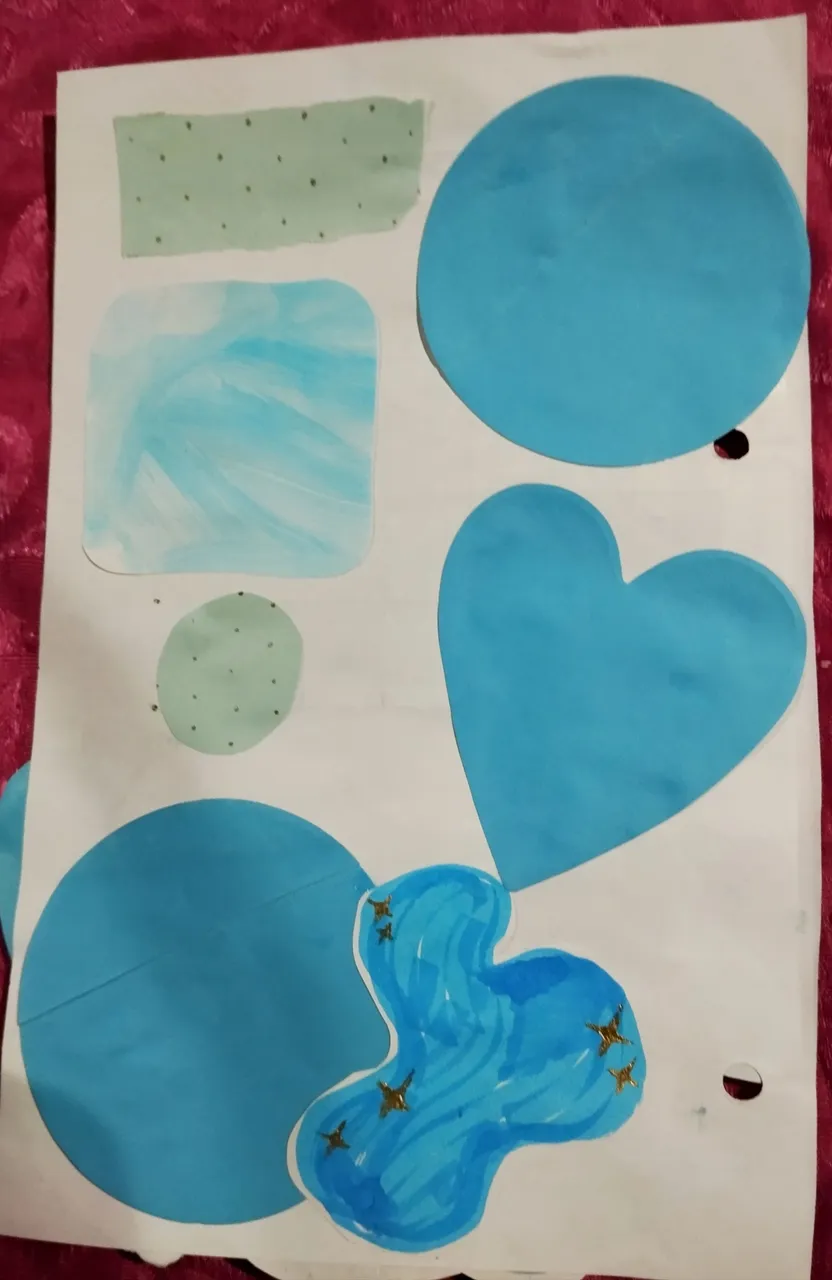
#2 Para este mes decidí usar una tonalidad azul, así qué use varios recortes de cartulinas , y papeles decorativos, también usé una ilustración que hice hace mucho tiempo, y que combinaba demasiado bonito ✨, post-its azules que encajaban perfecto. Ya con los elementos empecé a formar más o menos como quedaría el collage, y lo organice hasta que me gustó, teniendo la imágen central de la chica con muchos arabescos, hice algunos cortes para que se vieran más los colores de uno de los post-it que pegué por la parte de atrás. Tambien puse un post-it en forma de corazón en dónde pondré la frase del mes.Luego con pega blanca escolar pegué los recortes a la hoja.
English Version
#2 For this month I decided to use a blue tone, so I used several cardboard cutouts and decorative papers, I also used an illustration I made a long time ago, and that combined too beautifully ✨, blue post-its that fit perfectly. Now with the elements I began to form more or less how the collage would look, and I organized it until I liked it, having the central image of the girl with many arabesques, I made some cuts so that the colors of one of the post-its that I glued on the back could be seen more. I also put a heart-shaped post-it where I will put the phrase of the month. Then with white school glue I glued the cutouts to the sheet.
 |  | 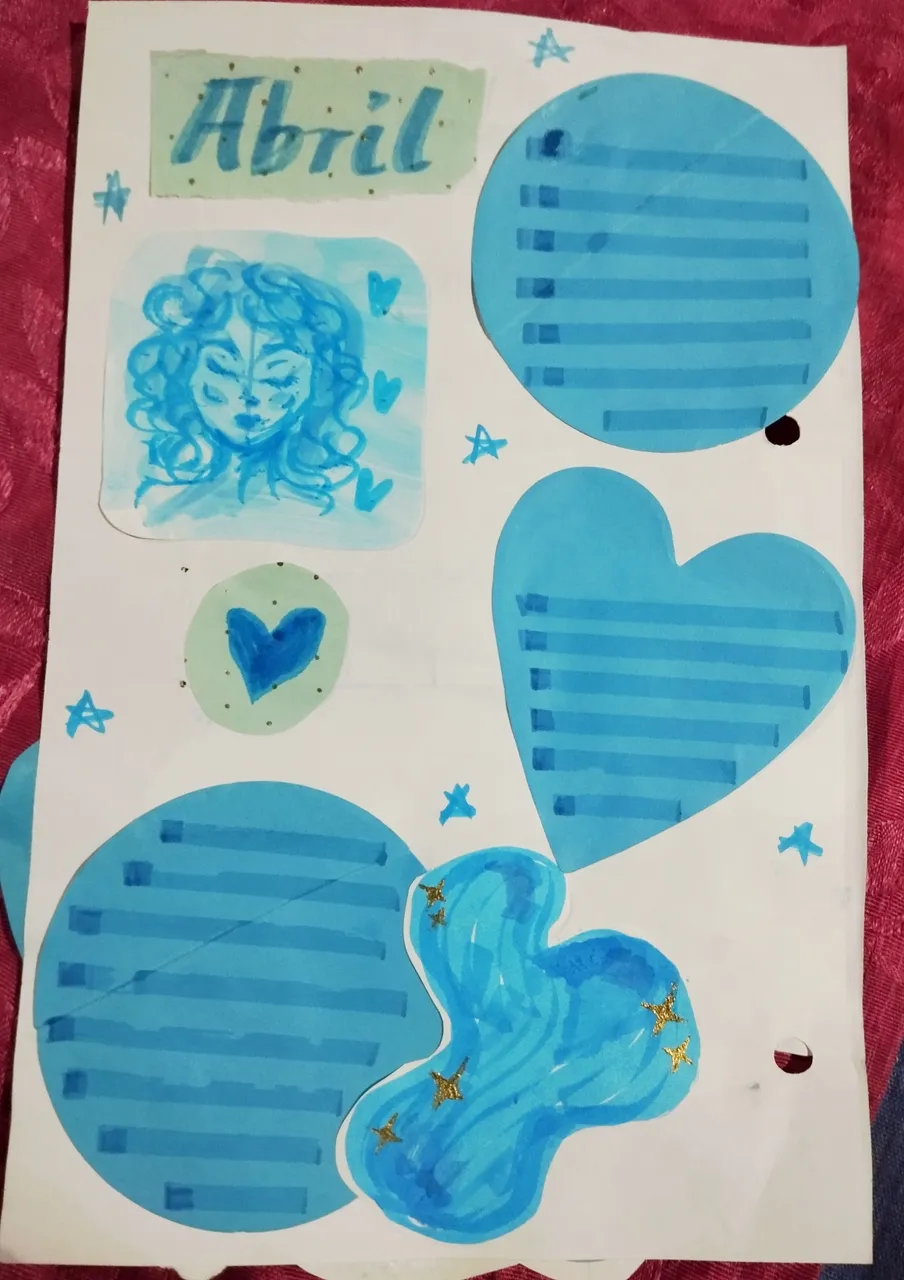 |
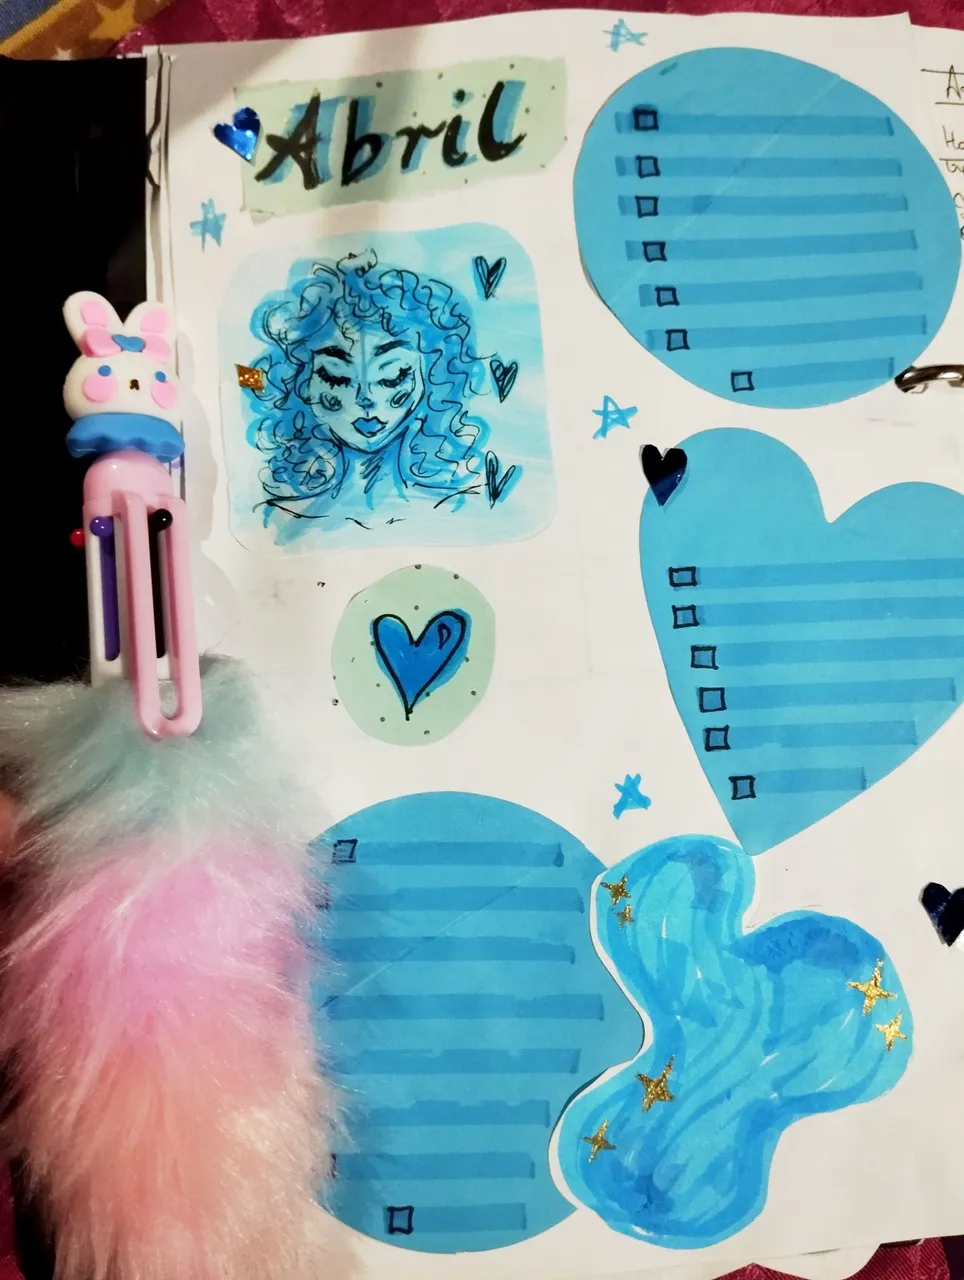
#3 Para la parte de atrás de la hoja seguí usando post-it para crear espacios de casillas en dónde pondré los objetivos escritos, usé también unas hojas decorativas, y las pegué con pega blanca, ya con el diseño acomodado a la hoja , con un resaltador azul pastel hice renglones que serán los espacios en dónde se escribirá, también luego encima de la línea hice un pequeño cuadrado para tachar, y para decorar y darle más personalidad al diseño, hice un dibujo de una chica azul, con marcador pastel azul y marcador azul mas oscuro, y puse algunas estrellas esparcidas en la hoja.
English Version
#3 For the back of the sheet I continued using post-its to create spaces for boxes where I will put the written objectives, I also used some decorative leaves, and I glued them with white glue, already with the design accommodated to the sheet, with a pastel blue highlighter I made lines that will be the spaces where it will be written, also then above the line I made a small square to cross out, and to decorate and give more personality to the design, I made a drawing of a blue girl, with a blue pastel marker and a darker blue marker, and I put some stars scattered on the sheet.
 | 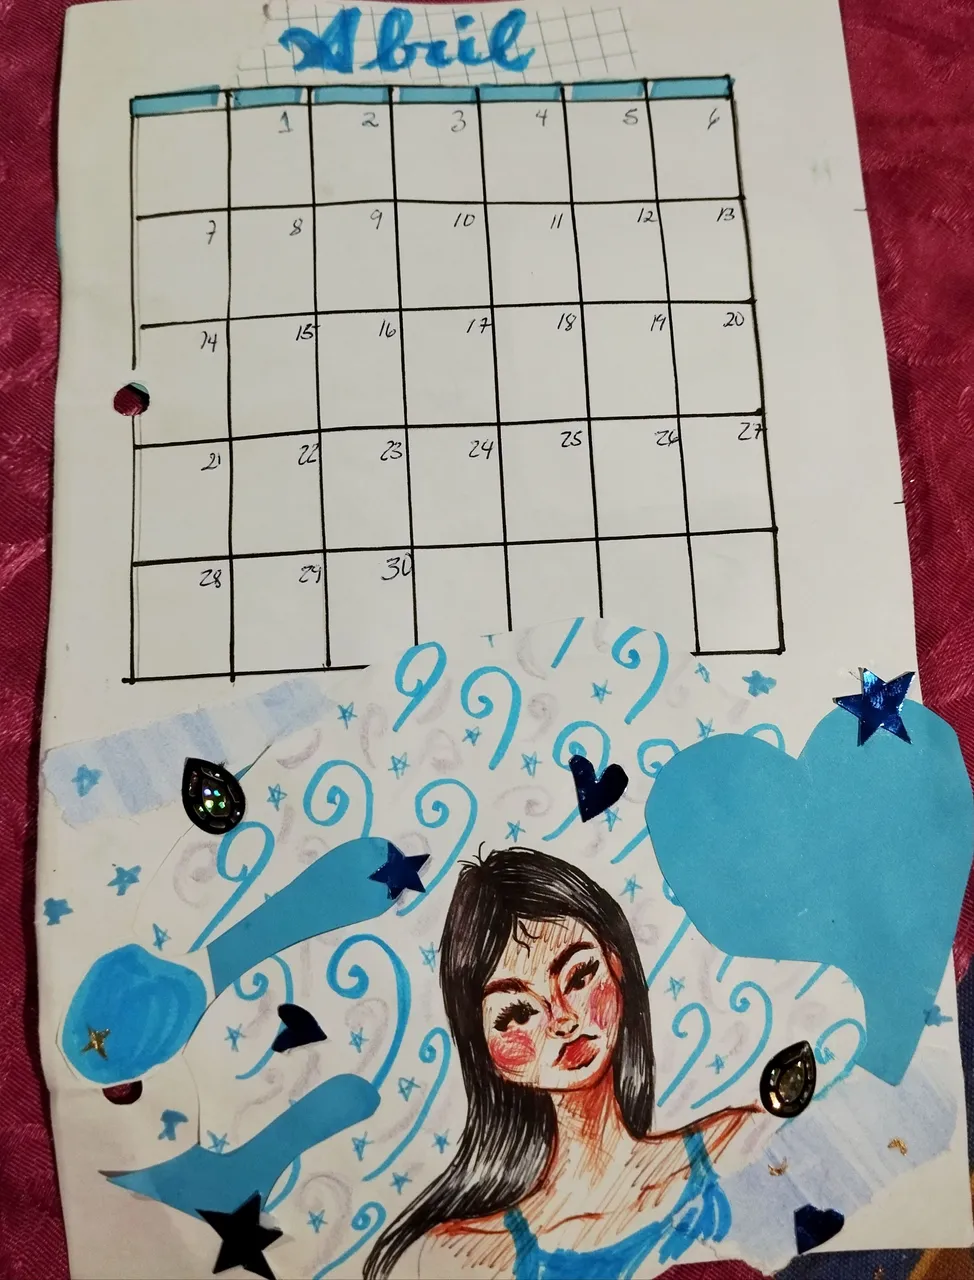 | 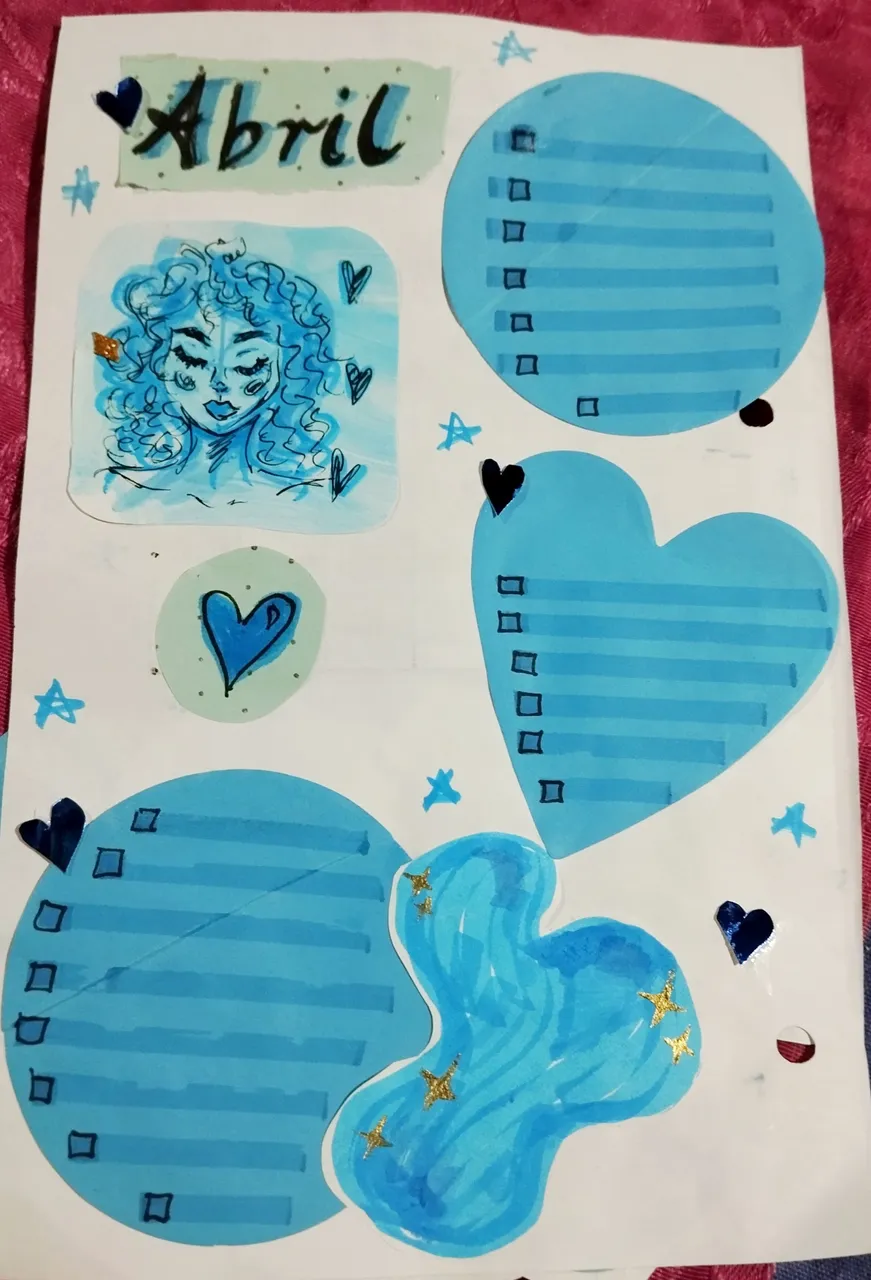 |
#4 En la página frontal, complete el diseño haciendo el título de abril con dos tonos de resaltadores azul, también puse los días en boligrafo azul, y algunas estrellitas y corazones en la cartulina azul metálico. Para la parte de atrás terminé el diseño con un marcador negro punta fina, haciendo los cuadraditos para tachar las tareas, también detalle mucho más la cara de la chica, y agregué un corazón en uno de los apartados, y agregué pequeños corazones de cartulina azul metálico.
English Version
#4 On the front page, I completed the design by making the April title with two shades of blue highlighters. I also added the days in blue ballpoint pens, and some little stars and hearts on the metallic blue cardstock. For the back, I finished the design with a fine-point black marker, making the little squares to check off the tasks. I also detailed the girl's face a lot more, and added a heart to one of the sections. I also added little hearts made of metallic blue cardstock.
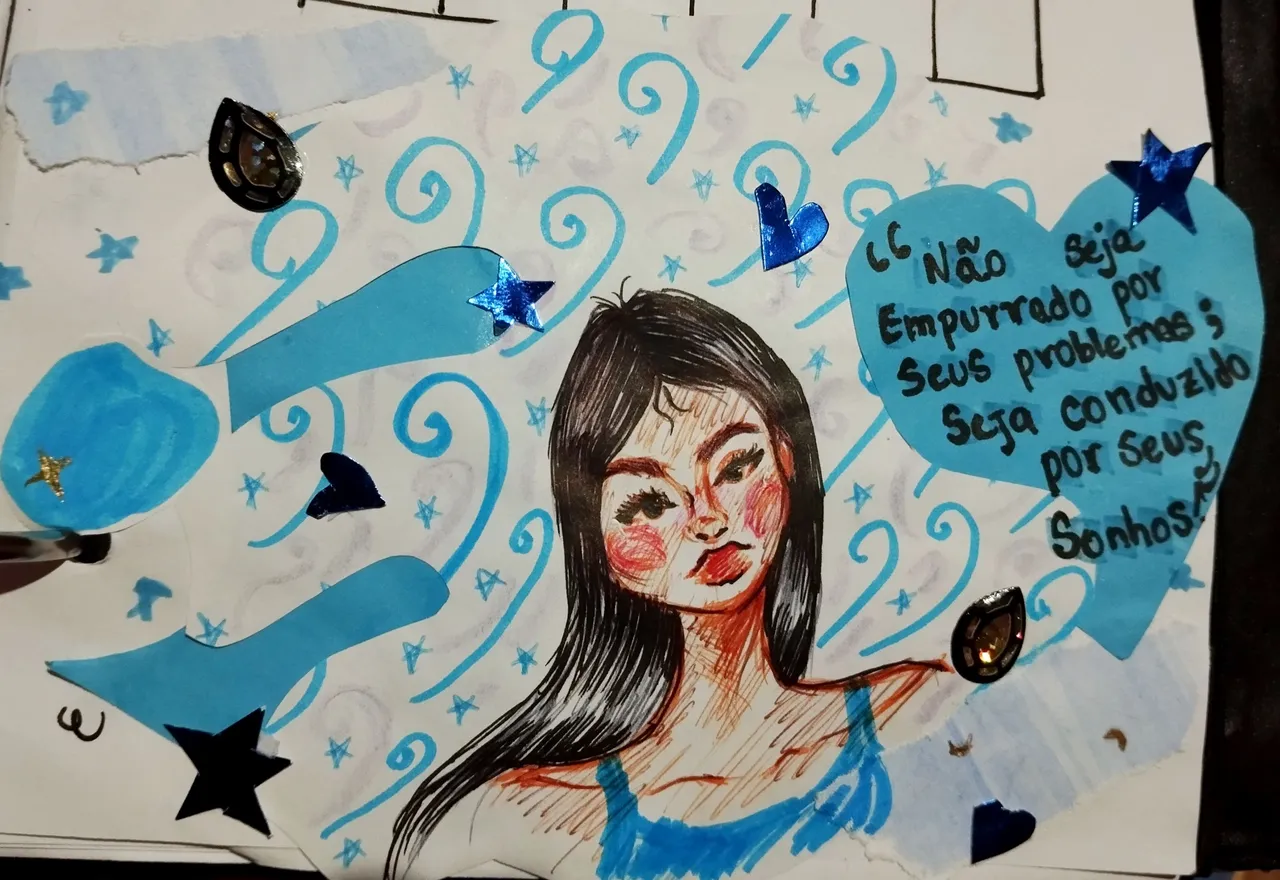 | 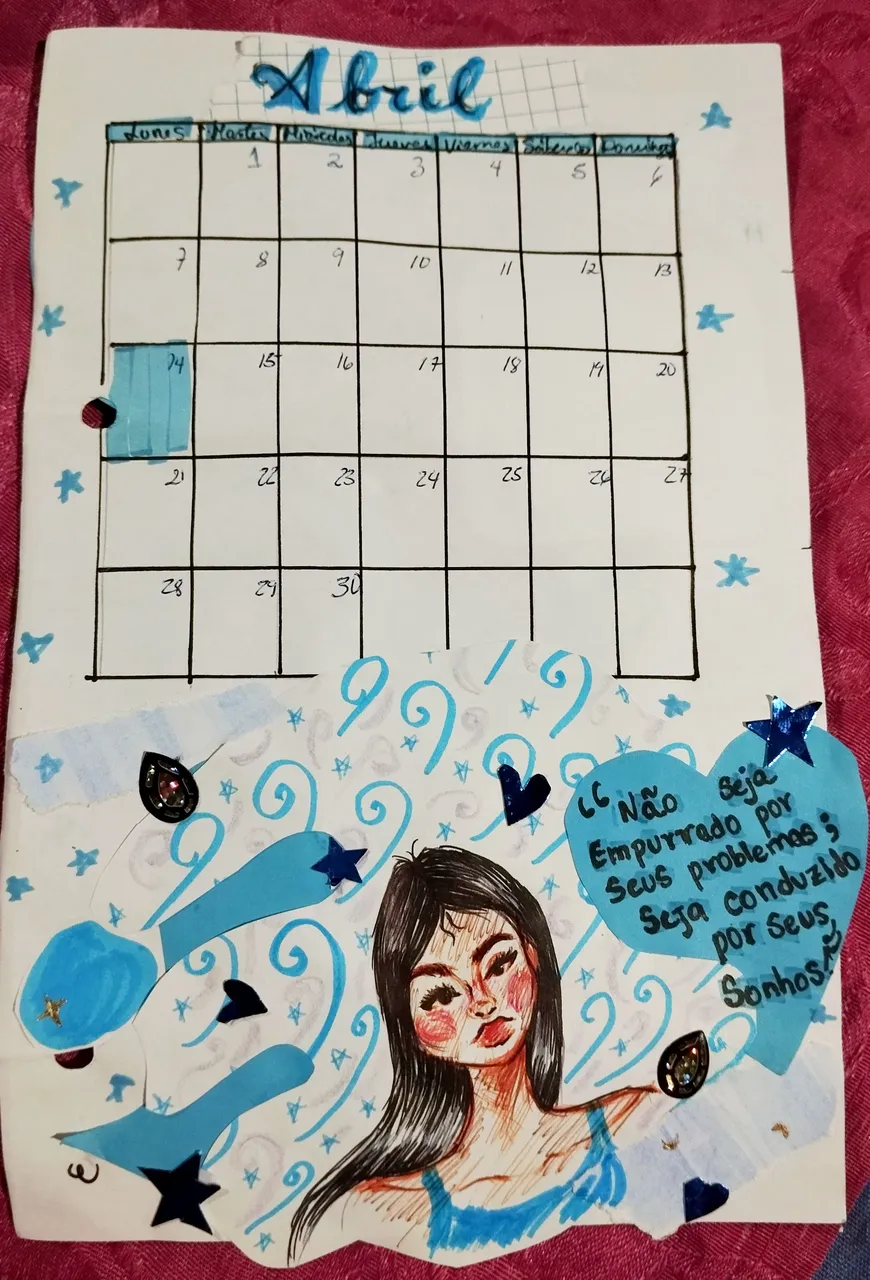 |  |

#5 Ya por último puse la frase de este mes, como es usual la pongo en portugués para practicar un poco el idioma, este mes la frase es" Não deja empurrado por seus problemas; Seja conduzido por seus Sonhos" "No te dejes llevar por tus problemas; déjate llevar por tus sueños", ☺️💜 que me pareció demasiado bonito y motivador para tener la mejor energía este mes, tantos problemas que tenemos en los que nos hundimos en las cosas negativas ,problemas y actividades diarias y rutinarias que vamos dejando de lado nuestros sueños y objetivos principales, ya cuando pasa el tiempito estos sueños y metas van quedando de lado ,relajadas a cuando tengamos tiempo para cumplirlas. Y como pueden ver este el el resultado final ,quedó bastante bonito, está vez la frase un poquito más pequeña, por cierto miren que hermosura de boligrafo de conejito con peluche me lo regalaron 💜☺️🩷 , que les pareció está decoración del mes.
Muchas gracias por leerme ! 🤭💜✨ Espero que les haya gustado el post!
Fotos tomadas por mí en mi equipo Redmi note 12 editadas en Pics art y gif realizado en app creador de GIFs texto traducido en Google traductor.
English Version
#5 Finally I put the phrase of this month, as usual I put it in Portuguese to practice the language a little, this month the phrase is "Não deja empurrado por seus problemas; Seja conduzido por seus Sonhos" "Do not let yourself be carried away by your problems; let yourself be carried away by your dreams", ☺️💜 which I found too beautiful and motivating to have the best energy this month, so many problems that we have in which we sink into negative things, problems and daily and routine activities that we leave aside our dreams and main objectives, when time passes these dreams and goals are left aside, relaxed until we have time to fulfill them. And as you can see, this is the final result, it turned out quite pretty, this time the phrase is a little smaller, by the way, look at what a beautiful bunny pen with a stuffed animal they gave me 💜☺️🩷, what did you think of this decoration of the month?
Thank you very much for reading me! 🤭💜✨ I hope you liked the post!
Photos taken by me on my Redmi note 12 device edited in Pics art and gif made in the GIF creator app, text translated in Google translator.