Greetings Hive DIY members, these last times I have been quite creative so I bring here my last works to share it with all of you. I had two needs, to have a cabinet to place a laser engraver and to move the electronics of one of my 3D printers to the lower part of the cabinet I made to optimize space, so this time I want to show you both jobs, tell you what went right and what went wrong.
Saludos miembros de Hive DIY estos últimos tiempos he estado bastante creativo así que traigo por aquí mis últimos trabajos para compartirlo con todos ustedes. Tuve dos necesidades, contar con un mueble para colocar una grabadora laser y mover la electrónica de una de mis impresoras 3D a la parte baja del mueble que hice para optimizar espacios, así que en esta oportunidad quiero mostrarles ambos trabajos, contarles lo que salió bien y lo que salió mal.
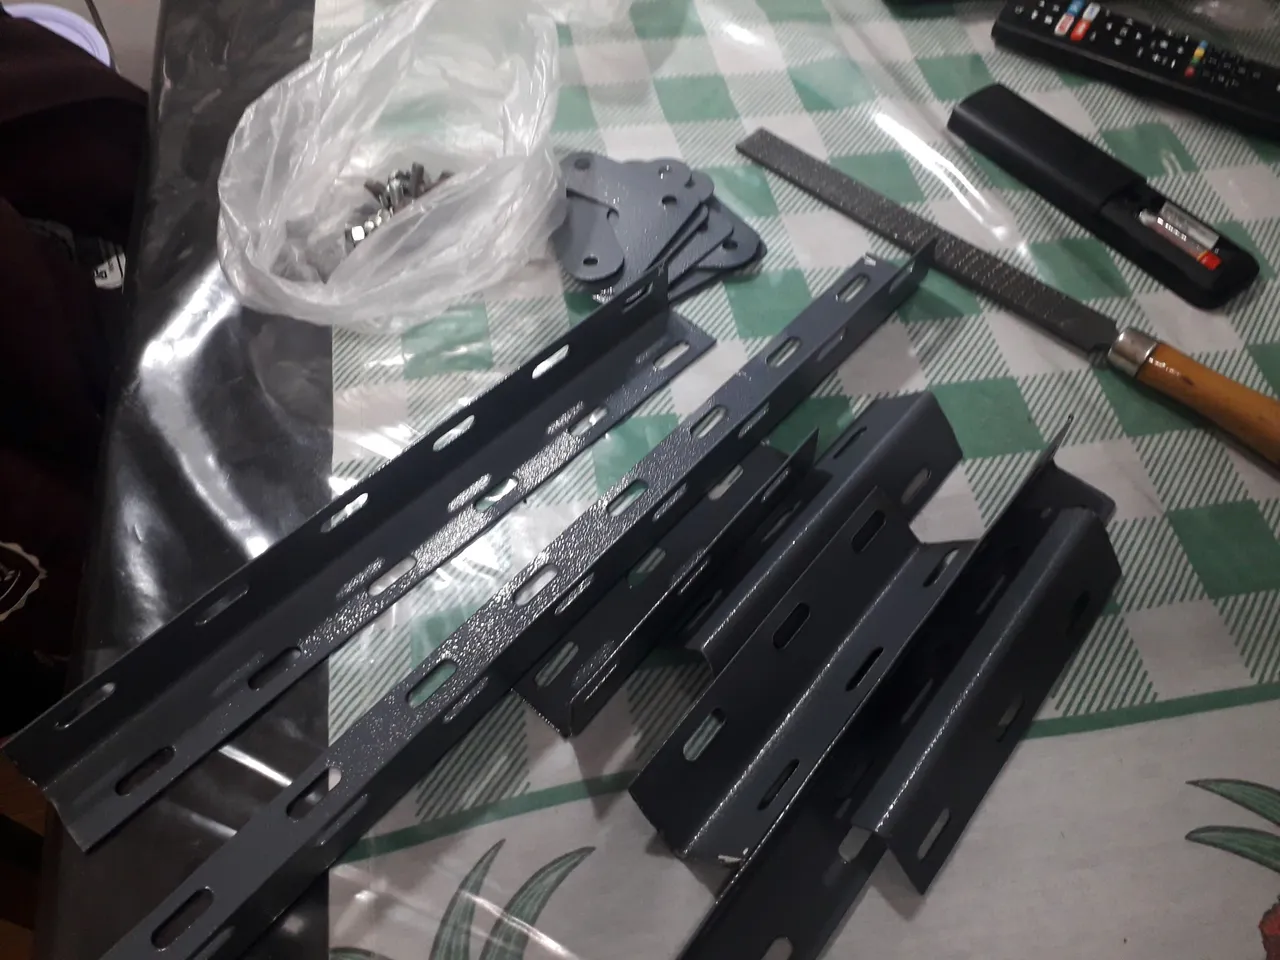
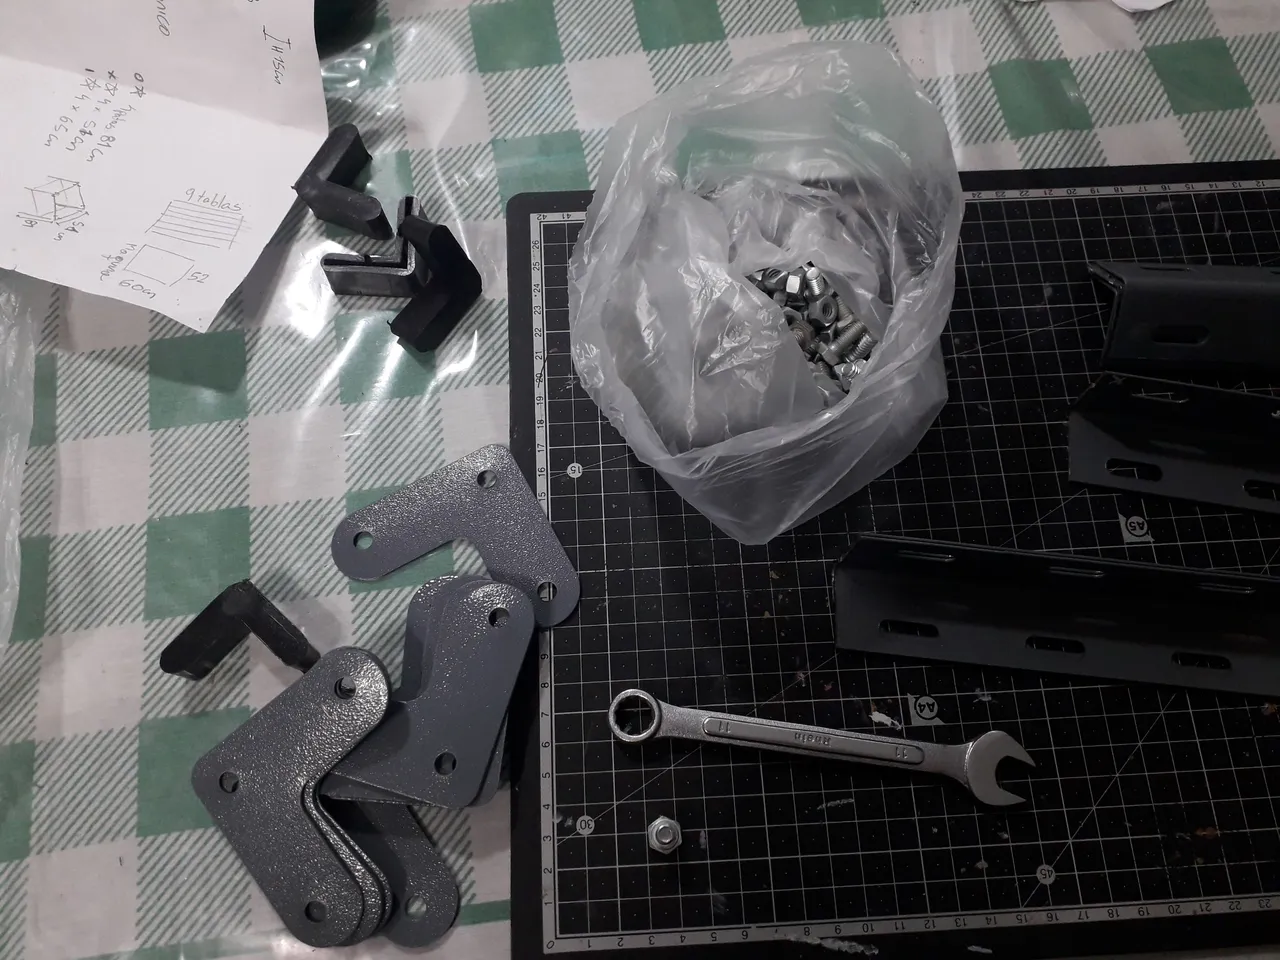
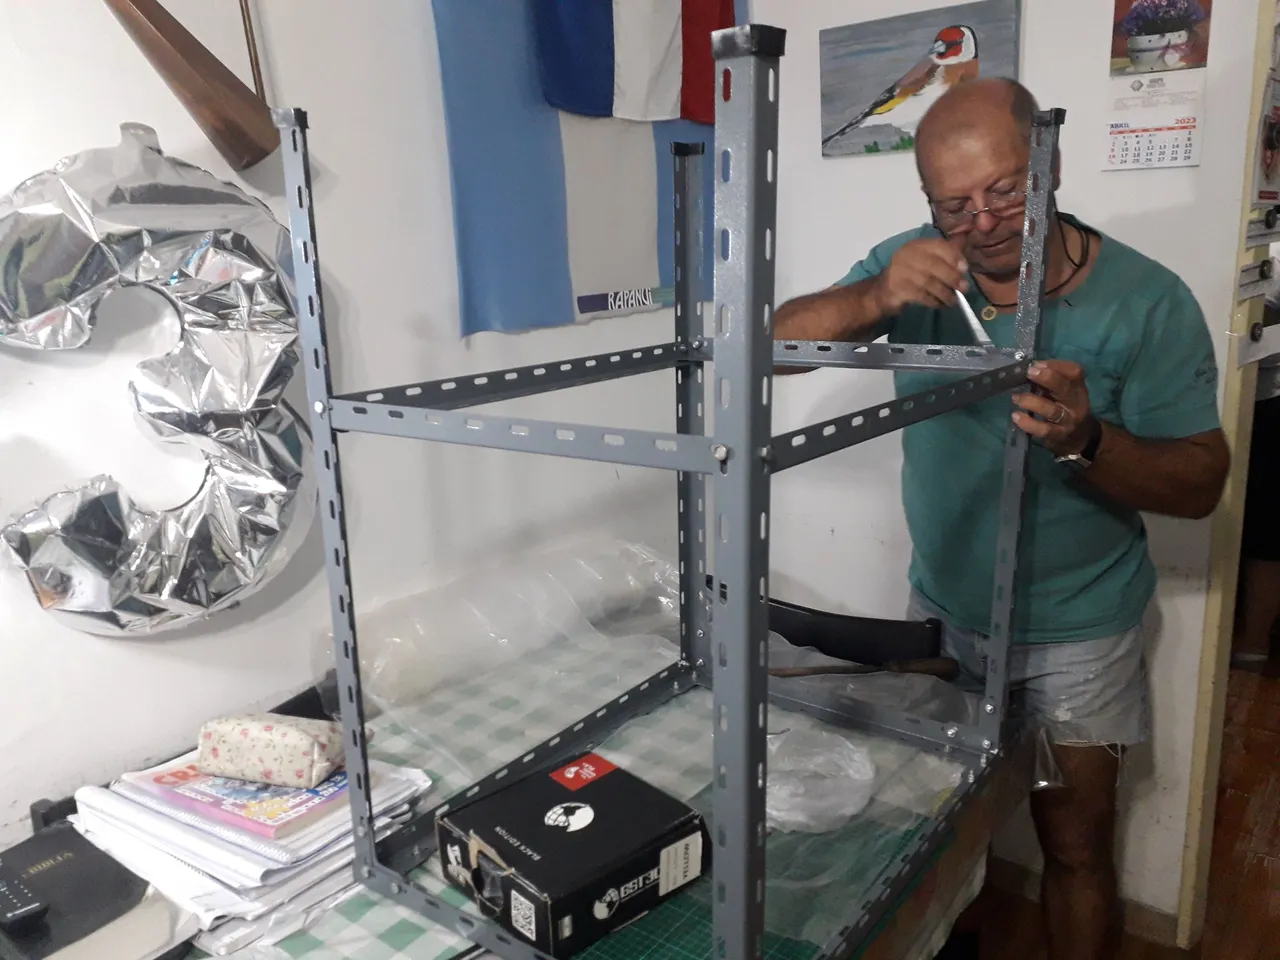
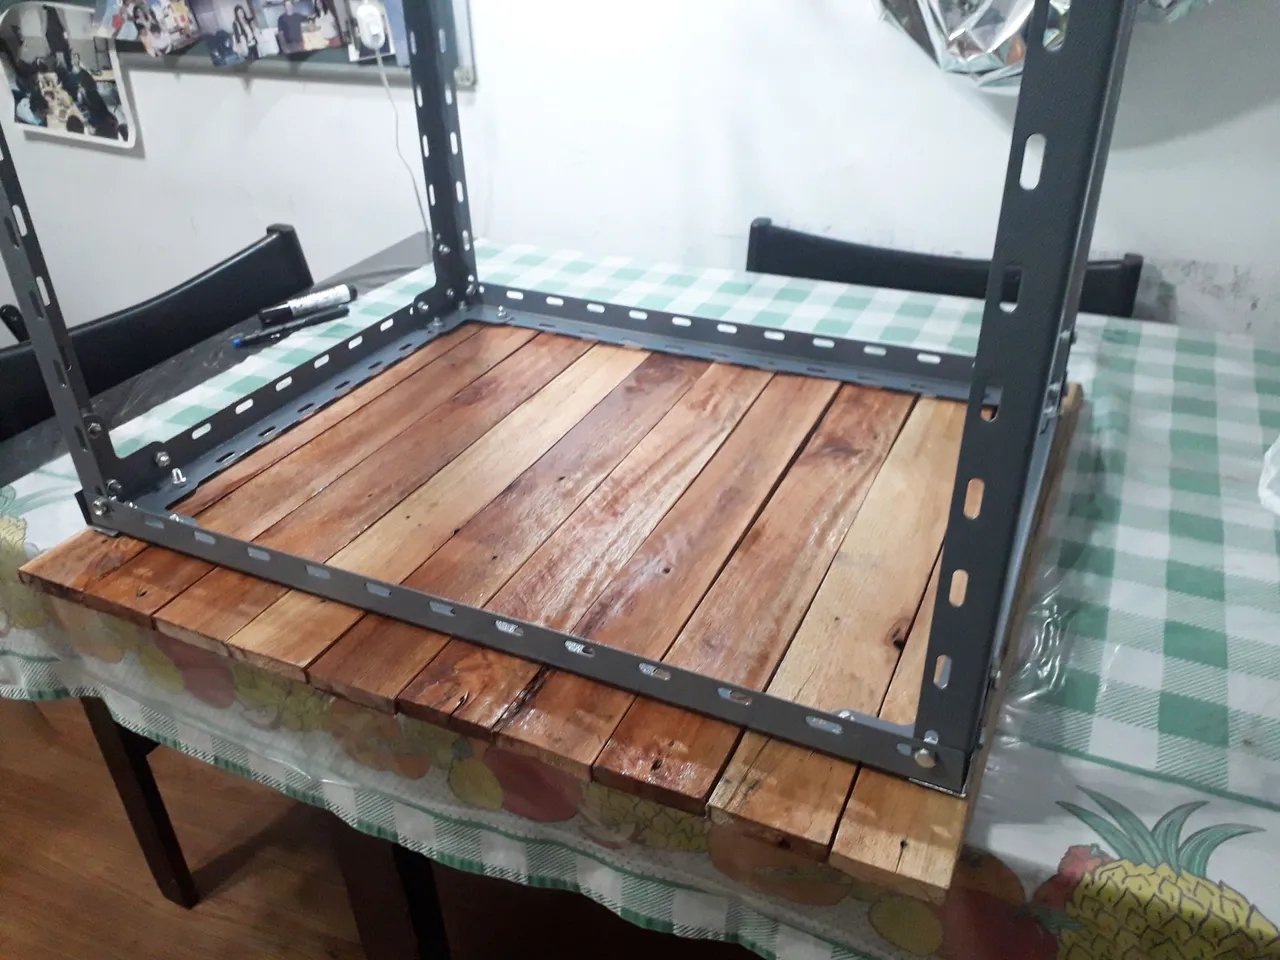
Let's start with what took me less time but it was still an interesting challenge that I achieved, although not in the best way. My requirement was to move the electronics box of my CR10 V3 under the furniture, this way I could recover some centimeters on the table of my furniture to place one of my printers and have everything more orderly. For this job I thought of generating a small structure with some profiles for shelves, join them by means of some bolts with nuts and use a wooden board to create the base where the electronics would be placed.
Comencemos con lo que me llevo menos tiempo pero que de todas formas fue un reto interesante que logre, aunque no concrete de la mejor manera. Mi requisito era mover la caja de la electrónica de mi CR10 V3 debajo del mueble, de esta forma lograba recuperar algunos centímetros sobre la tabla de mi mueble para colocar una de mis impresoras y tener todo más ordenado. Para este trabajo pensé en generar una pequeña estructura con unos perfiles para estantería, unirlos por medio de unos bulones con tuercas y usar una tabla de madera para crear la base donde apoyaría la electrónica.
|
|
|---|
|
|
|---|
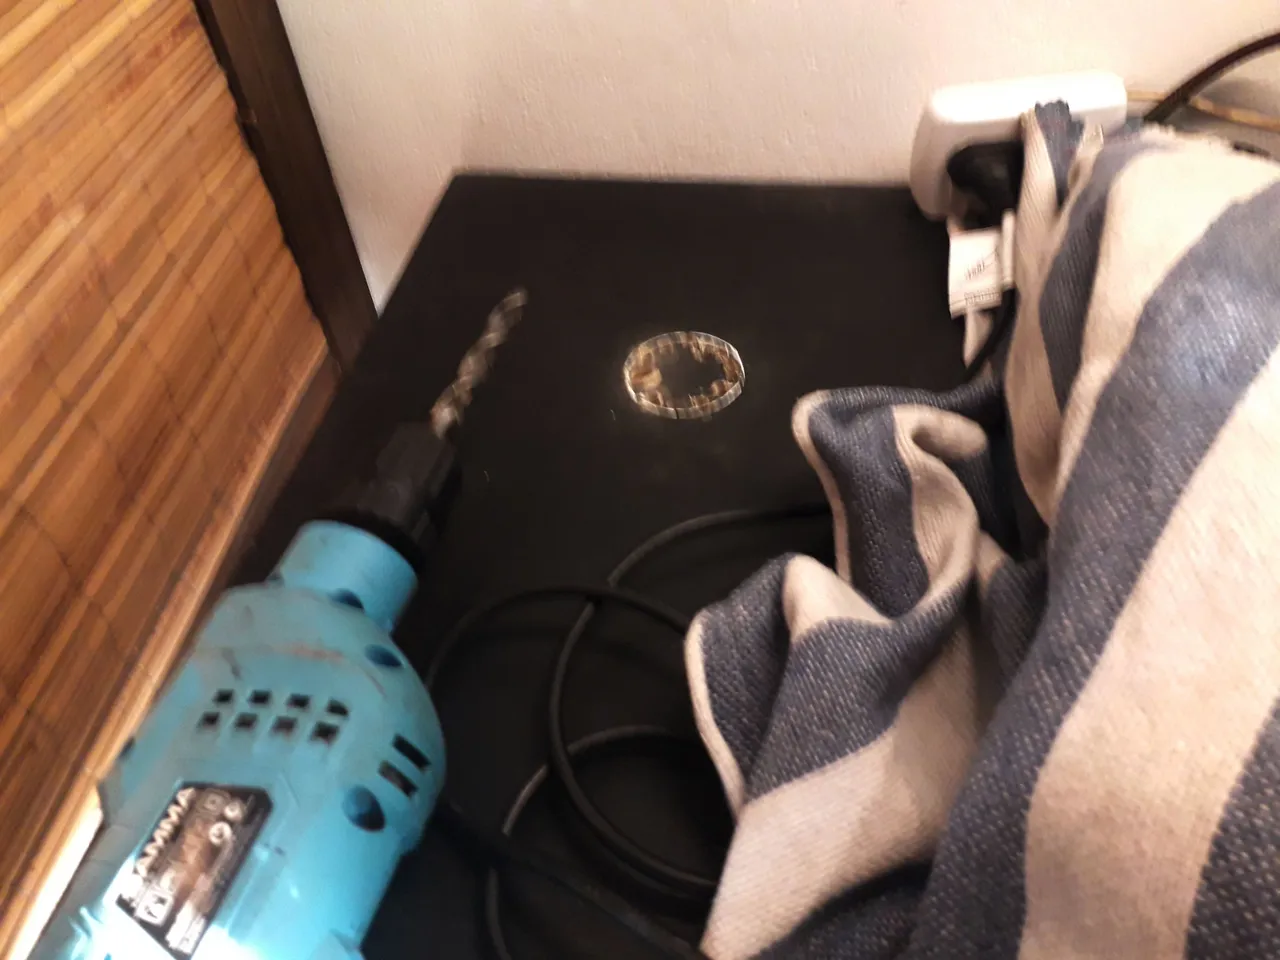
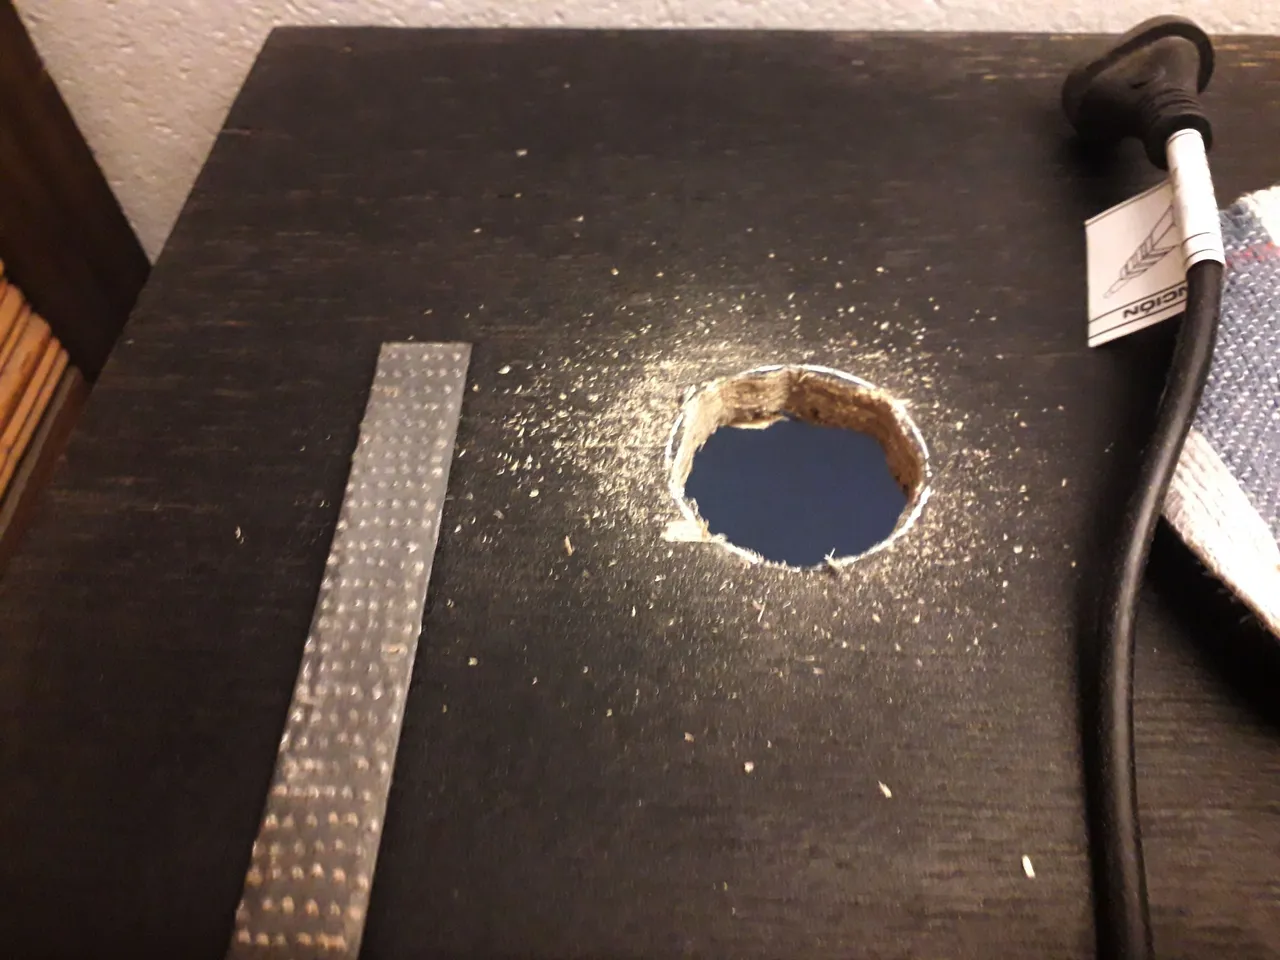
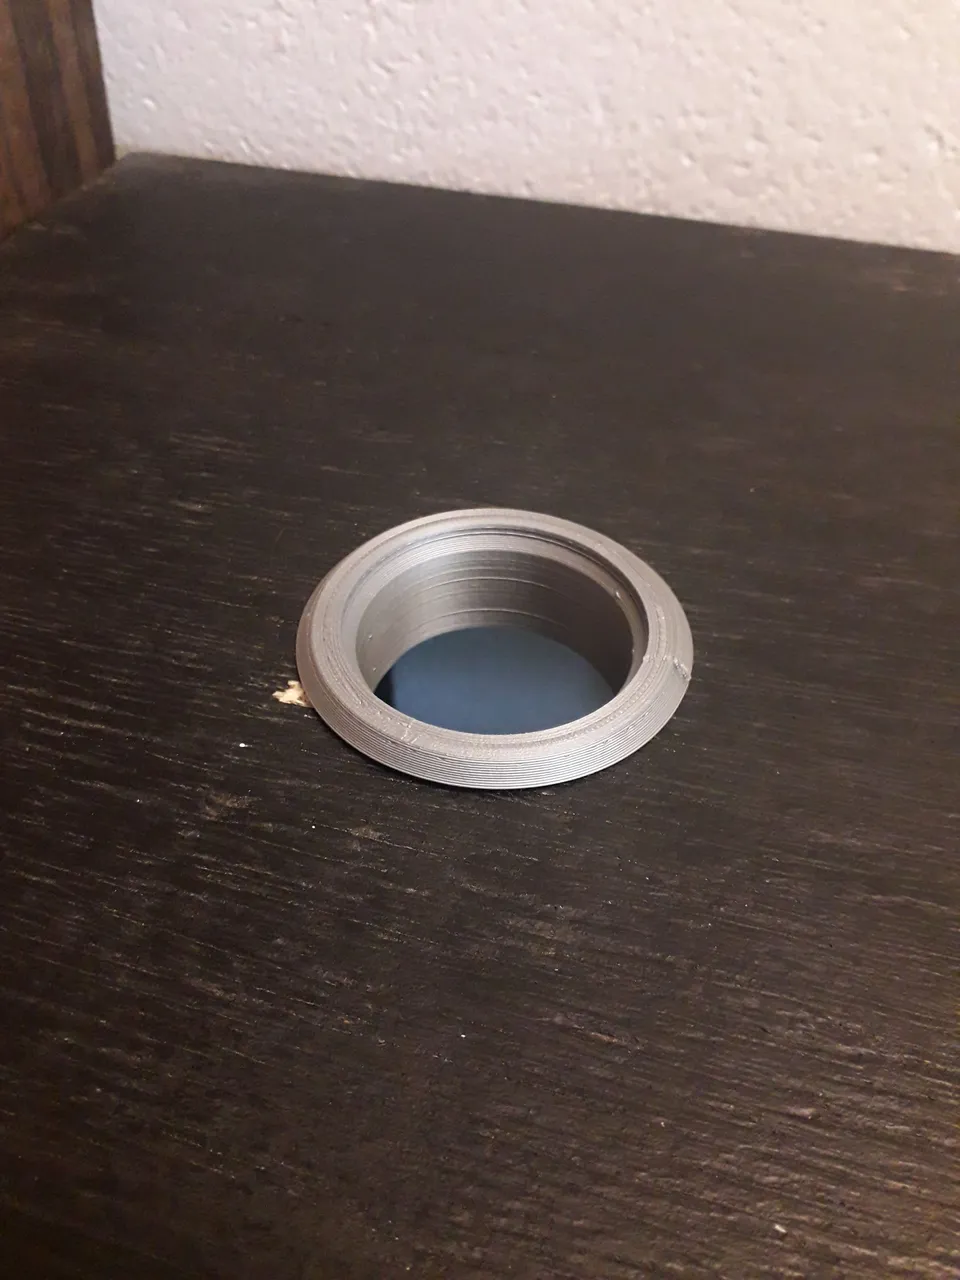
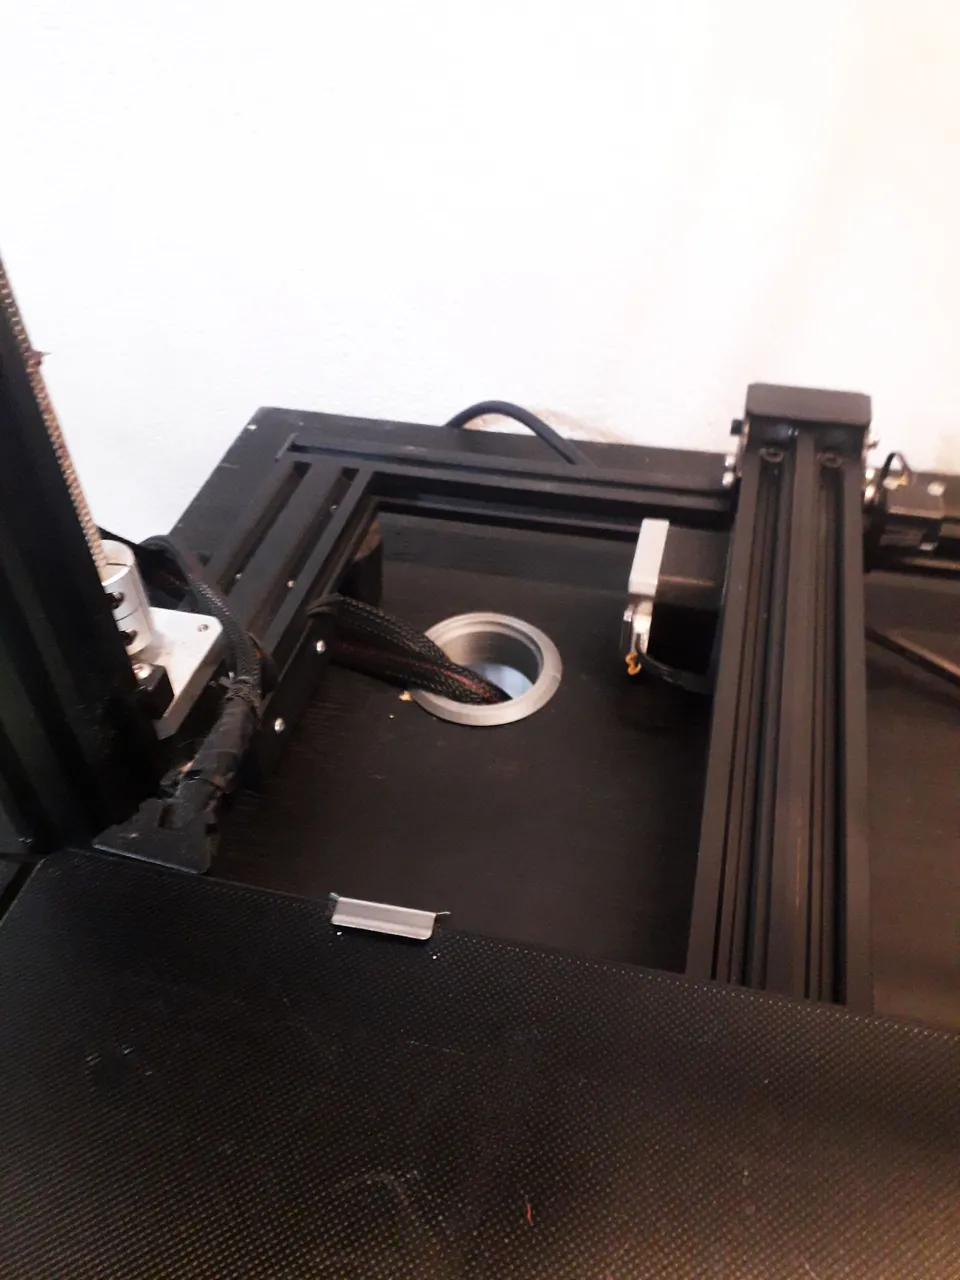
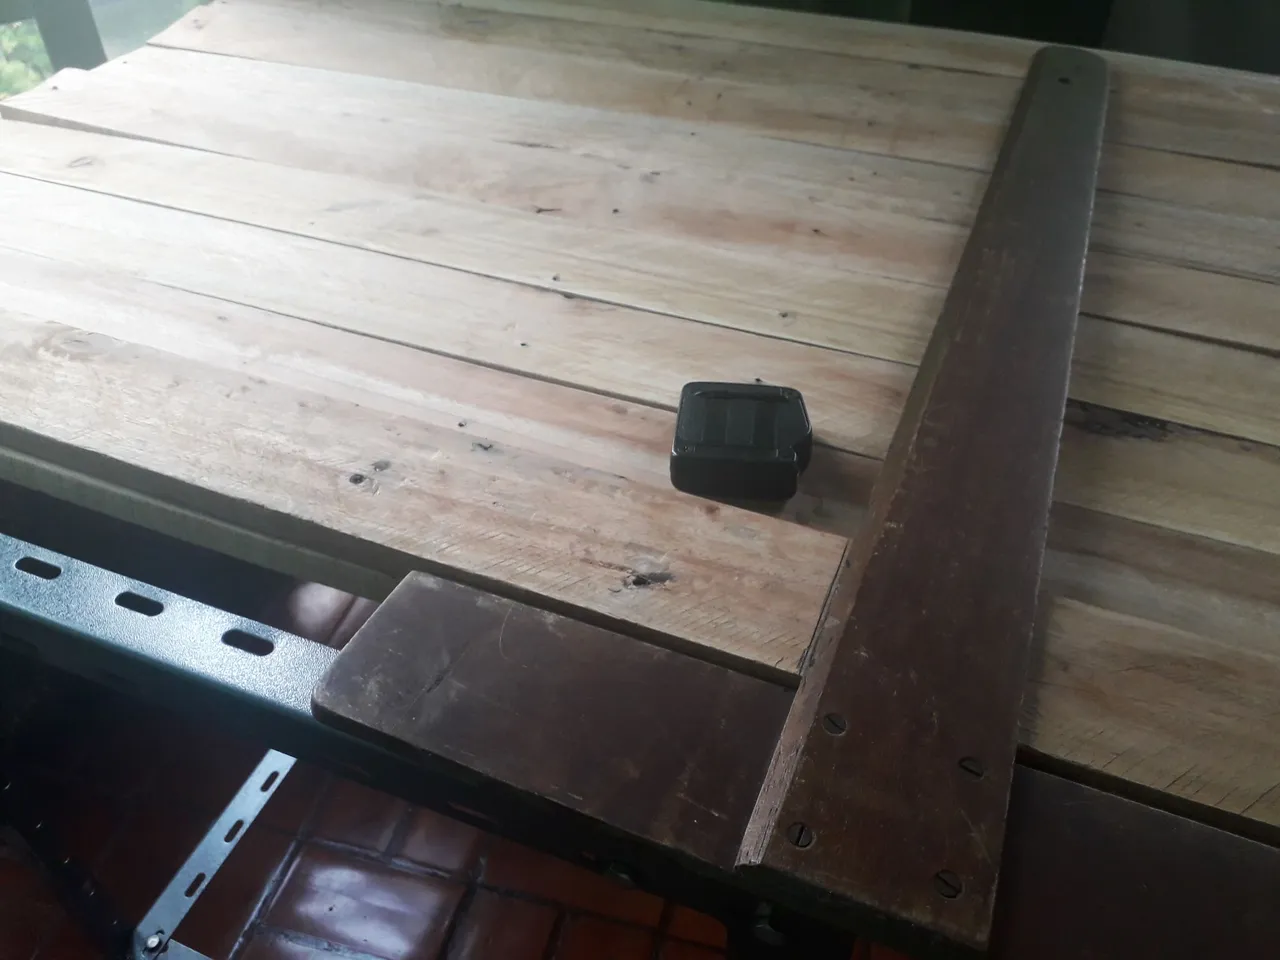
Also for this task it was necessary to drill a hole in the top board of the furniture to pass the wires of the electronics, I printed a piece in PLA to protect the wires when they rub against the edge and I could leave it fixed in place with the help of a hammer.
También para esta tarea me fue necesario agujerear la tabla superior del mueble para pasar los cables de la electrónica, imprimí una pieza en PLA para proteger los cables cuando rozaran con el borde y pude dejarlo fijo en su lugar ayudándome de un martillo.
For this task I thought of several options, but I opted for this one because it was the simplest and fastest, so I needed a 2 meter profile, four sheet metal frames to generate rigidity in the structure and about 12 bolts and nuts. I took the measurements, marked the necessary cuts and varnished the wood to protect it, allowing it to last longer.
Para esta tarea pensé varias opciones, pero me decante por esta por era la más sencilla y rápida así necesite un perfil de 2 metros, cuatro encuadres de chapa para generar rigidez en la estructura y unos 12 bulones y tuercas. Tome las medidas, marque los cortes necesarios y barnice la madera para protegerla, permitiendo así que dure más tiempo.
|
|
|---|
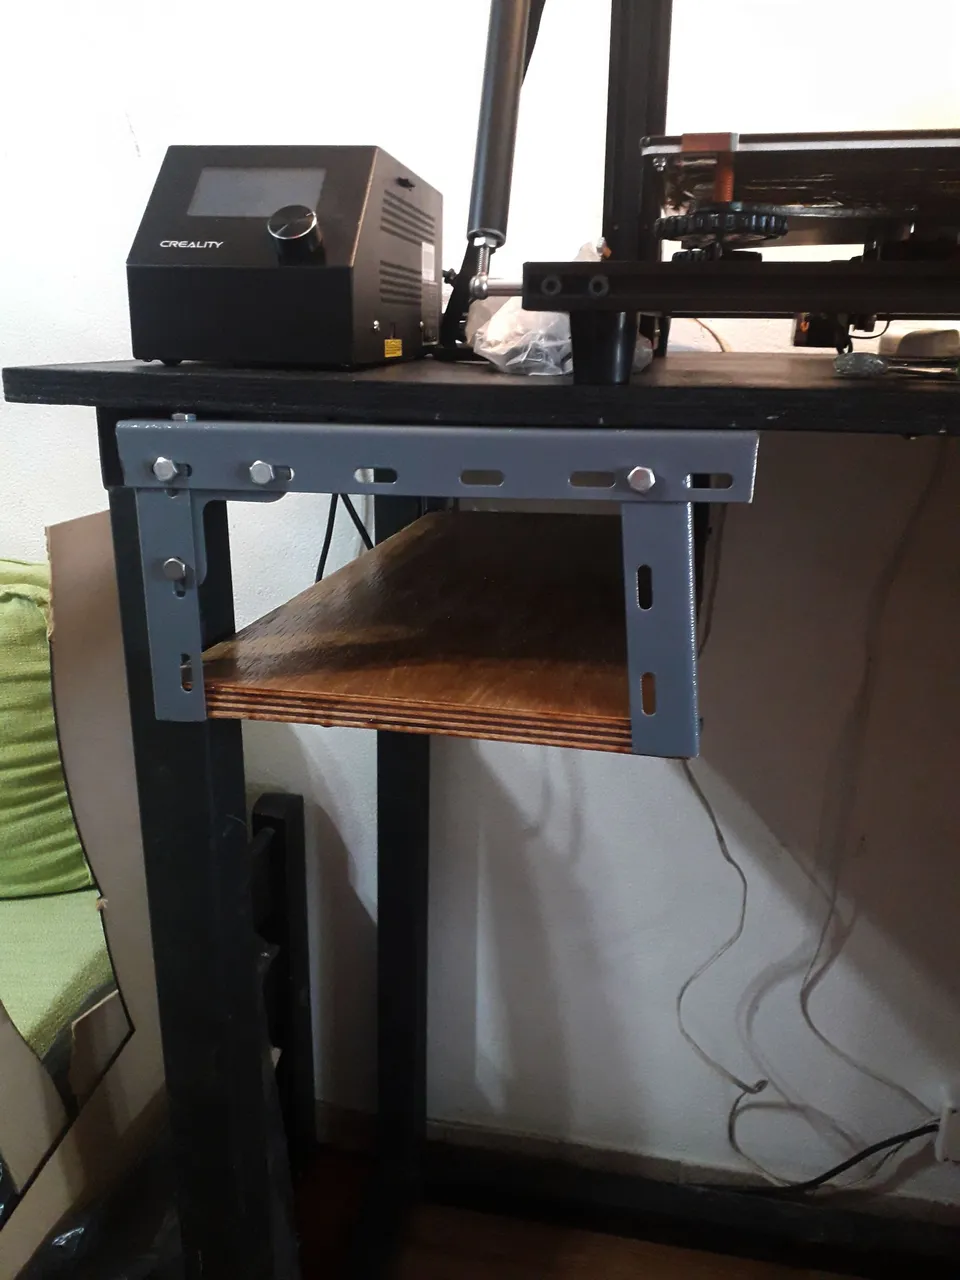
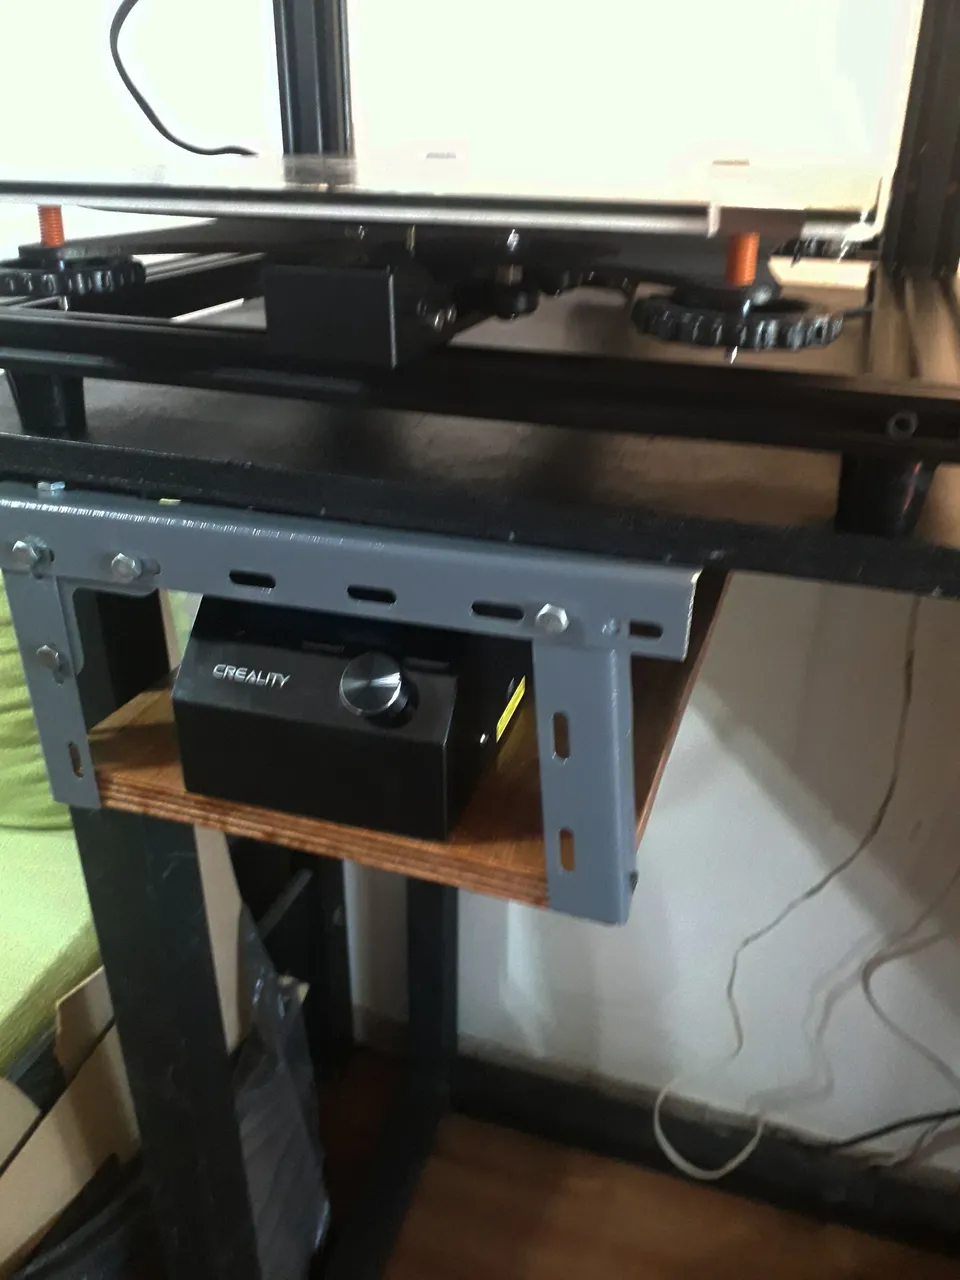
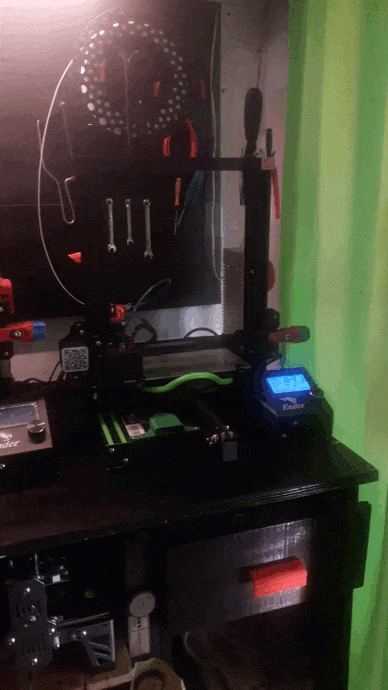
Once I had everything I started to screw the structure to realize that I had not thought the structure so well because once I put everything together and put the electronics in place I noticed that it would have been better to leave more space in the height because this way I can not see the screen of my machine properly so every time I want to move through the menu I have to bend down a little or move the equipment forward. But looking at the bright side it is useful.
Una vez tuve todo empecé a atornillar la estructura para darme cuenta que no había pensado tan bien la estructura ya que una vez que arme todo y coloque la electrónica en su lugar note que hubiera sido mejor dejar más espacio en la altura porque de esta forma no logro ver correctamente la pantalla de mi maquina así que cada vez que quiero moverme por el menú debo agacharme un poco o mover el equipo hacia delante. Pero mirándole el lado bueno me es útil.

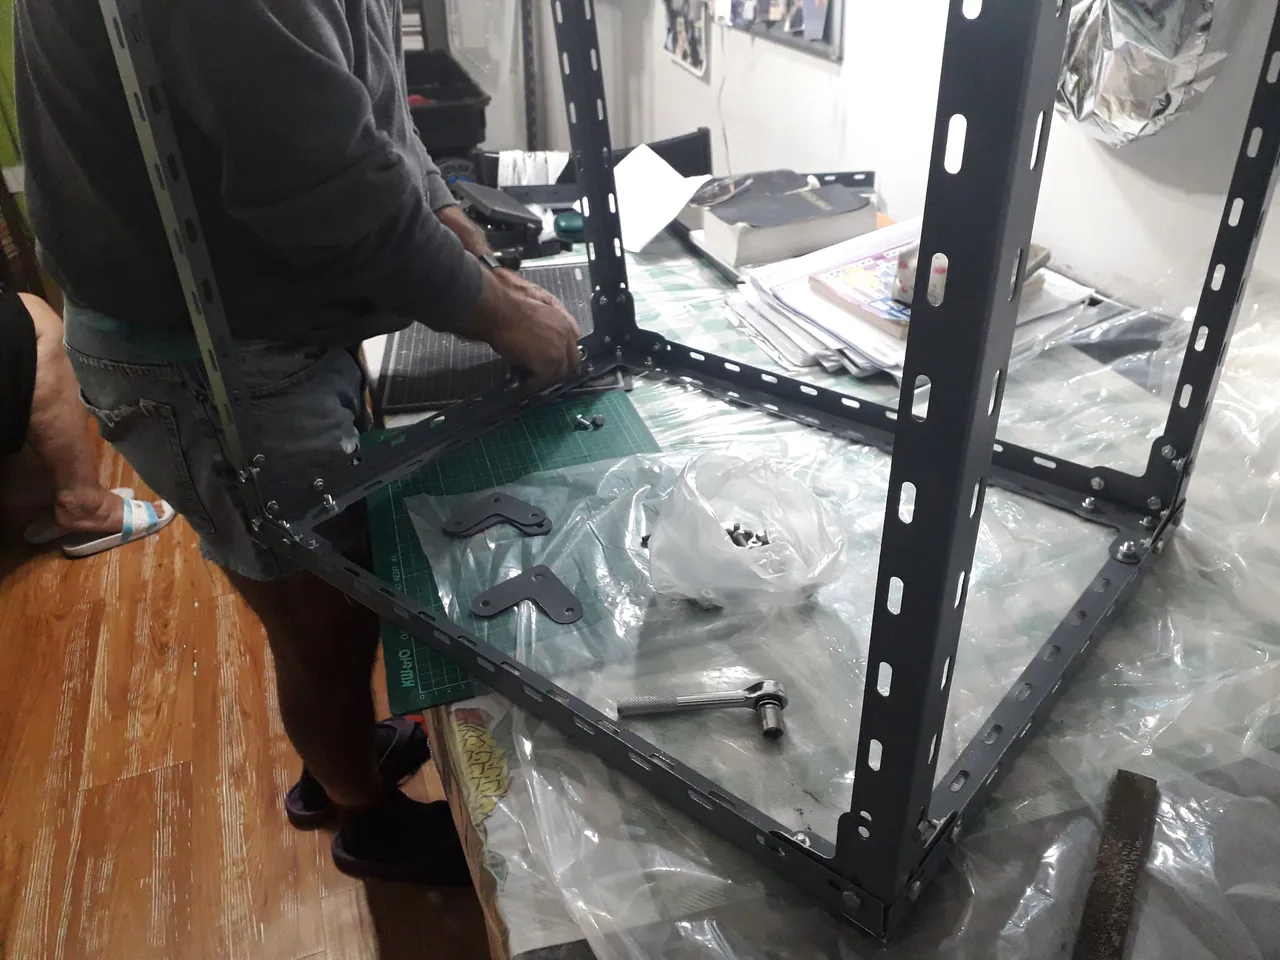
Returning to the main project of the furniture for the laser engraver, for this I needed 4 profiles for shelves of 2 meters, many screws and nuts, if I remember correctly almost 60 of each, some wooden boards that I recovered from a pallet of the street and some self-tapping screws.
Retomando el proyecto principal del mueble para la grabadora laser, para esto necesite 4 perfiles para estanterías de 2 metros, muchos tornillos y tuercas, si mal no recuerdo casi 60 de cada uno, unas tablas de madera que recupere de un palet de la calle y algunos tornillos autorroscante.
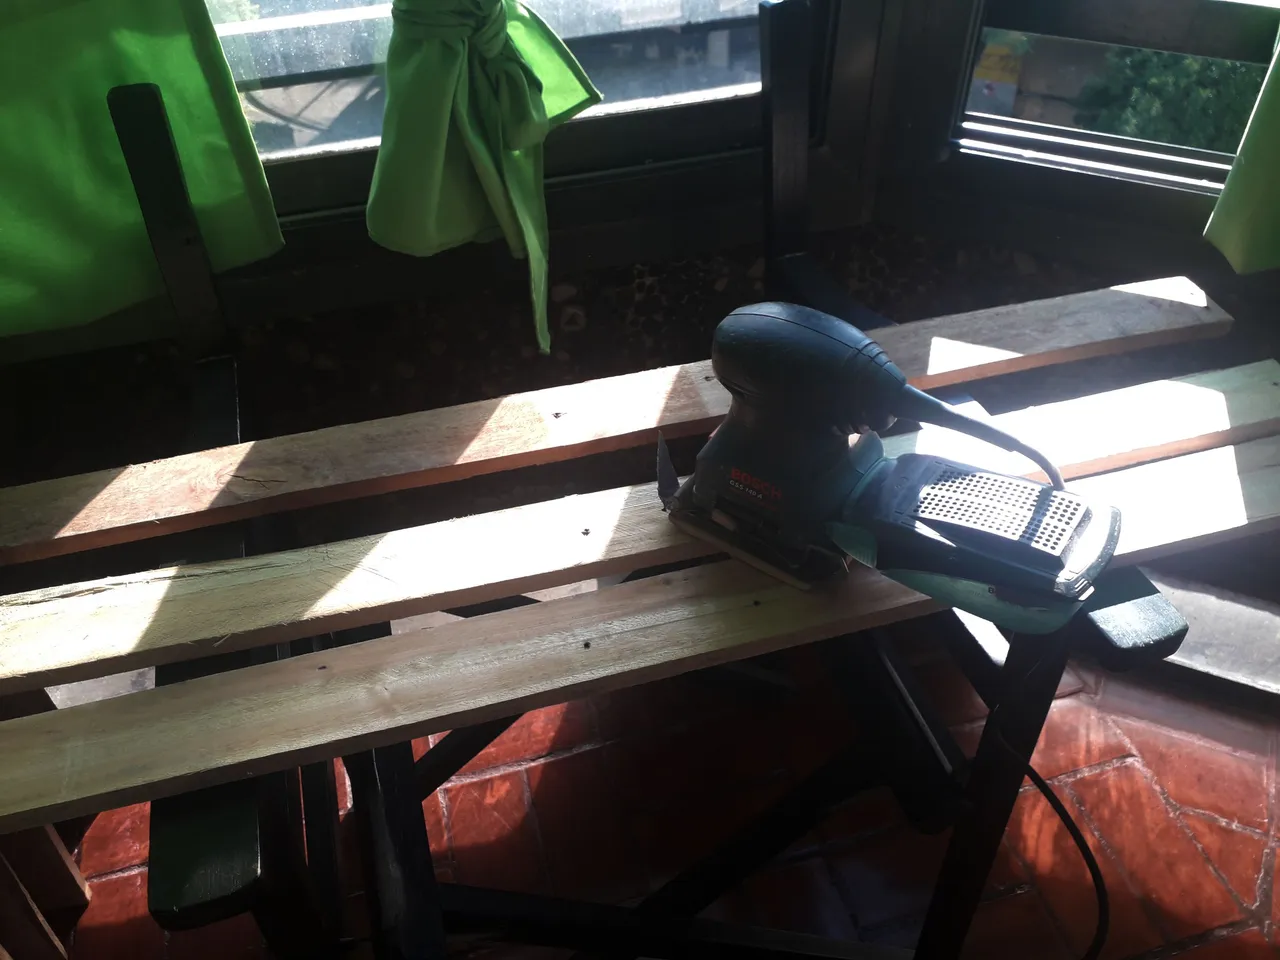
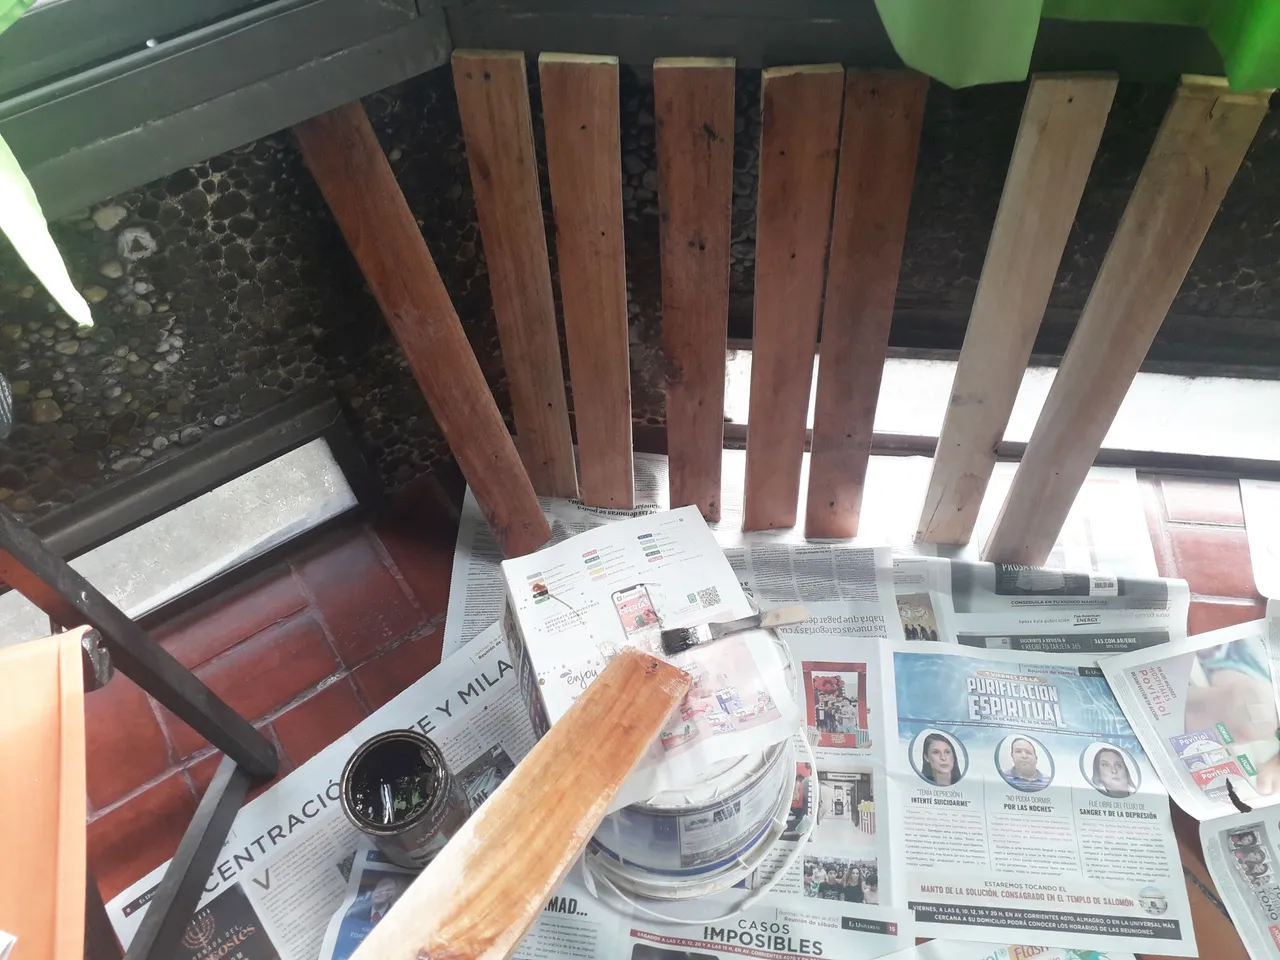
I started by disassembling the pallet and then using a sander to leave the entire surface smooth to the touch, I only used the woods that were in the best condition because some of them had many knots or were about to break. I cleaned up all the mess I had made with the sawdust and focused on the structure of the furniture.
Comencé desarmando el palet para luego utilizar una lijadora y dejar toda su superficie suave al tacto, solo utilicé las maderas que estaban en mejor estado porque algunas tenían muchos nudos o a punto de partirse. Limpie todo el desastre que había hecho con el aserrín y me enfoque en la estructura del mueble.
|
|
|---|
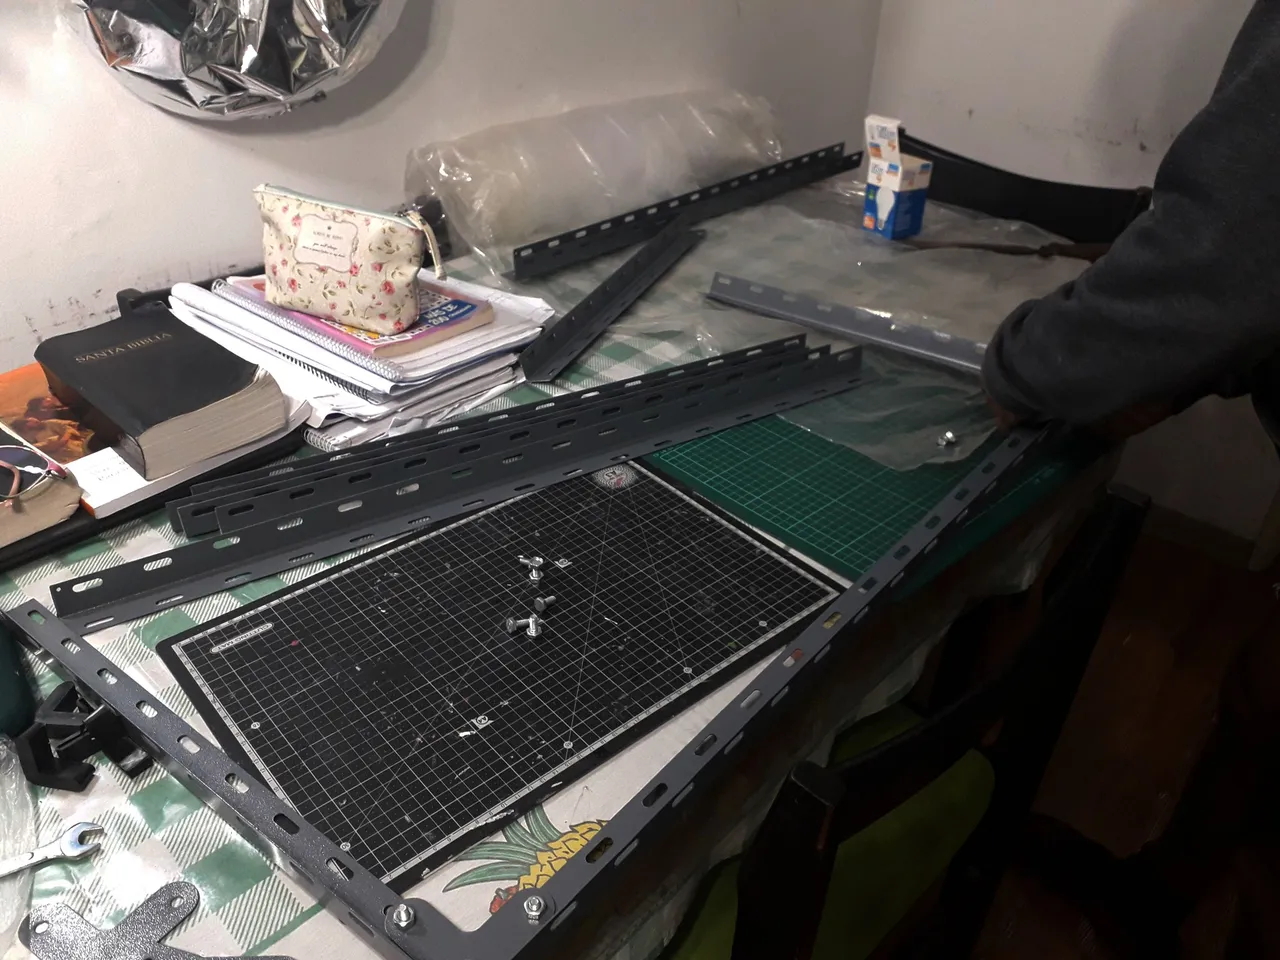
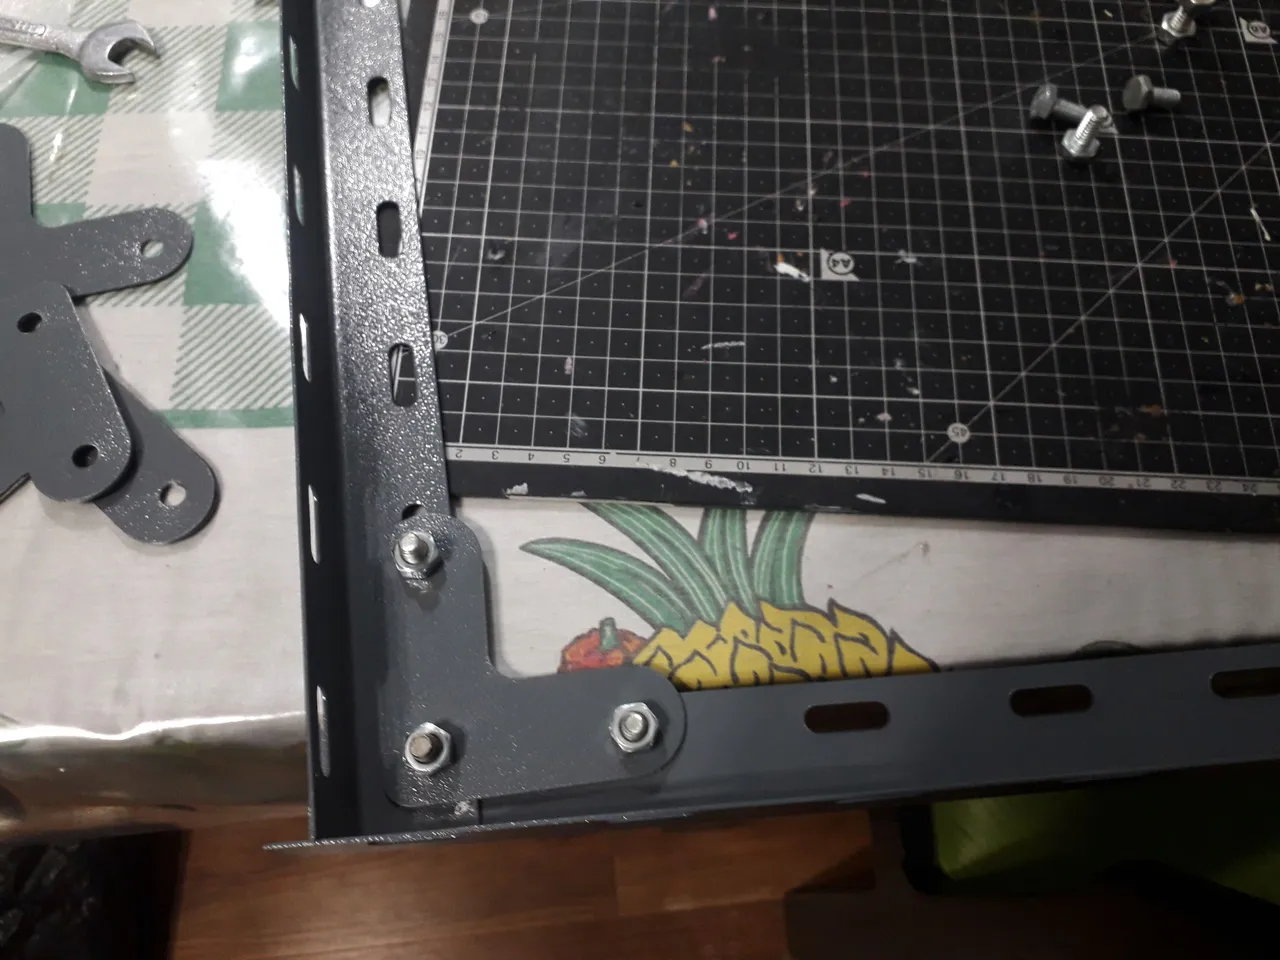
With my father's help we cut all the profiles for the shelving using as a guide a small plan with measurements that he had made, it was necessary to even out the sharp edges with a file to avoid accidents. Once everything was cut I started to assemble the different pieces in their place together with the corner pieces to improve the structural rigidity. The piece of furniture was taking shape every time we adjusted a new screw, the truth is something very gratifying to see that something you planned is being created and is well suited to your needs.
Con ayuda de mi padre cortamos todos los perfiles para estantería usando de guía un pequeño plano con medidas que había hecho, fue necesario emparejar los bordes vivos con una lima para evitar accidentes. Ya al tener todo cortado empecé a montar las diferentes piezas en su lugar junto con los esquineros para mejorar la rigidez estructural. El mueble iba tomando forma cada vez que ajustábamos un nuevo tornillo, la verdad es algo muy gratificante ver que algo que planeaste se va creando y queda bien para tus necesidades.
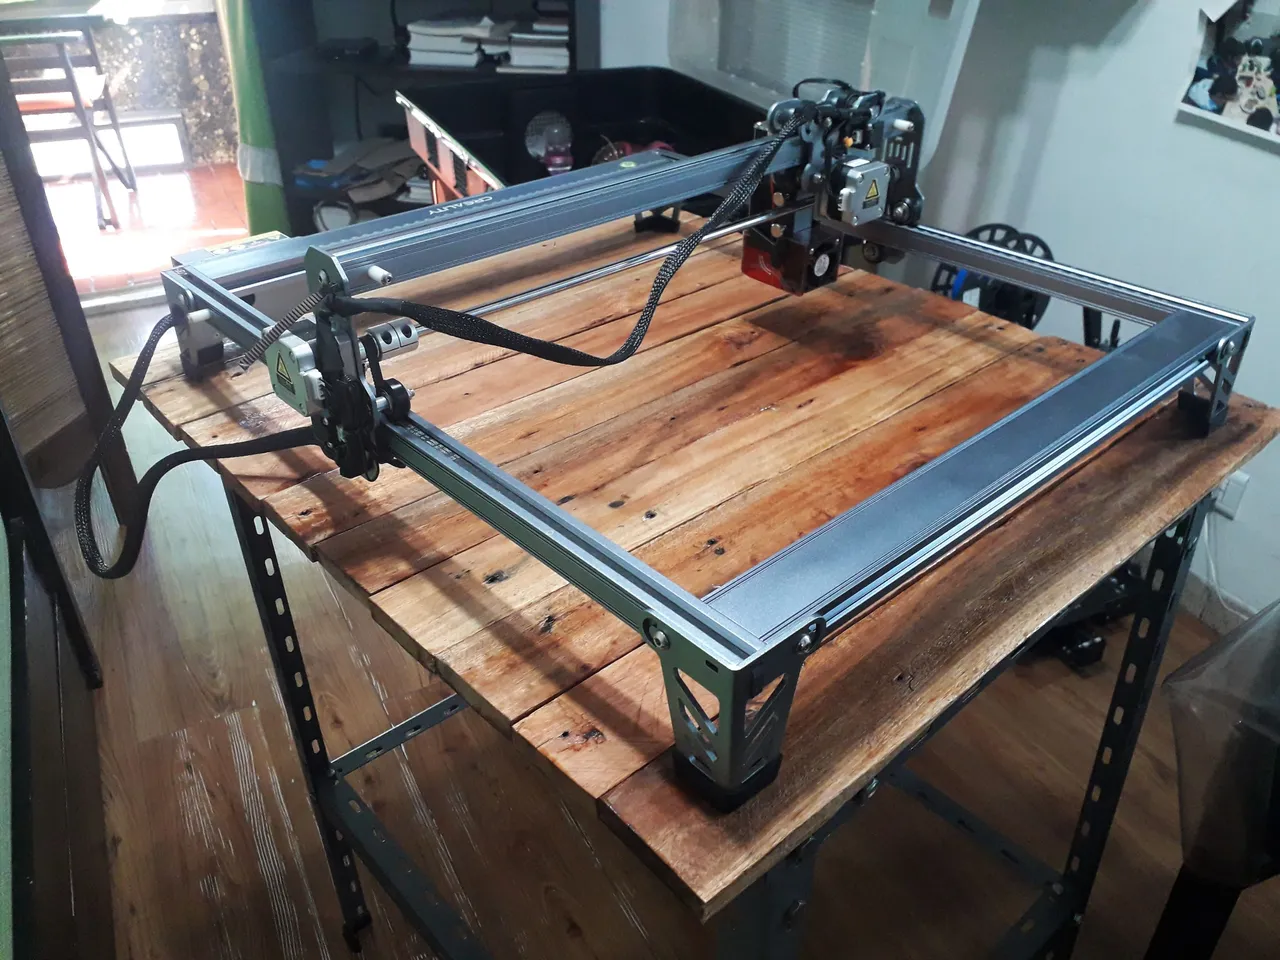
Once we finished putting the last profiles in place and adjusting the screws I glued some rubber strips at the base of the legs, this greatly improved the support on the floor and prevented me from generating scratches when I dragged the table. I made a small test to be sure of the dimensions of the furniture, my laser engraver fit in the structure I had created and considering that the wooden boards were going to protrude I had already removed the fear that it would not fit well in its place.
Una vez terminamos de colocar los últimos perfiles en su lugar y ajustar los tornillos pegue unos regatones de goma en la base de las patas, esto mejoraba enormemente el apoyo sobre el suelo y me evitaba generar rayones cuando arrastrara la mesa. Hice una pequeña prueba para estar seguro de las dimensiones del mueble, mi grabadora laser entraba en la estructura que había creado y considerando que las tablas de madera iban a sobresalir ya me había quitado el miedo de que esta no quedara bien en su lugar.

|
|
|---|
The last thing that remained was to see the measurements of the wooden boards, cut them, varnish them and screw them in place. So I did this task another day because the previous task had already consumed me enough time, plus the varnish takes time to dry and even more with the humidity in my city.
Lo ultimo que restaba eran ver las medidas de las tablas de madera, cortarlas, barnizarlas y atornillarlas en su lugar. Así que esta tarea la realice otro día porque lo anterior ya me había consumido bastante tiempo, sumado a que el barniz tarda en secar y más aun con la humedad que hay en mi ciudad.
|

|
|---|
Once I had all the boards varnished and dry I put them in place trying to make them fit as well as possible and by means of some short self-tapping screws I fixed them to the structure of the table. Something I always recommend when using self-tapping screws is to put a little jab on the thread to make it fit more easily, I assure you that with this method you will use less force when screwing.
Una vez tenia todas las tablas barnizadas y secas las fui colocando en su lugar intentando que encajaran lo mejor posible y por medio de unos tornillos autorroscantes cortos los fui fijando a la estructura re la mesa. Algo que siempre recomiendo al usar tornillos autorroscantes es colocar un poco de jab onde baño en la rosca para que este entre más fácilmente, le aseguro que con este método usaran menos fuerza al atornillar.
And everything was ready, I had the piece of furniture that I needed so much for my comfort for a low cost, I put it in place and I was very happy with the result. As a small observation and final detail I should buy a wooden board to better use the space at the bottom, there I could support other tools or boxes, although for now I solved it with a board that I had stored here at home.
Y ya estaba todo listo, tenia el mueble que tanto necesitaba para mi comodidad por un bajo costo, lo coloque en su lugar y me quede muy contento por el resultado. Como una pequeña observación y detalle final debería comprar una tabla de madera para utilizar mejor el espacio de la parte inferior, allí podría apoyar otras herramientas o cajas, aunque por ahora lo solucione con una tabla que tenía guardada aquí en mi casa.
What did you think of this project? I love being able to see new possibilities of optimization in the small workspace I have, both to store things and to work more comfortably. I'm Nitsu, I love to be part of the Hive DIY community and see your amazing creations and why not, also share my projects. Greetings.
¿Qué les ha parecido este proyecto? Me encanta poder ver nuevas posibilidades de optimización en el pequeño espacio de trabajo con el que cuento, tanto para poder guardar cosas como para trabajar más cómodamente. Soy Nitsu, me encanta ser parte de la comunidad de Hive DIY y ver sus increíbles creaciones y ¿porque no?, también compartir mis proyectos. Saludos.

My 3D printing works @nit_3dprinting
Mis trabajos de impresión 3D @nit_3dprinting
Translated by DeepL
Traducido con DeepL
All images are my own
Todas las imágenes son de mi autoría
My last post Rain World: An Unpredictable and Challenging World [ENG-ESP]
Mi último post Rain World: An Unpredictable and Challenging World [ENG-ESP]