Saludos mis queridos amigos artesanos!💞
Bienvenidos a mi blog, espero estén muy bien! Es un gusto estar con ustedes nuevamente, hace unos días
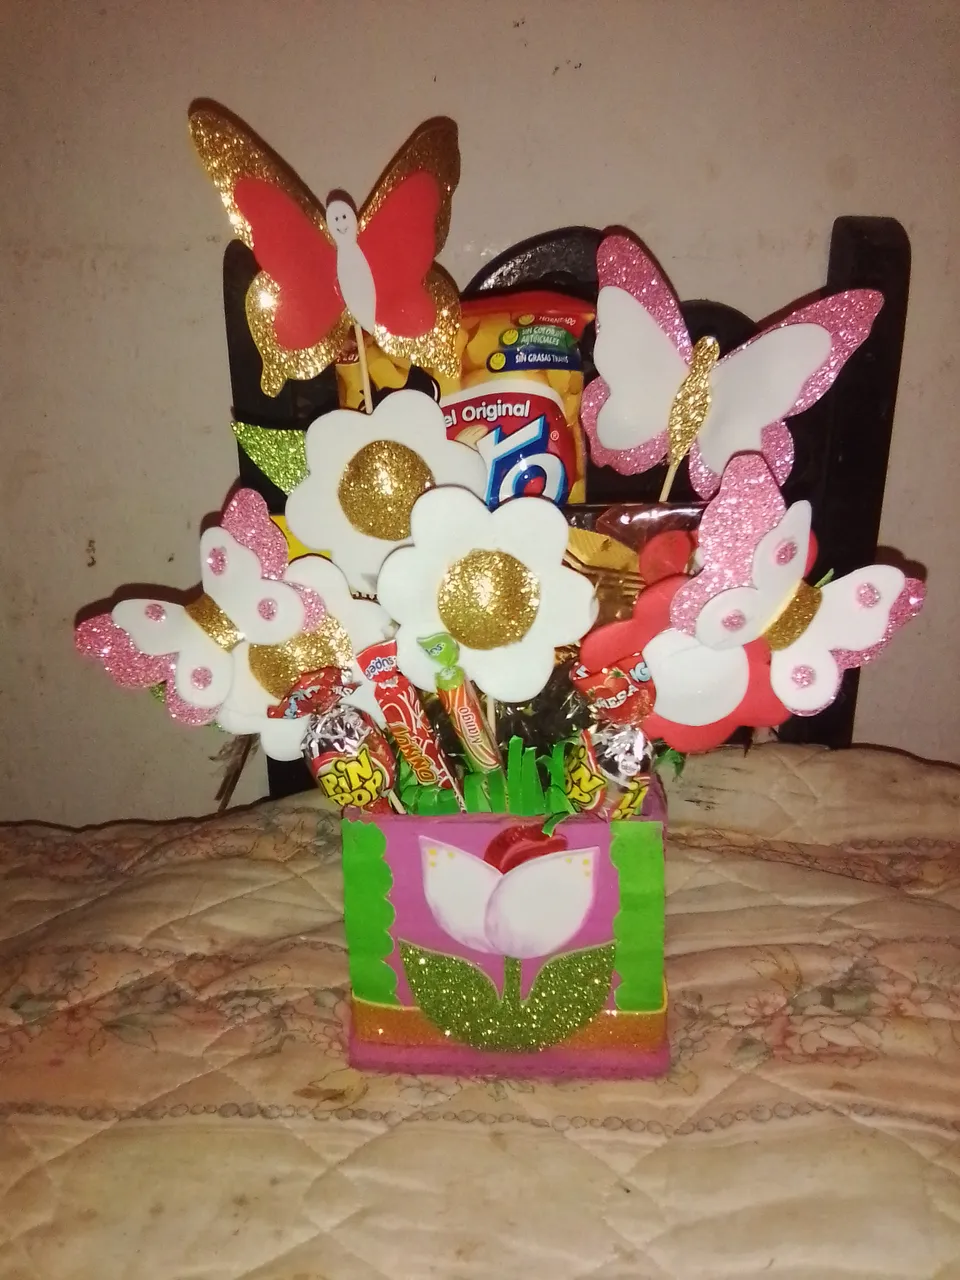
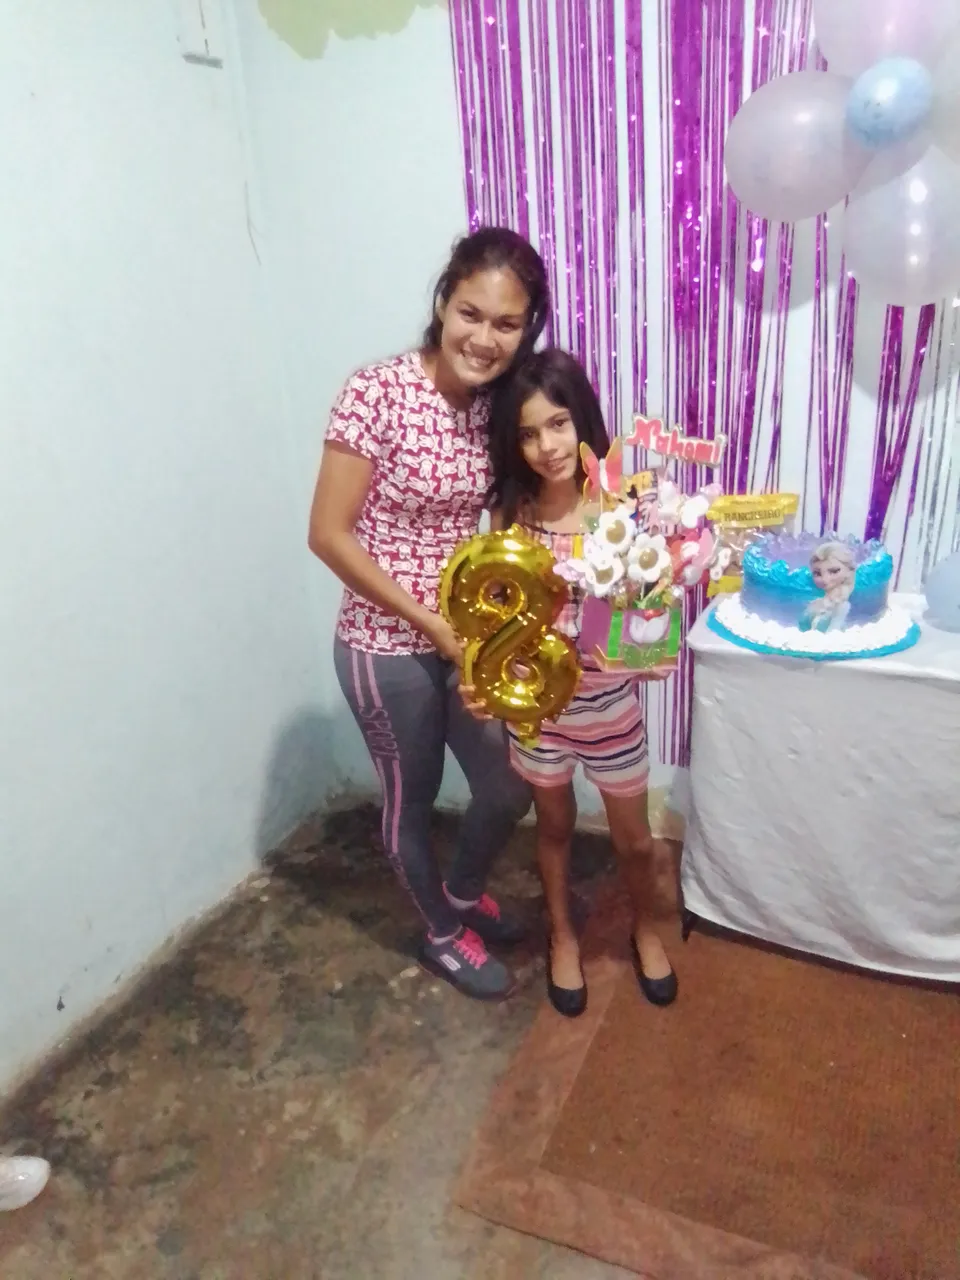
mi sobrina estuvo de cumpleaños motivo por el cual le quise obsequiar algo que tuviera doble uso, se trata de una linda cajita de cartón decoradas con mariposas y flores que luego de comer sus dulces le servirá para colocar sus accesorios. Hoy me encantaría enseñarte como lo hice.
Welcome to my blog, I hope you do very well! It is a pleasure to be with you again, a few days ago My niece was on her birthday so I wanted to give her something that would have double use, it is a cute cardboard box decorated with butterflies and flowers that after eating her sweets will serve to place her accessories. Today I would love to show you how I did it.
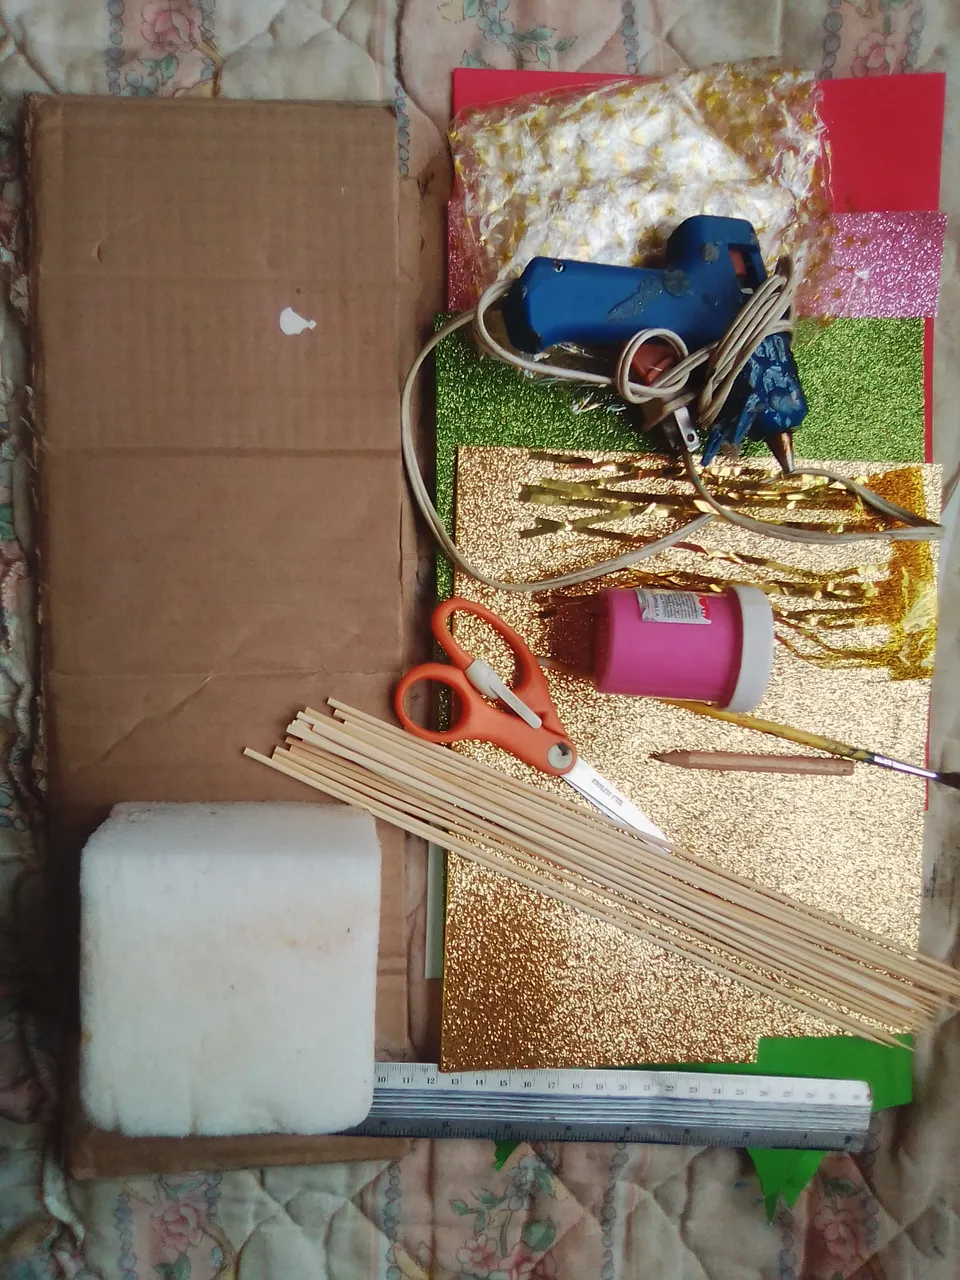
Materiales:
- Cartón
- Pintura rosada.
- Pincel.
- Foami brillante( del color de tu preferencia)
- Palillos de altura.
- Papel verde.
- Silicón y pistola.
- Anime.
Materials:
- Paperboard
- Pink paint.
- Brush.
- Glossy foam (whatever color you prefer)
- Height chopsticks.
- Green paper.
- Silicone and gun.
- Anime.
Pasos a seguir.
Steps to follow.
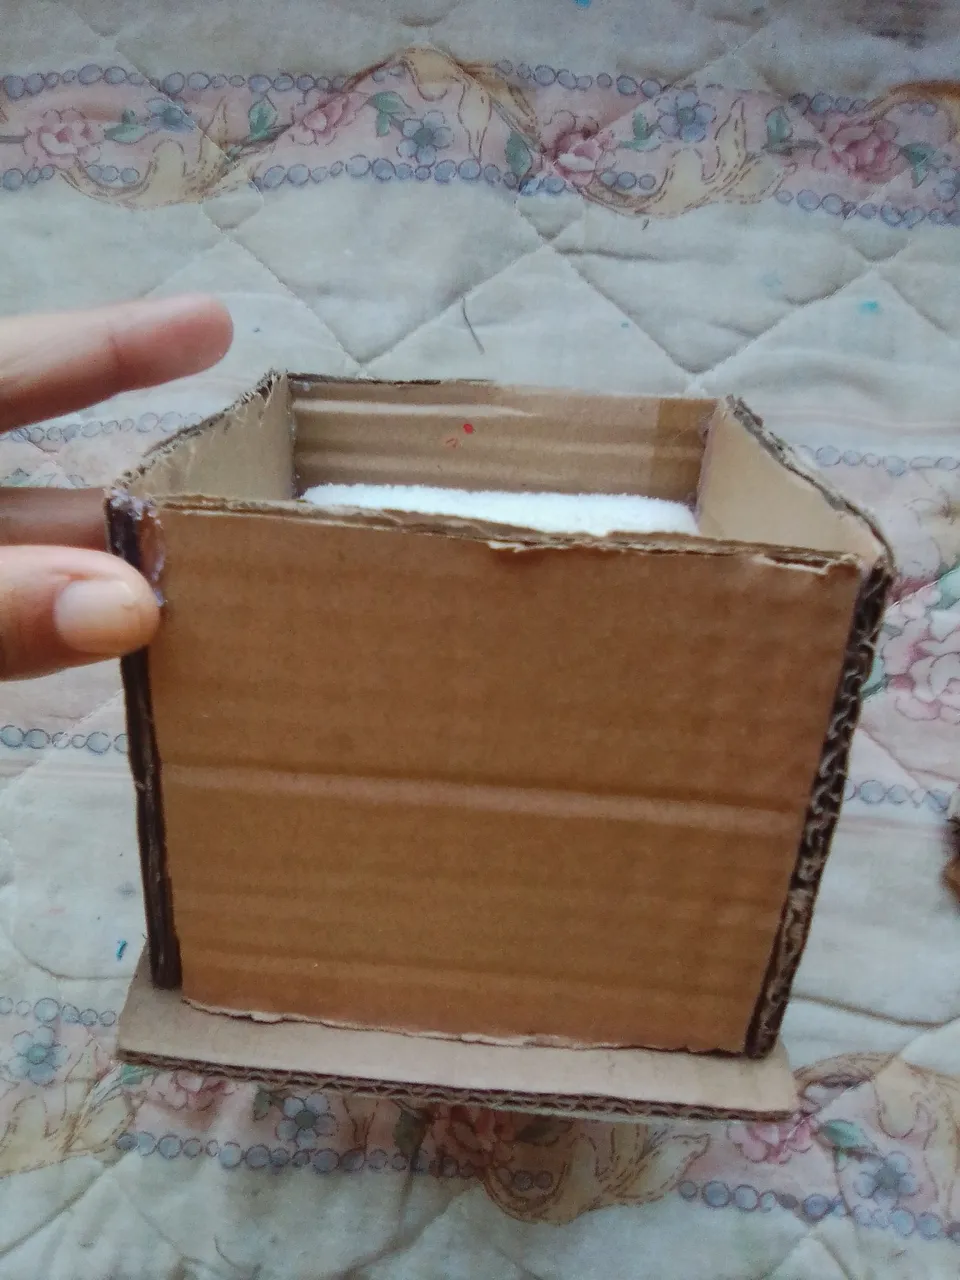
Paso 1.
Iniciaremos elaborando una pequeña caja de cartón con el anime adentro, esto lo haremos cortando cinco cuadrados del mismo tamaño y pegamos.
Step 1.
We will start by making a small cardboard box with the anime inside, we will do this by cutting five squares of the same size and gluing them.
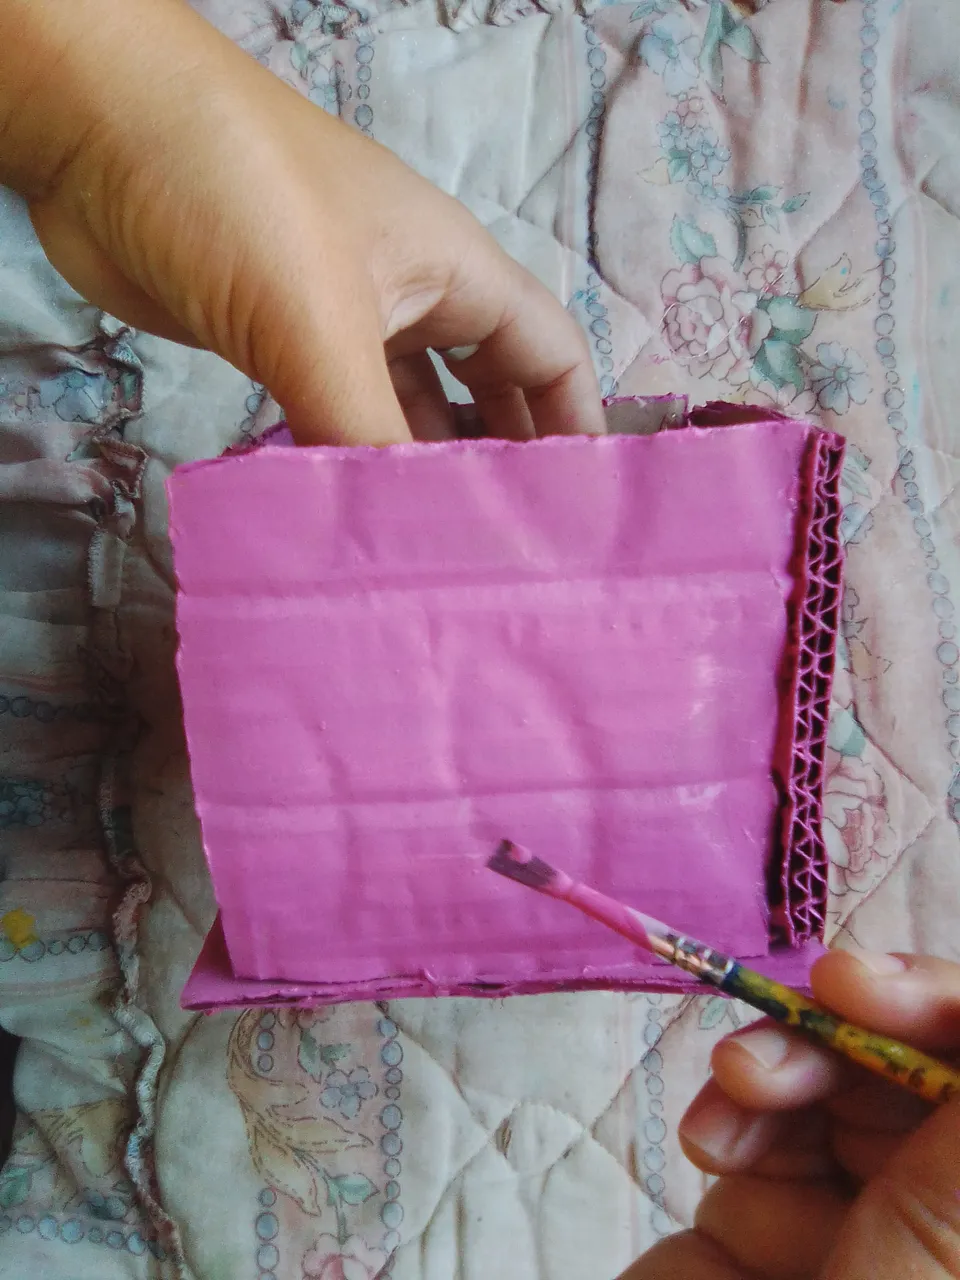
Paso 2
Luego pintamos con pintura rosada y dejamos secar.
Step 2
Then we paint with pink paint and let it dry.
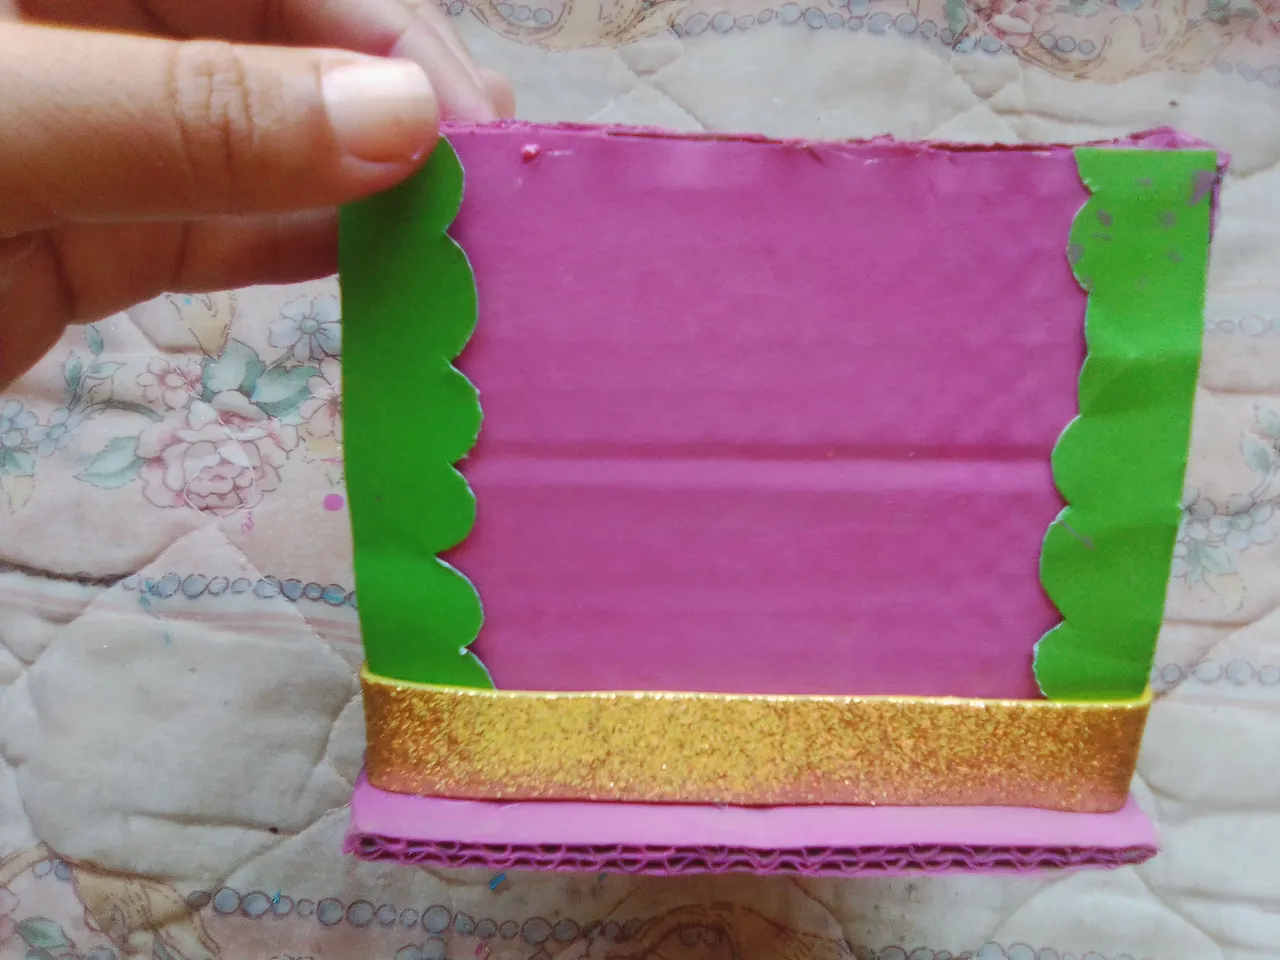
Paso 3
Para cubrir los borres cortamos tiras con ondas de papel verde y pegamos, también pegamos un cinta de foami dorado en la parte inferior.
Step 3
To cover the erasers we cut strips with green paper waves and glued, we also glued a gold foami ribbon on the bottom.
Paso 4
Formamos una flor de tulipán con foami blanco y verde y pegamos en la parte frontal para decorar.
Stage 4
We form a tulip flower with white and green foami and glue on the front to decorate.

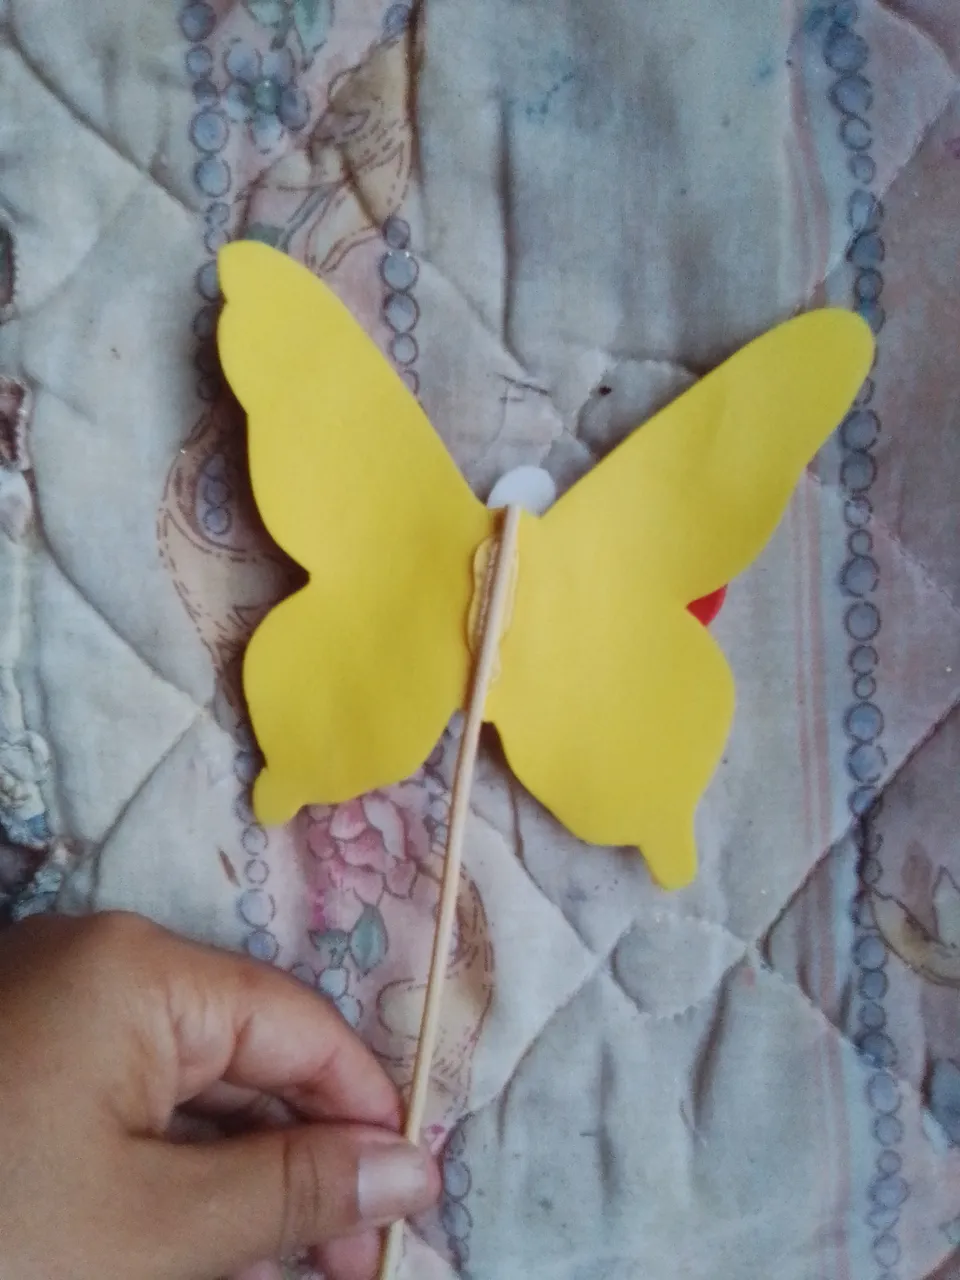
Paso 5
Cortamos dos pares de mariposas de foami de distintos tamaños y colores y pegamos.
Step 5
We cut two pairs of foami butterflies of different sizes and colors and glued them together.


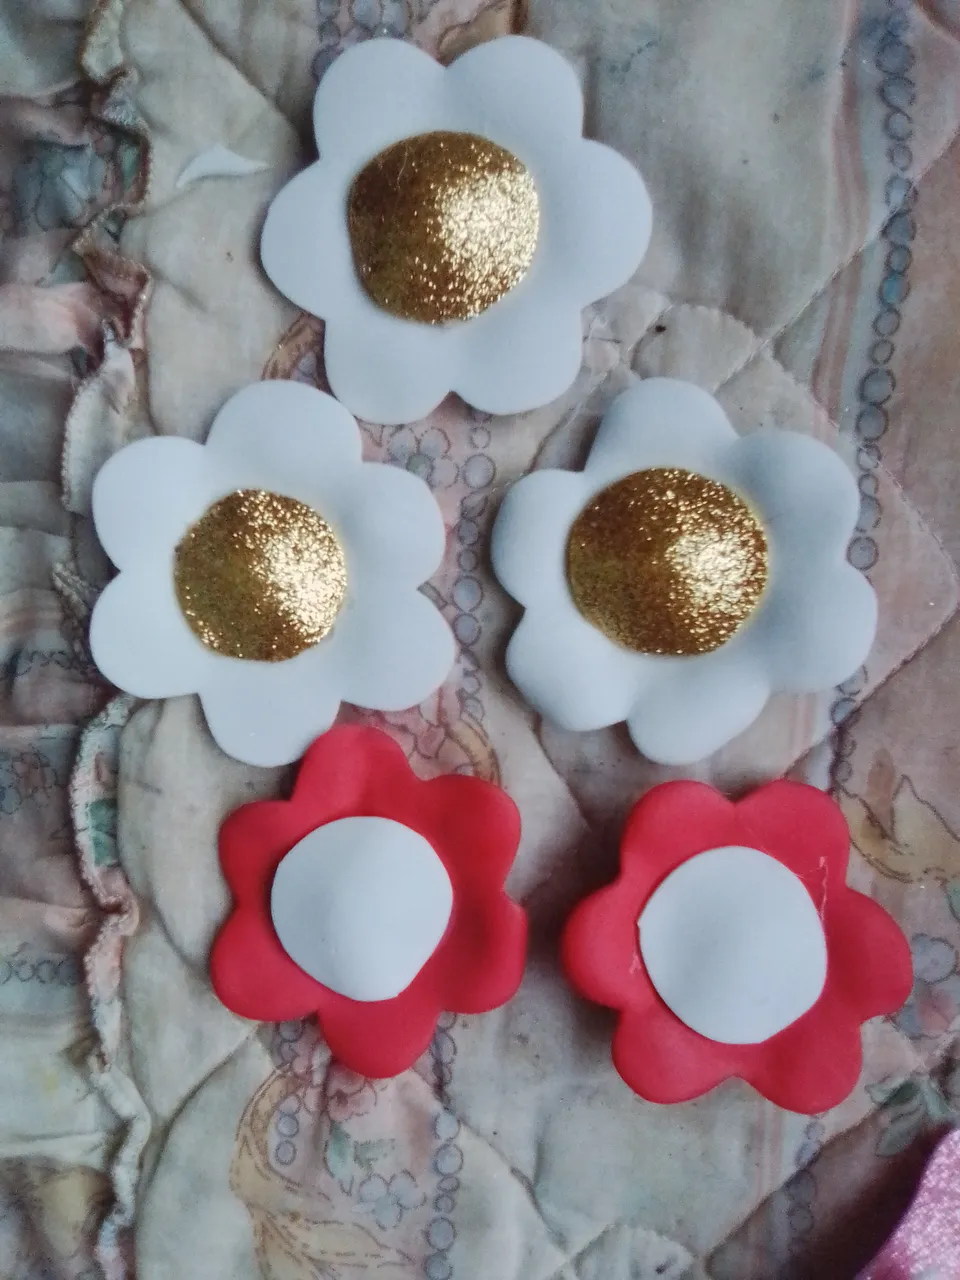
Paso 6
Cortamos pequeñas flores de foami blanco y rojo.
Step 6.
We cut small flowers from white and red foami.
Paso 7
Una vez con todas la piezas terminadas, las pegamos a los palillos de altura.
Step 7.
Once all the pieces are finished, we glue them to the height sticks.
Paso 8
Pondremos anime dentro de la caja e introducimos los palillos con sus adornos.
Step 8.
We will put anime inside the box and introduce the chopsticks with their decorations.
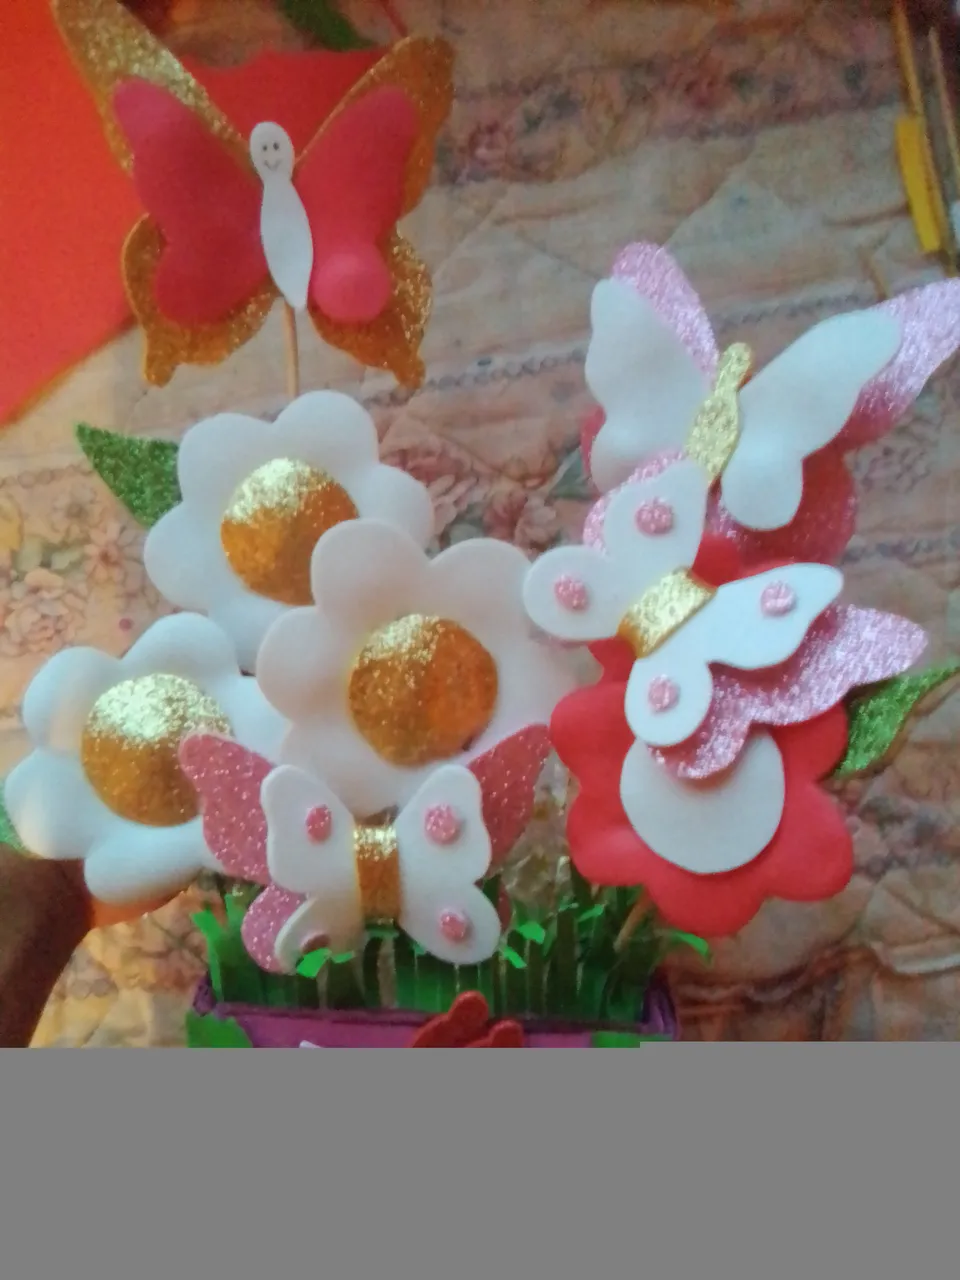
Este es es resultado amigos, es muy práctico y a cualquier pequeña le encantara.
This is the result friends, it is very practical and any girl will love it.
Gracias por tu linda visita a mi publicacion!
Espero esta idea te sea de beneficio en algun momento, gracias por tu apoyo que tengas un feliz día, como siempre les deseo un feliz día y que Dios los bendiga, un abrazo!
I hope this idea will be of benefit to you at some point, thank you for your support have a happy day, as always I wish you a happy day and God bless you, a hug!