❤️Bienvenidos a mi creativo blog!♥️
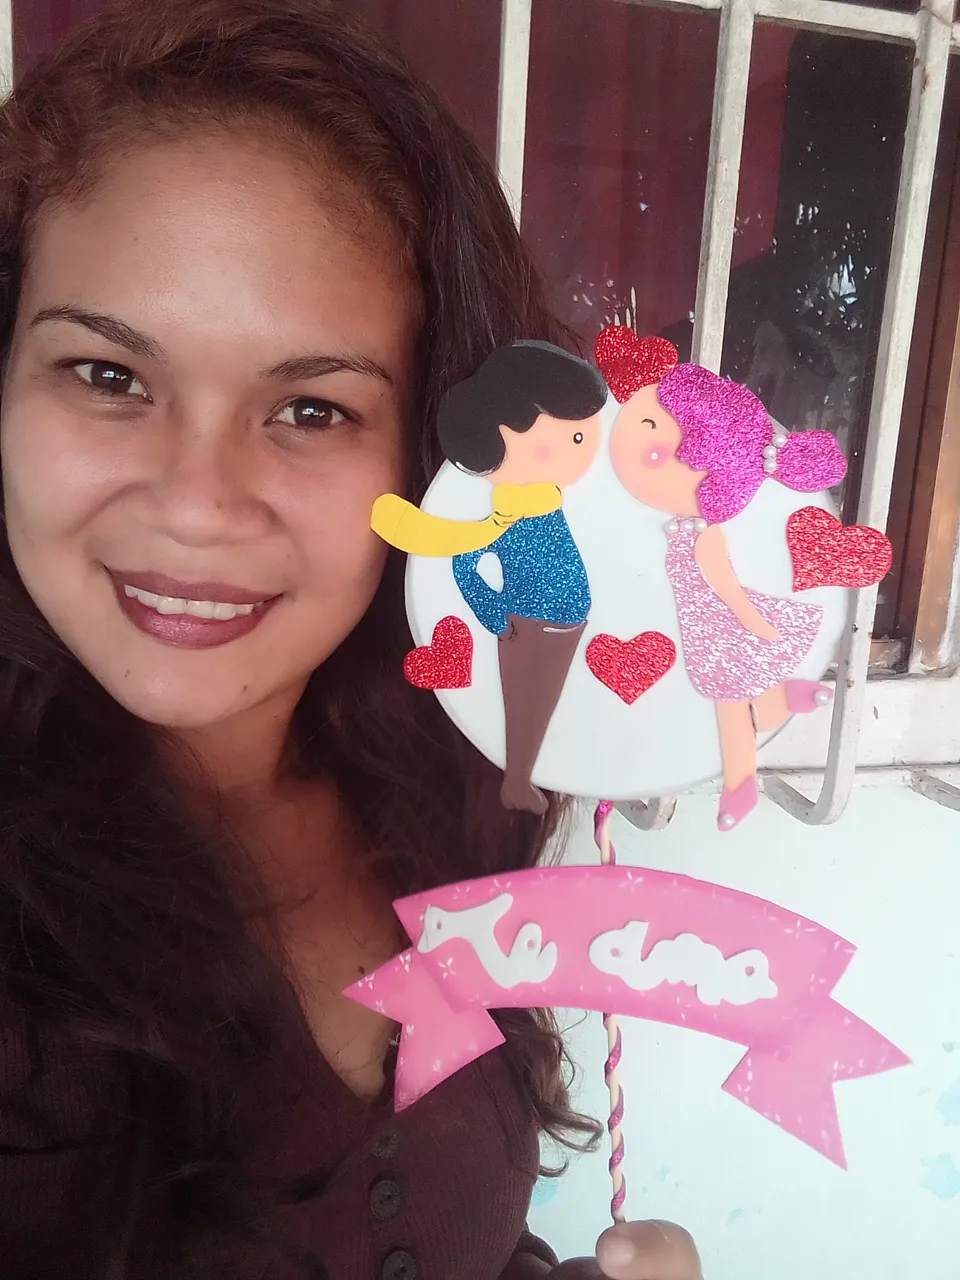
Muy buenos días a todos los amigos de #Hivediy! Estoy feliz de saludarles nuevamente, esperando que todo este marchando muy bien en sus vidas y que estén gozando de mucha salud, amor y paz!. Ya que se acerca un día especial para muchas personas como lo es el Día del amor y la amistad, es común que nos preguntemos que podemos regalar...? Por eso hoy te traigo esta idea, que consiste en elaborar un Topper de enamorados con foami que seguramente resulte un tierno obsequio para ese ser querido. Te invito a que me acompañes hasta el final de este tutorial!
Good morning to all the friends of #Hivediy! I am happy to greet you again, hoping that everything is going very well in your lives and that you are enjoying good health, love and peace! Since a special day is approaching for many people, such as the Day of love and friendship, it is common for us to ask ourselves what we can give...? That's why today I bring you this idea, which consists of making a lovers' Topper with foami that will surely be a tender gift for that loved one. I invite you to accompany me until the end of this tutorial!
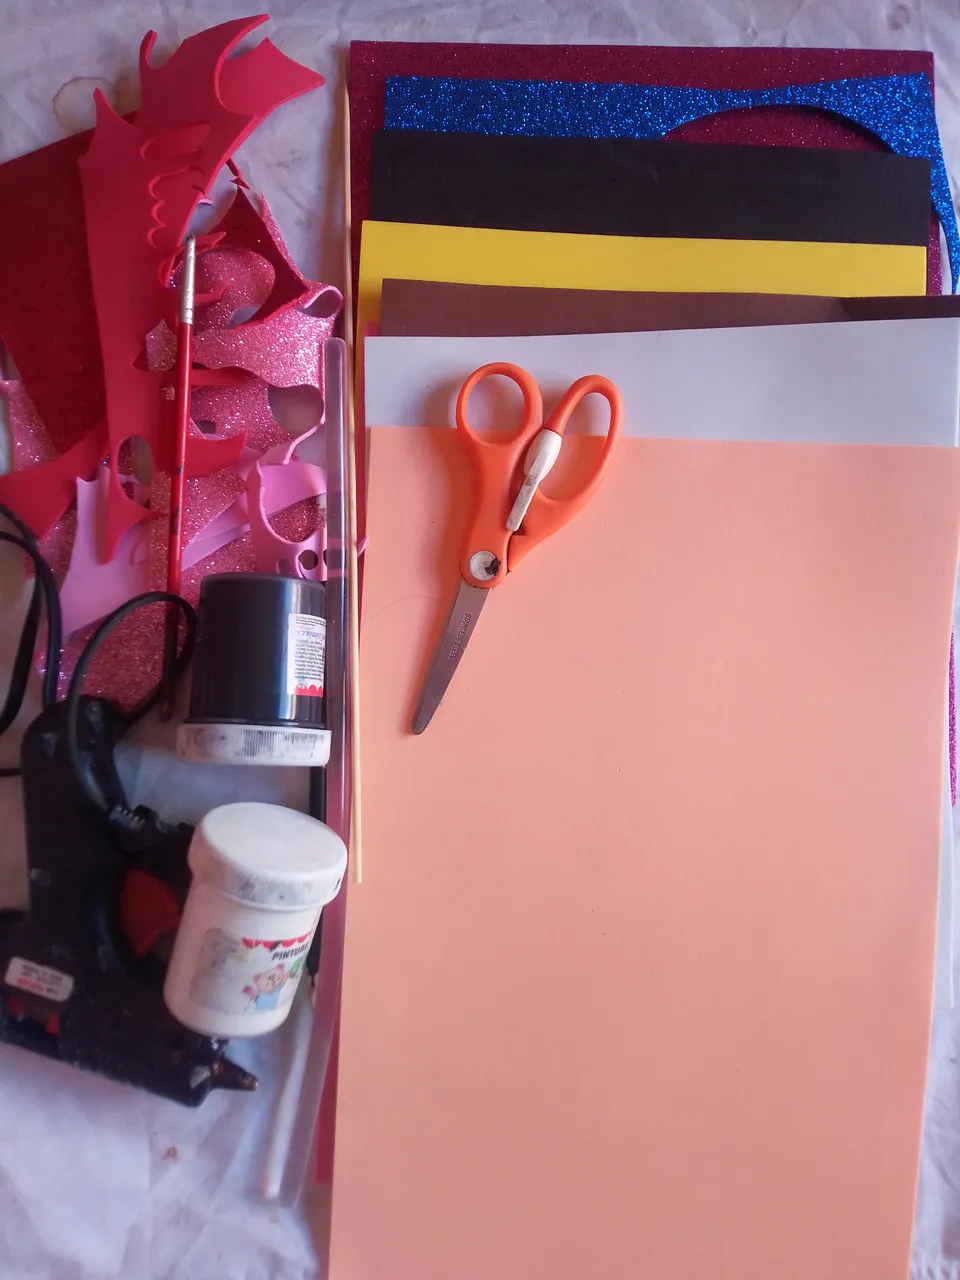
Materiales.
- Foami brillante rosado, azul y rojo.
- Foami blanco, amarillo, negro, marrón, rosado y color carne.
- Tijeras.
- Silicón.
- Palillos de altura.
- Pintura negra y pincel fino.
Materials.
- Bright pink, blue and red foam.
- White, yellow, black, brown, pink and flesh-colored foami.
- Pair of scissors.
- Silicone.
- Height sticks.
- Black paint and fine brush.
Paso a seguir.
Paso 01.
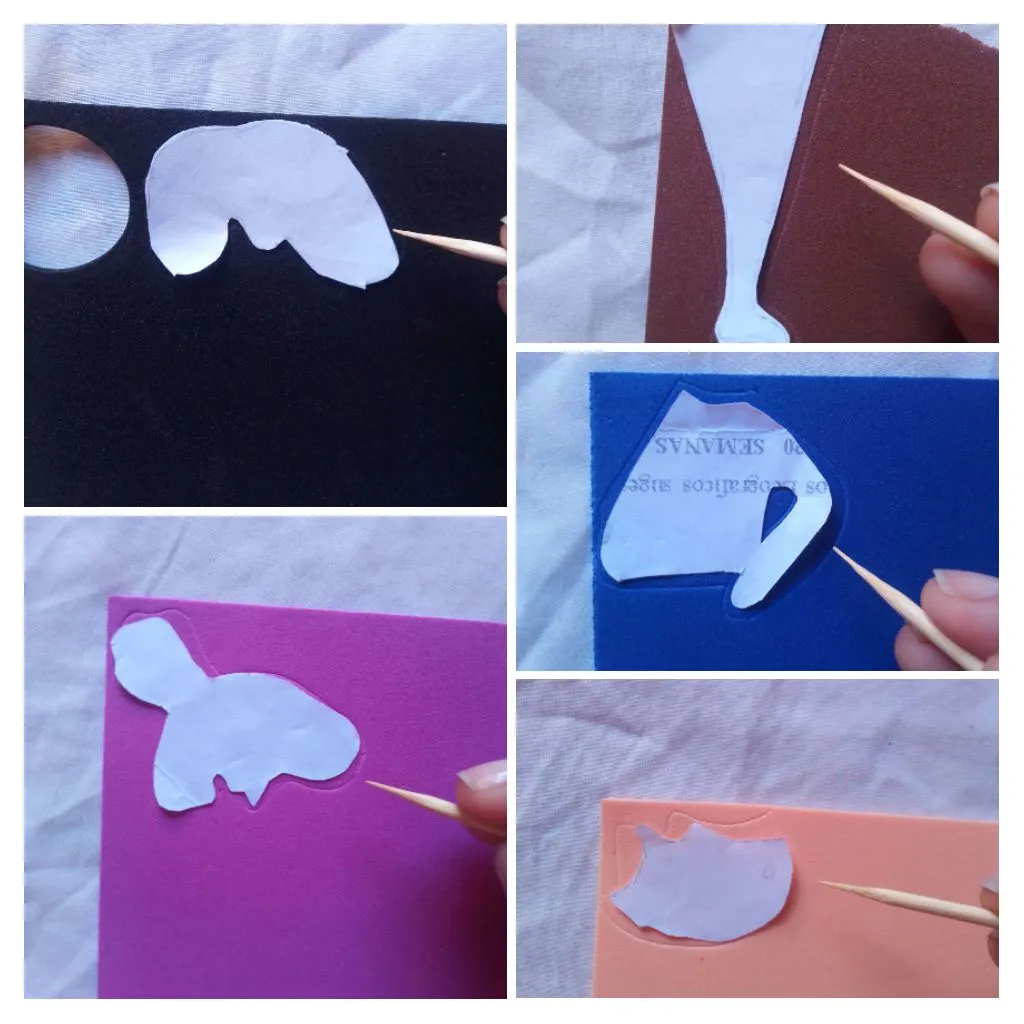
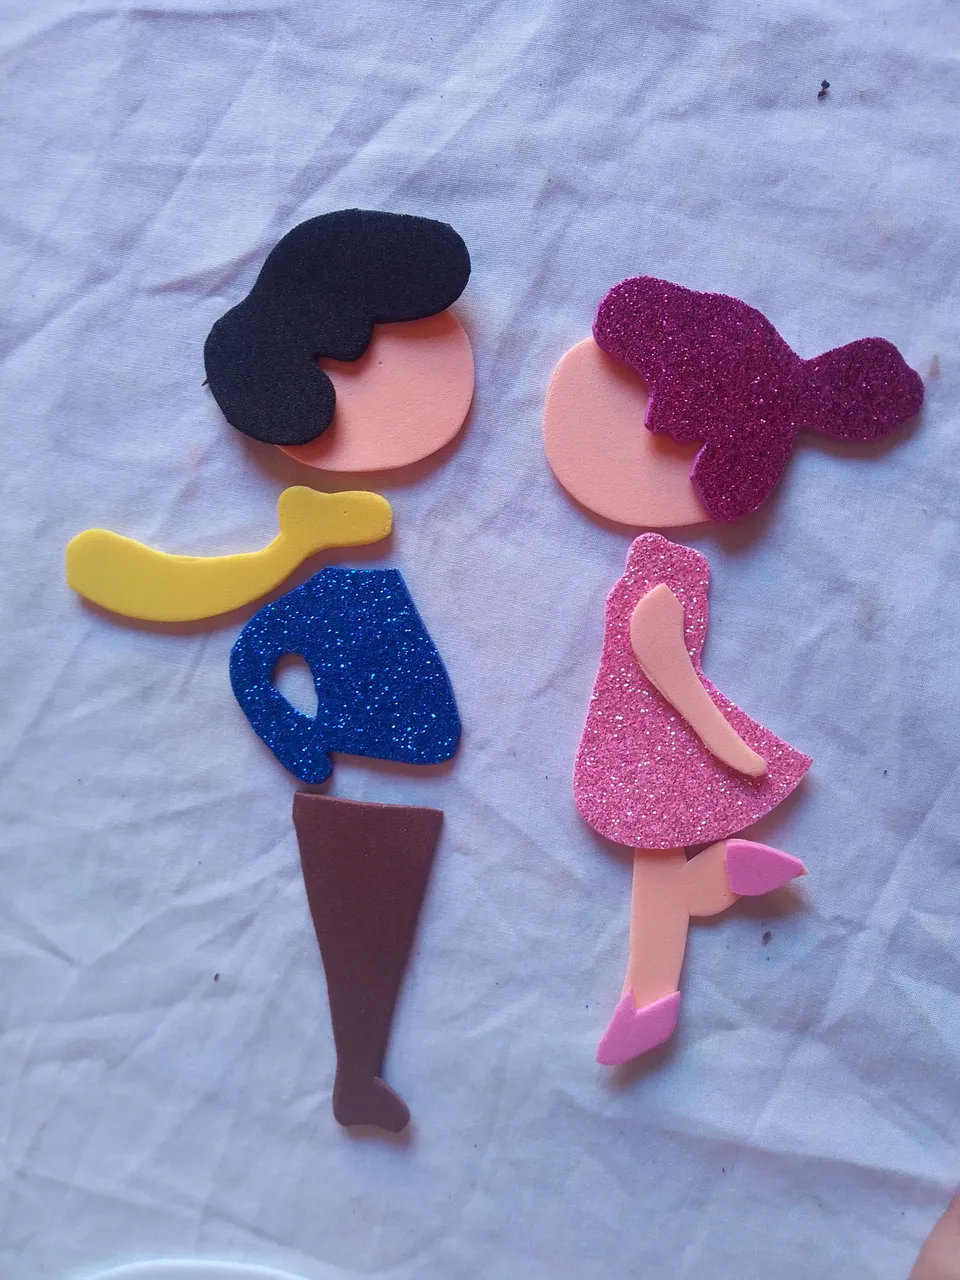
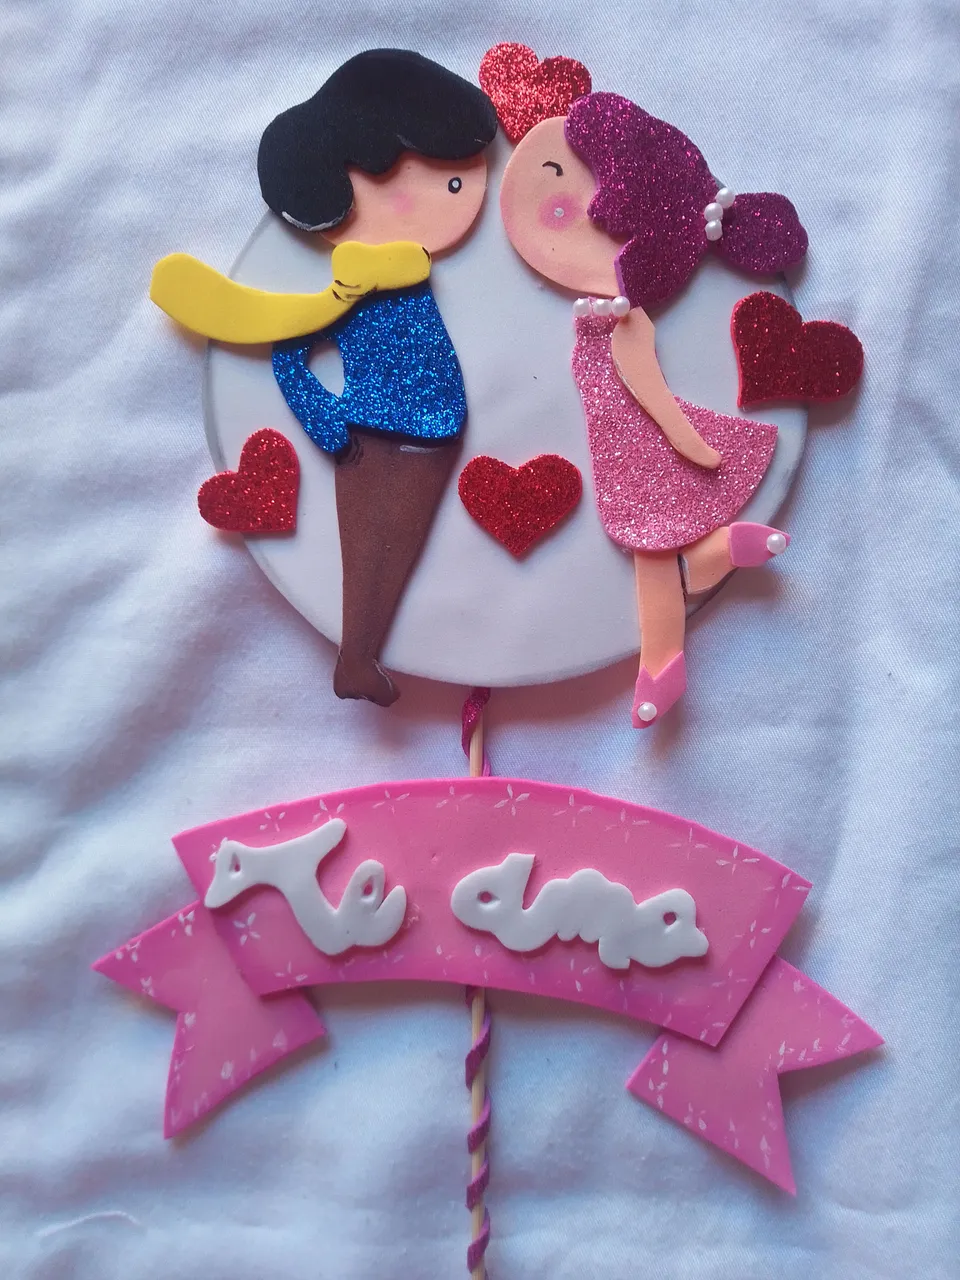
Para iniciar nuestro trabajo manual, trazaremos todas las piezas de dos personas enamoradas en los foami. Algo que debes tomar en cuenta es que al momento de marcar en el foami brillante es que debes poner el molde al revés,
en mi caso utilizo la punta de un palillo de altura para hacer esto y así no dañar el foami.
Step 01.
To start our manual work, we will trace all the pieces of two people in love on the foami. Something that you must take into account is that when marking on the shiny foami you must put the mold upside down, in my case I use the tip of a tall toothpick to do this and thus not damage the foami.
Paso 02.
Una vez hayamos marcado todas las piezas, las cortamos y separamos. Nos quedará de la siguiente manera.
Step 02.
Once we have marked all the pieces, we cut them and separate them. We will be left as follows.
Paso 03.
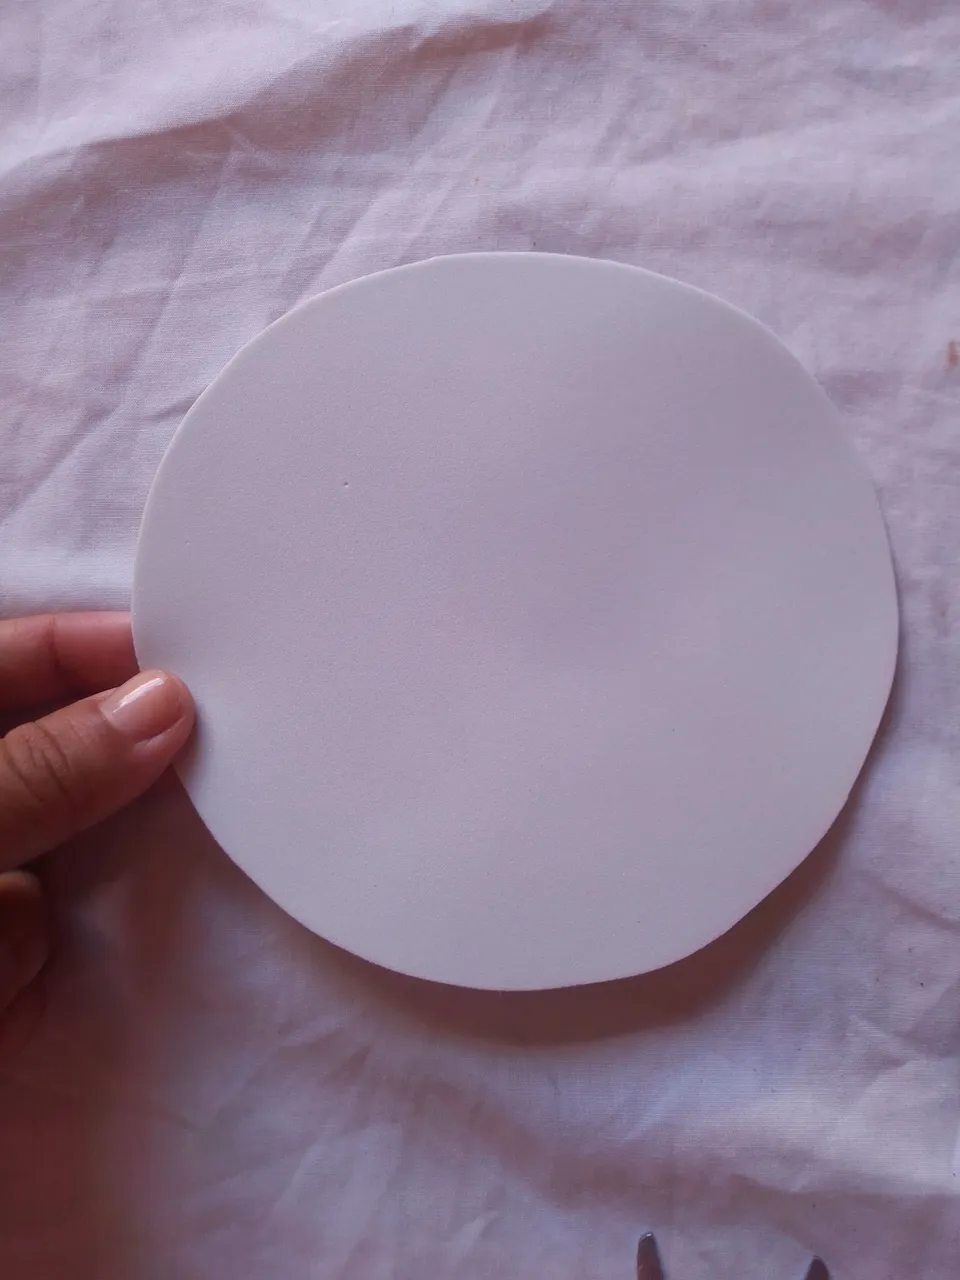
Utilizamos una pieza circular para marcar y luego cortar un círculo de foami blanco que será la case del Topper.
Step 03.
We use a circular piece to mark and then cut a circle of white foami to make the base of the topper.
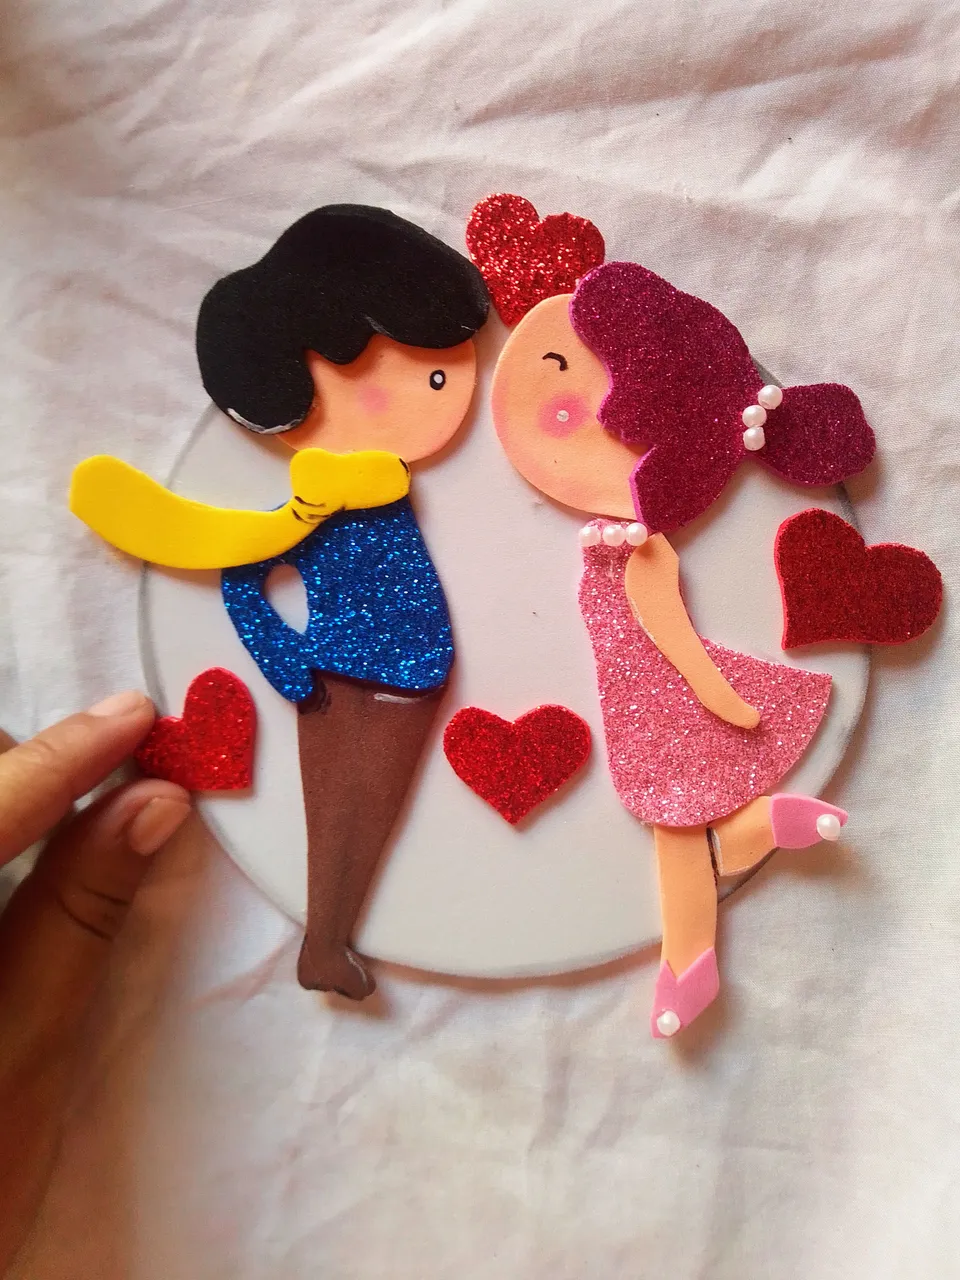
Paso 04.
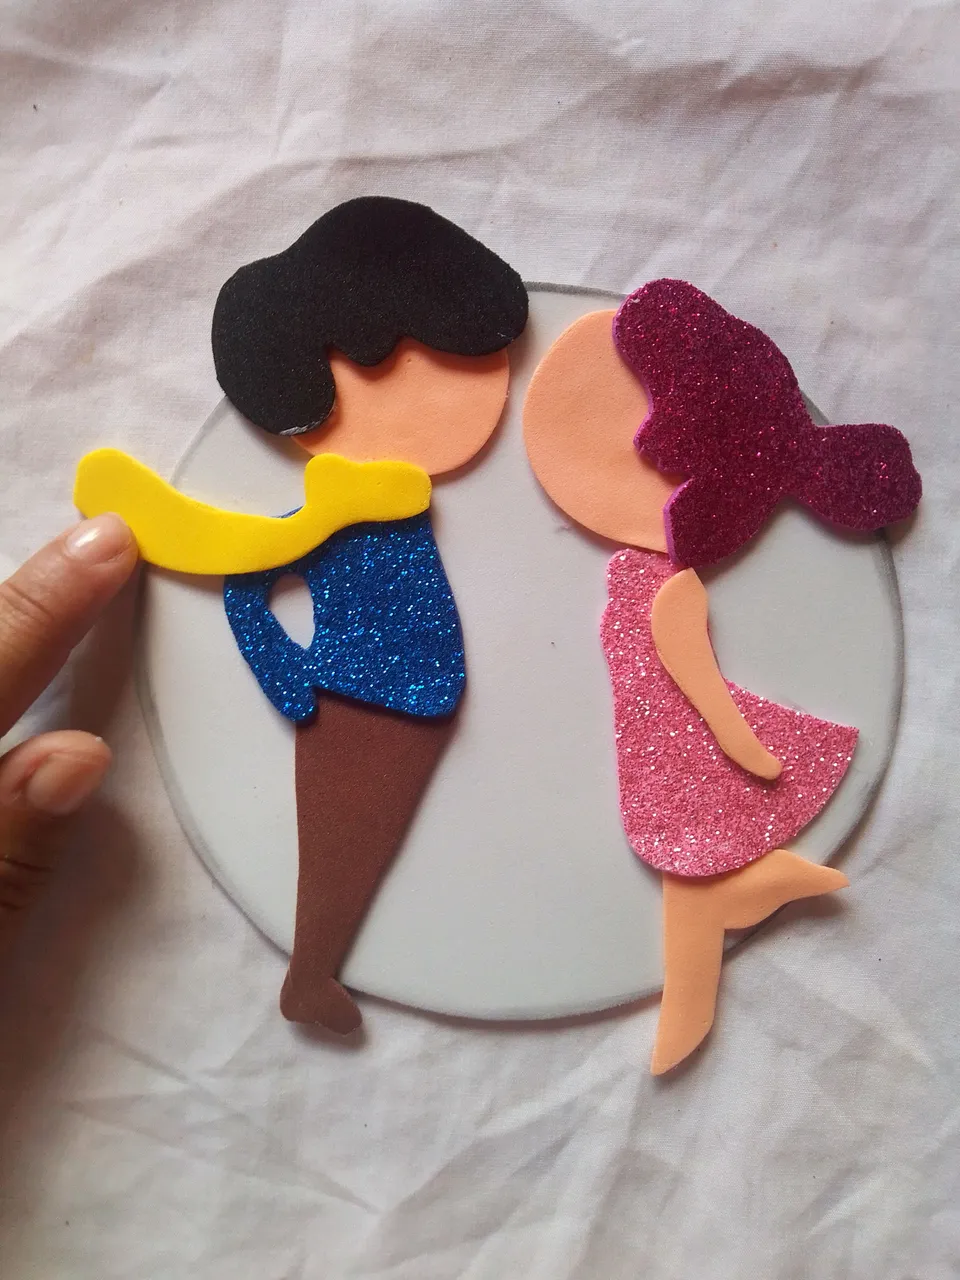
Seguidamente pegamos cada pieza anterior sobre el círculo. No debemos preocuparnos si los personajes sobresalen del círculo, pues se verá como si se tratara de una luna.
Step 04.
Then we glue each previous piece on the circle. We don't have to worry if the parts stick out of the circle, because it will look like a moon.
Paso 05.
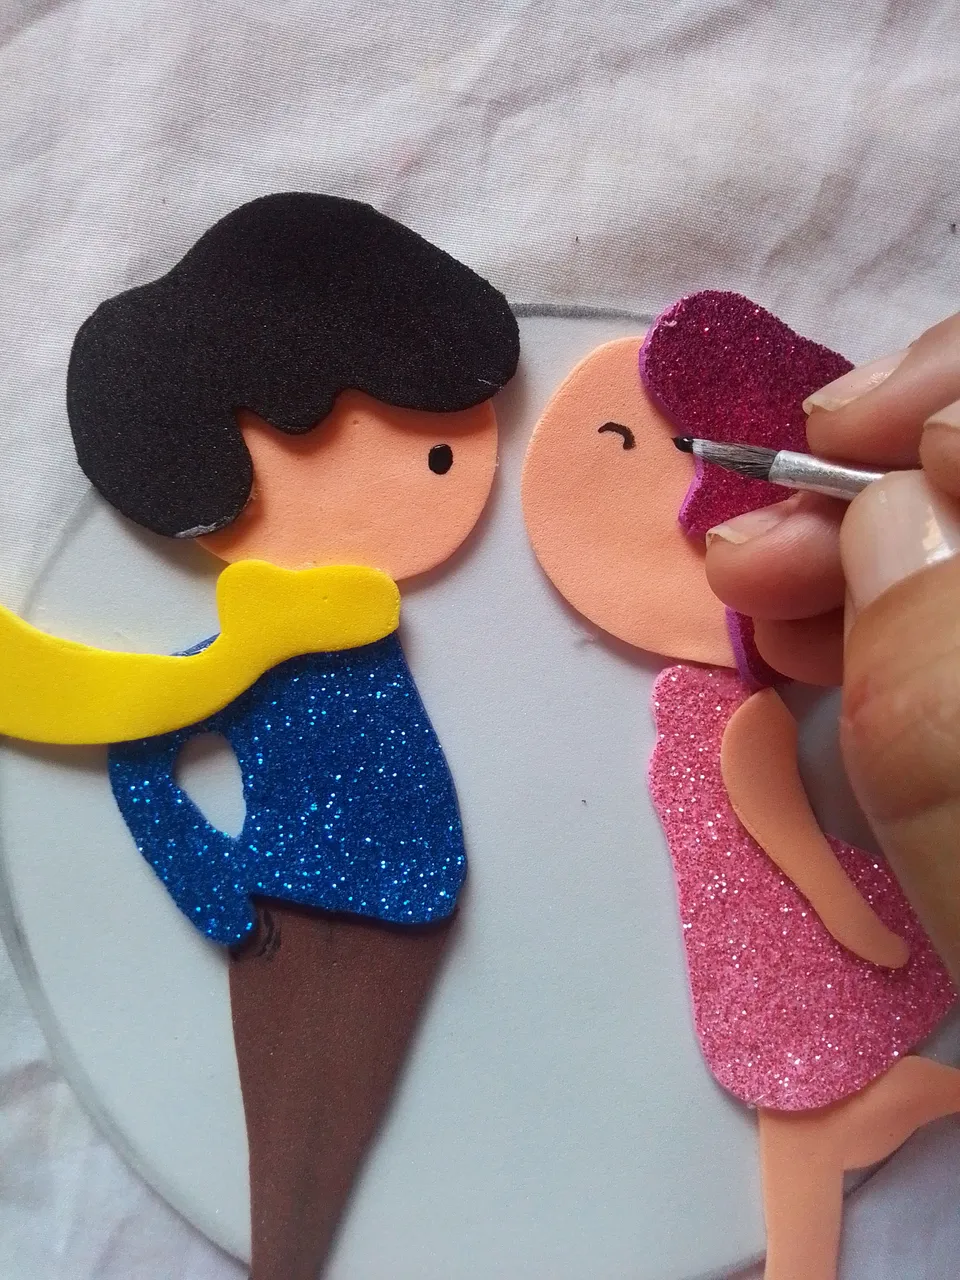
Con pintura negra y pincel fino dibujamos los ojos de cada persona.
Step 05.
With black paint and a fine brush we draw the eyes of each person.
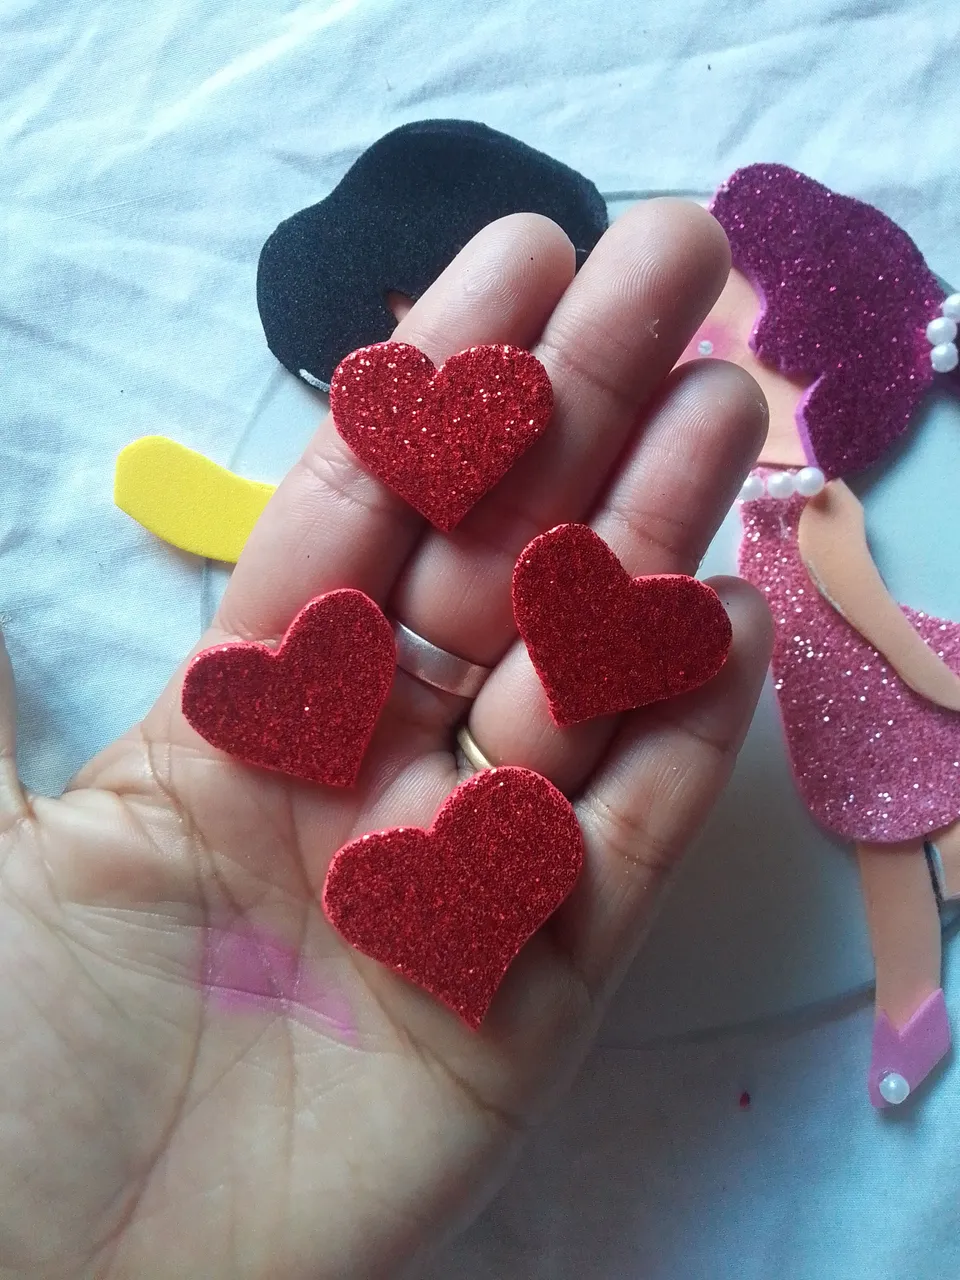
Paso 06.
Corta varios corazones de foami rojo brillante de diferentes tamaños y pega en el medio y a los lados del círculo.
Step 06.
Cut several different sized bright red foam hearts and glue them to the center and sides of the circle.
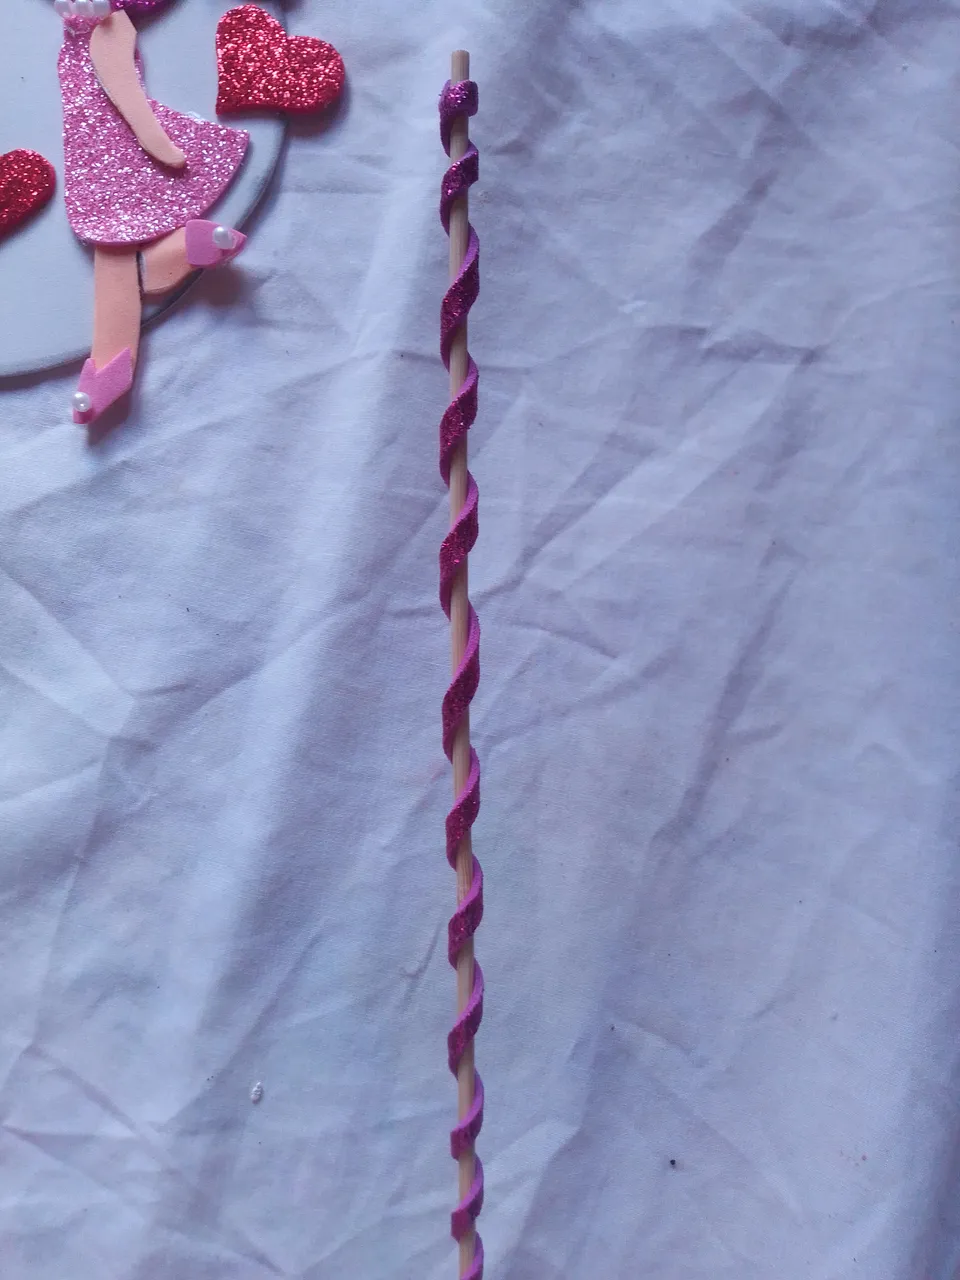
Paso 07.
Corta una tira de foami brillante y enrolla en un palillo de altura fijando con silicón.
Luego lo pegamos en la parte de atrás del Topper.
Step 07.
Cut a strip of glitter foam and roll it onto a tall stick, fixing it with silicone. Then we glue it to the back of the topper.
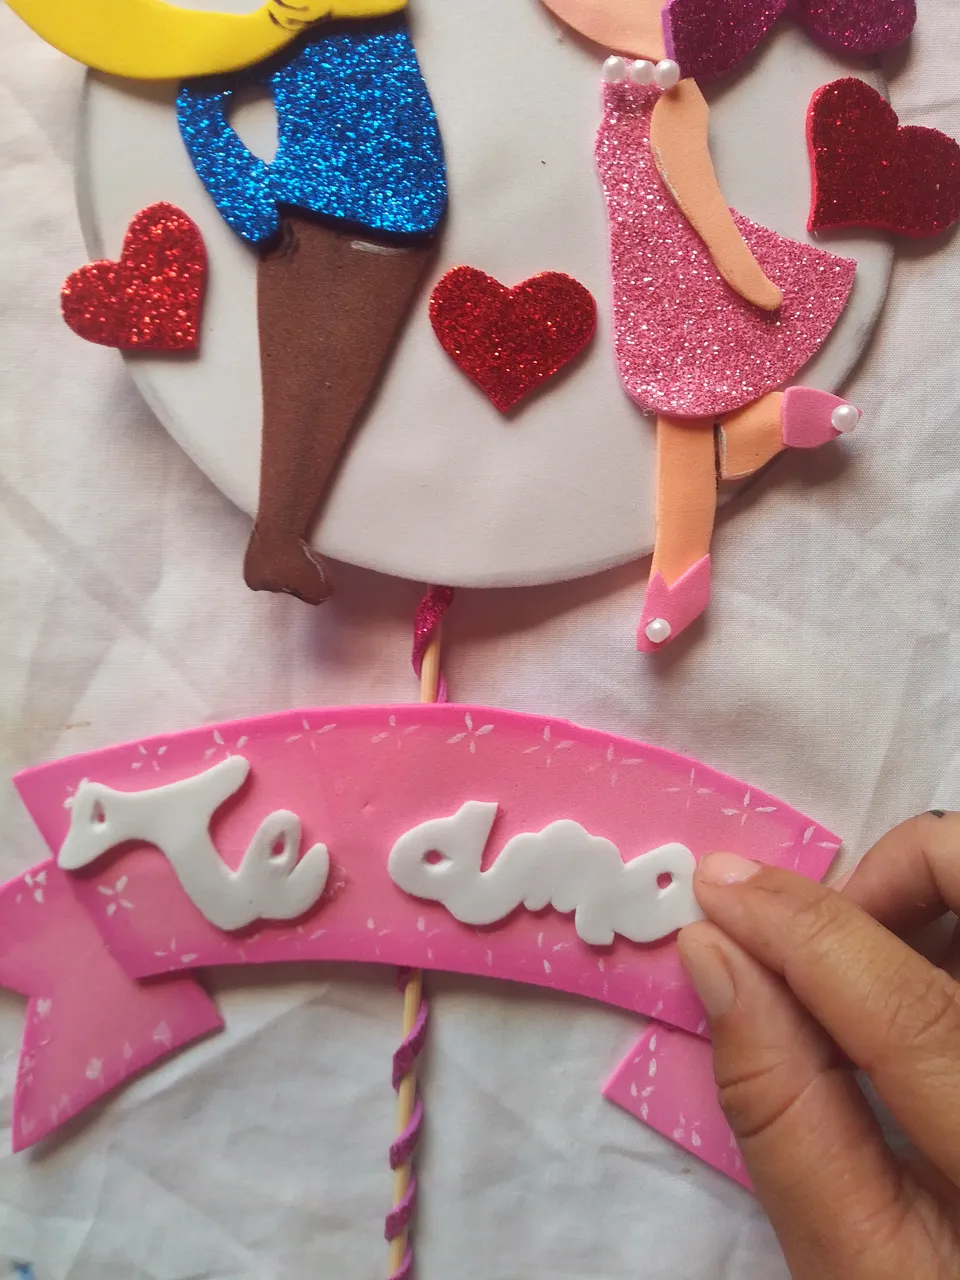
Paso 08.
Haremos un listón de foami rosado y pegamos también al palillo de altura.
Step 08
We will make a pink foami ribbon and we will also glue it to the height stick.


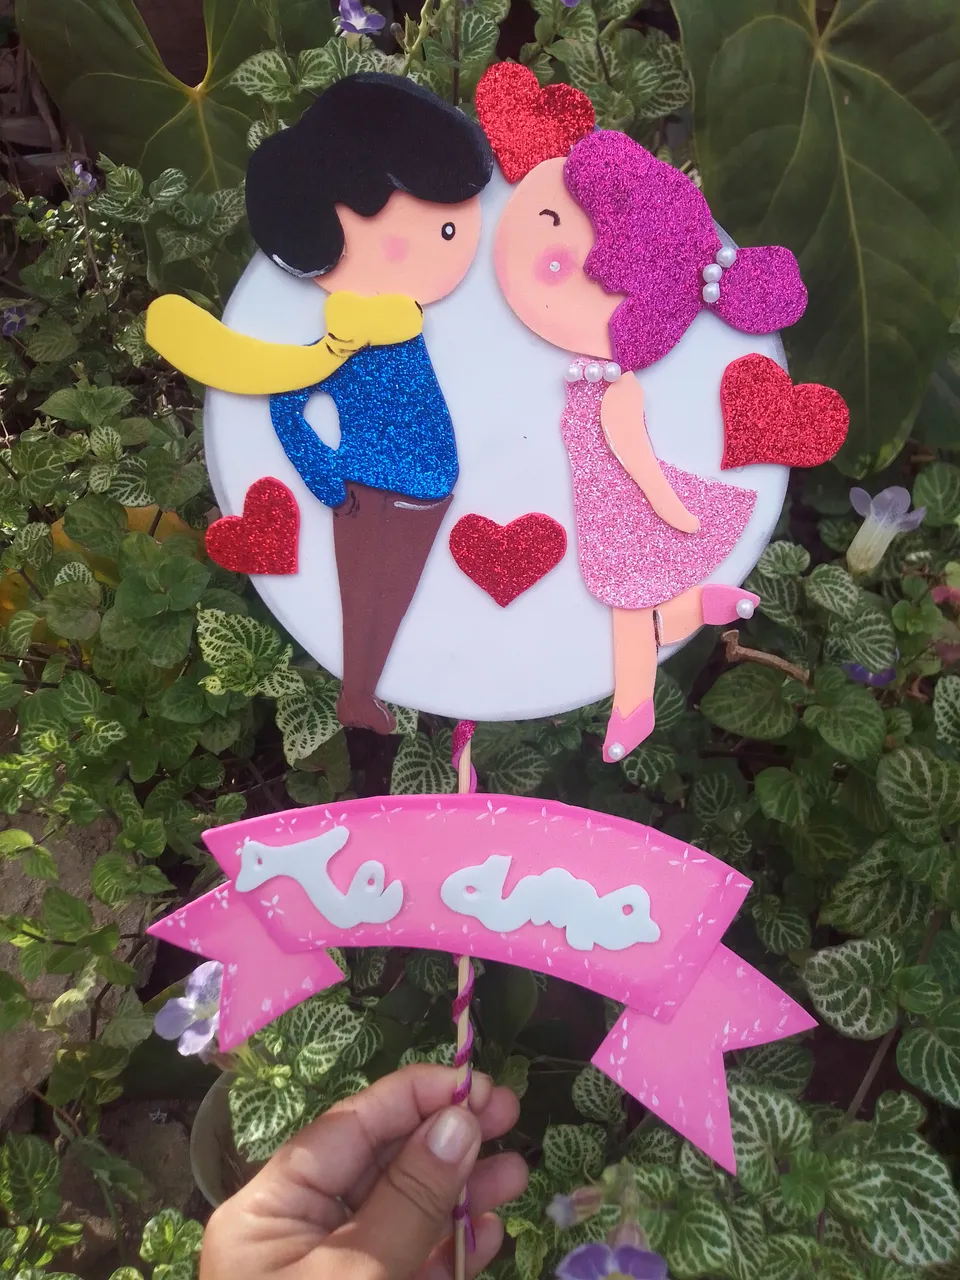
Paso 09.
Finamente le colocamos el mensaje en foami blanco que en ese momento queramos expresar.
Step 09.
Finally we put the message in white foami that we want to express at that moment.
Este detalle puedes acompañarlo con un dulce u otro obsequio y sorprender aún más a esa persona que amas.
You can accompany this detail with a sweet or other gift and surprise that person you love even more.
Amigos esta fue mi manualidad por el dia de hoy, esperando que sea de su agrado.
Friends this was my craft for today, hoping you like it.
Gracias por su linda visita a mi publicación!
Dios te bendiga y Dios te guarde! Cuídense mucho! Te mando un fuerte abrazo desde la distancia, agradezco todo tu apoyo, hasta la próxima idea!
God bless you and God keep you! Take care! I send you a big hug from a distance, I appreciate all your support, until the next idea!
All photographs are my own, captured with my Smooth 6.5 cell phone.