HOLA AMIGOS!

Feliz día, espero se encuentren bien y llenos de alegría! Mi trabajo manual de hoy es una linda y decorativa Anna de la película de Frozen ya que mi sobrina está de cumpleaños y le encanta este personaje. Está princesa realmente es muy bonita, así que no te pierdas el paso a paso de cómo realizar una de foami para las fiestas de niñas con esta temática, te invito a que me acompañes hasta el final.
Happy day, I hope you are well and full of joy! My craft today is a cute and decorative Anna from the movie Frozen since my niece is celebrating her birthday and she loves this character. This princess is really very pretty, so don't miss the step by step of how to make a foami for girls' parties with this theme, I invite you to accompany me until the end.
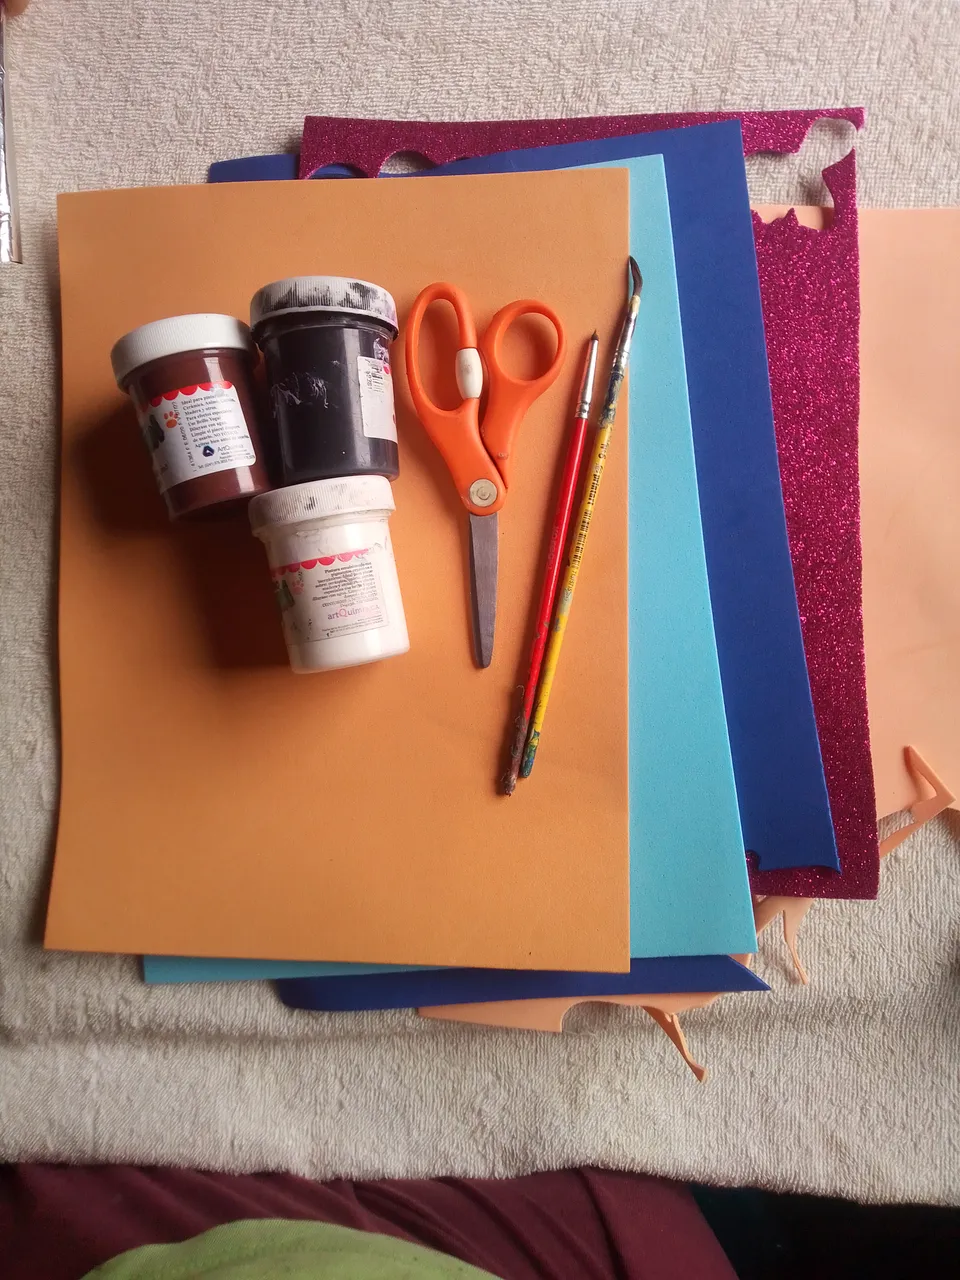
Materiales.
- Foami brillante morado y azul.
- Foami normal color carne, azul, marrón y blanco.
- Pintura marrón, blanca y negra.
- Tijera.
- Palillo de altura.
- Pincel fino.
- Silicón.
- Lápiz.
Materials.
- Purple and blue shiny foami.
- Foami normal flesh color, blue, brown and white.
- Brown, white and black paint.
- Scissor.
- Height sticks.
- Fine brush.
- Silicone.
- Pencil.
Paso a paso.
Step by Step.
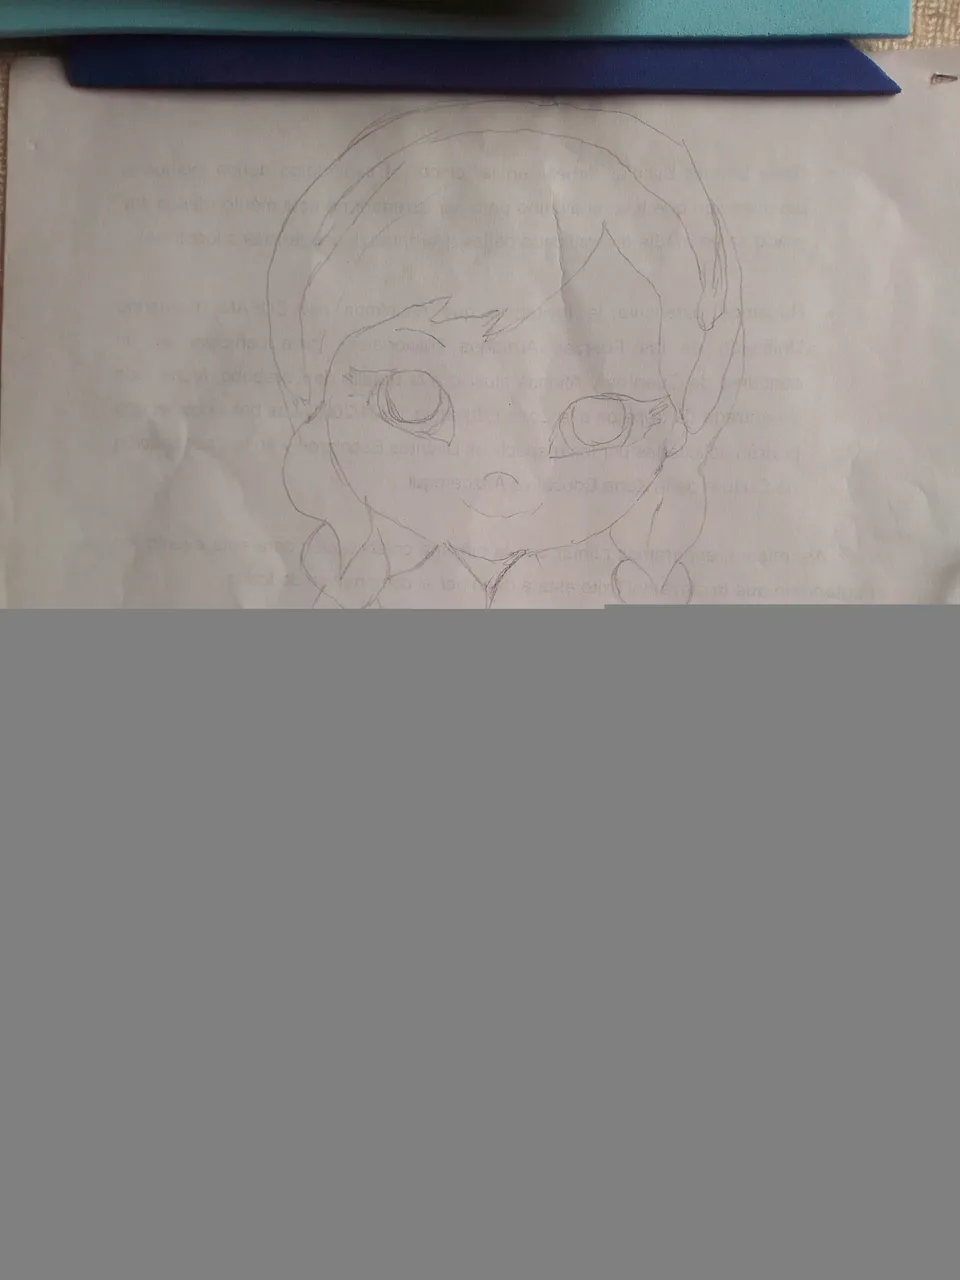
Para comenzar nuestro trabajo manual, dibujamos el diseño que más nos guste de la princesa sobre una hoja de papel, en mi caso dibujé la princesa Anna bebé.
To start our manual work, we draw the design that we like the most of the princess on a sheet of paper, in my case I drew the baby princess Anna.
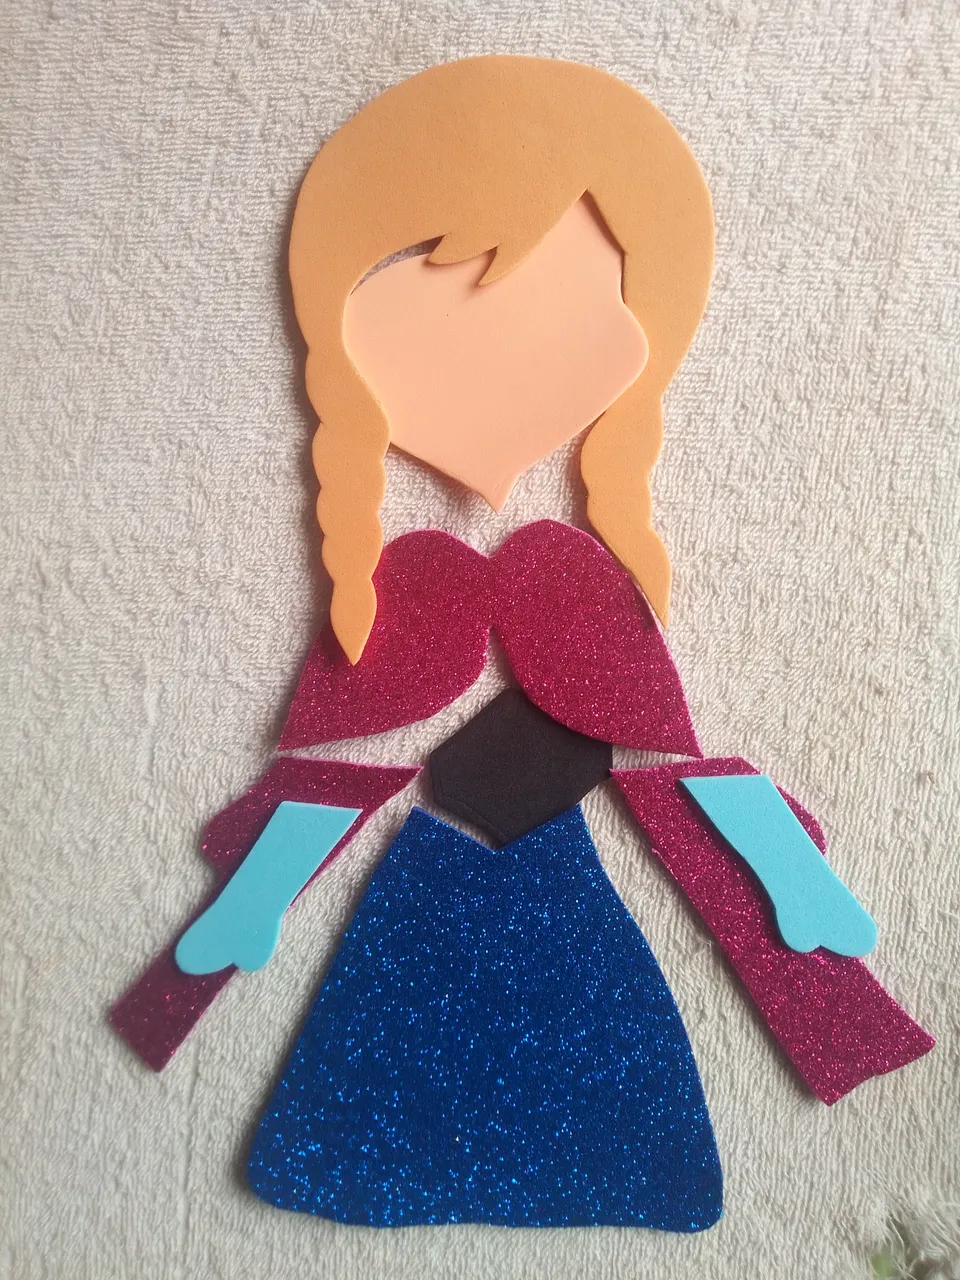
Luego cortamos todas las partes y marcamos en el foami según el color que corresponda, recuerda colocar las piezas en foami brillante brillante al revés.
Then we cut all the parts and mark the foami according to the corresponding color, remember to place the pieces in shiny foami face down.
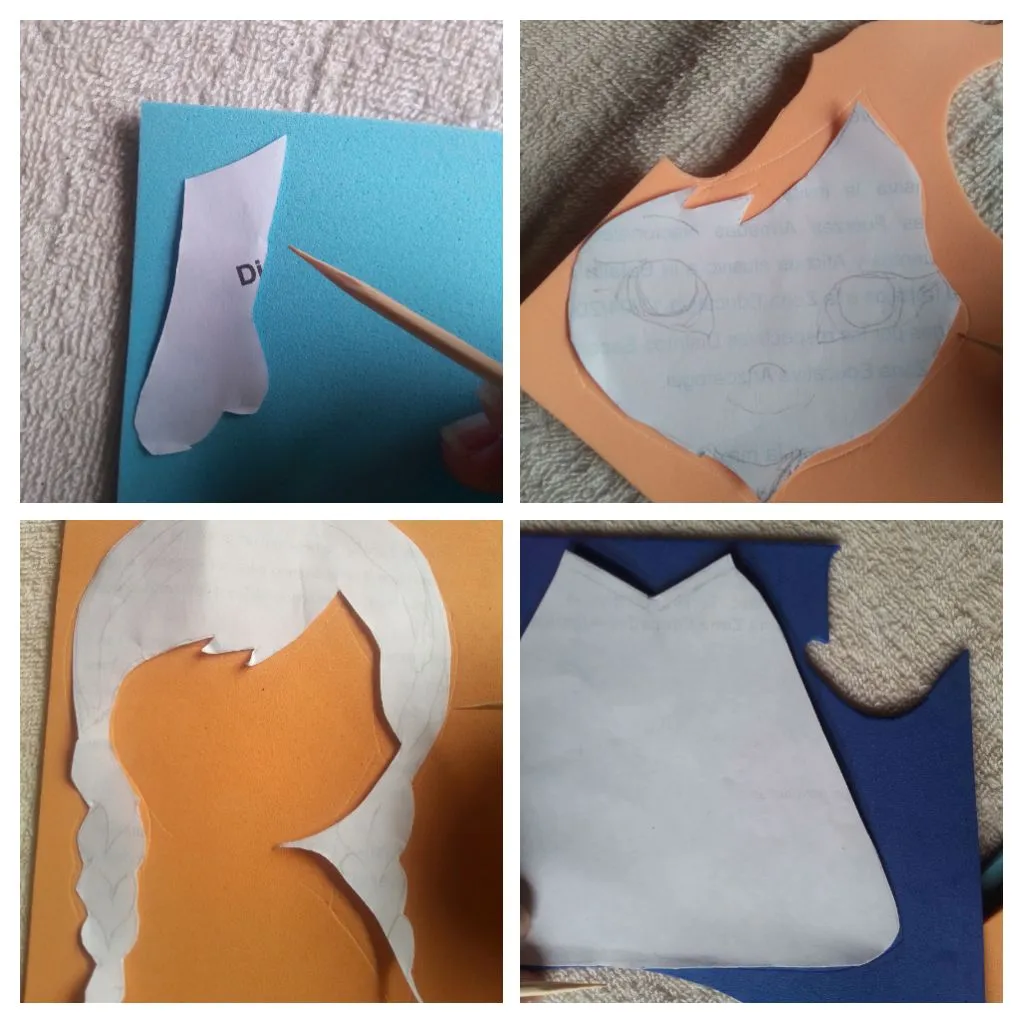
Luego cortamos y separamos cada parte de la cara y el traje de la princesa Anna.
Then we cut and separate each part of Princess Anna's face and outfit.
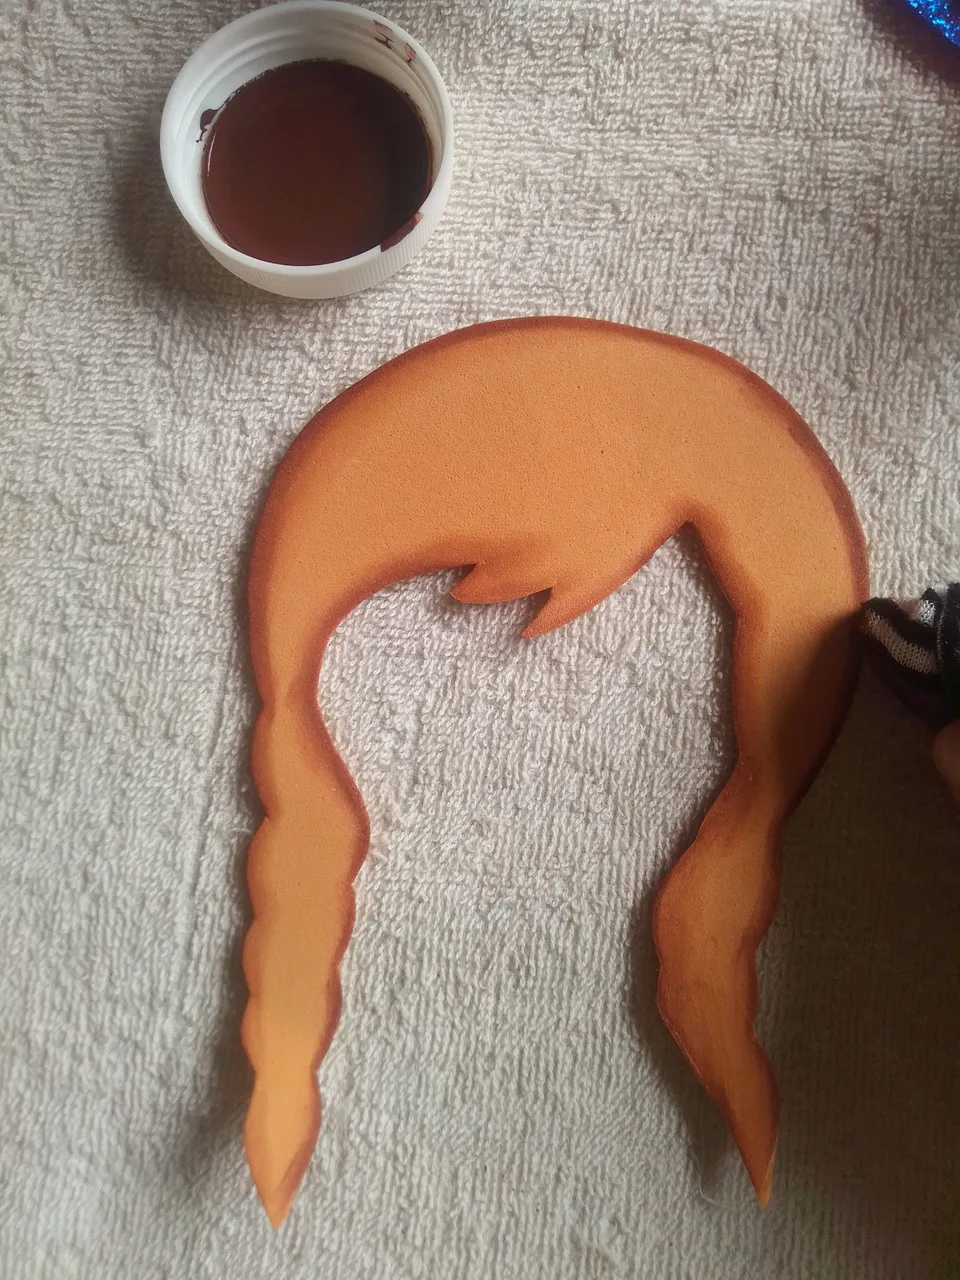
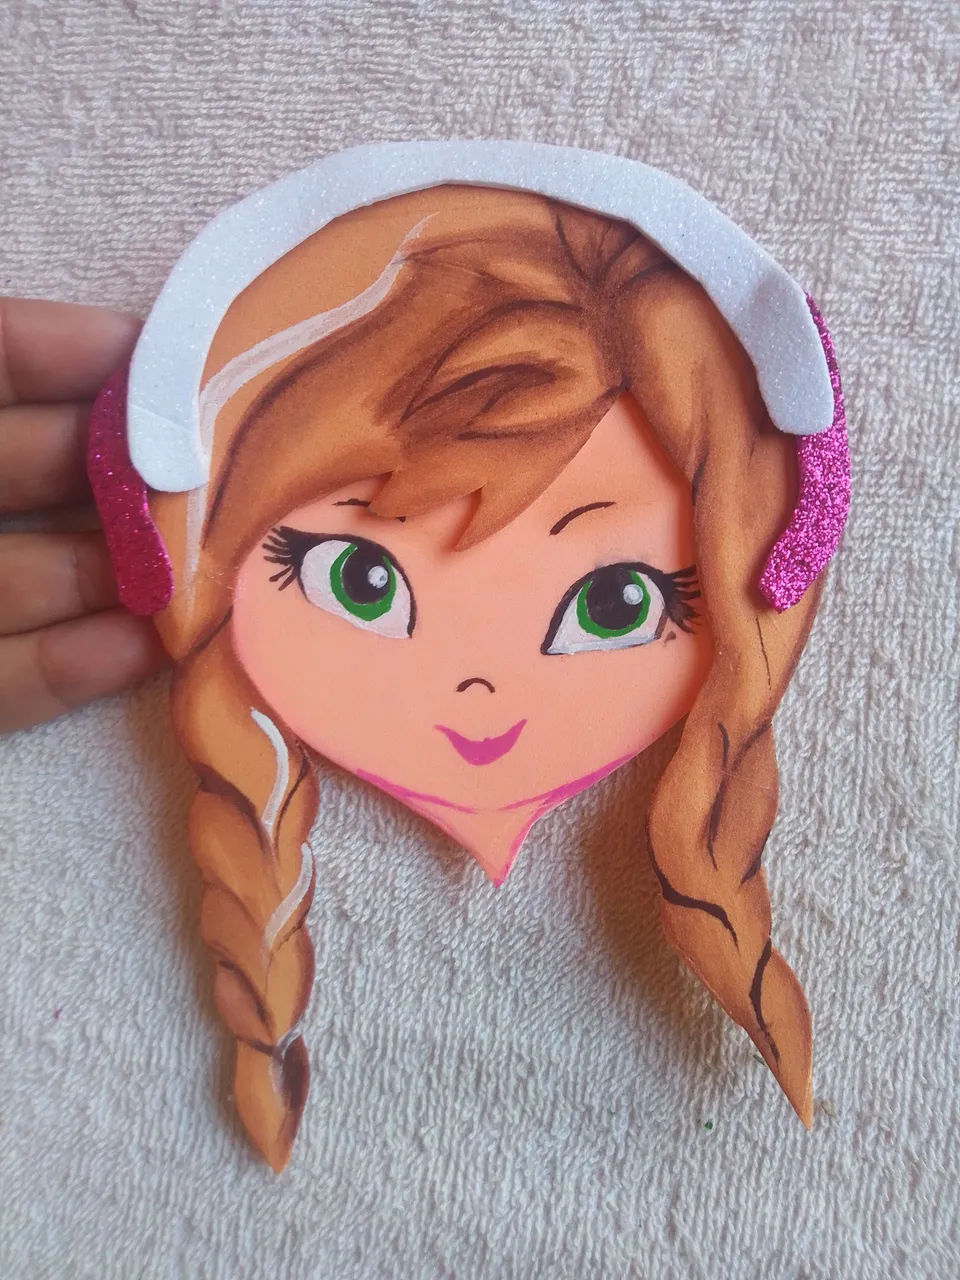
Comenzamos a difuminar los bordes del cabello con pintura marrón oscuro.
We begin to blur the edges of the hair with dark brown paint.
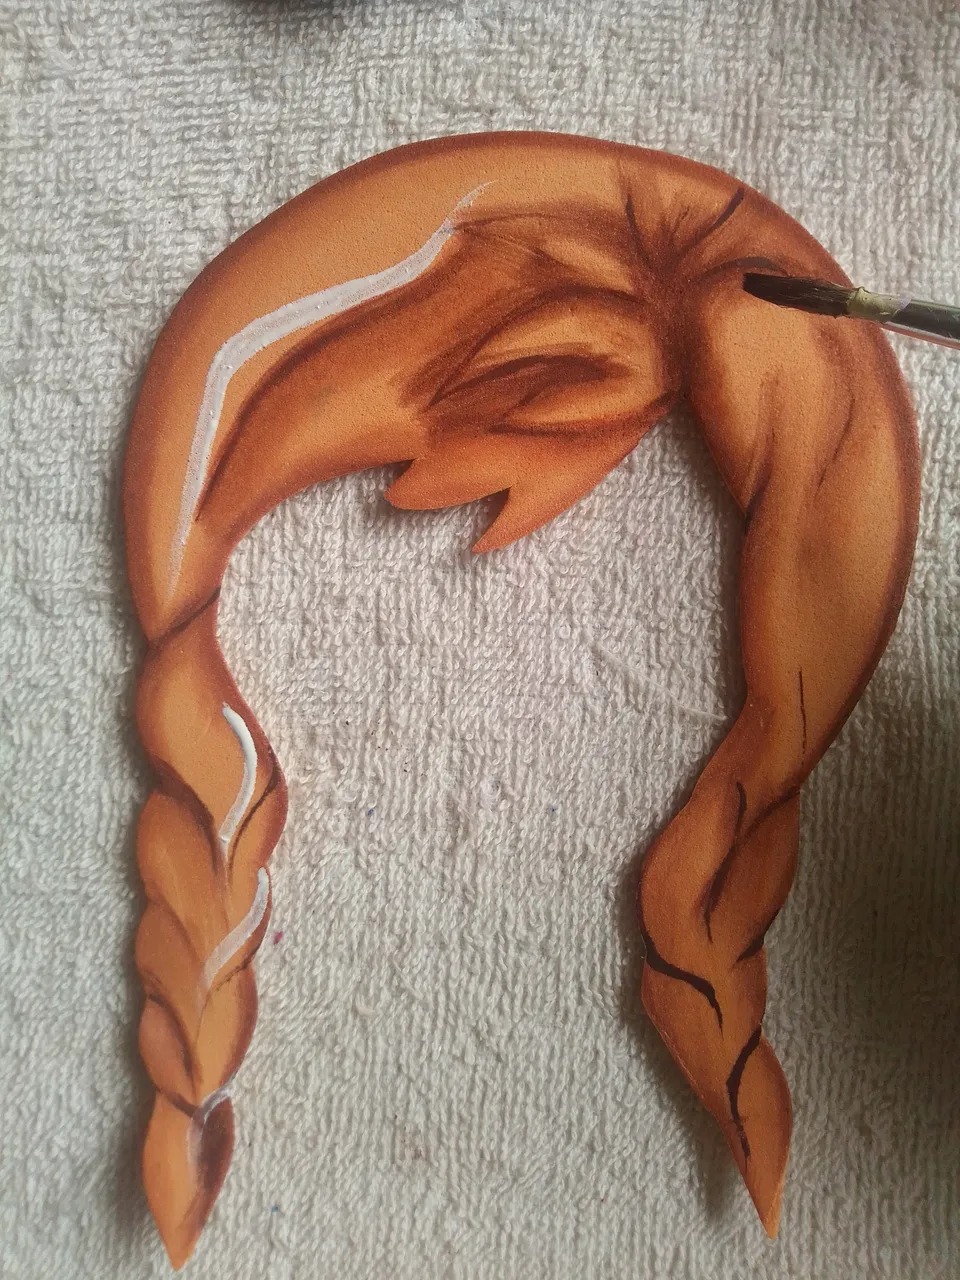
Con un pincel fino y pintura marrón haremos los detalles de cabello como la pollina y las trenzas, colocamos pintura negra para darle más profundidad al cabello.
With a fine brush and brown paint we will make the details of the hair like the ponytail and the braids, we put black paint to give the hair more depth.
Luego dibujamos sus ojos grandes con pintura negra, blanca y poco de verde. Este paso lo haremos con mucho cuidado tratando de hacerlo lo mejor posible, ya que los ojos es la parte más difícil de pintar..
Then we draw his big eyes with black, white and a little green paint. We will do this step very carefully trying to do it as well as possible, since the eyes are the most difficult part to paint..

Continuamos dibujando su nariz y boca y entonces se ver de esta manera.
We continue drawing his nose and mouth and then he stays like this.
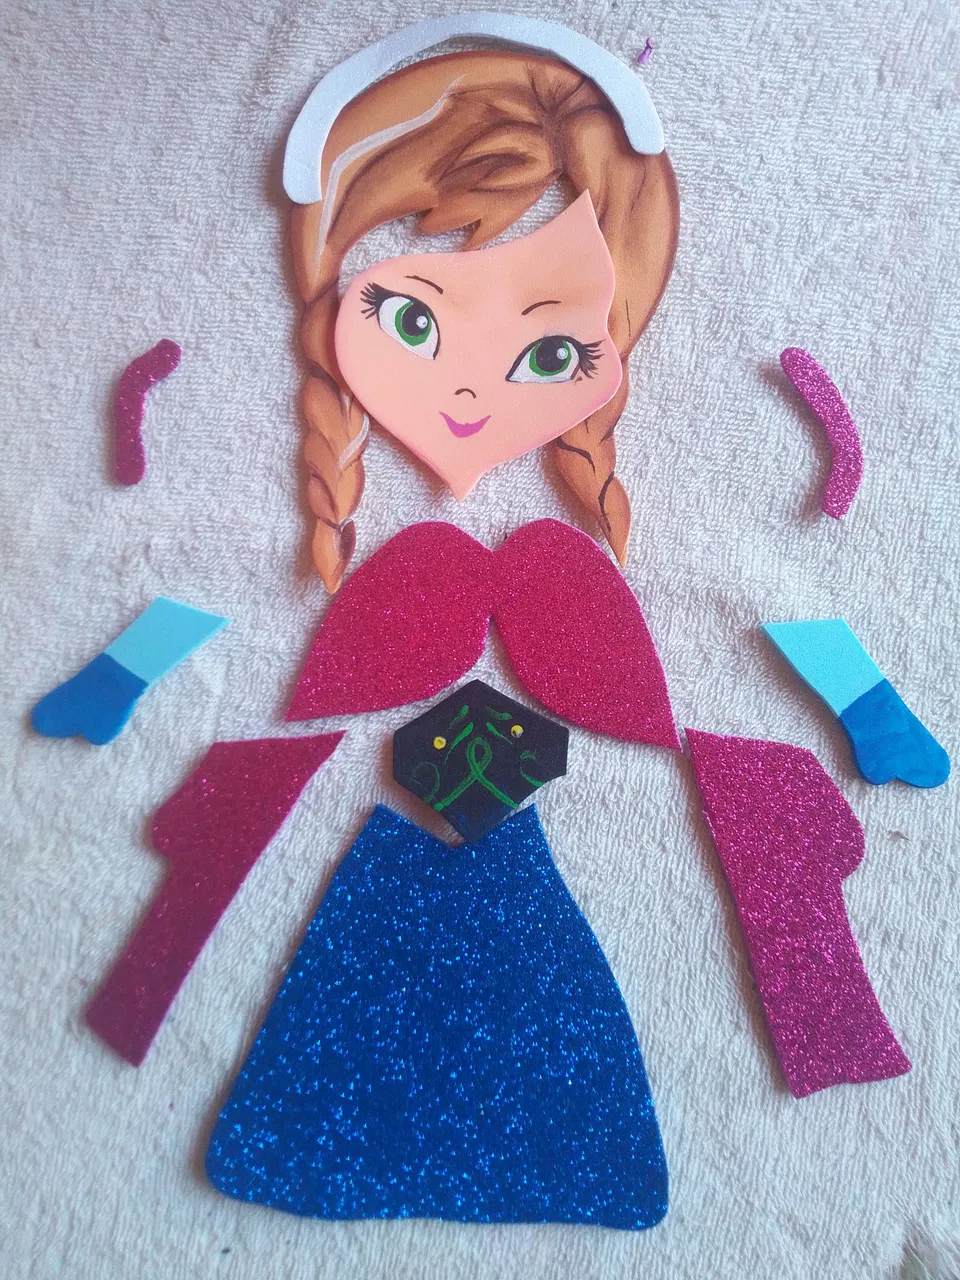
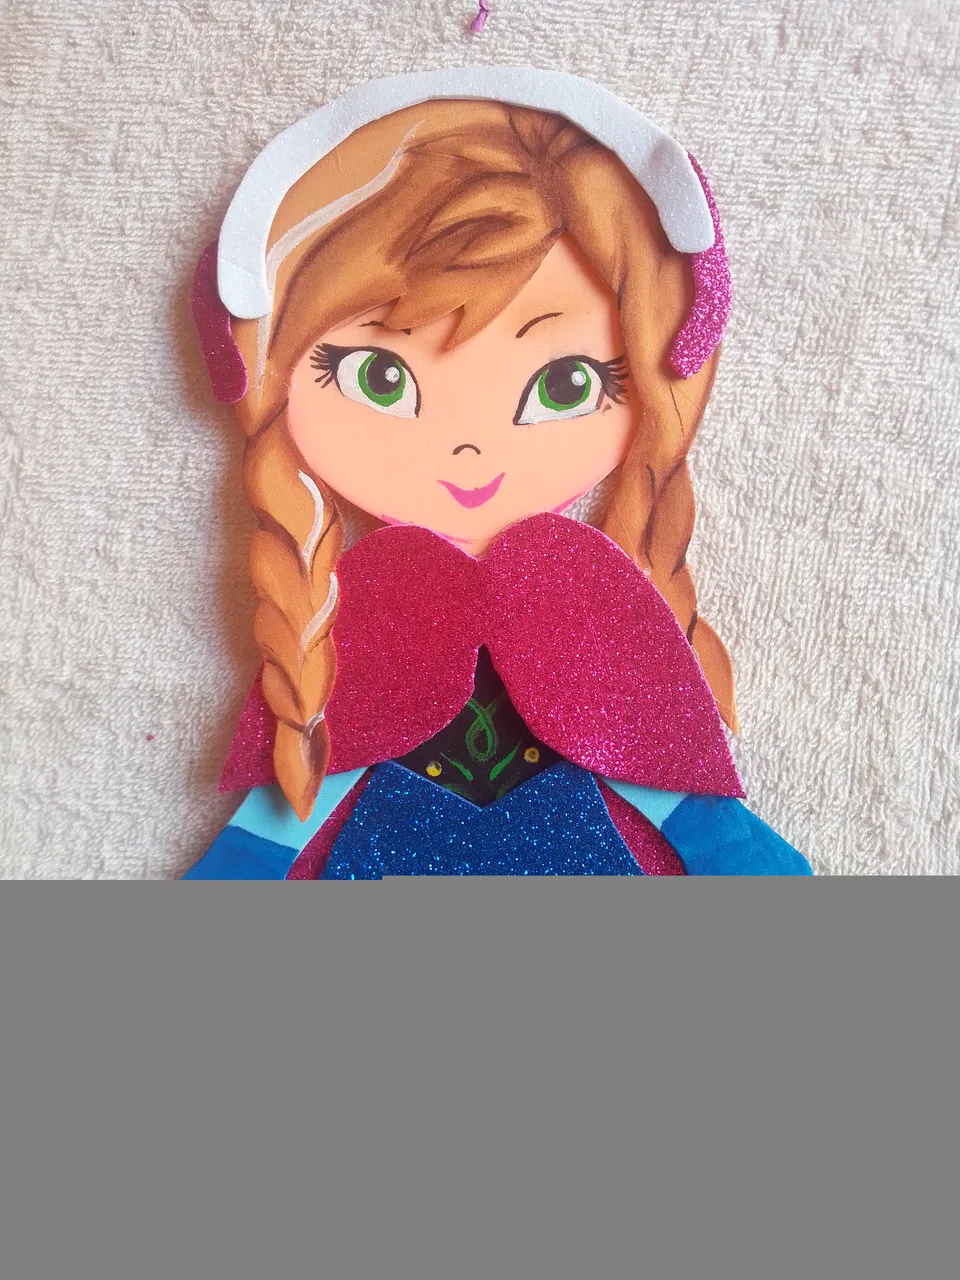
Ya con nuestra partes cortadas y pintadas comenzaremos a armar nuestra princesa, y pegamos con silicon la cara al cabello.
With our cut and painted parts, we will start to assemble our princess, and we will glue the face to the hair with silicone.
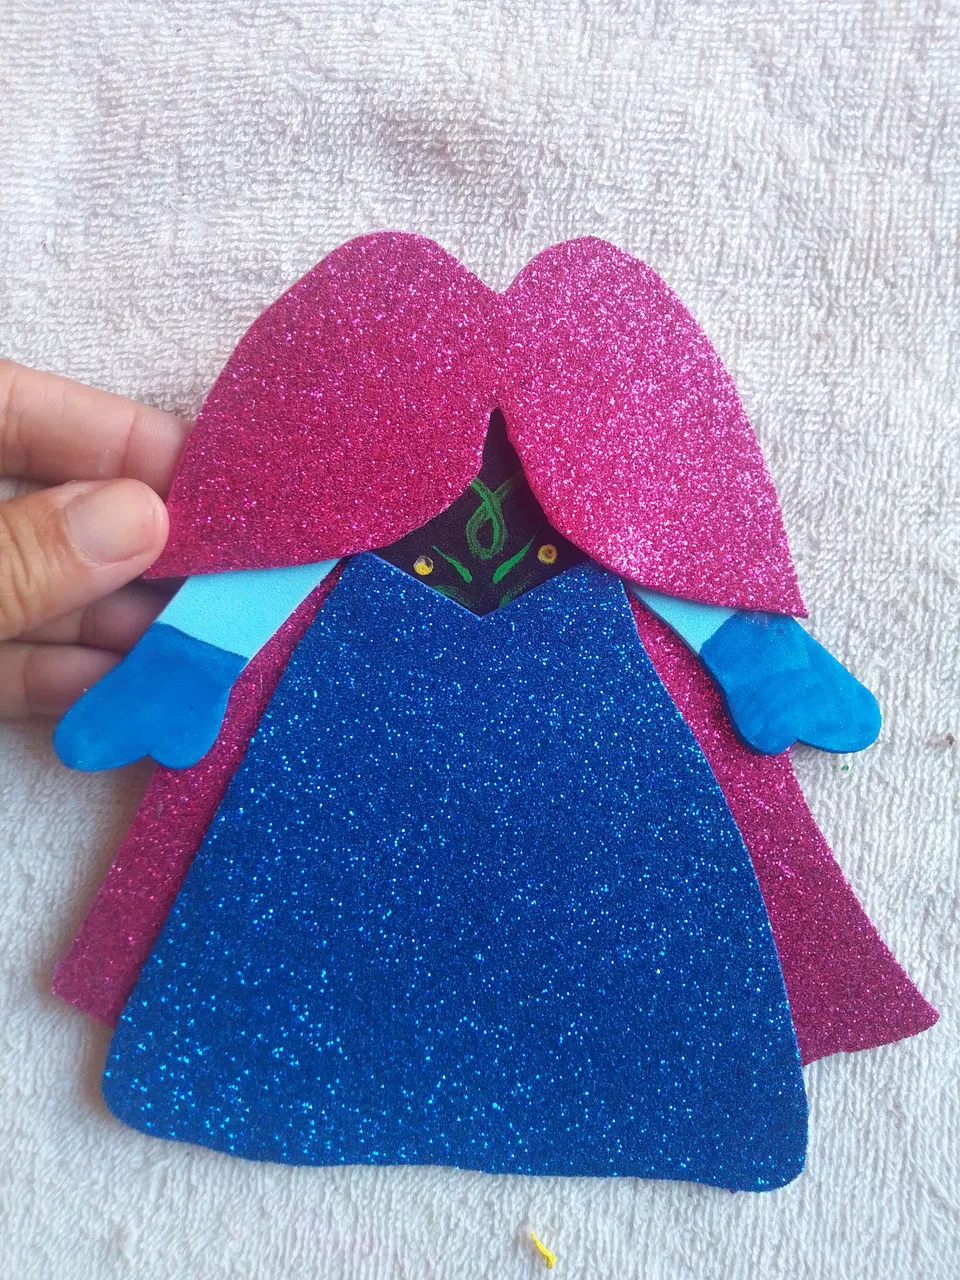
Luego pegamos las partes del traje según el diseño original.
Then we glue the parts of the suit according to the original design.
Y finalmente pegamos ambas partes anteriores.
And finally we paste the two previous parts.
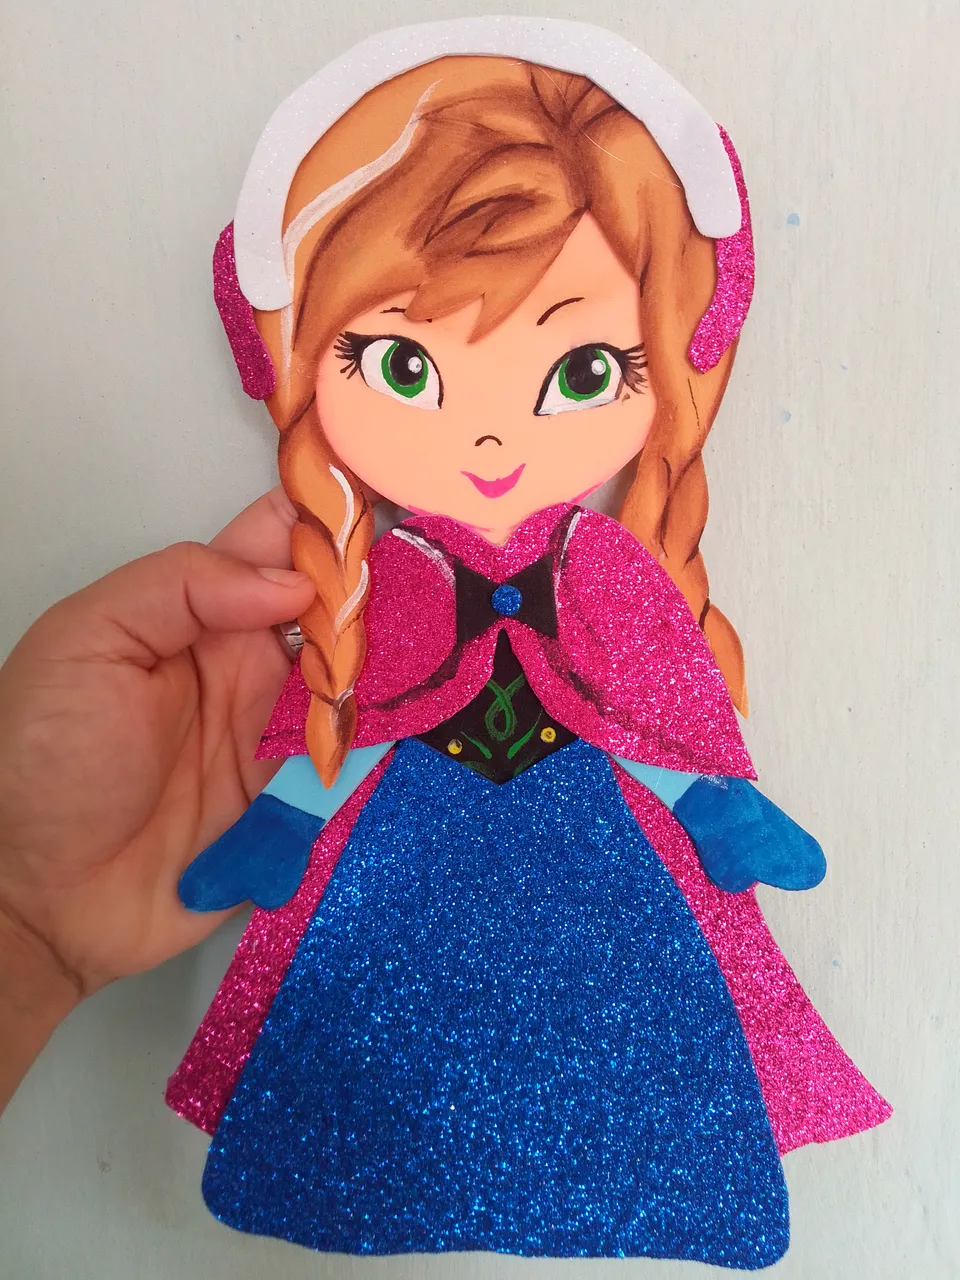
Resultado final!
Este es resultado mis queridos amigos, está princesa se verá muy hermosa dónde decidas colocarla.
This is the result my dear friends, this princess will look very beautiful wherever you decide to place her.
Gracias por tu linda vista a mi publicación!
Thank you for your nice view of my post!
Que Dios te regale un día lleno de bendiciones, si te ha gustado esta idea no olvides dejar tu comentario y decirme que te parece, una vez más agradezco todo el apoyo, hasta la próxima idea!.
May God give you a day full of blessings, if you liked this idea, don't forget to leave your comment and tell me what you think, once again I appreciate all the support, until the next idea!.
Dream big, no matter how low you start!
All photographs are my own, captured from my Smooth 6.5 cell phone and edited in PicsArt.