Holis gente bonita|Hello beautiful people🥰
Mi sueño es un día no muy lejano tener mi propio emprendimiento de arte, es algo que siento muy lejano y a veces hasta imposible por el hecho de que no tengo experiencia y apenas estoy en la etapa de aprendizaje, pero dar el primer paso ya es avanzar la mitad del camino, así que vamos bien 🥰 es por eso que poco a poco quiero ir aprendiendo varias cosas, entre ellas hacer flores, por eso en esta ocasión les traigo este post donde les cuento como aprendí una nueva técnica para mi, de hacer rosas, esperó que les guste. 🌹😘
My dream is one day not too far away to have my own art business, it is something that I feel very far away and sometimes even impossible because I have no experience and I'm just in the learning stage, but taking the first step is already half way, so we are doing well 🥰 that's why little by little I want to learn several things, including making flowers, so this time I bring you this post where I tell you how I learned a new technique for me, to make roses, I hope you like it. 🌹😘

En un post anterior les compartí unas rosas que hice para el día de las madres, desde ese día me propuse aprender nuevas técnicas, a pesar de que la técnica anterior esta bien y las rosas quedan muy hermosas, esta técnica me gusta mucho más porqué siento que las rosas quedan mucho más estilizadas y me parece que los pétalos quedan hermosos.
In a previous post I shared with you some roses I made for Mother's Day, since that day I decided to learn new techniques, although the previous technique is fine and the roses are very beautiful, I like this technique much more because I feel that the roses are much more stylized and I think the petals are beautiful.
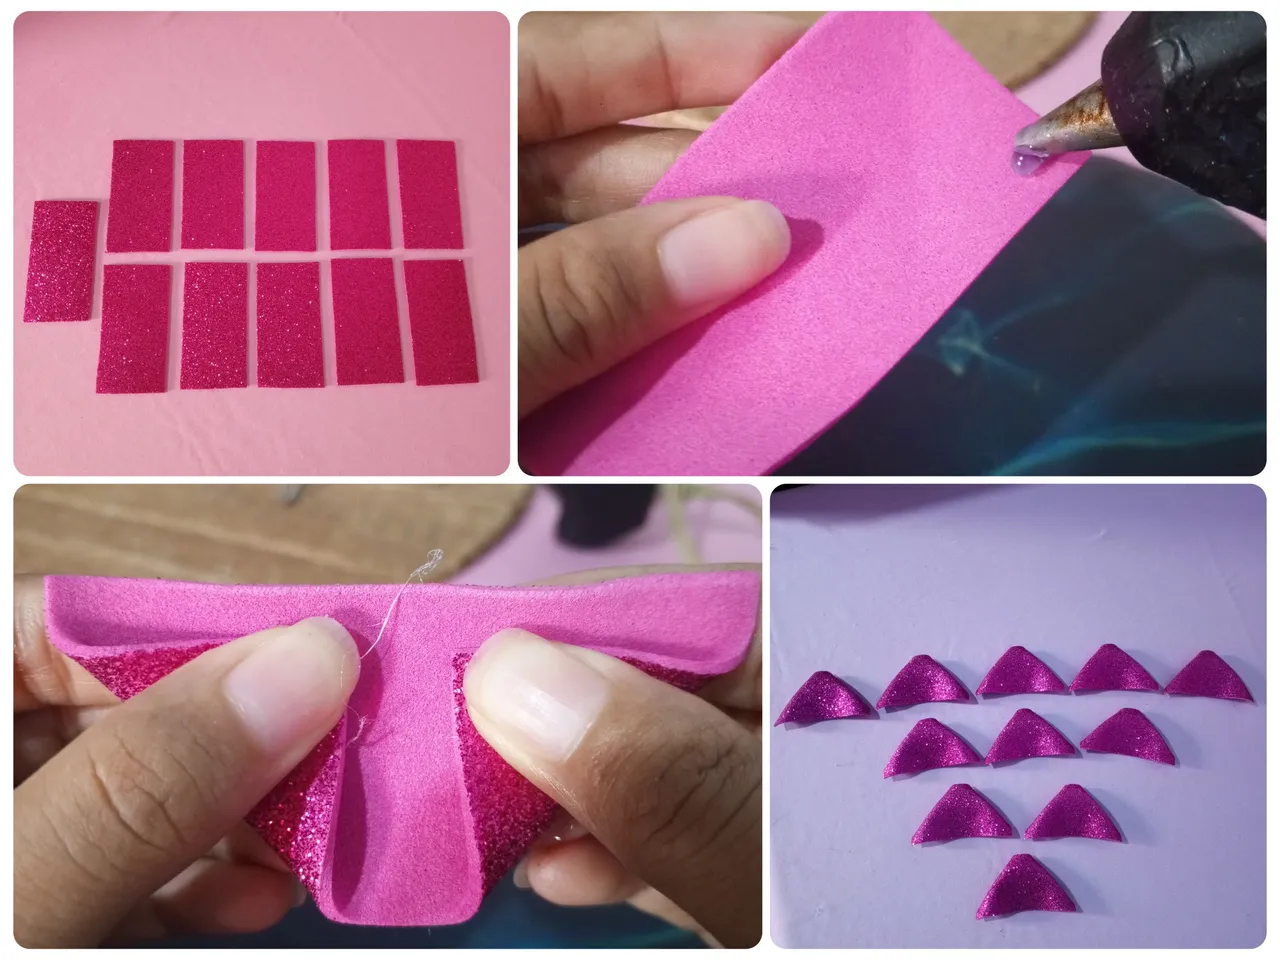
Para esta técnica es necesario picar 11 piezas en foami de 4x8 Cm. A cada uno de esos rectangulos le vamos doblar las esquinas hacia adentro, como se pued ver la imagen y las vamos a pegar con silicón, yo recomiendo silicón caliente para que pegue más rápido ya que el frío se tarda un poco más. Como oueden ver los rectangulos ahora quedan como con forma de triángulo.
For this technique it is necessary to cut 11 pieces of foami of 4x8 Cm. We are going to fold the corners of each of these rectangles inwards, as you can see in the image, and we are going to stick them together with silicone. I recommend hot silicone so that it sticks faster, as cold silicone takes a little longer. As you can see the rectangles now look like a triangle.
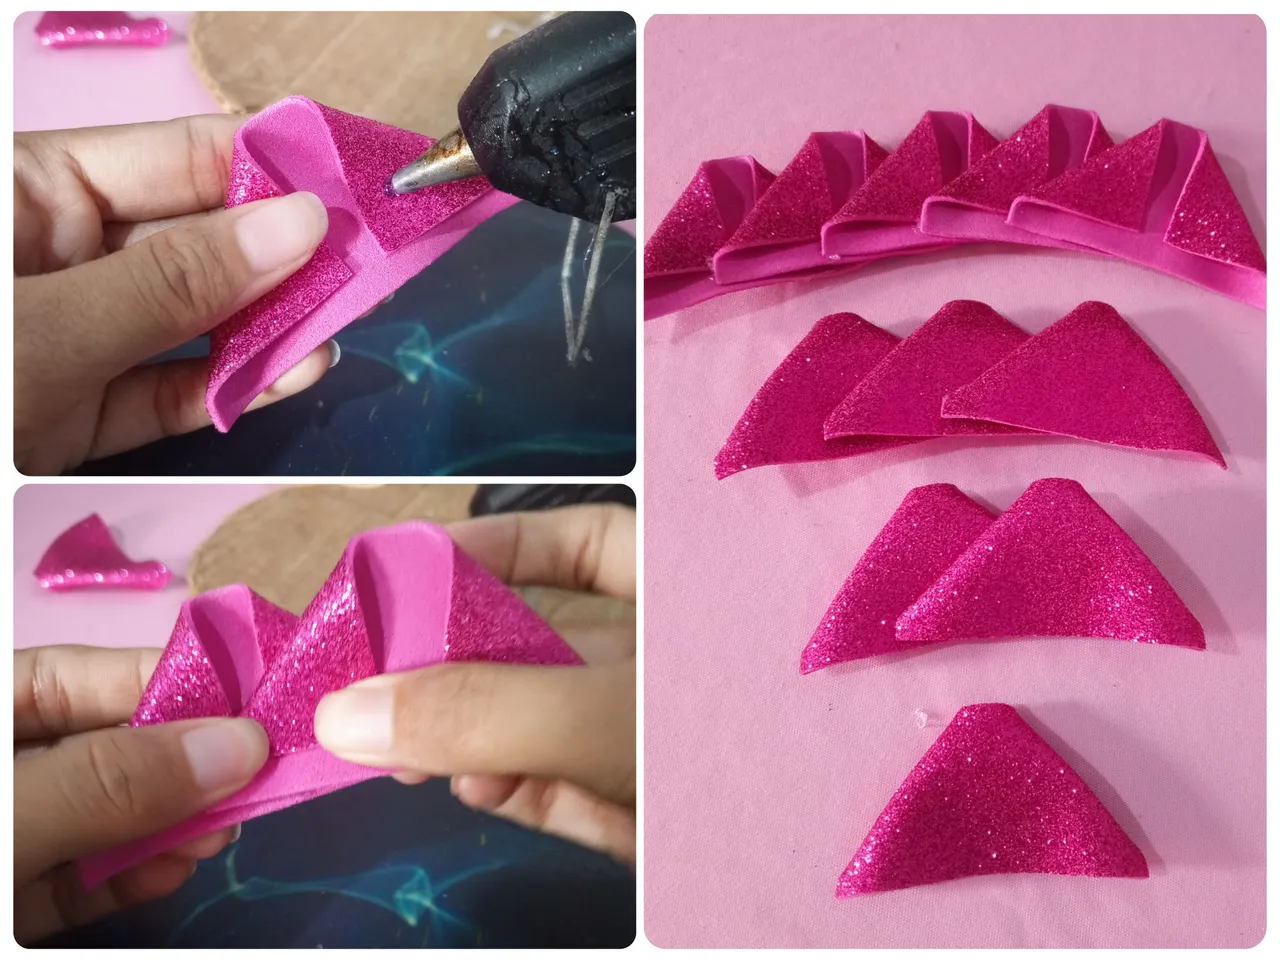
Luego pegamos una pieza a la otra, con silicón, de esta manera, 2 piezas, 3 piezas, 5 piezas y la última pieza que sería la pieza 11 la dejamos sola. En la imagen coloqué cada grupo de pétalos para que puedan entender mejor la explicación.
Then we glue one piece to the other, with silicone, in this way, 2 pieces, 3 pieces, 5 pieces and the last piece, which would be piece 11, we leave it alone. In the image I have placed each group of petals so that you can better understand the explanation.
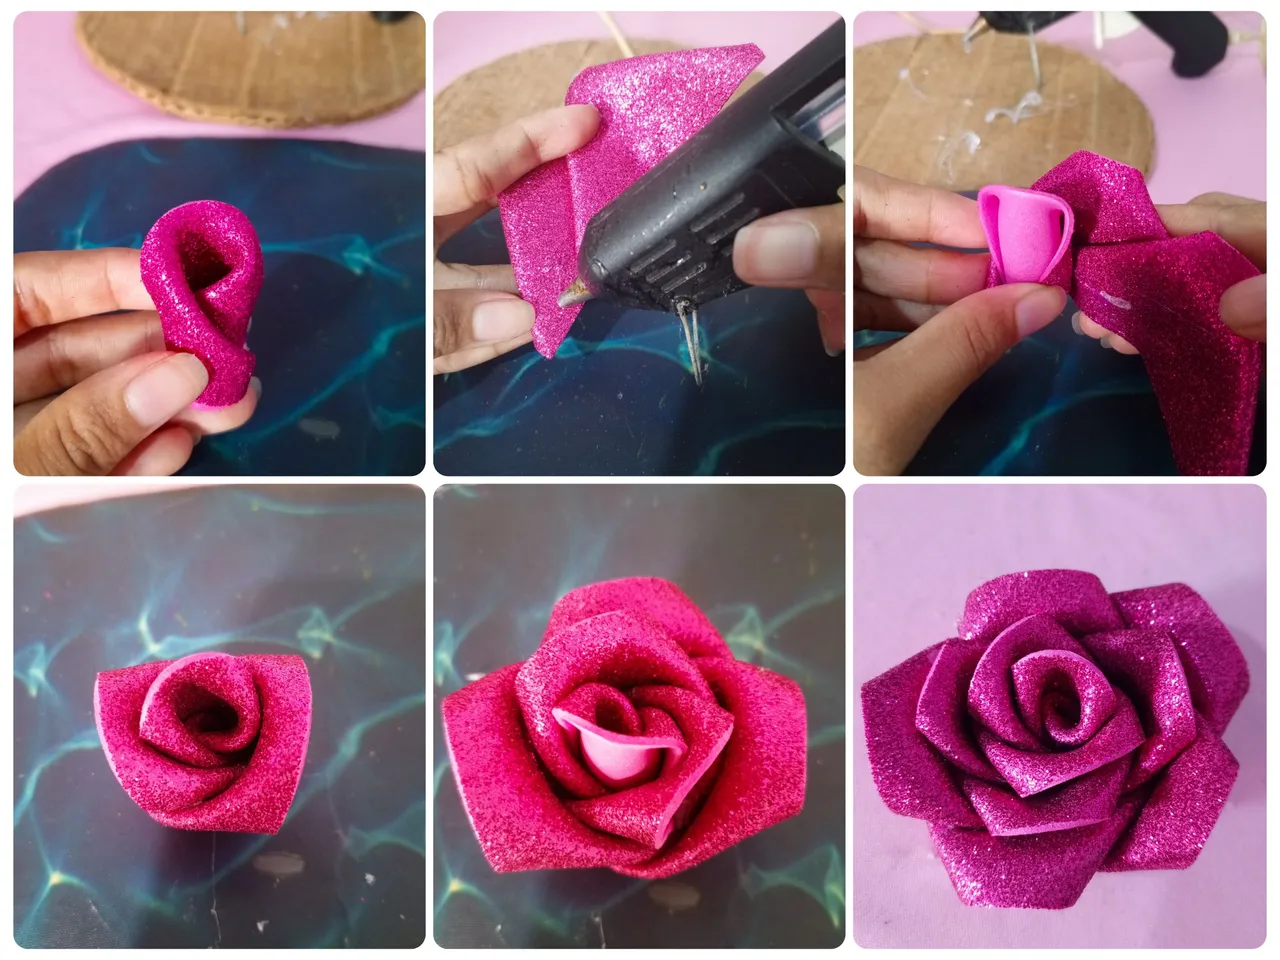
Llego el momento de comenzar a armar la rosa, para esto tome la pieza que quedo sola y la comencé a enrrollar y pega con silicón, este ser el centro de la rosa, luego tome el grupo de 2 piezas y la pegue también con silicona al rededor de el centro de la rosa. Lo mismo hice con el grupo de tres piezas y el grupo de 5 piezas, es básicamente ir poniendo cada grupo de piezas por capaz para ir formando la rosa.
It was time to start assembling the rose, for this I took the piece that was left alone and started to roll it up and glue it with silicone, this will be the centre of the rose, then I took the group of 2 pieces and also glued it with silicone around the centre of the rose. The same thing I did with the group of three pieces and the group of 5 pieces, it's basically putting each group of pieces in a row to form the rose.
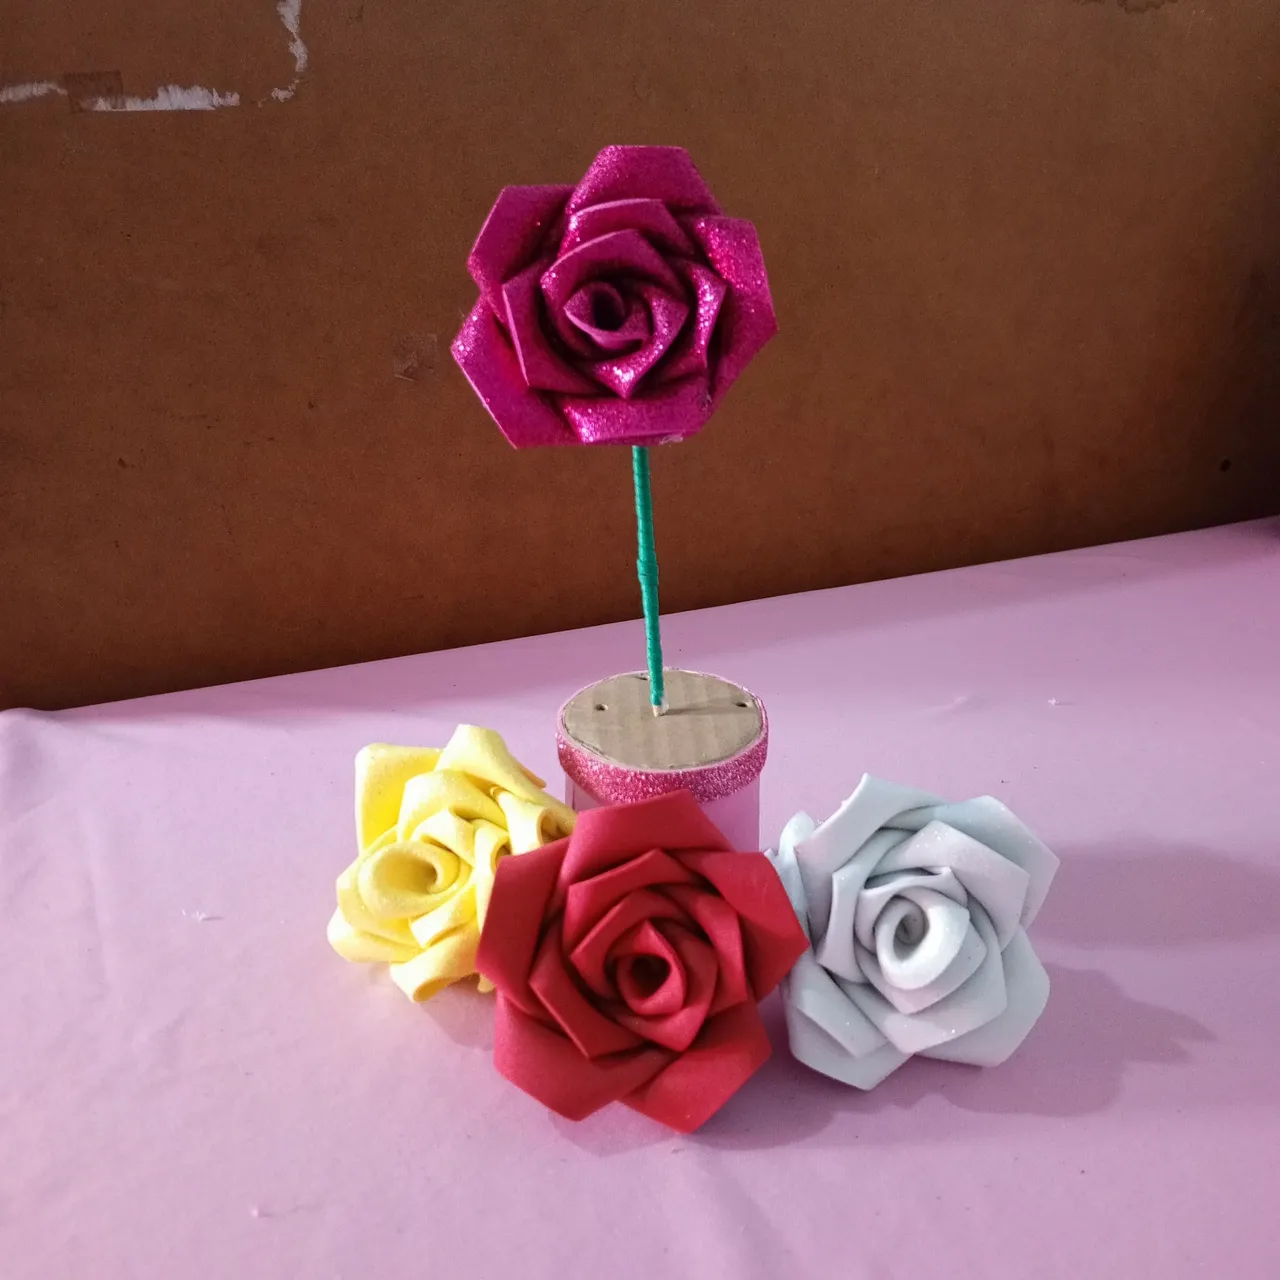
Y este fue el resultado, para no presentar la rosa tan simple, lo que hice fue forrar un palillo de altura con foami verde para simular el tallo de la rosa.🌹
And this was the result, so as not to present the rose so simply, what I did was to line a tall stick with green foami to simulate the stem of the rose.🌹
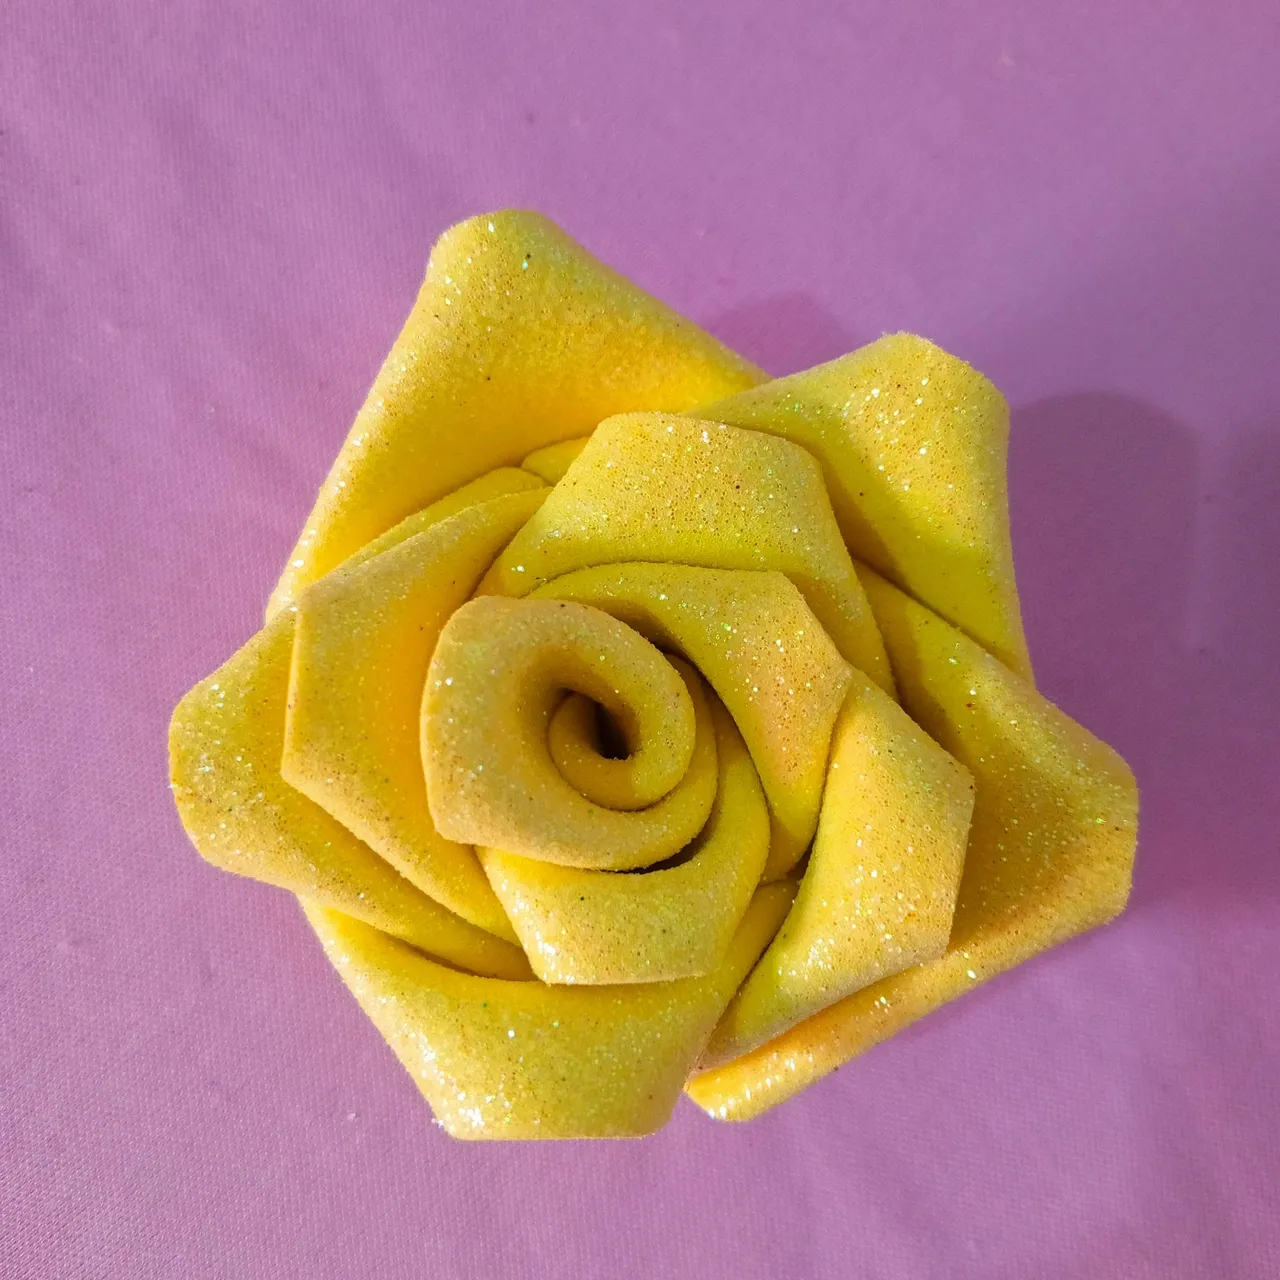
Ahor quiero comentarles un poco sobre mi experiencia aprendiendo a hacer estas rosas, la rosa que les muestro en este post no es la primera que hice más bien fue la cuarta, la primera que hice fue esta amarilla y la verdad es muy cómica porque olvide ponerle el grupo de 3 piezas 🤣 pegue el de 2 y luego el de 5 y la rosa se veía extraña y no sabía por qué hasta que ví la pieza faltante en la mesa y estalle en risas, 🤣 luego la pegue, pero obviamente se ve extraña pero bueno es la primera. 🤭
Now I want to tell you a little about my experience learning how to make these roses, the rose I show you in this post is not the first one I made but it was the fourth one, the first one I made was this yellow one and the truth is very funny because I forgot to put the group of 3 pieces 🤣 I glued the 2 and then the 5 and the rose looked strange and I did not know why until I saw the missing piece on the table and I burst out laughing, 🤣 then I glued it, but obviously it looks strange but well it is the first one. 🤭

La segunda fue esta blanca y no sé porque siento que quedo peor que la amarilla, a pesar de que ahora sí pegue todas las piezas en el orden correcto, pero de los errores se aprende, gracias a esta rosa supe que error estaba cometiendo para evitarlos en la próxima flor.
The second one was this white one and I don't know why I feel it was worse than the yellow one, even though now I glued all the pieces in the right order, but you learn from mistakes, thanks to this rose I knew what mistake I was making to avoid them in the next flower.
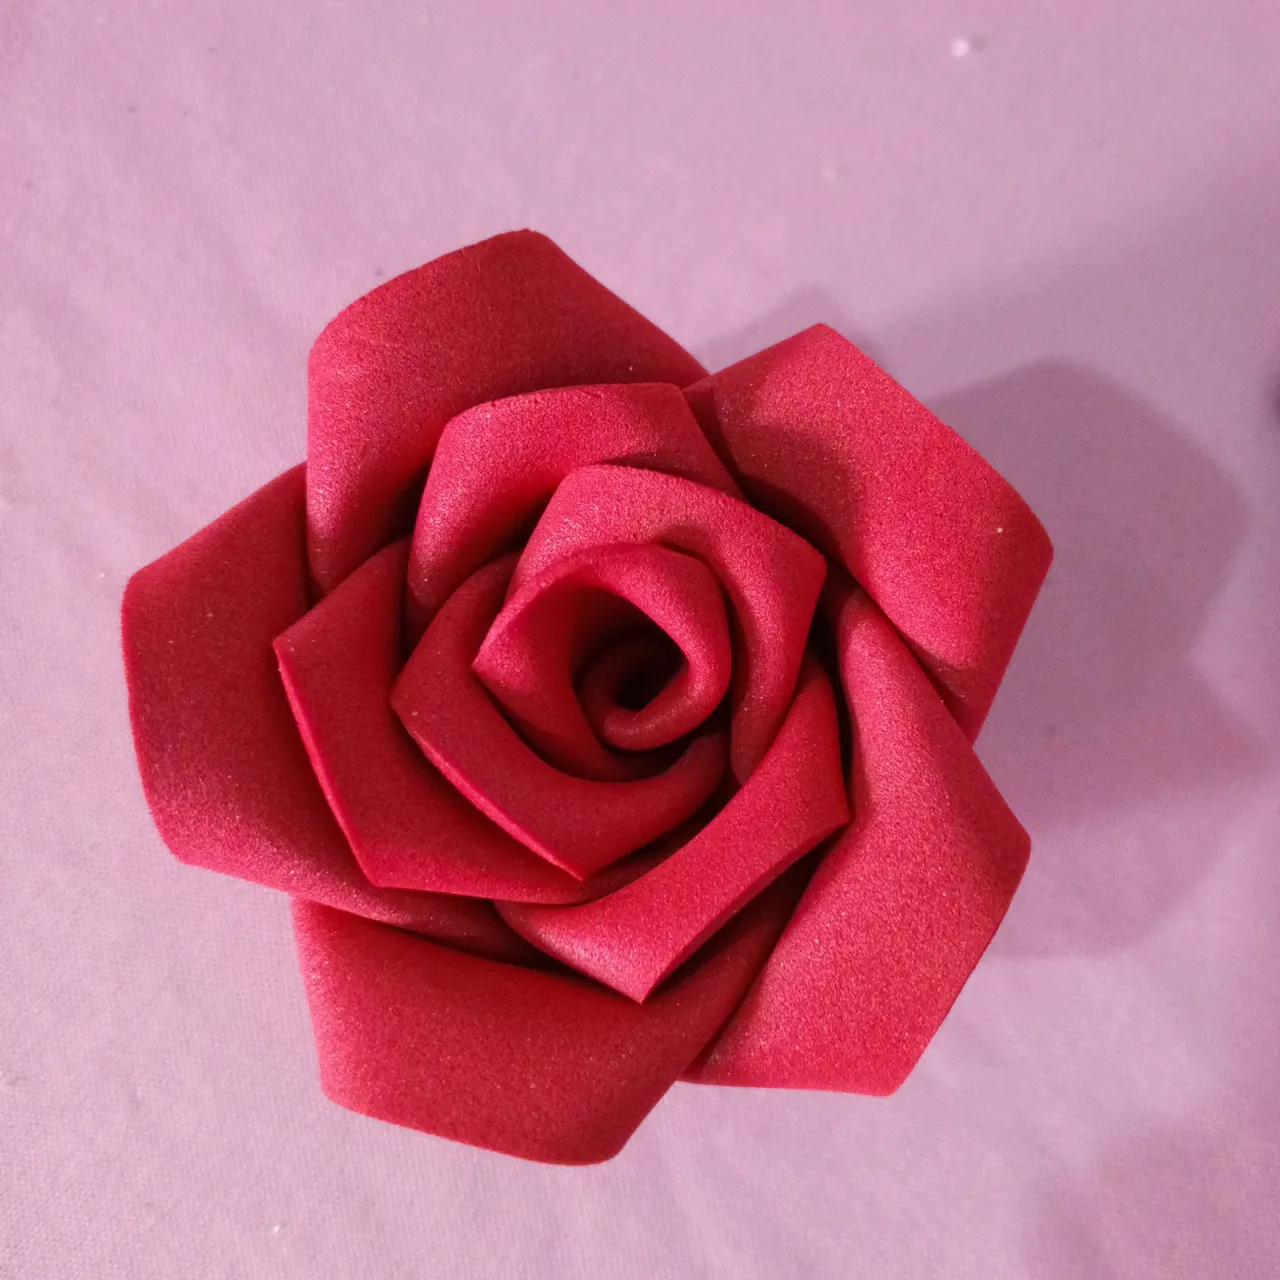
Esta hermosura es la tercera y es mi preferida 🥰 decidí hacerla con foami sencillo rojo y la verdad me enamore, aunque amo el Foami escarchado admito que lo sencillo también tiene su encanto, esta la hice con más cuidado, tratando de no comenter los mismos errores que con la blanca.
This beauty is the third one and it is my favourite 🥰 I decided to make it with simple red foami and I really fell in love with it, although I love frosted foami I admit that simple also has its charm, this one I made with more care, trying not to make the same mistakes as with the white one.
Y esto es todo por hoy, sí les gusto no olviden darle amorshito a mi post dejando un lindo comentario o dando click en el corazoncito. 💜😉😊🤭🥰
Nos vemos en un próximo post, que estén bien y Dios los bendiga, bye.🥰😘💜🌹🪷
And that's all for today, if you like me don't forget to give love to my post by leaving a nice comment or clicking on the little heart. 💜😉😊🤭🥰
See you in a next post, be well and God bless you, bye.🥰😘💜🌹🪷
Fotografías propias, tomadas con mi Tecno Spark 10 Pro editadas en incollage/ portada creada en Canva. Traducción al inglés con DeepL.
*Own photos, taken with my Tecno Spark 10 Pro edited in incollage/ cover created in Canva. Translation to English with DeepL.
