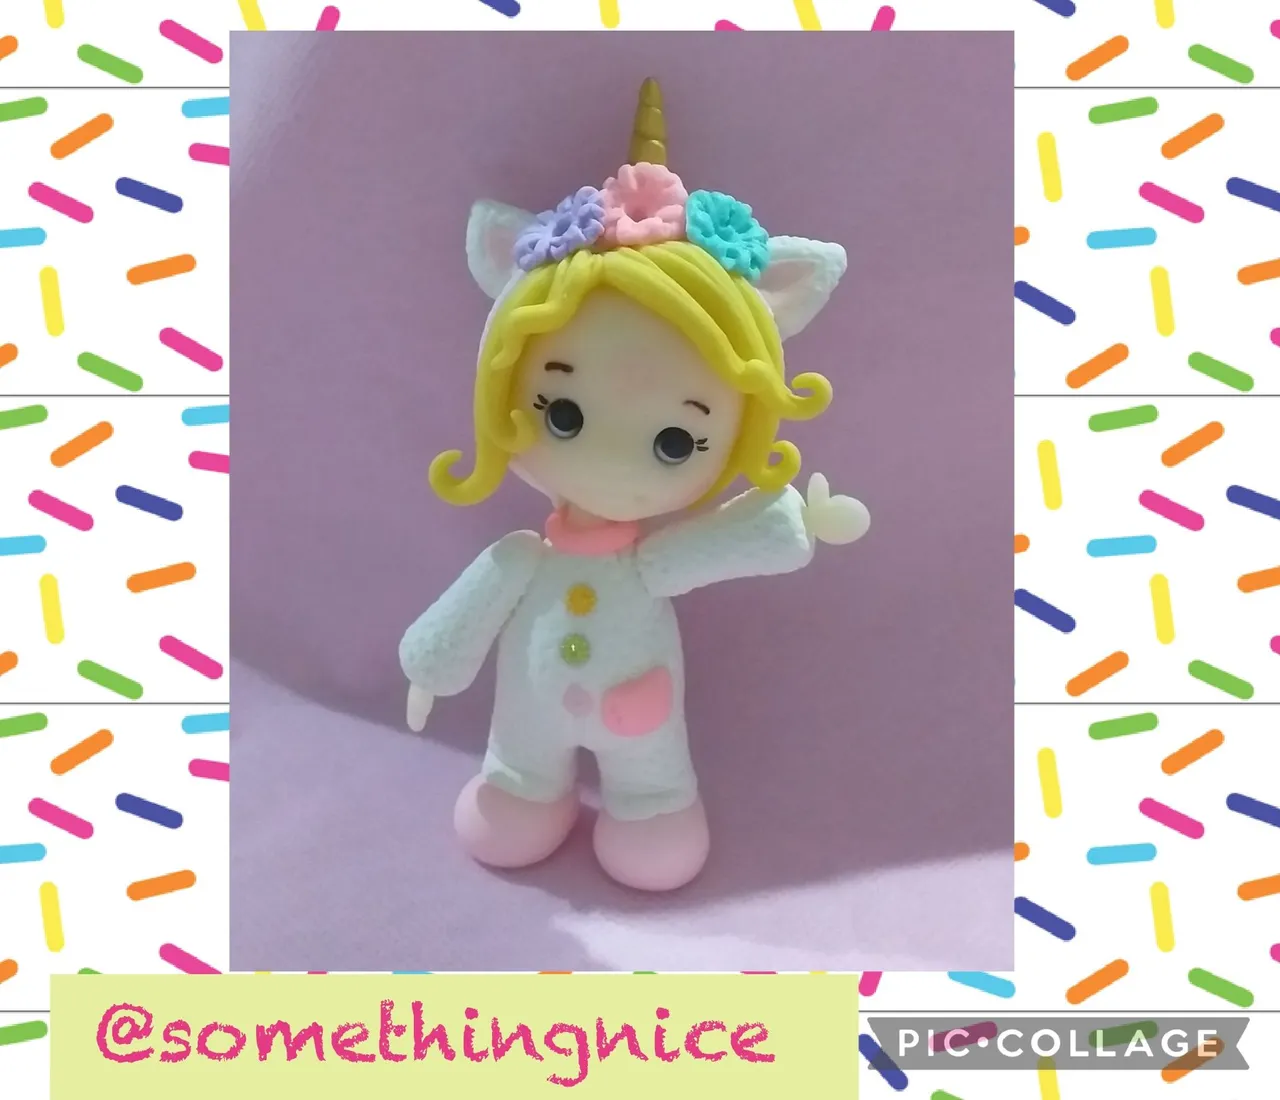
Good morning creative friends!!! Happy start to the week, I hope it is useful and you can create many beautiful things. Today I bring you a very tender work. A girl dressed as a unicorn.
Buenos días amigos creativos!!! Feliz inicio de semana, espero que sea de provecho y puedan crear muchas cosas bonitas. Hoy les traigo un trabajo muy tierno. Una niña disfrazada de unicornio.
I did this beautiful job with a very well explained video tutorial by Erica Ferrari cold porcelain from her YouTube channel.
Este hermoso trabajo lo hice con un video tutorial muy bien explicado de Erica Ferrari porcelana fría de su canal de YouTube.
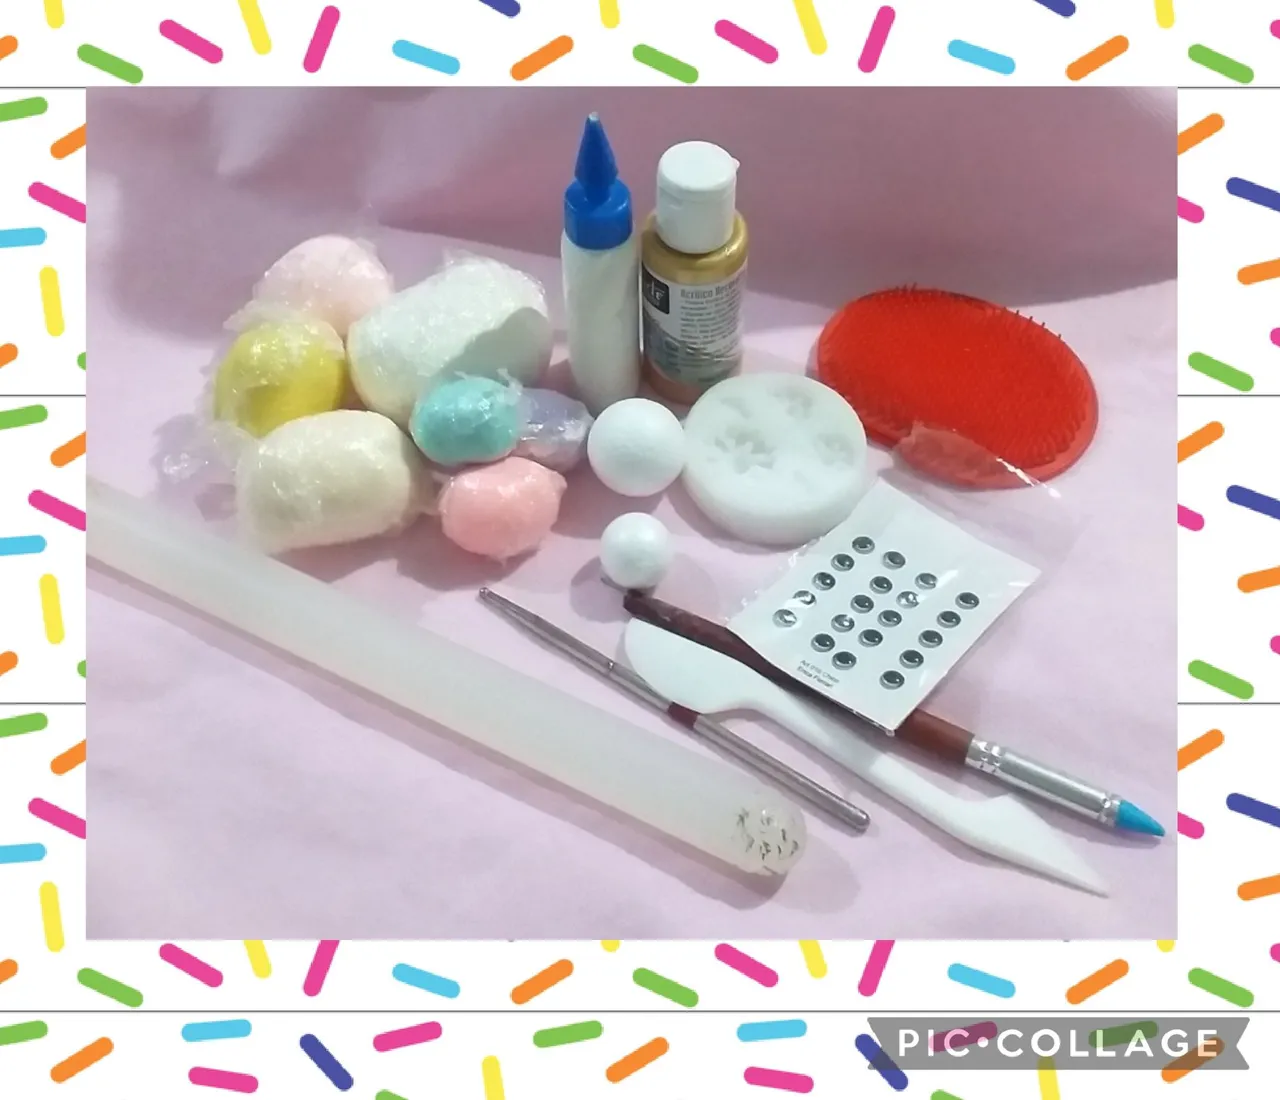
Materials
🦄 cold porcelain
🦄 vinyl glue
🦄 stakes
🦄 rolling pin
🦄 Styrofoam spheres
🦄 brush
🦄 flower mold
🦄 gold acrylic
🦄 self-adhesive eyes
Materiales
🦄 porcelana fría
🦄 cola vinilica
🦄 estecas
🦄 palo de amasar
🦄 esferas de telgopor
🦄 cepillo
🦄 molde de flores
🦄 acrílico dorado
🦄 ojos autoadhesivos
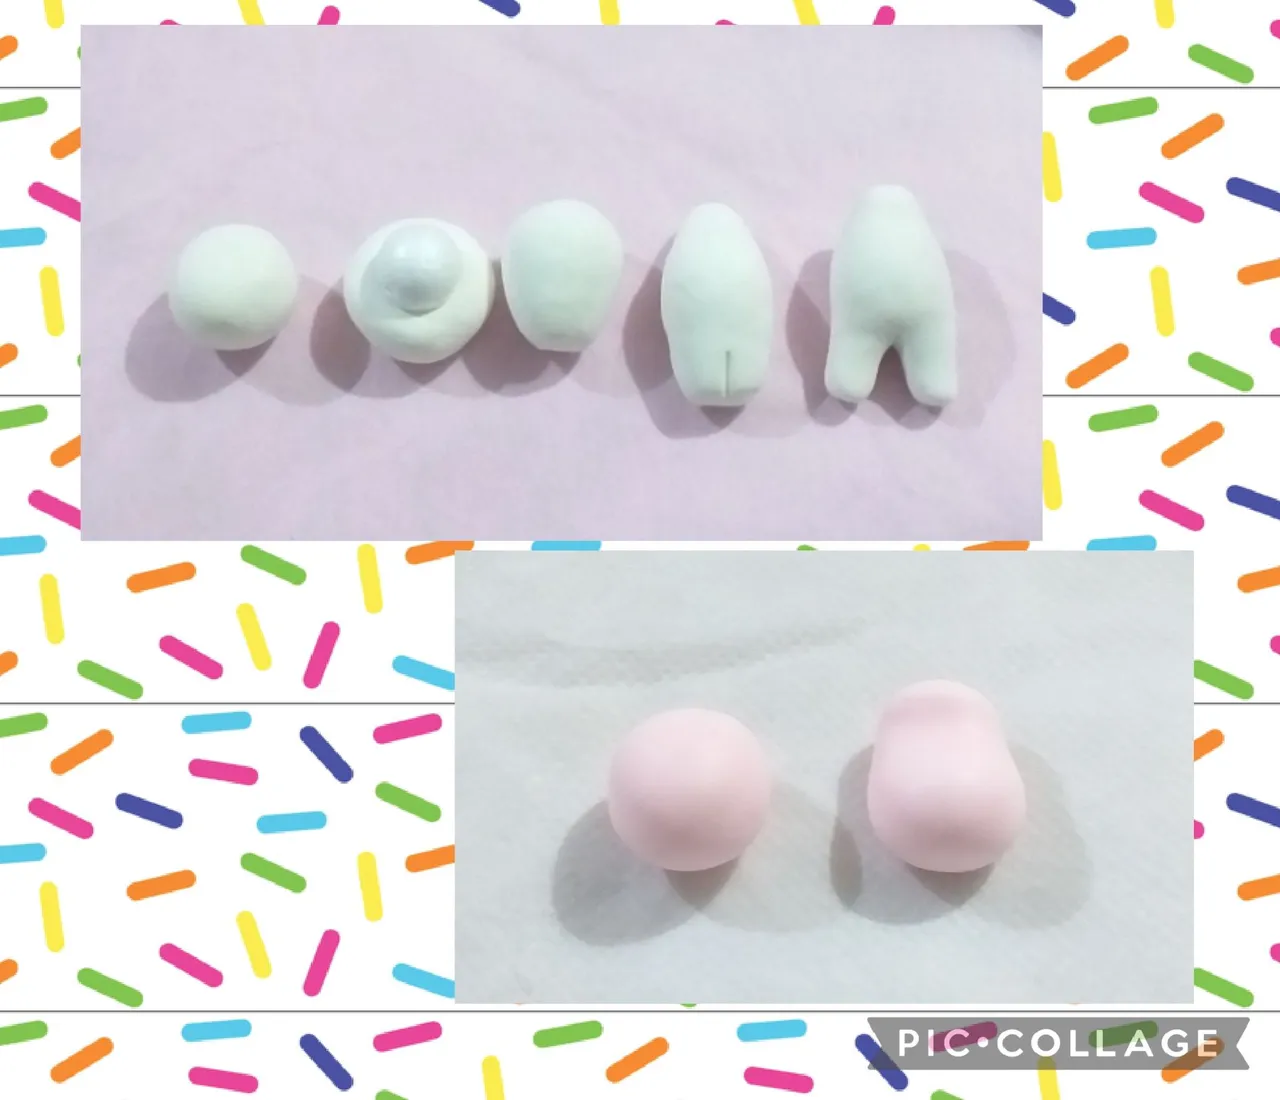
We are going to use two sizes of Styrofoam spheres.
For the body, make a ball with a lot more volume than the sphere, insert the smallest sphere, close with a pear shape, in the widest part form a little point, we will have the sphere in the middle and mass in the ends, on one of the sides cut in half, separate and form the legs. Texture everything with the brush.
For the shoes, make two equal balls, stretch and gently mark in the middle, give it a base on the table so that it has good support.
Vamos a utilizar dos tamaños de esferas de telgopor.
Para el cuerpo hacer una bolita con bastante volumen más que la esfera, introducir la esfera más pequeña, cerrar con forma de pera, en la parte mas ancha formar un poco de punta, nos va a quedar la esfera en el medio y masa en los extremos, en uno de los lados cortar a la mitad, separar y formar las piernas. Texturar todo con el cepillo.
Para los zapatos hacer dos bolitas iguales, estirar y marcar suavemente en el medio, dar base sobre la mesa para que tenga buen apoyo.
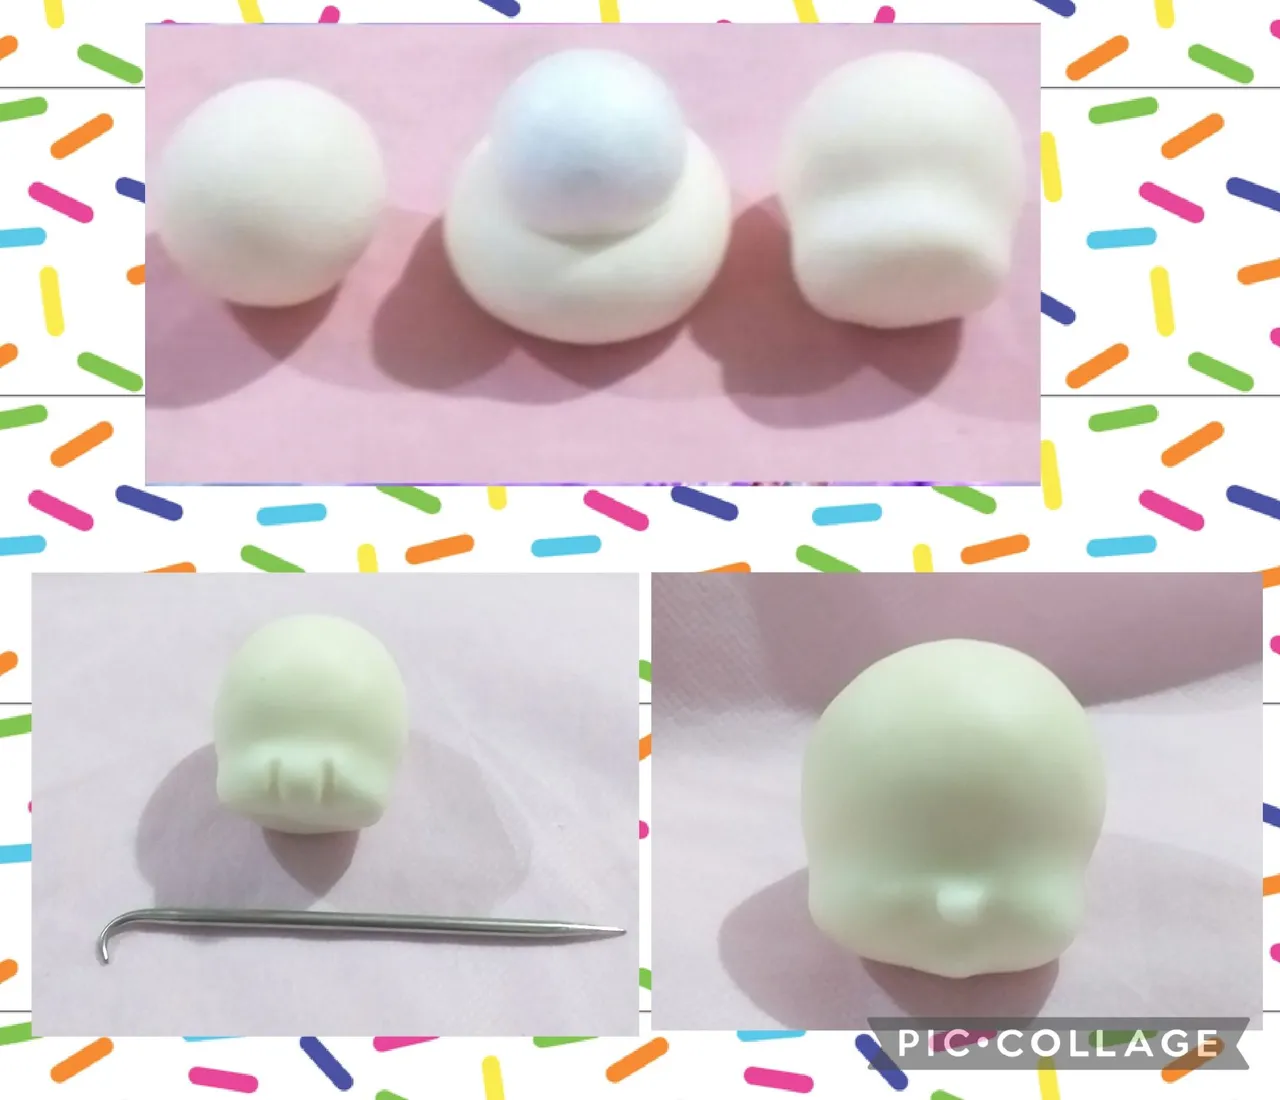
For the face, make a ball, insert the largest sphere, close and stretch so that there is dough left to form the face, with a stick make two straight lines in the middle of the nose, smooth with your fingers and separate a small portion in the part top for the nose.
Para la cara hacer una bolita, introducir la esfera más grande, cerrar y estirar para que quede masa para formar la cara, con una esteca hacer dos líneas rectas en la mitad del morro, suavizar con los dedos y separar una pequeña porción en la parte superior para la nariz.
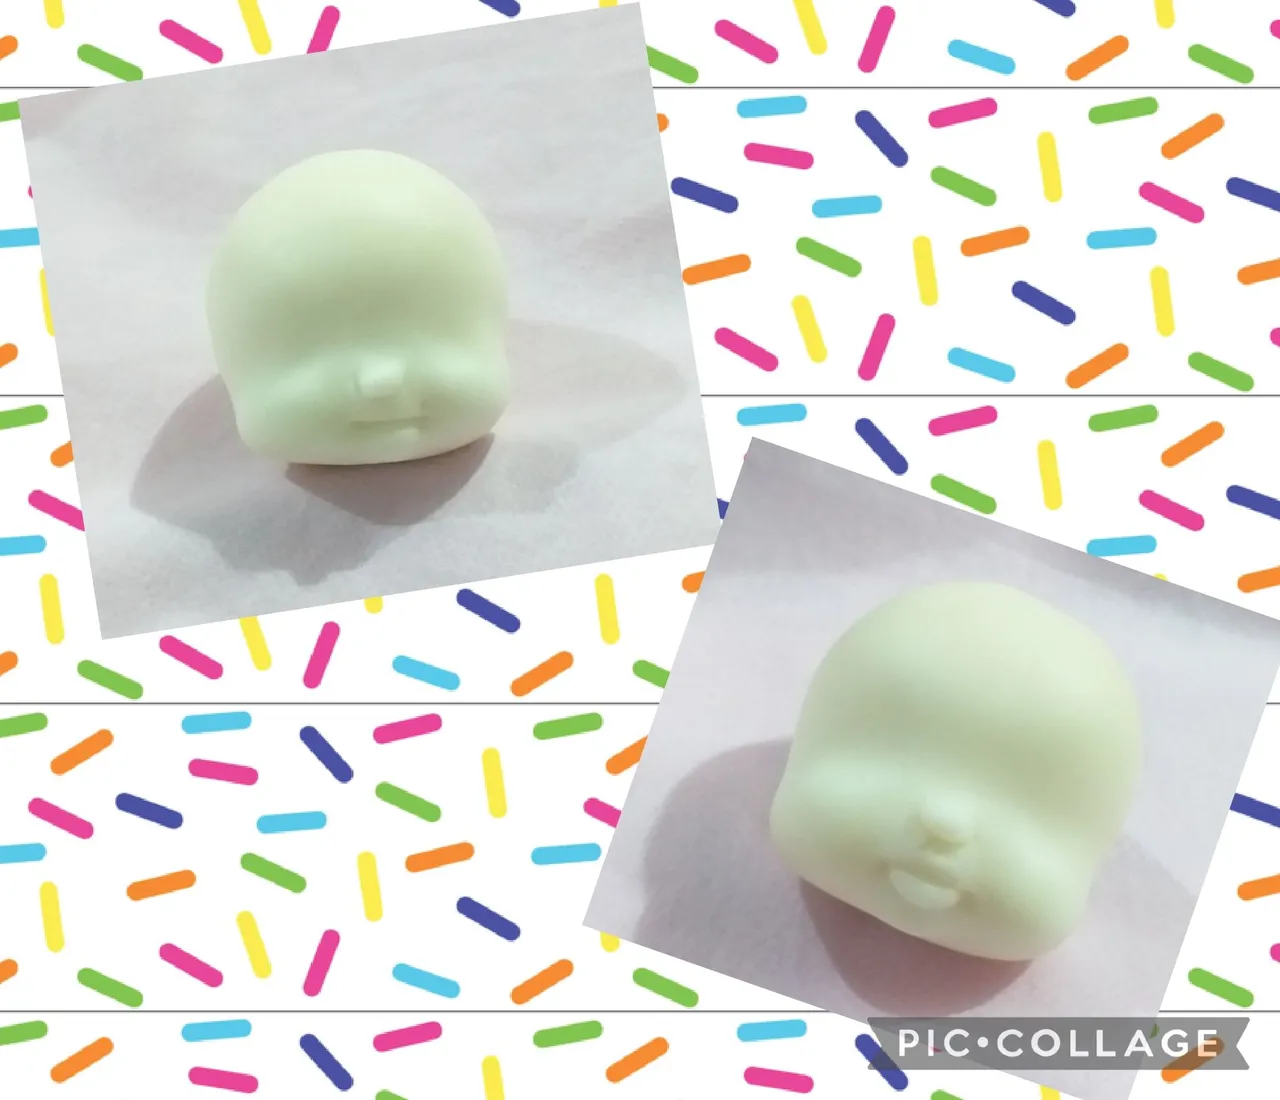
Under the nose, mark the corners and join them by making a cut, forming the upper and lower lips.
Debajo de la nariz, marcar las comisuras y unirlas haciendo un corte, formar los labios superior e inferior.
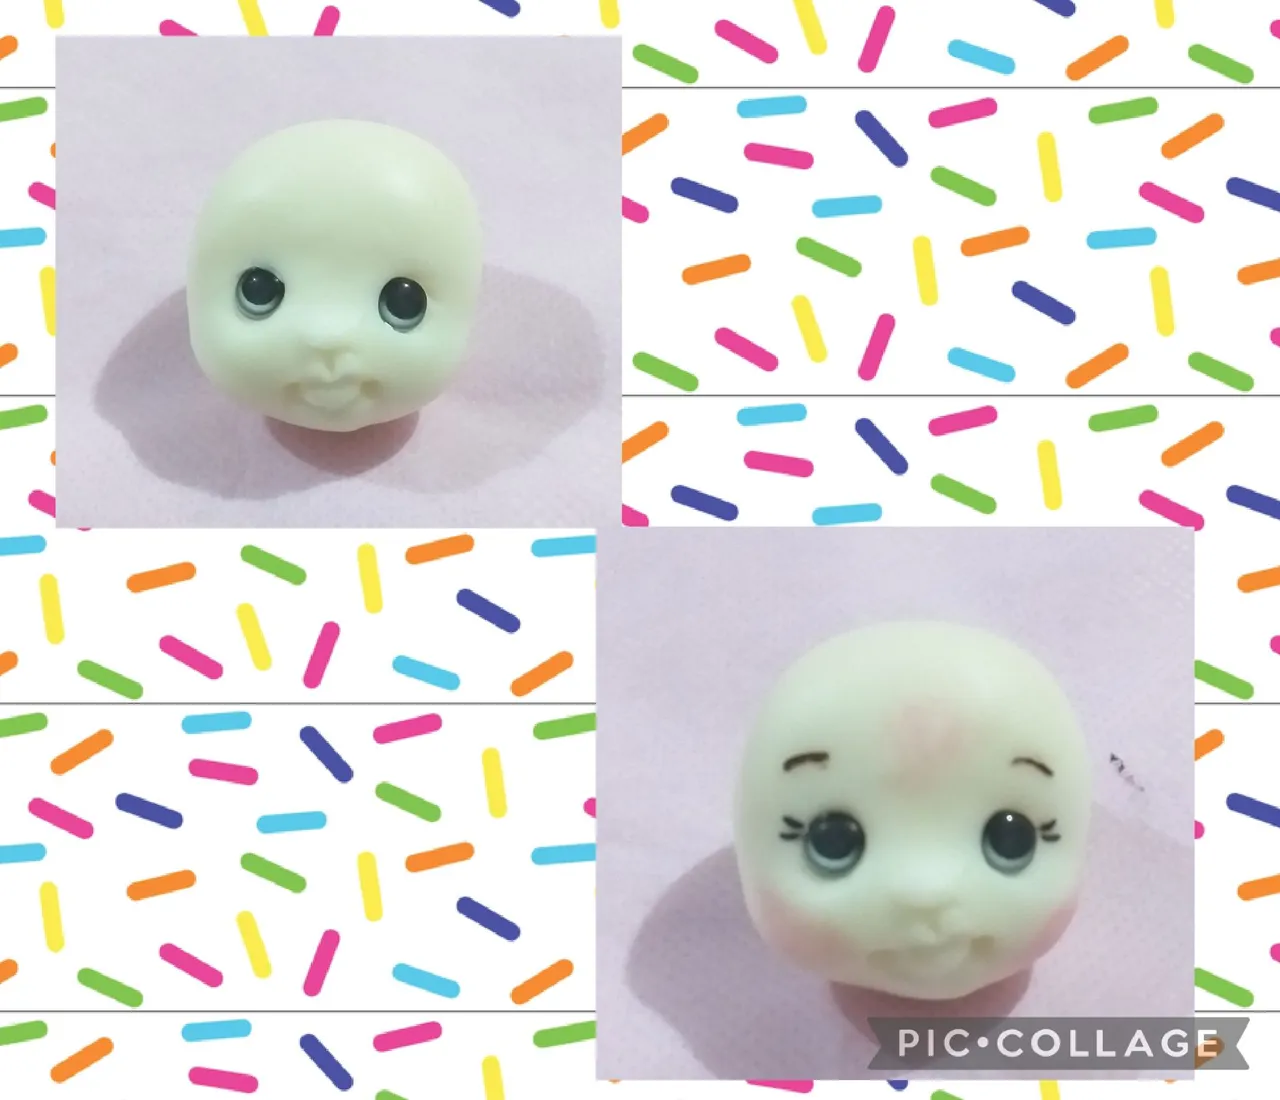
Stick on self-adhesive eyes or paint with acrylics or markers, draw eyebrows and eyelashes. Make up.
Pegar los ojos autoadhesivos o pintar con acrílicos o marcadores, dibujar las cejas y pestañas. Maquillar.
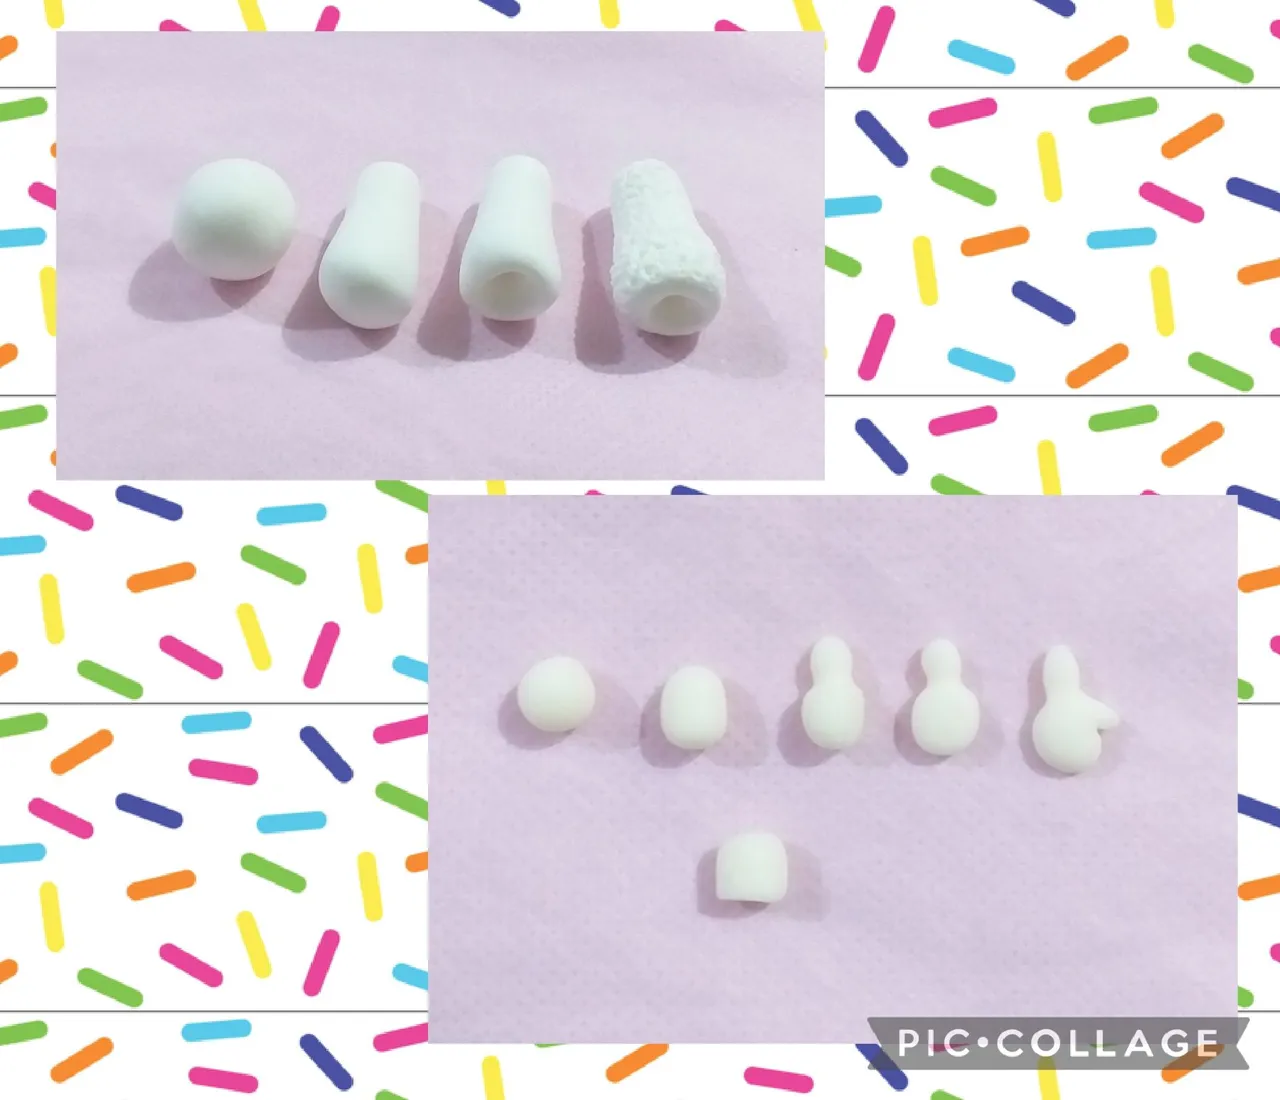
For the arms, make two equal balls, stretch leaving a larger end, hollow out there to be able to insert your hand, texture with the brush.
For the hands, make two equal balls, stretch in the shape of a cylinder, mark the wrist, flatten and mark the thumb.
For the neck, make a very small ball and form a cylinder.
Para los brazos hacer dos bolitas iguales, estirar dejando un extremo más grande, allí ahuecar para poder introducir la mano, texturar con el cepillo.
Para las manos hacer dos bolitas iguales, estirar en forma de cilindro, marcar la muñeca, aplanar y marcar el dedo pulgar.
Para el cuello hacer una bolita muy pequeña y formar un cilindro.
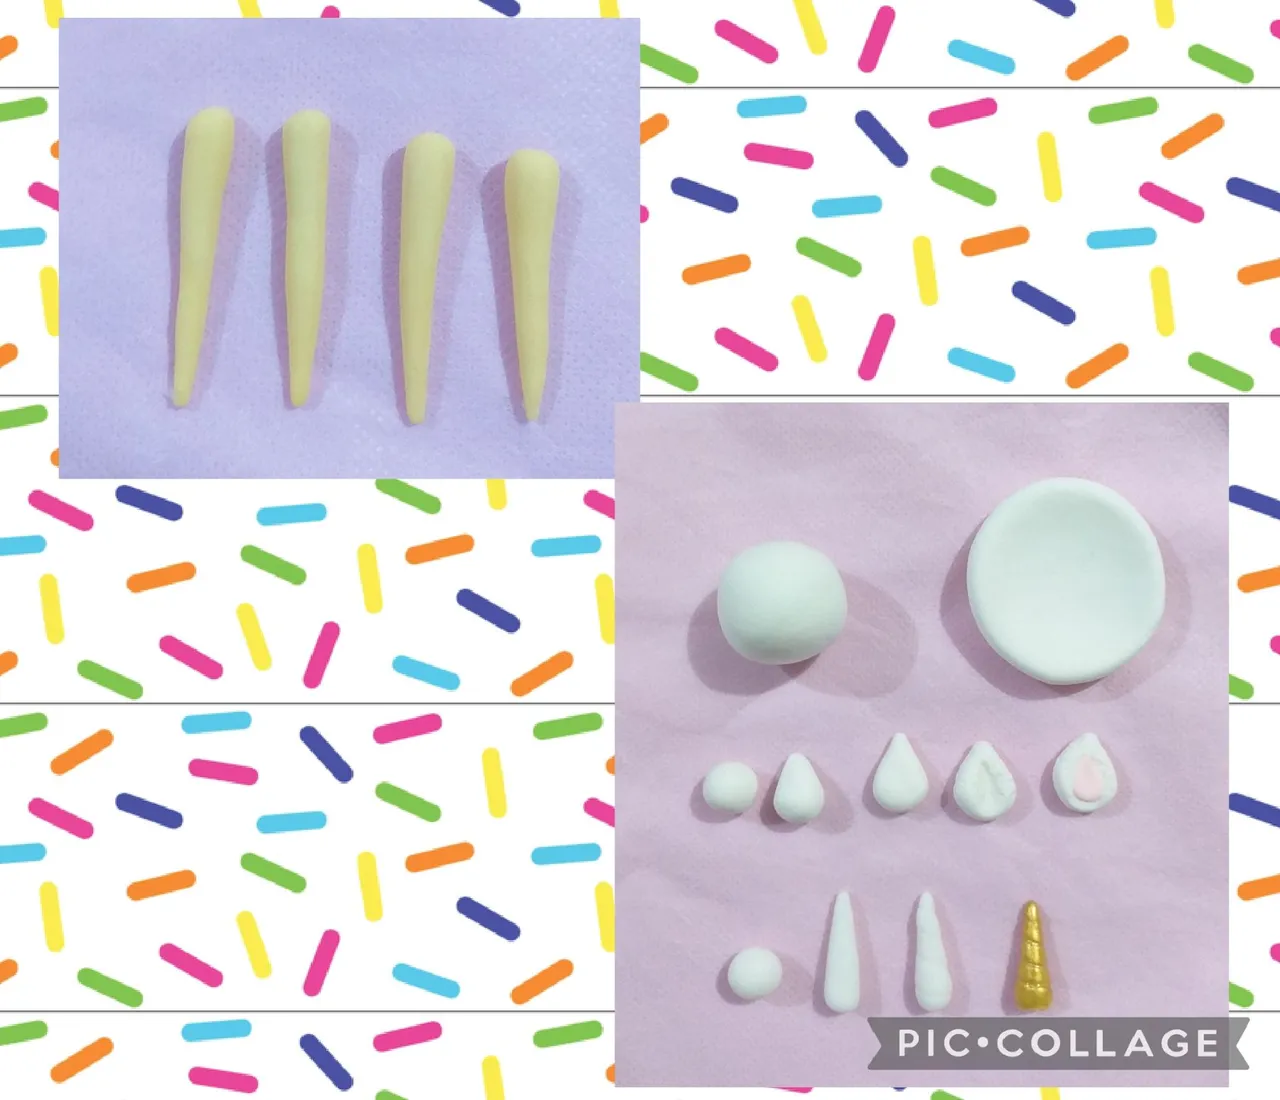
For the hair, make balls of different sizes, stretch like an elongated tear. Paste a strand on the head from side to side at the height of the ears and from there forward paste strands giving a wavy shape.
For the hat, make a ball and flatten a little with the rolling pin evenly and shape it into a helmet. Texture.
For the ears, make two equal balls, shape them into drops, flatten, hollow out and fill with a different color dough. Texture.
For the horn, make a ball, stretch as an elongated tear, mark going all the way around in a spiral shape and paint with gold acrylic.
Para el pelo hacer bolitas de diferentes tamaños, estirar como una lágrima alargada. Pegar en la cabeza un mechón de lado a lado a la altura de las orejas y de ahí para adelante pegar mechones dando forma ondulada.
Para el gorro hacer una bolita y aplanar un poco con el palo de amasar en forma pareja y dar forma de casco. Texturar.
Para las orejas hacer dos bolitas iguales, dar forma de gota, aplanar, ahuecar y rellenar con masa de otro color. Texturar
Para el cuerno hacer una bolita, estirar como lágrima alargada, marcar dando toda la vuelta en forma de espiral y pintar con acrílico dorado.

For the tail, make three balls of different colors, stretch them in the shape of an elongated tear.
Use the mold to make three different colored flowers.
Paste everything with vinyl glue, I added a strip of a darker pink color to cover the junction of the neck, some buttons that are small self-adhesive flowers and a pocket that I made with a ball to which I gave a cylindrical shape, I flattened and cut the half.
For this post I took photos with my Samsung Galaxy j4 cell phone and used the PicCollage app and Google Translate.
I hope you liked it. Greetings. Andrea❤❤❤
Para la cola hacer tres bolitas de diferentes colores, estirar en forma de lágrima alargada.
Utilizar el molde para hacer tres flores de diferentes colores.
Pegar todo con cola vinilica, le agregué una tira de un color rosado más oscuro para cubrir la unión del cuello, unos botones que son pequeñas flores autoadhesivas y un bolsillo que lo hice con una bolita a la cual di forma cilíndrica, aplané y corte la mitad.
Para este post tomé fotos con mi teléfono celular Samsung Galaxy j4 y utilicé la aplicación PicCollage y el traductor de Google.
Ojalá les haya gustado. Saludos. Andrea❤❤❤