✨¡Hola amigos amantes de la creatividad! Espero que estén todos bien.✨
🔸Sin más que añadir, a continuación los dejo con el paso a paso:
✨¡Hello friends who love creativity! I hope you are all well.✨
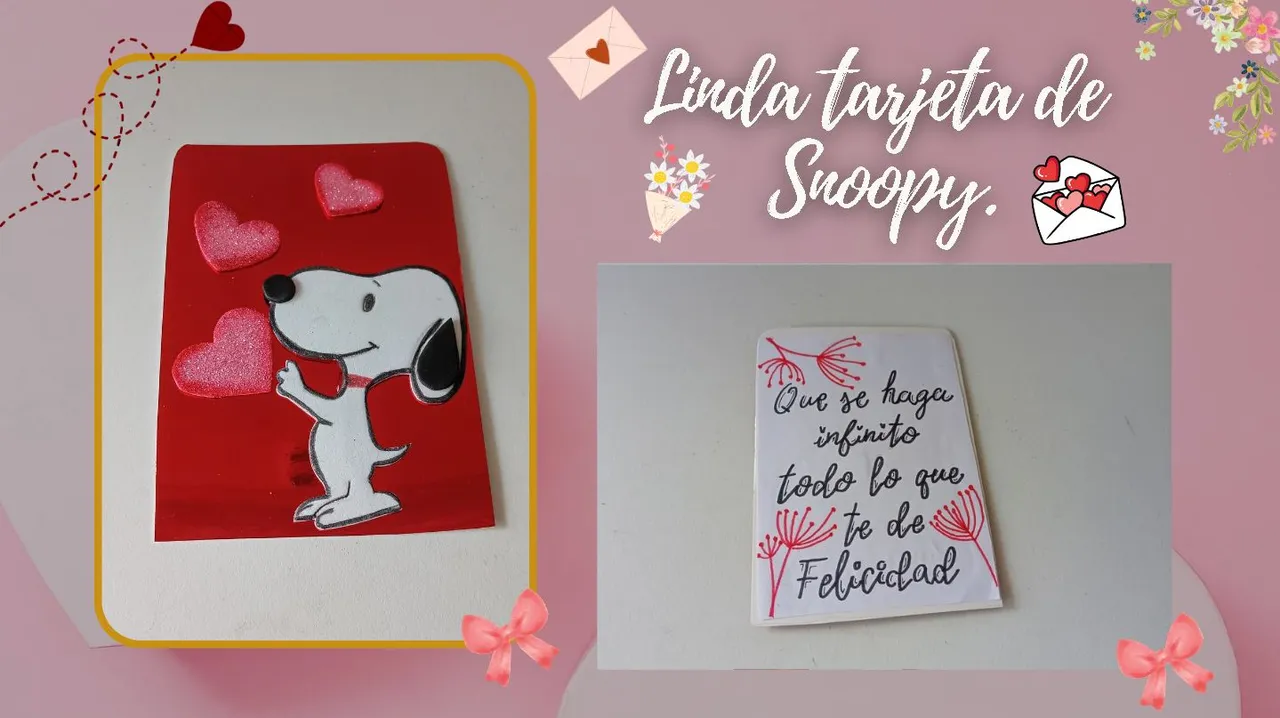
Good afternoon, friends! I hope you're having a great week. For my part, I'm happy to stop by to share a lovely idea with you. This time, I'm sharing the step-by-step instructions for making a cute Snoopy card. Thinking about what idea to share, I remembered I'd never shared anything about Snoopy, even though he's a character I love and find very funny. So, I wanted to share a card with this theme.
🔸Without more to add, then I leave you with the step by step:
♥️ESPERO QUE TE GUSTE,
¡Empecemos!
♥️I HOPE YOU LIKE IT,
Let's start!

✂️ MATERIALES | ✂️ MATERIALS
- Cartulina metalizada roja.
- Foami escarchado rosa.
- Foami blanco.
- Pinturas y marcadores.
- Pegamento.
- Tijeras.
- Regla.
- Hoja blanca.
- Lápiz.
- Red metallic cardstock.
- Pink frosted foam.
- White foam.
- Paints and markers.
- Glue.
- Scissors.
- Ruler.
- White paper.
- Pencil.
🌟 PROCEDIMIENTO | 🌟 PROCESS
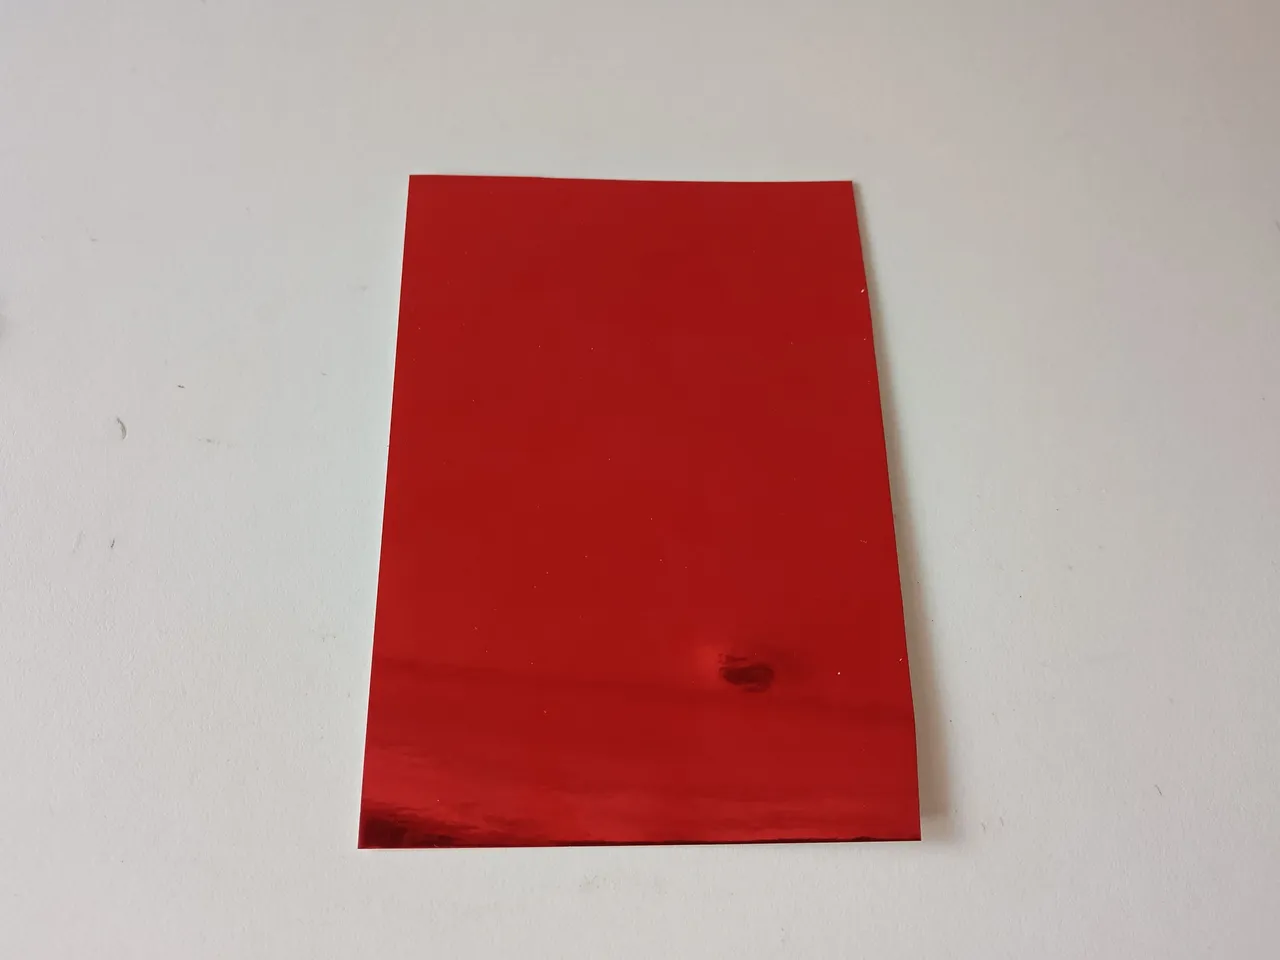
✨PASO 1:
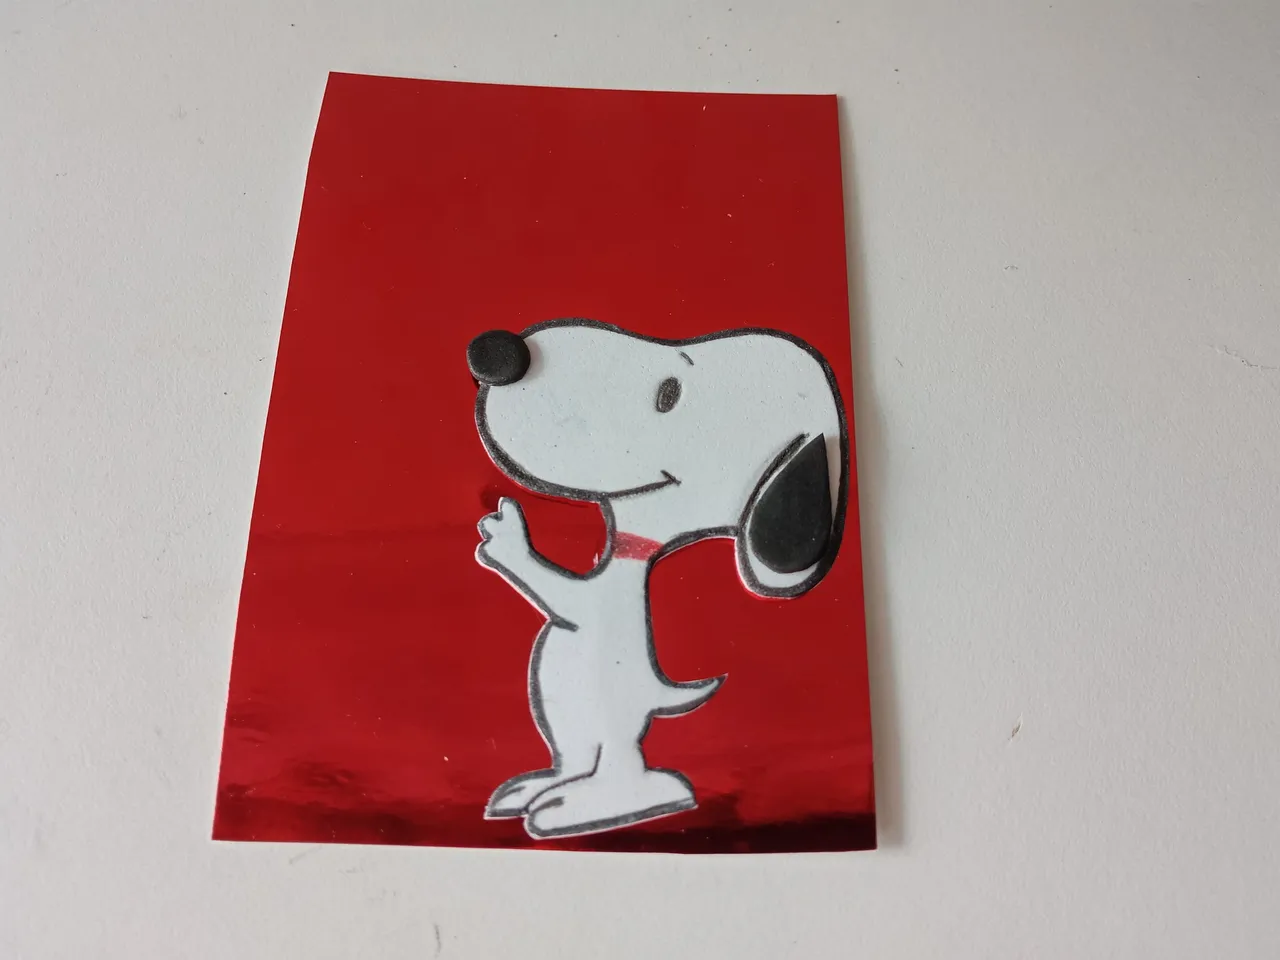
Lo primero que hice fue seleccionar un color de cartulina que combinara muy bien con la temática y es que, aunque Snoopy combina con la mayoría de los colores por ser blanco, yo quería un tono que hiciera resaltar aun más tanto al personaje como a los corazones. Al final me decidí por una cartulina metalizada color rojo, pues al ser un tono oscuro, ayuda a resaltar la decoración en tonos claros. Así que recorté la cartulina de 13.5 cm x 6.5 cm y una hoja blanca de 12.5 x 6 cm.
✨STEP 1:
The first thing I did was select a cardstock color that would go well with the theme. Although Snoopy goes with most colors because he's white, I wanted a shade that would make both the character and the hearts stand out even more. In the end, I decided on red metallic cardstock, because its dark color helps the decoration stand out in light tones. So I cut the cardstock to 13.5 cm x 6.5 cm and a white sheet of paper measuring 12.5 x 6 cm.
 |  |
|---|
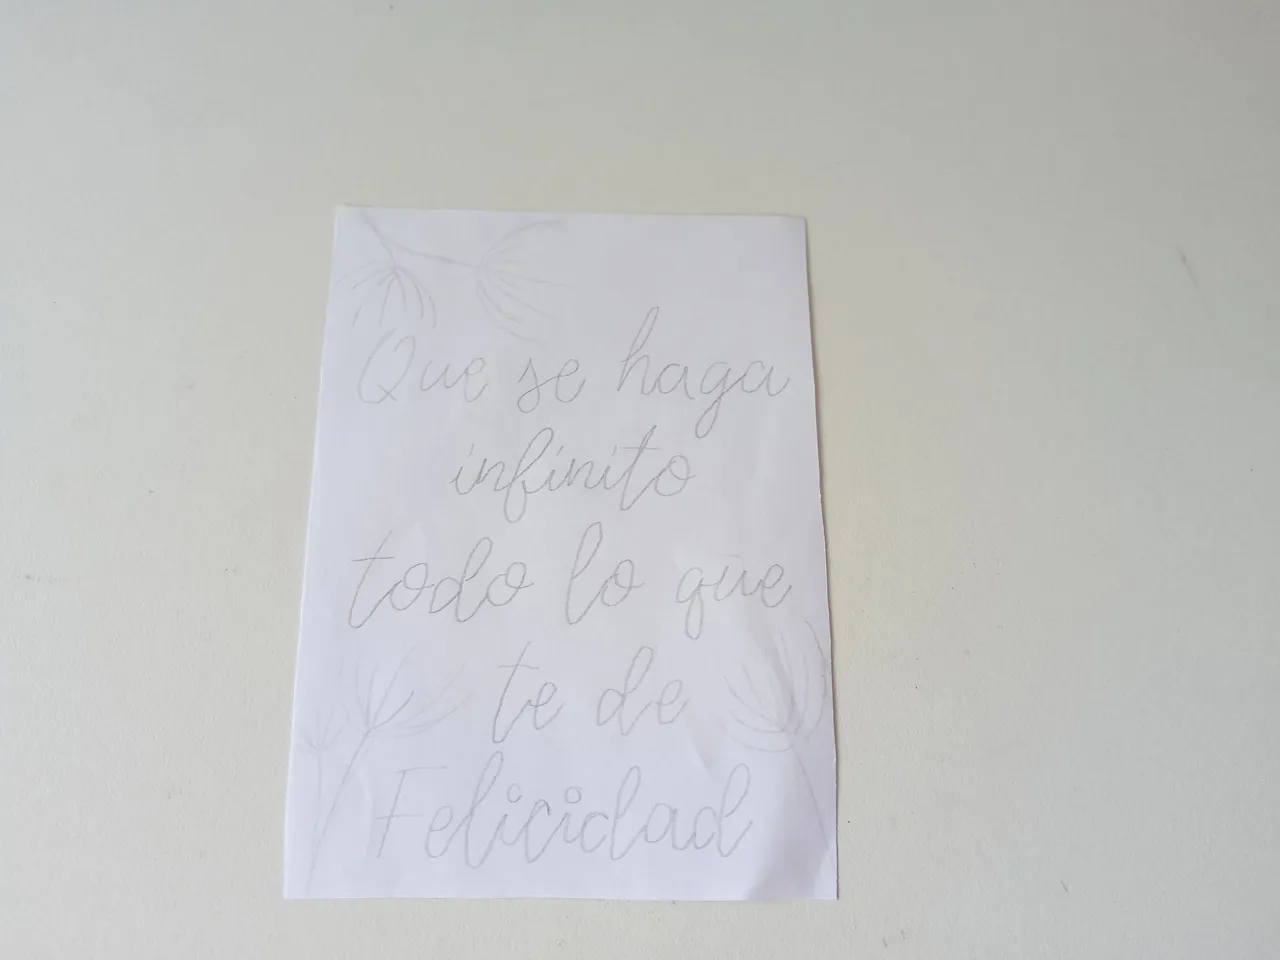
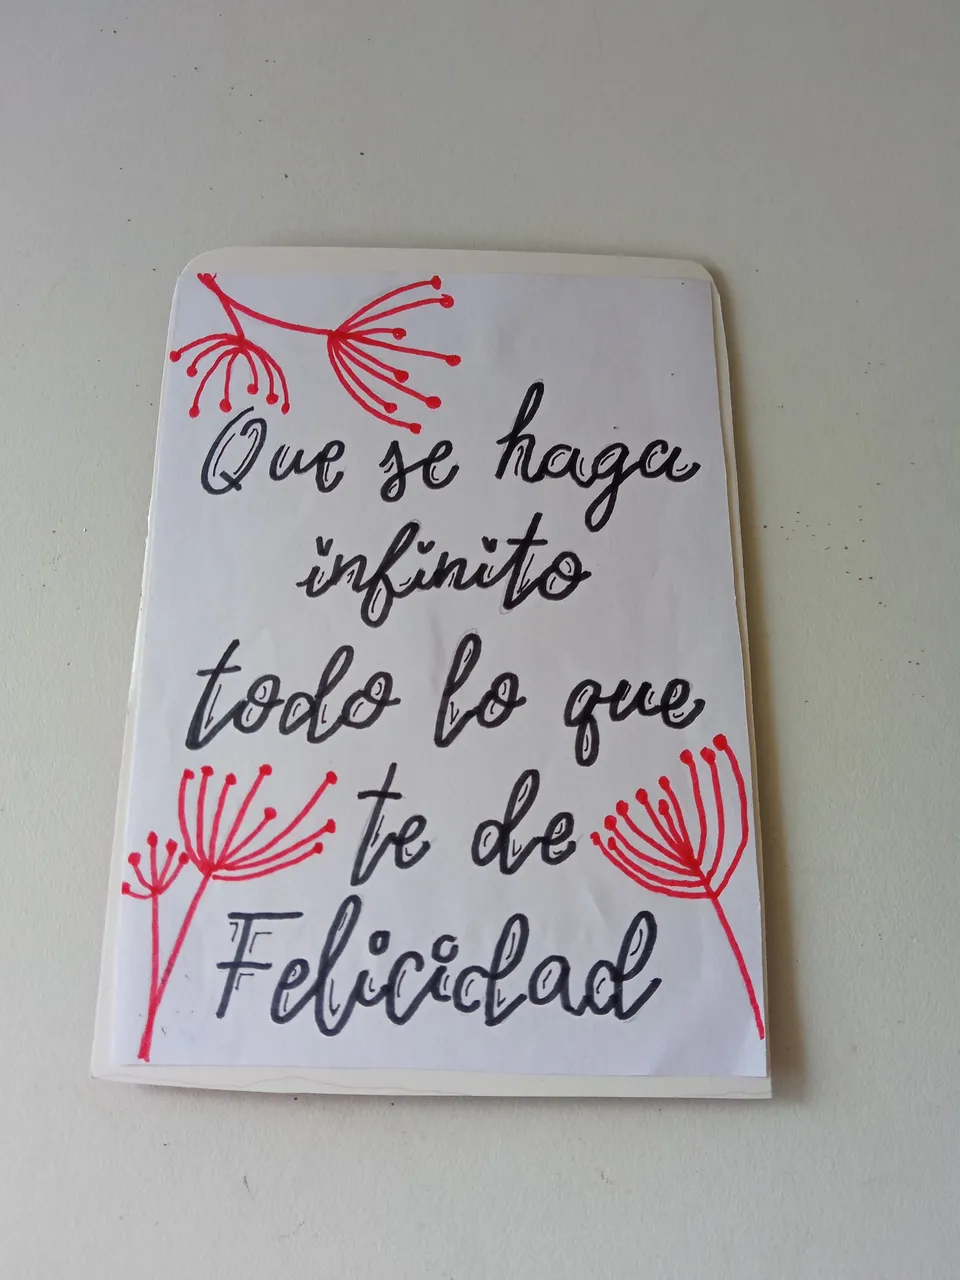
✨PASO 2:
A la hoja blanca, le escribí el mensaje con lápiz para la persona a la que se lo voy a obsequiar y luego, lo remarqué con marcador negro e hice un par de líneas más finas a la letra, como parte de la decoración. Además, quise dibujar como un diseño de plantas en color rojo para que combine con la cartulina y, al estar listo, pegué por la parte trasera de la cartulina.
✨STEP 2:
On the white sheet, I wrote the message for the person I'm giving it to in pencil, then outlined it with a black marker and made a few thinner lines in the lettering as part of the decoration. I also wanted to draw a kind of red plant design to match the cardstock, and when it was ready, I glued it to the back of the cardstock.
 |  |
|---|
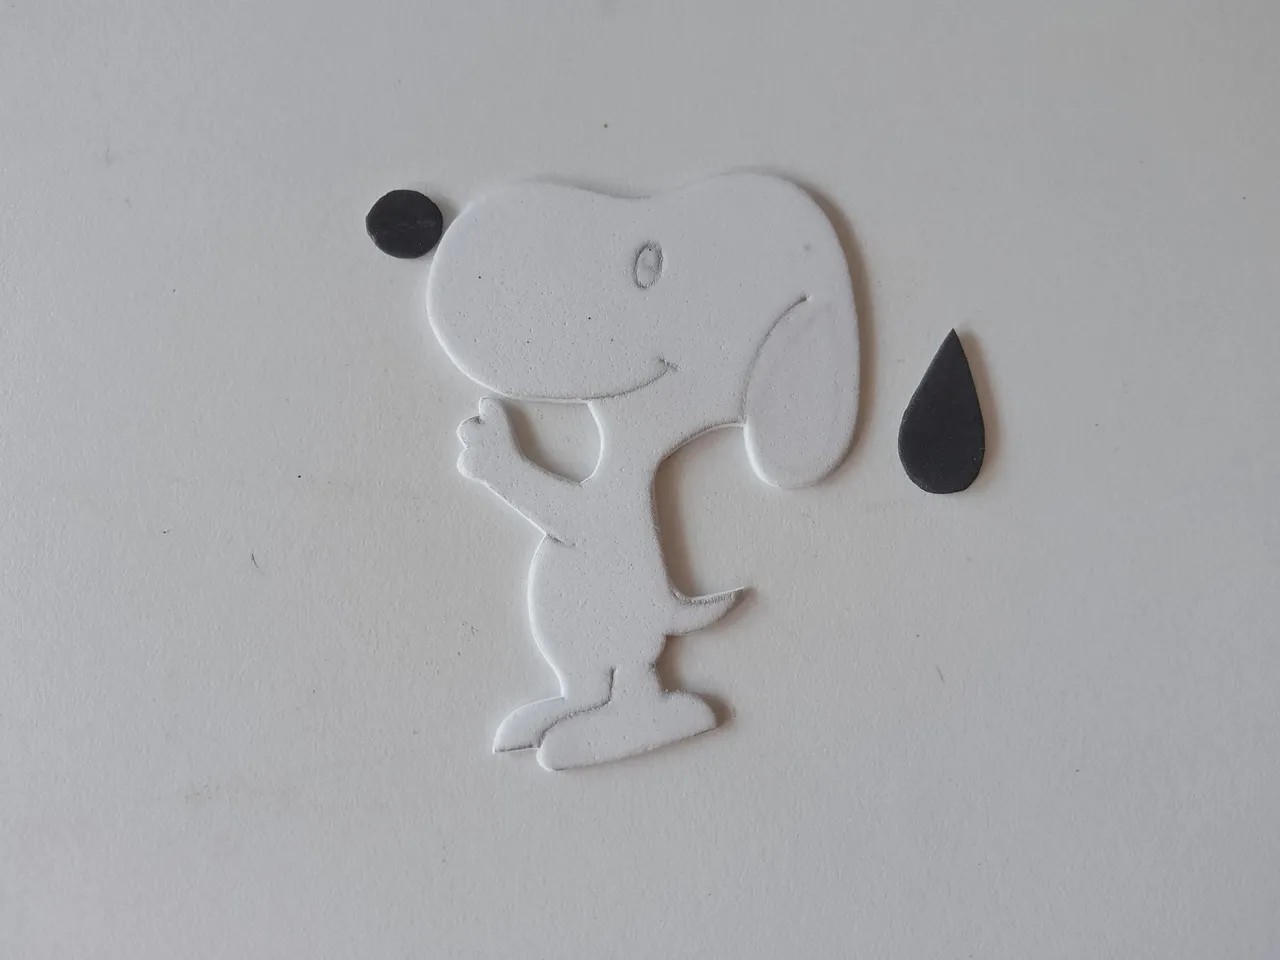
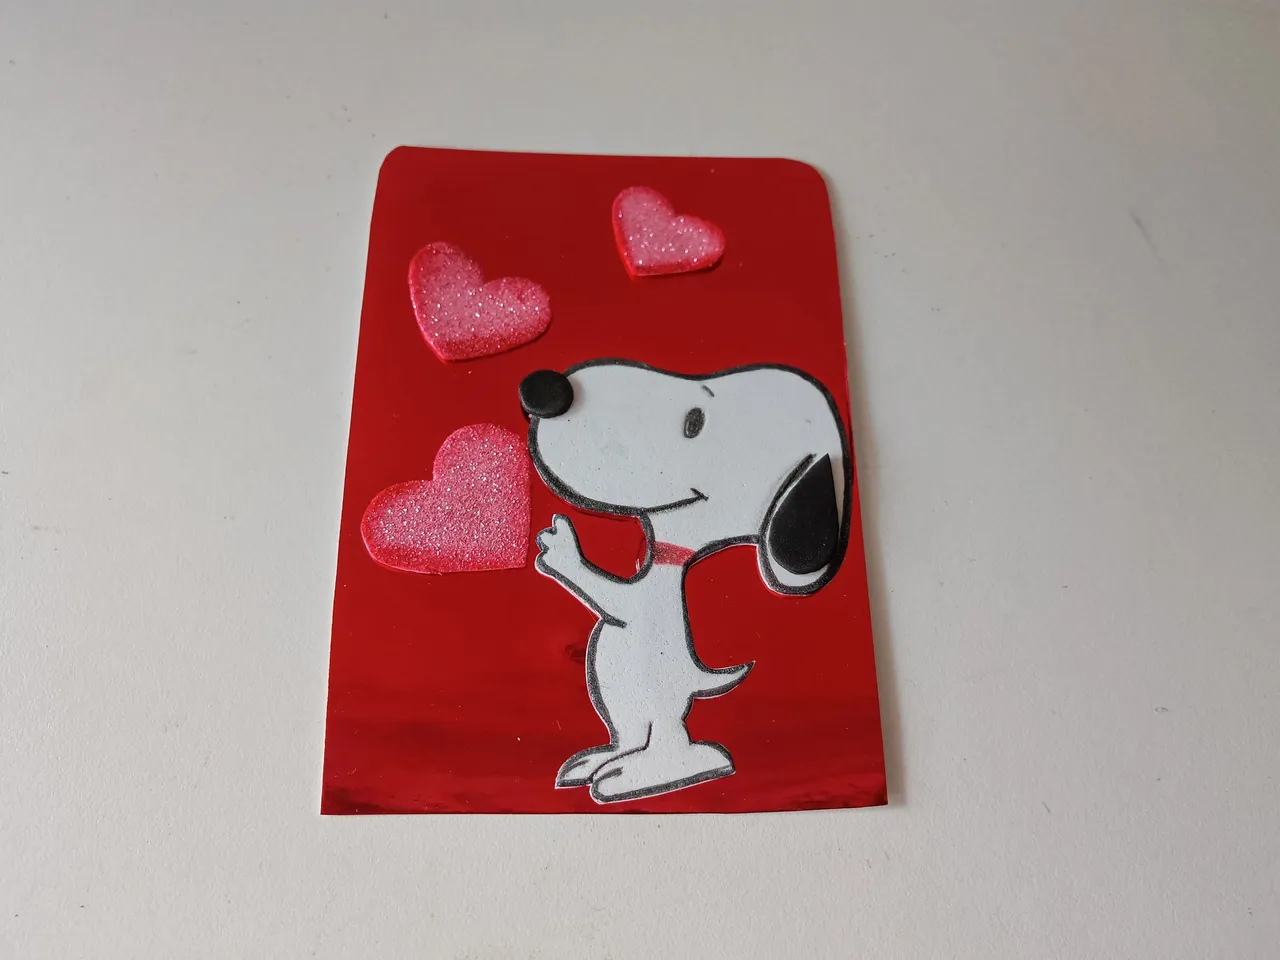
✨PASO 3:
Ahora sí, llegó mi momento favorito, que es elaborar la decoración principal. Busqué referencias de Snoopy, lo dibujé en una hoja blanca y le hice un cambio a sus patas, ya que quería que tuviera una mano alzada, como que está intentando tomar algo. Además, pensé en agregar un par de corazones de diferentes tamaños. Al tener lista la idea en una hoja blanca, transferí a los colores correspondientes de foami, como explico a continuación.
Cuerpo, cabeza, orejas, cola y patas: Todo en una misma pieza son 8 cm de largo.
✨De cabeza a cuello: 4 cm x 5.5 cm en foami blanco.
✨Cuerpo: 4 cm x 2 cm en foami blanco.
✨Patas delanteras y traseras: 2 cm x 0.5 cm y 2.5 cm x 1 cm en foami blanco.
Individual:
✨Nariz: 1 cm de circunferencia en foami negro.
✨Parte interna de la oreja: 3 cm x 1.4 cm en foami negro.
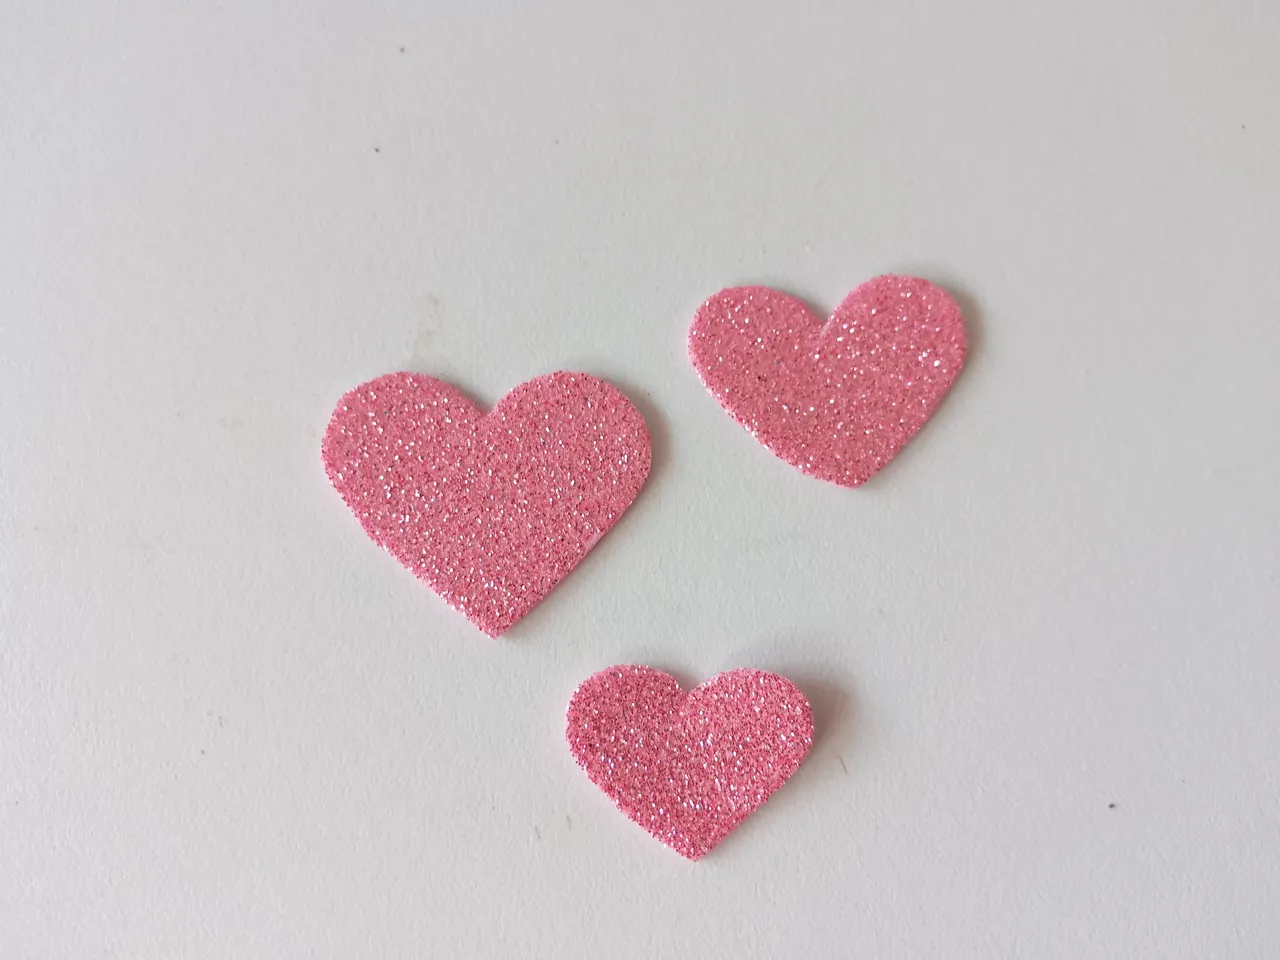
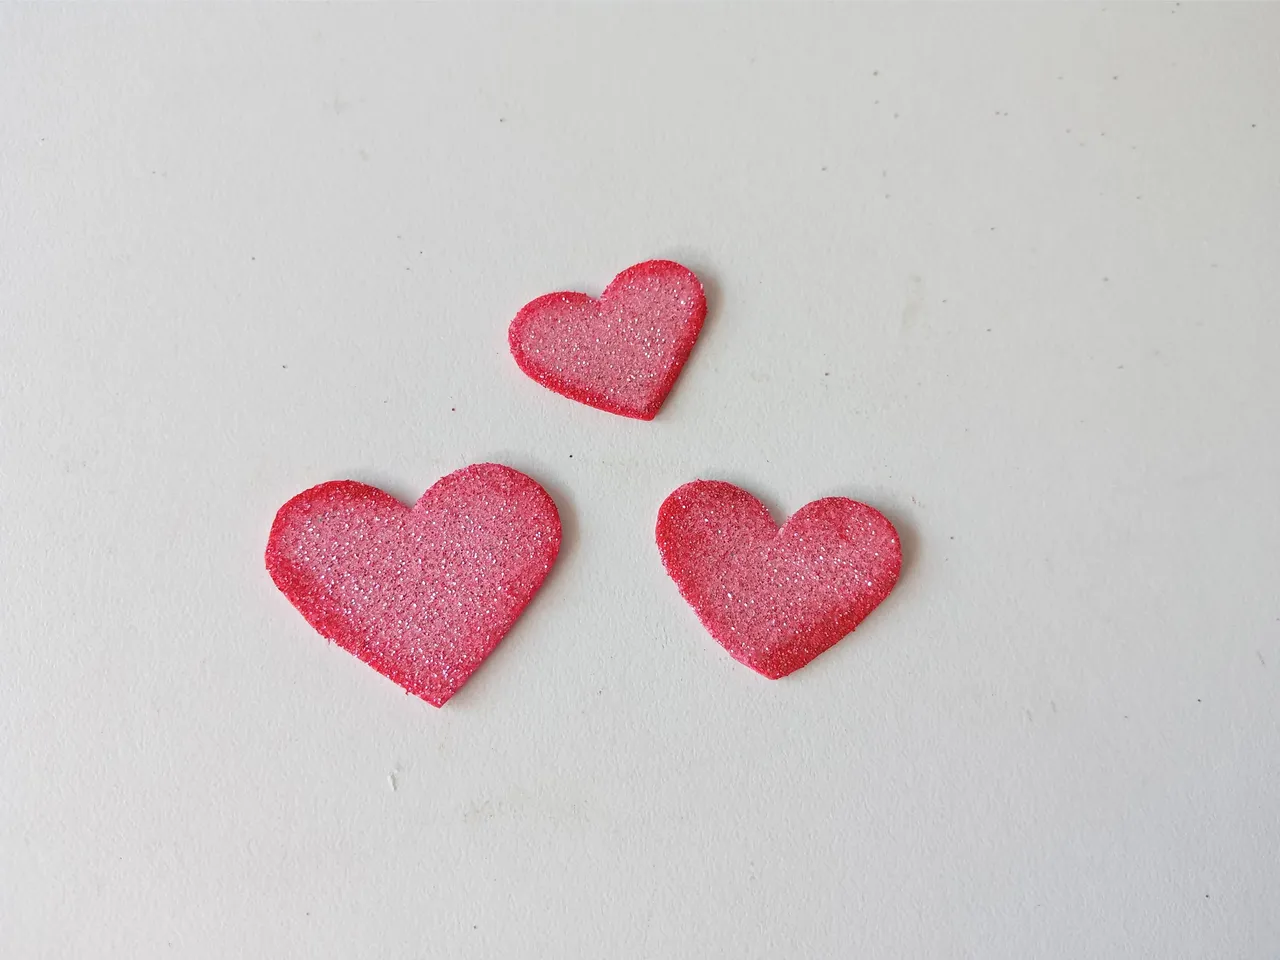
✨Corazones: 3.5 cm x 3 cm, 2.5 cm x 3 cm y 2 cm x 2.5 cm en foami escarchado rosa.
✨STEP 3:
Now, my favorite part arrived: making the main decoration. I looked for Snoopy references, drew him on a white sheet, and made a change to his paws, since I wanted him to have one hand raised, as if he's reaching for something. I also thought about adding a couple of hearts of different sizes. Once I had the idea ready on a white sheet of paper, I transferred it to the corresponding colors of foam, as explained below.
Body, head, ears, tail, and legs: All in one piece are 8 cm long.
✨Head to neck: 4 cm x 5.5 cm in white foam.
✨Body: 4 cm x 2 cm in white foam.
✨Front and back legs: 2 cm x 0.5 cm and 2.5 cm x 1 cm in white foam.
Individual:
✨Nose: 1 cm circumference in black foam.
✨Inner ear: 3 cm x 1.4 cm in black foam.
✨Hearts: 3.5 cm x 3 cm, 2.5 cm x 3 cm, and 2 cm x 2.5 cm in pink frosted foam.
 |  |
|---|
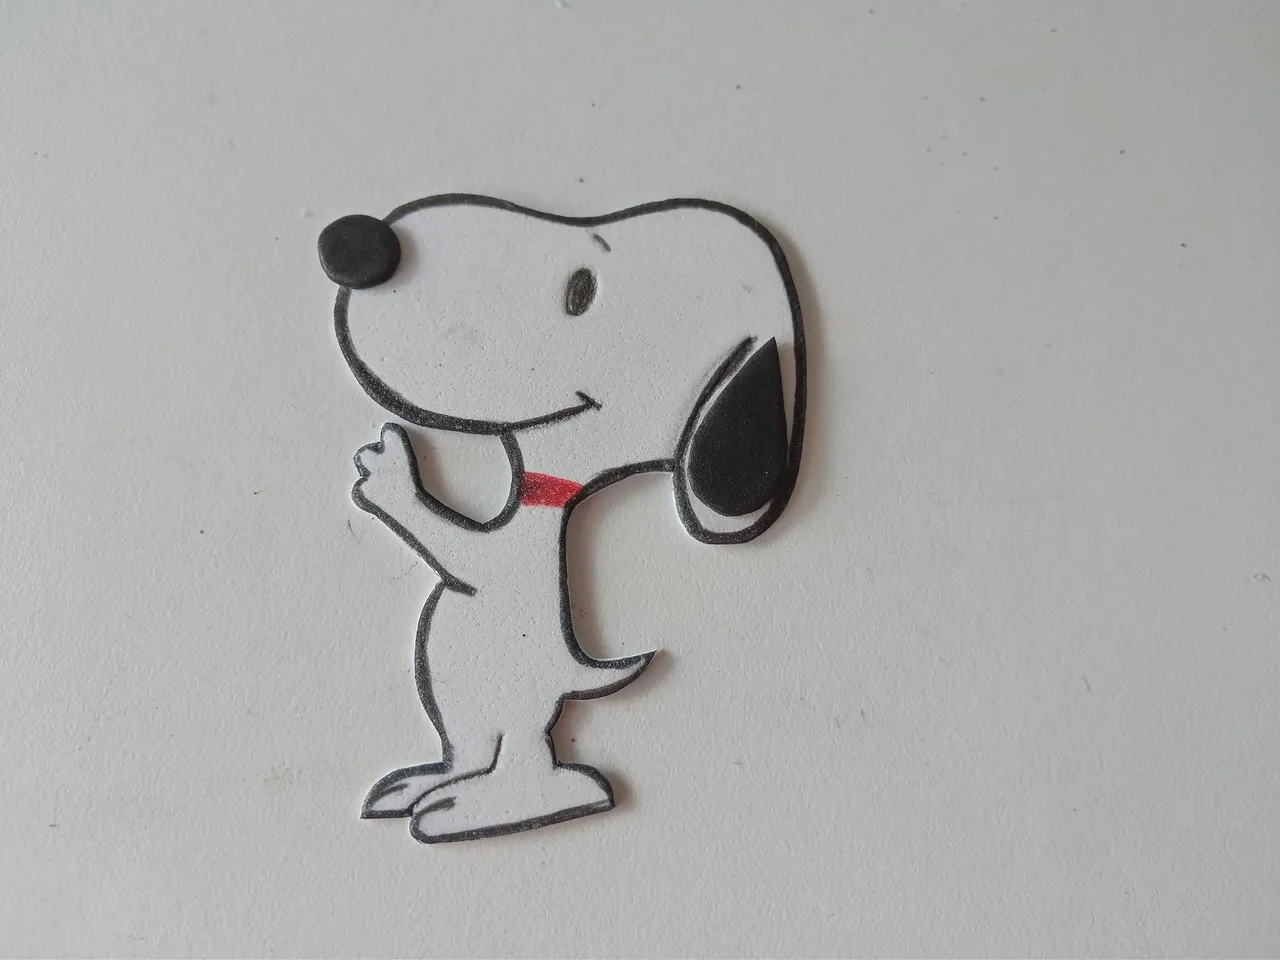
✨PASO 4:
Seguidamente, comencé a dar detalles a las piezas y en este caso no difuminé la pieza de Snoopy porque se iba a ver como sucio, así que me fui más por cómo se ve él realmente, que es con un delineado negro por todo su cuerpo, pero en el caso de los corazones en foami escarchado, sí tomé un poco de pintura roja y difuminé por los bordes para que se viera como un tono fucsia. Además, di detalles más específicos como ojos, cejas, collar, boca y patas.
✨STEP 4:
Next, I started adding details to the pieces. In this case, I didn't blend the Snoopy piece because it would have looked dirty, so I went more with how he actually looks, which is a black outline all over his body. However, in the case of the frosted foam hearts, I did use a little red paint and blended it around the edges to give it a fuchsia hue. I also added more specific details like the eyes, eyebrows, collar, mouth, and paws.
 |  |
|---|
✨PASO 5:
Al estar secas las piezas, es momento de comenzar a pegar. Por mi parte, pegué a Snoopy más hacia la parte baja de la derecha y los corazones, uno arriba del otro como si estuvieran en el aire, muy parecido a los movimientos de un globo y él intentando sostener uno de ellos. Además, al final me decidí por redondear un poco las esquinas superiores de la cartulina para que no se viera tan recto.
✨STEP 5:
Once the pieces were dry, it was time to start gluing. For my part, I glued Snoopy closer to the bottom right corner and the hearts, one on top of the other as if they were in the air, very similar to the movements of a balloon and him trying to hold one of them. I also decided to round the top corners of the cardboard a bit so it didn't look so straight.
 |  |
|---|
✨This is how you can make a lovely card to give to someone you love, whether accompanied by some treats, an accessory, or whatever you'd like, featuring the Snoopy character or a theme of your choice. I hope you enjoyed the step-by-step instructions and are inspired to give it a try.
❤️Until the next post.
✨RESULTADO: | ✨RESULT:
 | |
|---|

Todas las fotografías son de mi propiedad.
Separador y Fotos editadas en Canva
All photographs are my property.
Photos edited in Canva