✨🌹🌼🌸¡Hola amigos amantes de la creatividad! Espero que hayan pasado un muy buen comienzo de semana.🌸🌼🌹✨
🔸Sin más que añadir, a continuación los dejo con el paso a paso:
✨🌸🌼🌹¡Hello friends who love creativity! I hope you had a very good start to the week.🌹🌼🌸✨
I hope you are well and that you had a good Monday. This time I share the step by step to make a beautiful flower-themed pencil holder. For those who follow my post and those who don't, I've always loved organizers, so whenever I can I share one and make a new one for my collection, haha. Pencil holders are a very easy organizer to make and we can literally make it for any theme, and there is a wide variety of materials that we can use for its base, such as: cans, paper rolls, containers, etc. Everything leads us to the same, recycle one or more materials depending on how we want to do it.
This time I opted for a very pretty pencil holder, this idea arose because when looking for inspiration I found a very subtle one that had flowers of many colors and since I love to draw my own ideas and use my creativity, it occurred to me to make a kind of fence with flowers of different colors to which I gave a very tender design and with which I am totally delighted.
🔸Without more to add, then I leave you with the step by step:
♥️ESPERO QUE TE GUSTE,
¡Empecemos!
♥️I HOPE YOU LIKE IT,
Let's start!

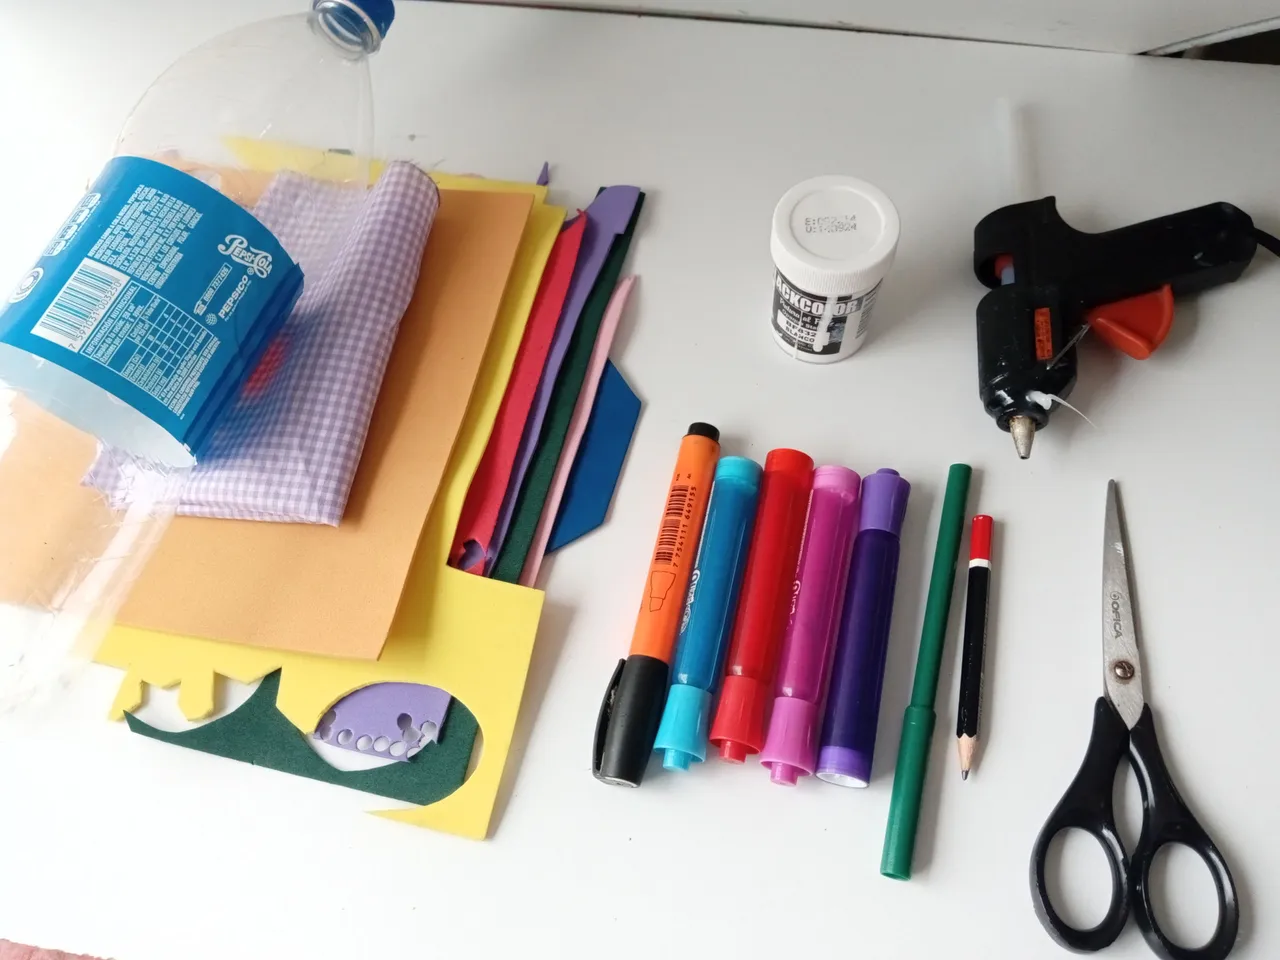
🌹 MATERIALES | 🌹 MATERIALS
- Botella platica.
- Tela con el color o
diseño deseado. - Cartón grueso.
- Cartulina escolar negra.
- Foami marrón.
- Foami de colores para
las flores. - Foami verde.
- Marcadores.
- Plancha.
- Hoja blanca.
- Pegamento.
- Regla.
- Tijera.
- Lápiz.
- Plastic bottle.
- fabric with color or
desired design. - thick cardboard
- Black school cardboard.
- brown foam.
- colored foam for
flowers. - green foam.
- Markers.
- Iron.
- white sheet.
- Glue.
- Ruler.
- Scissors.
- Pencil.
🌼 PROCEDIMIENTO | 🌼 PROCESS
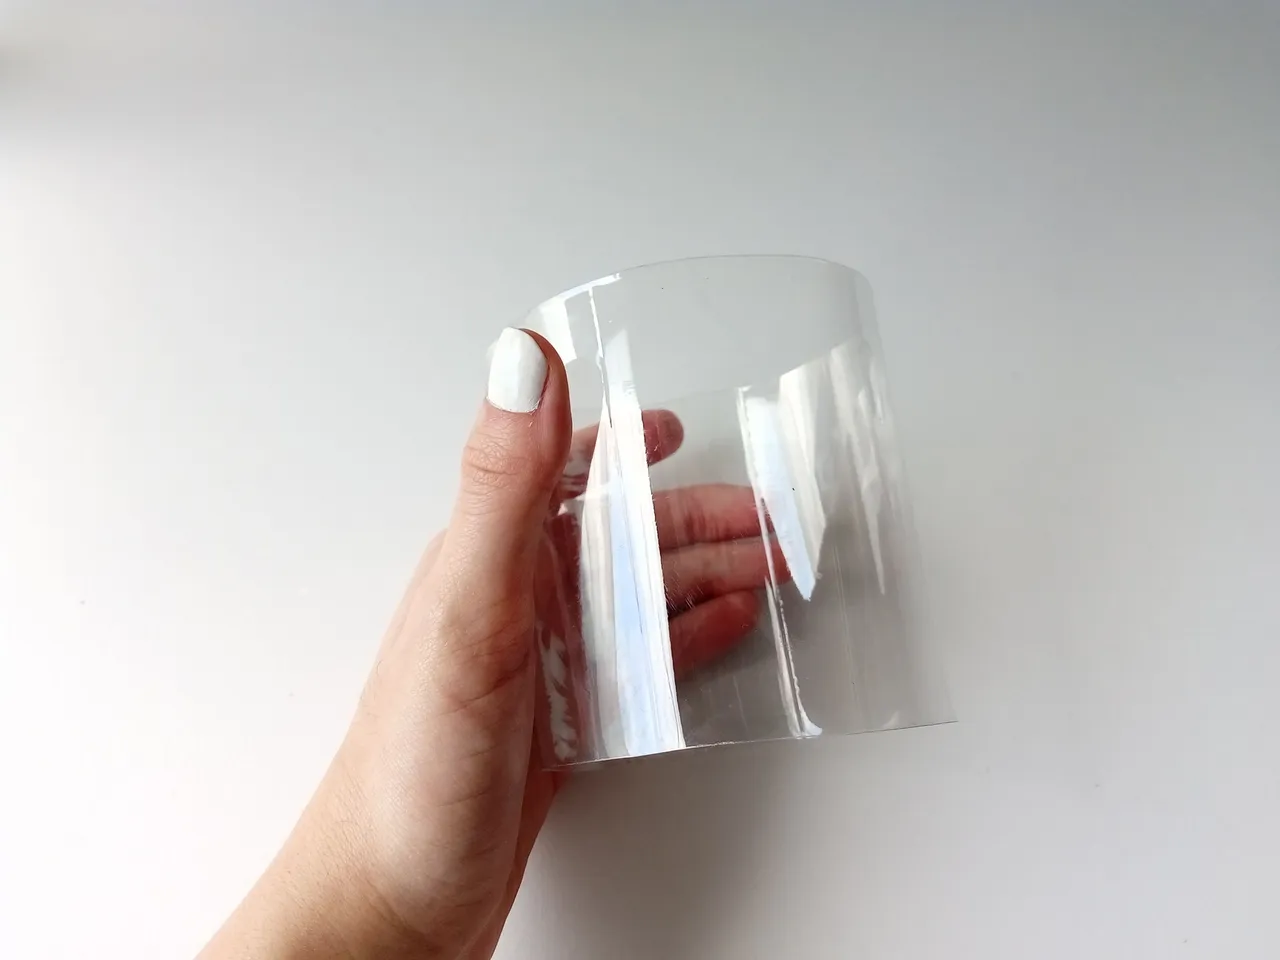
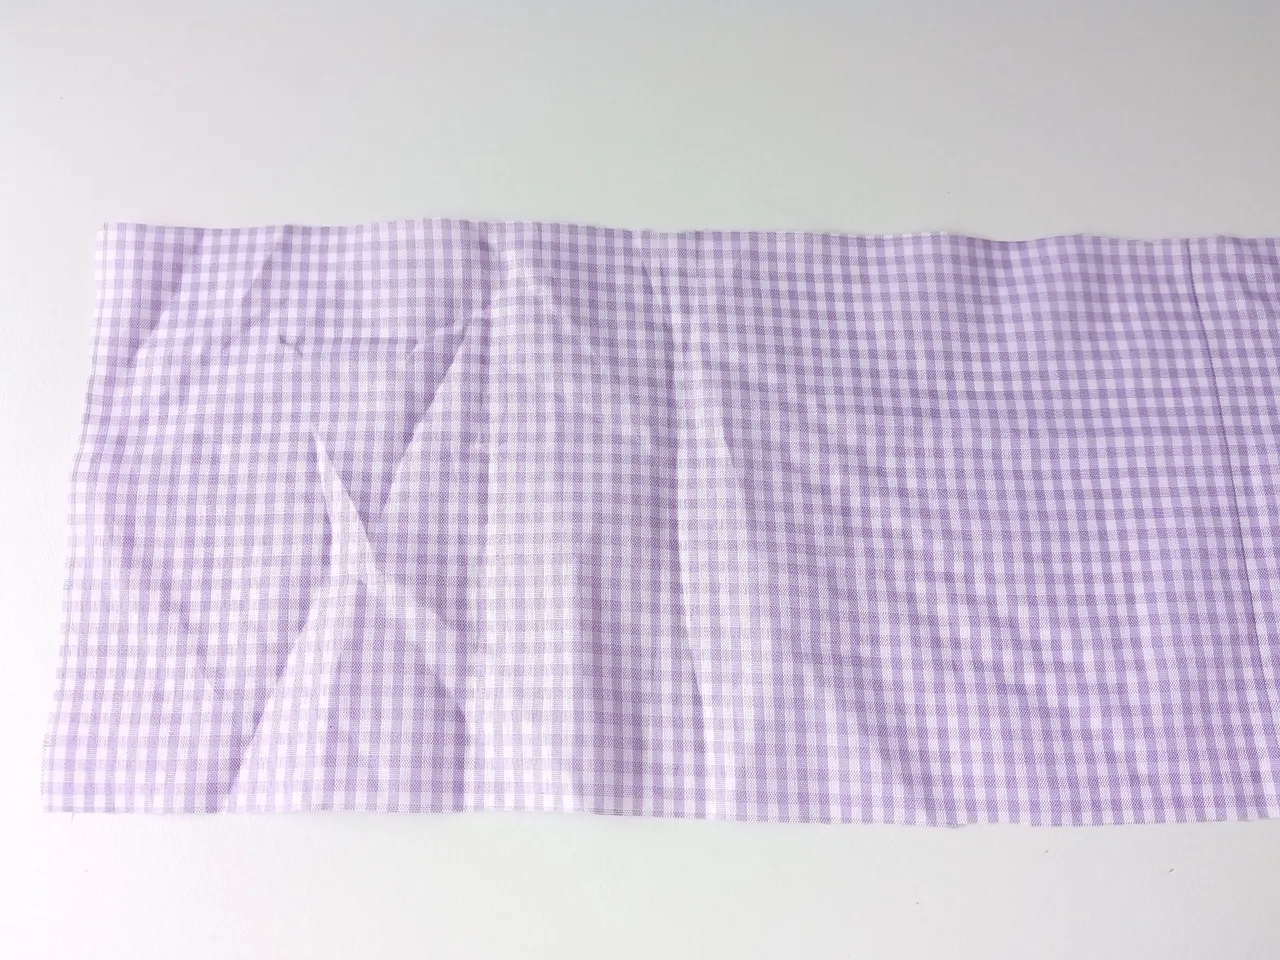
- PASO 1:
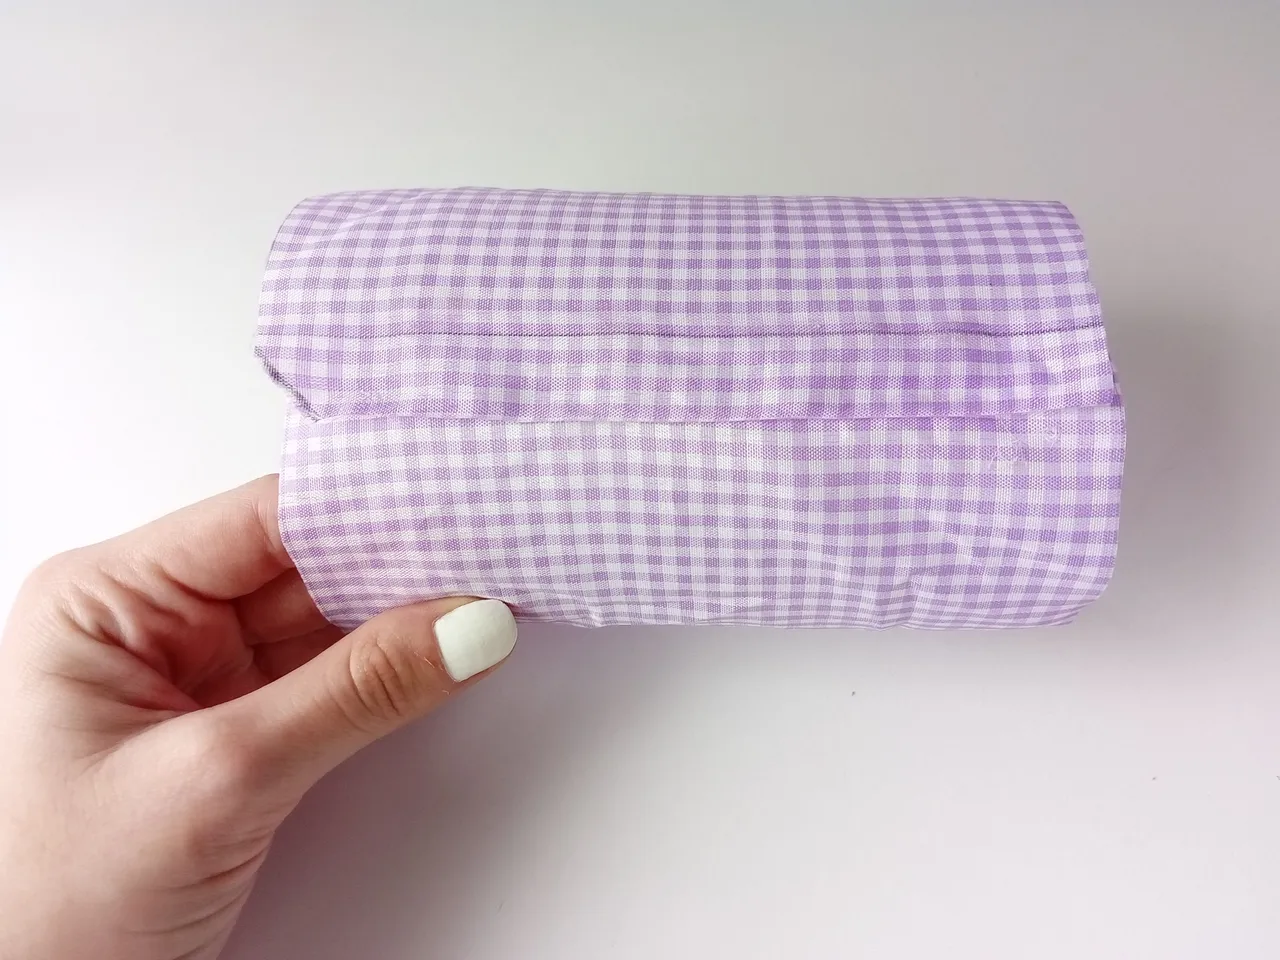
Lo primero que hice fue tomar la botella, le quité la etiqueta y corté el cilindro donde va la etiqueta con ayuda de un cúter. Luego, tomé la tela y corté una tira con 1 cm más de ancho y largo que el cilindro que corté.
- STEP 1:
The first thing I did was take the bottle, I removed the label and cut the cylinder where the label goes with the help of a cutter. Then, I took the fabric and cut a strip with 1 cm more width and length than the cylinder that I cut.
- PASO 2:
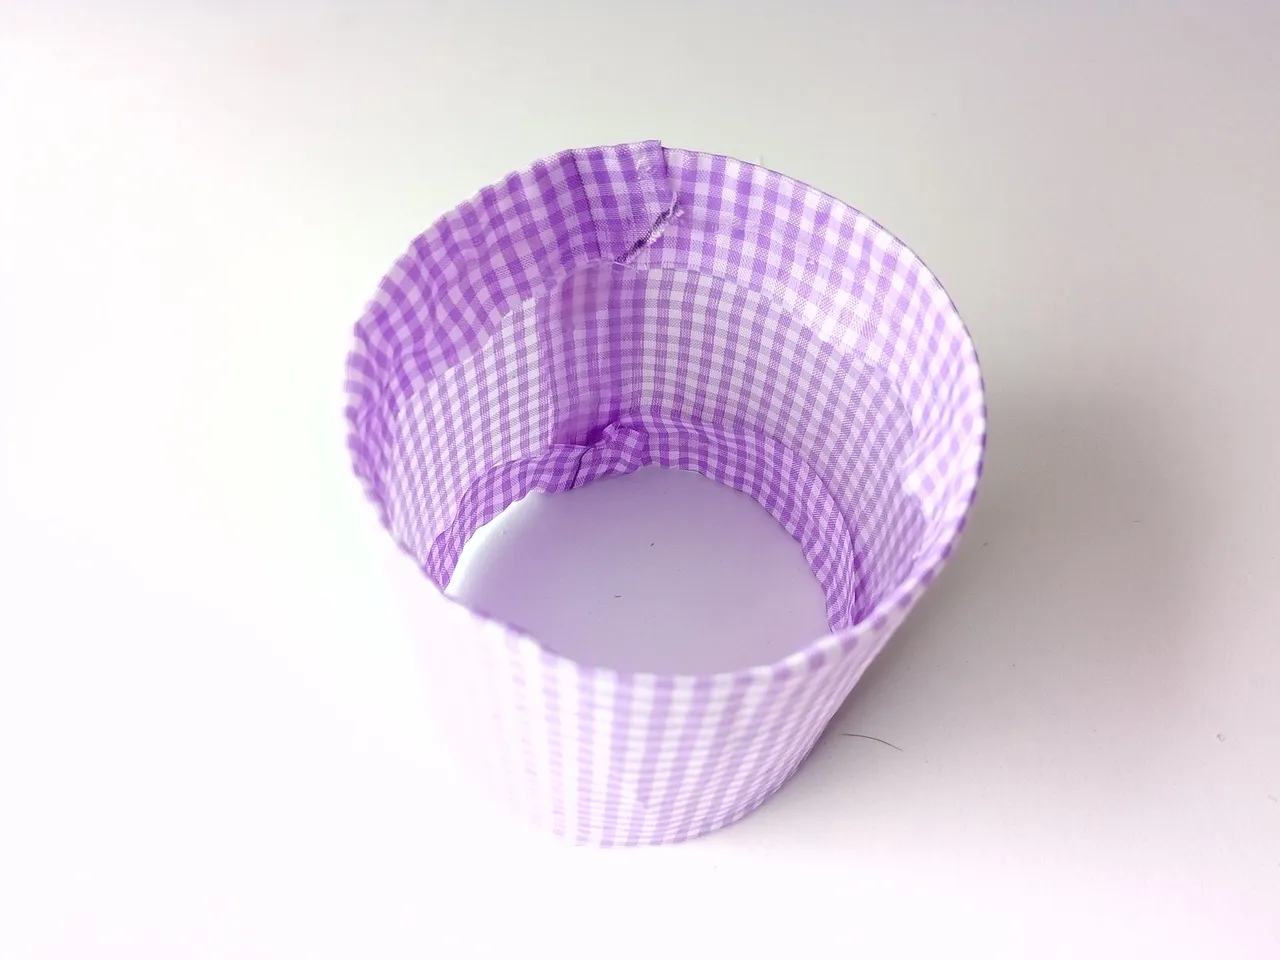
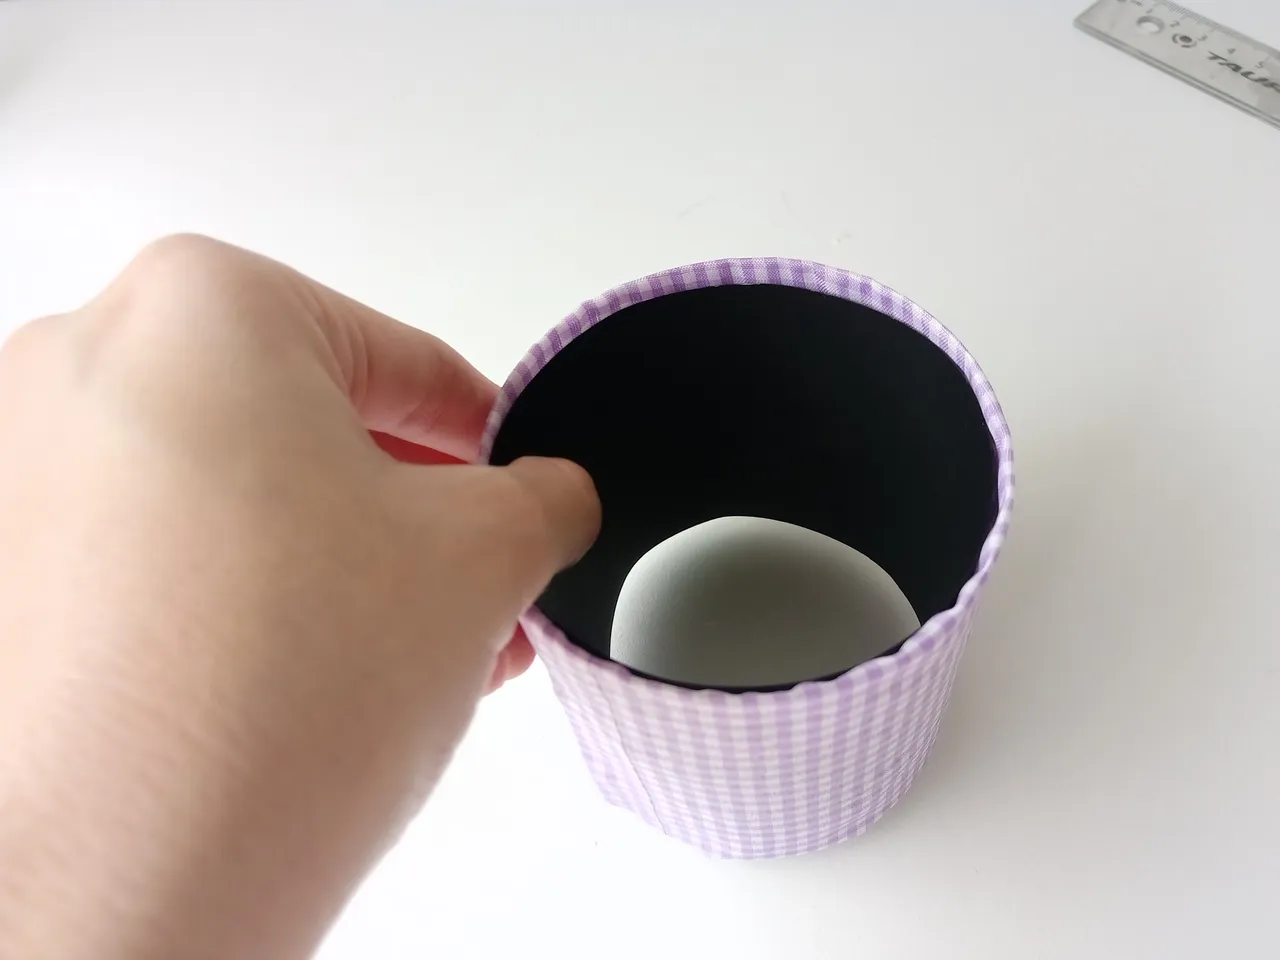
Luego, pegué toda la tela alrededor del cilindro, pero antes de pegar el último extremo, hice un pequeño pliegue y pegué, para que tuviera un mejor acabado. Con el exceso de tela que quedaba en el borde inferior y superior, simplemente los pegué al interior del cilindro. corté una tira de cartulina negra 0,5 cm más pequeña que el largo del cilindro y 1 cm más grande que el ancho del cilindro. Posteriormente lo pegué dentro del cilindro para obtener un mejor acabado y así no se noten las imperfecciones.
- STEP 2:
Then, I glued all the fabric around the cylinder, but before gluing the last end, I made a small fold and glued it, so it would have a better finish. With the excess fabric left on the bottom and top edge, I simply glued them to the inside of the cylinder. I cut a strip of black cardboard 0.5 cm smaller than the length of the cylinder and 1 cm larger than the width of the cylinder. Later I glued it inside the cylinder to obtain a better finish and thus the imperfections are not noticeable.
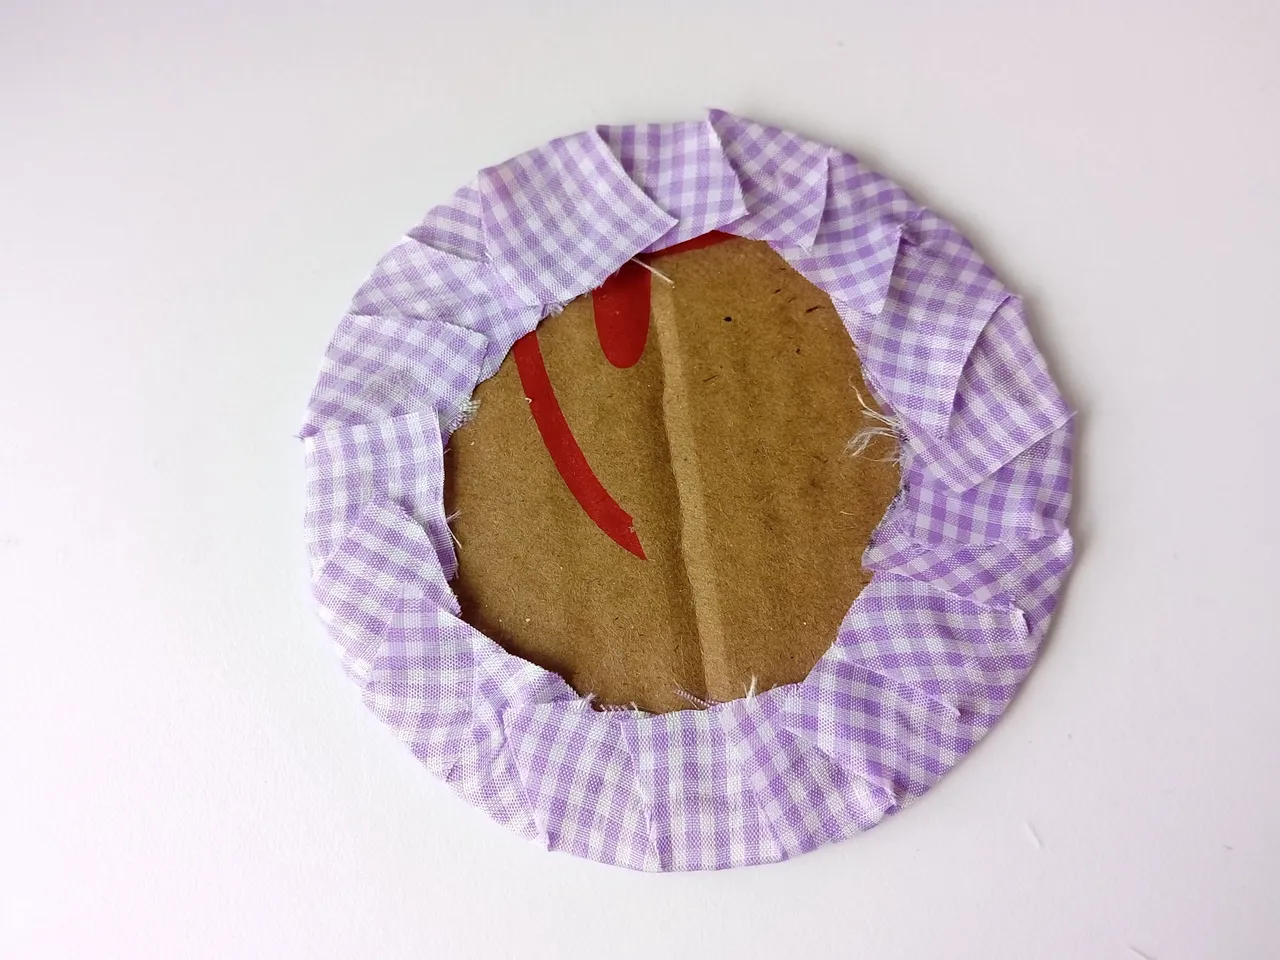
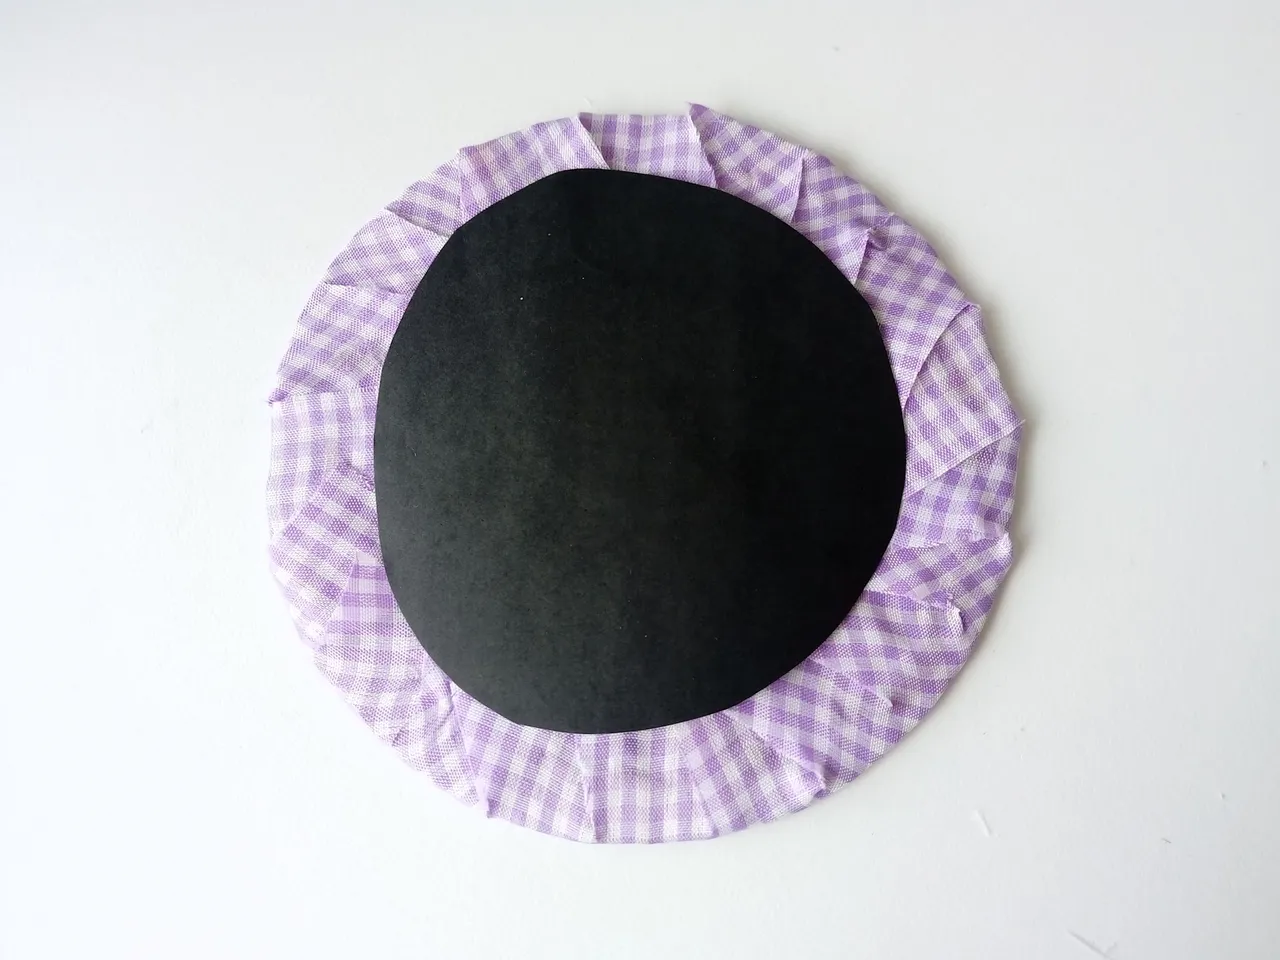
- PASO 3:
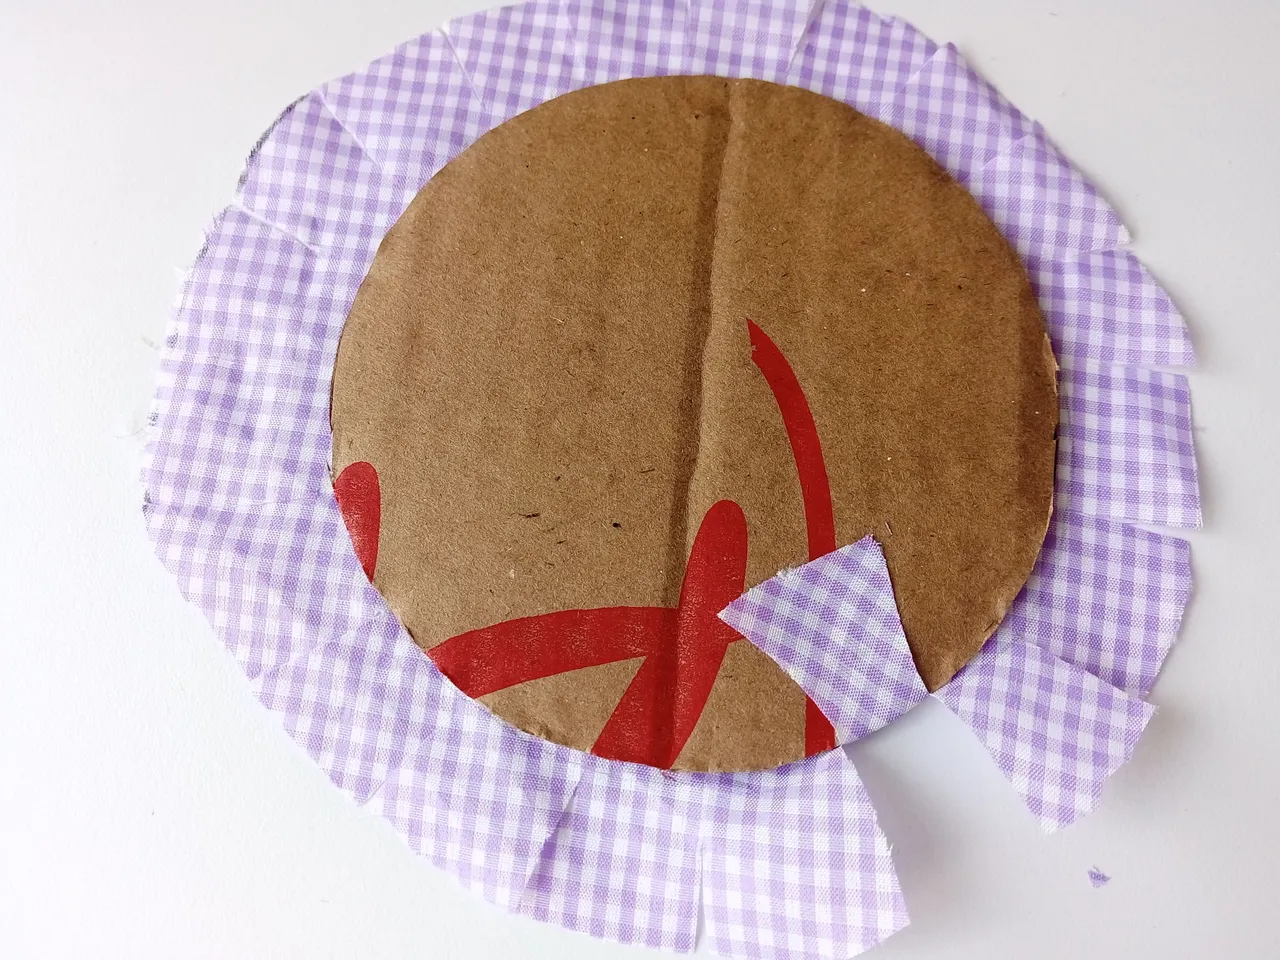
Una vez hecho esto, recorté un círculo de cartón grueso de 1,5 cm más grande que el cilindro de plástico y un círculo de la misma tela con la que cubrí el cartón, cortando todo el borde de la tela en tiras para ir pegando poco a poco para que quedara con la forma deseada. Para hacerlo más prolijo, pegué un círculo en cartulina negra y lo pegué en el medio. Luego, pegué ambas piezas para formar el portalápiz.
- STEP 3:
Once this was done, I cut a circle of thick cardboard 1.5 cm larger than the plastic cylinder and a circle of the same fabric with which I covered the cardboard, cutting the entire edge of the fabric into strips to stick little little by little to get the desired shape. To make it neater, I glued a circle onto black cardstock and glued it in the middle. Then, I glued both pieces together to form the pencil holder.
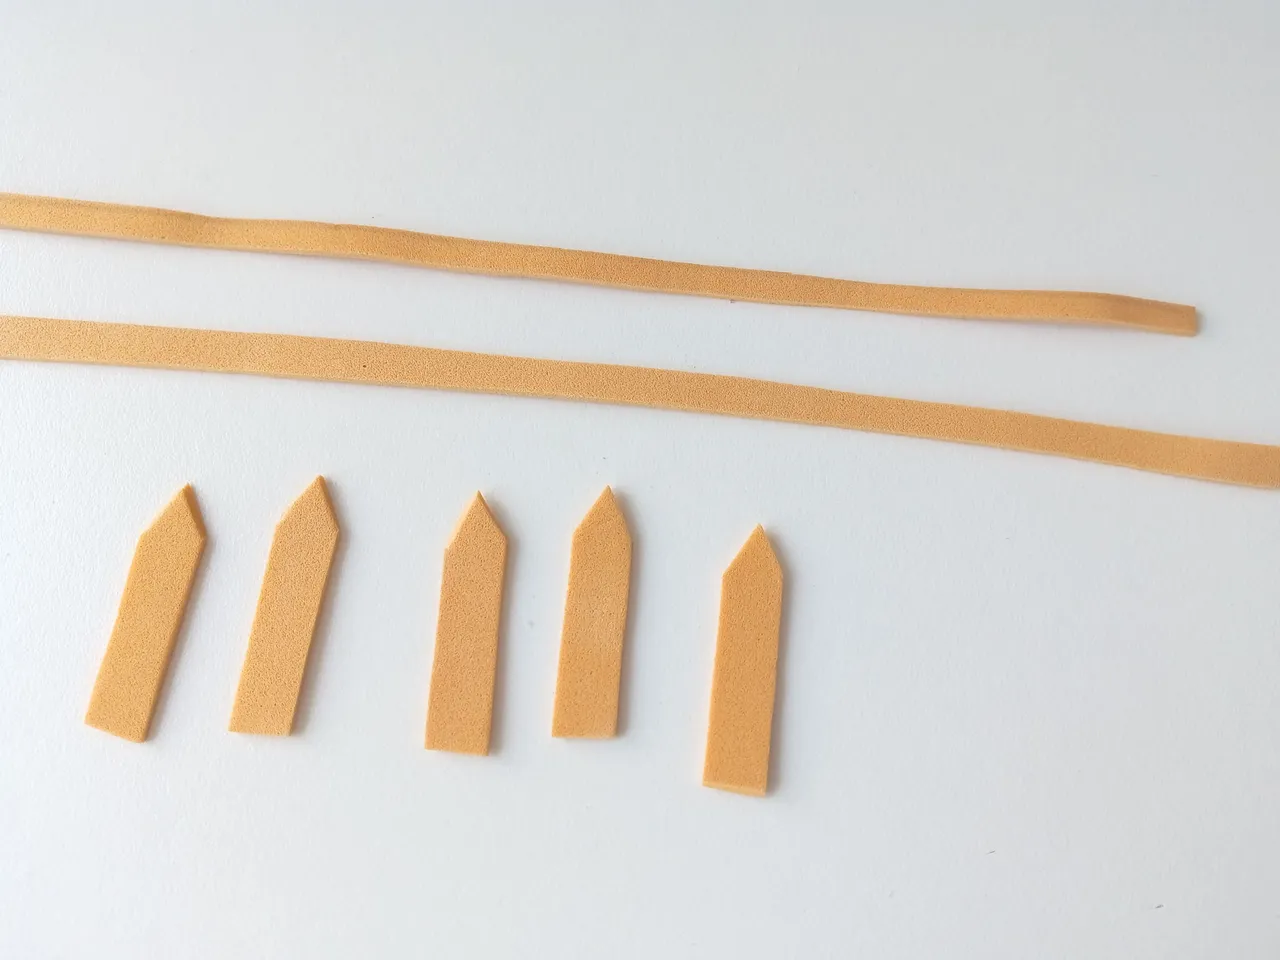
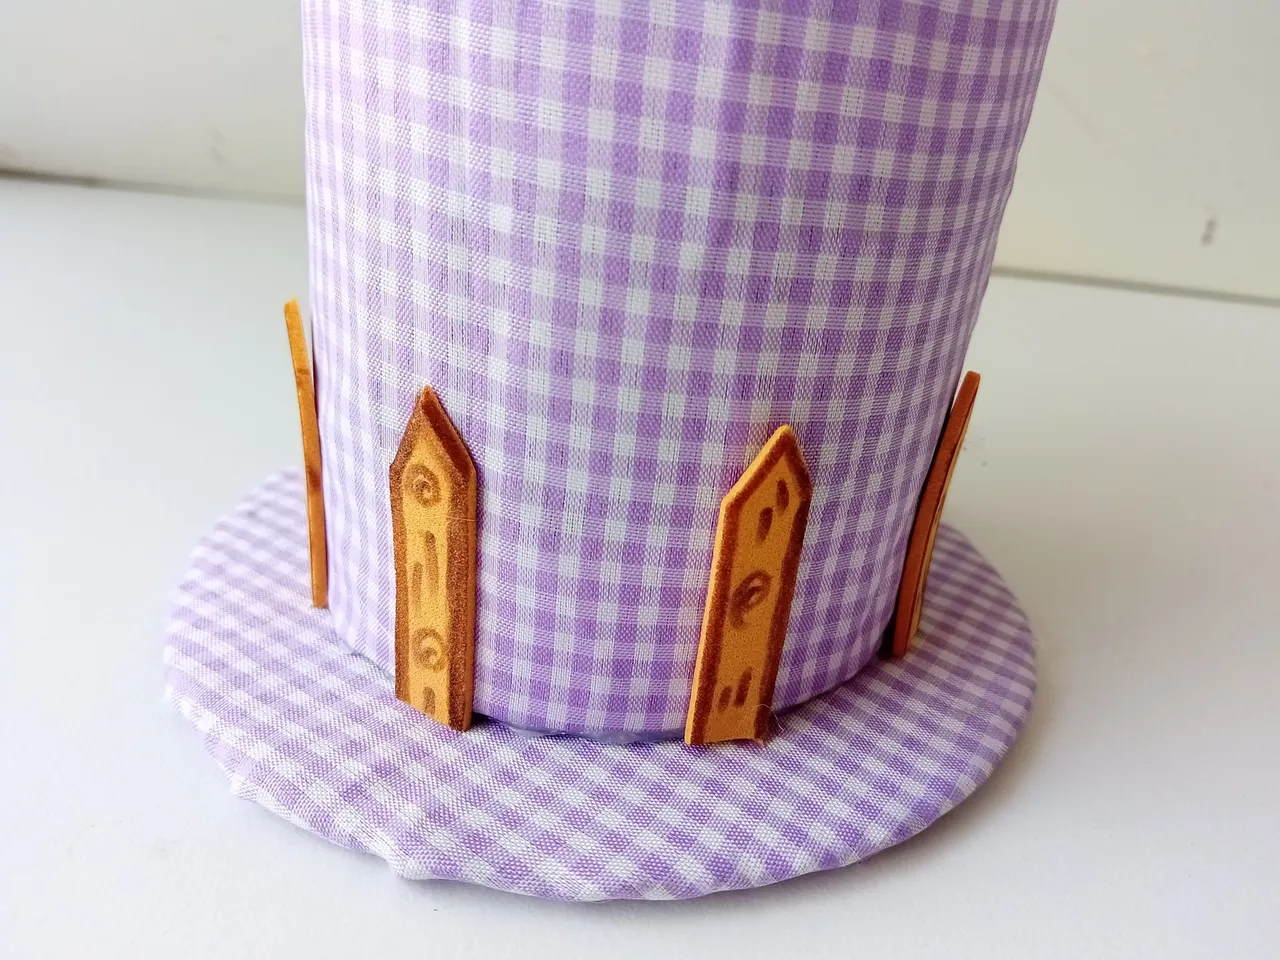
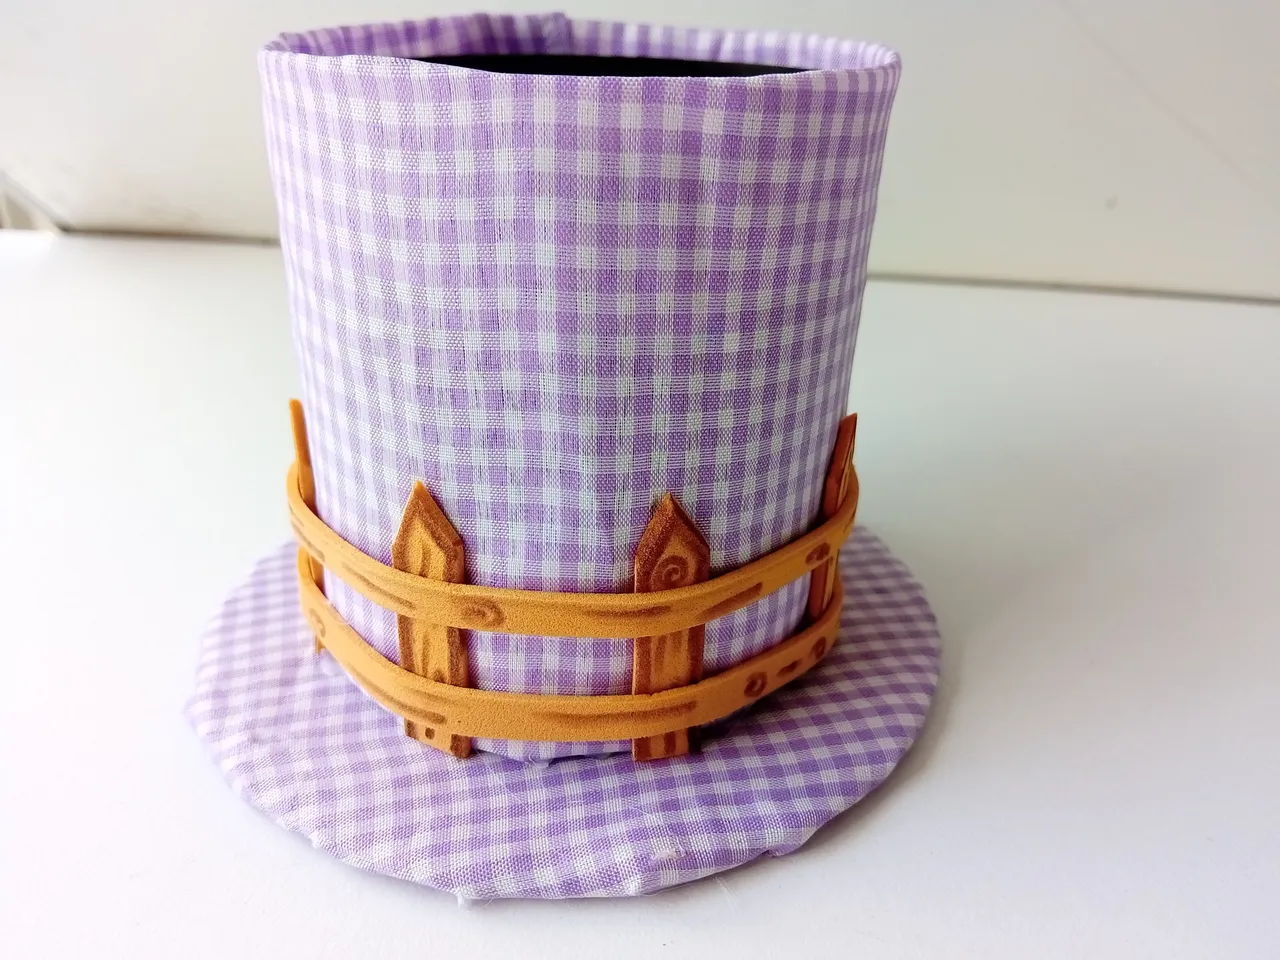
- PASO 4:
Ahora toca decorar, en foami marrón, cortamos 2 tiras largas de 0,5 cm de ancho y 7 piezas más de 4 cm x 1 cm a las que en un extremo le di forma triangular. Luego, las pegué al portalápices, dejando una distancia entre cada una y con un marcador le di la apariencia de madera. A continuación, pegué las tiras más finas encima de las anteriores, de forma horizontal, dejando una distancia entre cada una, y también di detalles con un marcador.
- STEP 4:
Now it's time to decorate, in brown foami, we cut 2 long strips of 0.5 cm wide and 7 more pieces of 4 cm x 1 cm to which I gave a triangular shape at one end. Then, I glued them to the pencil holder, leaving a distance between each one and with a marker I gave it the appearance of wood. Next, I glued the thinnest strips on top of the previous ones, horizontally, leaving a distance between each one, and I also gave details with a marker.
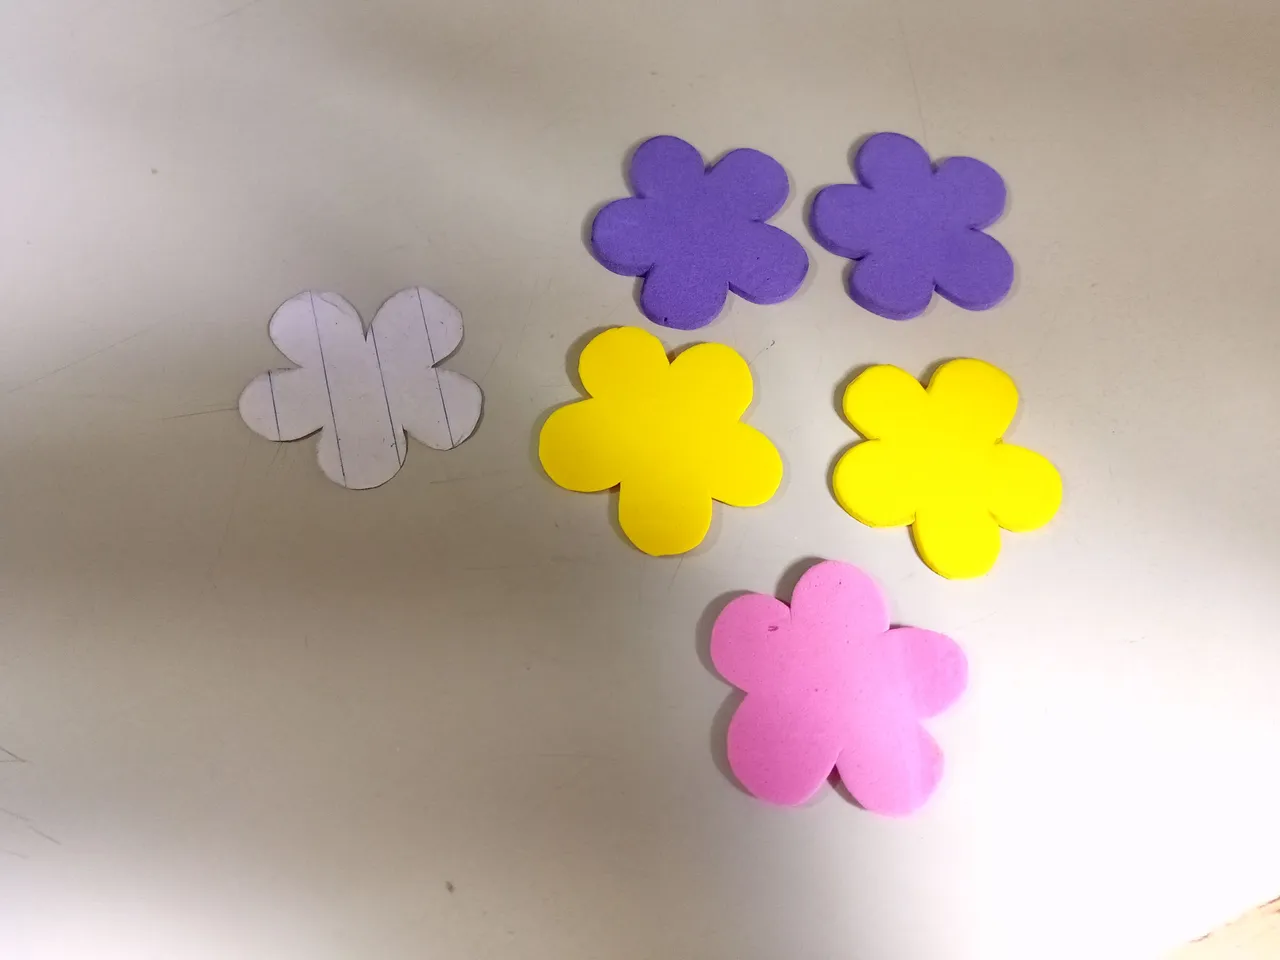
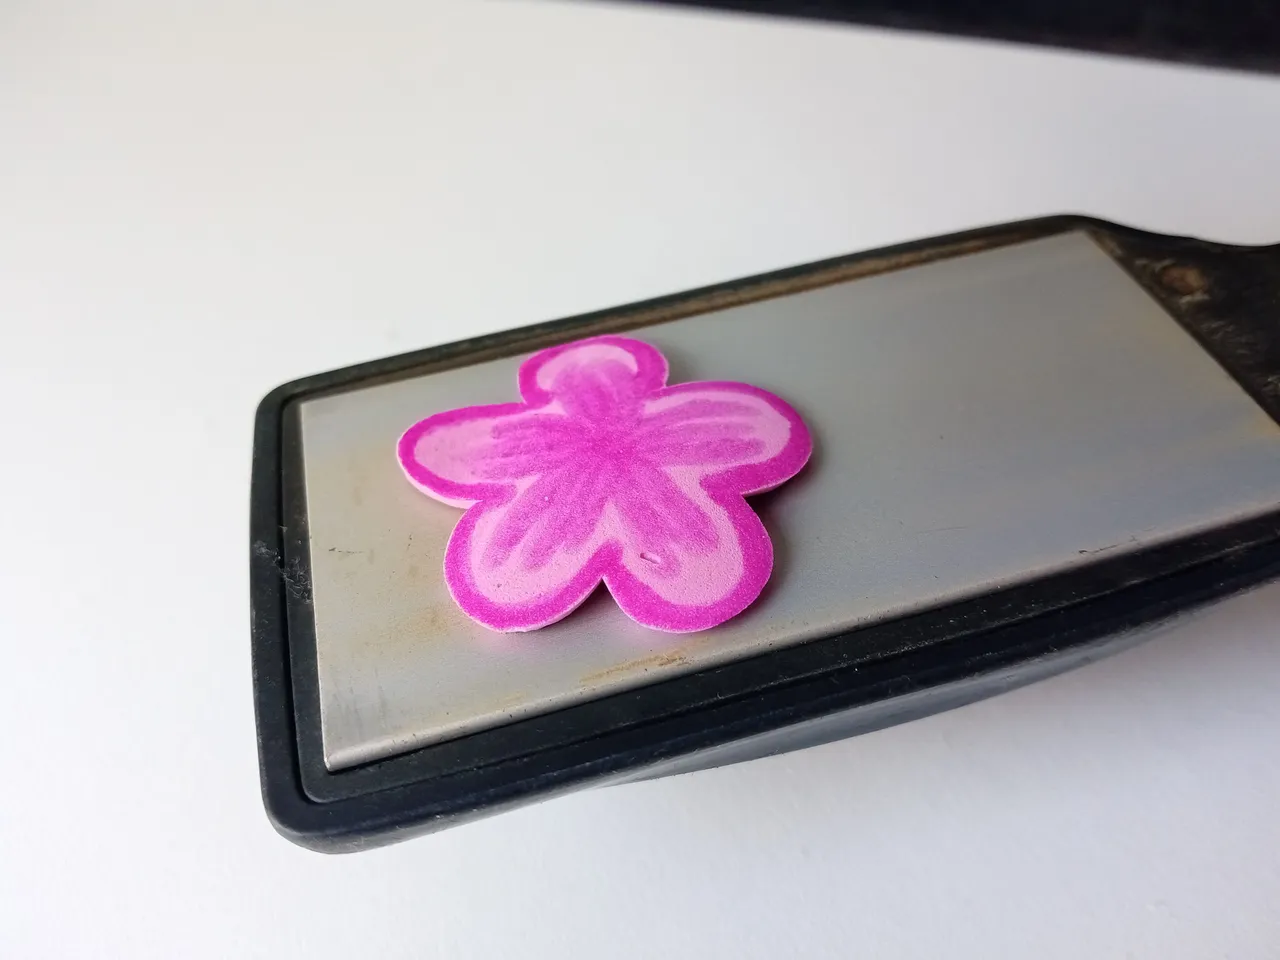
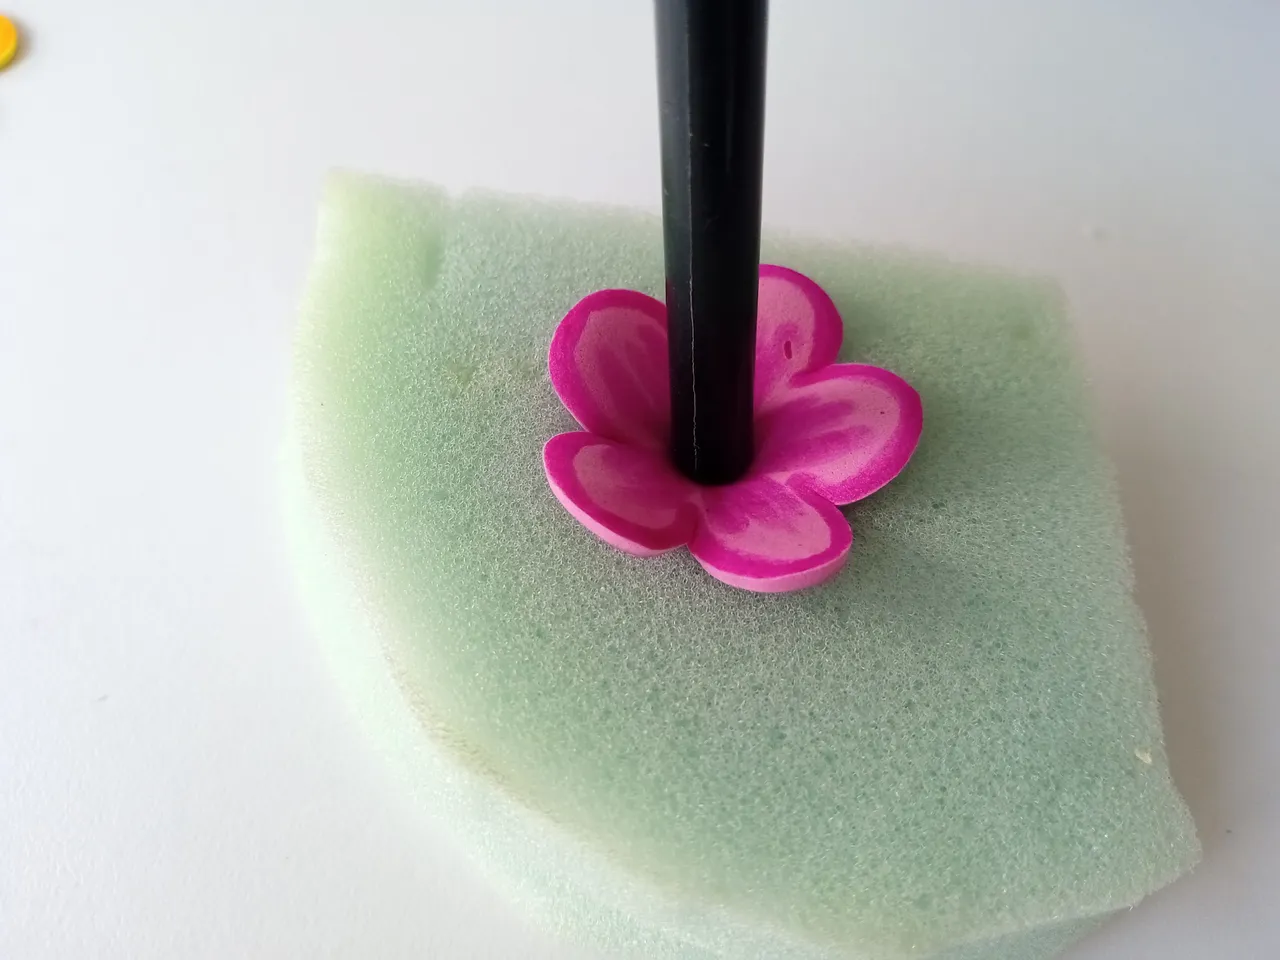
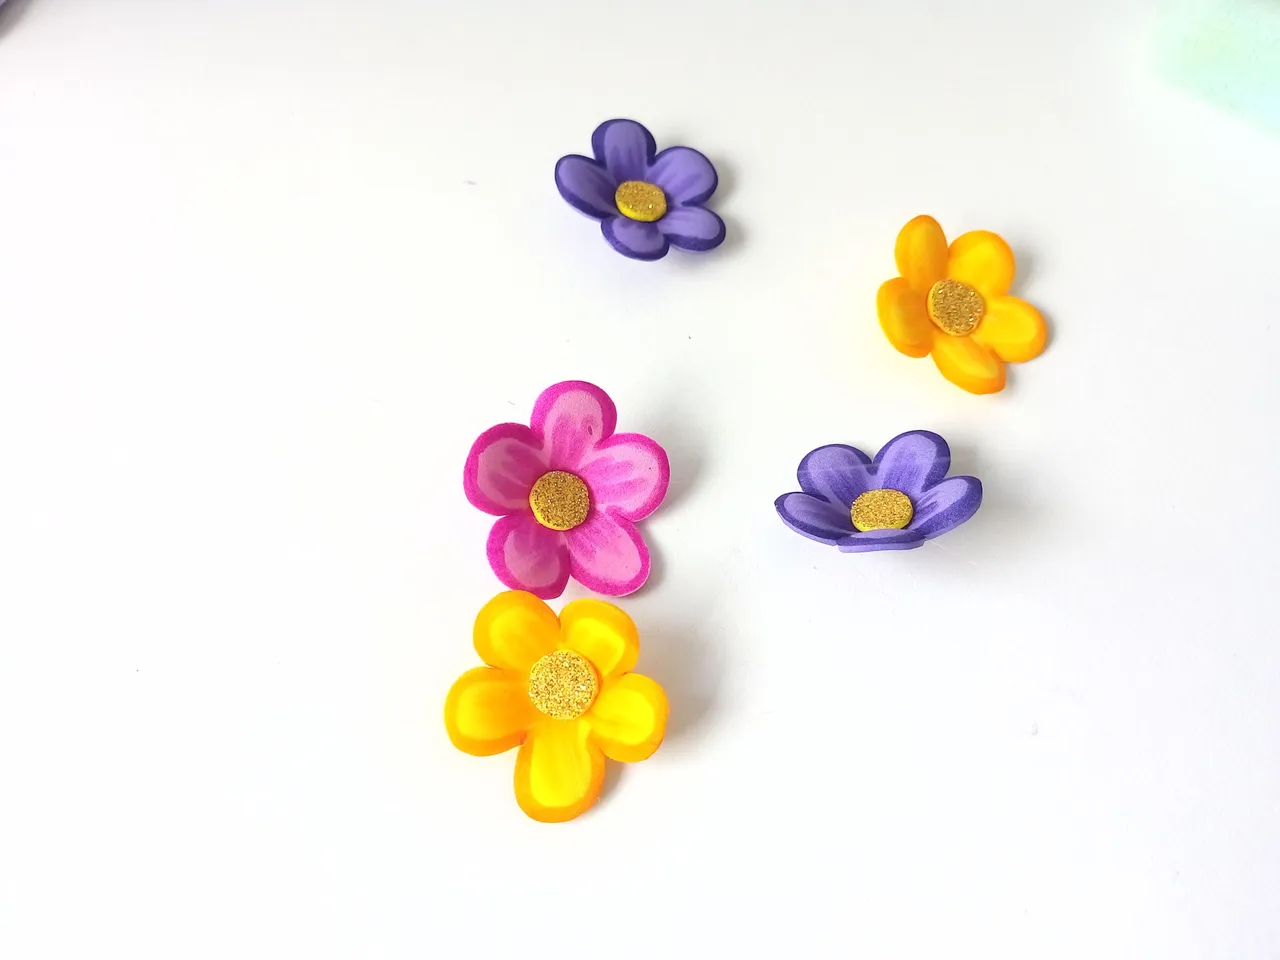
- PASO 5:
Dibujé el patrón de una flor y lo tracé en los colores de foami de mi elección, en este caso: rosa, amarillo y morado. Una vez lista, recorté y con marcadores del mismo color, le di detalles a las flores. Luego las coloqué sobre la plancha hasta que abultaran, y con una punta redonda y una esponja las hundí en el centro, luego pegué un círculo de foami en el medio.
- STEP 5:
I drew the pattern of a flower and traced it on the foami colors of my choice, in this case: pink, yellow and purple. Once ready, I cut out and with markers of the same color, I gave details to the flowers. Then I placed them on the iron until they bulged, and with a round tip and a sponge I sank them in the center, then I glued a circle of foami in the middle.
- PASO 6:
Para terminar, pegué las flores intercaladas en el medio y dejando un poco de distancia. Luego, corté hojas de foami verde, las coloqué detrás de las flores y con pintura blanca pinté unos puntos para dar luz.
- STEP 6:
To finish, I glued the interspersed flowers in the middle and leaving a little distance. Then, I cut green foami leaves, placed them behind the flowers and with white paint I painted some dots to give light.
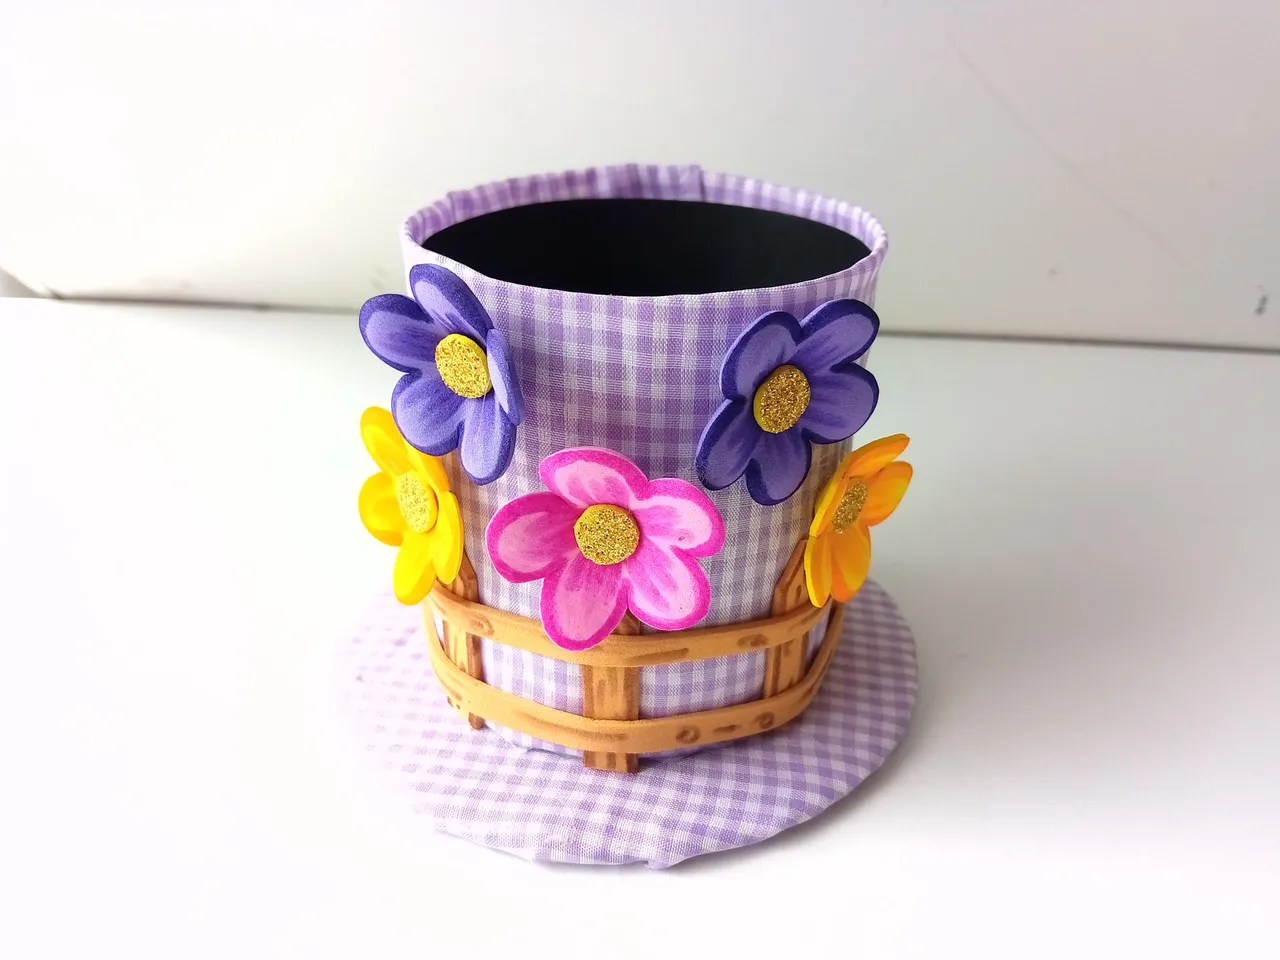
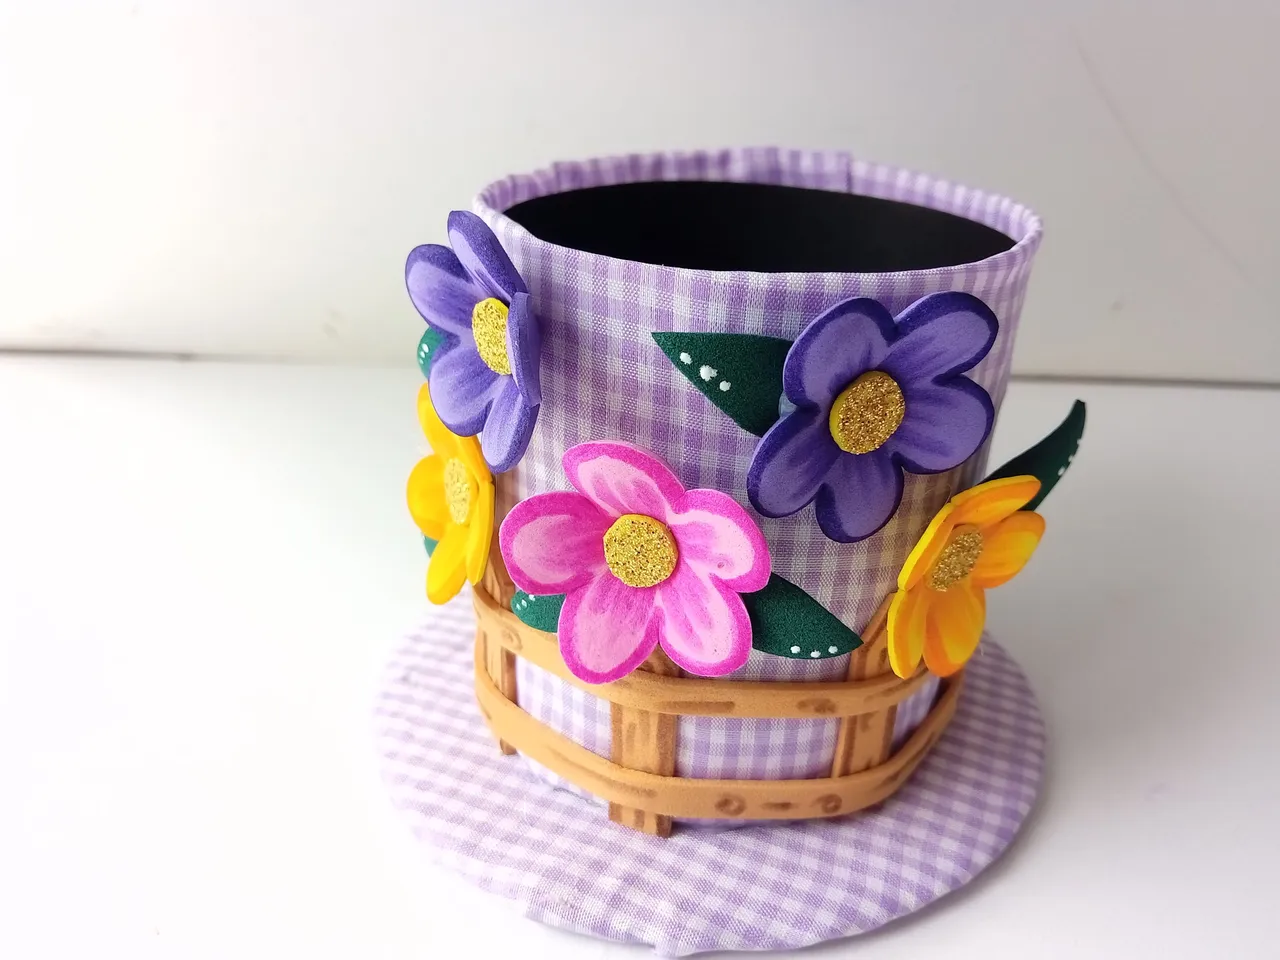
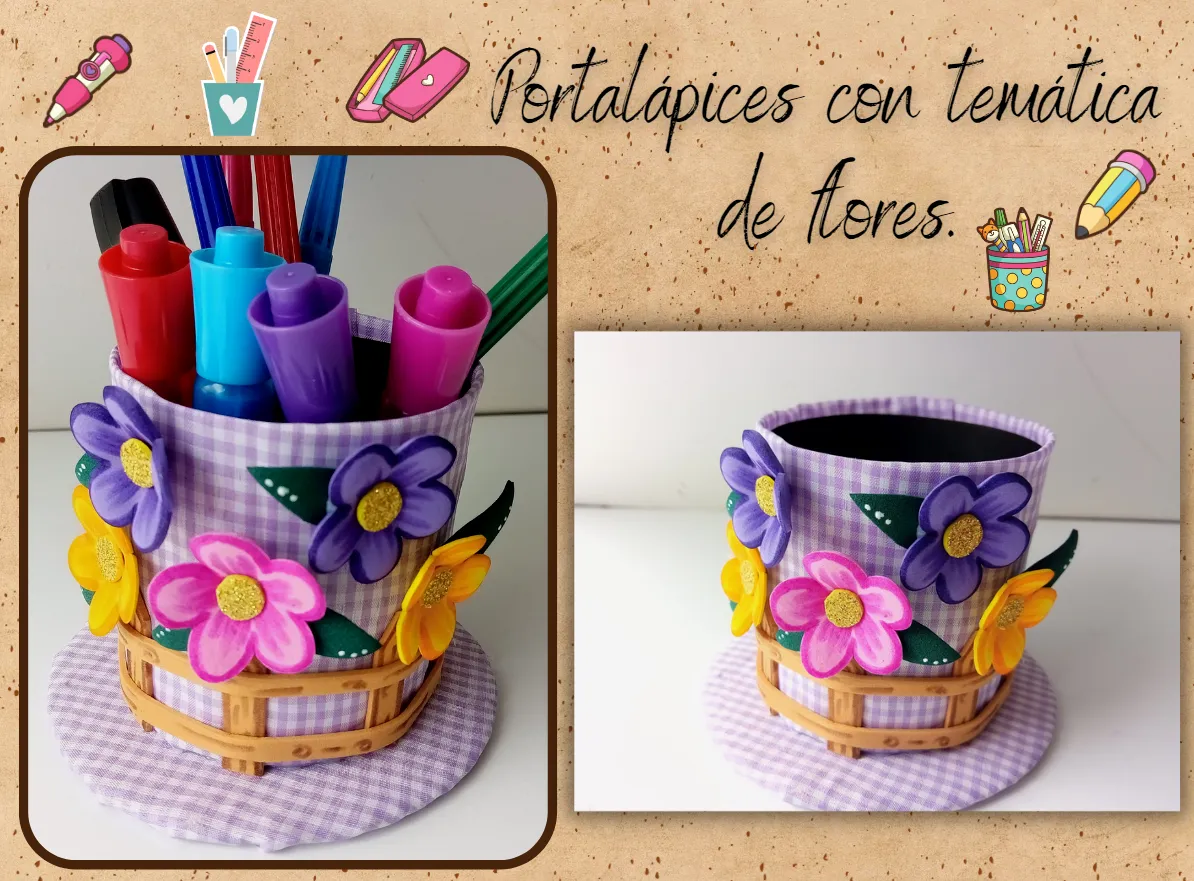
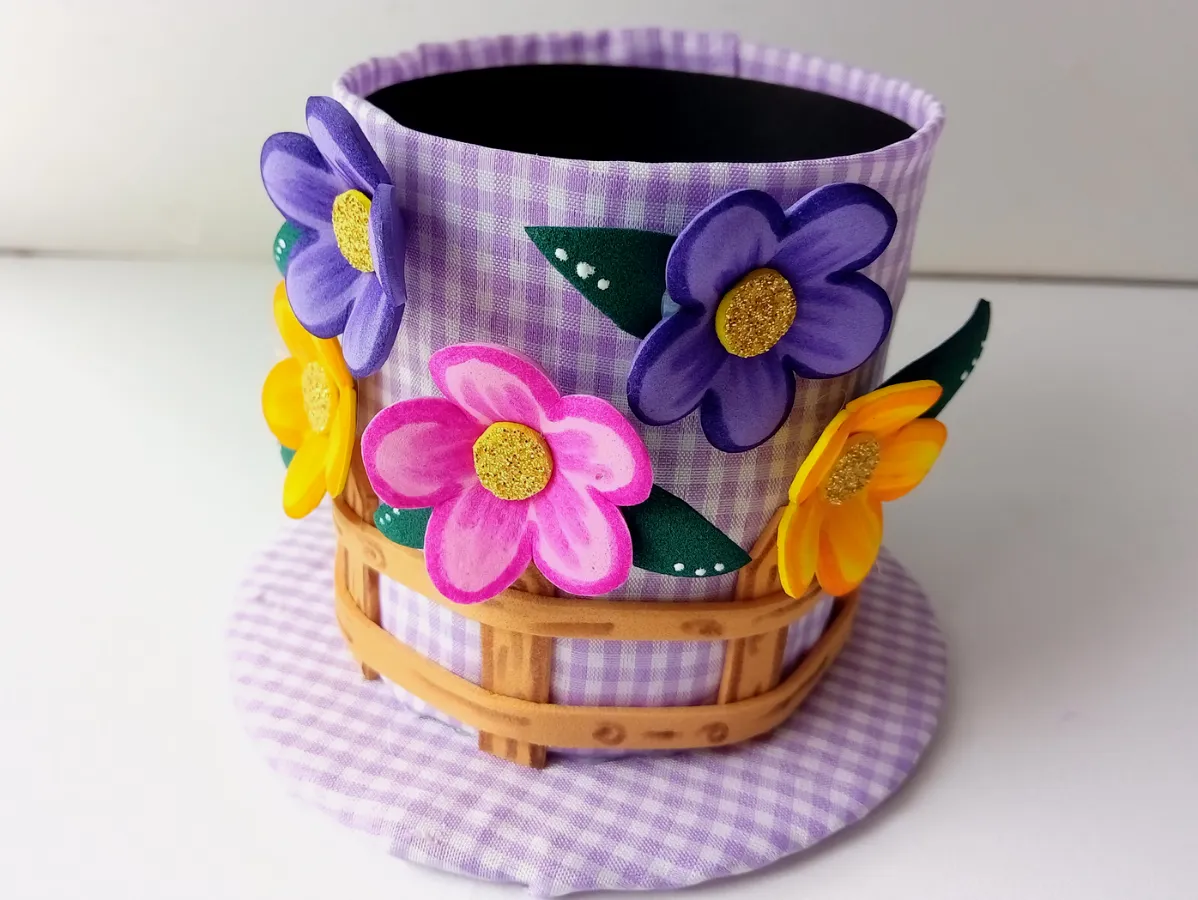
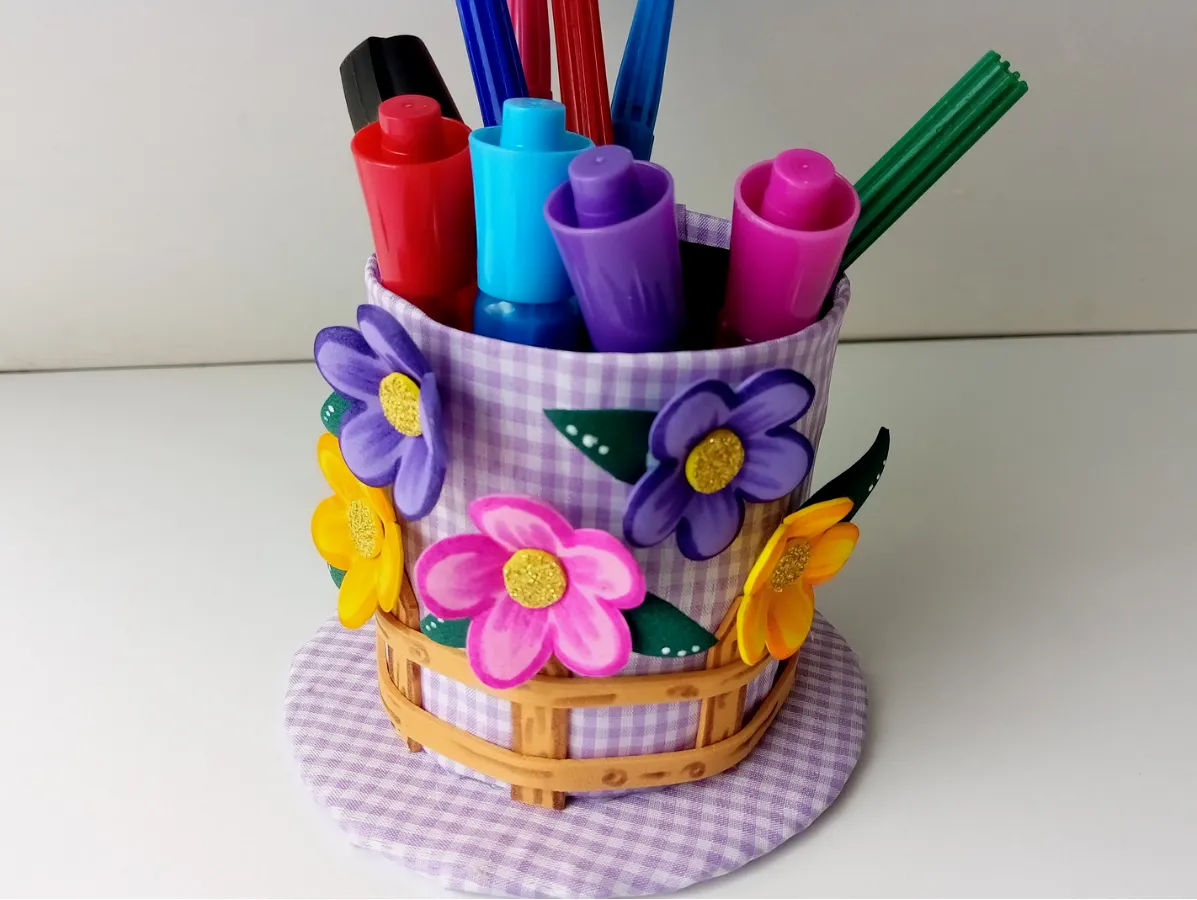
✨🌹¡Y listo!🌹✨ De esta forma tan sencilla, pueden hacer un bonito portalápices de flores. Me enamoré totalmente de este diseño, ya que me encantan las flores y estoy bastante contenta con el resultado final. Recuerda que no es necesario hacer flores de tantos colores, puedes utilizar la que tengas a tu disposición. Espero les haya gustado y se animen a elaborar el paso a paso de esta bonita idea
❤️Hasta la próxima publicación.
✨🌹¡And ready!🌹✨ In this simple way, they can make a pretty flower pencil holder. I fell totally in love with this design, since I love flowers and I'm quite happy with the final result. Remember that it is not necessary to make flowers of so many colors, you can use the one you have at your disposal. I hope you liked the step by step and are encouraged to elaborate it. I hope you liked it and are encouraged to elaborate the step by step of this beautiful idea
❤️Until the next post.
✨RESULTADO: | ✨RESULT:


Todas las fotografías son de mi propiedad.
Separador y Fotos editadas en Canva
All photographs are my property.
Photos edited in Canva