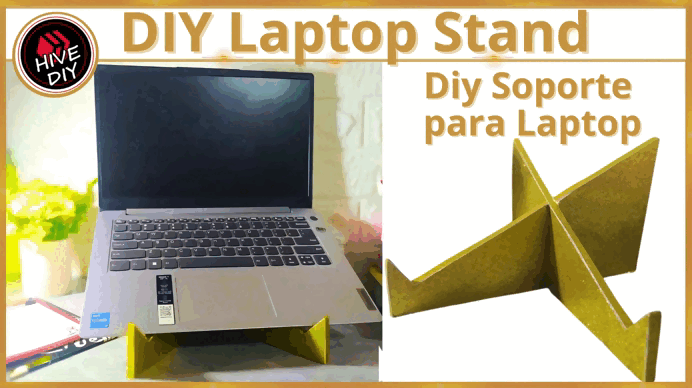
Hace tiempo que tenía en deuda realizar esta manualidad para mi hija, ella tiene una laptop que utiliza en su escritorio sobre una caja de madera para darle la altura que le gusta. Así que quería que le realizara un soporte o base que fuese muy funcional, se pudiese desmontar cuando lo necesitara y que se viera muy bien.
El día de hoy por fin me decidí a realizar este proyecto y como estructura utilicé cartón reciclado, era de una caja, es grueso y fuerte, ideal para soportar el peso de la laptop. A continuación les presento el proceso... Bienvenidos.
I've been meaning to make this craft for my daughter for a while. She has a laptop she uses at her desk on a wooden box to give it the height she likes. So she wanted me to make her a stand or base that would be very functional, removable when needed, and look great.
Today I finally decided to try this project, and I used recycled cardboard from a box as the frame. It's thick and strong, perfect for supporting the weight of the laptop. Below is the process... Welcome.

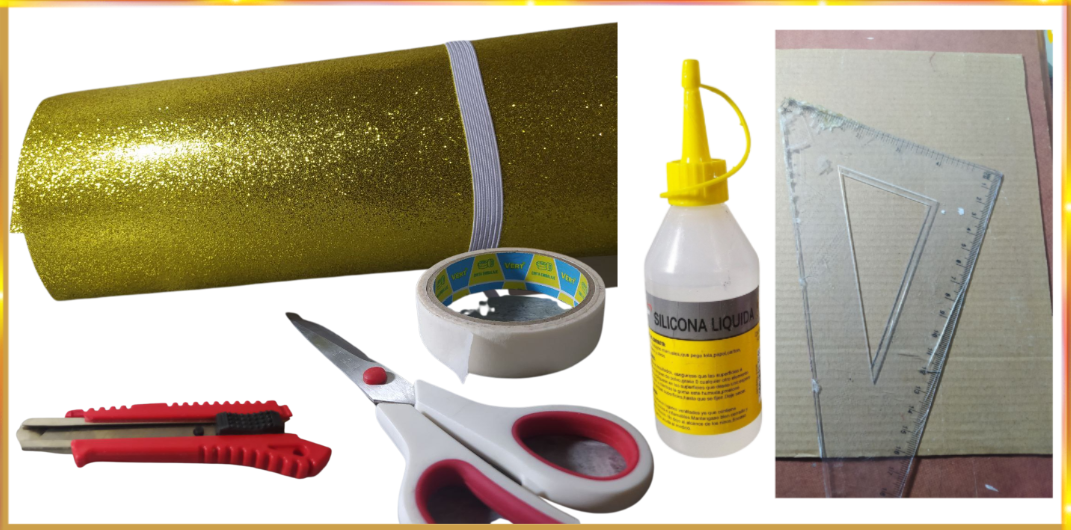
- Cartulina dorada y escarchada
- Cartón reciclado
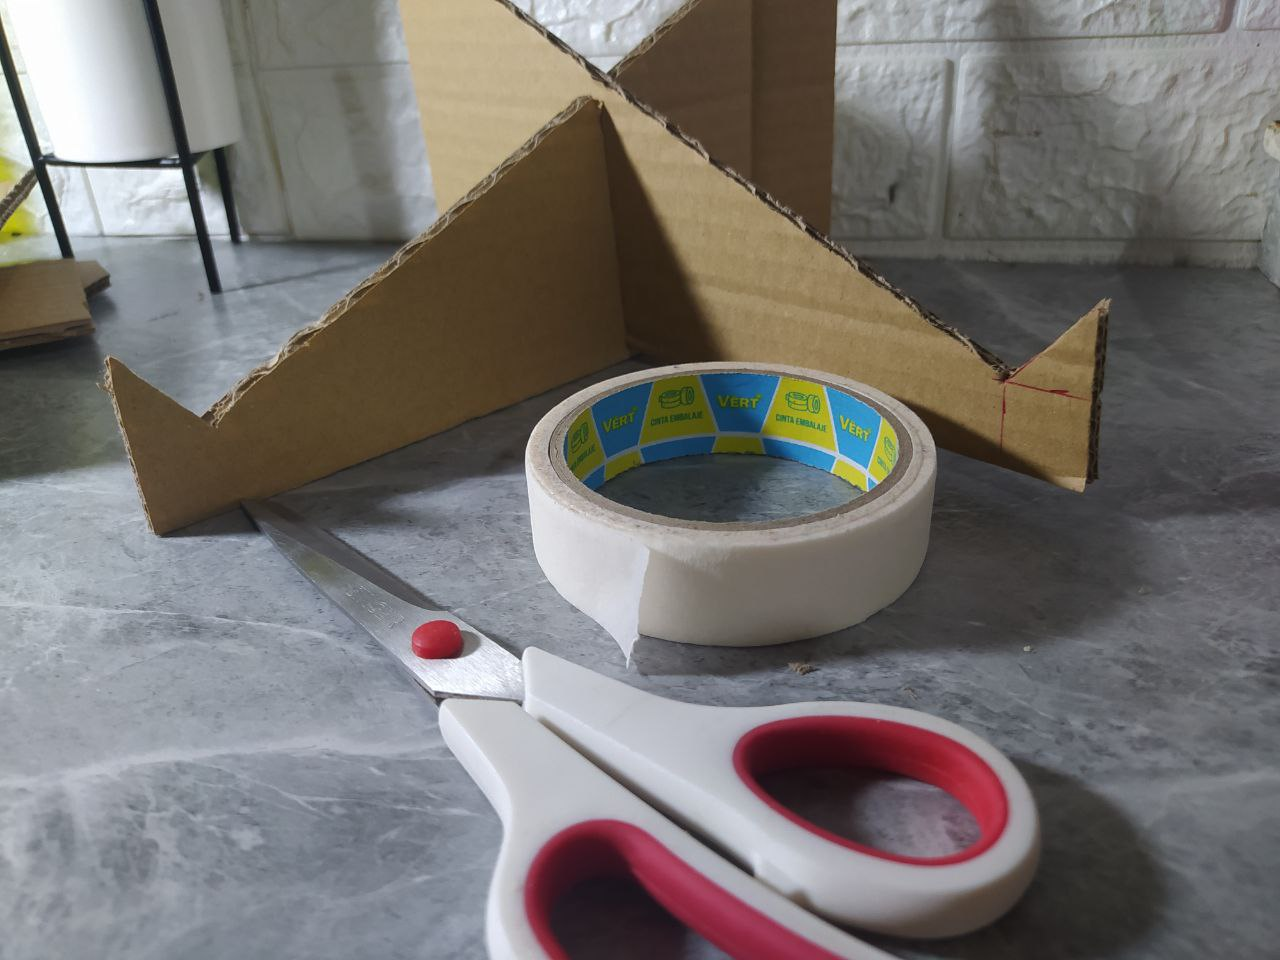
- Tijera y cúter
- Tirro
- Silicón líquido
- Gold and glitter cardstock
- Recycled cardboard
- Scissors and cutter
- Adhesive tape
- Liquid silicone

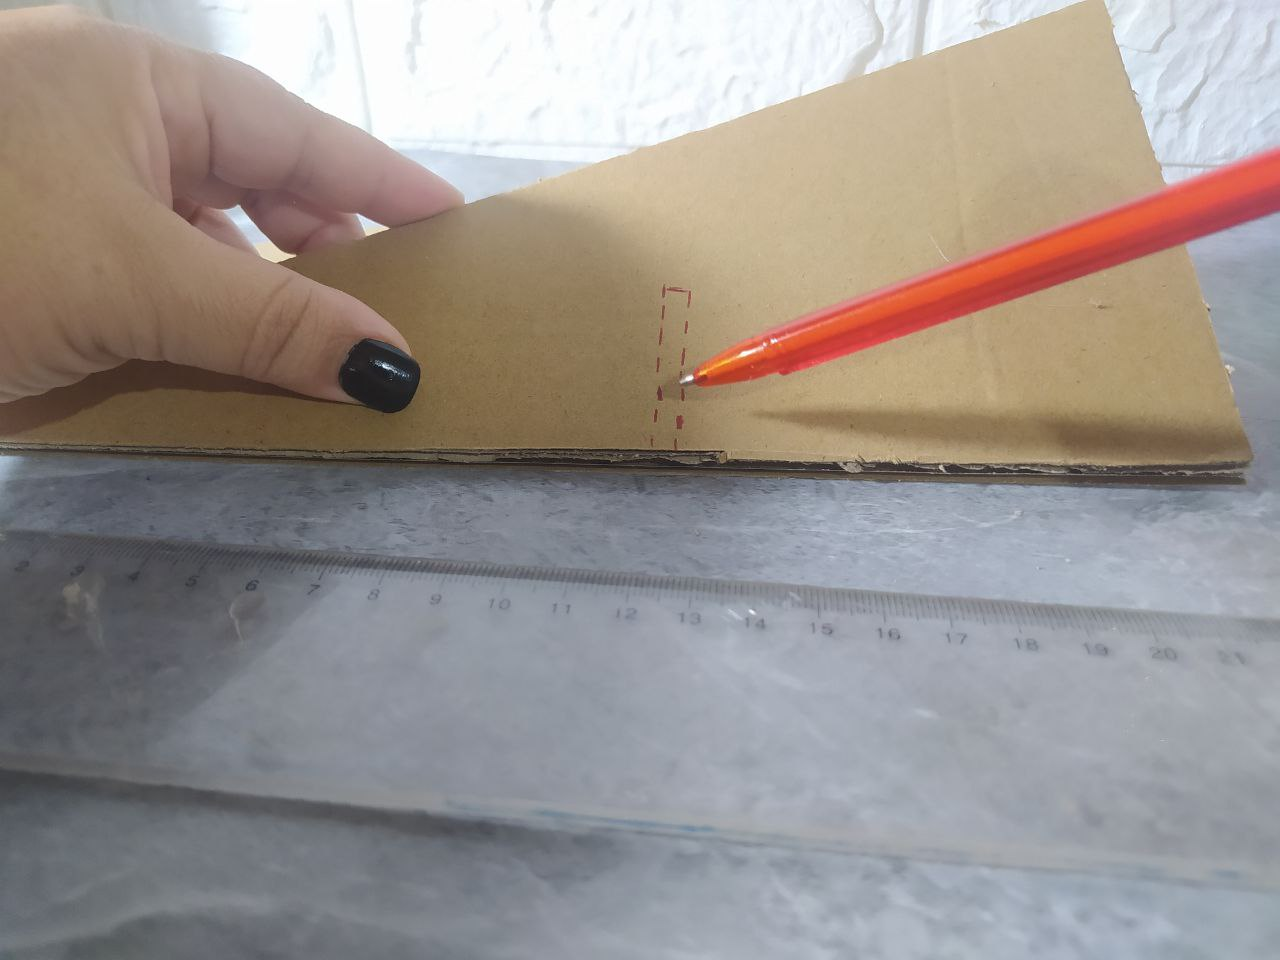
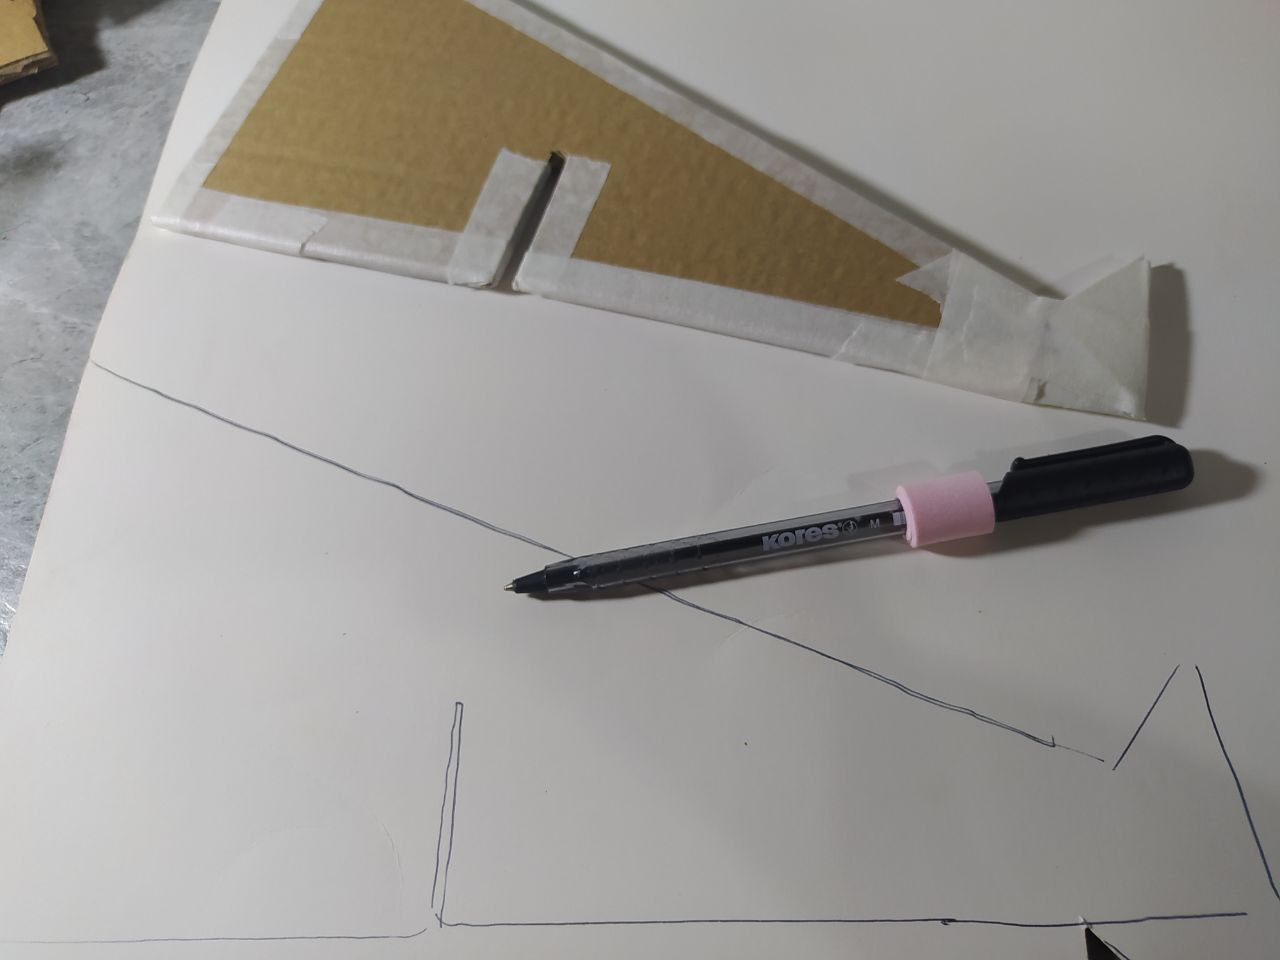
De acuerdo a los requerimientos que quería mi hija, este soporte debía tener la posibilidad de desmontarse o desarmarse, así que primero hice una plantilla con el diseño del soporte, que constaría de dos piezas idénticas, con las medidas que les muestro a continuación:
According to my daughter's requirements, this stand had to be able to be disassembled or taken apart, so I first made a template with the design of the stand, which would consist of two identical pieces, with the measurements shown below:
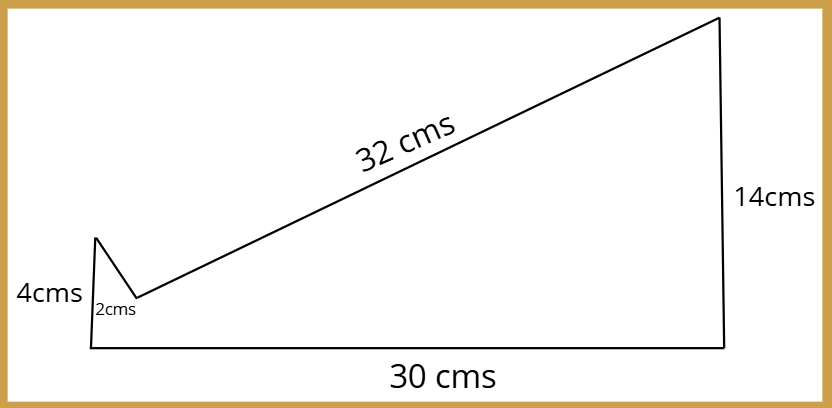
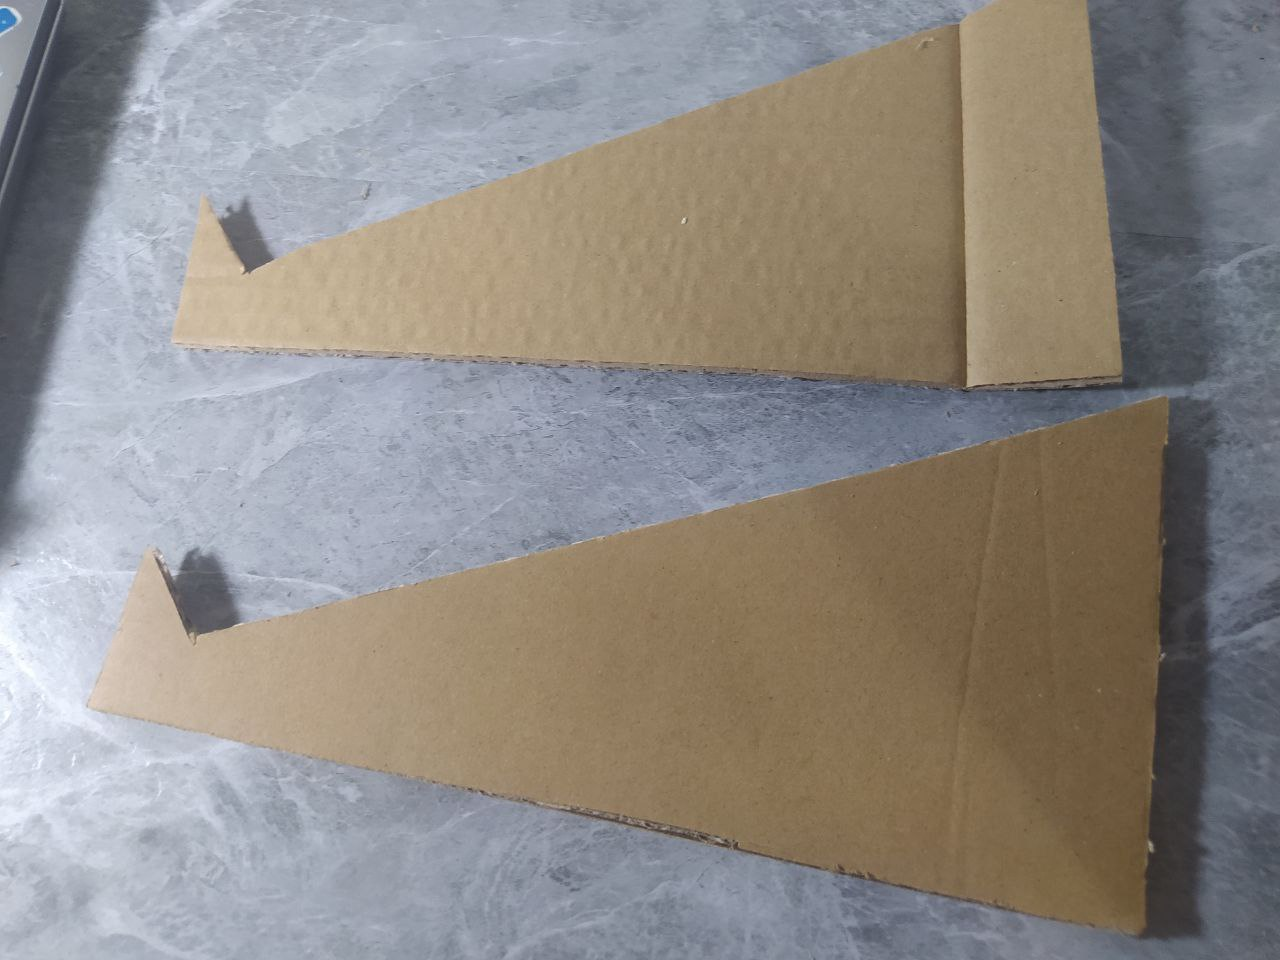
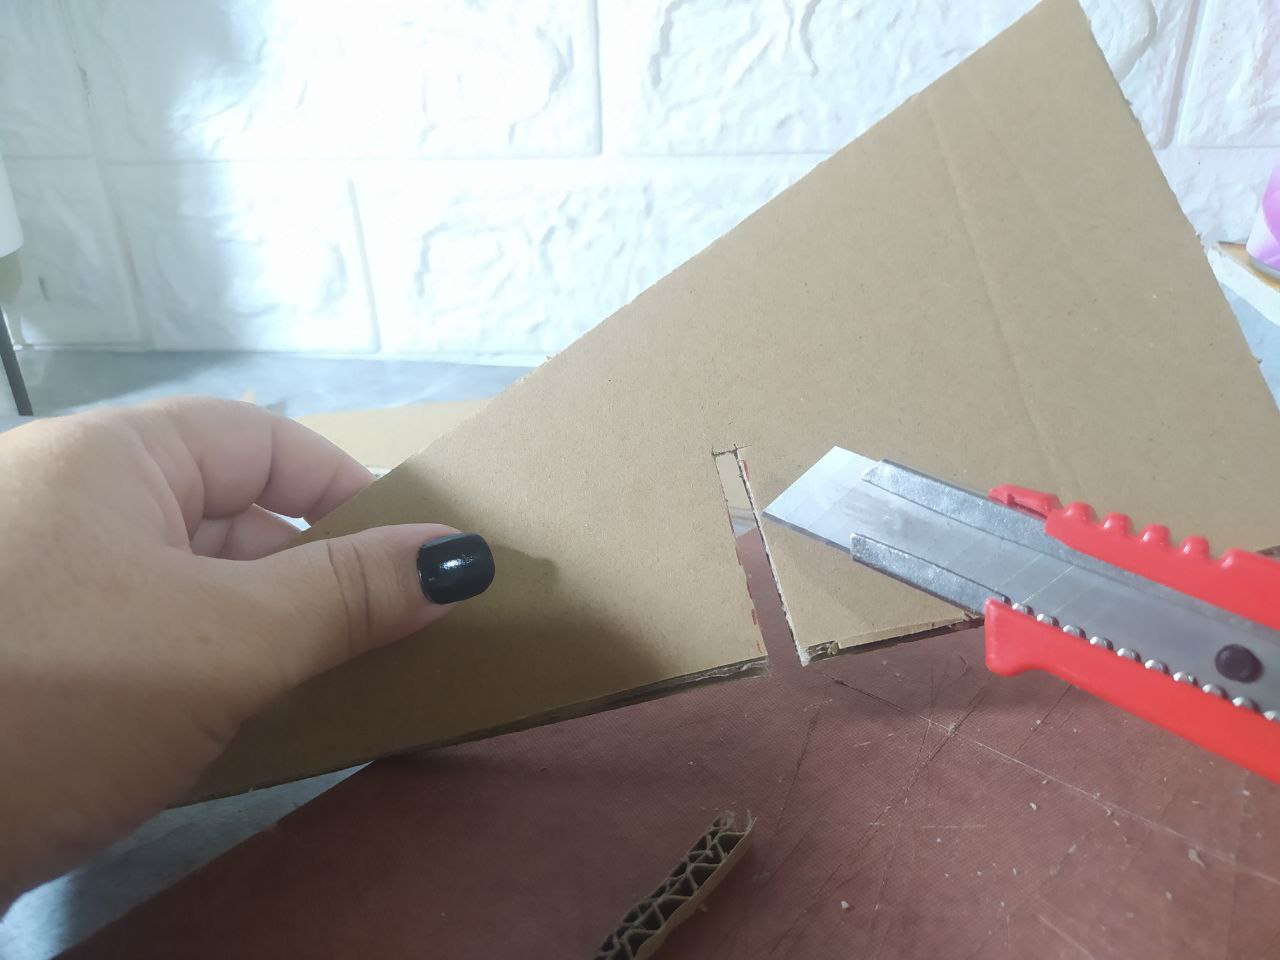
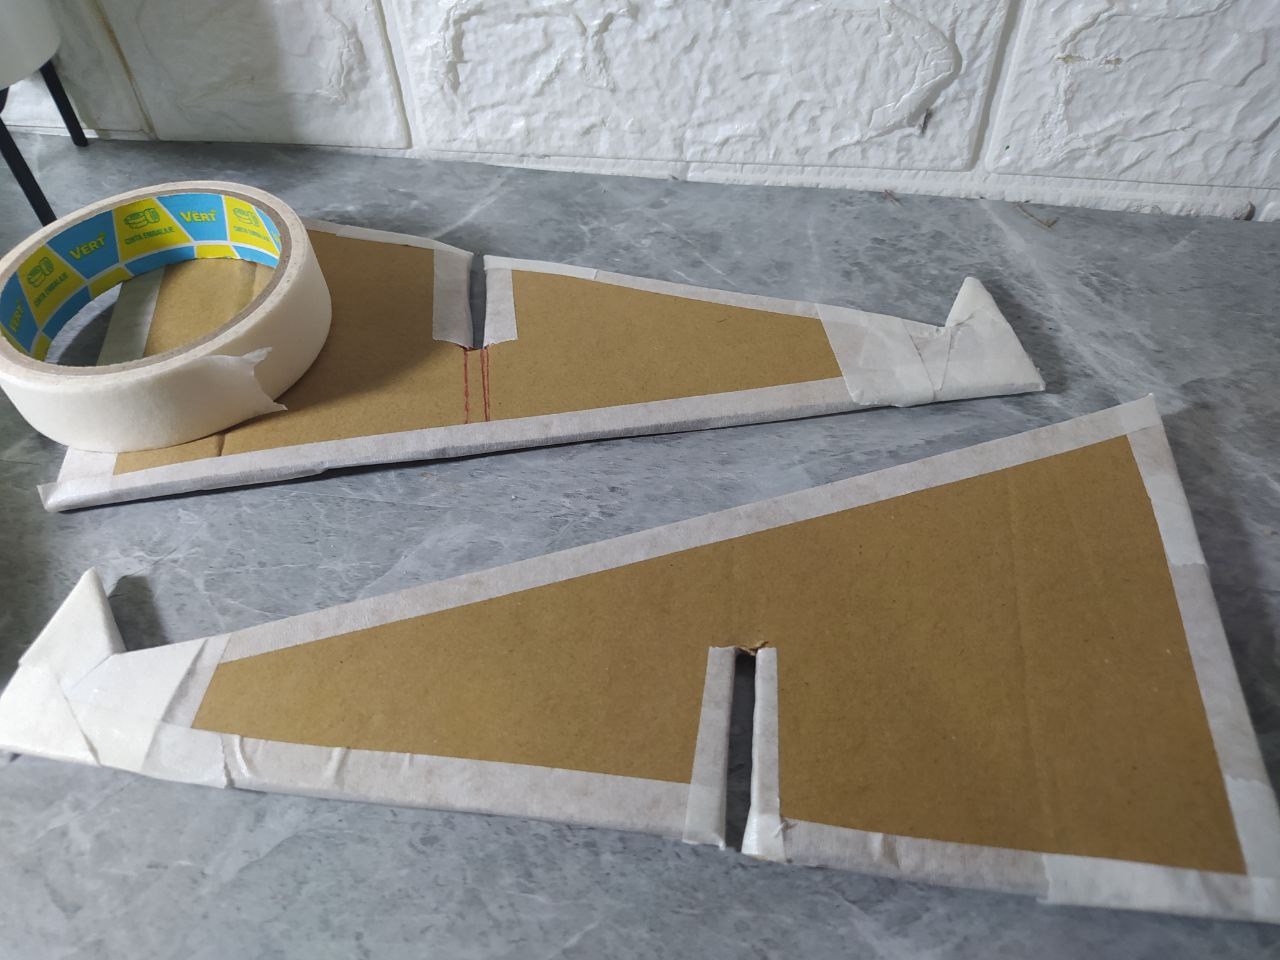
Corté en el cartón reciclado dos piezas idénticas, pero le realicé una corte a cada una de 4cms de largo x 0,7cms de ancho. En una de las piezas ese corte estaría ubicado en la parte de abajo, y en la otra pieza estaría a la misma altura pero en la parte superior. Esto permitiría que ambas piezas se crucen o calcen perfectamente y no necesitará ninguna otra pieza adicional.
I cut two identical pieces out of the recycled cardboard, but I made a slit in each measuring 4 cm long x 0.7 cm wide. On one piece, this slit would be at the bottom, and on the other, it would be at the same height but at the top. This would allow both pieces to intersect or fit together perfectly, and I wouldn't need any additional pieces.
 |  |  |  |
|---|
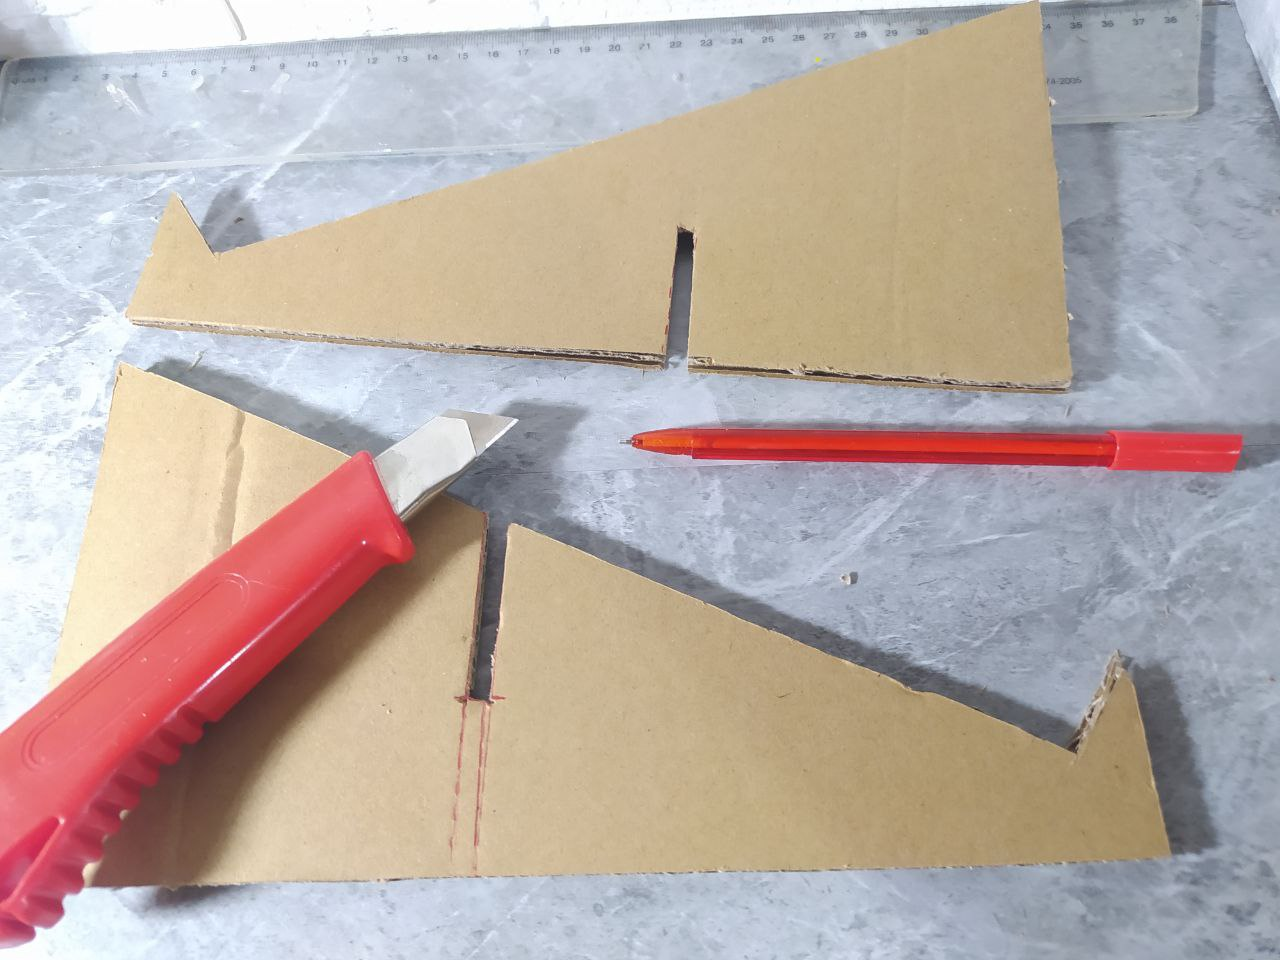
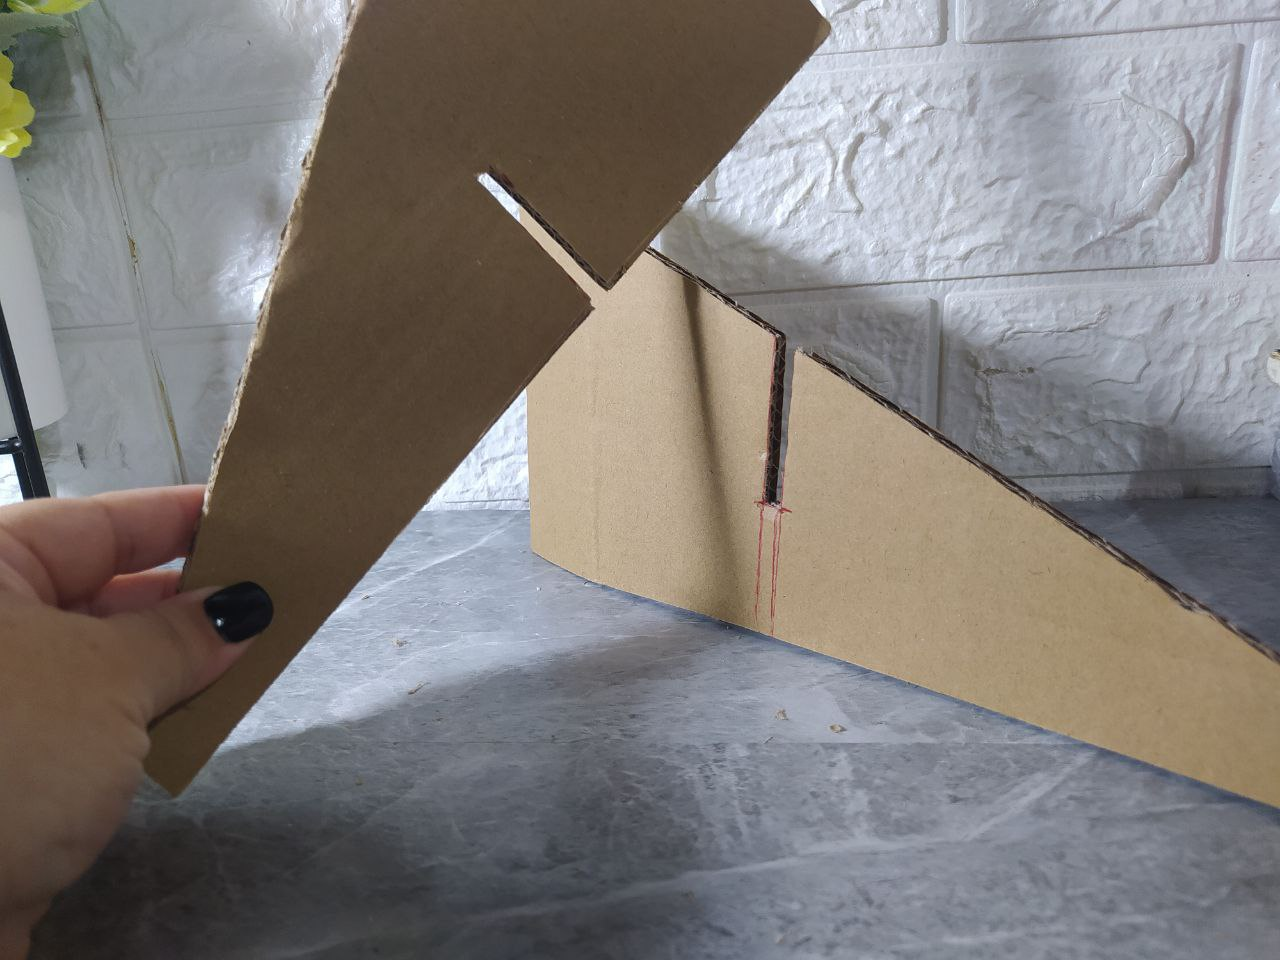
Antes de continuar es importante probar si efectivamente funciona el patrón de este diseño. Como puede ver las ranuras permiten que calcen muy bien, y al probar con el peso de la laptop, el soporte se mantiene muy estable, así que puedo continuar.
Before continuing, it's important to test whether this design pattern actually works. As you can see, the slots fit very snugly, and when tested with the weight of the laptop, the stand remains very stable, so I can continue.
 |  |  |  |
|---|
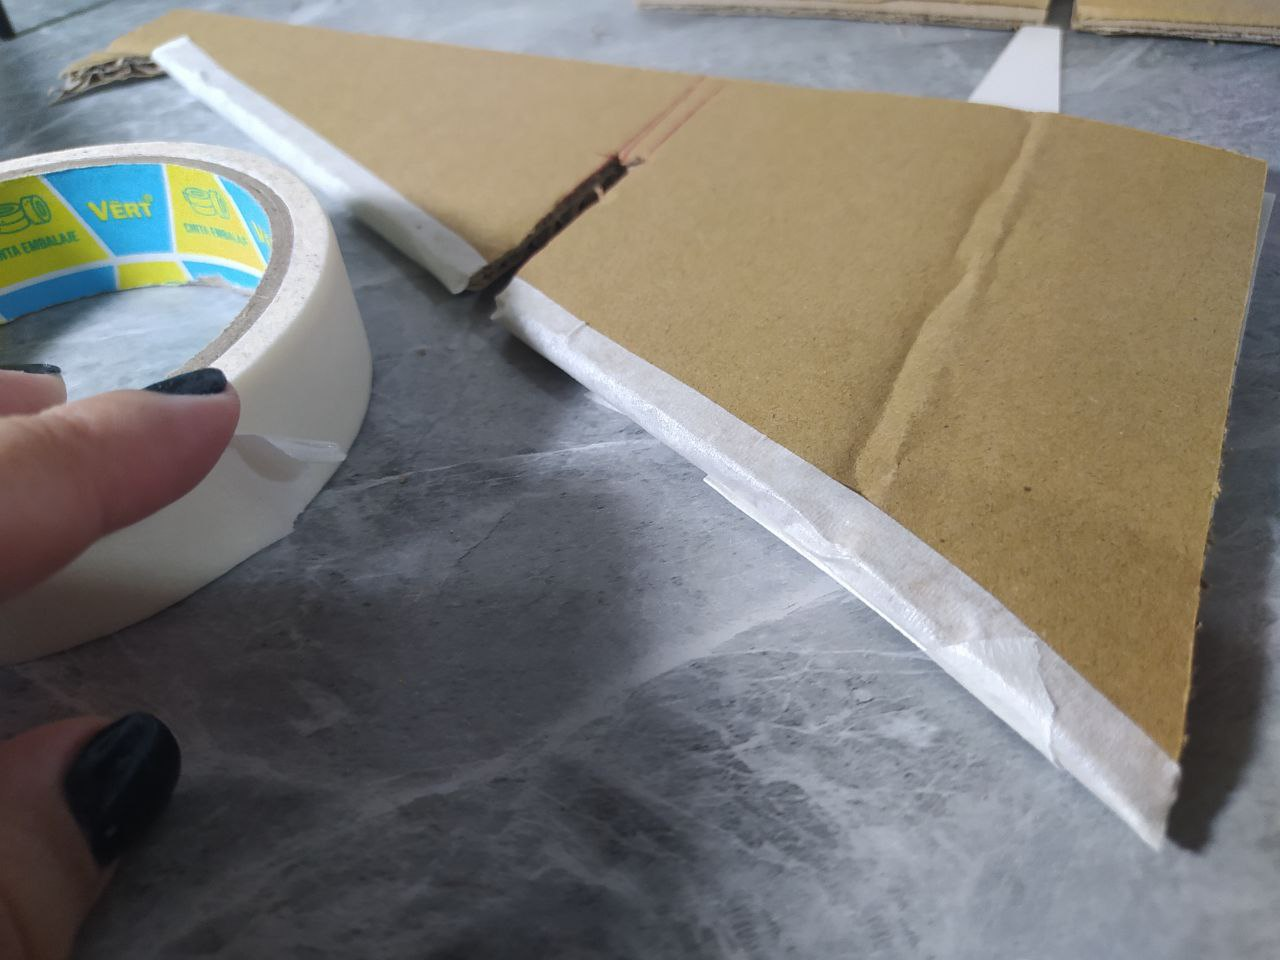
Con tirro o también puede ser cinta adhesiva, recubro todos los bordes y las puntas, para que tenga mayor integridad el cartón.
Using duct tape or adhesive tape, I cover all the edges and tips to give the cardboard greater integrity.
 |  |
|---|
Así lucen las dos piezas ya recubiertas con el tirro. En caso de que el cartón que utilicemos un cartón más delgado, se pueden juntar varios para lograr un espesor más fuerte para este proyecto.
This is what the two pieces look like, already covered with tape. If you're using thinner cardboard, you can stack several pieces together to achieve a stronger thickness for this project.
 |  |
|---|
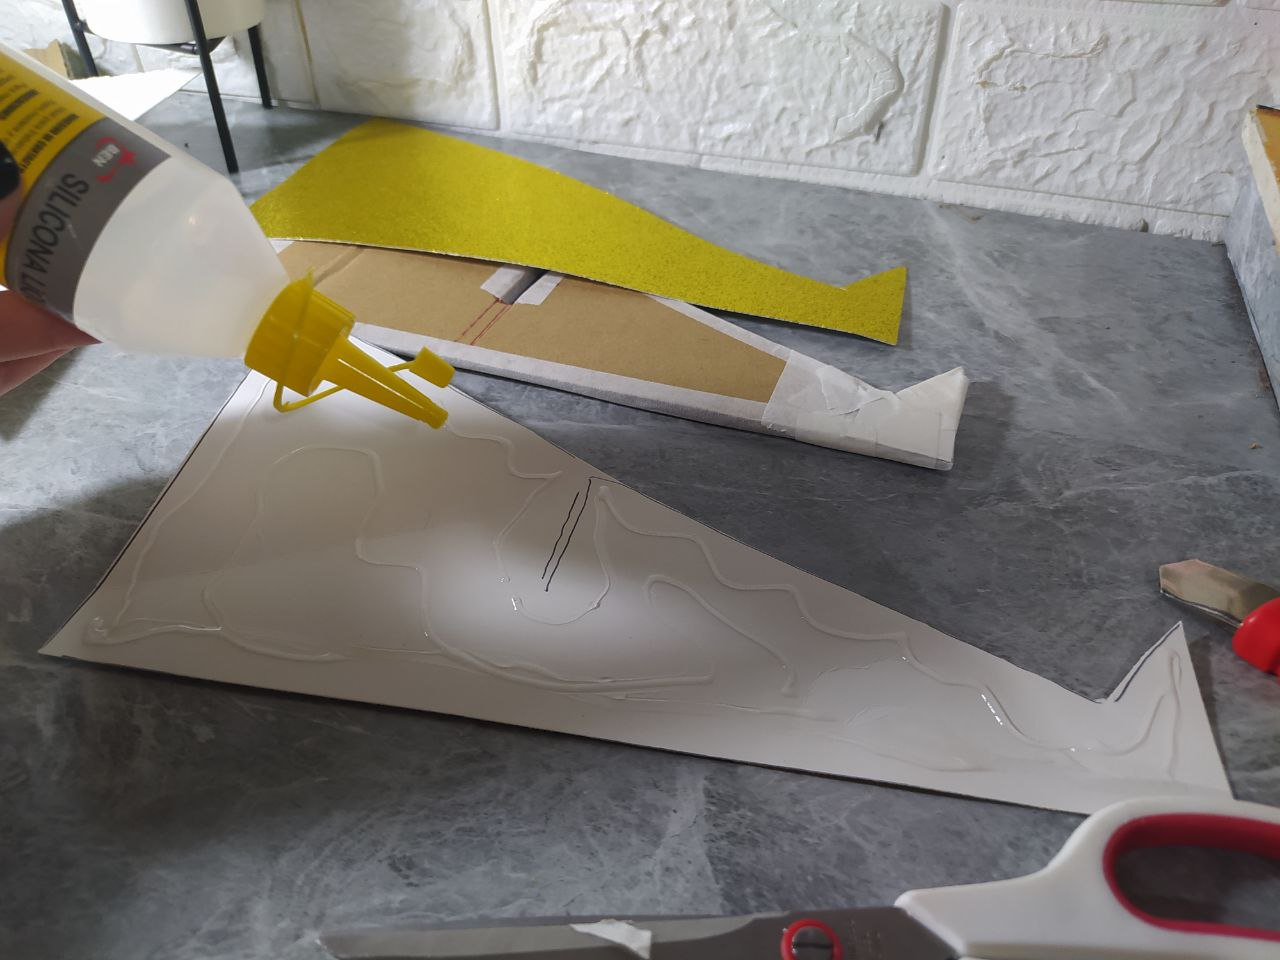
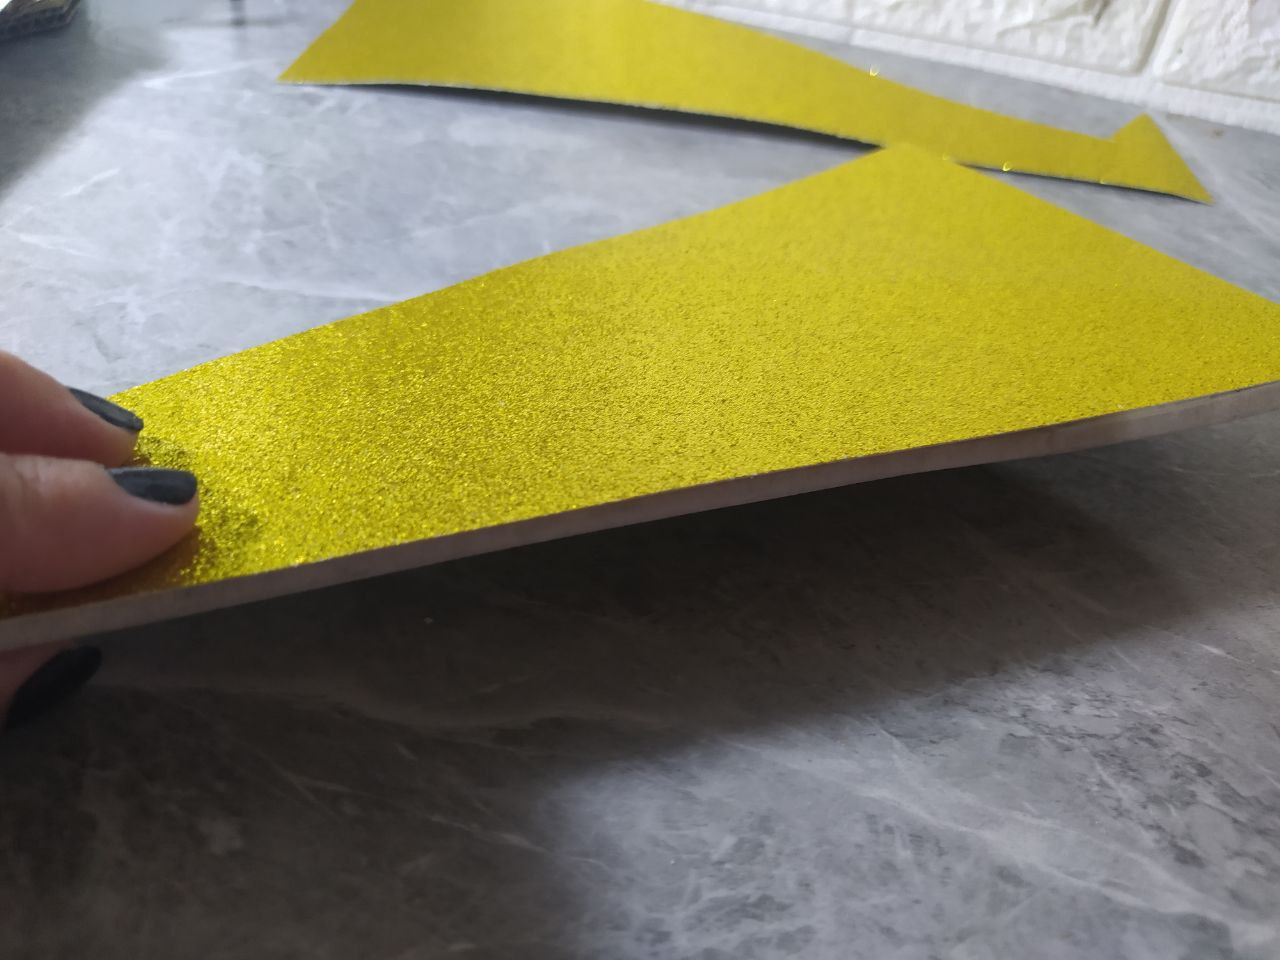
Ahora para decorar con la cartulina dorada escarchada, marco la forma de las piezas por el reverso de la cartulina y luego las pego utilizando silicón líquido. Las dos piezas deben estar forradas por ambos lados.
Now, to decorate with the frosted gold cardstock, I outline the shapes of the pieces on the back of the cardstock and then glue them together using liquid silicone. Both pieces should be covered on both sides.
 |  |  |
|---|
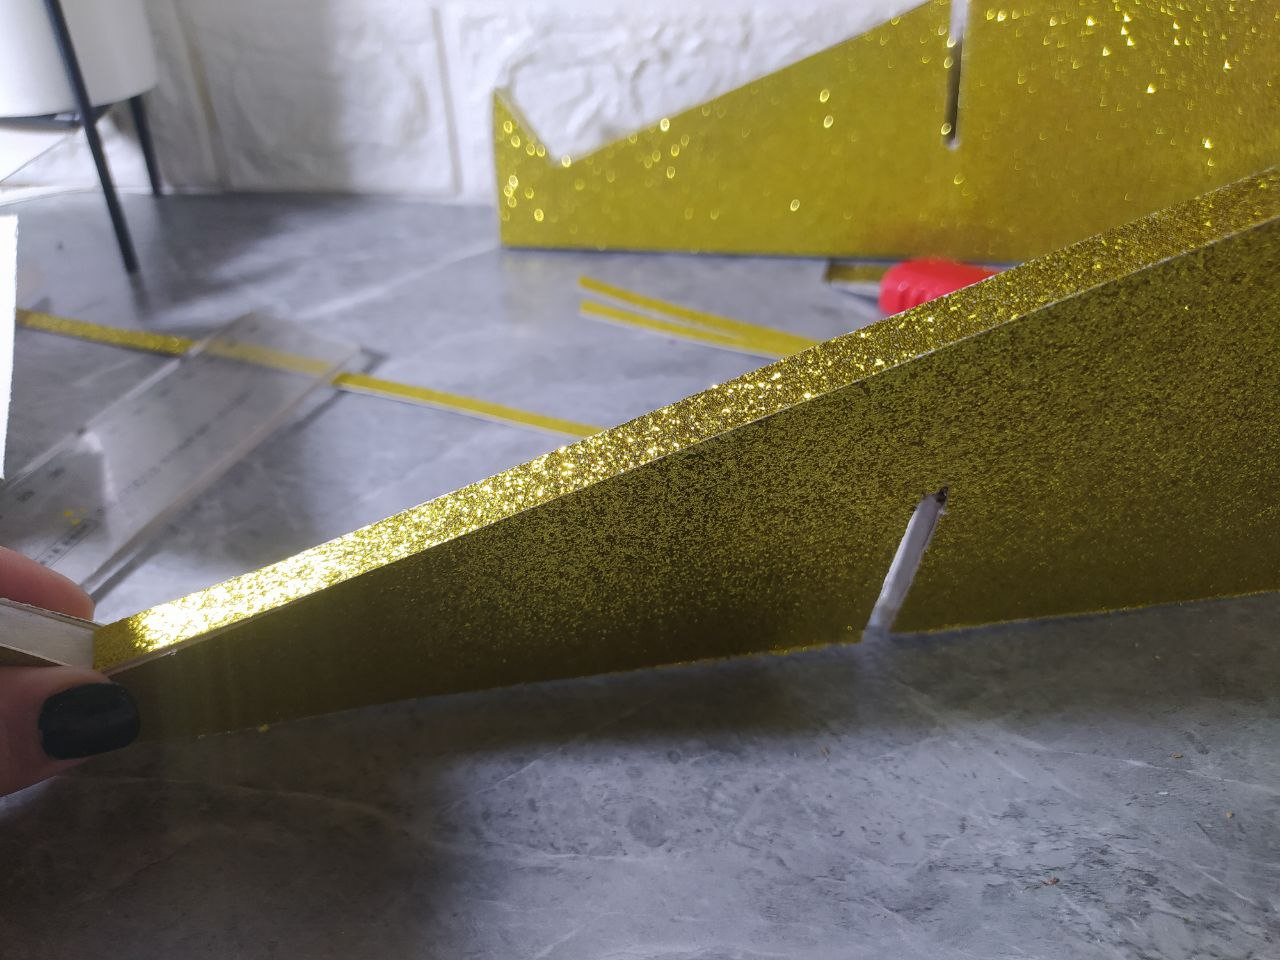
Se forran las piezas utilizando el silicón líquido y si es necesario se dejan prolijos los bordes cortando excedentes.
The pieces are covered using liquid silicone and if necessary the edges are left neat by cutting off the excess.
 |  |
|---|
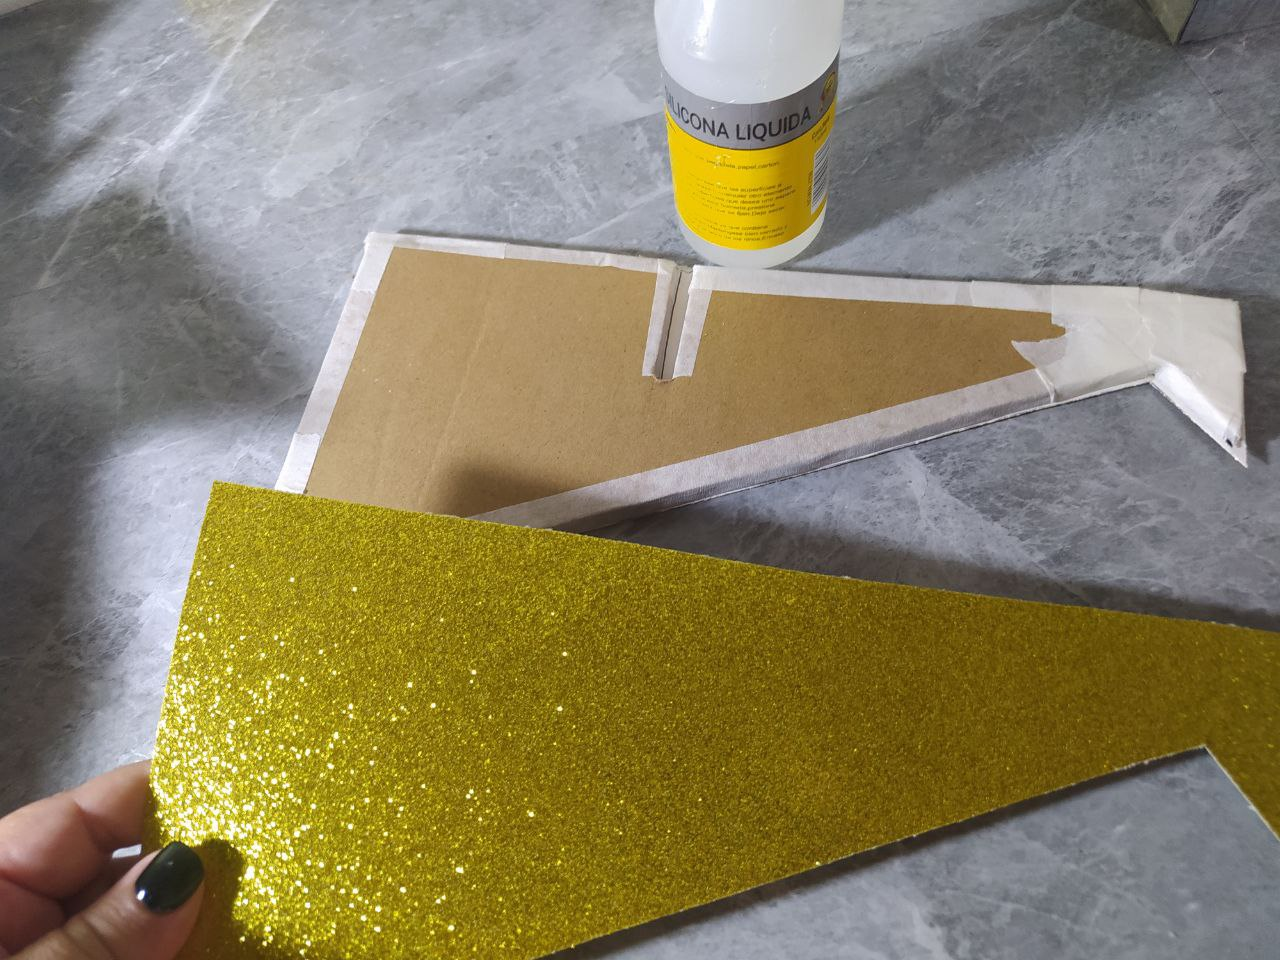
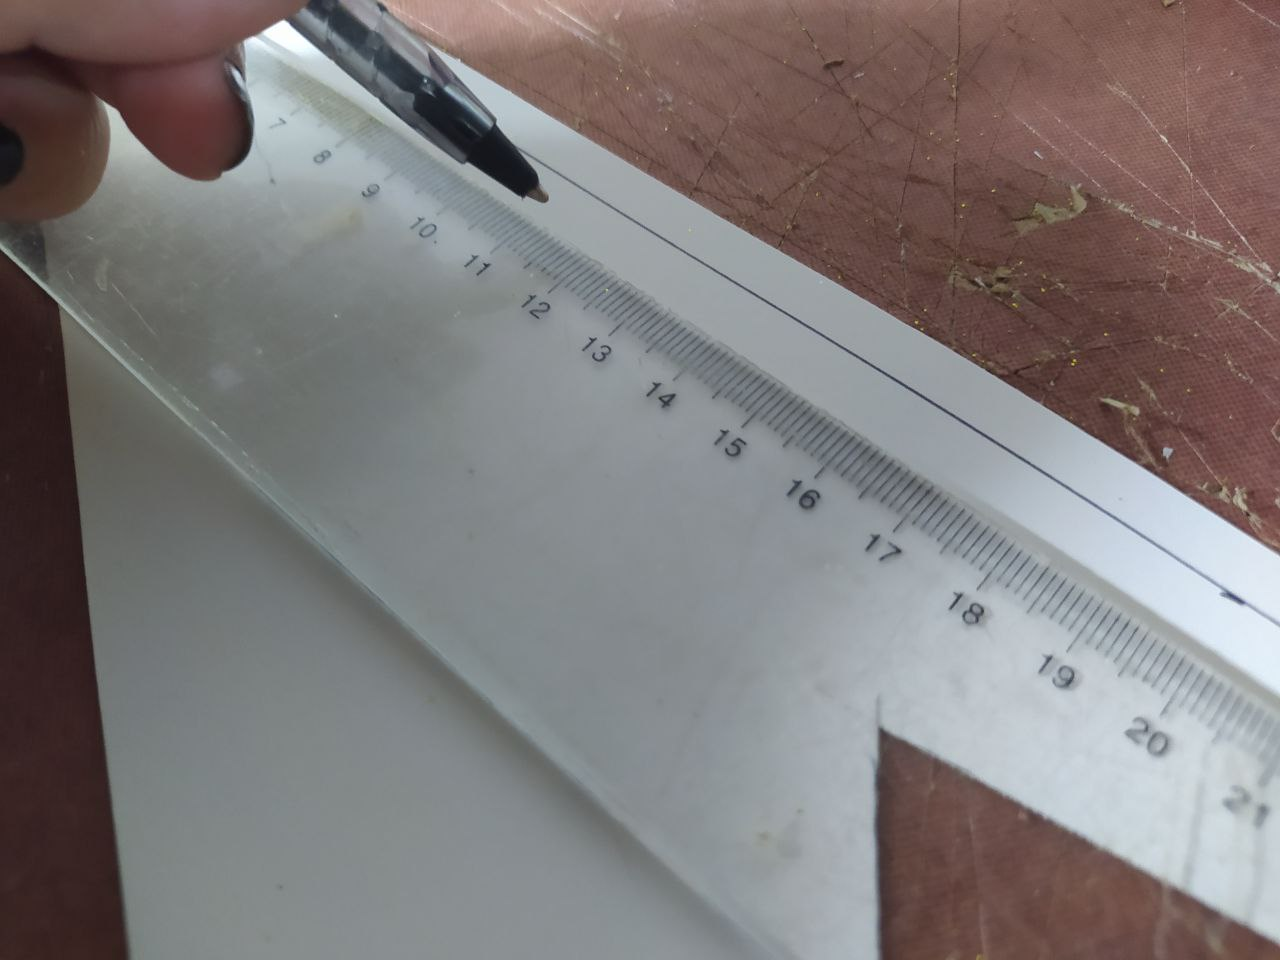
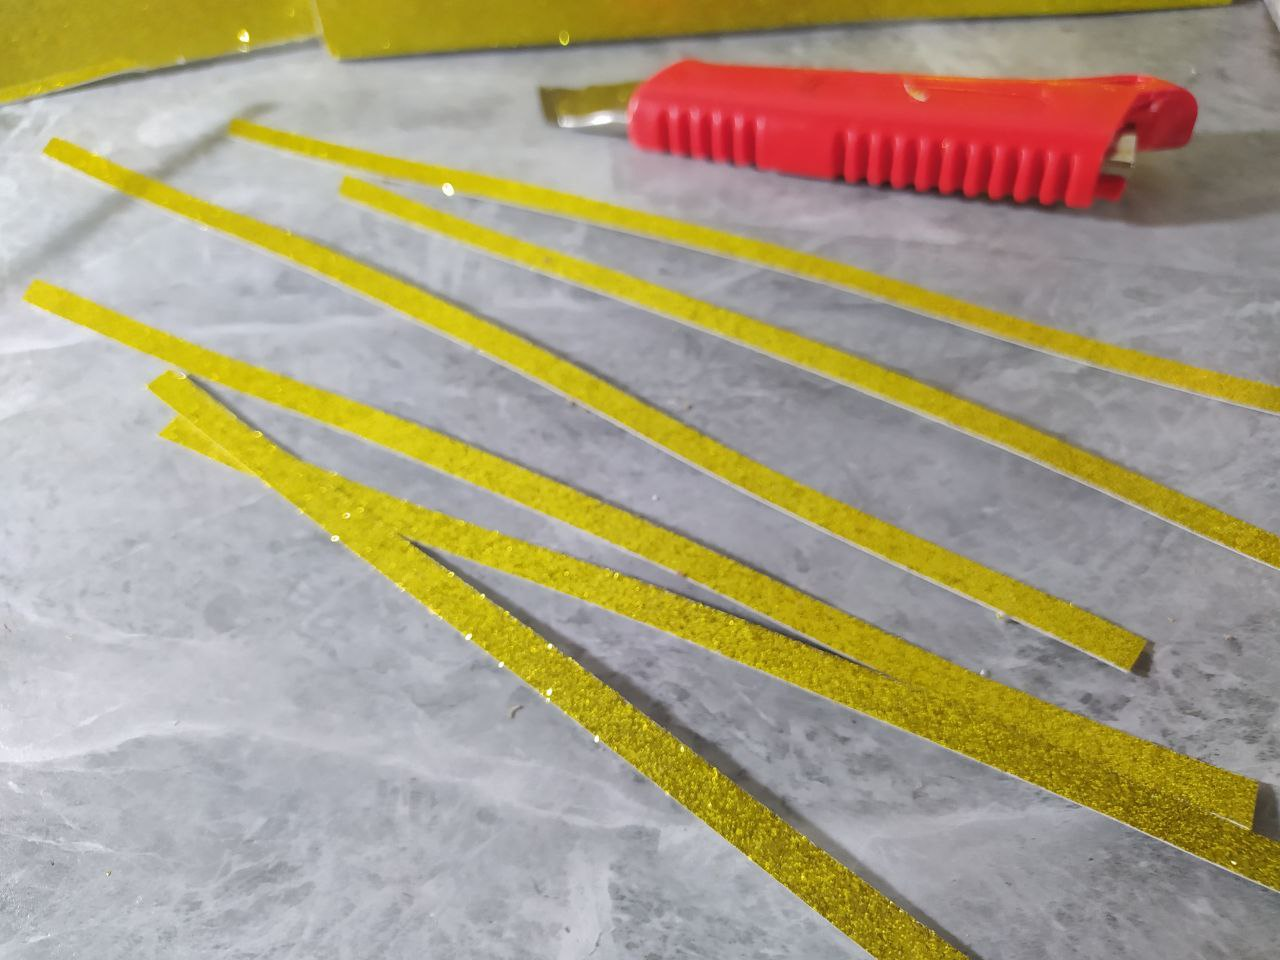
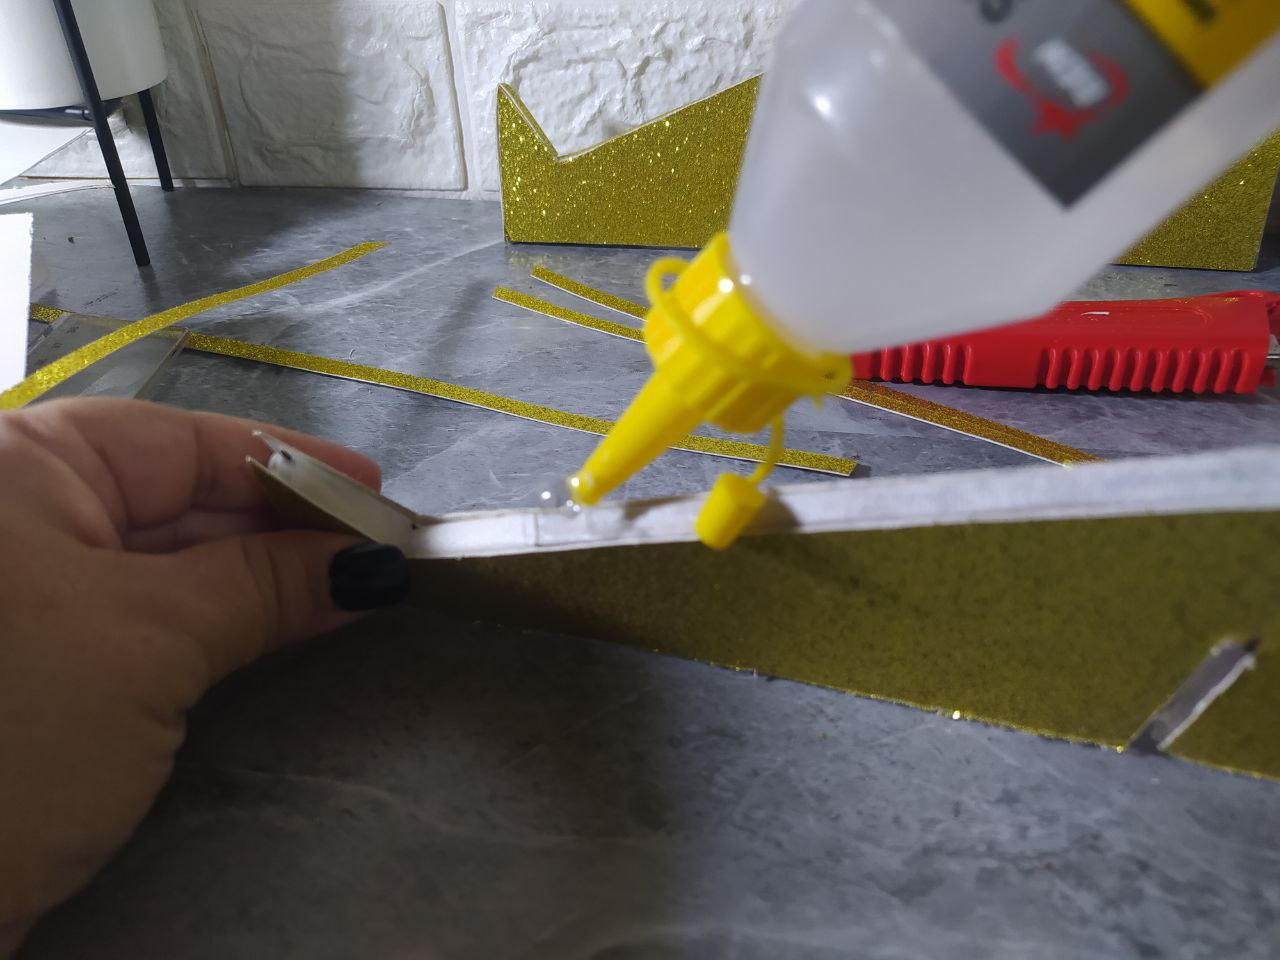
Para los bordes corté tiras en cartulina dorada, con medidas de 0,7cms de ancho, que es el ancho o grosor del cartón. Los pego en los bordes con silicón líquido.
For the edges, I cut strips of gold cardstock measuring 0.7 cm wide, which is the width or thickness of the cardboard. I glued them to the edges with liquid silicone.
 |  |  |  |
|---|
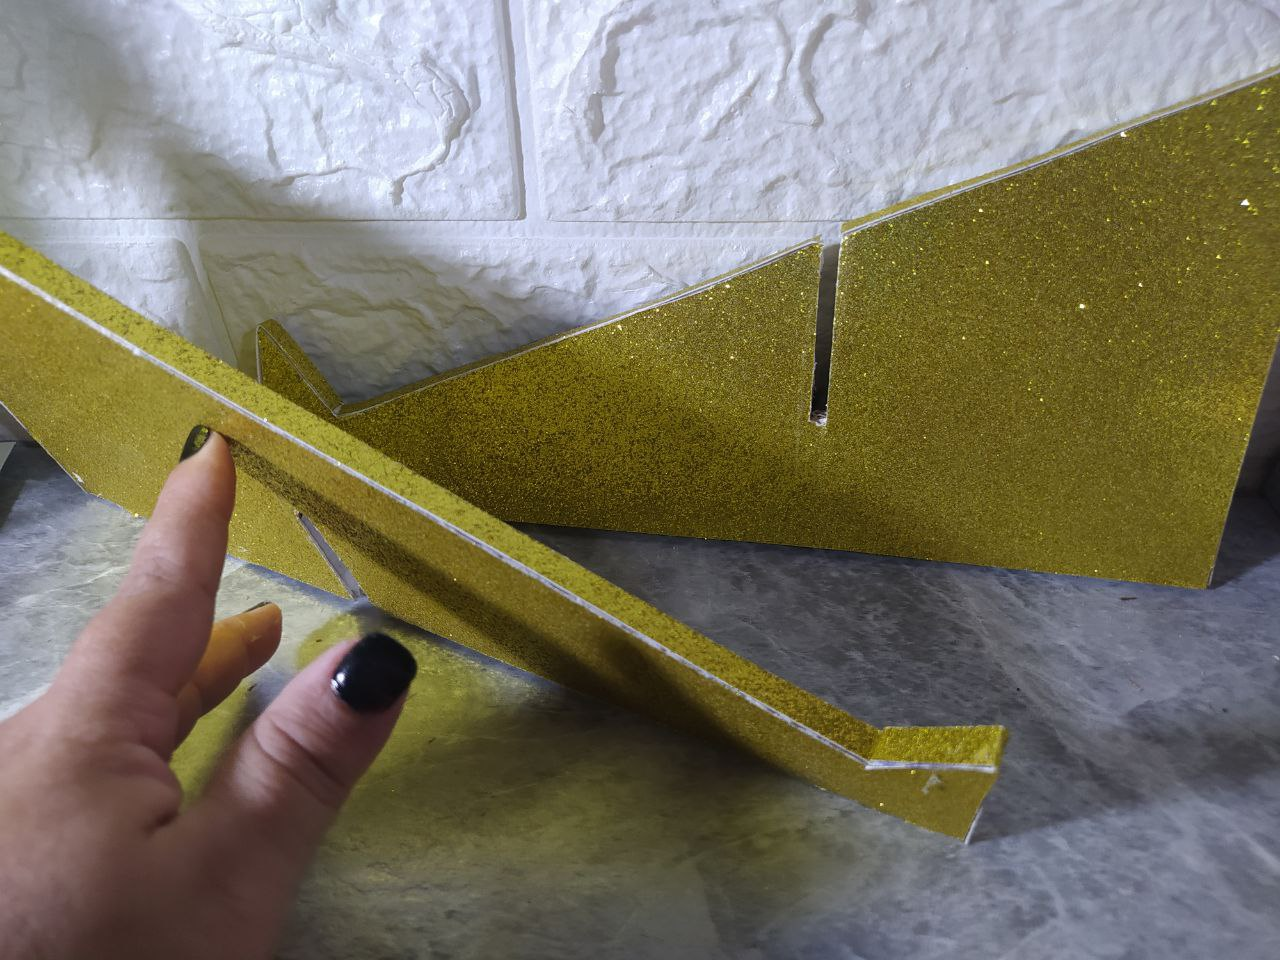
Así quedan listas las dos piezas, es bueno esperar unos cuantos minutos para garantizar que sequen bien las piezas. Estas dos piezas listas lucen de esta forma, y así quedarían desarmadas.
This is how the two pieces are ready. It's a good idea to wait a few minutes to ensure they dry thoroughly. These two finished pieces look like this, and this is how they would look disassembled.
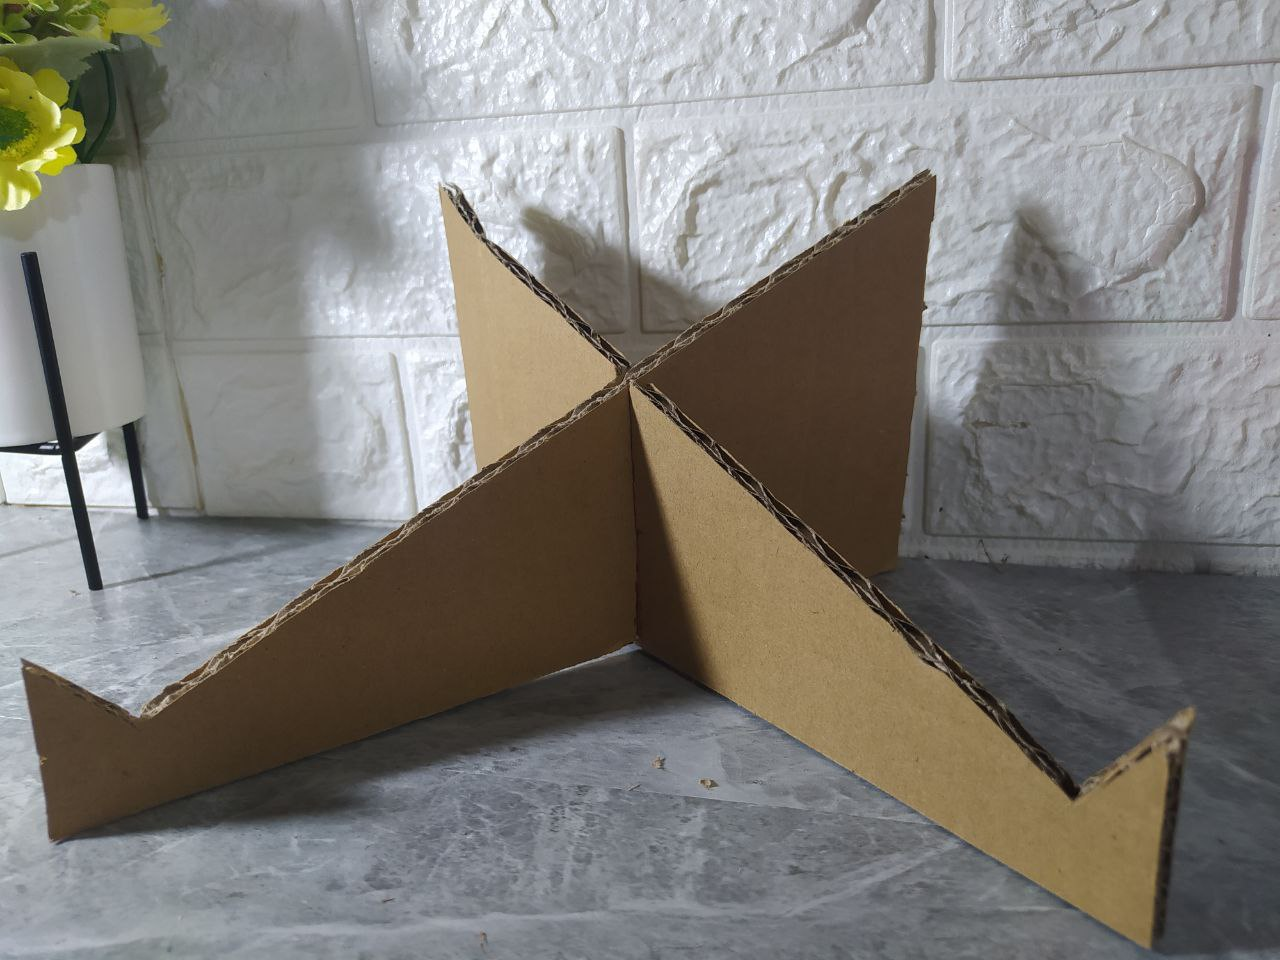
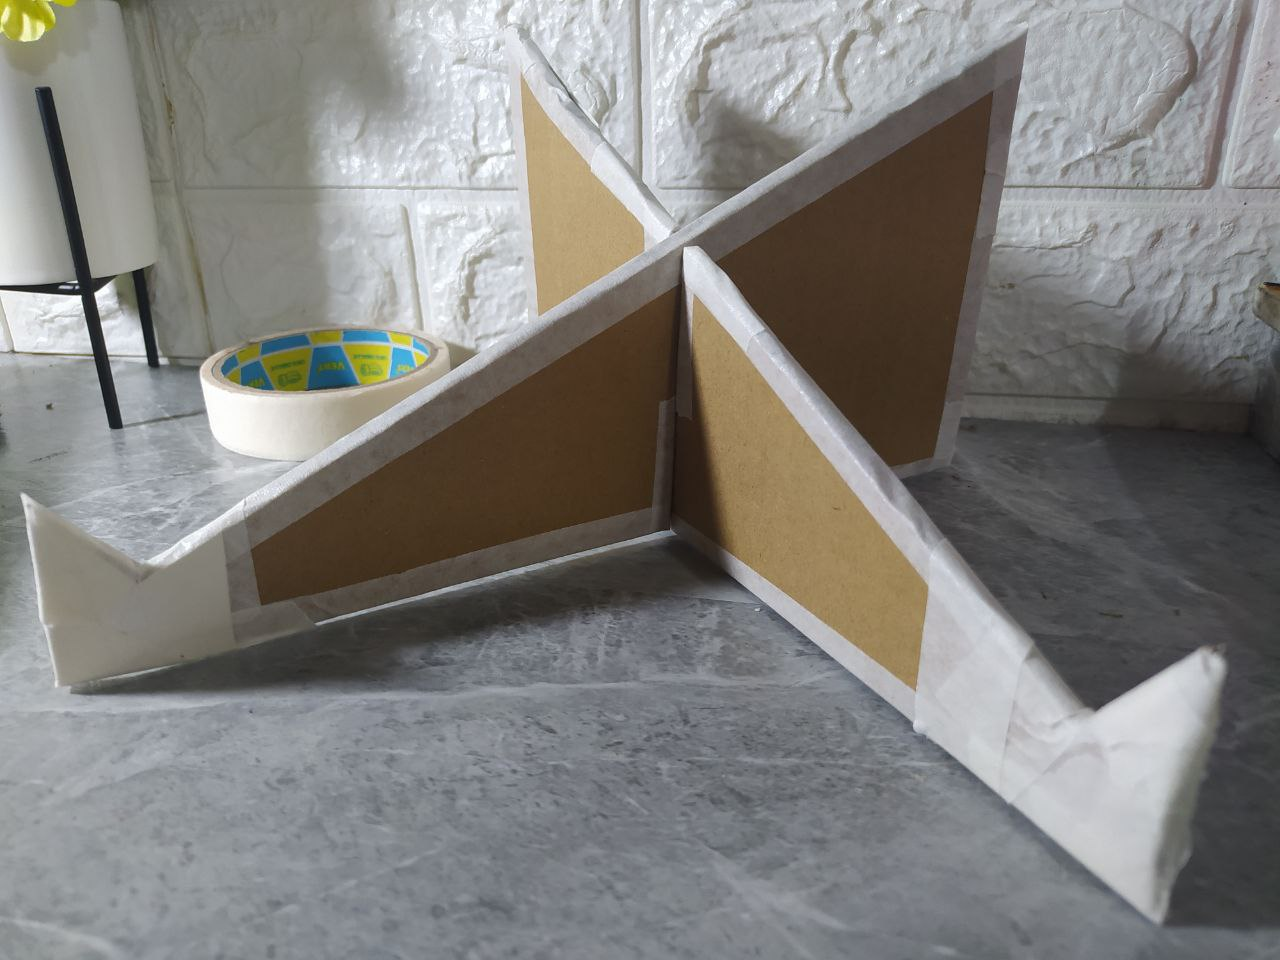
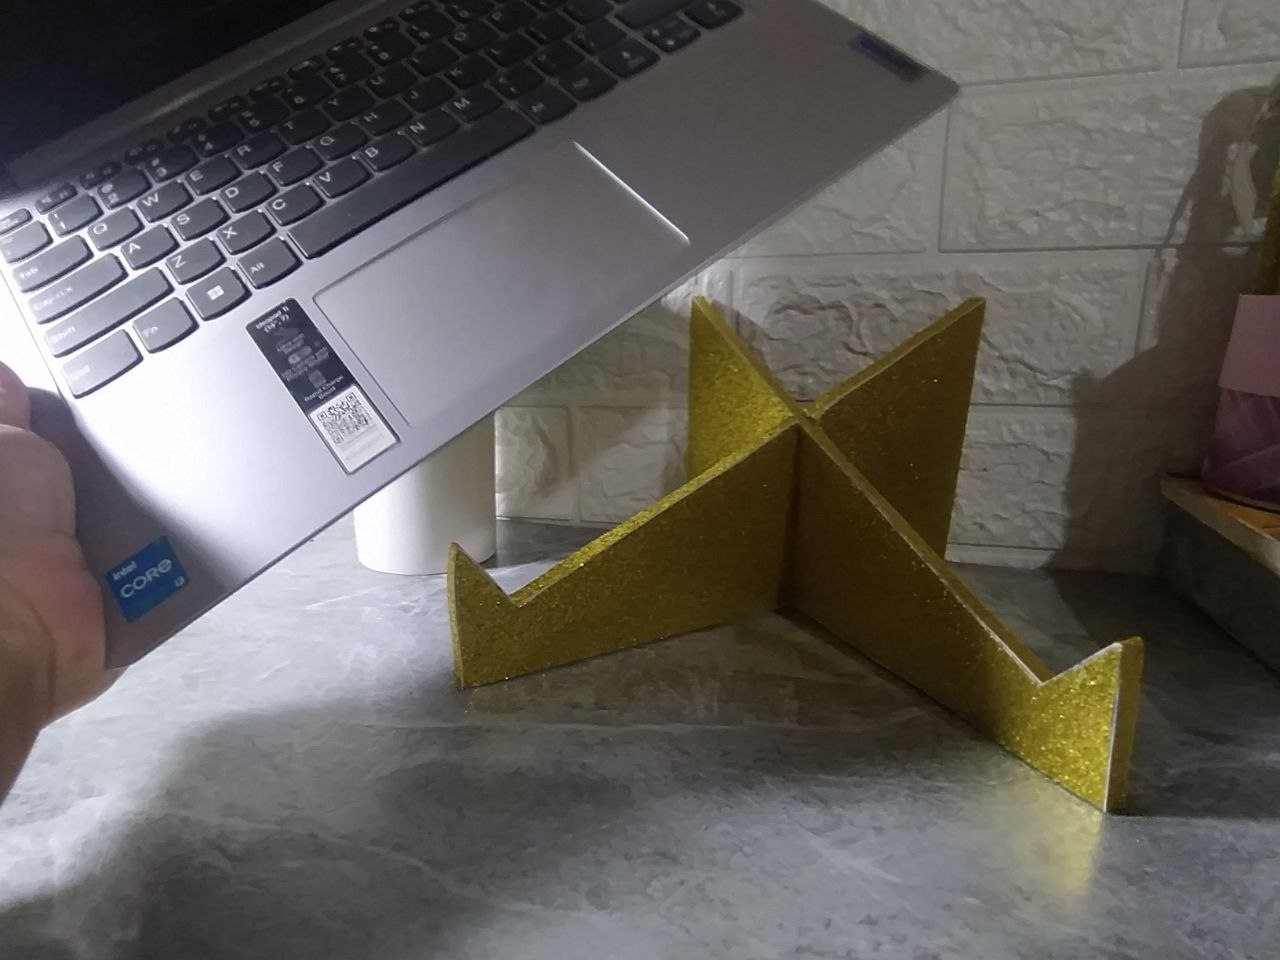
Al unir las dos piezas por las ranuras o cortes, se ve muy bien toda la estructura.
When the two pieces are joined together using the slots or cuts, the entire structure looks very good.
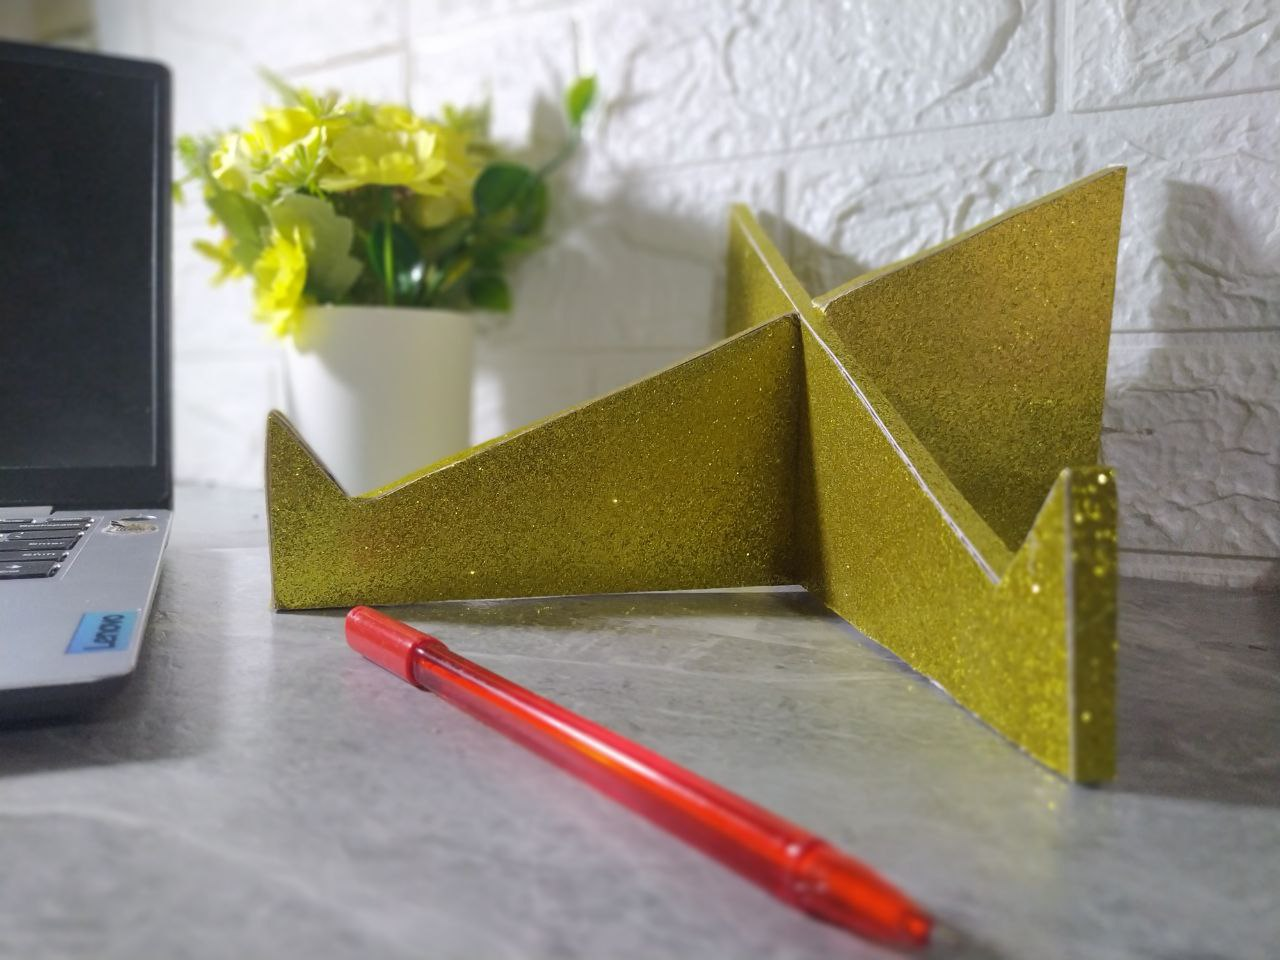
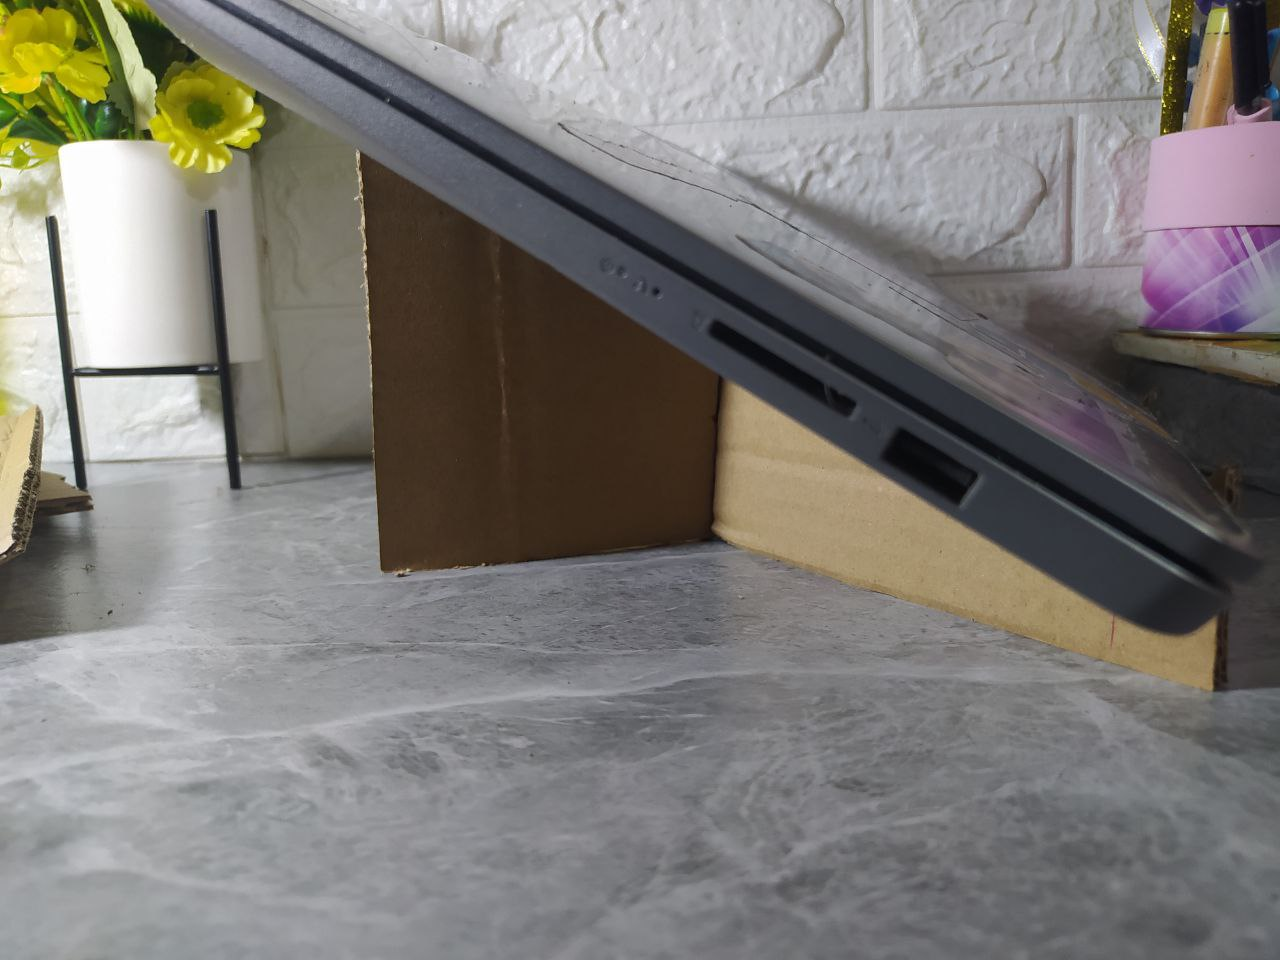
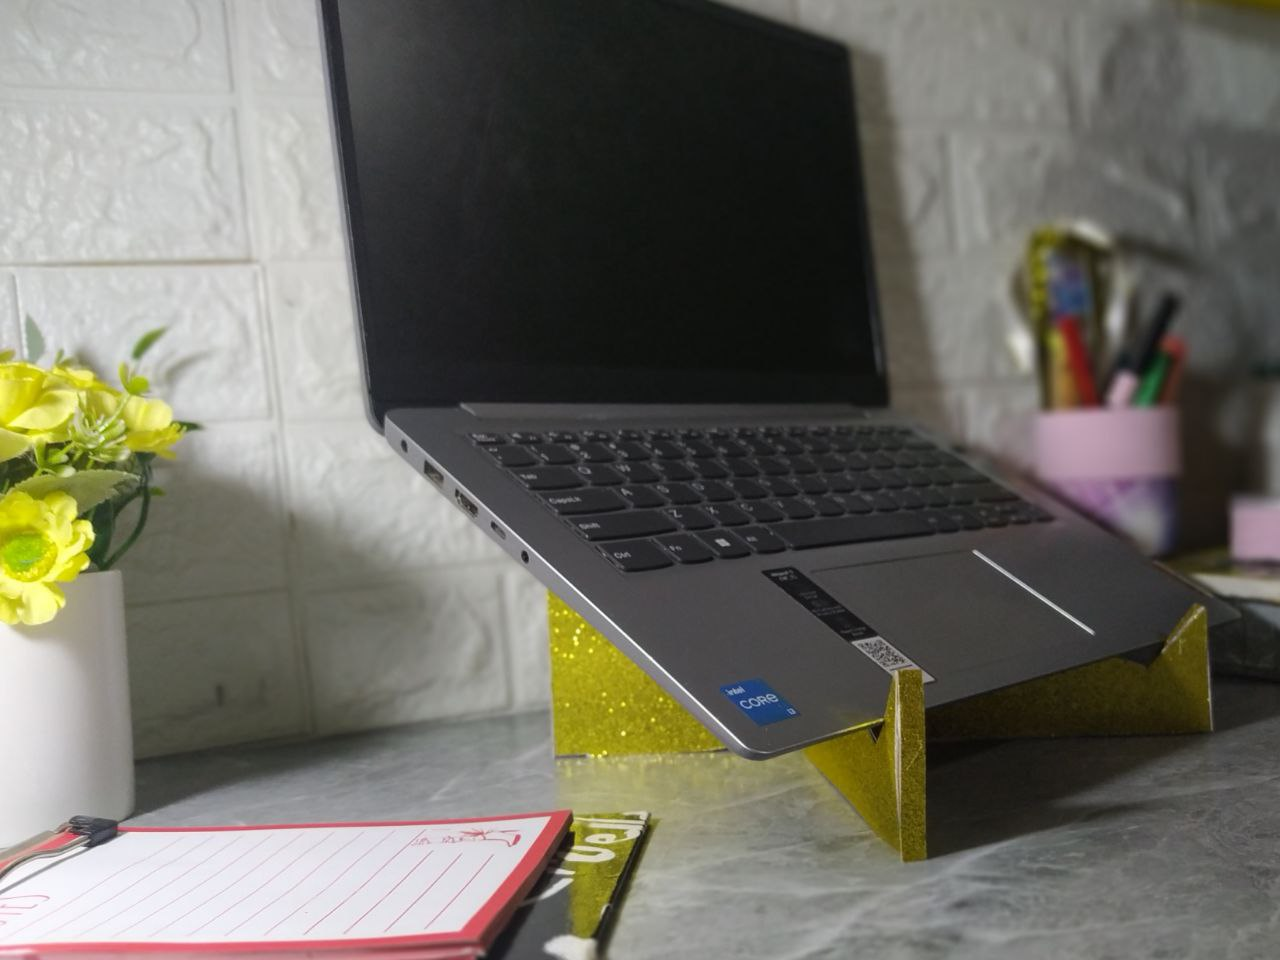
Como pueden ver, el diseño forma una "X" muy estable y puedo colocar la laptop, la cual por cierto es algo pesadita, pero queda muy bien. Las puntas del diseño, permiten que la laptop no se deslice y queda bien fija en el soporte.
Se puede mover de un lado a otro, y es muy estable y segura.
As you can see, the design forms a very stable "X," and I can place my laptop on it, which is a bit heavy, but it fits very well. The prongs of the design prevent the laptop from sliding and it stays securely in place on the stand.
It can be moved from side to side, and it's very stable and secure.
Deseo que les haya gustado este proyecto, a mi me encantó y a mi hija también, cumplí con todos sus requerimientos, y el color lo amó.
Si quieren realizar esta base o soporte, pueden tomar con confianza el patrón del diseño que les dejé en esta publicación, y recrearlo con confianza porque funciona muy bien.
I hope you enjoyed this project. I loved it, and so did my daughter. I met all her requirements, and she loved the color.
If you want to make this base or stand, feel free to use the design pattern I left in this post and recreate it with confidence because it works very well.

I took the photos with my phone Redmi Note 8
Apps I used:
Canva Pro for Cover, Collage and Banners
I used Deepl Translator
My social networks:
Discord: YennysYaneth#0189
Twitter: @yennysferm
Instagram: @yennysyaneth
Las fotos las tomé con mi teléfono Redmi Note 8
Apps que utilicé:
Canva Pro para la Portada, Collage y Banners
Utilicé el Traductor Deepl
Mi redes sociales:
Discord: YennysYaneth#0189
Twitter: @yennysferm
Instagram: @yennysyaneth