Hello everyone... 🐱
Hello to my dear Hivers and the dear community of Holozing, very pleased and excited to be here to show you a very simple work made with much love and especially for you.
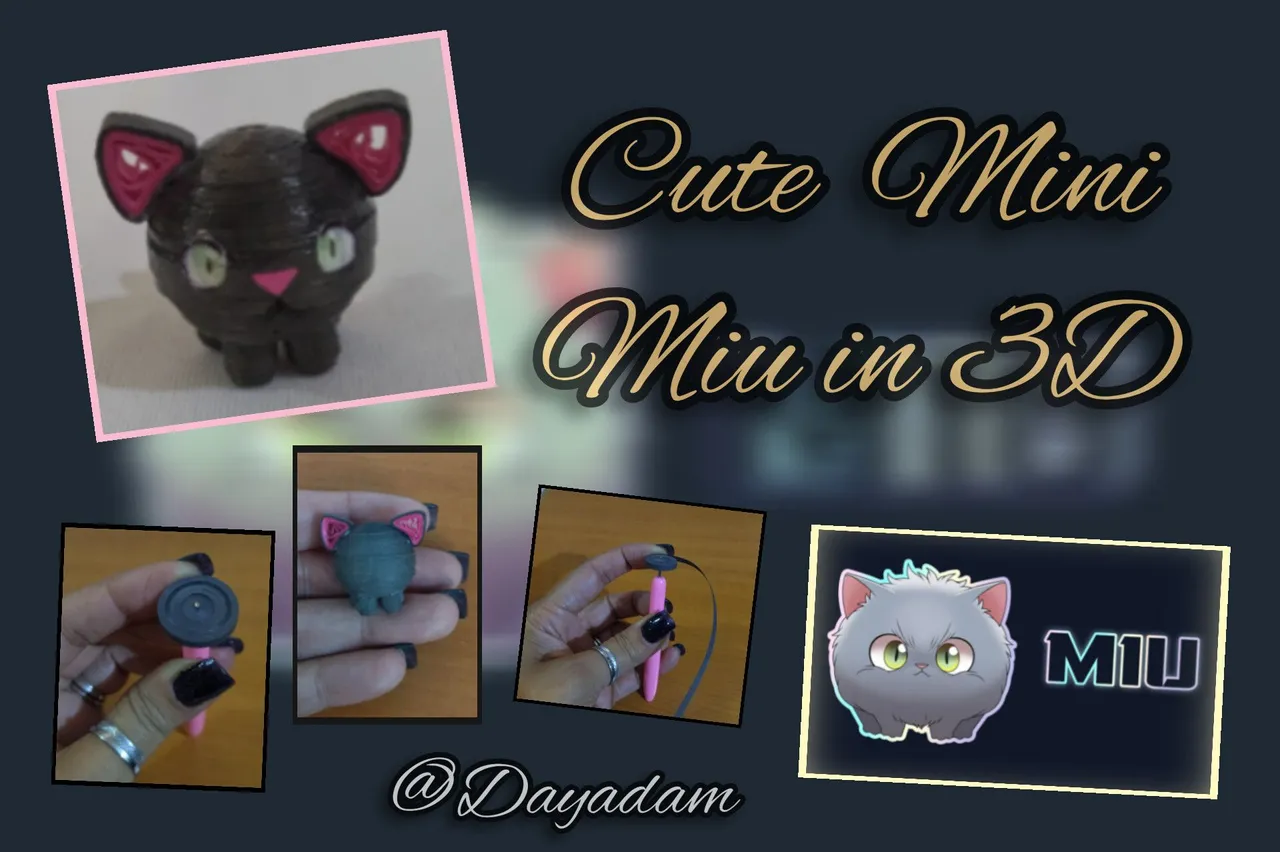
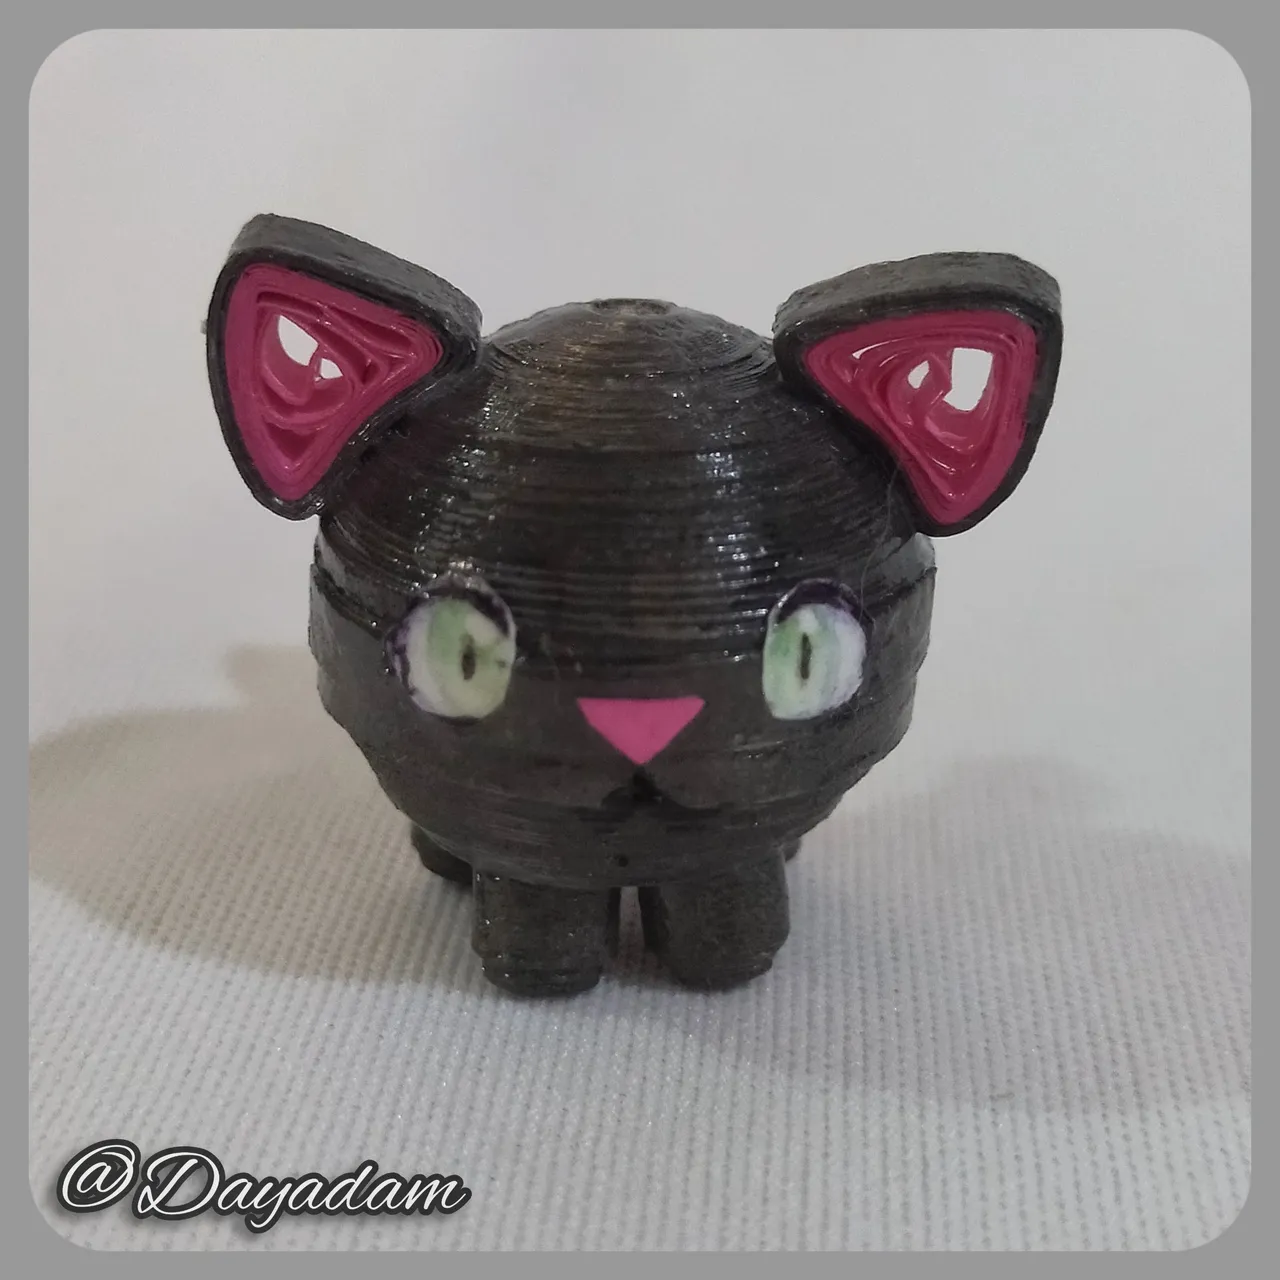
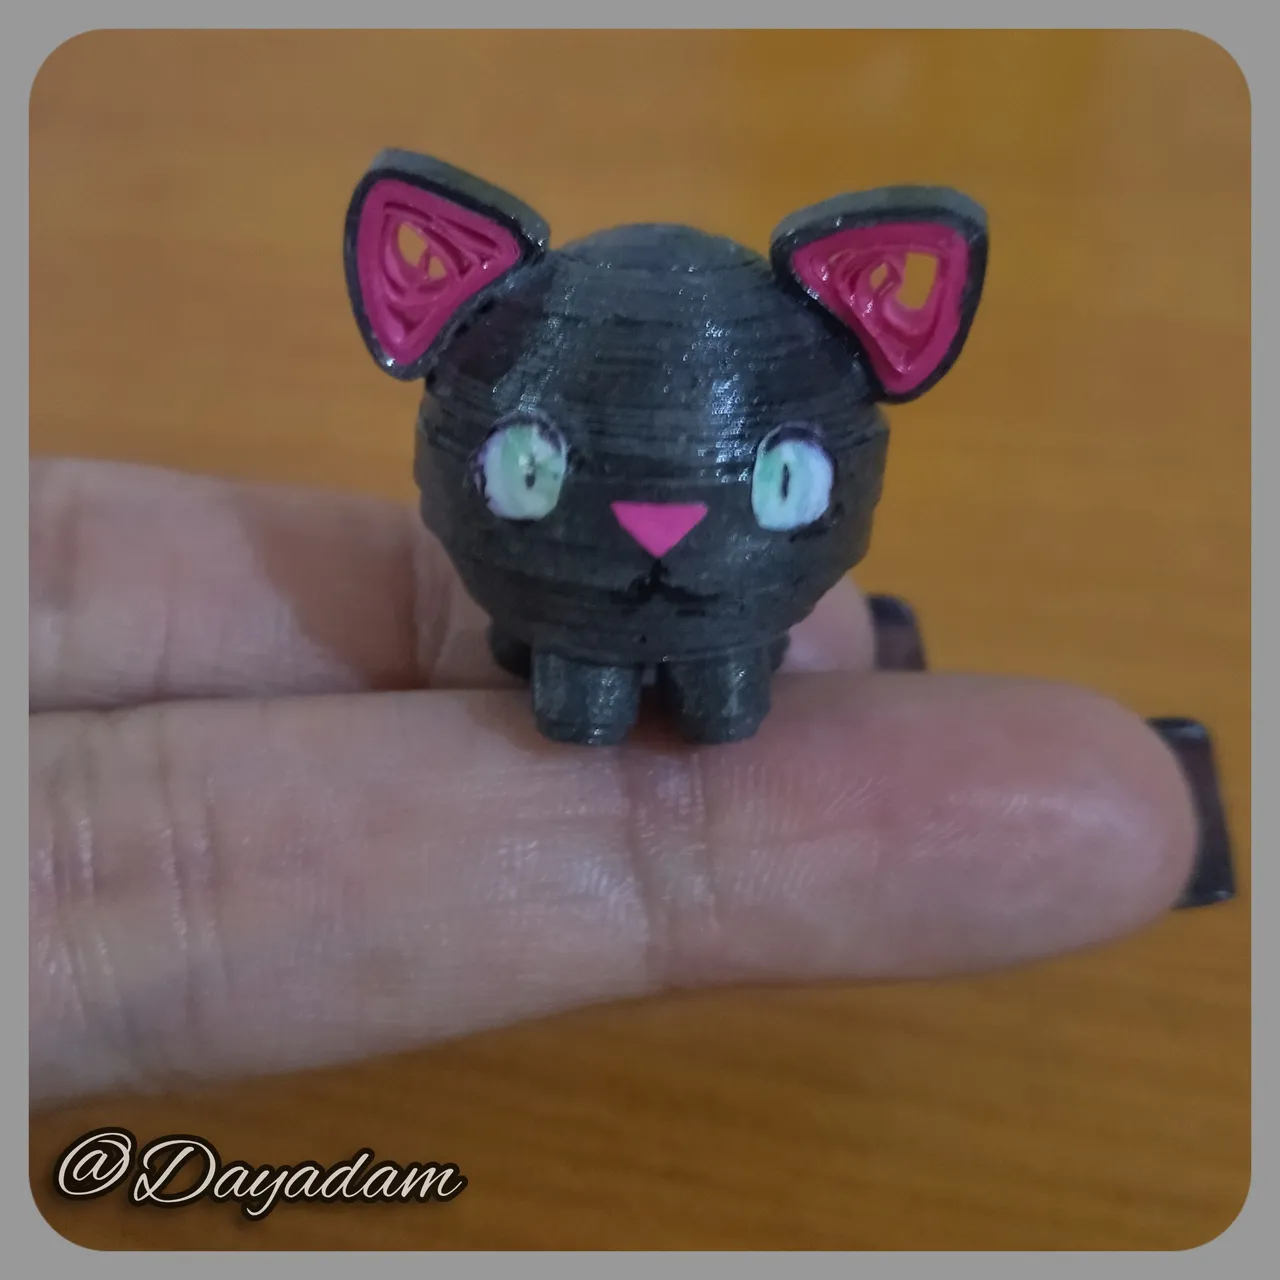
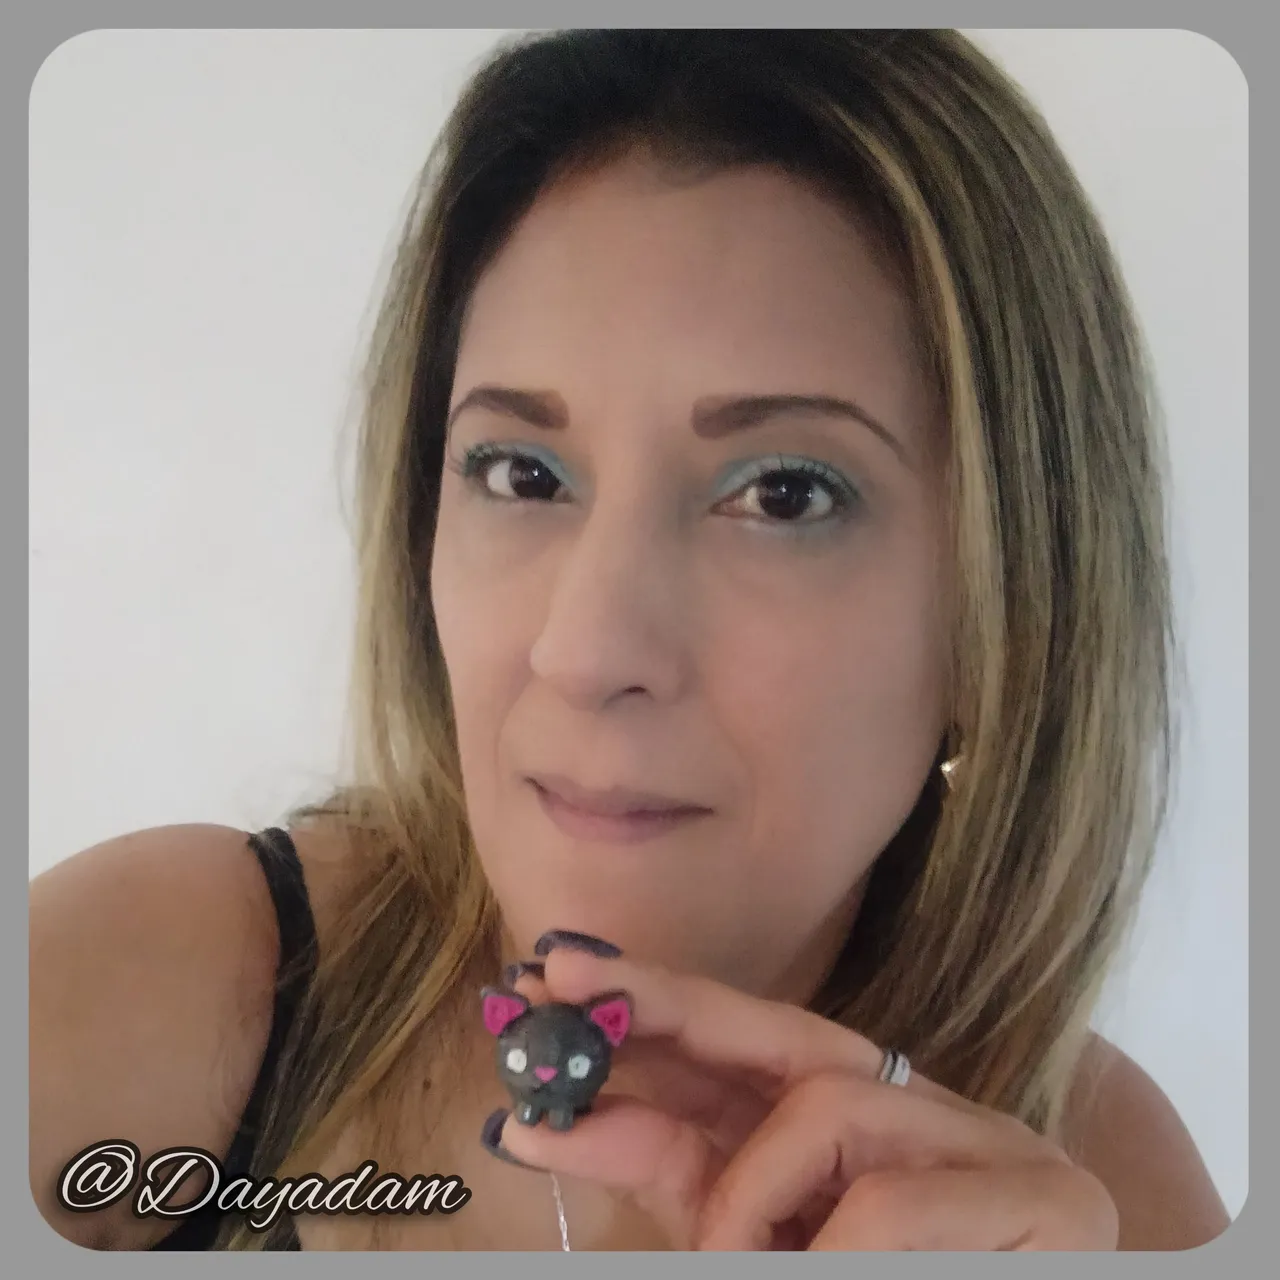
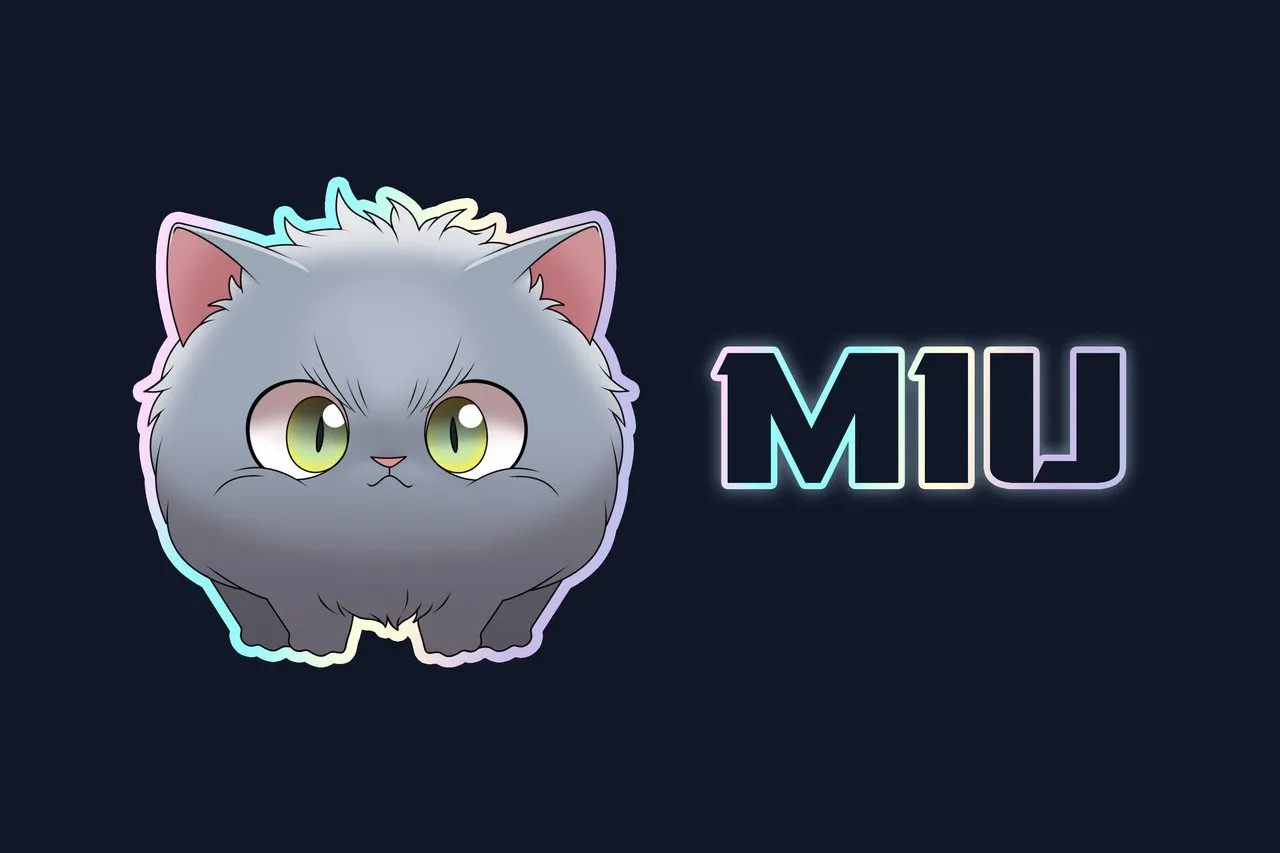
Today in this new weekly update of rewards and progress in the holozing community, I continue with my art, and as a kitty lover and human mom for almost 6 years of a little furry named Shira, seeing the beautiful MIU inspired by the kitty of the friend @acidyo, I could not help but fall in love with the creature and try to materialize it in my style making a mini cute, and giggly one in the quilling technique. I hope you like this little MIU 🐱🐾❤️
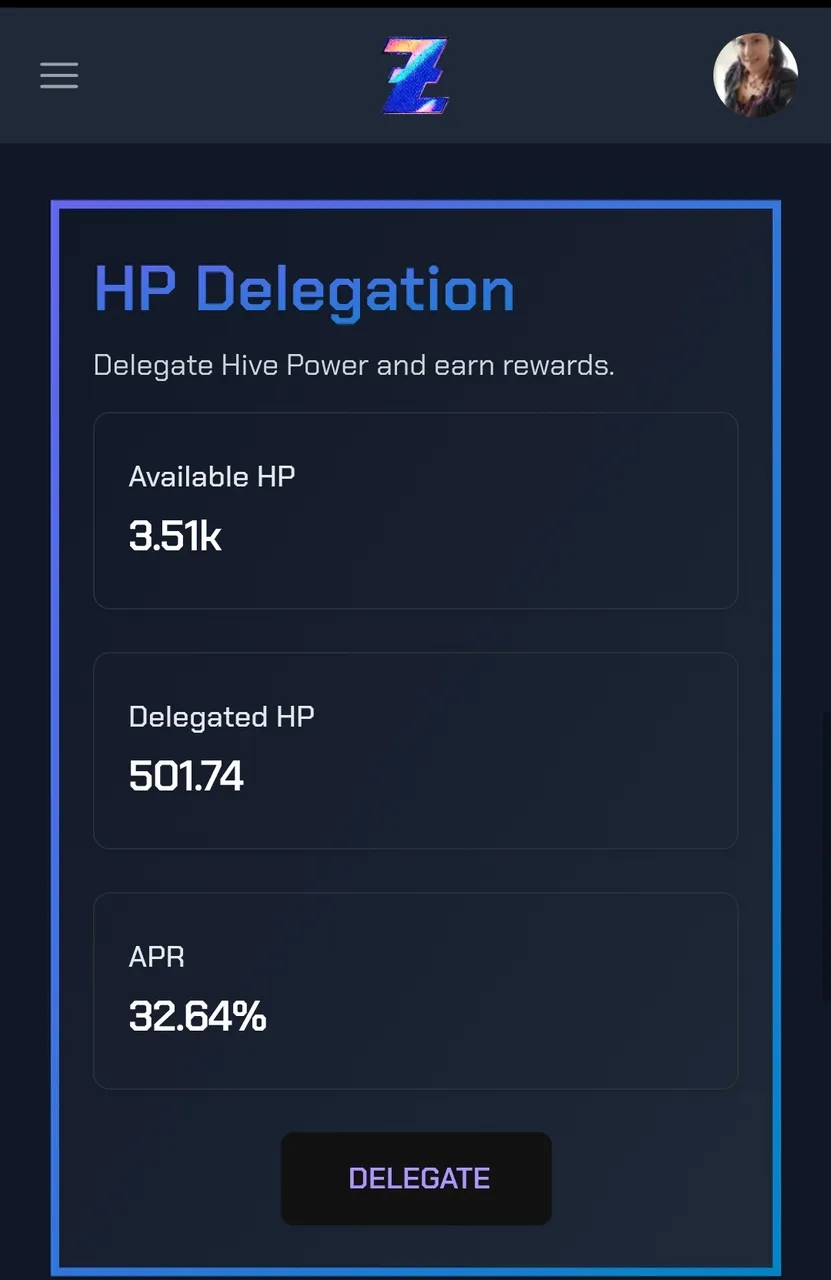
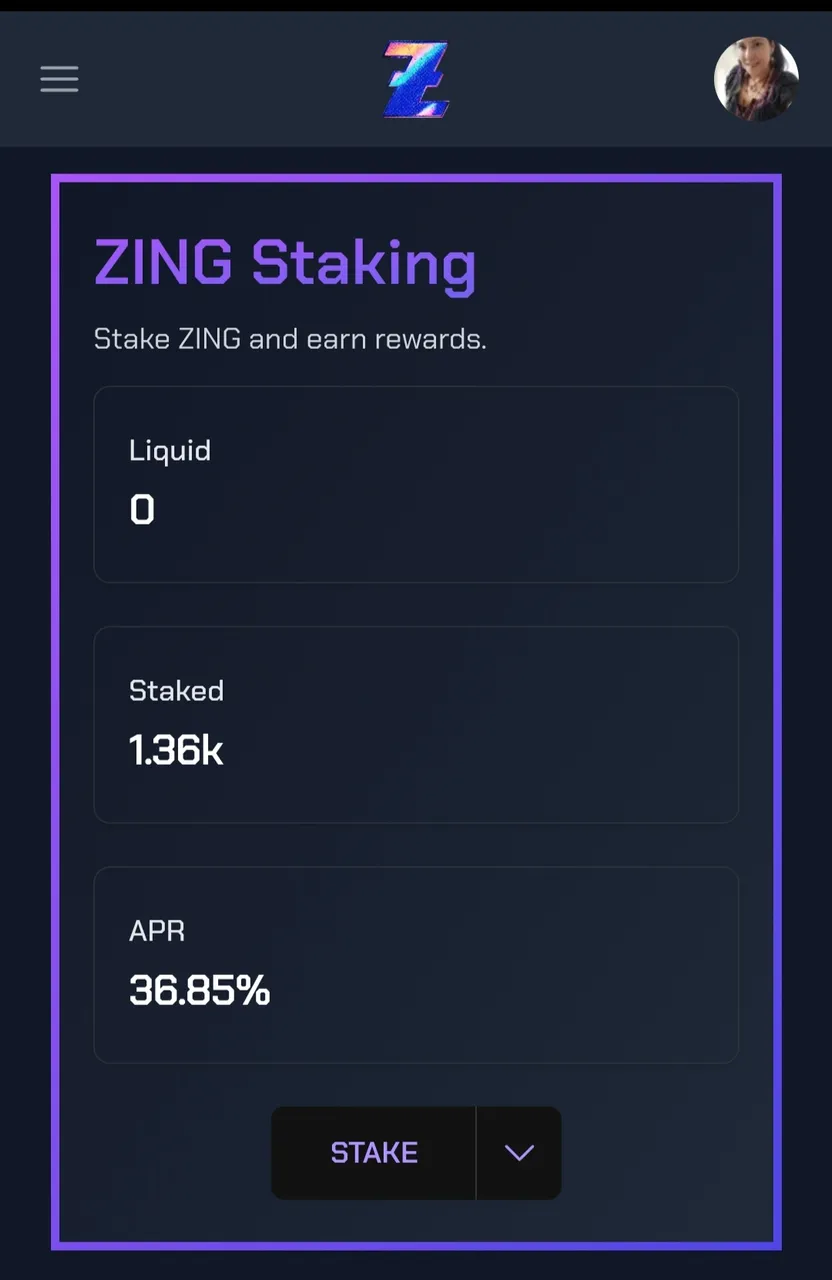
I attach several images of what has been my progress claiming the rewards for my delegation to Holozing that I aspire very soon to increase, and although I know that the $POSH tokens will stop working I have been able to get some through the promotion on reddit, I started with 10 POSH and I already have 55.
I hope you like my work, join me in this short creative process.
Let's begin:😃

Hola a Todos... 🐱
Hola a mis queridos Hivers y a la querida comunidad de Holozing, muy complacida y emocionada de encontrarme por acá para mostrarles un trabajo muy sencillo hecho con mucho amor y especialmente para ustedes.
Para hoy en esta nueva actualización semanal de recompensas y progreso en la comunidad de holozing, continuo con mi arte, y como amante de los gatitos y mama humana desde hace casi 6 años de una peludita llamada Shira, al ver al hermoso MIU inspirado en la gatita del amigo @acidyo, no pude evitar enamorarme de la criatura y tratar de materializarlo a mi estilo realizando uno mini cute, y risueño en la técnica de quilling. Espero que les guste este pequeño MIU 🐱🐾❤️
Les adjunto varias imágenes de lo que ha sido mi progreso reclamando las recompensas por mi delegacion a Holozing que aspiro muy pronto aumentar, y aunque se que el tokens $POSH dejara de funcionar he podido obtener algunos mediante la promoción en reddit, comencé con 10 POSH y ya cuento con 55.
Espero sea de su agrado mi trabajo, acompáñenme en este corto proceso creativo.
Comencemos:😃


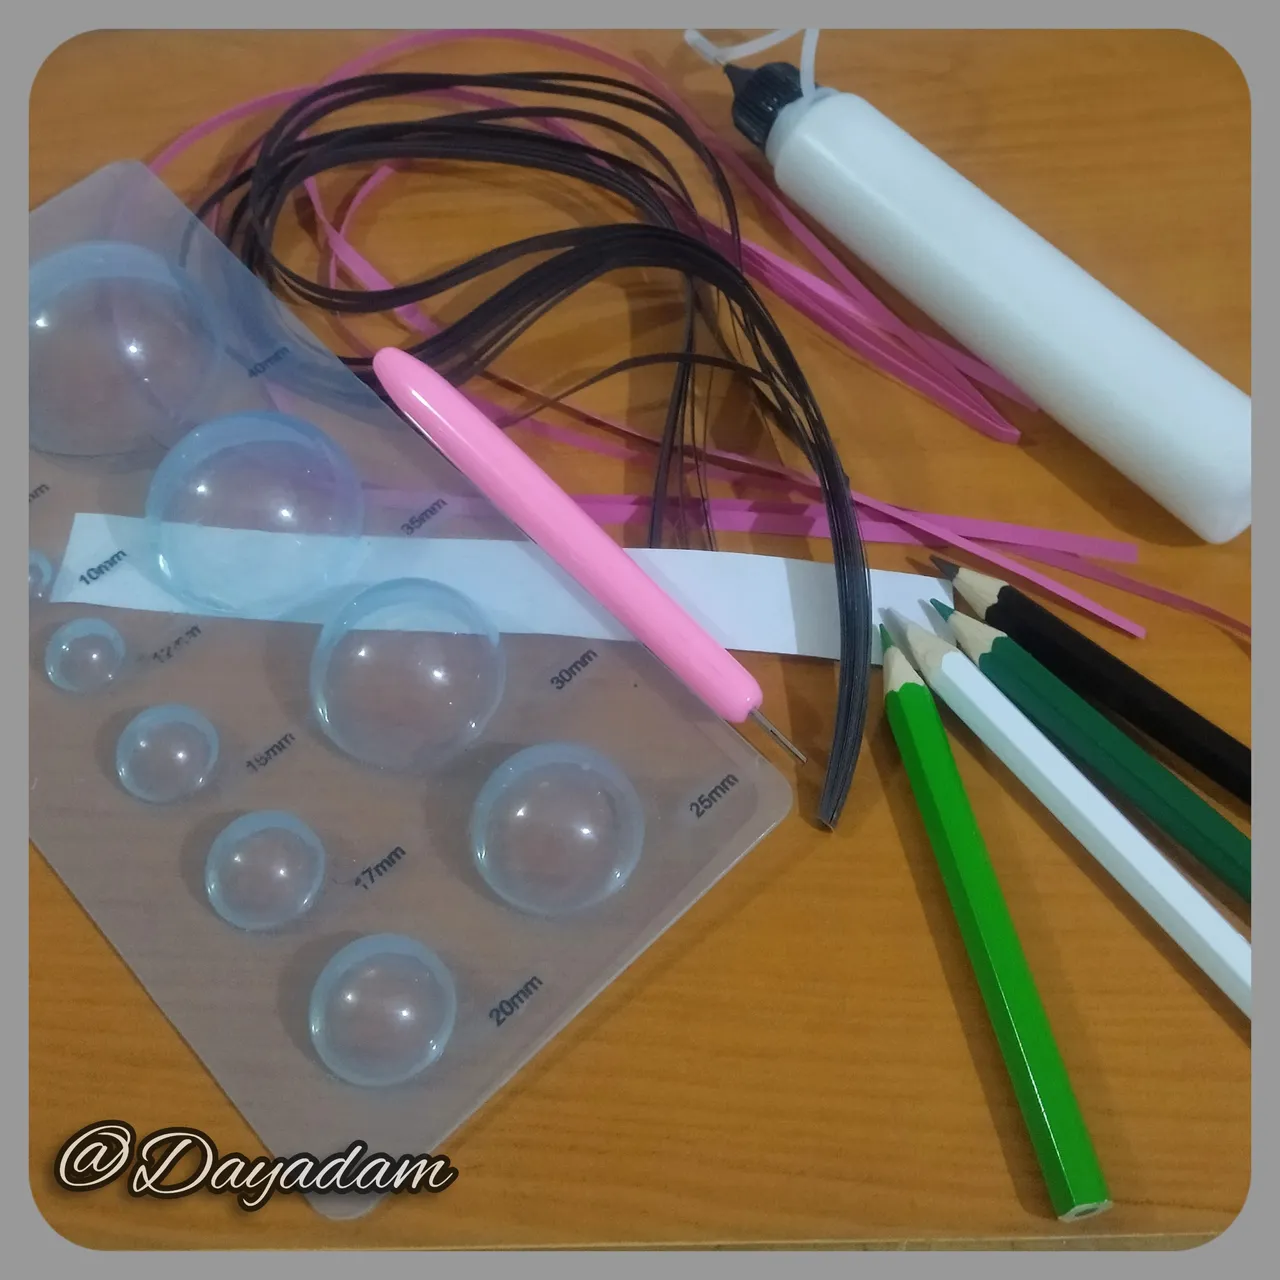
• Cintas de quilling de 3mm de ancho de diversos colores.
• Aguja para quilling.
• Molde para círculos.
• Colores, marcadores.
• Hoja blanca.
• Pega blanca extra fuerte (de carpintería).
• Tijera.
• Pincel.
- 3mm wide quilling ribbons in different colors.
- Quilling needle.
- Mold for circles.
- Colors, markers.
- White sheet.
- Extra strong white glue (carpentry glue).
- Scissors.
- Paintbrush.

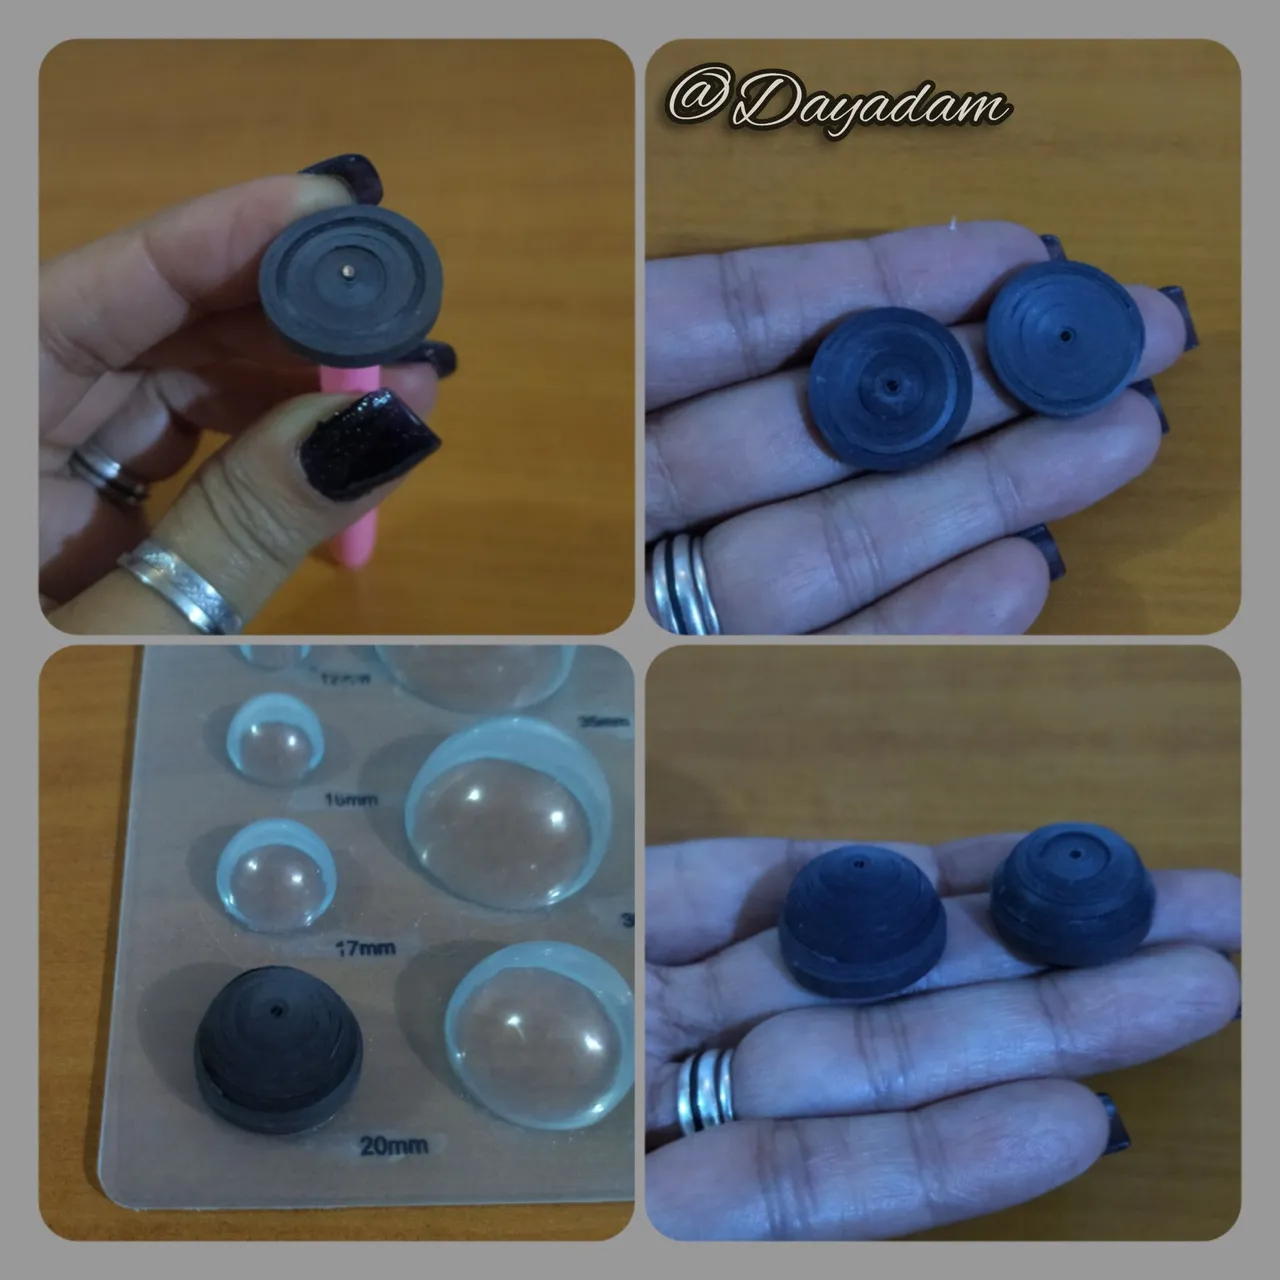
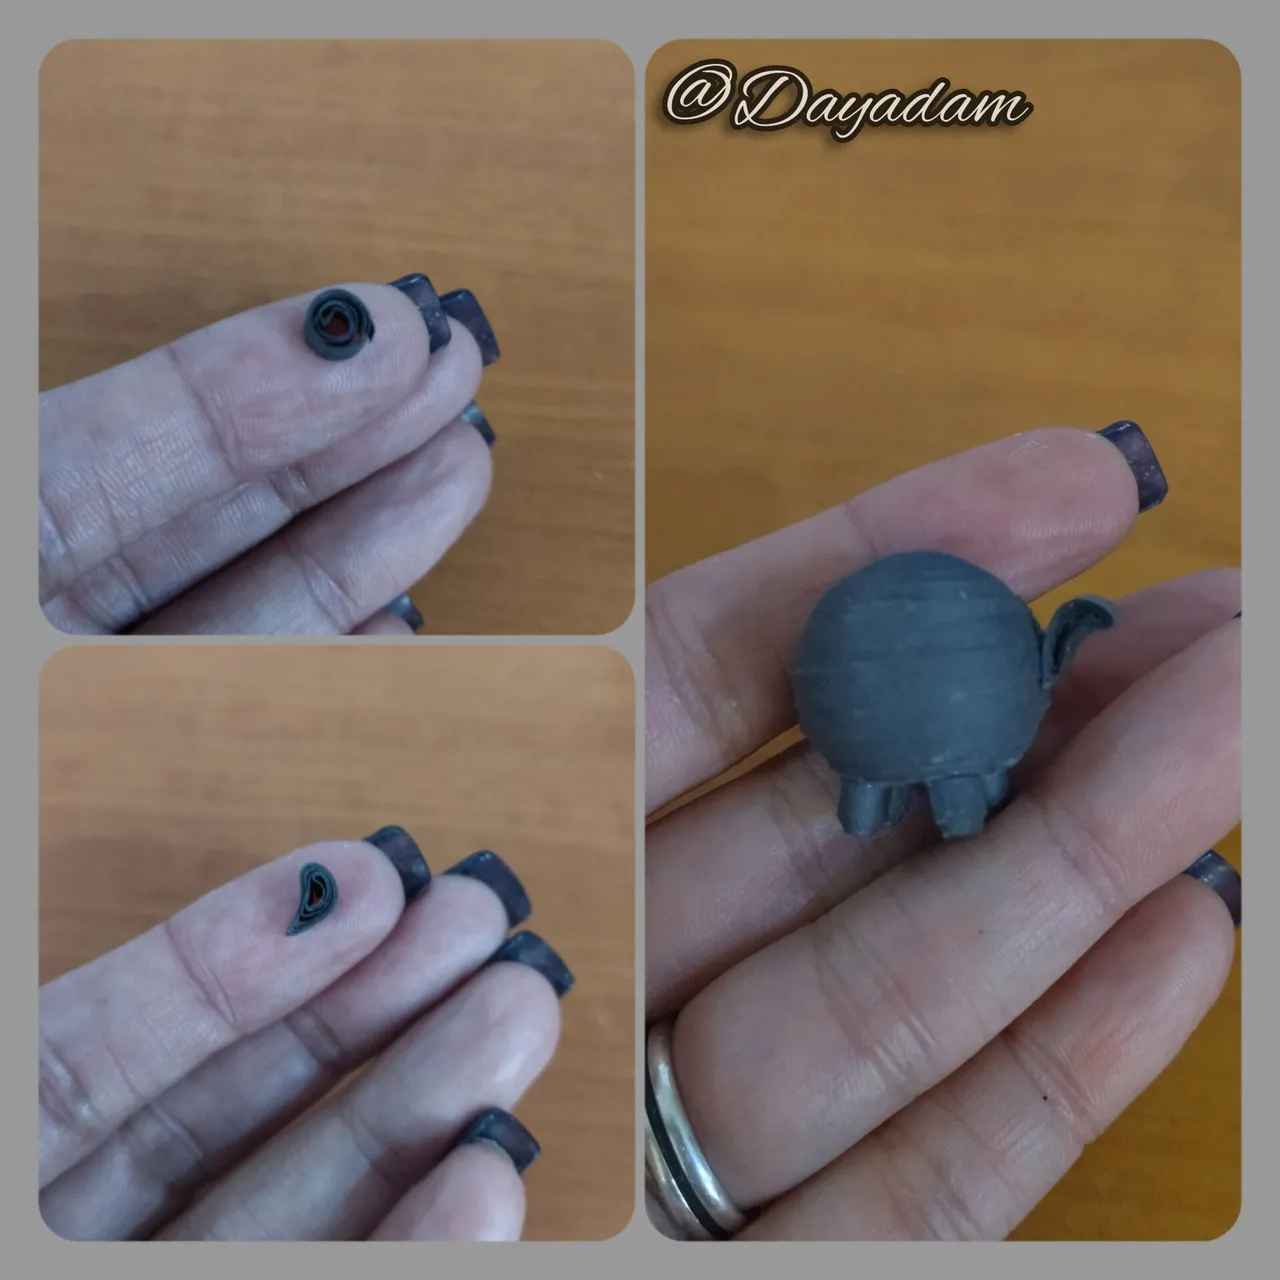
- We start by taking 3mm wide x 240cms long gray quilling tape, we roll it with the quilling needle until we reach the end of the tape, we seal it with extra strong white glue, we take it out of the needle, we will obtain a closed circle. For each MIU we are going to make we will need 2 circles.
- We are going to mold the circles, placing them in the circle template in the 20mm size, once molded we take them out of the template and add a little glue on the inside, let them dry to prevent the pieces from moving.
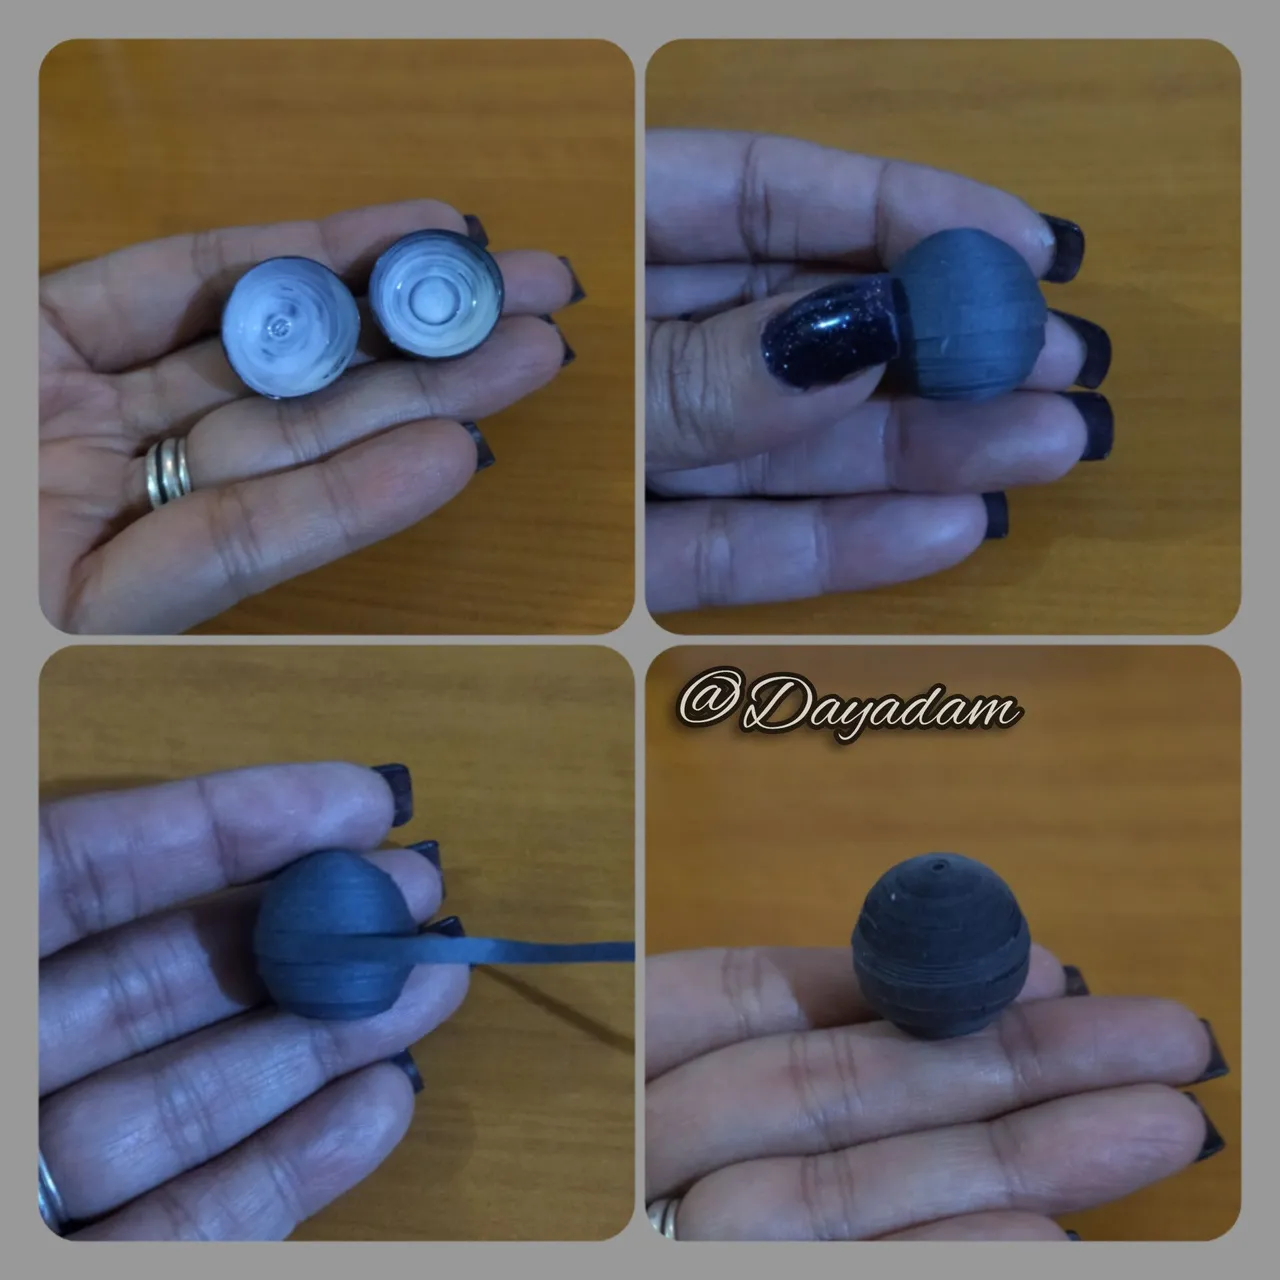
- We will take the pieces and join them with a small piece of 3mm wide quilling tape, we couple both pieces passing the tape through the middle with extra strong white glue (reserve).
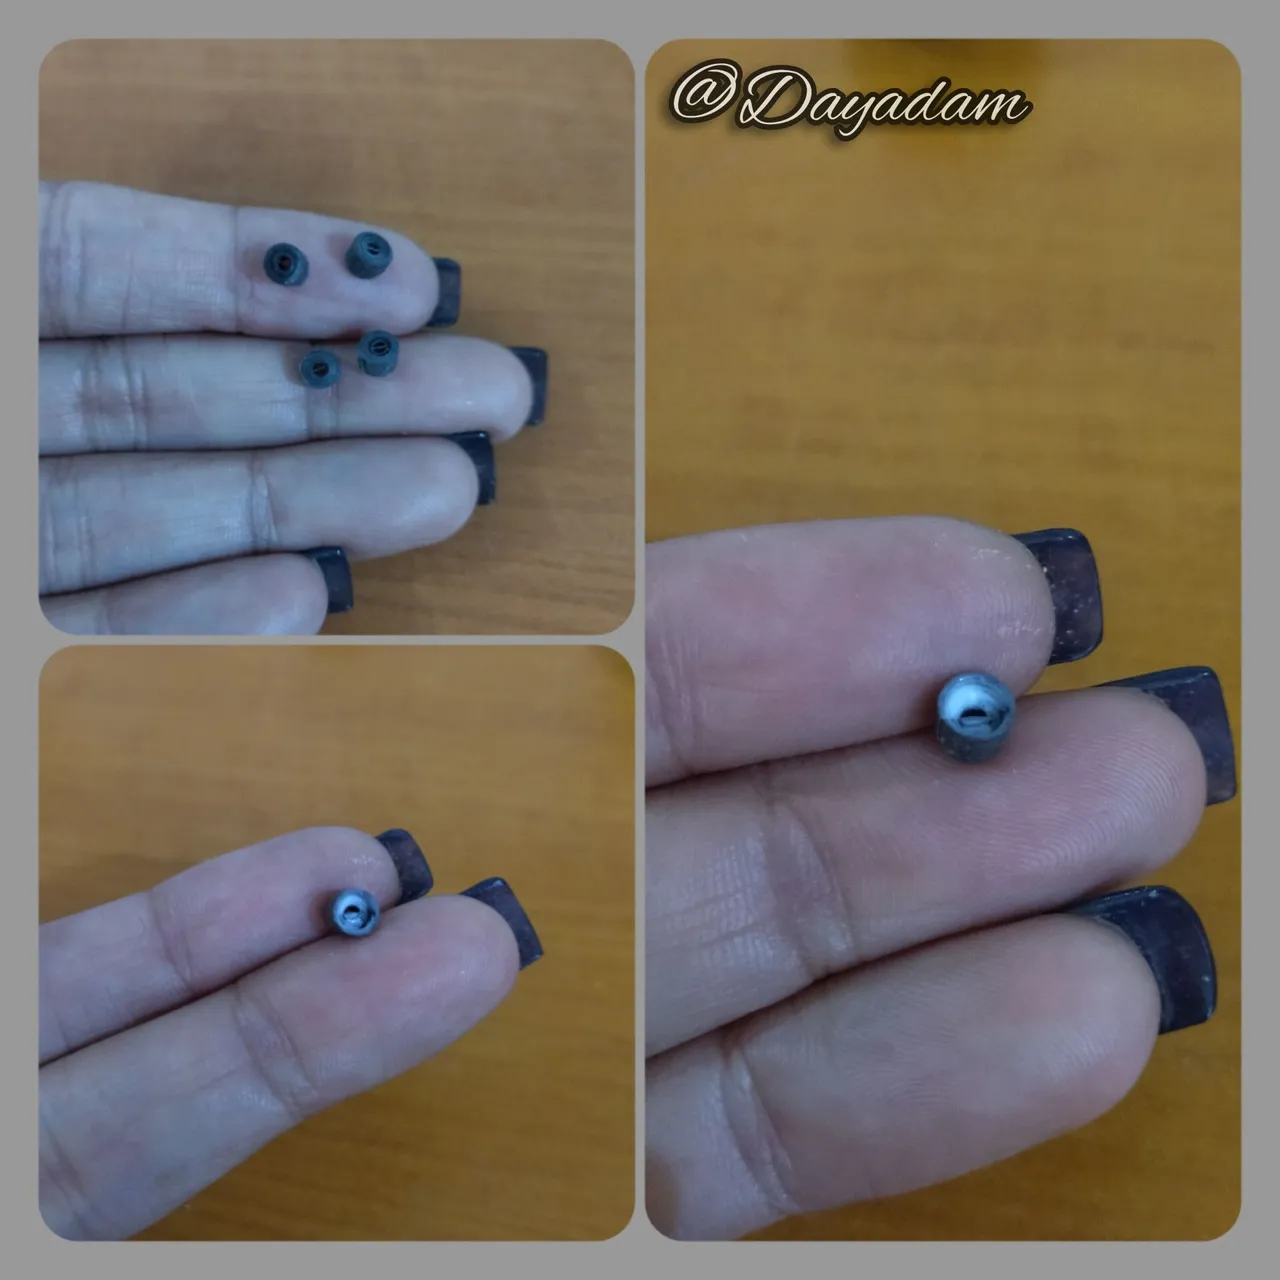
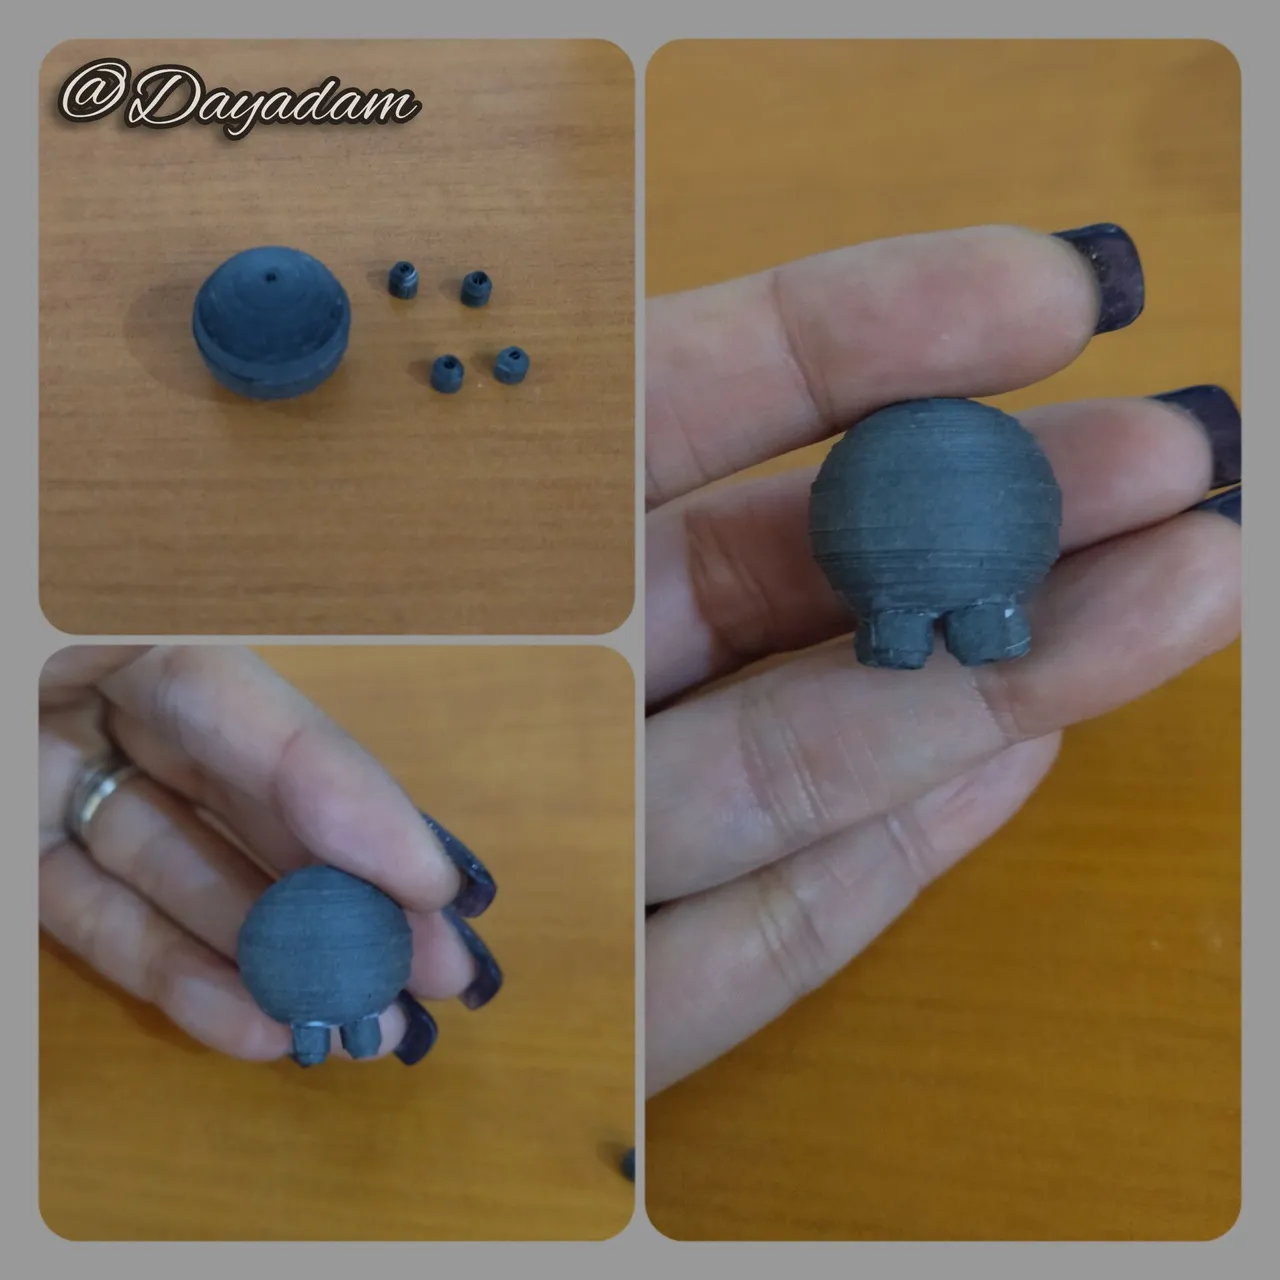
- For the legs we will take quilling tape 3mm wide x 20cms long and we will make a closed circle, we will need 4. We will mold them pushing them a little bit outwards leaving in the bottom a little square shape, in the internal part we will apply glue so that they do not deform, we will glue to the body that we previously made.

• Comenzamos tomando cinta para quilling de color gris de 3mm de ancho x 240cms de largo cada una, enrollamos con la aguja para quilling hasta llegar al final de la cinta, sellamos con pega blanca extra fuerte, sacamos de la aguja, obtendremos un círculo cerrado. Por cada MIU que vayamos a realizar necesitaremos 2 círculos.
• Vamos a moldear los círculos, colocando en la plantilla de círculos en la medida 20mm, una vez moldeada sacamos de la plantilla y en la parte de adentro agregamos un poco de pega, dejamos secar para evitar que se muevan las piezas.
• Tomaremos las piezas y uniremos con un pequeño trozo de cinta de quilling de 3mm de ancho, acoplamos ambas pasando la cinta por el medio con pega blanca extra fuerte (reservamos).
• Para las patas tomaremos cinta para quilling de 3mm de ancho x 20cms de largo y haremos un circulo cerrado, necesitaremos 4. Los moldearemos empujando un poco hacia afuera dejando en la parte de abajo una forma un poco cuadrada, en la parte interna aplicaremos pega para que no se deformen, pegaremos al cuerpo que previamente hicimos.

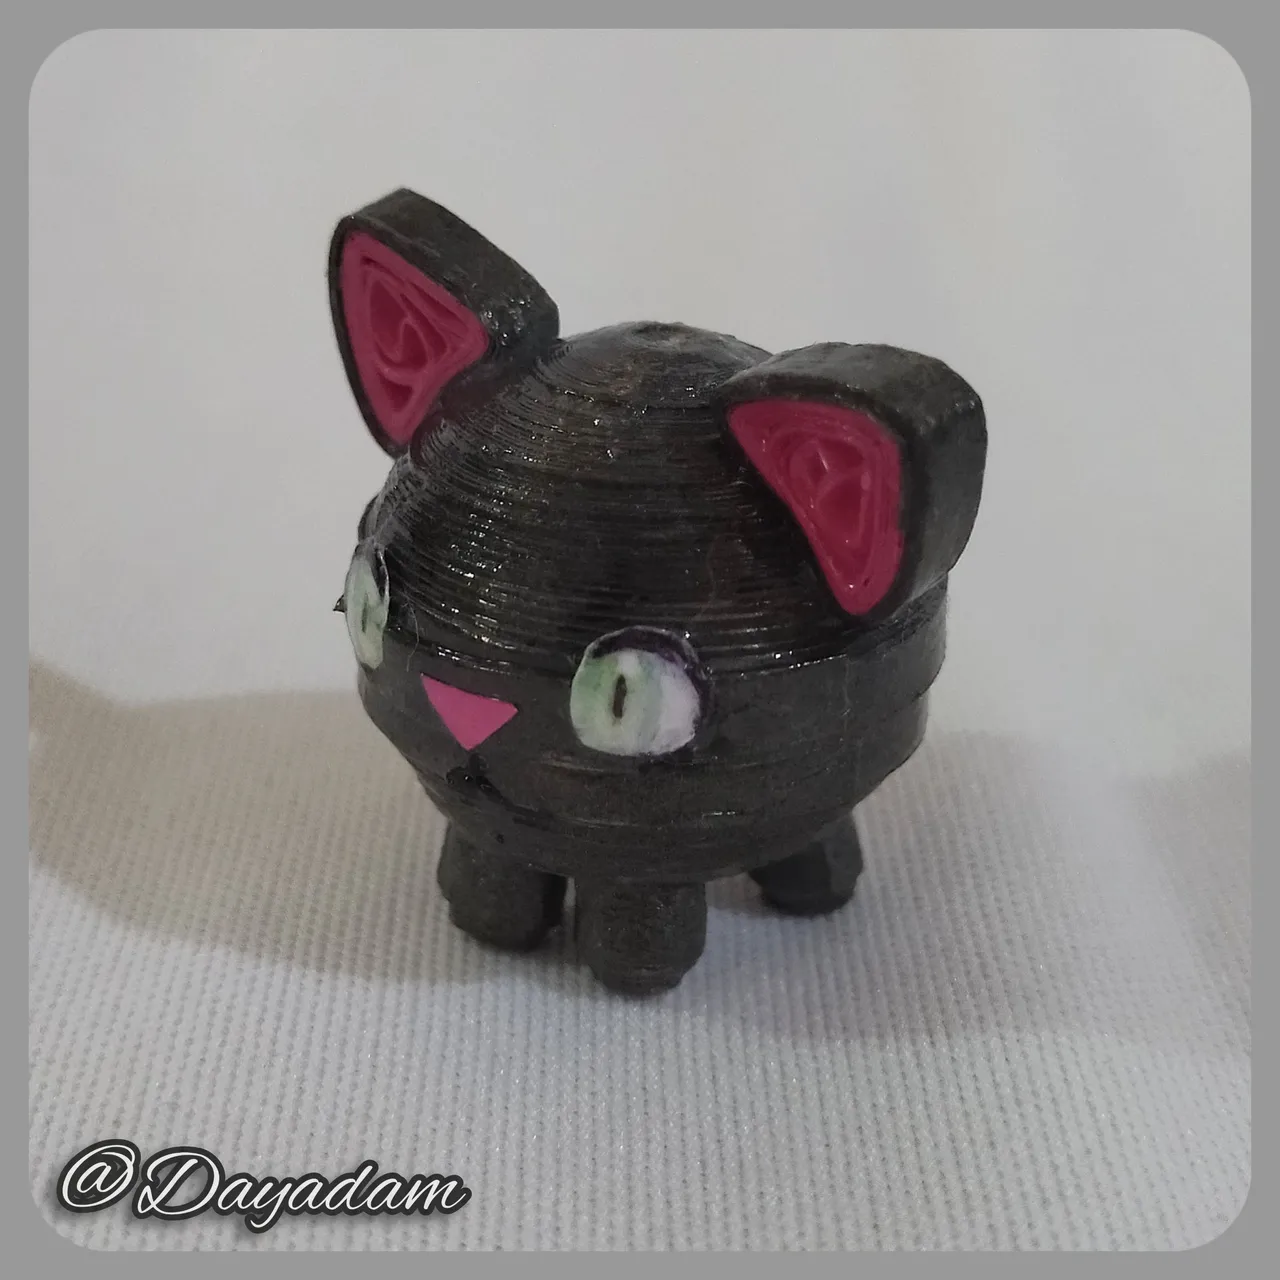
- The tail will be made with a small piece of gray ribbon 3mm wide from a small closed circle which is molded in the shape of a half moon. We glue it on the back of MIU's body.
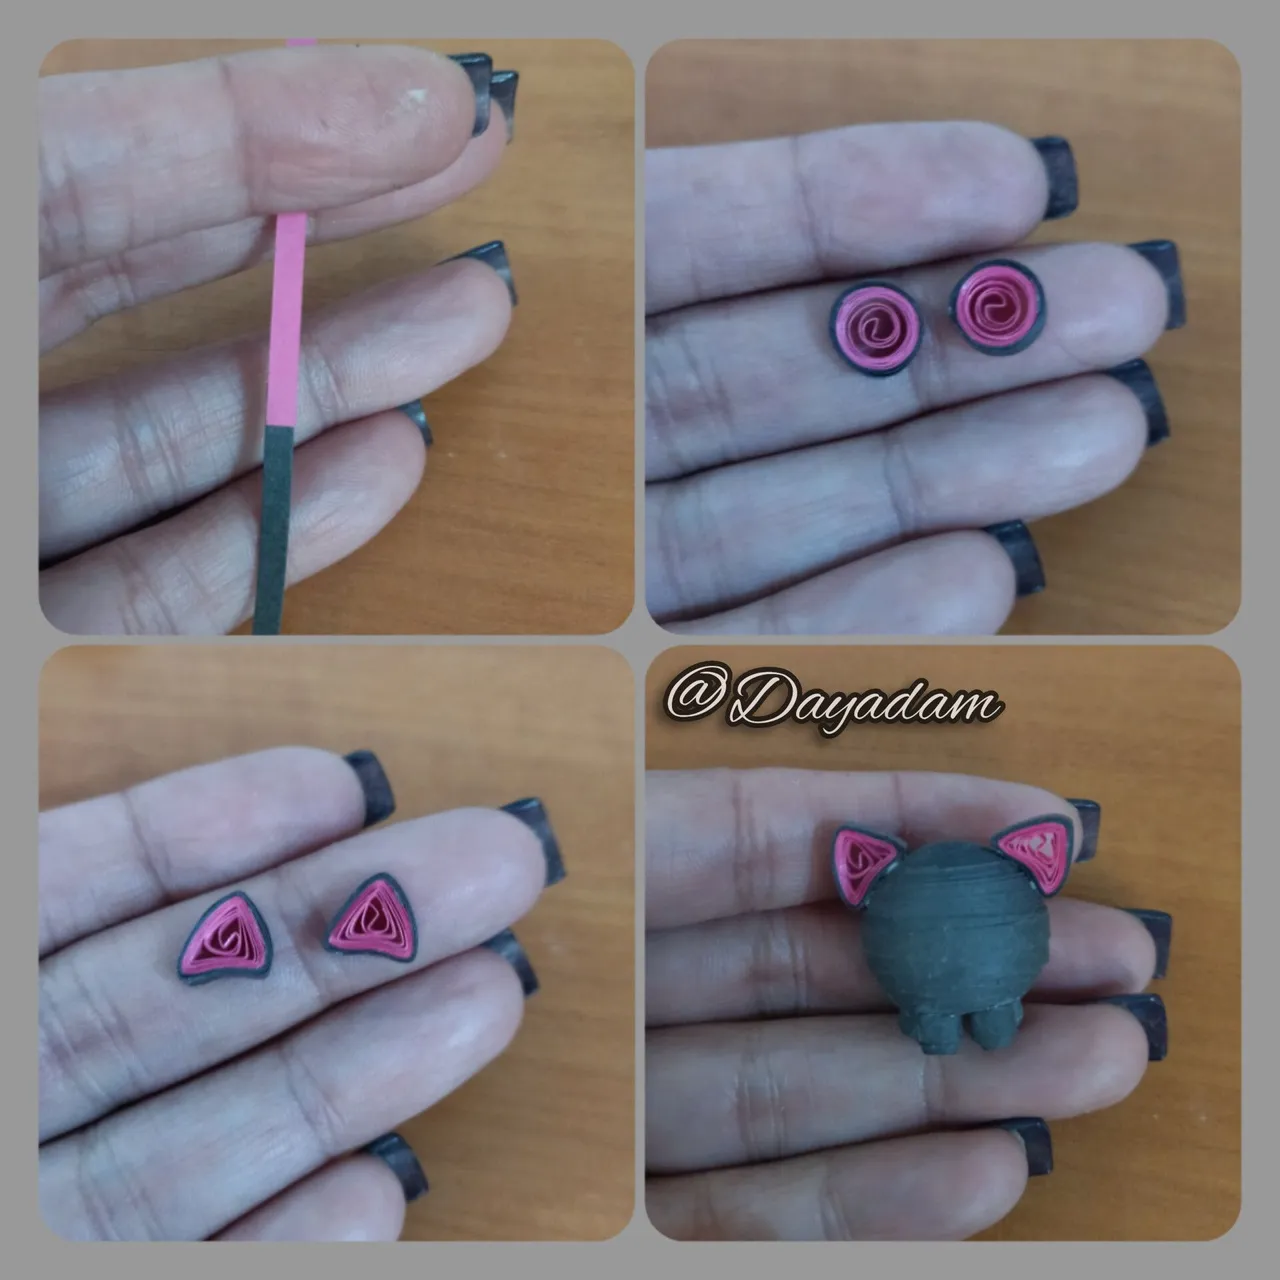
- For the ears we will take 3mm wide gray and pink ribbon which we will join into one and we will make an open circle which we will mold in the shape of a triangle, we glue on the top of the head.
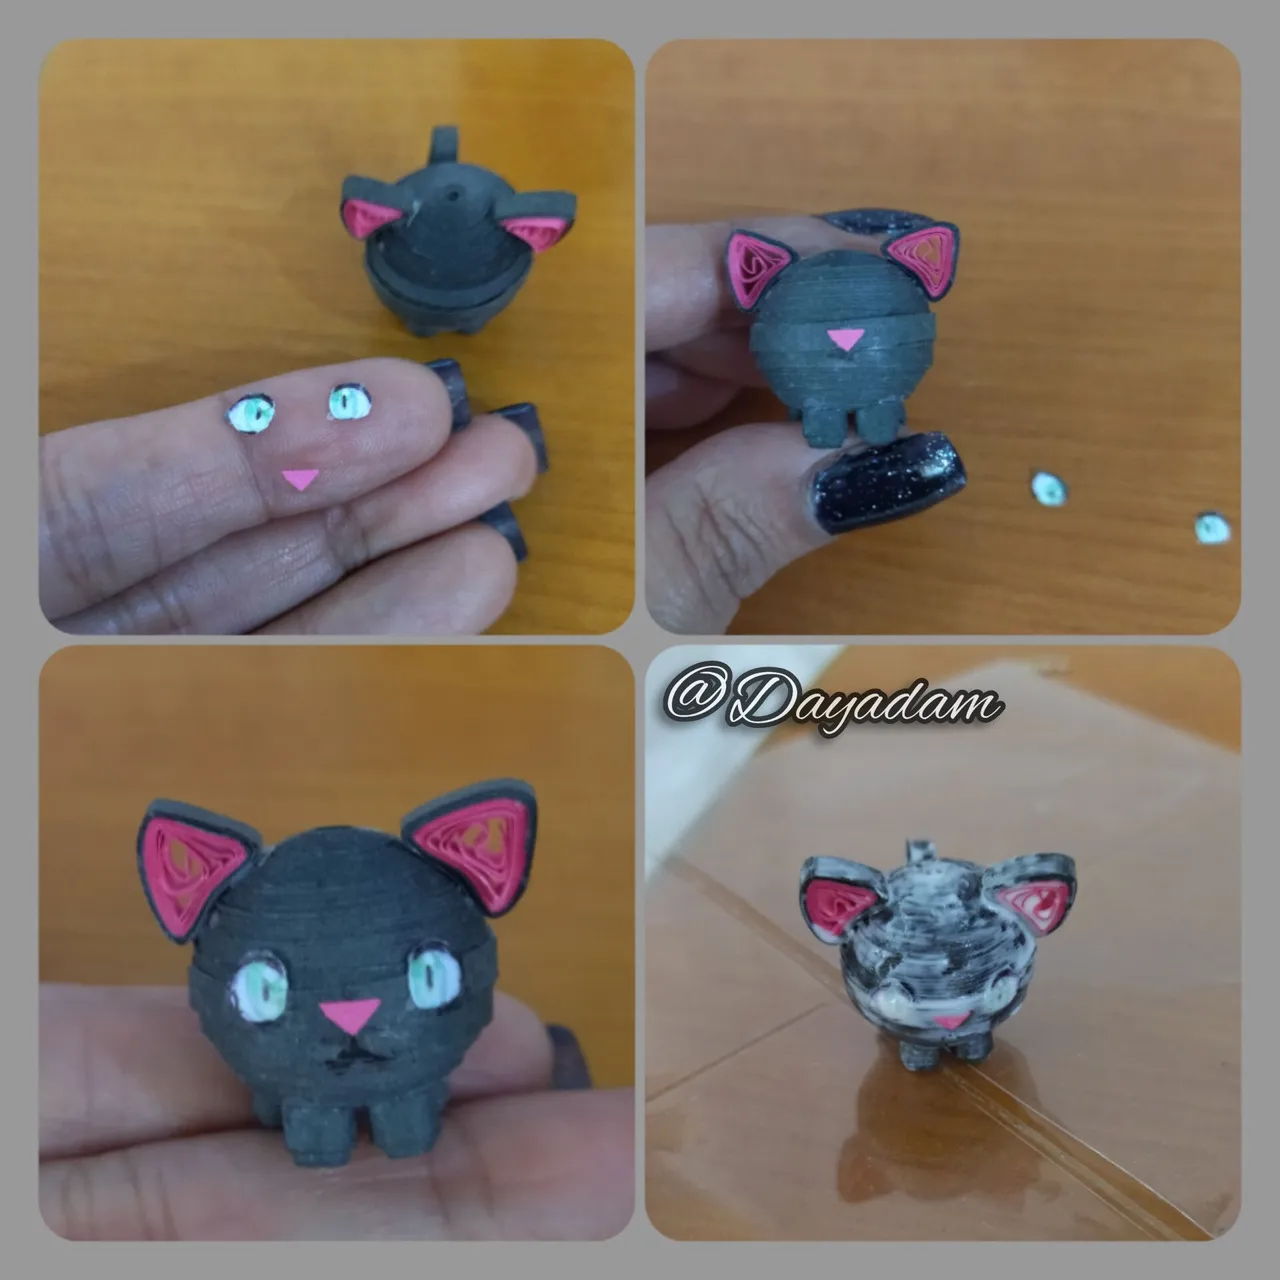
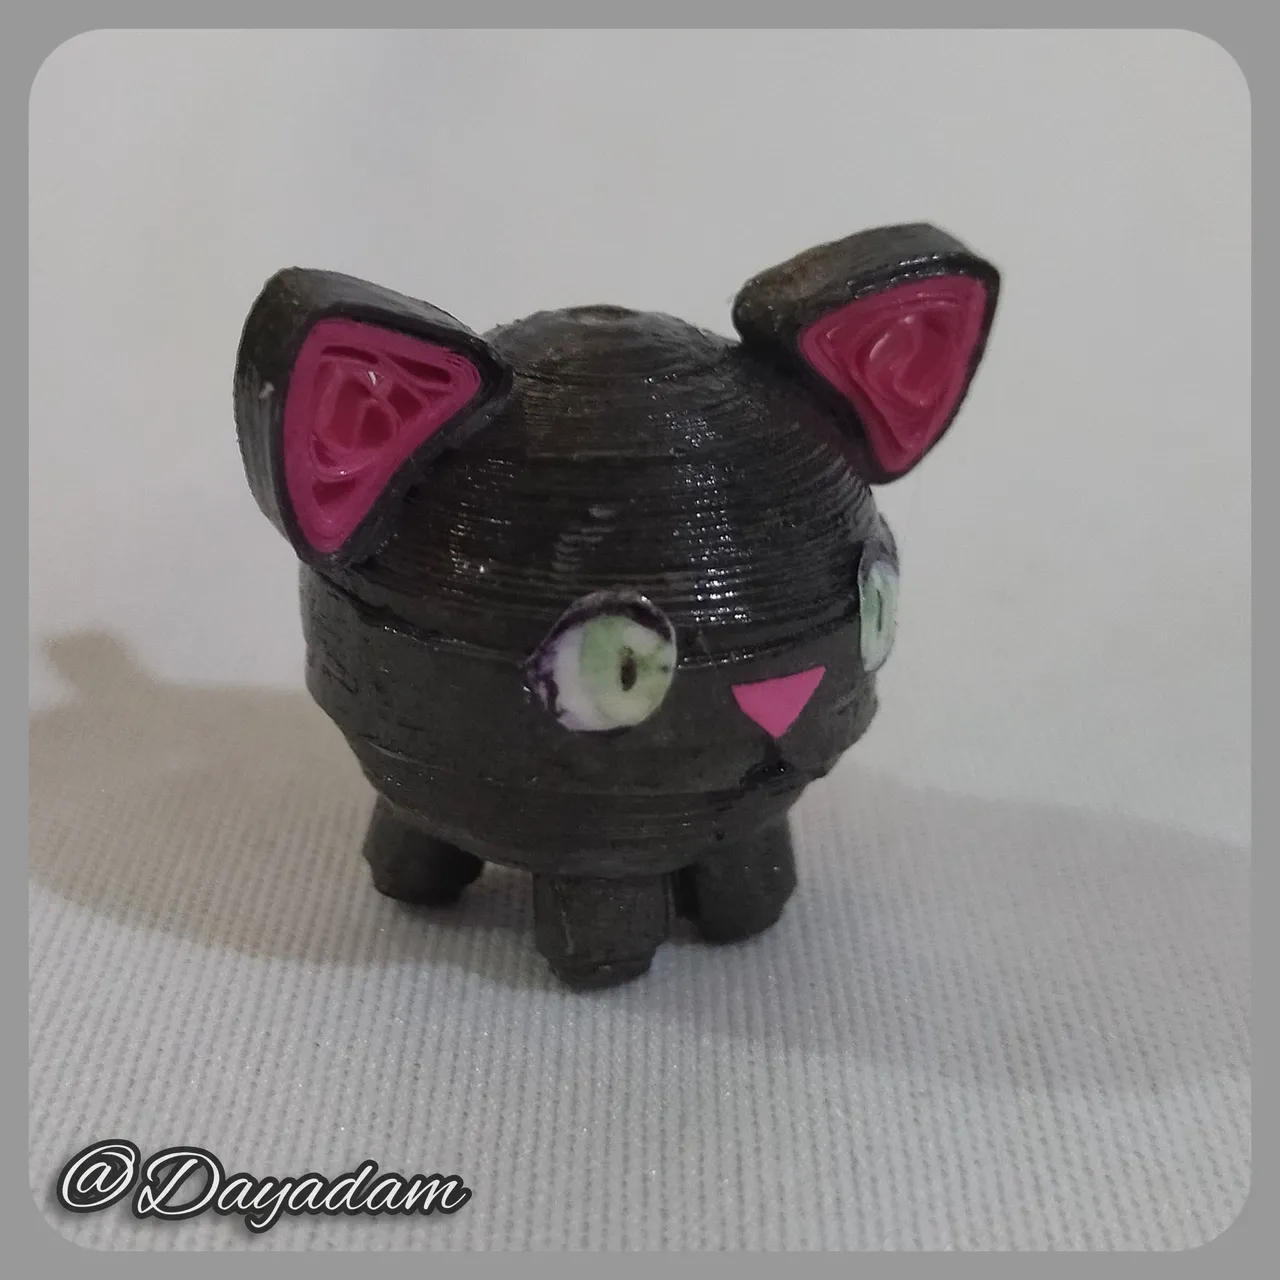
- The last details which would be the eyes, nose and mouth, were painted on a piece of white paper and glued on MIU's face.
- Finally I applied a layer of extra strong white glue to protect and give shine to the little MIU.
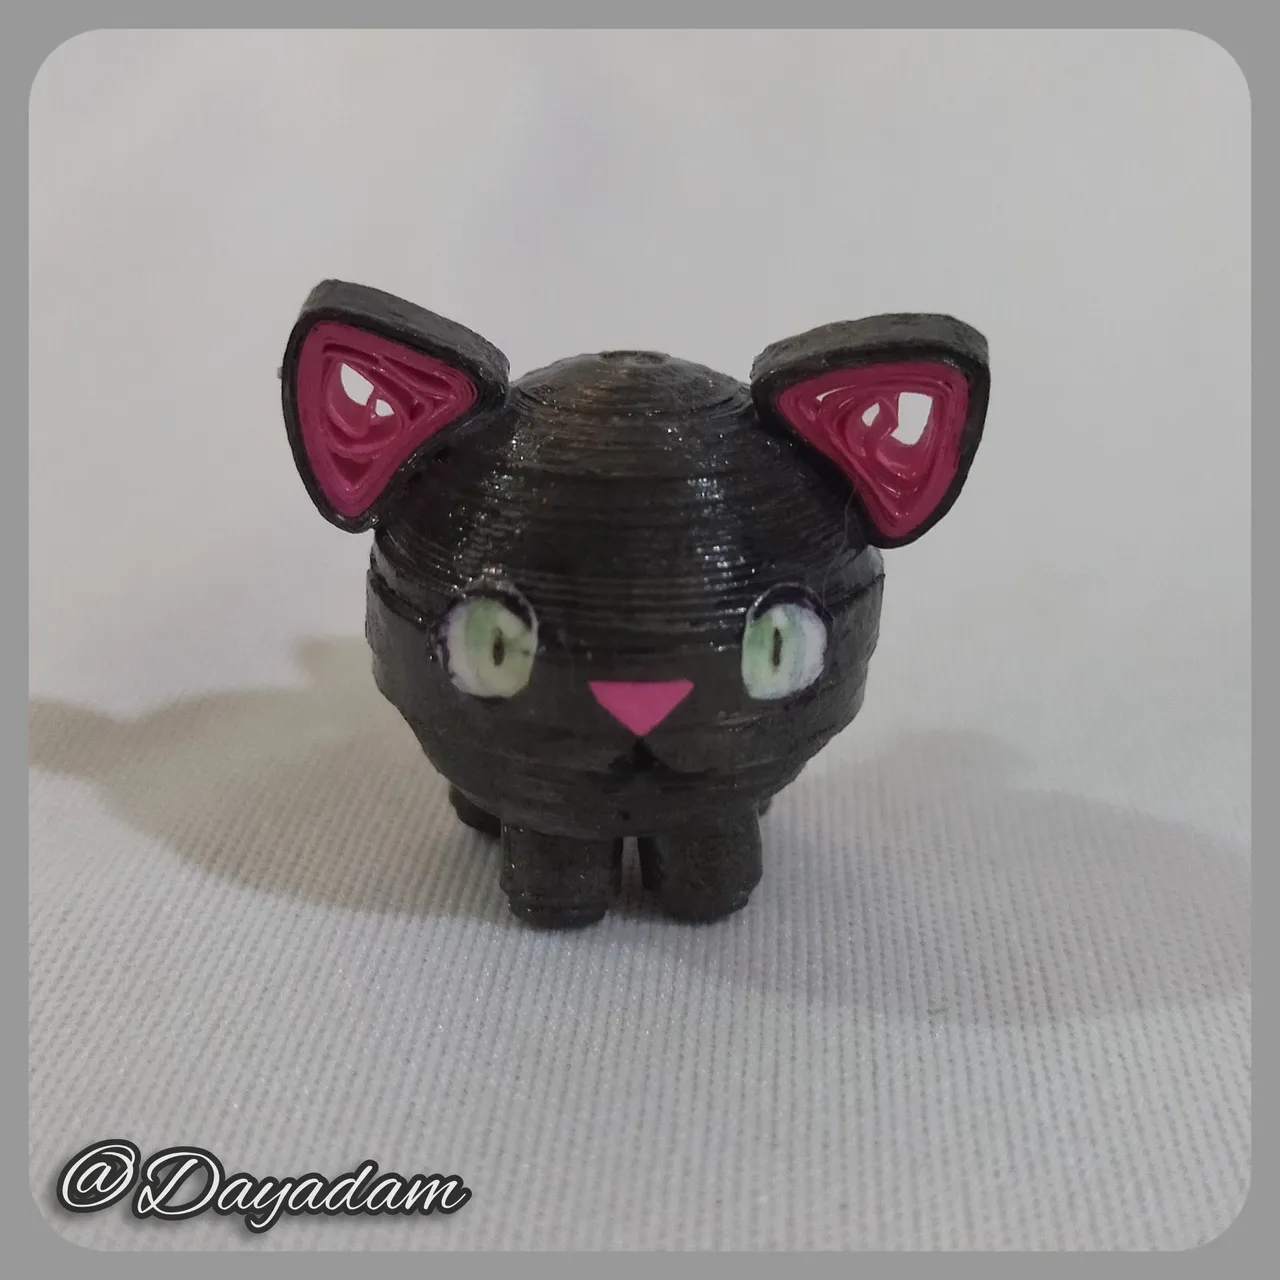
This way we have ready this little decorative MIU, in 3D in the quilling technique.
• La colita la realizare con un pequeño trozo de cinta color gris de 3mm de ancho a partir de un pequeño circulo cerrado el cual se moldea en forma de media luna. Pegamos en la parte de atrás del cuerpo de MIU.
• Para las orejas tomaremos cinta de color gris y color rosada de 3mm de ancho las cuales uniremos en una sola y realizaremos un circulo abierto el cual moldeare en forma de triangulo, Pegamos en la parte de arriba de la cabeza.
• Los últimos detalles que serian ojos nariz y boca, fueron pintados en un trocito de hoja blanca y los pegue de la carita de MIU.
• Para finalizar aplique una capa de pega blanca extra fuerte para proteger y darle brillo al pequeño MIU.
De esta manera tenemos listo este pequeño MIU decorativo, en 3D en la técnica de quilling.


What did you think, did you like it?
I hope you did, I hope you liked my explanation, procedure and photos, I made them with love for you.
"Let out that muse that inspires you, and let your imagination fly".
Thank you all, see you next time.🐱

¿Qué les pareció, les gustó?
Espero que sí, que les haya gustado mi explicación, procedimiento y fotos, los hice con mucho cariño por y para ustedes.
"Deja salir esa musa que te inspira, y deja volar tu imaginación".
Gracias a todos, nos vemos en la próxima.🐱

