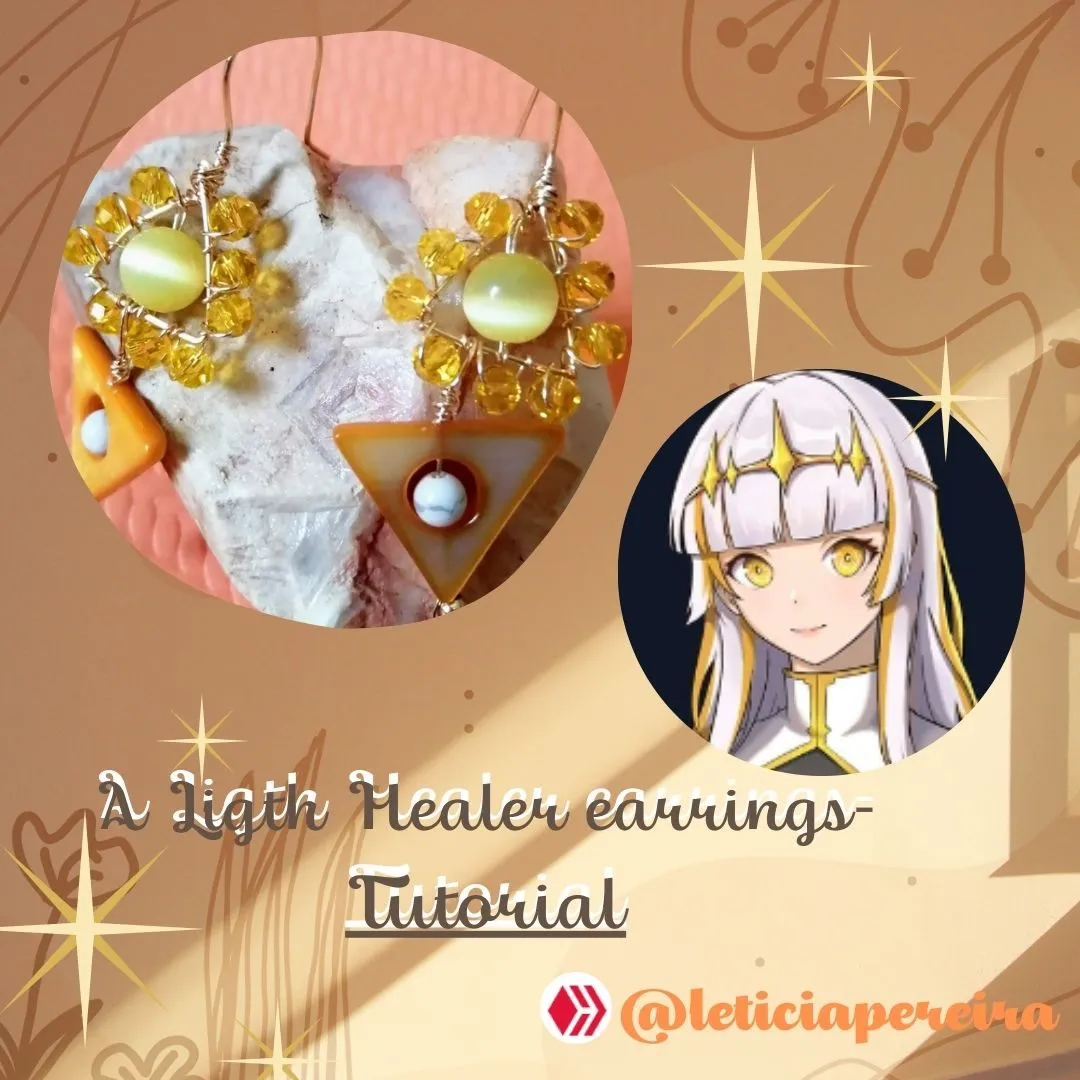
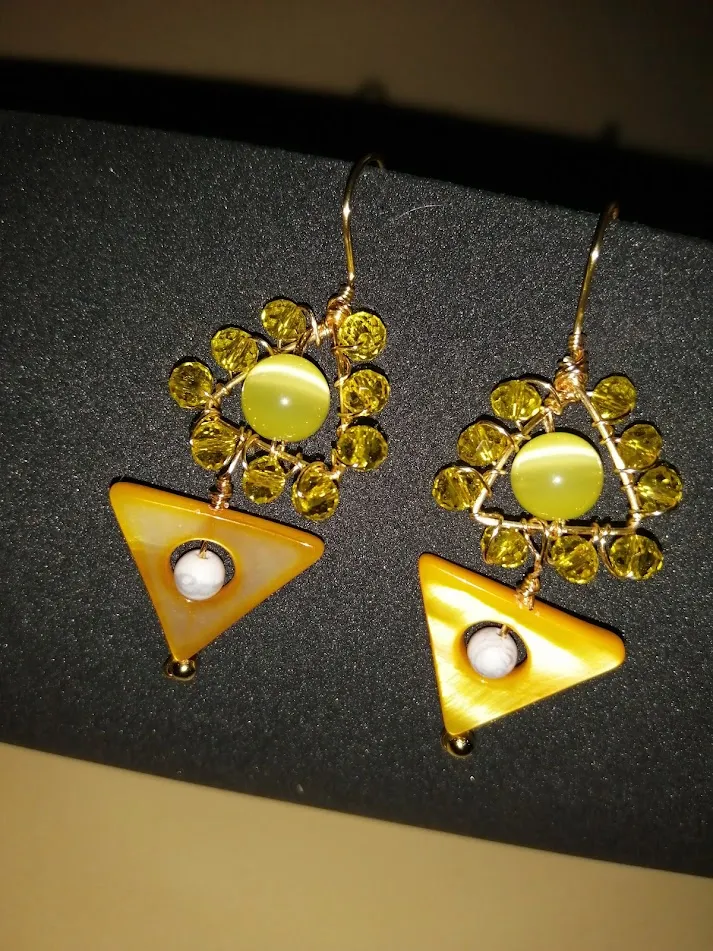
Holo!, my dear friends of the Holozing Community, it's a pleasure to be able to participate again, this time with a project that I had prepared a long time ago: some beautiful earrings inspired by the Healer of Light; I hope that the tutorial below will be very useful if you are looking for ideas to undertake.
Below I will show you the materials needed and the step-by-step in a graphic and easy to visualise way.
Holo! mis queridos amigos de la Comunidad de Holozing!, es un gusto poder participar nuevamente, en esta oportunidad con un proyecto que tenía preparado hace bastante tiempo: unos bellos aretes inspirados en la Sanadora de Luz; espero que el tutorial a continuación, les sea de gran utilidad si te encuentras buscando ideas para emprender.
A continuación te mostraré los materiales necesarios y el paso a paso de manera gráfica y fácil de visualizar.

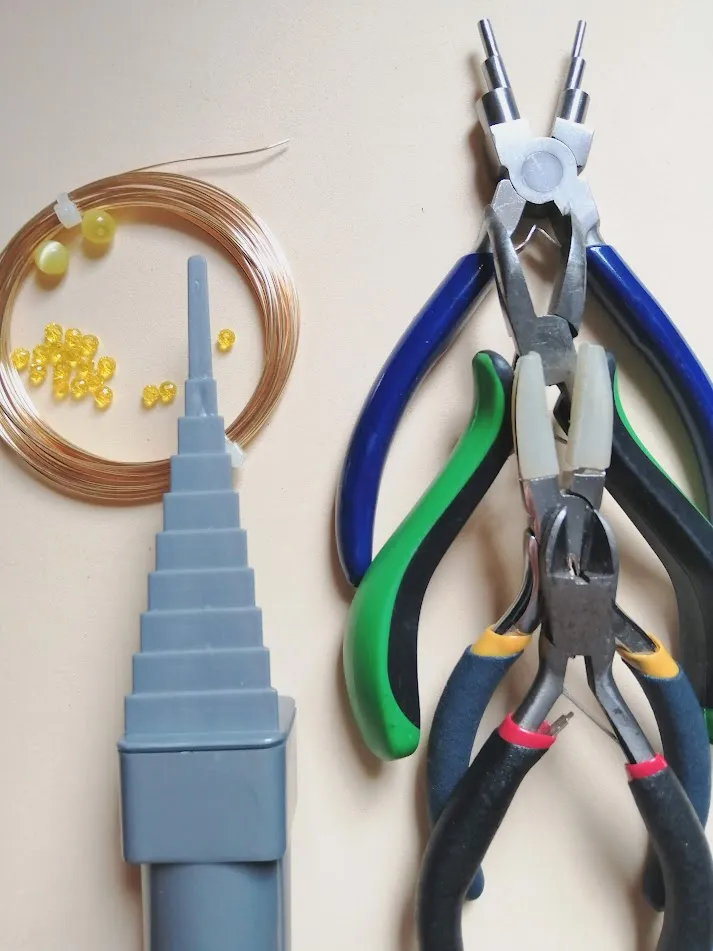
Materiales:
- Hilo de bisutería dorado Beadalon nro 22 (0.64mm-0.025in) y 26 (0.41mm-0.0126in)
- 02 unidades de cristales de roca (ojo de gato) de 8mm
- 02 unidades de piedra natural (howlita) de 4mm
- 02 triángulos de nácar
- 02 perlas doradas de 2mm
- 18 cristales de acrílico facetado
- Pinzas básicas de bisutería
- Mandril multinivel en forma de triángulo
Materials:
- Beadalon gold jewellery thread no. 22 (0.64mm-0.025in) and 26 (0.41mm-0.0126in).
- 02 units of 8mm rock crystals (cat's eye)
- 02 units of natural stone (howlite) of 4mm
- 02 mother-of-pearl triangles
- 02 2mm gold pearls
- 18 faceted acrylic crystals
- Basic jewellery tweezers
- Multilevel mandrel in the shape of a triangle

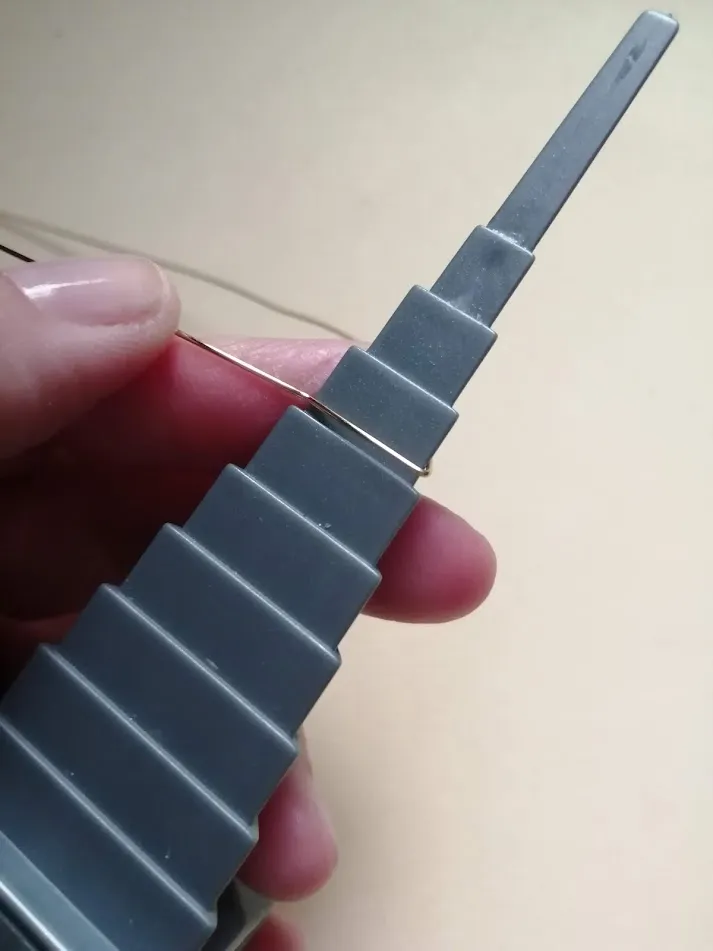
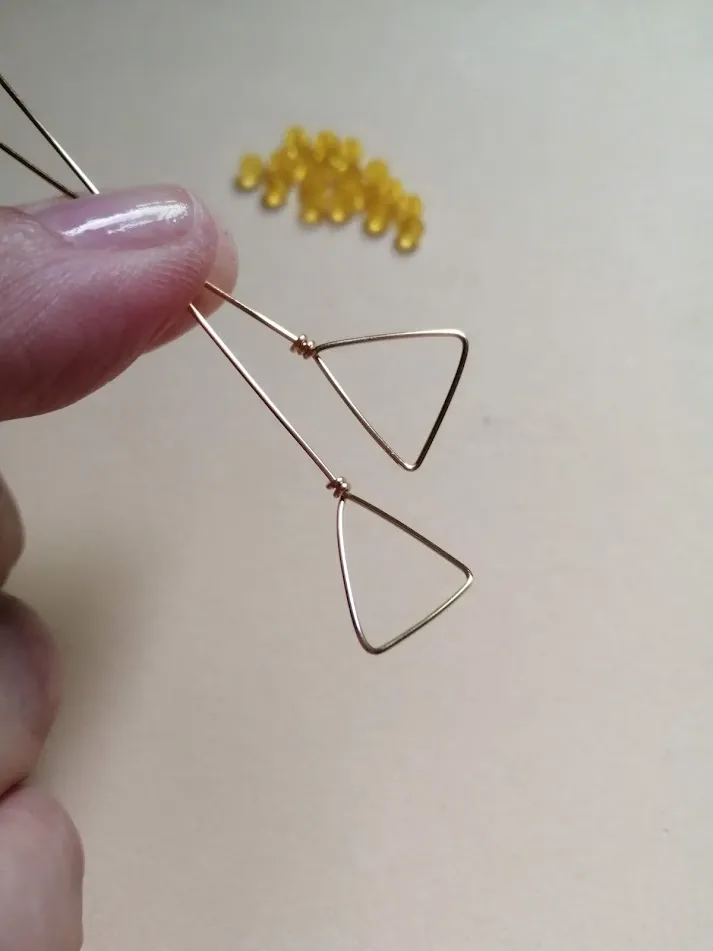
The first thing we will do is to make the two wire bases of our earrings; working directly from the spool of costume jewellery wire no. 22, we measure 7cm and from there we will make a triangle with the help of the mandrel on level 4 (from the upper level of our tool).
Lo primero que haremos es realizar las dos bases en alambre de nuestros aretes; trabajando directamente del carrete de hilo de bisutería nro. 22, medimos 7cm y a partir de allí vamos realizamos un triángulo con ayuda del mandril en el nivel 4 (a partir del nivel superior de nuestra herramienta).
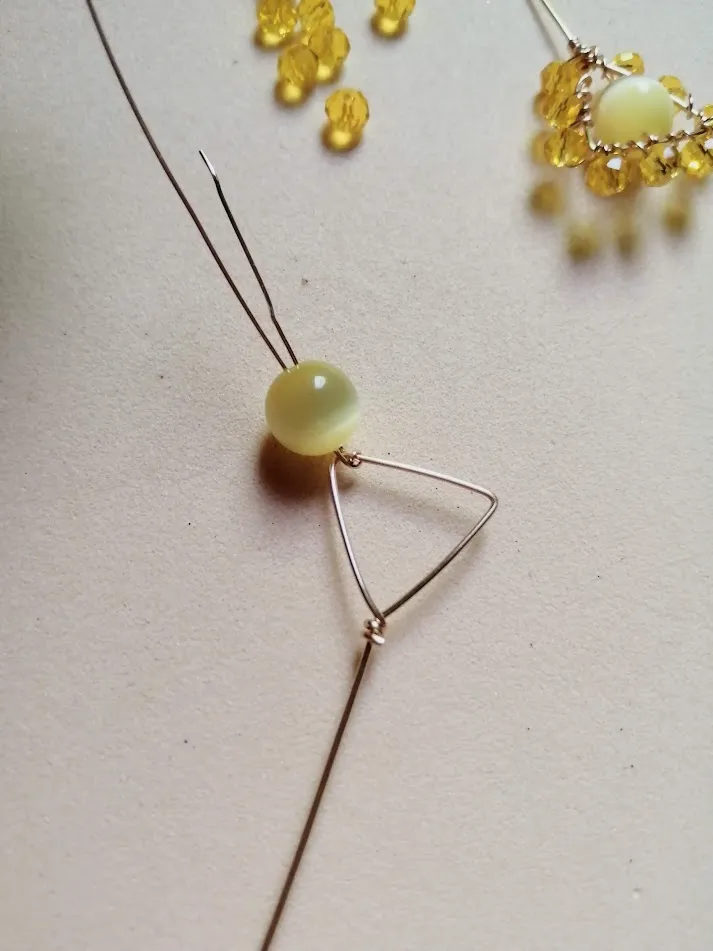
Using approx. 25cm of jewellery thread no. 26, make a small tie on one of the bases we made before and insert the 8mm cat's eye crystal, as shown in the picture.
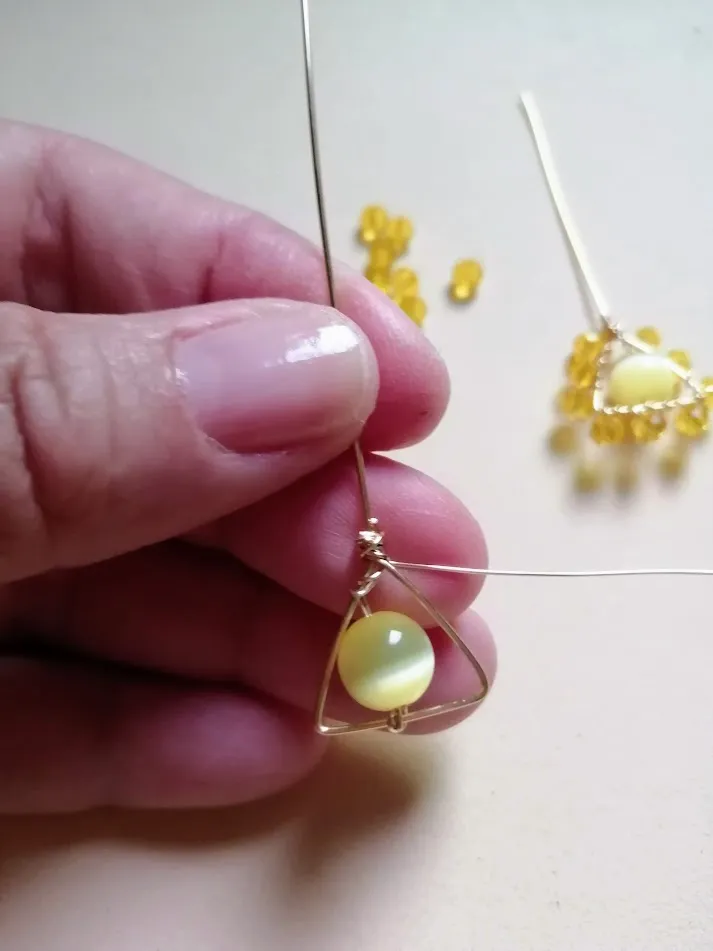
Tighten at the end with the excess thread, cut the shorter thread and make a two-strand tie.
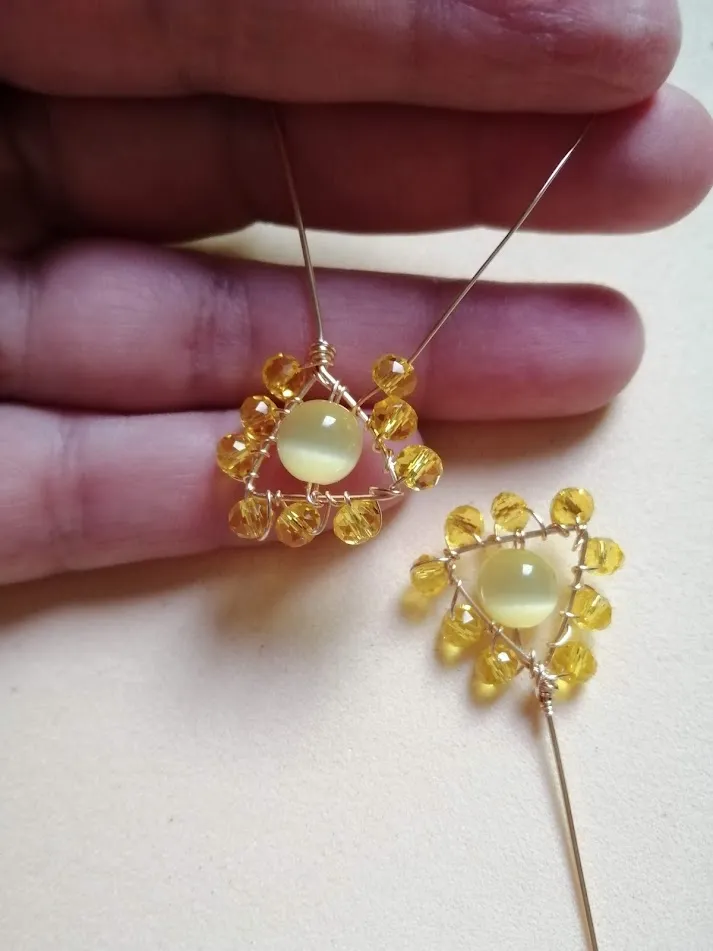
Insert faceted acrylic crystals and secure each of them to the piece with two loops; repeat until the entire edge of our base is complete, adjust very well at the beginning and cut off the excess.
Con aproximadamente 25cm de hilo de bisutería nro. 26, realiza un pequeño amarre en una de las bases que realizamos antes e inserta el cristal de ojo de gato de 8mm , tal como se muestra en la imagen.
Ajusta en el extremo con el hilo sobrante, corta el hilo más corto y haz un amarre de dos vueltas.
Inserta cristales de acrílico facetado y asegura a la pieza cada uno de ellos mediante dos vueltas; repite hasta completar todo el borde de nuestra base, ajusta muy bien en el inicio y corta el excedente.
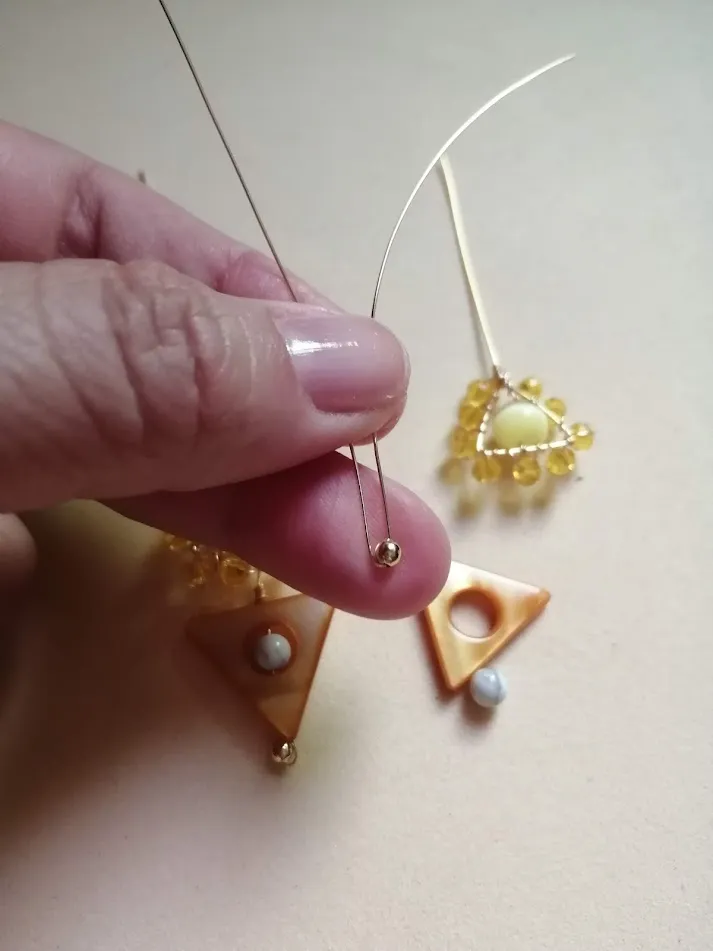
Insert a golden steel pearl into approximately 10cm of thread no. 26 which we have previously folded in half.
Insert a Howlite bead into the circumference of the mother-of-pearl motif and insert the thread from the previous step.
Introduce una perla de Howlita en la circunferencia del motivo de nácar e inserta el hilo del paso anterior.
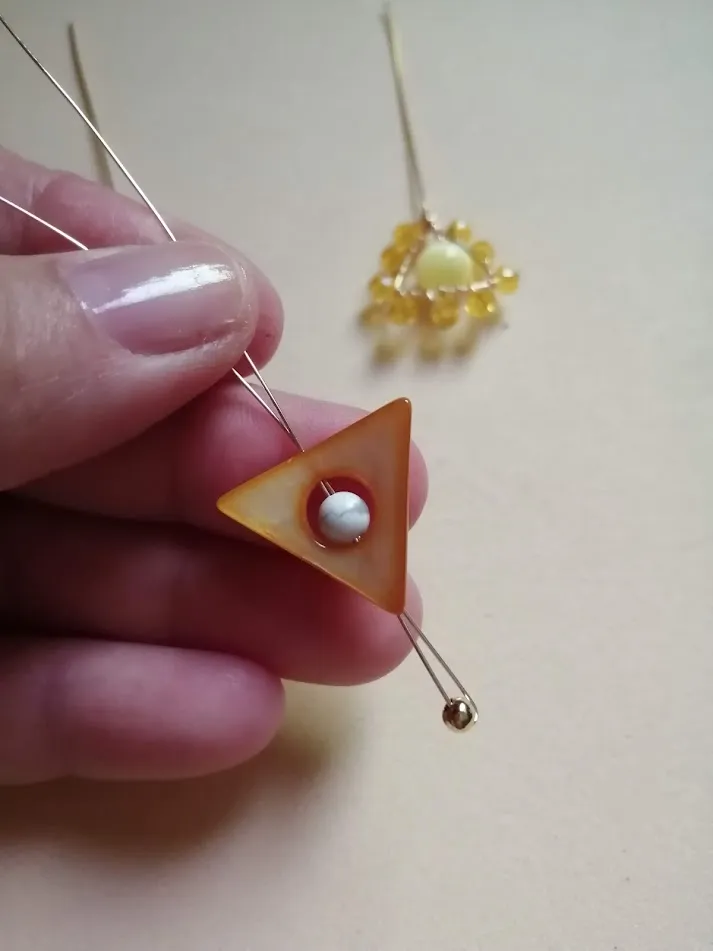

With one end of the thread, make three turns to secure the piece, cut off the excess.
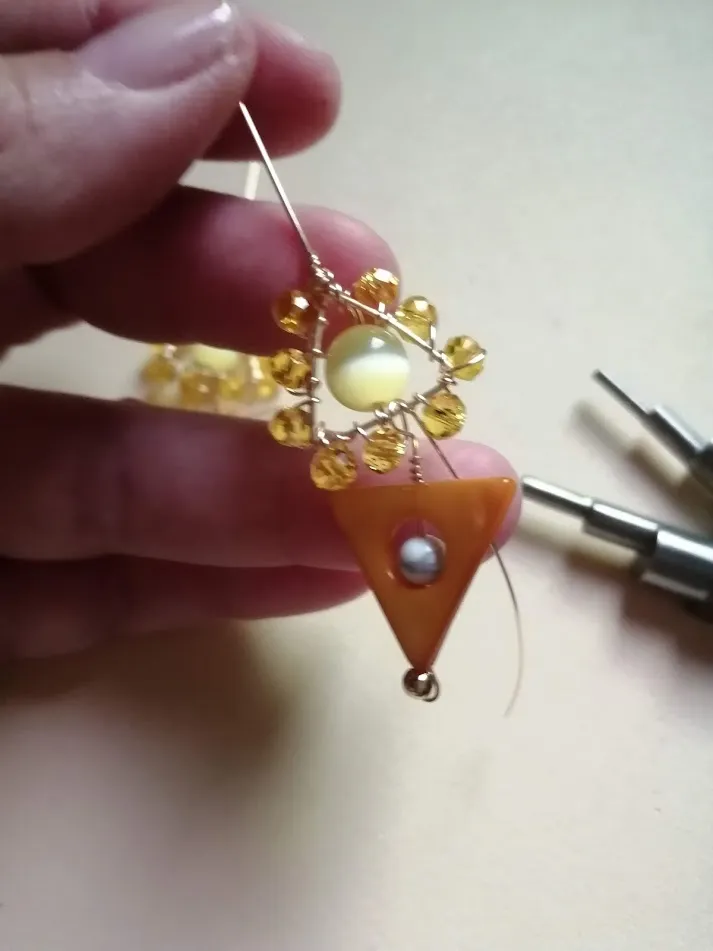
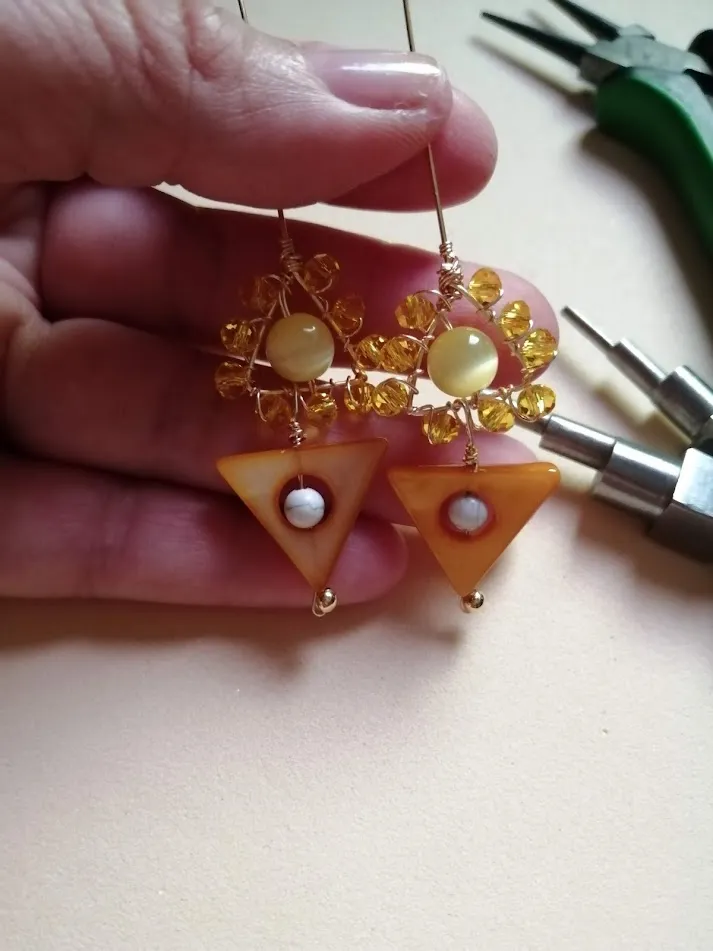
With the help of the multiple mandrel pliers level 1 (or 2), make a ring and insert it into our base before closing, making sure it is as central as possible.
Repeat the process on the other earring.
Con un extremo del hilo, realizamos tres vueltas para asegurar la pieza, cortamos el excedente.
Con ayuda de la pinza mandril múltiple nivel 1 (ó 2), realiza una argolla e inserta antes de cerrar en nuestra base, procurando que quede lo más céntrica posible.
Repite el proceso en el otro arete.

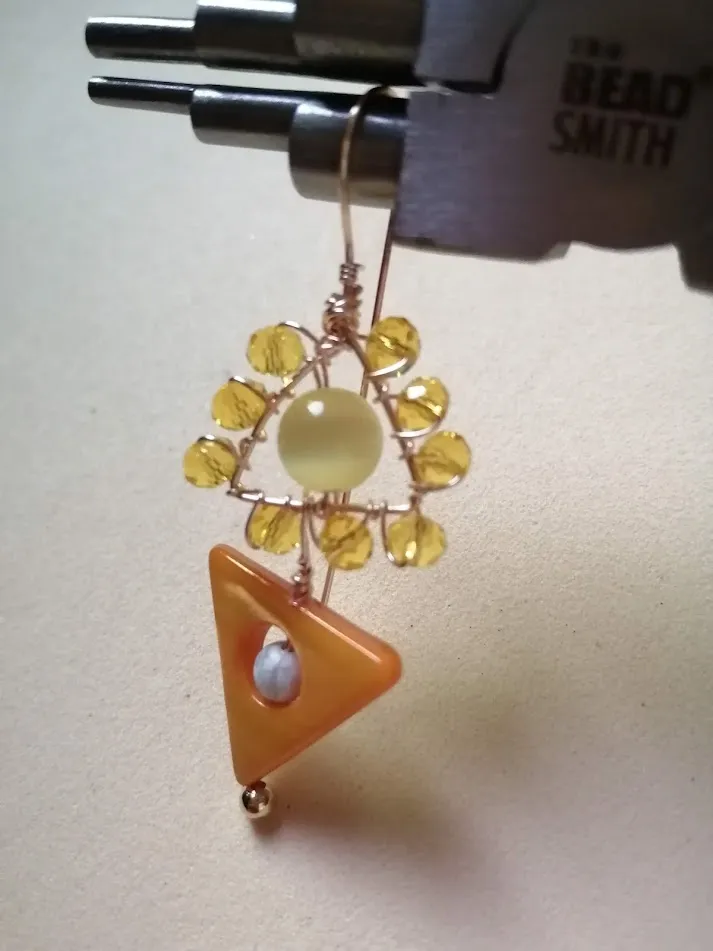
With the mandrel pliers (level 5), make the shape of the earring, cut off the excess and that's it!
Con la pinza mandril (nivel 5), realiza la forma del arete, corta el excedente y ¡listo!
Grateful to you for joining me in this new tutorial, see you soon!
Un nuevo tutorial ha llegado a nuestra querida Web3, deseo con todo mi corazón que te haya gustado y que puedas usar esta referencia como inspiración para crear tus prendas!, no quería dejar pasar mi link de referido, para que se puedan unir al juego de Holozing y al mundo de la Web3.
Agradecida con ustedes por acompañarme en éste nuevo tutorial, nos vemos muy pronto!
©️ APR-2024, @leticiapereira - Original Content
📷 HuaweiY9 - 2019
Translated with DeepL.com (free version)
Central picture by Canva
Filters by Google Photos