Greetings, art-loving brothers and sisters, welcome to my post.
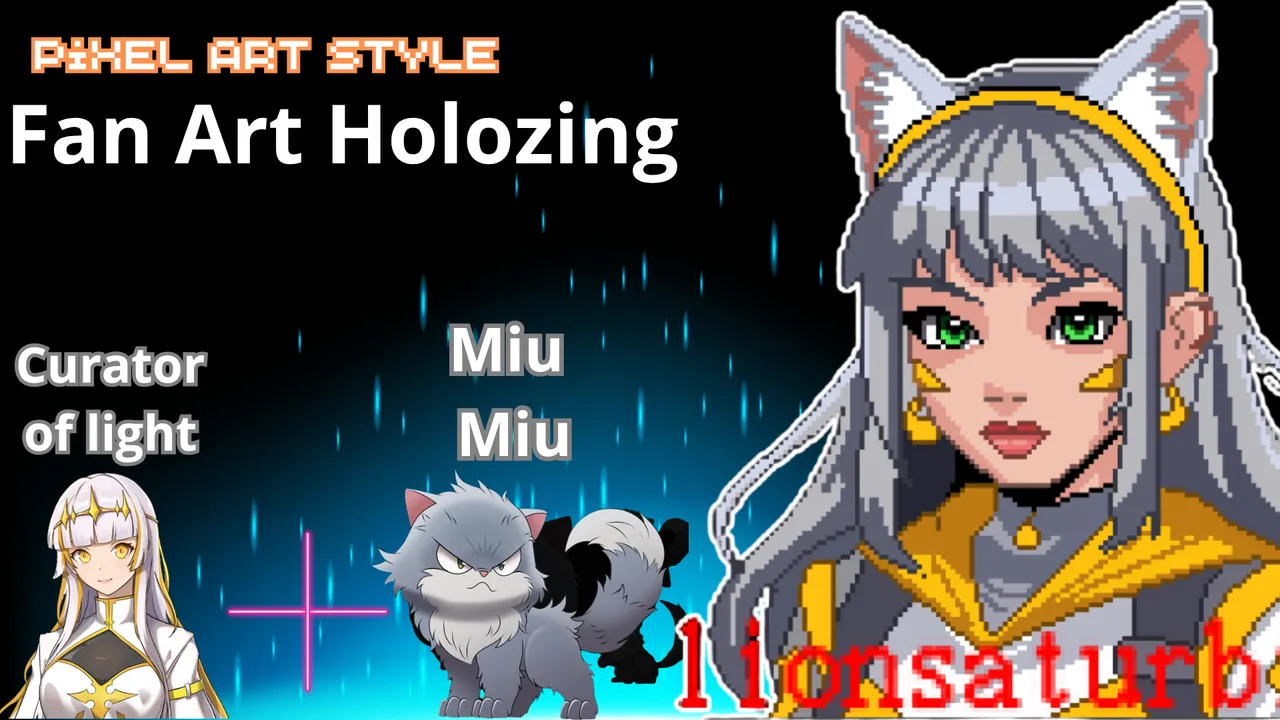
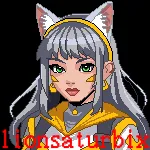
Today I'm sharing a new fan art of a fusion of two characters from the world of Holozing. In this case, it's the Curator of Light, plus a Holozing named Miu Miu. The drawing uses colors and shapes from these characters. Below, I'll show you the creation process for this drawing. Without further ado, let's get started.
The images I used as references can be found at the end of this post.
! [Spanish version]
Saludos, hermanos y hermanas amantes del arte y artistas, sean todos bienvenidos a mi publicacion.
El día de hoy les comparto un nuevo Fan Art de una fusión de dos personajes en el mundo de Holozing, en este caso, se trata de la curadora de la luz, más un Holozing llamado Miu Miu, usando colores y algunas formas que poseen estos personajes, donde a continuación, les estaré mostrando como fue el proceso de creación de este dibujo, sin más preámbulos, comencemos con la publicación.
Las imágenes que use en referencia, se encontraran al final de esta publicación.

 |  |
|---|
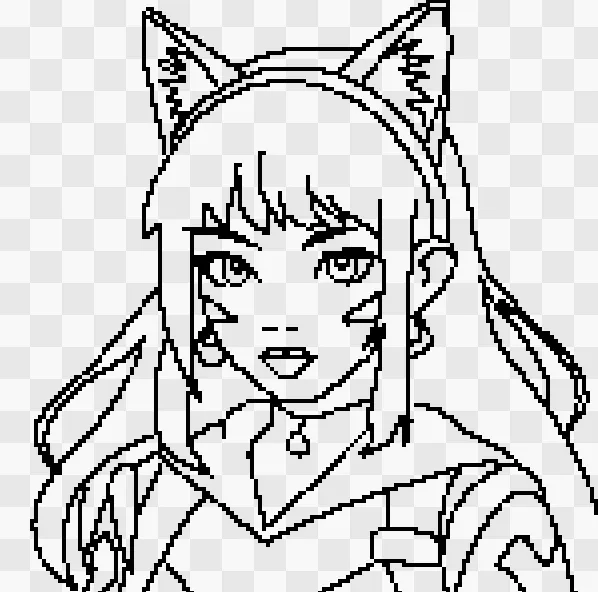
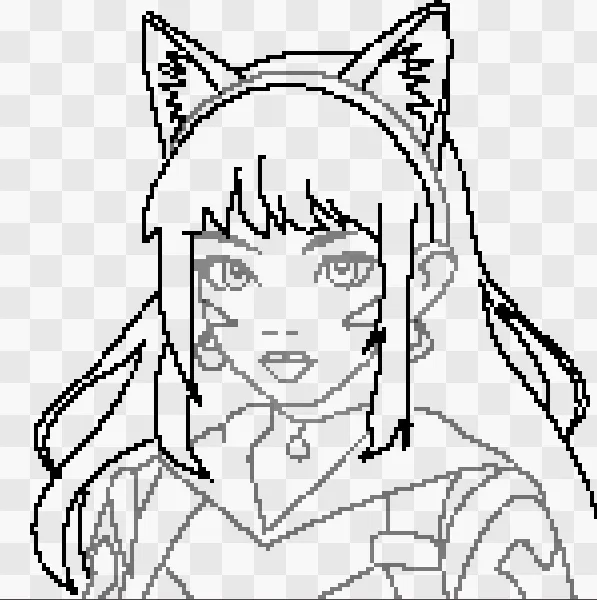
For this first step, I started by creating my character's silhouette. Once the silhouette was completely created, my next step would be to clean up the drawing. You can see that there are many pixels that, when merged, create a line. For this style of drawing in Pixel Art, the lines shouldn't look that way. Instead, the drawing should look like the same style I mentioned above. So, to complete this step, I had to lighten the other layers except for the one I'm going to work on. This is a great time-saver when you start creating each of the structures of your drawing on separate layers from the beginning of your drawing.
Since in this case, I like to start my drawings from top to bottom, both when cleaning up the pixels and when evaluating them, I started by cleaning up the hair pixels first. You'll notice this because the lines or pixels are much darker than those in the background.
! [Spanish version]
Para este primer paso, inicie creando la silueta de mi personaje, donde una vez realizada completamente la silueta, mi siguiente paso sería limpiar el dibujo, ya que se pueden apreciar que hay muchos píxeles que sé al fusionarse crean una línea, el cual para este estilo de dibujo en Pixel Art, las líneas no deben verse de esa manera, sino que el dibujo debe verse como el mismo estilo que mencione anteriormente, así que para poder hacer este paso, he tenido que aclarecer las demás capas salvo la que voy a trabajar para poder limpiar todos los píxeles por parte y de manera ordenada, ventaja que ahorra mucho el tiempo cuando desde el inicio de tu dibujo, comienza creando cada una de las estructuras de tu dibujo en capas separadas.
Como en este caso me gusta comenzar mis dibujos de arriba para abajo tanto en el limpiado de los píxeles como en la valoración, comencé primero con limpiar los píxeles del cabello, lo notaran porque se ven las líneas o píxeles mucho más oscuros que los que están en el fondo.
 |  |
|---|
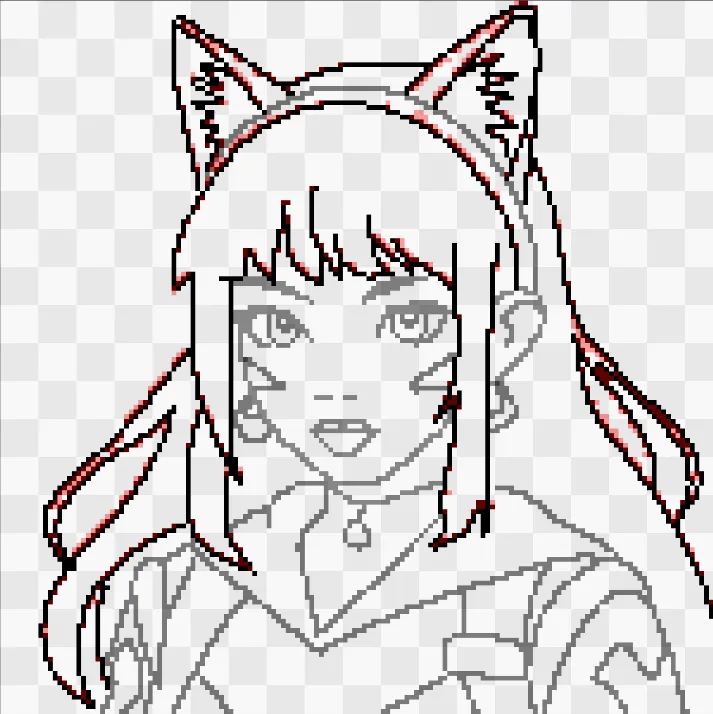
To mark each of the pixels I think I need to remove to clean up my drawing, I used a tool similar to a magic wand to manually mark each and every one of the pixels I want to remove. These marks, or pixels, will be marked in red. Once I've marked everything I want to remove, with just the press of a button, I erase all the pixels I had previously marked in red.
Now, if you look at the two images at the bottom of this text, you can see a before and after of applying this technique. Now, the hair looks much cleaner and tidier.
! [Spanish version]
Para poder marcar cada uno de los píxeles que considero que debo eliminarlas para poder limpiar mi dibujo, use una herramienta similar a la barita mágica para poder marcar de manera manual, todos y cada uno de los píxeles que quiero eliminar, las cuales, estas marcas o dichos píxeles, estarán marcados de color rojo, donde una vez marcados todos lo que quiero eliminar, con solo pulsar un botón, borre todos los píxeles que anteriormente había marcado de color rojo.
Ahora si se fijan en las dos imágenes que se encuentran en la parte inferior de este texto, podrán notar un antes y un después de aplicar esta técnica, ahora el cabello se ve mucho más limpio y ordenado.
| |
|---|
 |  |
|---|
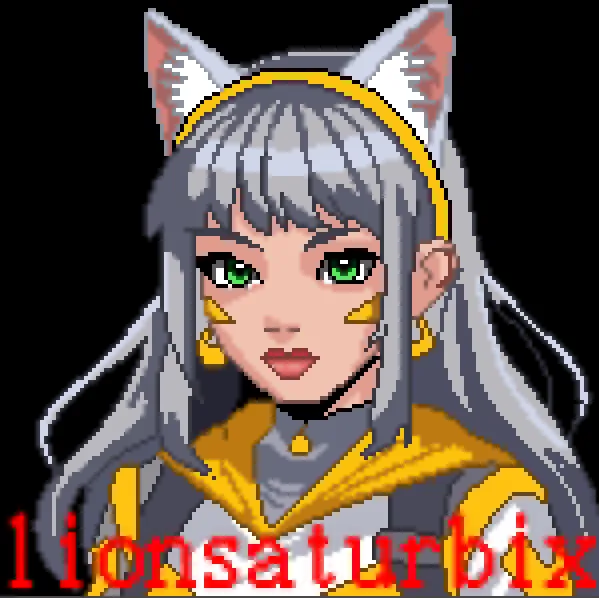
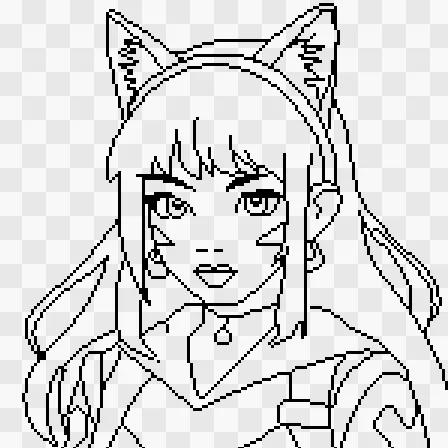
I repeated the same process throughout the entire structure of my drawing, and now the drawing is ready to begin adding the first layers of enhancement.
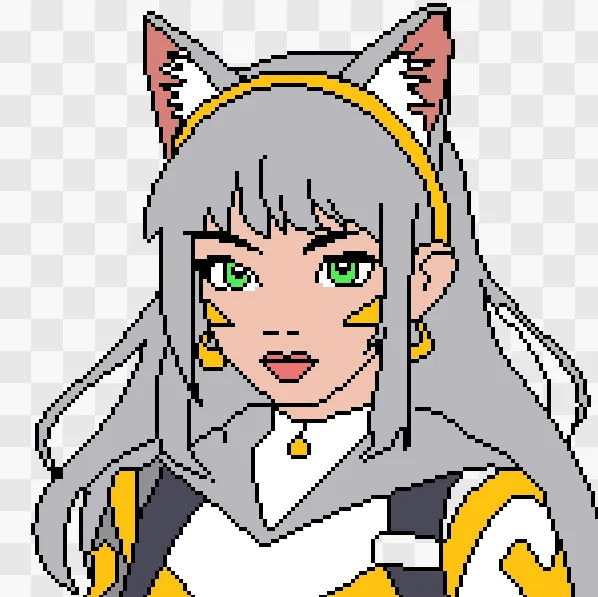
Paying close attention to the colors of both the character and the holozing, since I'm merging them both, I used the color of the Miu Miu holozing for the hair, also using colors from the light healer's outfit. The eye color is also the same as Miu Miu's, which in this case is green, thus completing the first part of the coloring in my drawing.
! [Spanish version]
Repetí el mismo proceso en toda la estructura de mi dibujo donde ahora el dibujo se encuentra listo para comenzar a realizar las primeras capas de valorizado.
Fijándome bien en los colores que tiene tanto el personaje como el holozing, ya que estoy haciendo una fusión de ambos, use el color del holozing Miu Miu para el cabello, usando también colores del traje de la curadora de la luz, también el color de los ojos son del mismo color que el de miu miu, que en este caso es el verde, realizando de esta manera la primera parte de coloreado en mi dibujo.
 |  |
|---|
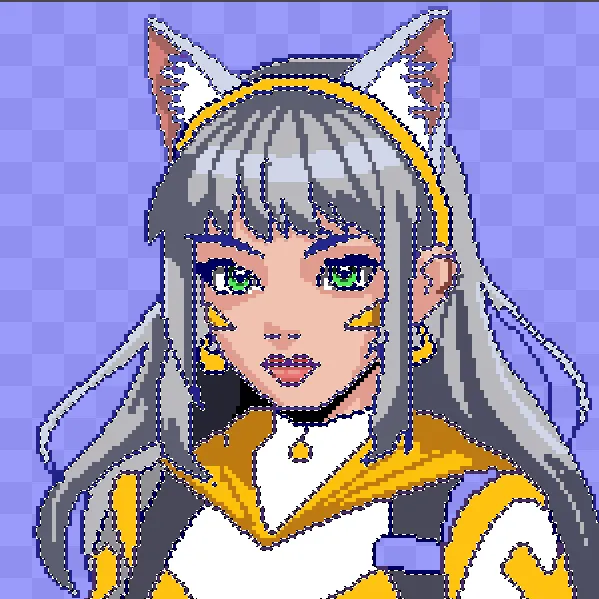
After having the flat colors, I began adding shine, shading, and depth to the hair, using shades slightly darker than the base color, thus emphasizing both the hair and the face.
Next, I began changing the color of the guide lines, the edges, to give my drawing a more beautiful touch. I used shades darker than the base and shading, as the idea here is to create a difference in color between each of them.
! [Spanish version]
Después de tener los colores planos, comencé a darle brillo, sombreado y profundidad al cabello, usando tonalidades un poco más oscuras que la del color base, valorizando de esta manera tanto el cabello como el rostro.
Acto seguido, comencé a cambiarle el color a las líneas guías, es decir, los bordes para poder darle un toque más hermoso a mi dibujo, usando tonalidades más oscuras que la de la base y la del sombreado, ya que la idea aquí es crear una diferencia de colores en cada uno de ellos.
 |  |
|---|
When I make a mistake highlighting a part on the same layer that I'd previously highlighted, I use a tool that allows me to copy the layer and paste it into a new one, highlighting only the parts I had mistakenly highlighted. Then I delete it, thus separating it from a layer.
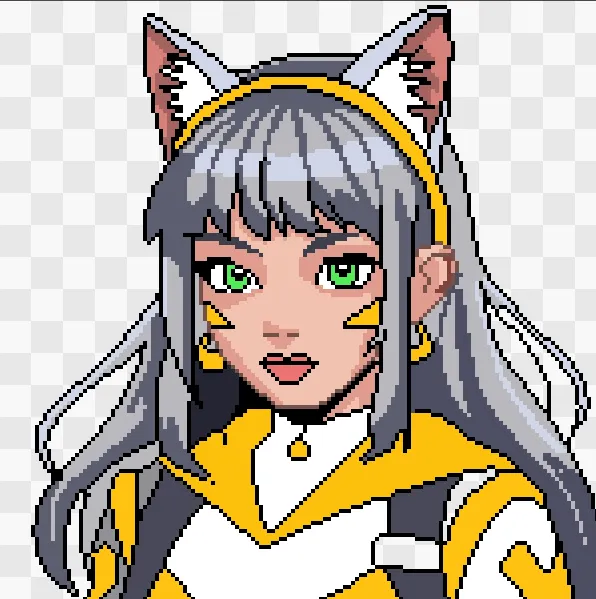
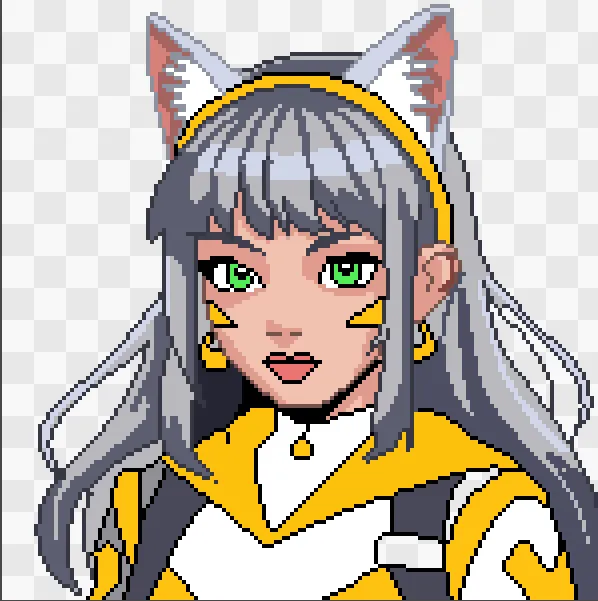
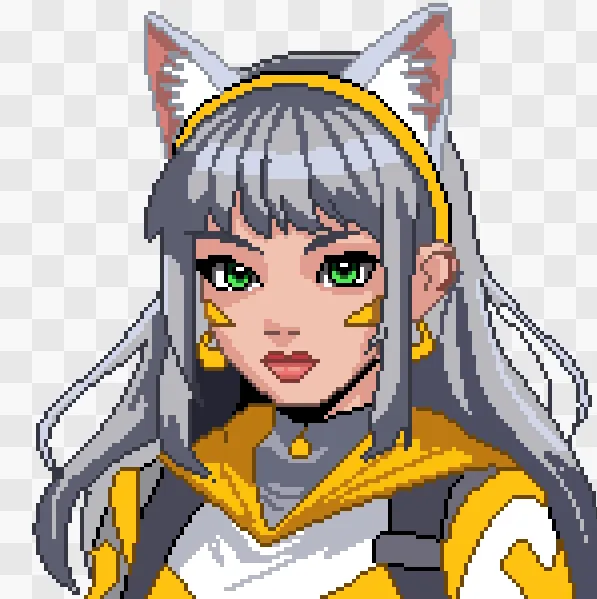
Next, I began working on my character's eyes, face, and clothing, thus completing my drawing of the day.
The images I used as sources are at the end of the post; they were taken from the Holozing Discord community.
Thank you very much for reading this post. I hope you enjoy it. See you next time.
! [Spanish version]
Cuando me equivoco al valorizar una parte sobre una misma capa que ya anteriormente había valorizado, uso una herramienta que me permite copiar la capa y pegarlo en una nueva, marcando solamente las partes que había valorizado por error, después lo elimino y de esta forma lo separo de una capa.
Seguidamente, había comenzaron a trabajar con los ojos, rostro, y vestimenta de mi personaje, realizando así mi dibujo del día.
Las imágenes que use como fuente, se encuentran al final de la publicación, las cuales fueron sacadas de la comunidad de Discord de Holozing.
Muchas gracias por haber llegado hasta aquí en mi publicación, espero les sea de su agrado, hasta la próxima.
|  |
|---|


Discord
LionSaturBix#7545
Los separadores son de mi autoría, las imágenes tienen su fuente, las capturas fueron realizadas en mi perfil de jugador en mi ordenador, las ediciones del GIF son creados por mí.
The separators are of my authorship, the images have their source, the screenshots were made in my player profile on my computer, the GIF edits are created by me.
Programas que utilicé para crear mi diseño es este:
This is the program I used to create my design:
Gif y portada cortesía de Canva
Gif and cover courtesy of Canva
Traducido por Deepl
Herramienta de dibujo, tableta digitalizadora Huion 420 black
Drawing tool, digitizing tablet Huion 420 black
Dibujo realizado en MediBan Paint Pro
Drawing made in MediBan Paint Pro