🔸Sin más que añadir, a continuación los dejo con el paso a paso:
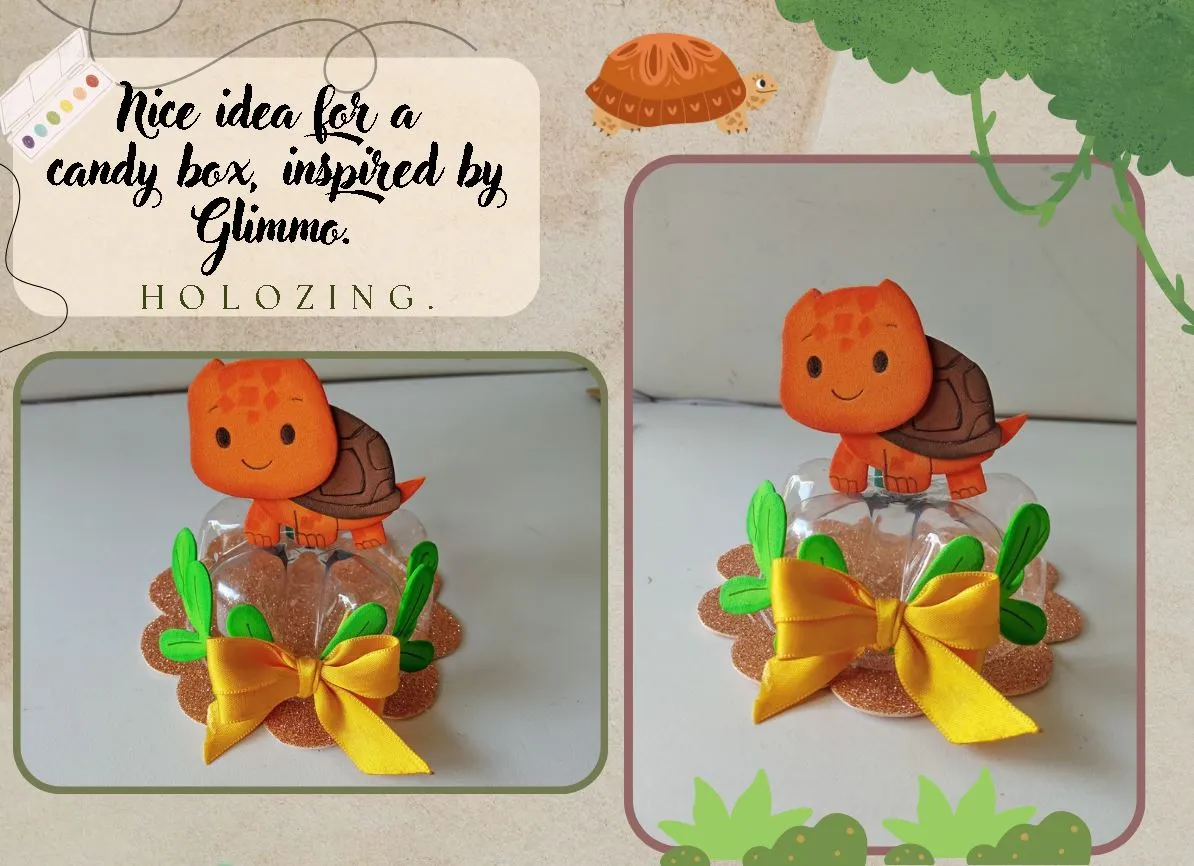
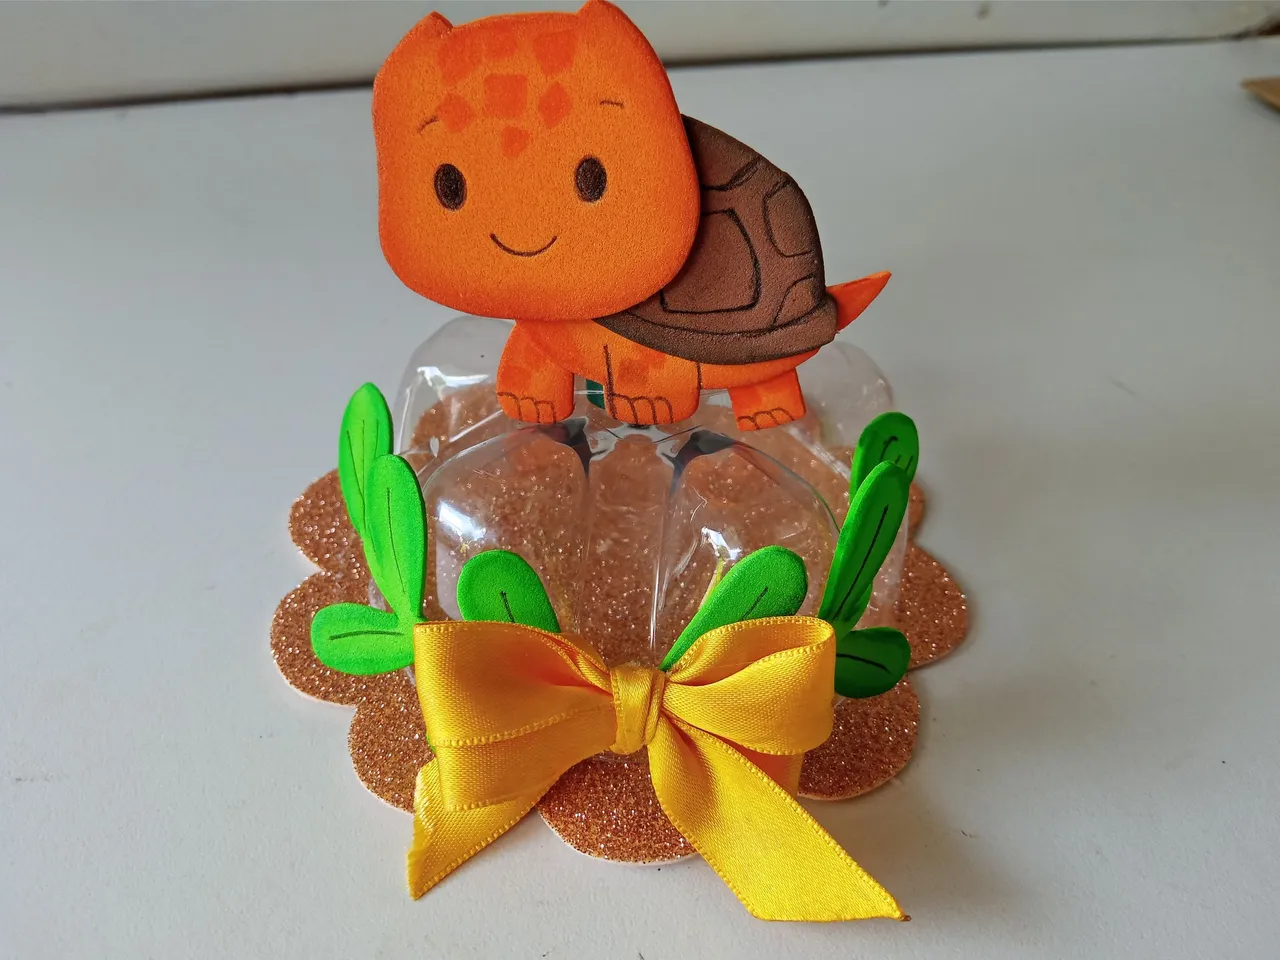
✨Good afternoon, holozing friends!✨ As always, I'm happy to stop by again to share a cute candy dish idea, inspired by Glimmo. For me, Glimmo is one of my favorite creatures in terms of design; I imagine him very cute and sturdy, haha. With this in mind, I wanted to share a candy dish with Glimmo on top, a few leaves, and a cute bow in the middle. I thought about placing him on top to make him stand out even more. Plus, it's a great way to recycle soda bottle parts.
🔸Without more to add, then I leave you with the step by step:
♥️ESPERO QUE TE GUSTE,
¡Empecemos!
♥️I HOPE YOU LIKE IT,
Let's start!

✂️ MATERIALES | ✂️ MATERIALS
- Foami escarchado salmón.
- Botella de refresco.
- Foami naranja.
- Foami marrón.
- Foami verde.
- Pinturas y marcadores.
- Pegamento.
- Tijeras.
- Regla.
- Hoja blanca.
- Lápiz.
- Salmon-frosted foam.
- Soda bottle.
- Orange foam.
- Brown foam.
- Green foam.
- Paints and markers.
- Glue.
- Scissors.
- Ruler.
- White paper.
- Pencil.
✨ PROCEDIMIENTO | ✨ PROCESS
✨ PASO 1:
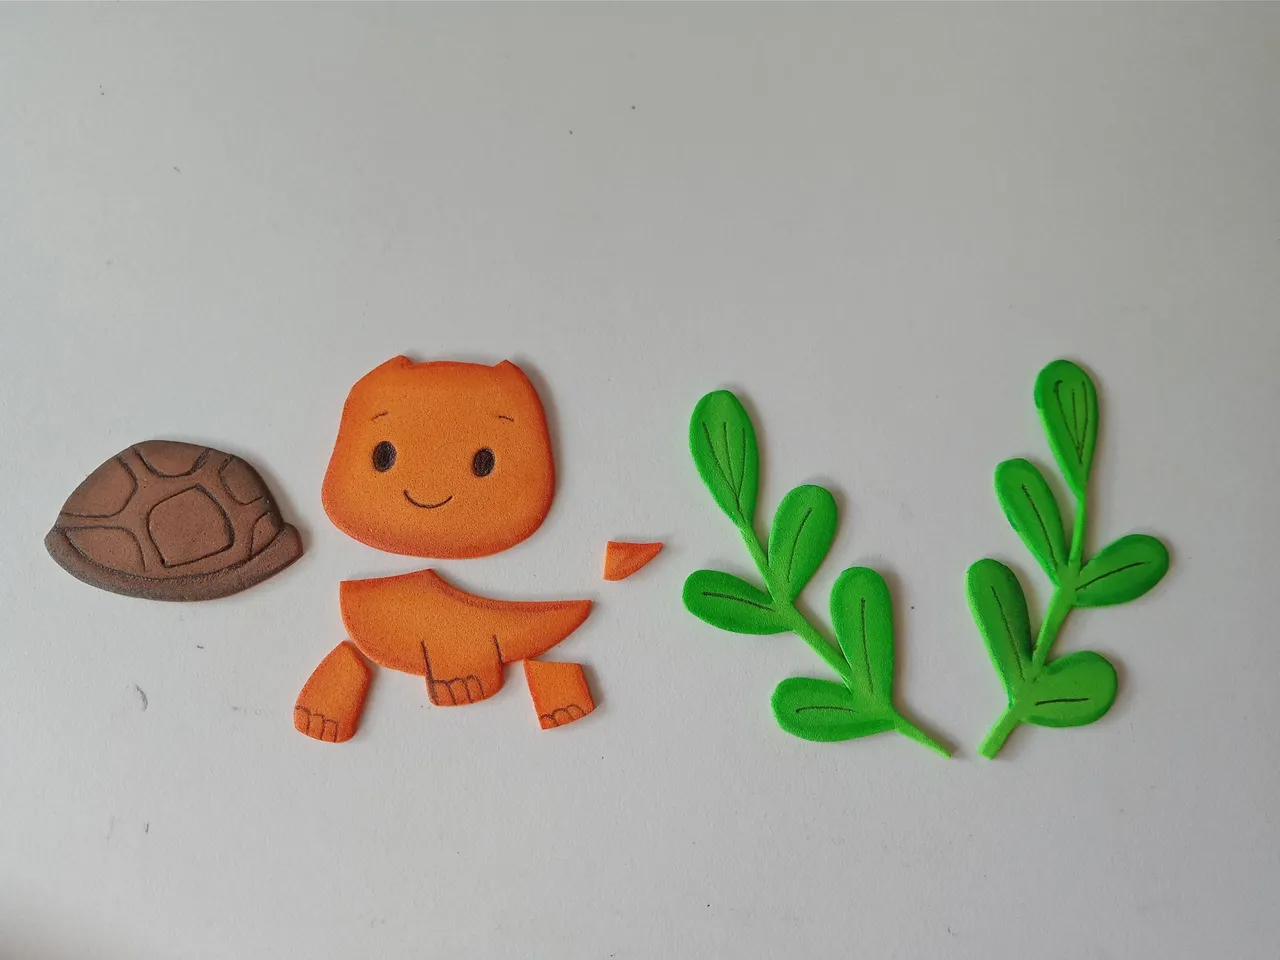
Lo primero que hice fue dibujar el diseño que quería esta vez para Glimmo en una hoja blanca. Esta vez quería un diseño de él caminando en cuatro patas y con una carita muy feliz. Adicional a eso, quería como decoración extra un par de hojas tipo enredaderas. Al tener el diseño listo en la hoja blanca, es momento de transferir a los colores correspondientes de foami, como explico a continuación:
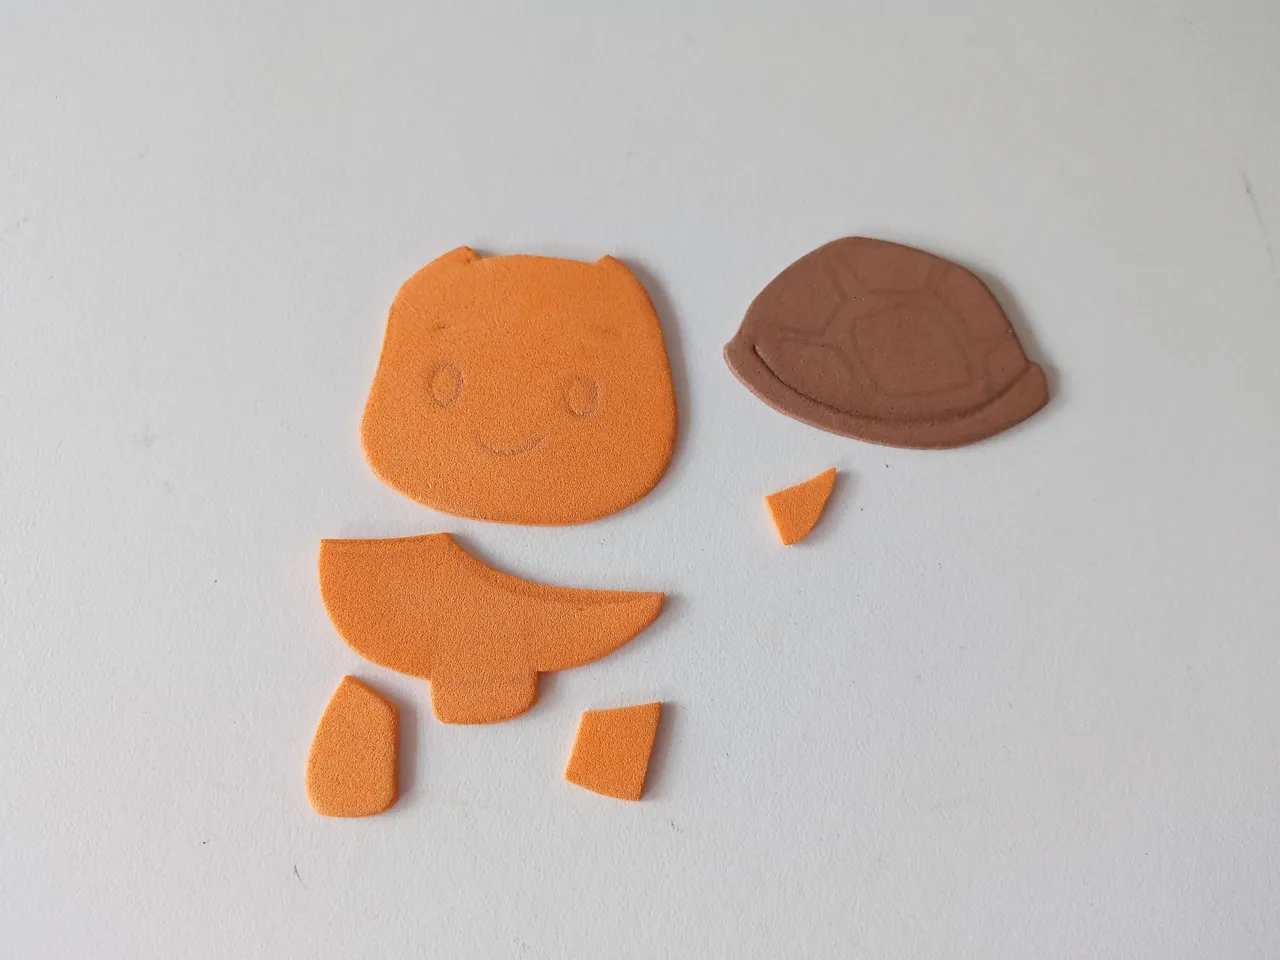
✨Cabeza: 4.5 cm x 4 cm en foami naranja.
✨Cuerpo y pata: 4.5 cm x 2.7 cm en foami naranja.
✨Pata delantera y trasera: 2 cm x 1 cm y 1.3 cm x 1 cm en foami naranja.
✨Caparazón: 5 cm x 3 cm en foami marrón.
✨Cola: 1 cm en foami naranja.
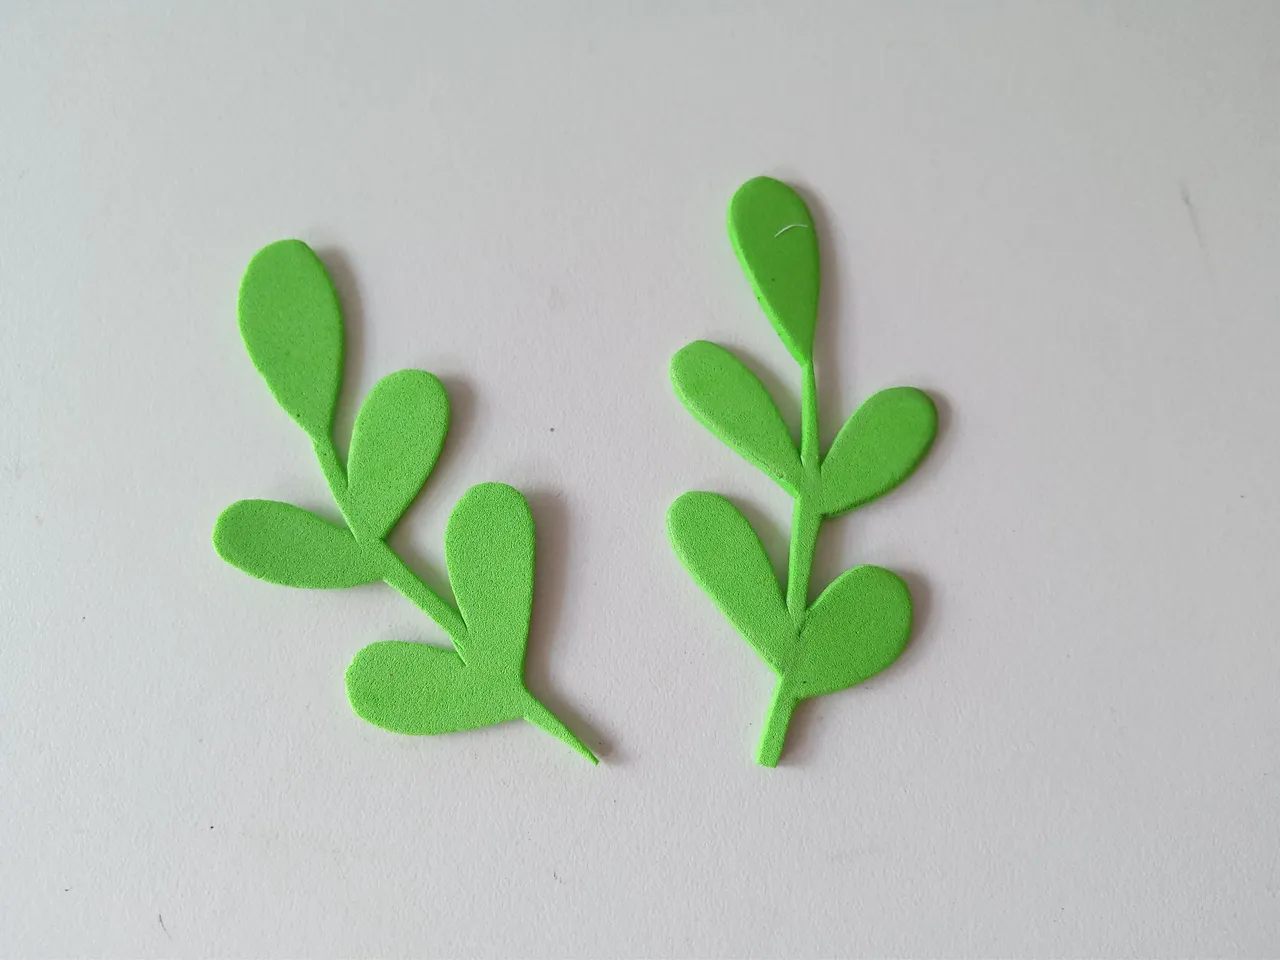
✨Hojas o enredadera: 8.5 cm en foami verde.
✨ STEP 1:
The first thing I did was draw the design I wanted for Glimmo on a white sheet of paper. This time, I wanted a design of him walking on all fours with a very happy face. In addition to that, I wanted a couple of vine-like leaves as extra decoration. Once you have the design ready on the white sheet, it's time to transfer it to the corresponding colors of foam, as explained below:
✨Head: 4.5 cm x 4 cm in orange foam.
✨Body and leg: 4.5 cm x 2.7 cm in orange foam.
✨Front and back legs: 2 cm x 1 cm and 1.3 cm x 1 cm in orange foam.
✨Shell: 5 cm x 3 cm in brown foam.
✨Tail: 1 cm in orange foam.
✨Leaves or vine: 8.5 cm in green foam.
✨ PASO 2:
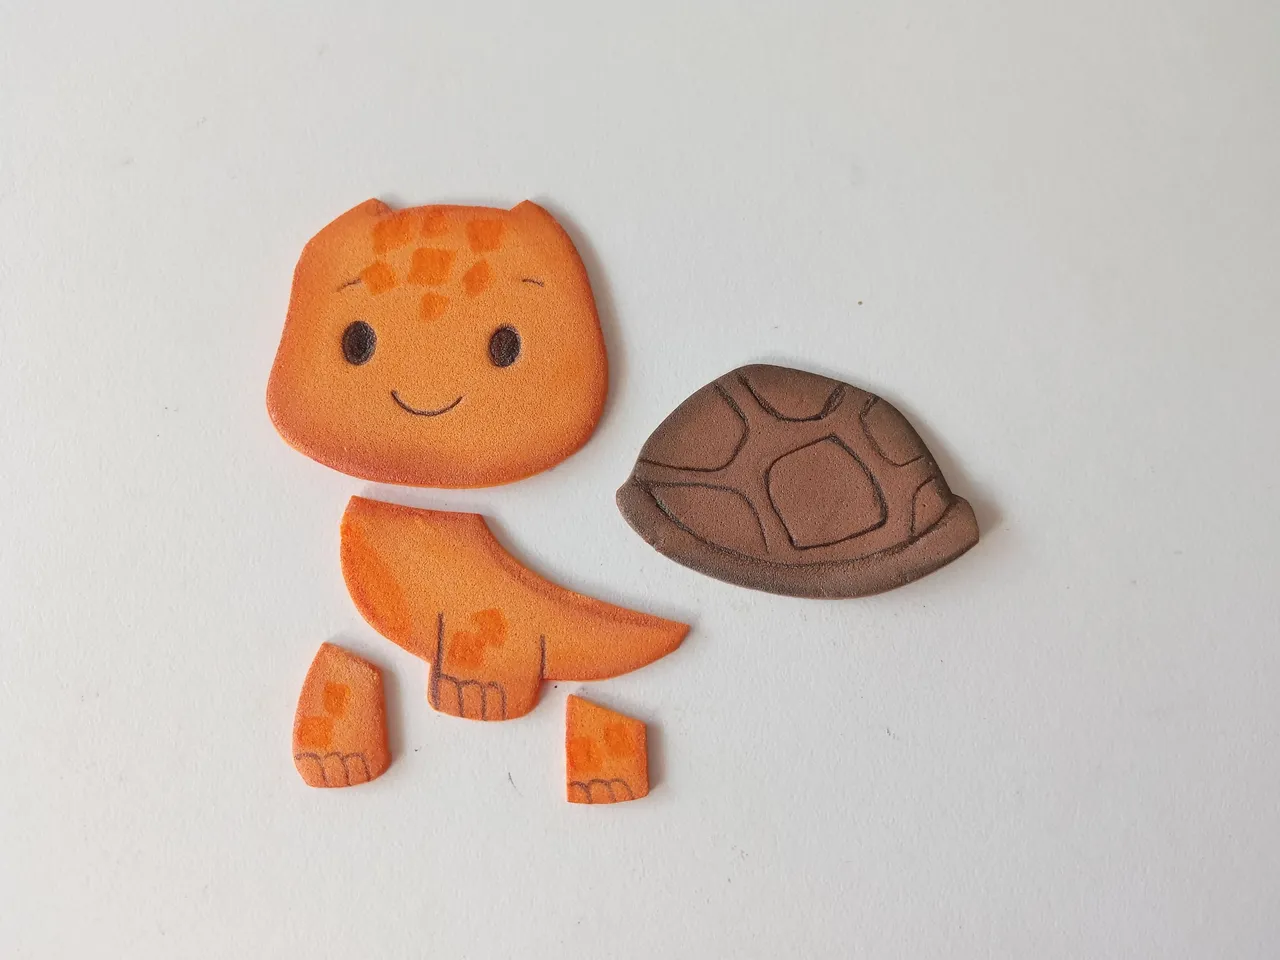
Al tener listas y recortadas todas las piezas, es momento de comenzar a dar color a los bordes con pinturas o marcadores de un tono más oscuro o que haga contraste con el color de cada una de las piezas y se difumina con un pañito. Al estar secas las piezas, es momento de dar más detalles con marcador negro, como a las enredaderas, ojos, ceja, boca, caparazón y patas. Además, le hice algunas formitas de color naranja en algunas partes del cuerpo, para que se viera una piel más rústica.
✨ STEP 2:
Once you have all the pieces ready and cut out, it's time to start coloring the edges with paints or markers in a darker shade or one that contrasts with the color of each piece, blending them with a cloth. Once the pieces are dry, it's time to add more details with a black marker, such as the vines, eyes, eyebrows, mouth, shell, and legs. I also made some orange shapes on some parts of the body to give a more rustic look.
✨ PASO 3:
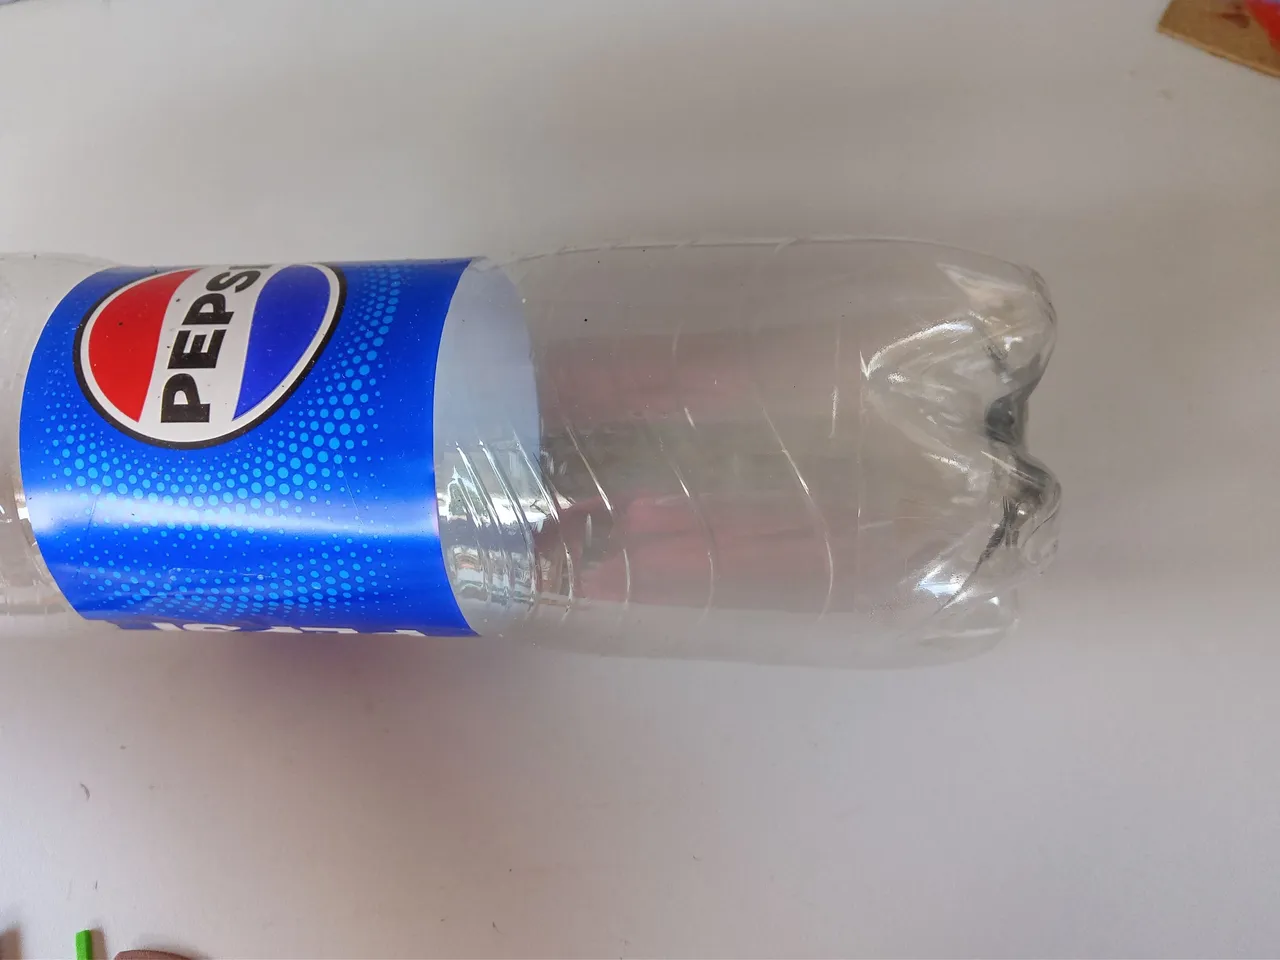
Mientras secan las piezas, tomé la botella de refresco y recorté con ayuda de un cutter y una tijera la parte baja de la misma, justo en donde hay una línea que nos guía perfectamente por donde debemos cortar.
✨ STEP 3:
While the pieces were drying, I took the soda bottle and cut out the bottom with a box cutter and scissors, right where there's a line that perfectly guides us where to cut.
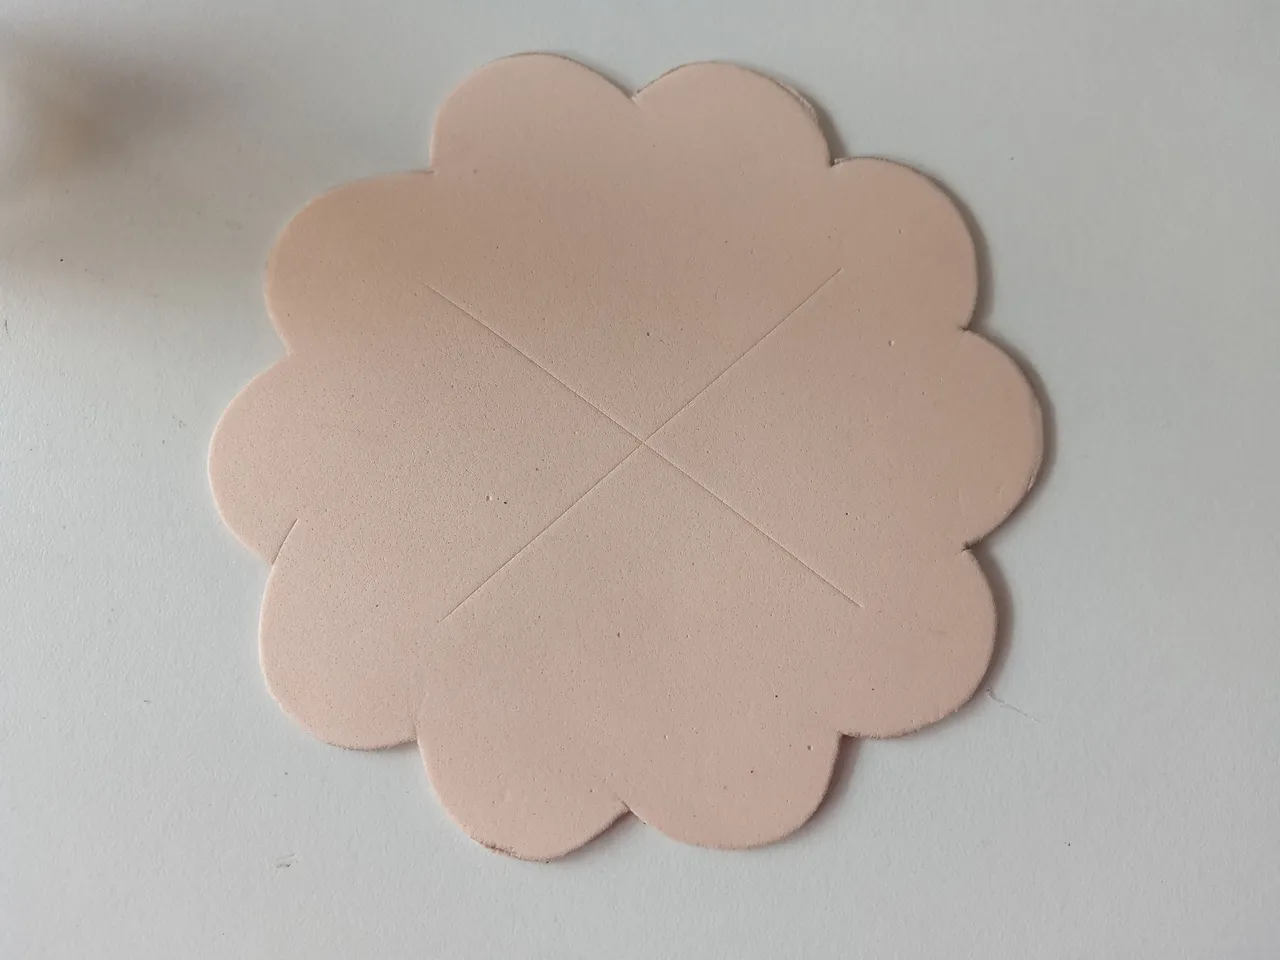
✨ PASO 4:
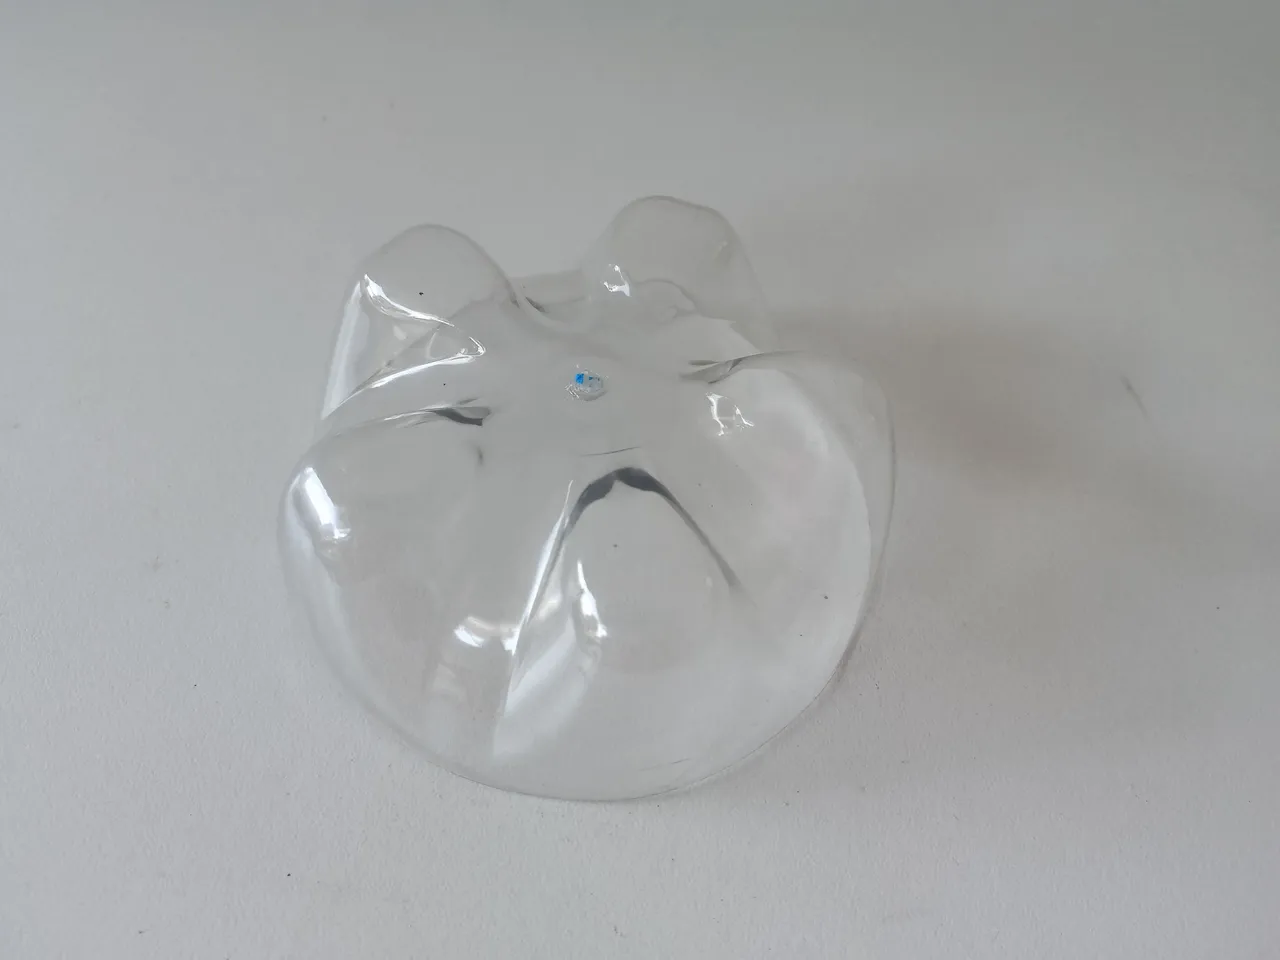
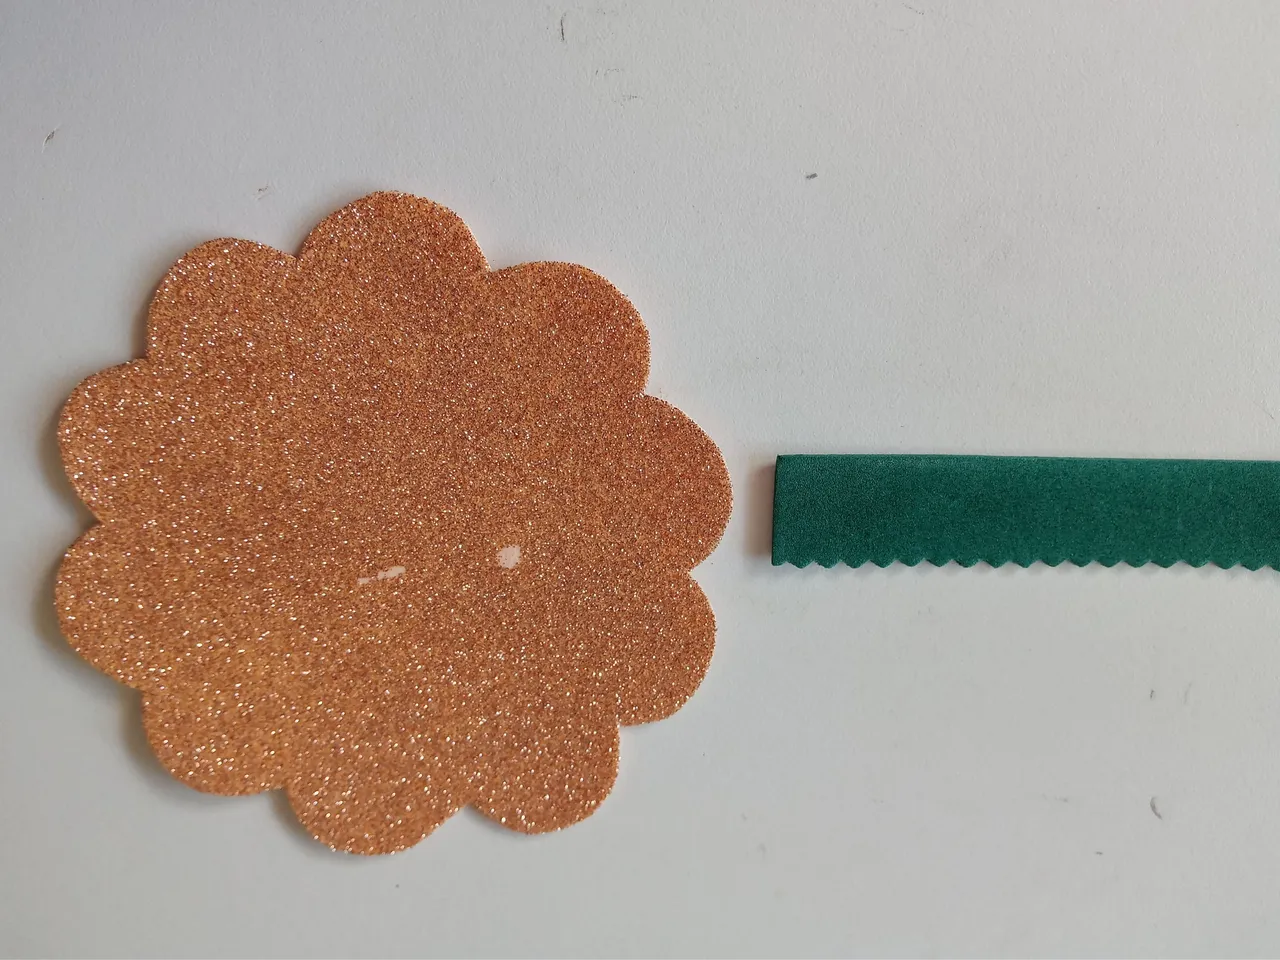
Luego, recorté una base en foami escarchado salmón con bordes ovalados de 12 cm de circunferencia y una tira de 8 cm x 2 cm en foami verde. Seguidamente, con ayuda del cutter hice un corte en forma de cruz en medio que será por donde entren los dulces. Pegué la base por debajo de la pieza de la botella y en la parte superior, pegué la tira, previamente enrollada.
✨ STEP 4:
Then, I cut out a base from salmon-colored frosted foam with oval edges measuring 12 cm in circumference and an 8 cm x 2 cm strip of green foam. Next, using the box cutter, I made a cross-shaped cut in the middle where the candy will go. I glued the base underneath the bottle piece, and glued the previously rolled strip to the top.
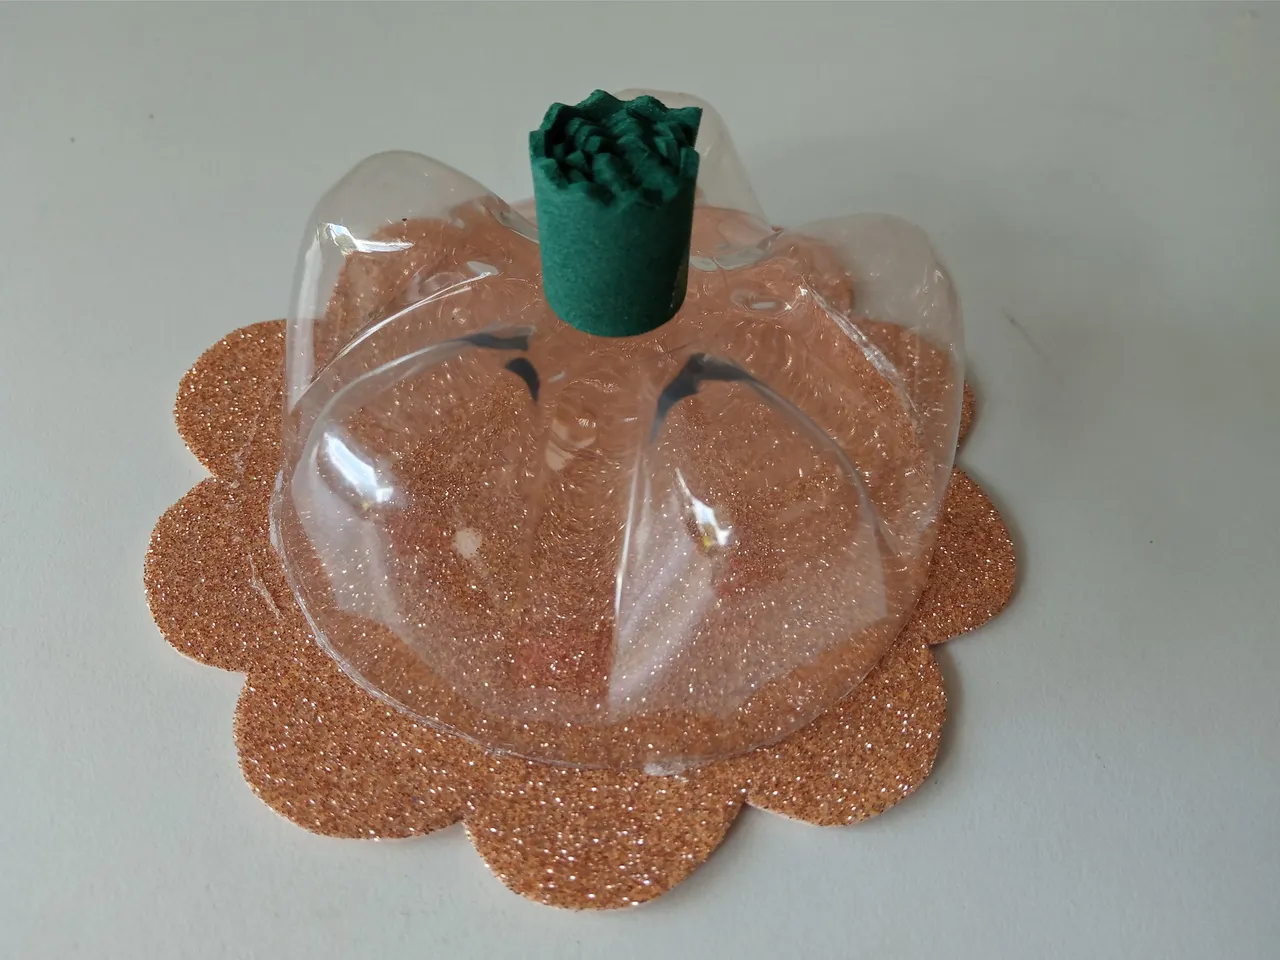
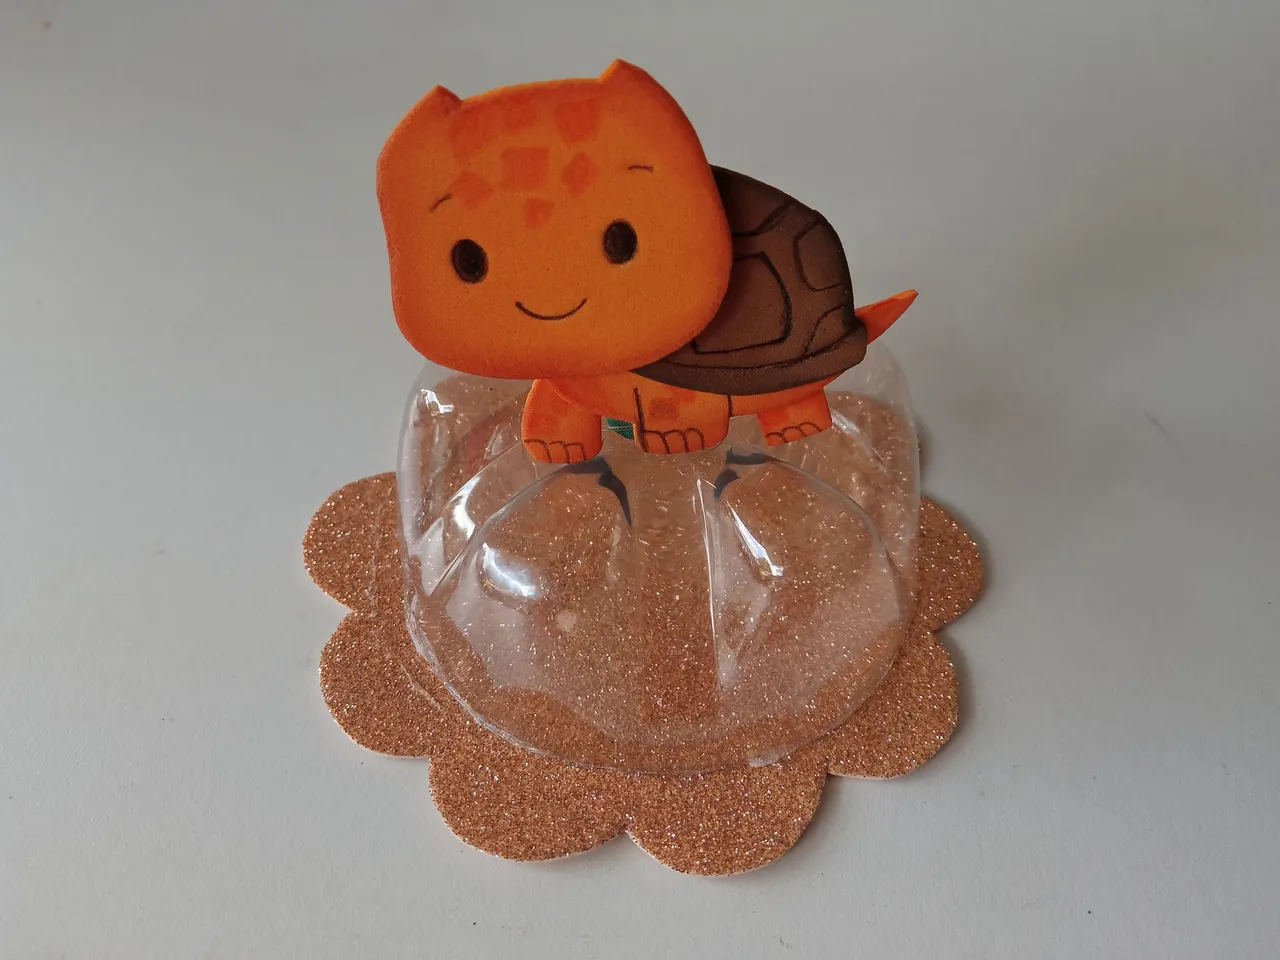
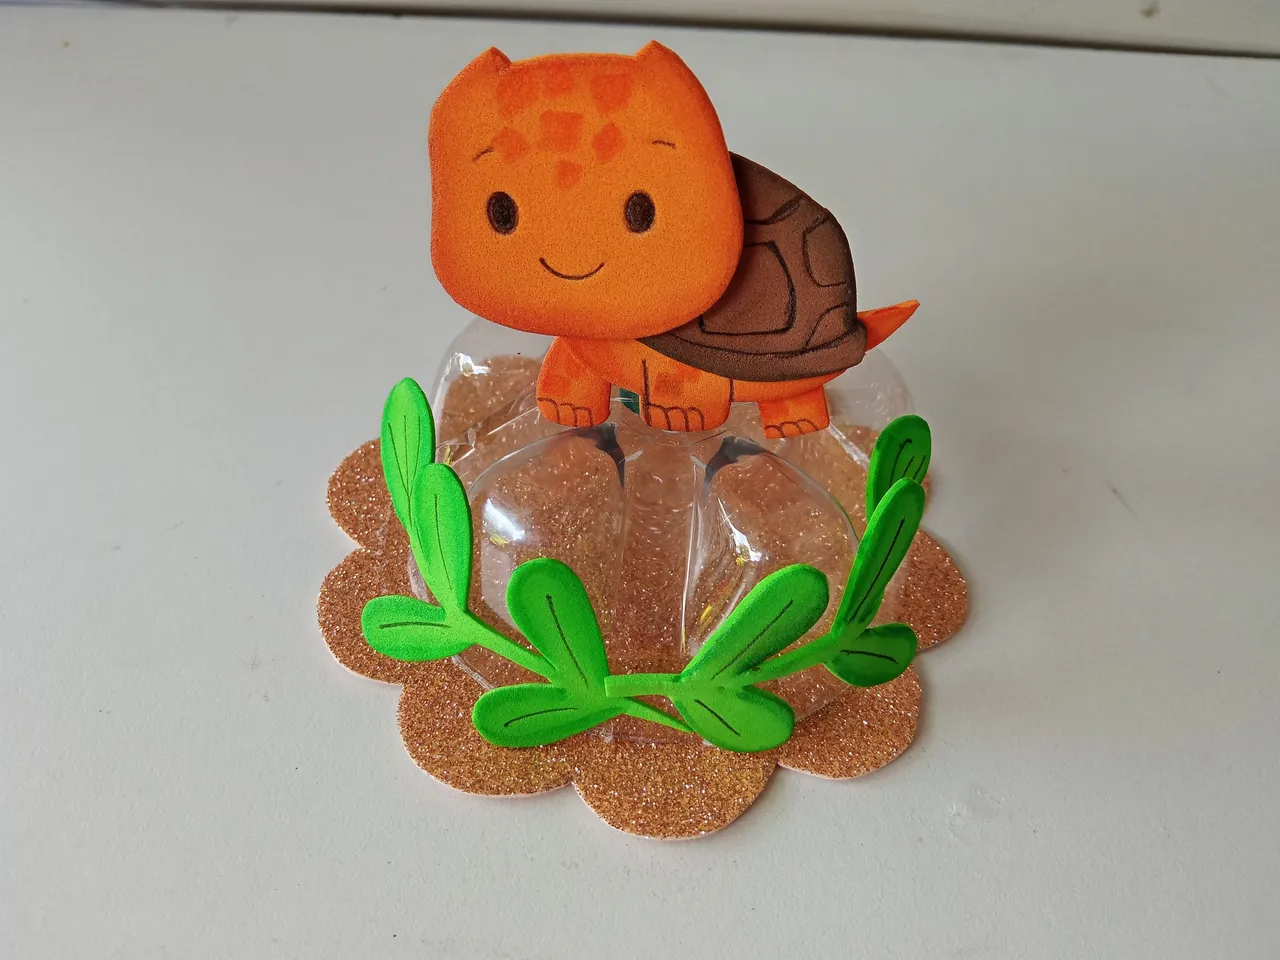
✨ PASO 5:
Para finalizar, pegué a Glimmo a uno de los lados de la tira ya enrollada. Seguidamente, pegué la enredadera en las paredes de la pieza de la botella y justo en medio o en la unión de estas dos enredaderas, pegué un lazo para dar otro detalle extra.
✨ STEP 5:
Finally, I glued Glimmo to one side of the rolled strip. Next, I glued the vine to the sides of the bottle piece, and right in the middle or where the two vines meet, I glued a bow to give another extra detail.
❤️ Hasta la próxima publicación.
❤️ Until the next post.

Todas las fotografías son de mi propiedad.
Separador y Fotos editadas en Canva
All photographs are my property.
Photos edited in Canva