🔸Sin más que añadir, a continuación los dejo con el paso a paso:
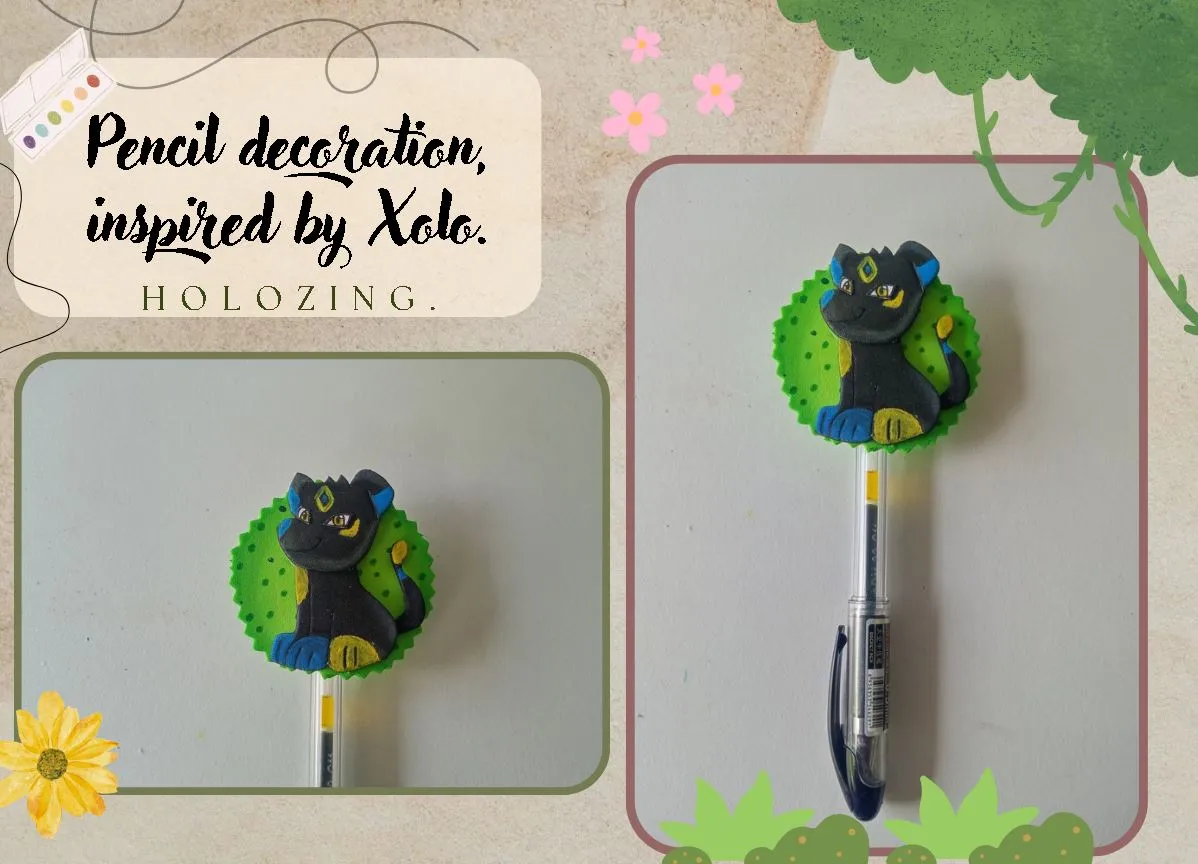
✨Good afternoon, holozing friends!✨ As always, I'm happy to stop by here again to share a lovely Xolo-inspired pencil decoration idea. Finally, this is my first time making a Xolo decoration. I hadn't created one before because it seemed too complicated, and I confirmed that I was right: creating it was quite a challenge for me, as I have a hard time adding detail to black backgrounds, as they're not fully visible, but somehow I managed. But that wasn't just complicated; it was also complicated because, as I mentioned before, it's not easy to work with such small decorations.
🔸Without more to add, then I leave you with the step by step:
♥️ESPERO QUE TE GUSTE,
¡Empecemos!
♥️I HOPE YOU LIKE IT,
Let's start!

✂️ MATERIALES | ✂️ MATERIALS
- Foami negro.
- Foami verde.
- Pinturas y marcadores.
- Pegamento.
- Tijeras.
- Regla.
- Hoja blanca.
- Lápiz.
- Black foam.
- Green foam.
- Paints and markers.
- Glue.
- Scissors.
- Ruler.
- White paper.
- Pencil.
✨ PROCEDIMIENTO | ✨ PROCESS
✨ PASO 1:
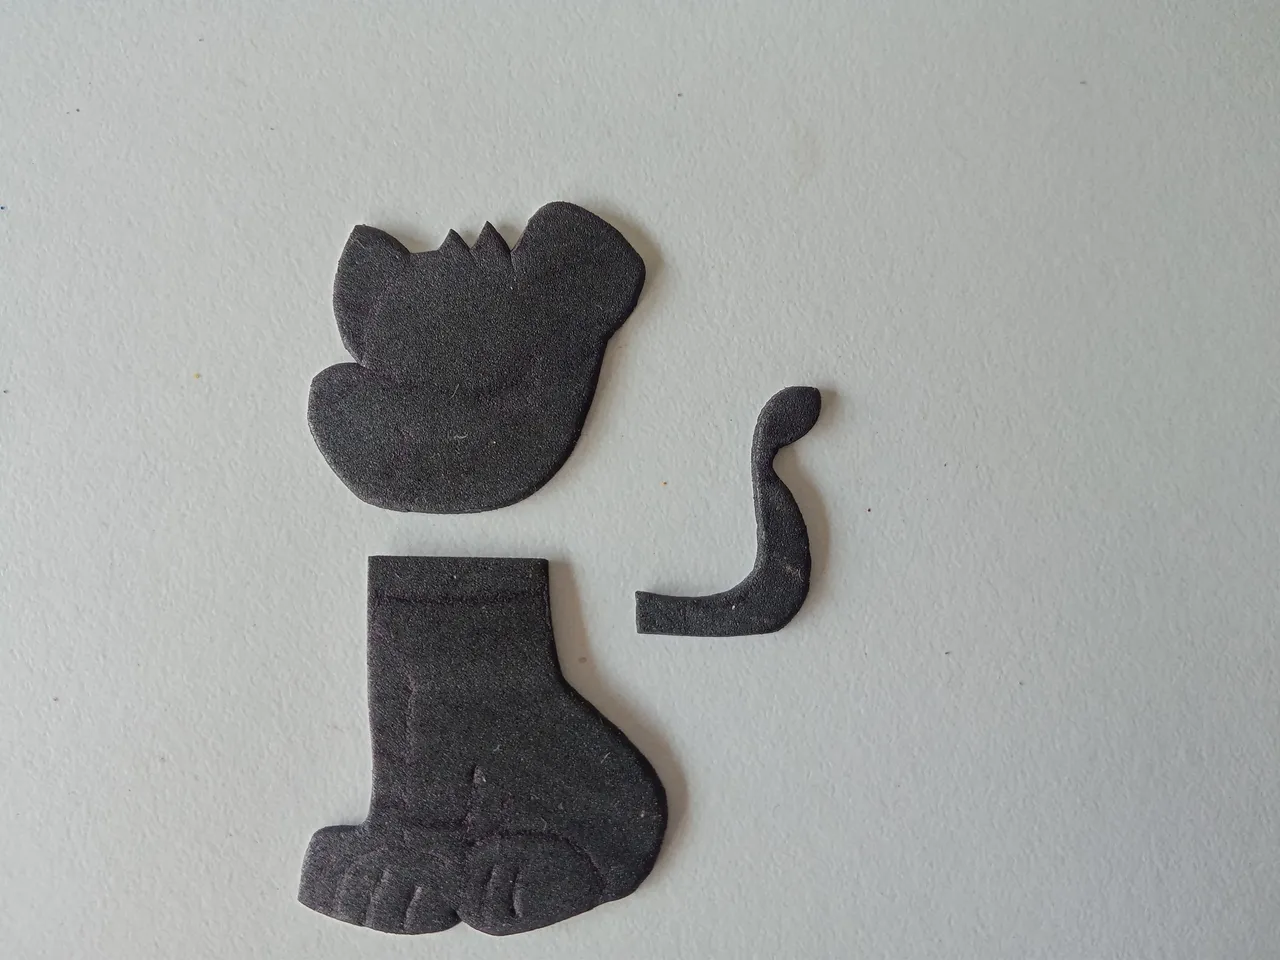
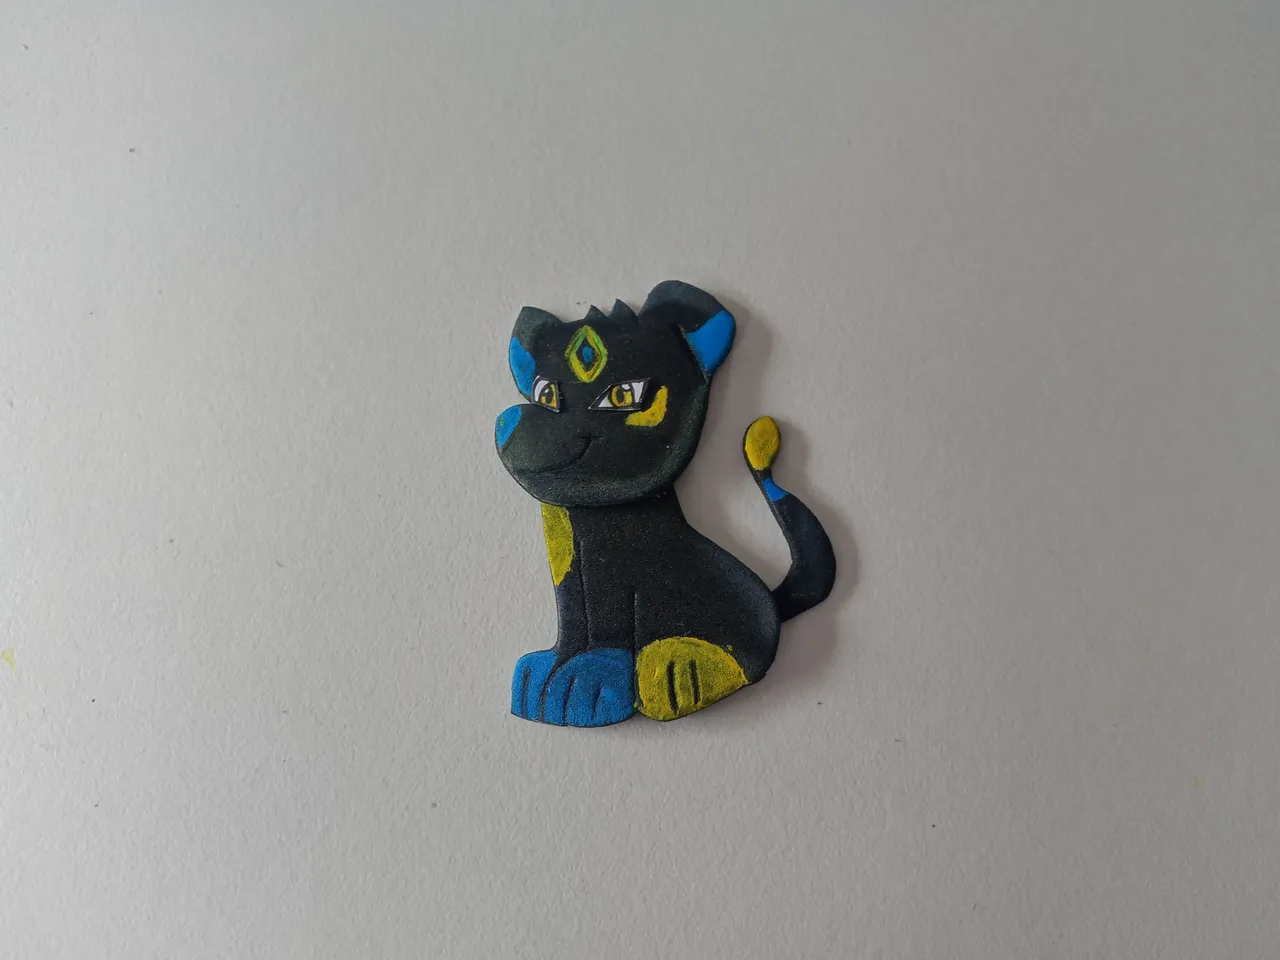
Lo primero que comencé a hacer fue dibujar en una hoja blanca el diseño y la posición en la que quería para Xolo. Al tener listos varios diseños, al final me decidí por uno que al momento no me generaba mucha confianza, pues otro diseño que dibujé me gusta más para otra idea que quiero elaborar más adelante. Pero bueno, en este diseño lo hice sentado, viendo hacia el lado izquierdo. Luego, transferí el diseño a los colores correspondientes de foami, como explico a continuación:
✨Cabeza y orejas: 3.2 cm x 3 cm en foami negro.
✨Cuerpo: 3.7 cm x 3 cm en foami negro.
✨Cola: 2.7 cm x 0.5 mm en foami negro.
✨ STEP 1:
The first thing I started doing was drawing the design and the position I wanted for the Xolo on a white sheet of paper. Having several designs ready, I finally settled on one that didn't inspire much confidence at the time, as I liked another design I drew better for another idea I want to work on later. Anyway, in this design, I made him sitting, facing left. Then, I transferred the design to the corresponding colors of foam, as explained below:
✨Head and ears: 3.2 cm x 3 cm in black foam.
✨Body: 3.7 cm x 3 cm in black foam.
✨Tail: 2.7 cm x 0.5 mm in black foam.
✨ PASO 2:
Al tener listas las piezas, decidí intentar cambiar un poco el color tan fuerte del foami, para que se pudieran apreciar un poco más los detalles. Así que di color a todos los bordes de las piezas, en este caso utilizando un poco de pintura blanca y difuminé con un pañito.
✨ STEP 2:
Once I had the pieces ready, I decided to try changing the strong color of the foam a bit, so the details could be appreciated a little more. So I colored all the edges of the pieces, in this case using a little white paint, and blended it with a cloth.

✨ PASO 3:
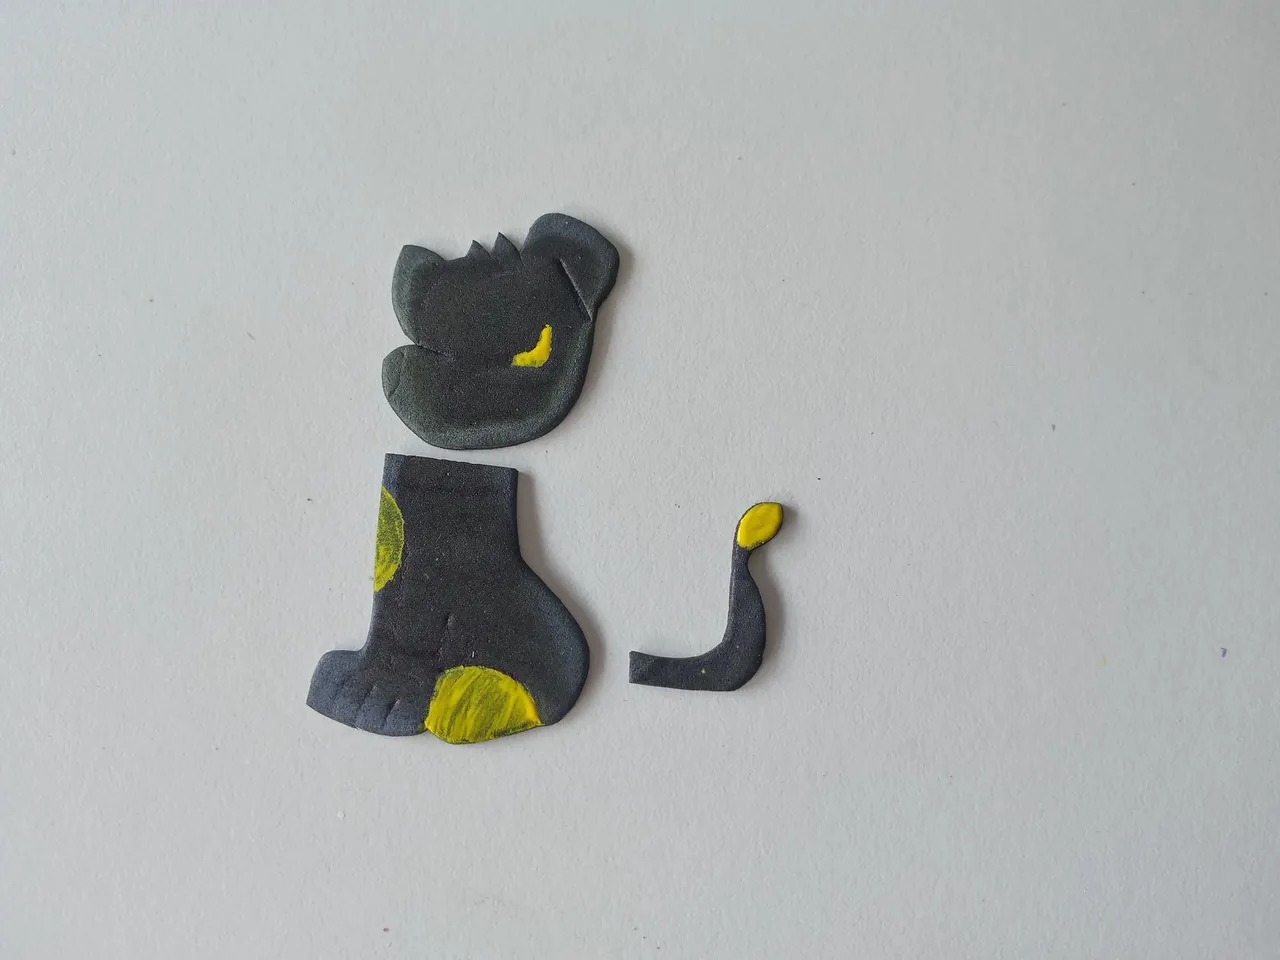
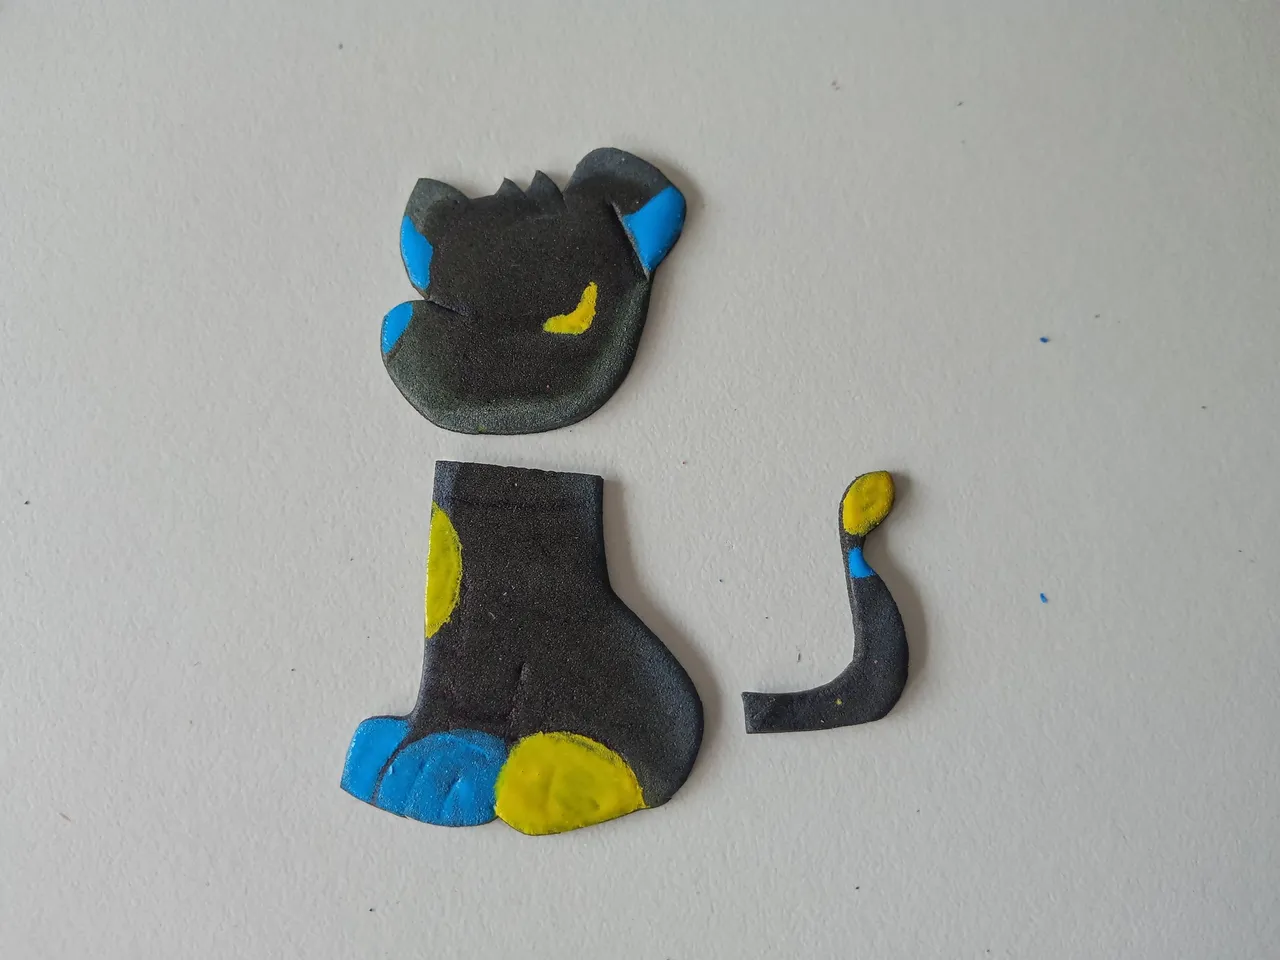
Al estar seco, tomé pintura en tono amarillo y azul para comenzar a hacerle los detalles que tiene Xolo por todo su cuerpo. Así que pinté las dos patas delanteras en color azul, la trasera con el tono amarillo y el pecho en amarillo también. En el caso de la cara, pinté las puntas de las orejas y la nariz de azul, pinté el diseño que lleva en medio con ambos colores y el detalle que tiene a un lado de los ojos, con amarillo. En cuanto a la cola, la punta la pinté de amarillo y una línea más abajo, en azul.
✨ STEP 3:
Once it was dry, I used yellow and blue paint to begin adding the details that Xolo has all over his body. So I painted the two front legs in blue, the back leg in yellow, and the chest in yellow as well. For the face, I painted the tips of the ears and nose blue, the design in the middle with both colors, and the detail next to the eyes with yellow. For the tail, I painted the tip yellow and a line below it in blue.
✨ PASO 4:
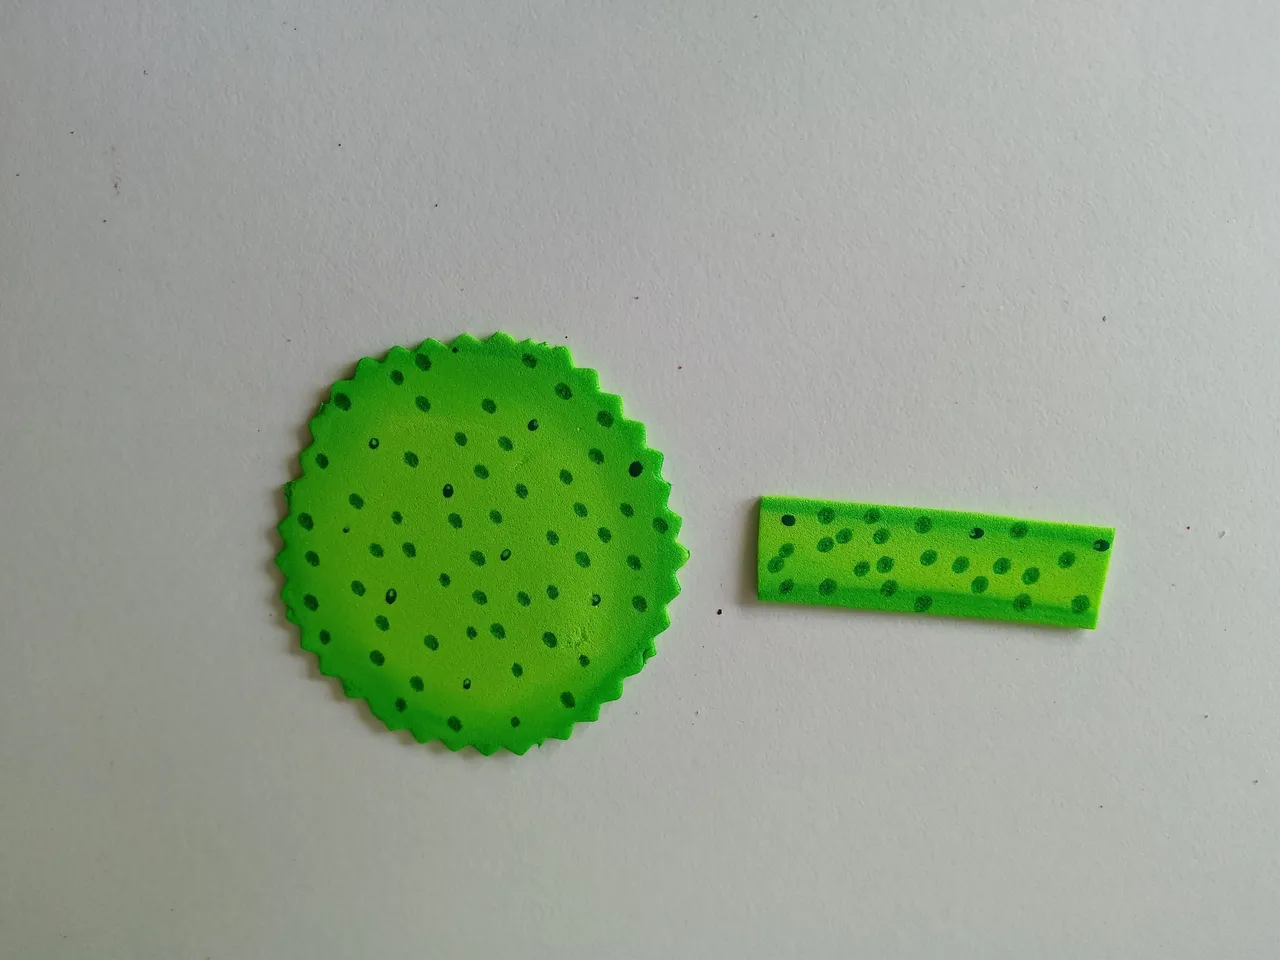
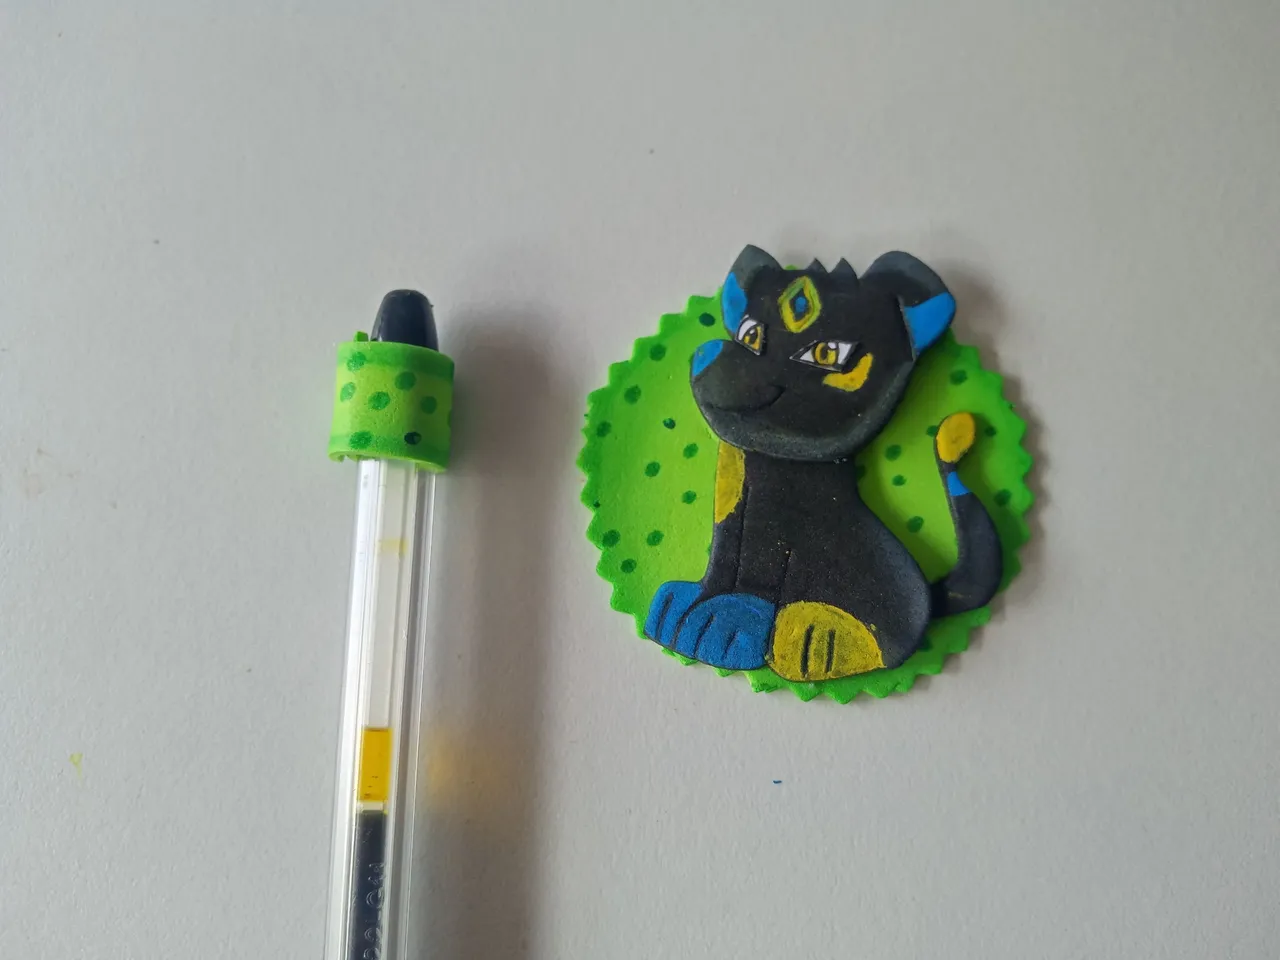
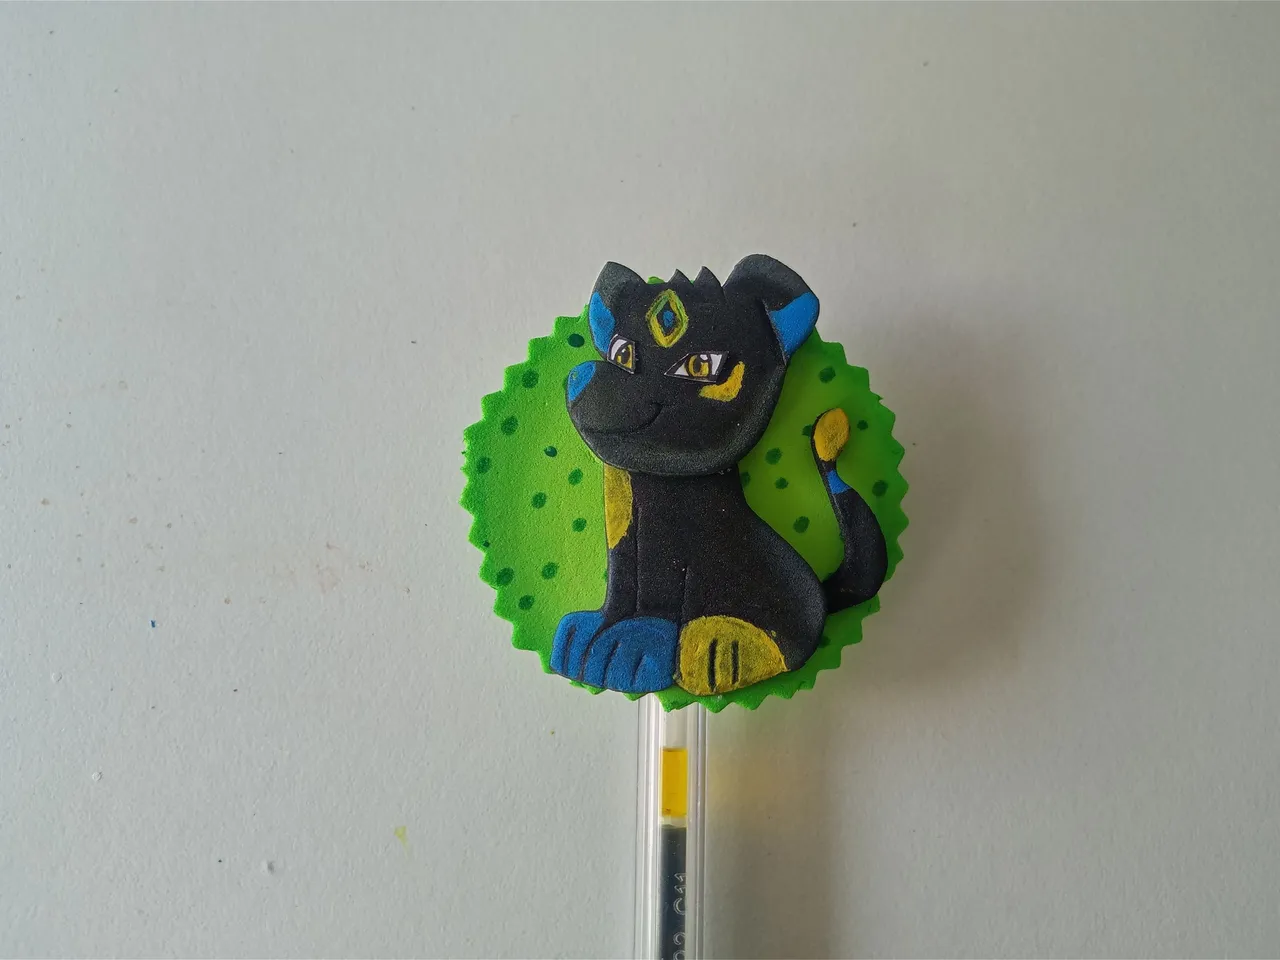
Dejé secar muy bien para no hacer un desastre y, mientras secaba, pinté los ojos del diseño que dibujé en la hoja blanca, así que, al dar los detalles con marcadores, pegué los ojos en su lugar. Al estar listo, recorté con tijeras de diseño la base, que es un círculo de 6 cm de circunferencia en foami verde y una tira de 4.5 cm x 1 cm en foami verde. Luego pinté los bordes con pintura verde de un tono más oscuro e hice puntos en ambas piezas. Al estar seco, pegué la tira en la parte superior del lápiz, encima pegué la circunferencia y encima y bien entrado a Xolo.
✨ STEP 4:
I let it dry thoroughly to avoid a mess, and while it dried, I painted the eyes from the design I drew on the white sheet. After adding the details with markers, I glued the eyes in place. Once it was ready, I cut out the base with designer scissors, which is a 6 cm circle from green foam and a 4.5 cm x 1 cm strip from green foam. Then I painted the edges with a darker shade of green paint and made dots on both pieces. Once it was dry, I glued the strip to the top of the pencil, glued the circle on top, and glued Xolo right on top.
❤️ Hasta la próxima publicación.
❤️ Until the next post.

Todas las fotografías son de mi propiedad.
Separador y Fotos editadas en Canva
All photographs are my property.
Photos edited in Canva