
🔸Sin más que añadir, a continuación los dejo con el paso a paso:
✨Good afternoon, holozing friends!✨ I hope you're having a great week. For my part, I'm happy to stop by to share a lovely idea with you. This time, I'm sharing the step-by-step instructions for making a cute pencil topper inspired by the Ocean Healer. This time, I had the idea of creating just the Healer's head, giving it a nice border to draw more attention. As an extra decoration for another pencil or pen holder that goes with it, I wanted to make the Healer's logo, obviously using the character's corresponding colors.
🔸Without more to add, then I leave you with the step by step:
♥️ESPERO QUE TE GUSTE,
¡Empecemos!
♥️I HOPE YOU LIKE IT,
Let's start!

✂️ MATERIALES | ✂️ MATERIALS
- Foami escarchado dorado.
- Foami azul.
- Foami blanco.
- Foami crema.
- Pinturas y marcadores.
- Pegamento.
- Tijeras.
- Regla.
- Hoja blanca.
- Lápiz.
- Gold frosted foam.
- Blue foam.
- White foam.
- Cream foam.
- Paints and markers.
- Glue.
- Scissors.
- Ruler.
- White paper.
- Pencil.
✨ PROCEDIMIENTO | ✨ PROCESS
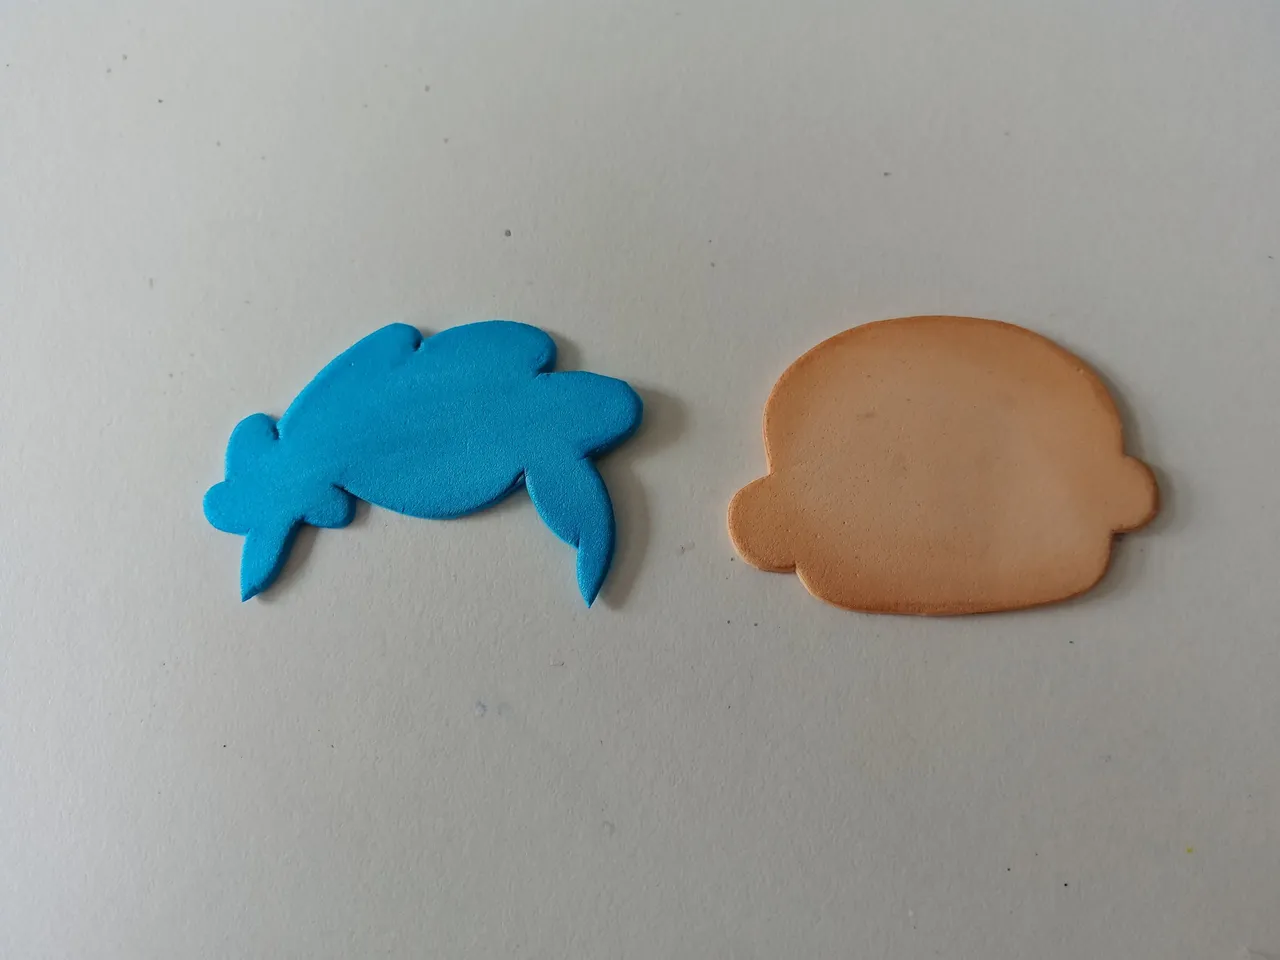
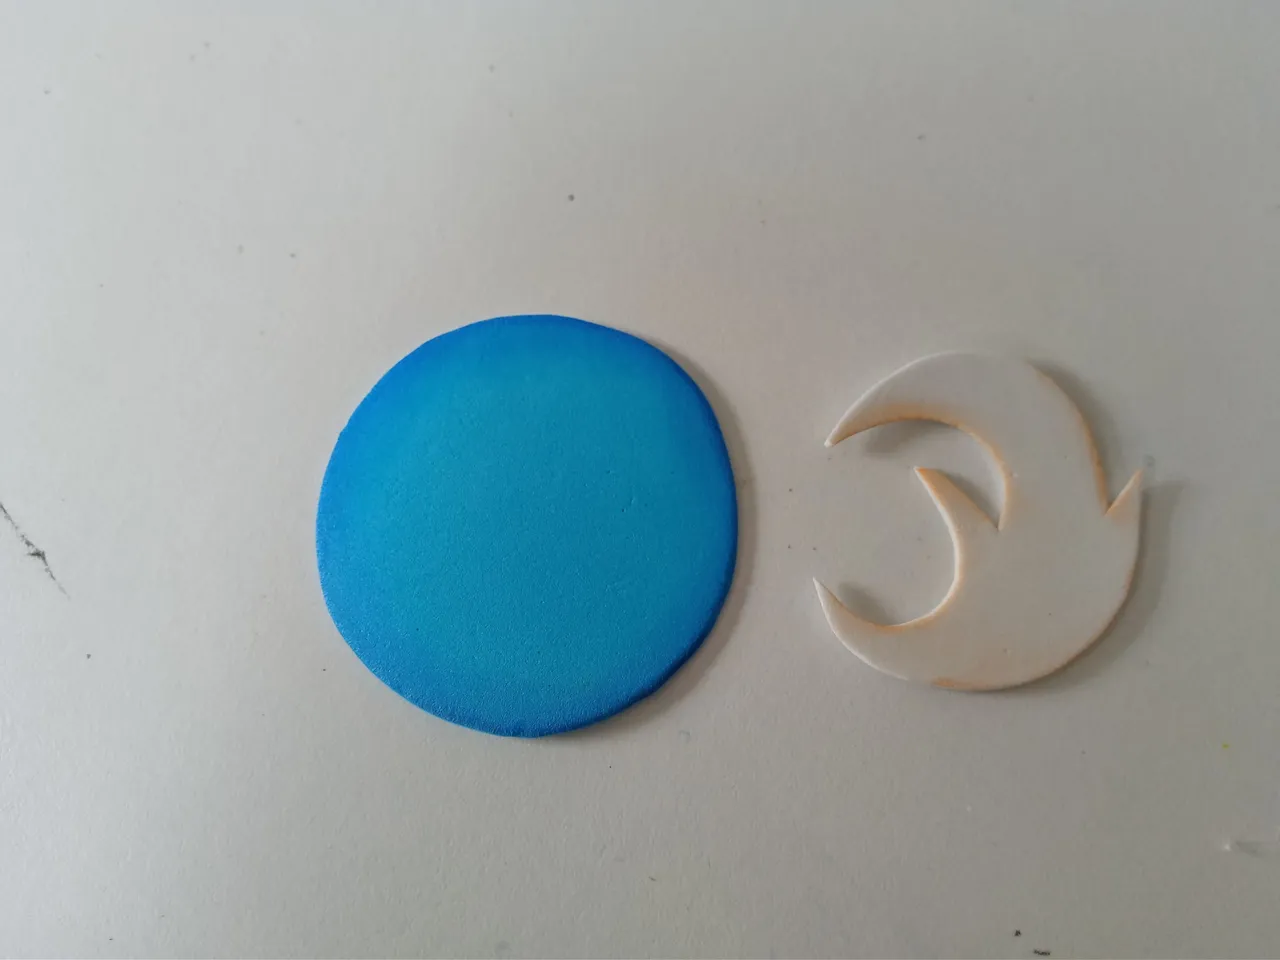
✨ PASO 1:
Lo primero que hice fue tomar una hoja blanca y dibujar el diseño que quería para el rostro y cabello del Sanador del océano. Luego de tener la idea lista, dibujé el logo. Al estar listos los diseños y tamaños que quería, transferí a los colores correspondientes de foami, como explico a continuación:
Para el sanador del océano:
✨Cabeza: 5.5 cm x 4.5 cm en foami crema.
✨Cabello: 6 cm x 4.5 cm en foami azul.
Para el logo:
✨Diseño: 5 cm x 4.5 cm en foami blanco.
✨Base: 6 cm de circunferencia en foami azul.
✨ STEP 1:
The first thing I did was take a white sheet of paper and draw the design I wanted for the Ocean Healer's face and hair. After I had the idea ready, I drew the logo. Once the designs and sizes were ready, I transferred them to the corresponding colors of foam, as explained below:
For the ocean healer:
✨Head: 5.5 cm x 4.5 cm in cream foam.
✨Hair: 6 cm x 4.5 cm in blue foam.
For the logo:
✨Design: 5 cm x 4.5 cm in white foam.
✨Base: 6 cm circumference in blue foam.


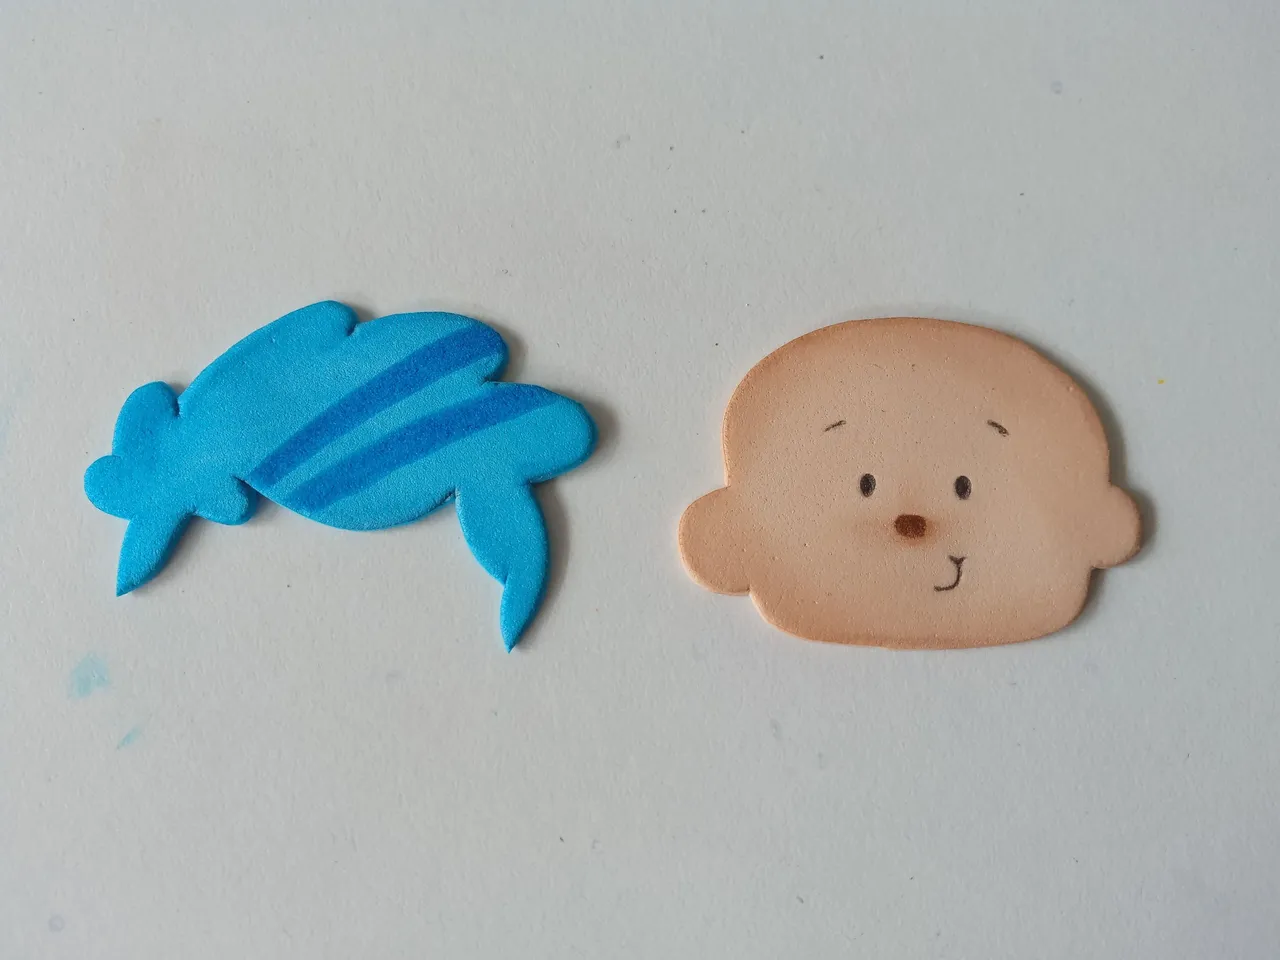
✨ PASO 2:
Al tener las piezas listas, es momento de dar color a los bordes, para dar contraste con pinturas o marcadores, y difuminamos con un pañito. Así que para la cabeza utilicé un tono marrón claro, para el diseño del logo un tono de marrón y para el cabello y la base del logo un tono de azul oscuro.
✨ STEP 2:
With the pieces ready, it's time to color the edges, adding contrast with paints or markers, and blending with a cloth. So for the head, I used a light brown shade, for the logo design, a shade of brown, and for the hair and the base of the logo, a shade of dark blue.
✨ PASO 3:
Al estar secas las piezas, comencé a dar detalles más específicos, como ojos, cejas, boca, nariz, detalles al cabello, puntos por toda la base del logo con azul oscuro, rubor en las mejillas y, nuevamente, dejamos secar.
✨ STEP 3:
Once the pieces were dry, I began adding more specific details, such as eyes, eyebrows, mouth, nose, hair details, dots all over the base of the logo with dark blue, blush on the cheeks, and let it dry again.
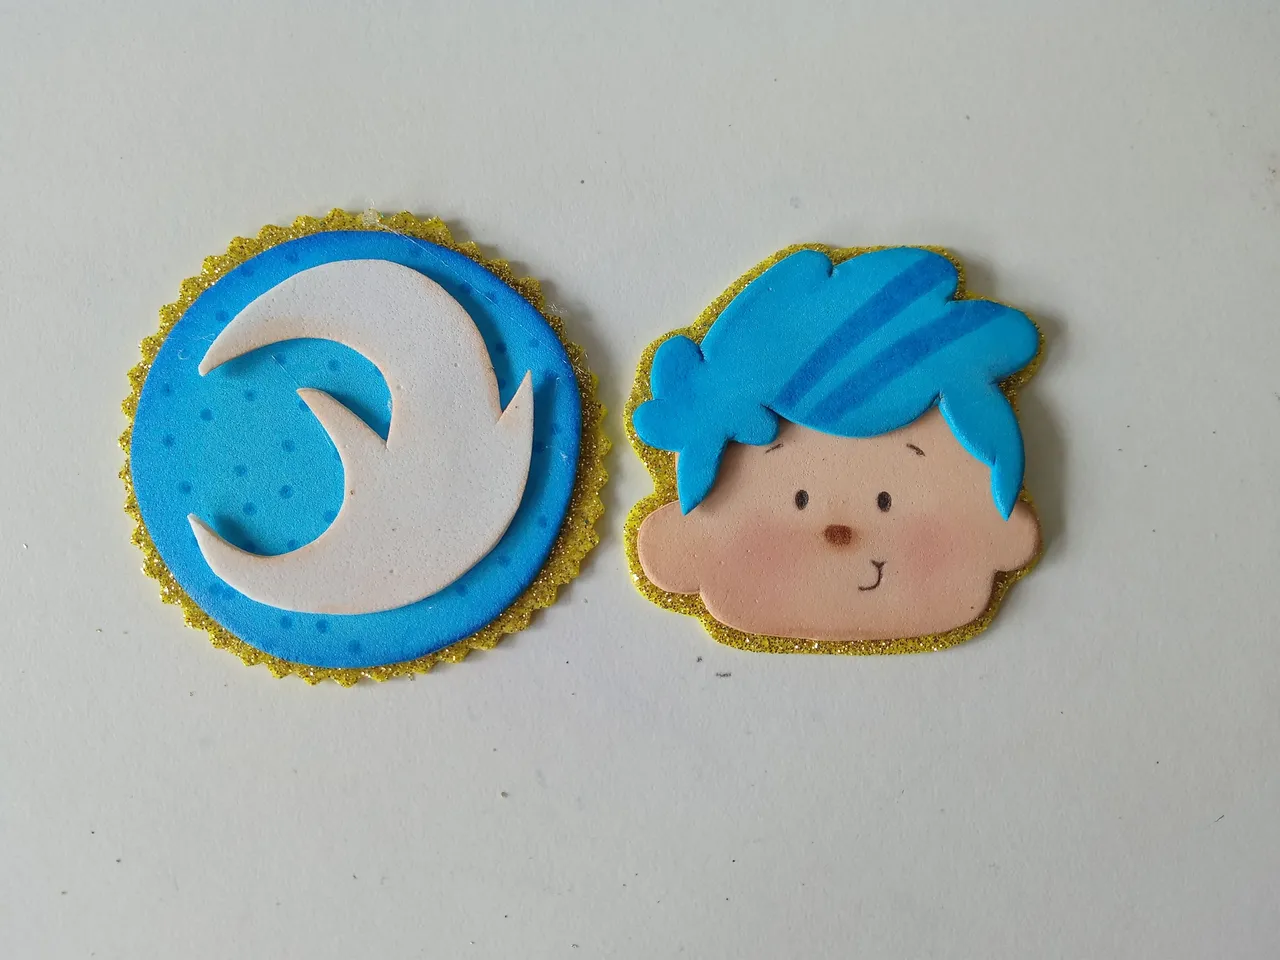
✨ PASO 4:
Seguidamente, pegamos las piezas del logo y las piezas del sanador del océano. Luego, pegamos ambos diseños sobre foami escarchado dorado y, con tijeras con decoración, recortamos siguiendo la forma de ambos diseños y dejando un borde de foami escarchado de 0.5 mm aproximadamente.
✨ STEP 4:
Next, we glued the logo pieces and the ocean healer pieces together. Then, we glued both designs onto gold glitter foam and, using decorative scissors, cut out the shapes of both designs, leaving a 0.5 mm glitter foam border.
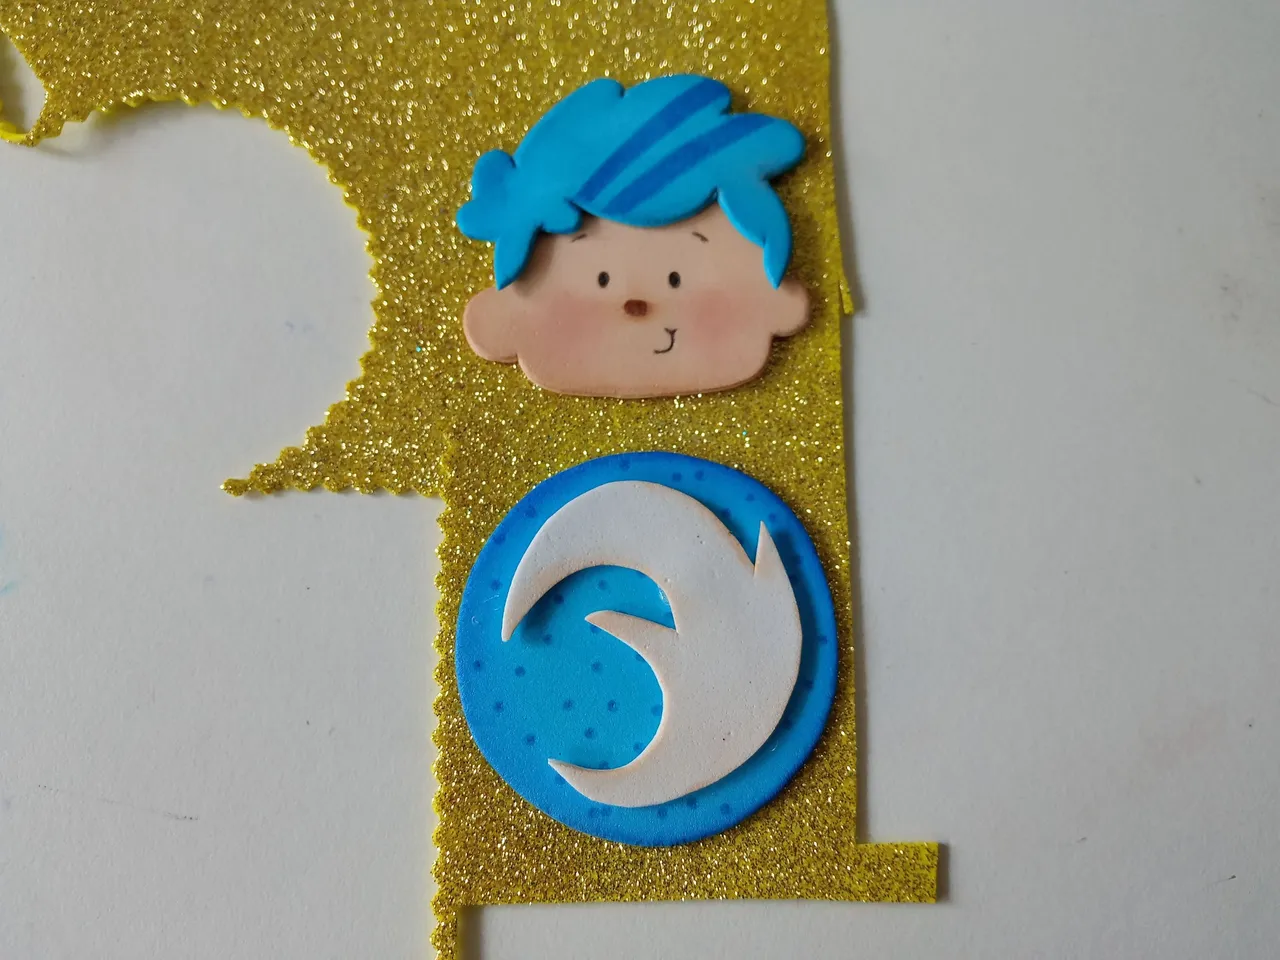
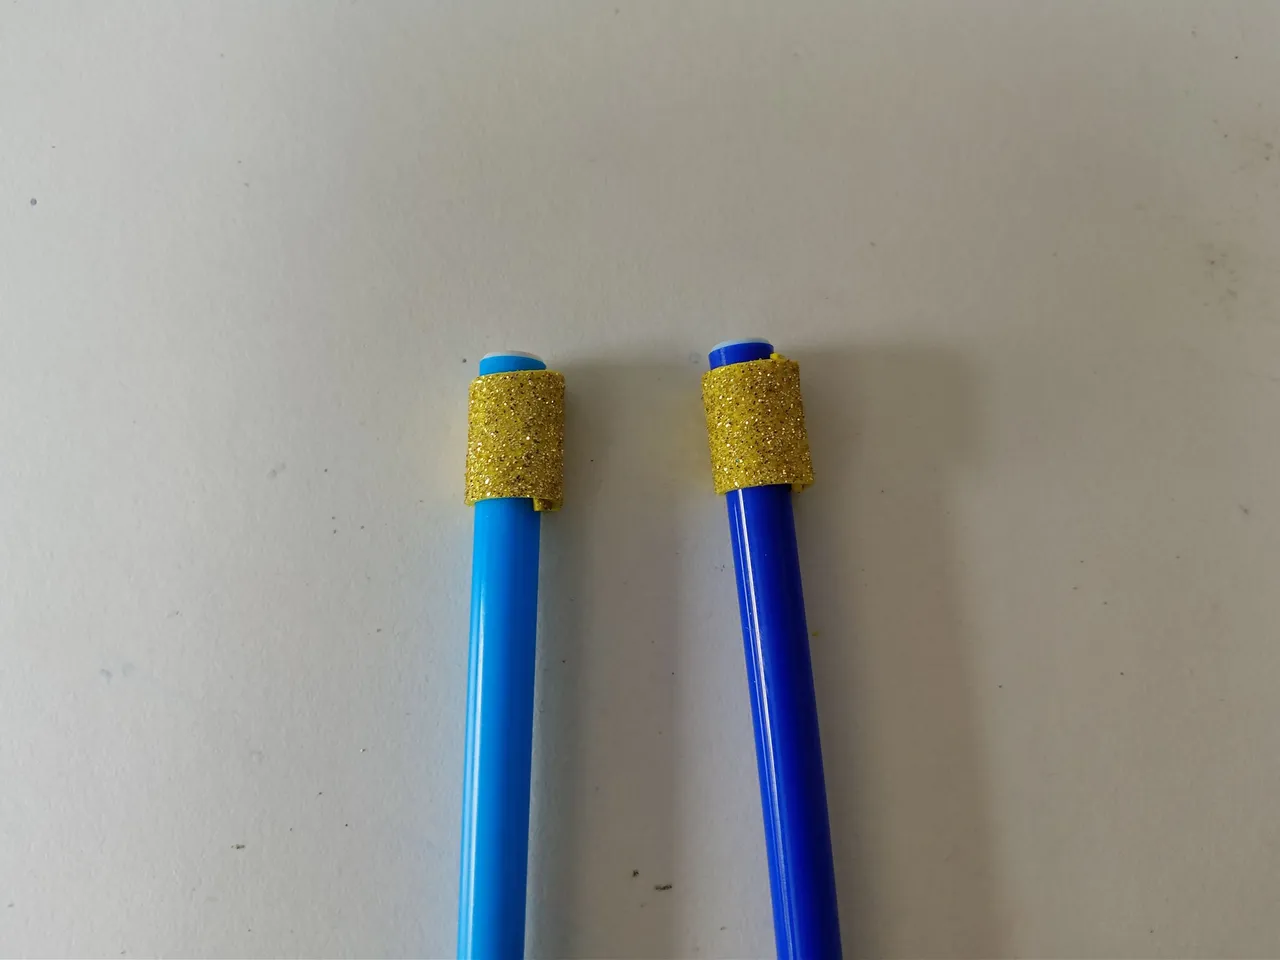
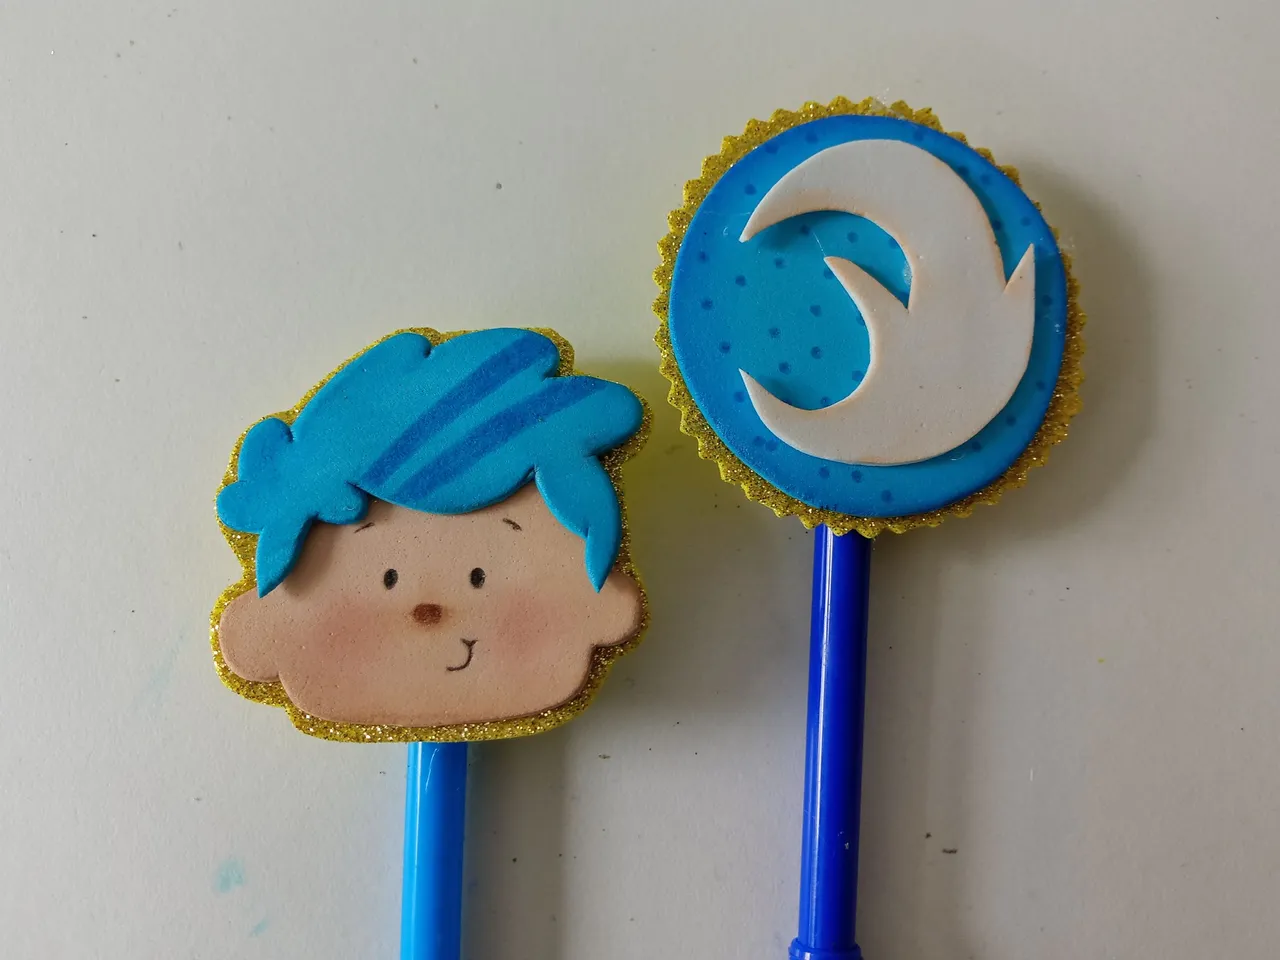
✨ PASO 5:
Finalmente, recorté dos tiras en foami escarchado dorado de 4 cm x 1 cm, las pegué en la parte superior de los lápices o lapiceros y encima de estas piezas, pegué las decoraciones en cada uno.
✨ STEP 5:
Finally, I cut two strips of gold glitter foam measuring 4 cm x 1 cm, glued them to the top of the pencils, and glued the decorations on top of these pieces.
❤️ Hasta la próxima publicación.
❤️ Until the next post.

Todas las fotografías son de mi propiedad.
Separador y Fotos editadas en Canva
All photographs are my property.
Photos edited in Canva