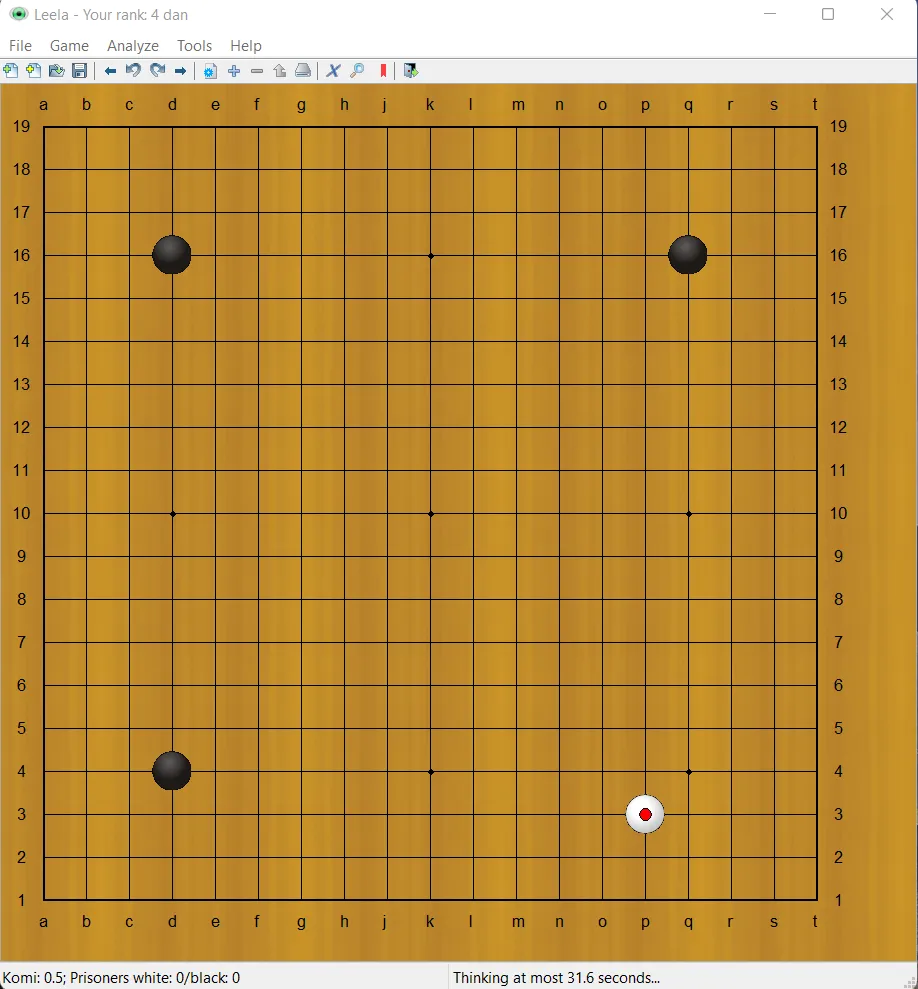
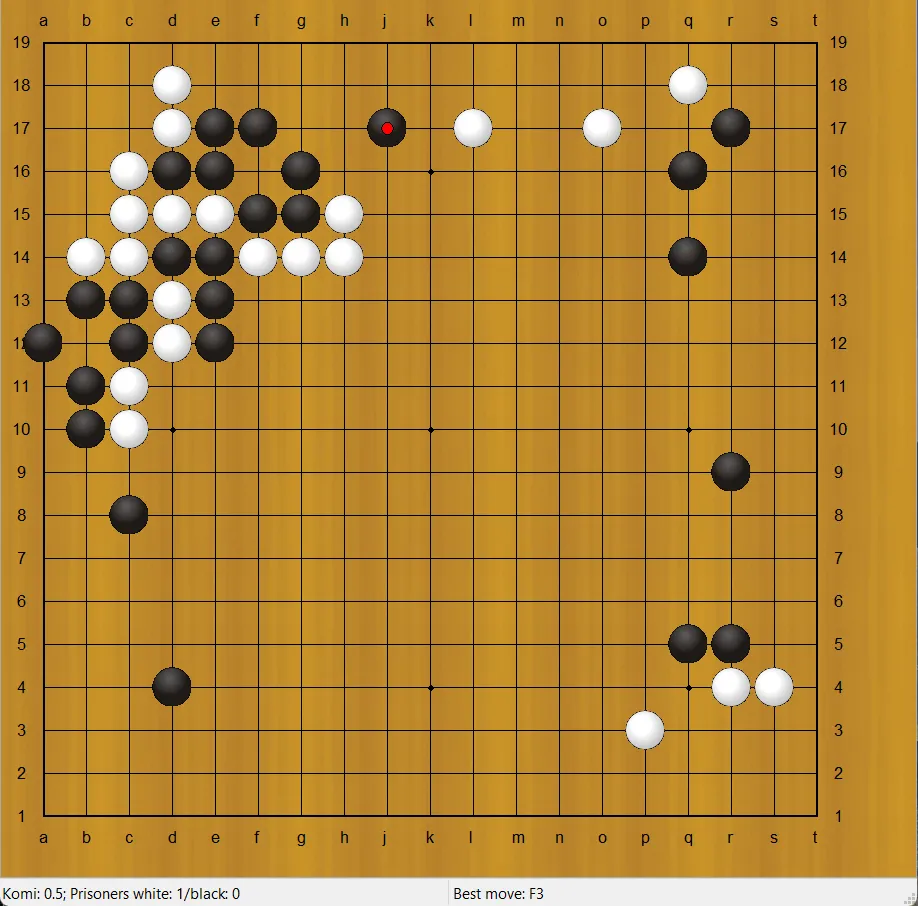
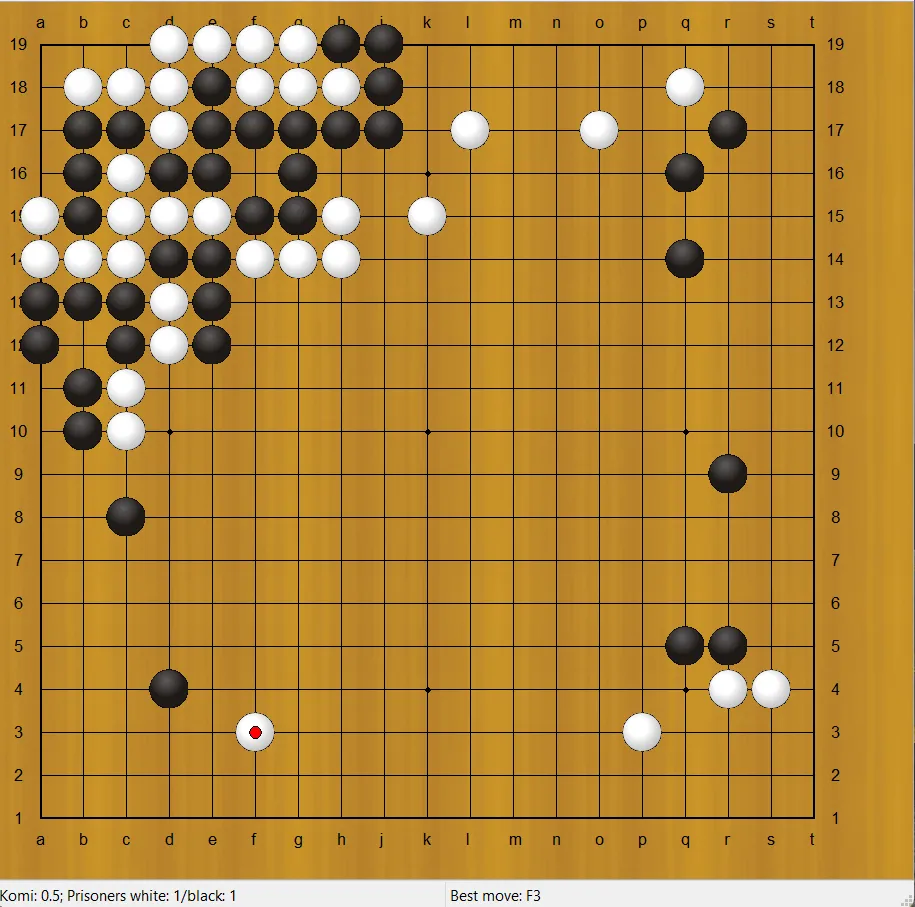
Leela began by playing the marked white stone.
Black's approach at q5 was followed by the exhchange in the lower right corner. Then white approached black's corner at o17, which led to the peaceful exchange. When black played the small keima at f17, white split the left hand side with the marked stone.
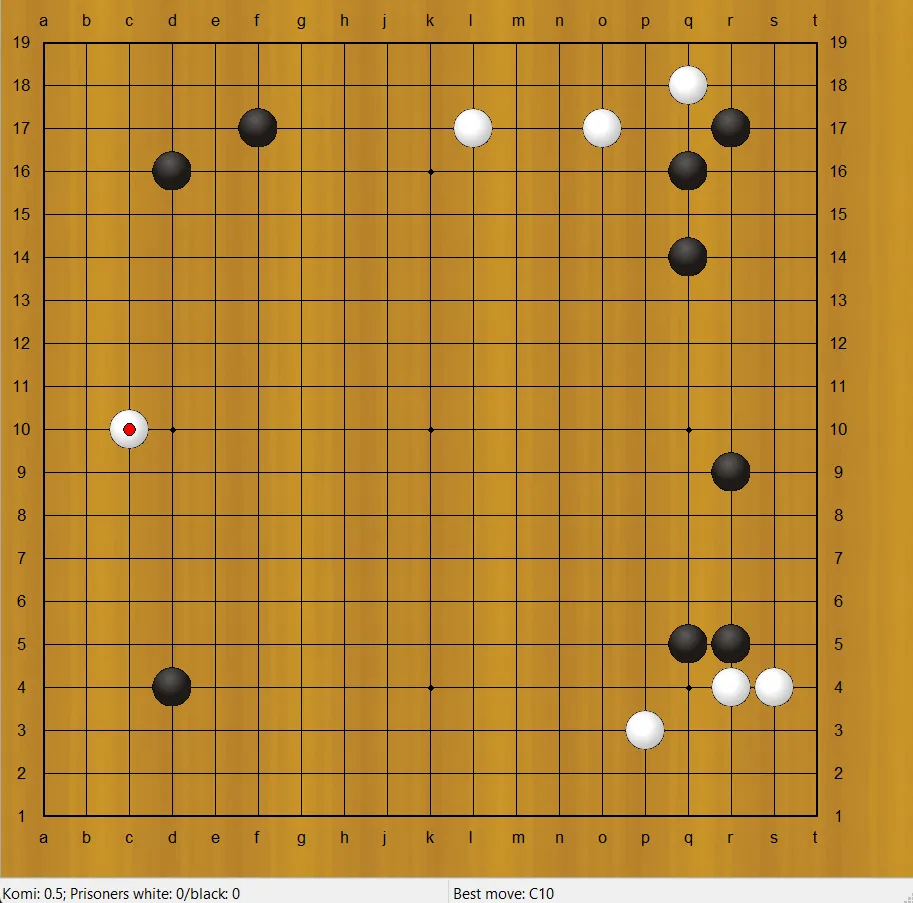
Now the question is whether black should invade at c12 or play a peaceful move to enclose the corner, for instance. White would probably play at d12 to strengthen his position. That would leave the lower left black formation a little awkward. I decided to go for a complicated solution and invaded at c12.

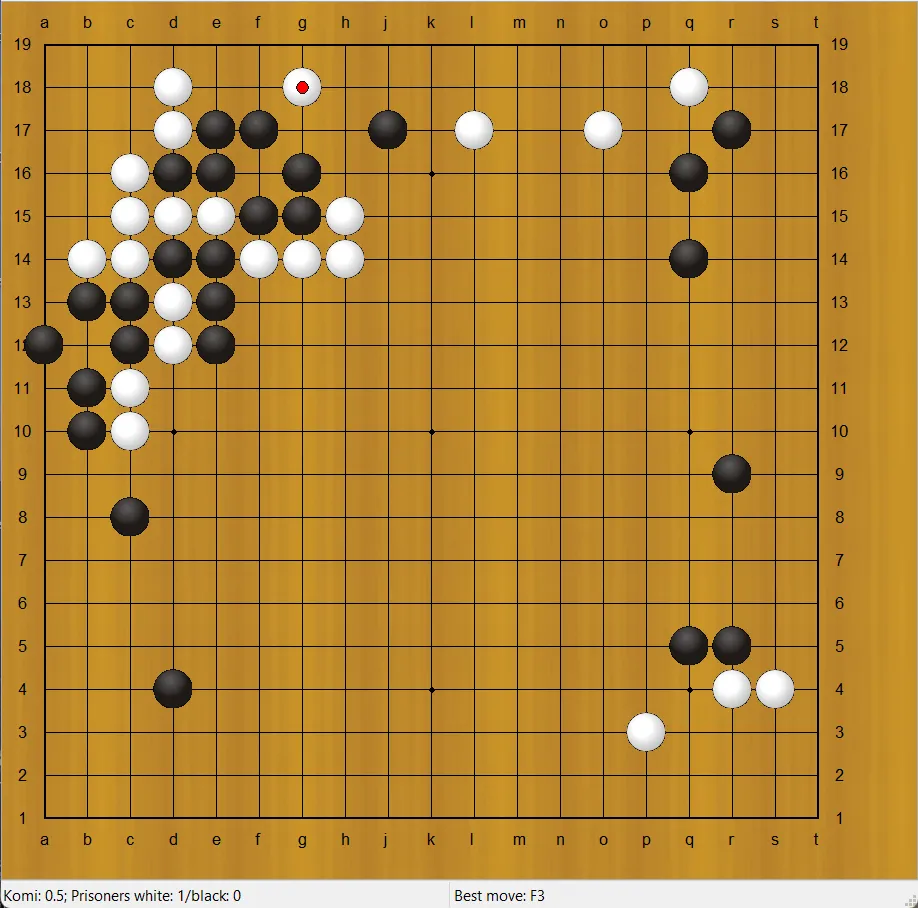
To be perfectly honest, I think I have messed up here. This is embarrassing.

But I wasn't expecting white to connect at c15, which I think was the move that could save blacks bacon.
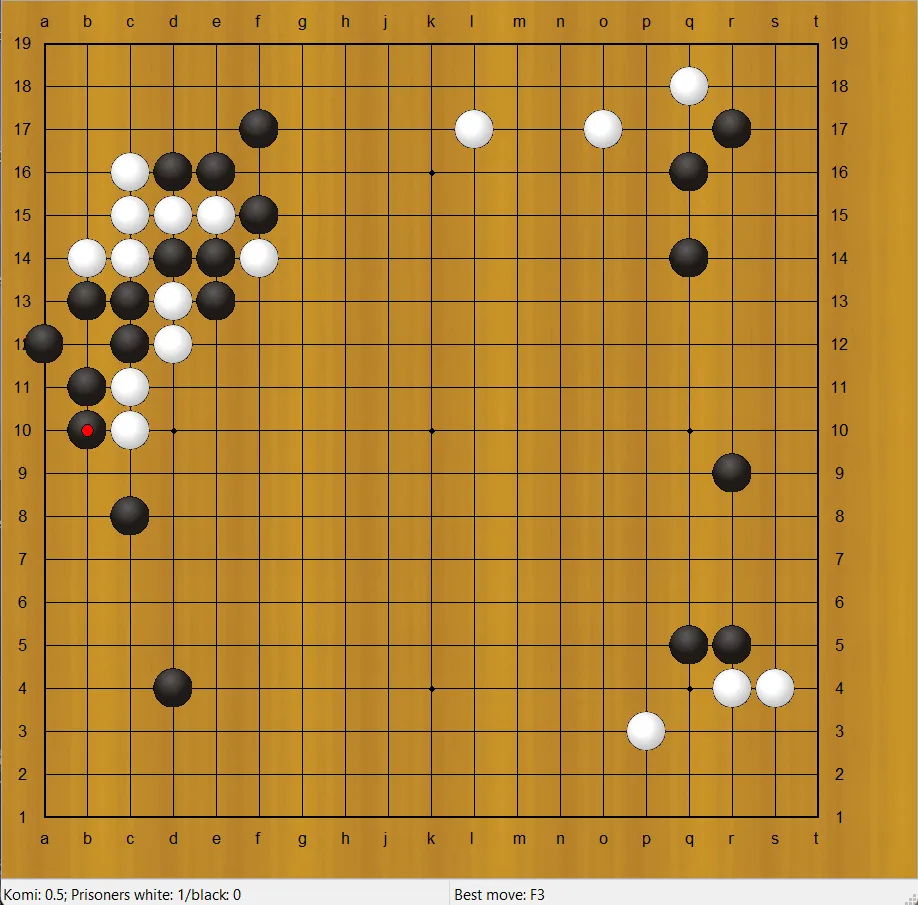
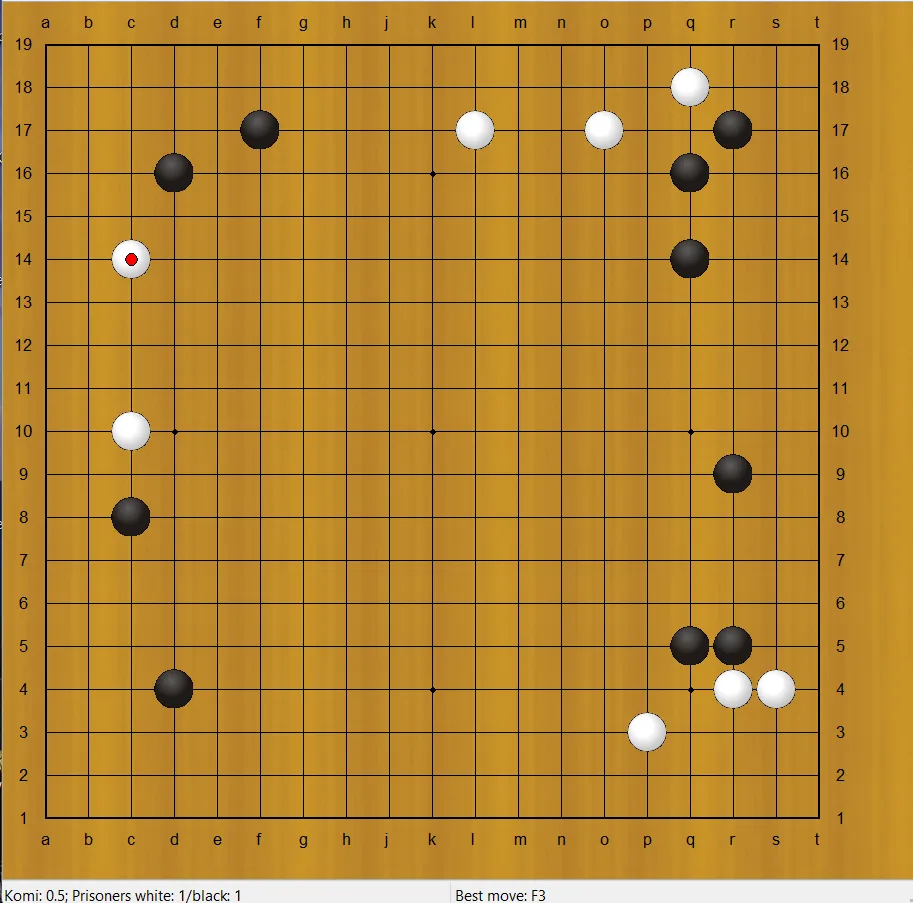
Note that the three black stones cannot be captured although there is plenty of bad aji for them. The extension at b10 was mandatory to save the black's group and the prevent the collapse of black's position. Now white could begin by giving atari at g15 thus wrecking black's shape.

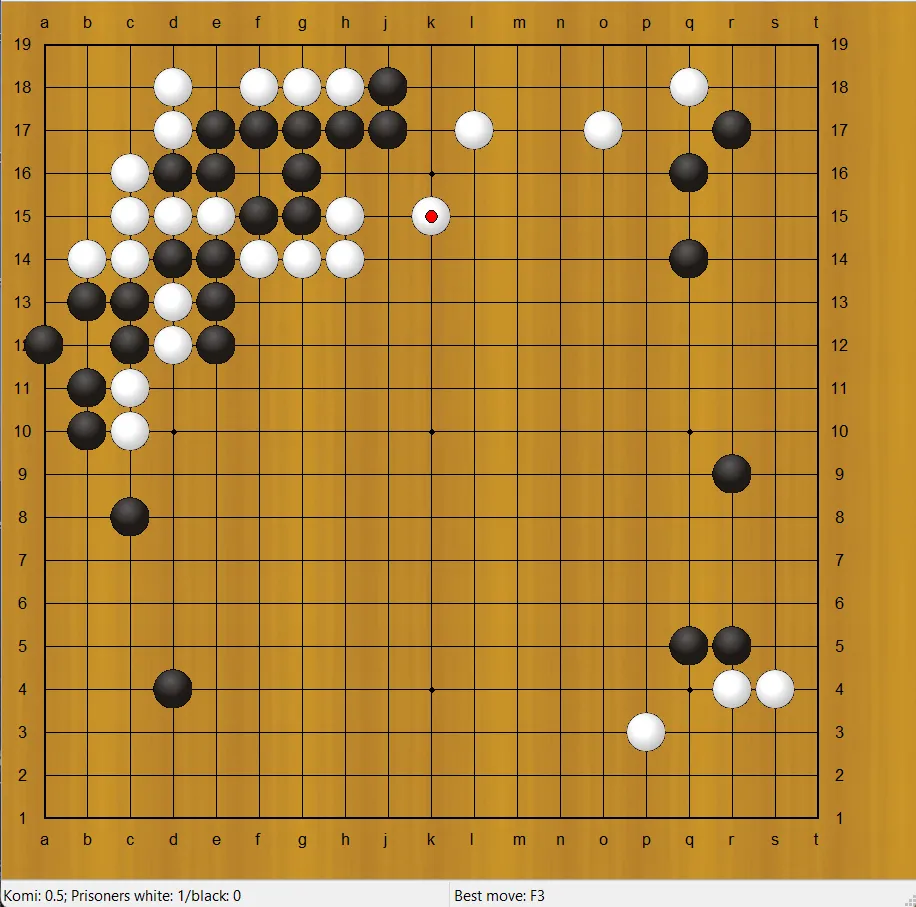
What? White chooses to strengthen its corner and lets black extend despite having the opportunity to give atari at g15.
White extended at g14, after which black had to prevent the three black stones from being captured with a ladder. An exchange took place, the result of which you see in the above.
White starts attacking the black group.
Black pressing at h8 was an elaborate trap, which white hopefully has begun to fall into with the enclosure move of the marked stone. If white does not give up the three stones on the upper edge, black has a nasty surprise involving a few tesujis for white in store...
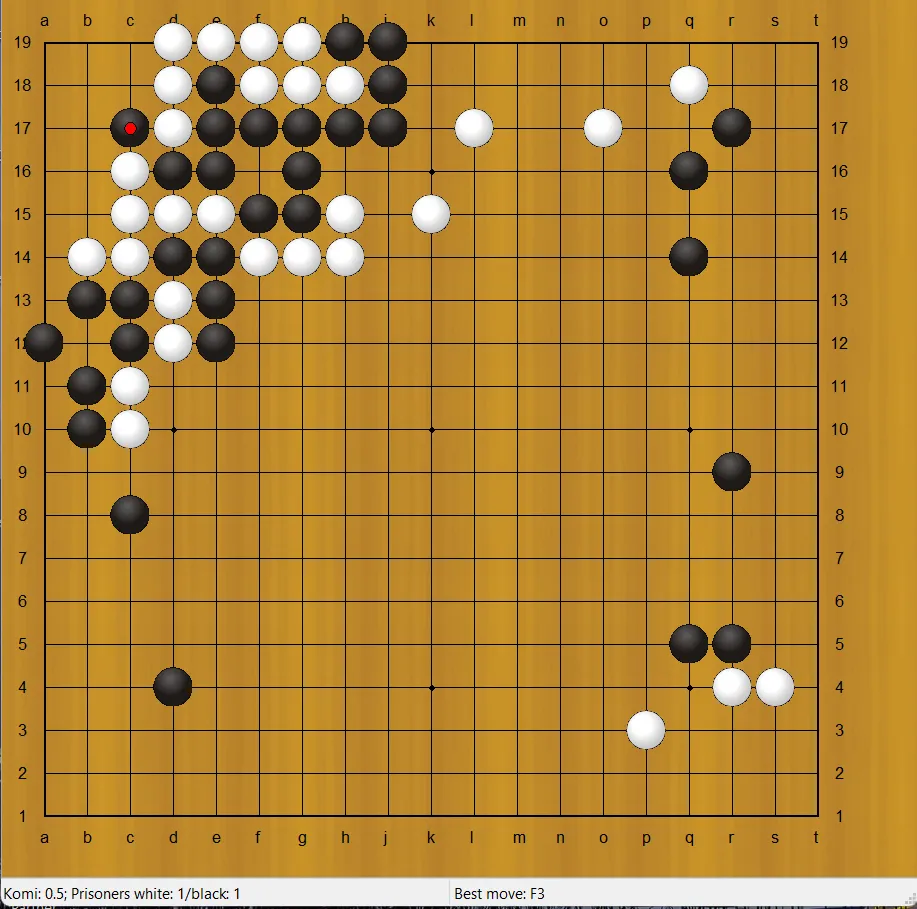
Oops!
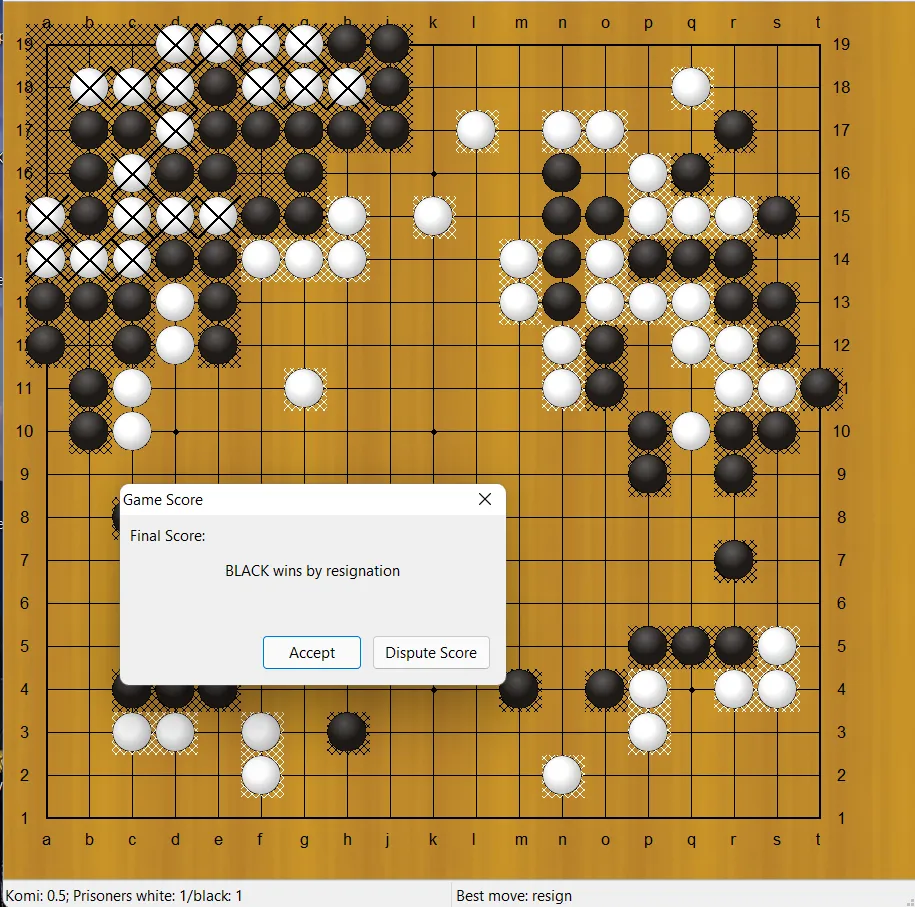
White's position in the corner is completely destroyed. Everything is dead. If white extends to a18, black will reduce the number of eyes to one with a placement at b19.
White opens a new front on the lower edge at f3.
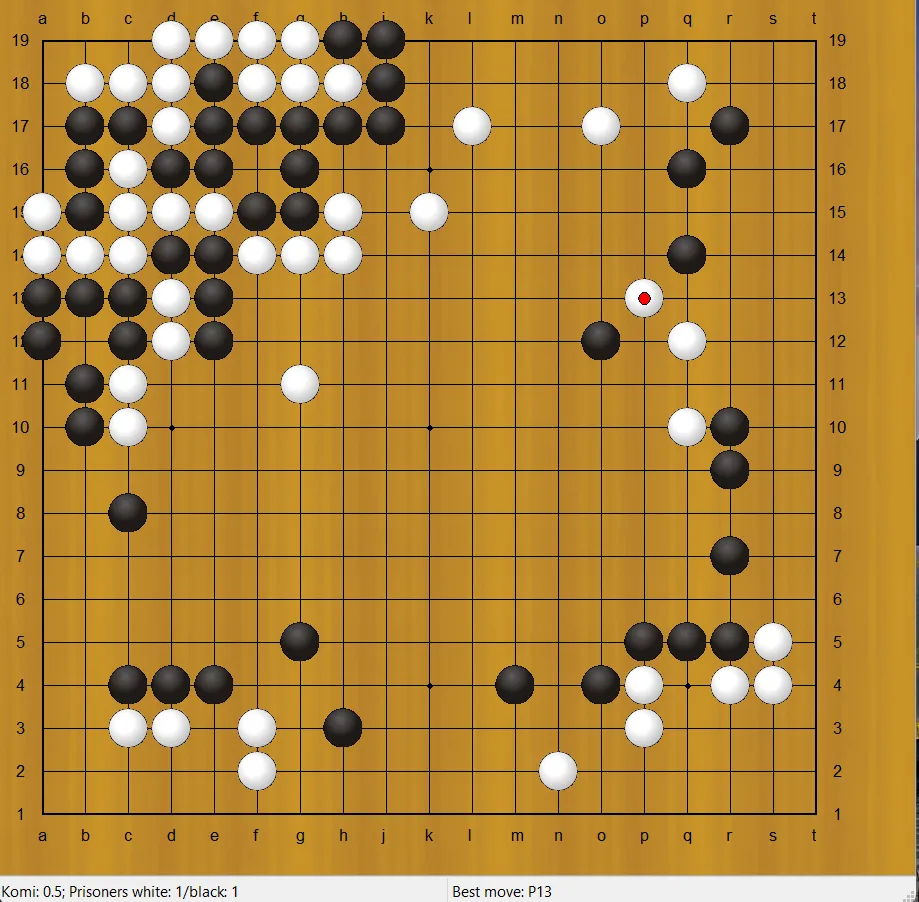
Black pincered at h3, which was followed by an exchange. Then black pressed at o4. White's shoulder hit at q10 aimed to press black's position and take influence toward the center. Black's move at o12 was a counterattack. White runs toward safety with the marked stone.
Black leaned against white with n16 and extended at o11. White splits with the marked stone.
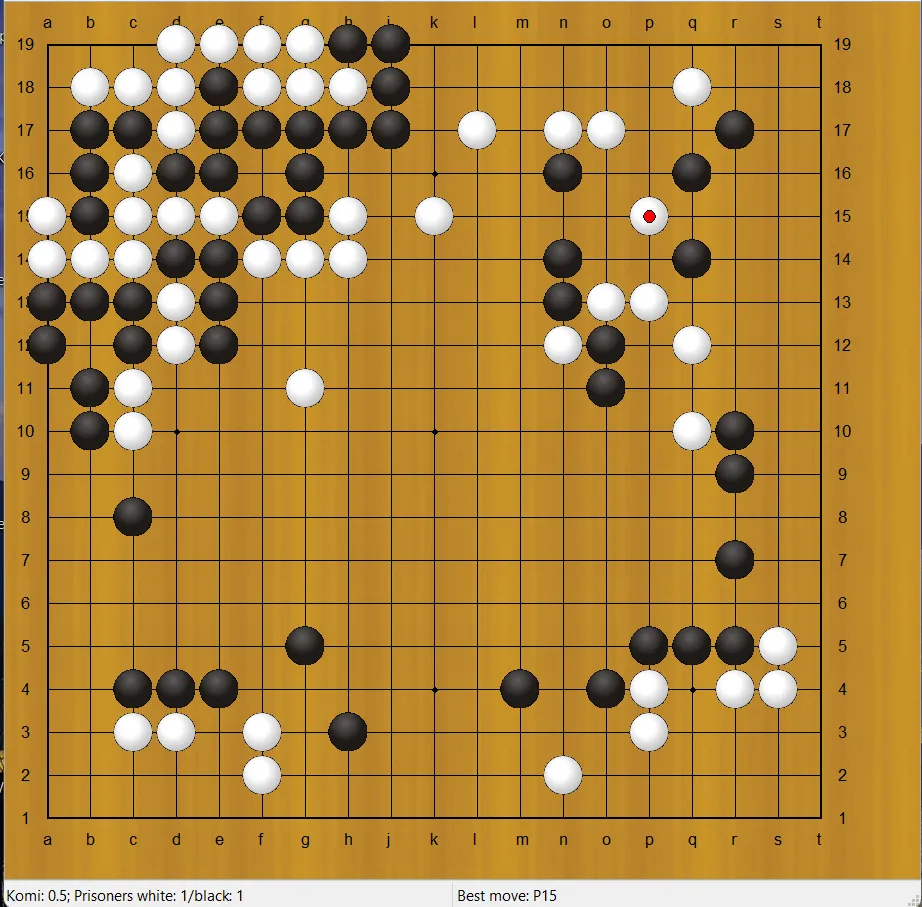
The fight ended in black's complete success. The black stones on the outer side have three liberties while the white's on the inside are at two. The white push through at q4 didn't accomplish much because black could connect from underneath at s15.