Hey!
Welcome to this Battle Mage Challenge, this time featuring the Armored Up rule, where every Monster receives +2 Armor.
Armored Up
As said, in this rule every Monster in the field increases their Armor stat by two points, so what kind of approach should we have in this ruleset?

Considering that a lot of Armor is going to be present in the battle, picking up a Magical team would be the most pragmatic solution, since Magic attacks ignore Armor. However, if the Earth Splinter is not available for you to use, which is for new players the easiest Magical Splinter to access, then you should think of other solutions.
When it comes to defense, you should have in your ranks, Armor Repairers, such as the Scavo Hireling, as well as another card that boost your Armor, in case your opponent tries to “Rust” yours. And you should consider using Monsters with the Void Armor ability (Magic attacks hit Armor first), to make the most of those extra points granted by the ruleset.

Offensive wise, you should try to diminish your opponent’s Armor stat or use effects that take it down with ease. So, to diminish it we have “Rust”, which lowers Armor by two points, and to take it down with ease we have the “Shatter” effect that destroys it at once. The Legendary Summoner Immortalis would be perfect for this rule, since he grants the Void and the Shatter ability to all Monsters. And, of course, let’s not forget the new Rebellion set’s ability, Corrosive Ward, which not only returns two points of Armor damage, when Melee atacked by a Monster, but also reduces it’s Max Armor stat by two.
A couple of little tricks to make the most of this rule are:
- Using a Monster with the Bloodlust effect. Everytime it kills his/her stats go up, and in this case, it would also include Armor, becoming a much more dangerous card.
- Using a Monster with the Resurrect ability, alongside with a tank with Void Armor. When resurrected, his Health is going to be at one point, but his Armor will be at max.

- Using the new Rebellion set skill, “Armored Strike”. Monsters with this ability get one extra Melee attack, using their Armor stat, so alongside with the “Armored Up” rule, they can have a really monstruos attack.
Battles
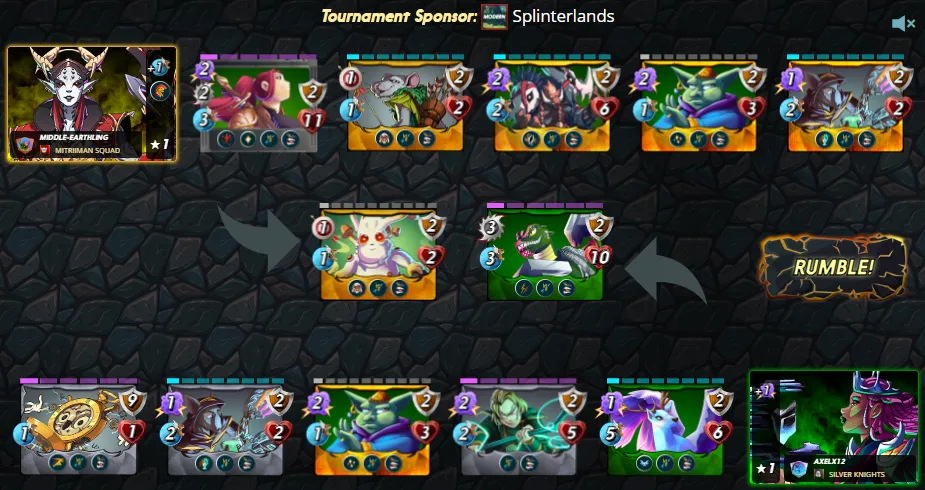
Battle #1
Ruleset

Lineup & Strategy
This first battle was done in a Brawl. Bronze level cap, all sets allowed, only Gold Foils. Alongside with Armored Up, there was the Aim True rule, which means attacks always hit their target, so no point in using fast cards to dodge, at least not tanks.


- Since Earth was not available, I opted for the Ranged firepower of the Life Splinter, so General Sloan as my Summoner.
- Luckily for me, I had a Gold Foil Gladius, in this case Hugo Strongsword. He’s not powerful at all, but he has Shield and plenty of hit points, plus Bloodlust.
- Next, the Scavo Hireling, to Repair Armor.
- In third position, the Time Mage. Even though the Aim True rule was in effect, it’s a good idea to attack first.
- Then, the Venari Crystalsmith, as a Healer.
- In fifth position, the Pelacor Arbalest, one of the most deadly and used Life Core Chaos Monsters, with it’s Double Strike.
- At last, the Prismologist, whose attack is slow, but quite powerful because of the Blast.
It was a close battle, but I lost because of small details in my opinion, even though my opponent had a solid lineup.
- My first problem was positioning. The Scavo was too close to the line of fire, so when the tank fell, he was immedeately next, leaving me without the chance to Repair Armor.
- If the Arbalest would’ve been in the last position, instead of the Prismologist, I would’ve won.
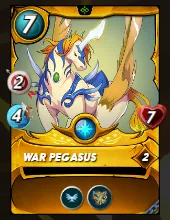
- I could’ve replace the Prismologist’s Blast, for the War Pegasus’s Shatter and the Time Mage for the Xenith Monk, after Hugo and before the Scavo, to have more hit points and a self-healing card.
Battle #2
Ruleset

Lineup & Analysis
Novice Splinterlands tournament, only Modern cards, no Legendaries. This battle’s approach was quite simple, since the Earth Splinter was available. Lots of Magic, so:
- As a Summoner, Obsidian, to boost my Magic attacks.
- As a tank, Grund, with it’s deadly Double Strike Melee attack. I could’ve use the Mycelic Slipspawn, but that would’ve been stupid with a Ferocity rule on place.
- Next, the Regal Peryton, which I usually locate after the tank or in last position, because of it’s Speed.
- In third position, the Magi of Chaos, a card that I try to place in the middle because of it’s strong Magic attack.
- Next, the Goblin Psychic, as a Healer and also with a good Magic attack.
- In case of a Gladius, the Venari Spellsmith’s Dispel ability is able to reverse the Bloodlust effect or any other buff.
- At last the Clockwork Aide, as a backline shield or Opportunity bait.
The battle was a success. I did have the right approach, but my opponent also made some mistakes:
- Relying too much on Quora. Is not wrong, since she’s a very dangerous card, but with this Mana available, there is too much firepower and she has no Shield or Void.
- Overusing Martyrs. It’s addictive, but you lose the chance of maybe using a card that may give your lineup more strength overall.
- Using a Monster with Recharge. Is not particularly wrong, but in this case, considering that he already used two places in Monsters with practically no firepower, using a third one in a Monster that has to wait an extra round to attack, is counter-productive, no matter how strong the attack is.

This is it guys, thanks for reading!