This week's Battle Mage Secrets challenge features the Rise of the Commons ruleset! Our ruleset today is one that is one that you may like to see if you enjoy trying to squeeze every last card you can out of your limited budget, or if you get a warm fuzzy feeling inside it when some of those lower rarity cards get their chance to shine in a fight. Today, we will be looking at a battle with the Rise of the Commons ruleset!
In battles with Rise of the Commons, every single one of those pricey (and even not so pricey) epic and legendary monsters are ineligible to be selected for the battle. Luckily for the sake of having enough monsters to use, despite the name you are still allowed to bring your rares out to play. Notably, while monsters are restricted, legendary summoners are still allowed. There aren't really whole categories of cards that are winners or losers in Rise of the Commons battles, aside from the legendary and epic monsters which are unable to be used. Instead, you tend to see a battle with a slightly lower power level, with fewer of those big splashy monsters since those often tend to be the higher rarity cards.
If you wanted to jump right to the action, the Battle Link is right here. Want to hear some more about the lineup? Read on further!

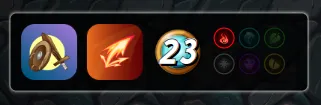
Here are the rules for our battle. Of course, we have Rise of the Commons, which means that only common and rare monsters are allowed. To go along with it we also have Aimless, which gives every monster Scattershot. Finally, we have a relatively low mana cap with just 23 to work with, and a very limited splinter selection - just one, Fire!
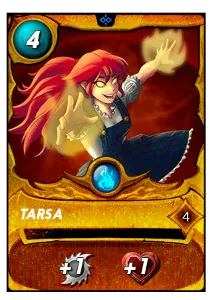
With just a single splinter option, our summoner choices are fairly narrow. Given the low mana cap I like Tarsa as a summoner for this battle. Her melee and health buffs are great if you have a few melee monsters on your team, and the Fire splinter has plenty of cheap melee monsters that we can use for our lineup in this battle.
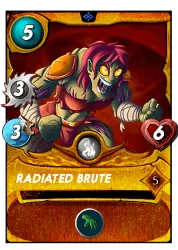
We'll start off with our tank and secondary tank. Xenith Monk is a great low-mana tank. His Heal gets quite a bit better when the damage output in a battle is lower since that gives him a higher chance of being able to get more Heals off. The low mana cap and Rise of the Commons rule both mean that we are likely to see those ideal low damage conditions. Radiated Brute is excellent as a melee secondary tank. He hits for 3 and can do it out of the second position thanks to Reach, which means that he is a bit harder to knock out of the fight quickly.
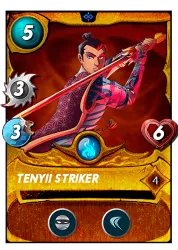
My midline consisted of some Sneak attackers. Gobalano Soldier and Tenyii Striker are both relatively cheap mana costed monsters who can attack the enemy's back line where they are least expecting it. Tenyii Striker even comes with the Dodge ability, which gives him some extra survivability.
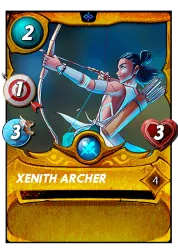
I was just about out of mana at this point, so I finished off the team with Xenith Archer. A point of ranged damage per turn for just 2 mana isn't bad - every bit helps! Oh, and adding an extra buffer at the back of your team is never a bad idea.

With the lineup set, it's off into battle! When I see the selected teams I am a little confused - there seems to be a distinct lack of monsters on my opponent's side of the field. In fact, upon further examination they have only used 11 out of a possible 23 mana for their lineup! Well, I am not one to look a gift horse in the mouth - this is a ranked battle with SPS and rating points on the line, I'll take any lopsided battle I can get!
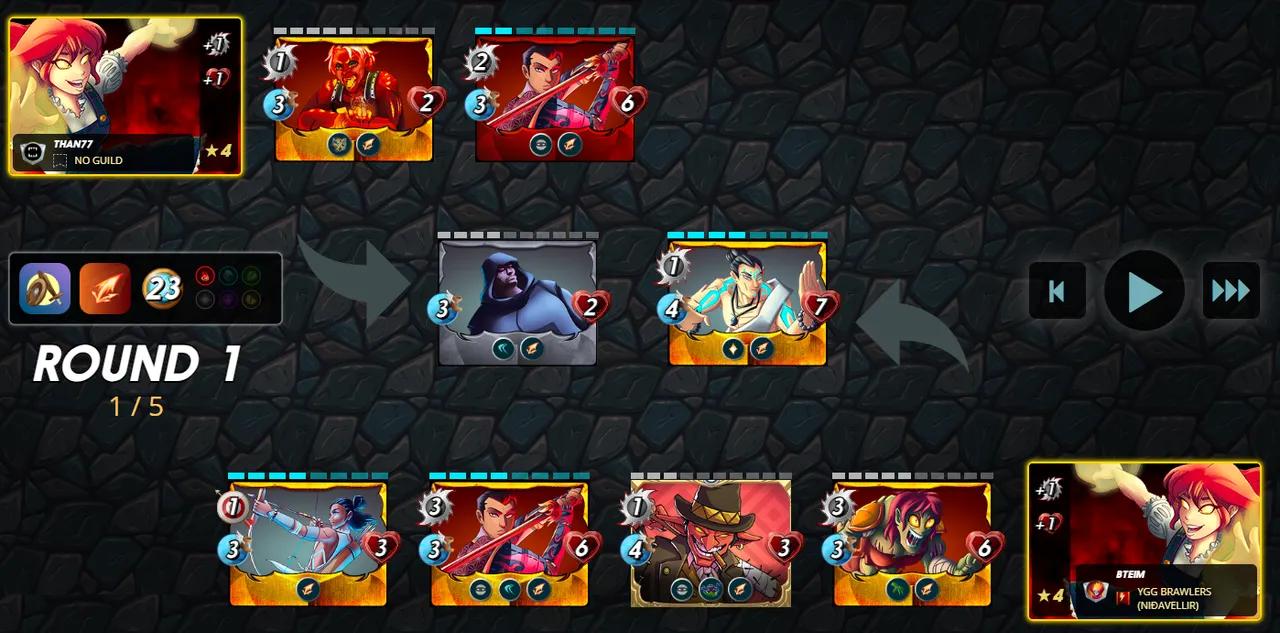
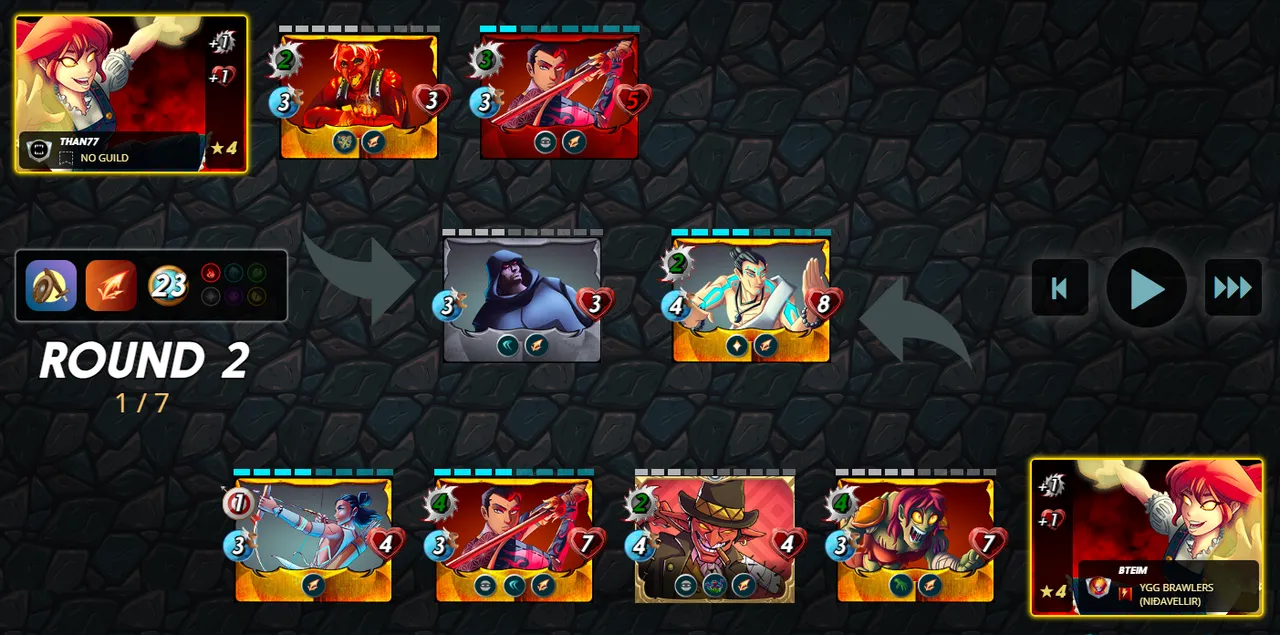
Do note that although the screenshot below says "Round 2", this is actually just after the ambush phase of the battle - the Splinterlands UI seems to have started to behave a little strangely with the release of Rebellion and its new game mechanics. Right off the bat, my Goblano Soldier is able to get its ambush off and pin some damage on the opposing Tenyii Striker.
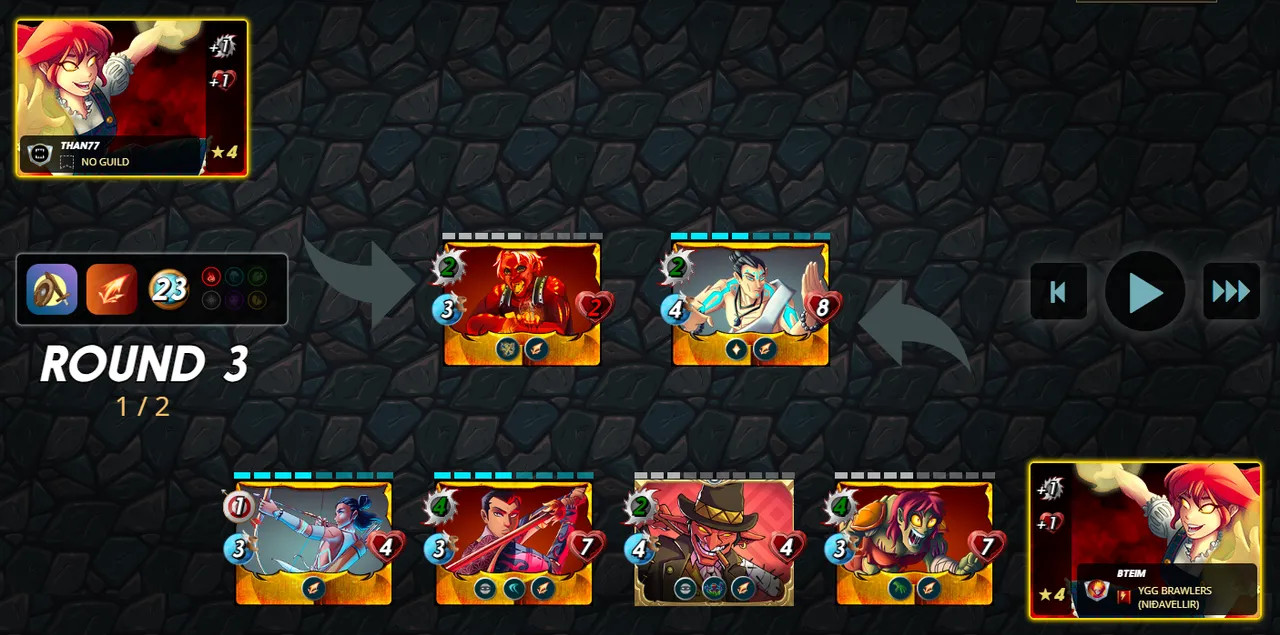
After just a single round of full-on attacks (in addition to the ambush phase), it is clear that the enemy team is outmatched. The enemy Tenyii Striker goes down, as well as the Chaos Agent. All that remains on the other side of the battlefield is a Radiated Scorcher, and even that one is heavily damage. One more quick attack and I claimed my victory. And again, if you wanted to see the whole battle for yourself, you can see it right here.
This battle was not particularly competitive, and it highlights the importance of paying attention and spending all of your mana wisely. I am not sure why my opponent submitted the team that they did - maybe they tried changing their monsters and ran out of time, maybe they didn't have enough high level Fire cards and wanted to avoid a RP penalty, or maybe they were using a bot and it had a glitch. Whatever the reason, it resulted in the enemy team effectively being forget to battle with one hand behind its back, and that is an incredibly difficult position to win from. Don't give up those easy wins - be sure to fill in your teams as much as you can!

Thank you so much for reading all the way to the end. Interested in seeing some more of my writing in the future? Be sure to give me a follow! In the meantime, if you'd like to see some of my recent posts:
Shiny and New - Taking Rebellion Out For a Spin - A Splinterlands battle analysis, featuring the brand new Rebellion cards!
Eyes On the Prize - Setting your Splinterlands Goals - Starting out in Splinterlands? Be sure to come up with a plan!
Rebellion Sale Plans and Goals - My plans and goals as we approach the Rebellion release!
Thinking about giving Splinterlands a try but haven't signed up yet? Feel free to use my referral link: https://splinterlands.com?ref=bteim, and be sure to reach out to me if you have any questions!
All images used in this article are open source and obtained from Pixabay or Unsplash. Thumbnails borrowed with permission from the Splinterlands team or made in Canva.