In the spirit of the new weekly Battle Mage Secrets challenges, I would like to take a look at a Splinterlands battle with a particular focus on a ruleset. In this battle, we will be taking a look at one of those rulesets that go ahead and removes some of the things that make some Splinterlands battles fun. In this case, I am referring to the rather large categories of ranged, magic, and attack-less monsters. While this can often make a battle more boring by eliminating the possibility of particular strategies, it also shakes up the typical meta and gives you a slightly different battlefield to work with. Today, we will be taking a look at a battle with the Up Close and Personal ruleset!
In case you have forgotten, the Up Close and Personal ruleset makes it so that only monsters with melee attacks are eligible for the battle. This is great for melee attackers, and awful for monsters with ranged or magic damage, or with no attack at all. The winners of Up Close and Personal include monsters with abilities that impact melee, such as Demoralize, Thorns, or Shield. Melee monsters with abilities that allow them to attack from the back of a lineup, such as Sneak, Opportunity, Reach, or even a second attack type are also great in Up Close and Personal since those are the only ways to be able to attack with more than a single monster per turn. Oh, though before we get too far into it I should probably mention - those abilities? Yeah, they won't be coming into play very much in today's battle!
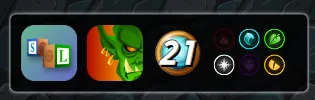
If you wanted to jump right to the action, the Battle Link is right here. Want to hear some more about the lineup? Read on further!
First up: the ruleset. This is a relatively "boring" ruleset, because the combination of Back to Basics and Up Close and Personal means that the battle will pretty much consist of the front line monsters on each team taking turns attacking each other. It does, however, shift the emphasis of the battle to a different area than we would normally see - instead of caring about abilities and types of attacks, the focus is instead on pure stats and cost efficiency.
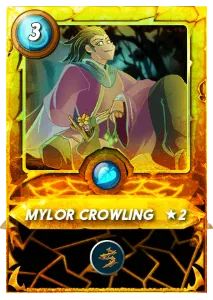
Back to Basics eliminates all of the monster abilities. A crucial part of that ruleset is that it still allows you to use your summoner abilities. Remembering that we are playing this battle with Up Close and Personal, this makes Mylor Crowling an amazing choice for this battle. Thanks to the ruleset combination each side gets just a single attack per round, baring any monster deaths. Thorns from Mylor's summoner ability essentially gives all of my monsters a second attack each round, tilting the numbers game in my favor.
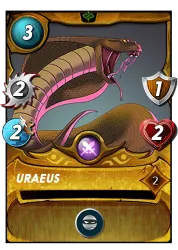
Keeping in mind that the name of the game is maximizing monster stats and mana efficiency, I wanted to select the monsters that give me the biggest bang for my buck. Fingus Fiend is amazing in this battle because it doesn't cost any mana at all to bring into the fight - pure added value! It doesn't pack a whole lot of attack or health, but for a free card I really don't expect much at all. Uraeus is another cost-effective monster. While it is also relatively fragile, it also has a point or armor, which has a decent chance of helping it to survive an extra hit.
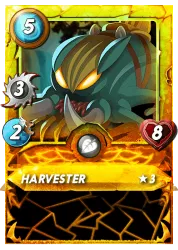
Next up were some of the heavier hitters on my lineup. Hill Giant is a bargain, with 2 attack and 7 health for the low, low price of just 3 mana. Harvester costs a bit more at 5, but pairs 8 health with 3 attack. Add on the fact that every one of my monsters will be gaining the Thorns ability from Mylor, and this is a lineup that won't go down easily!
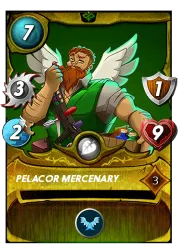
Closing out my lineup was Pelacor Mercenary. He has the best stat line out of my whole team, though he had a mana cost to match it. With the ruleset combination for this battle promising to be a slugfest, I wanted to be able to finish strong!

With the lineup set, it's off into battle! When I see the selected teams I am encouraged by what I see. Unfortunately, my opponent has also brought a team with Mylor Crowling into the fight, which means that there will be Thorns damaging on all sides. However, upon closer examination, at least a couple of my opponent's monsters have a fairly high cost considering their stats, which means that my team appears to have a bit of a bulk advantage. Will it pay off? We'll have to see!
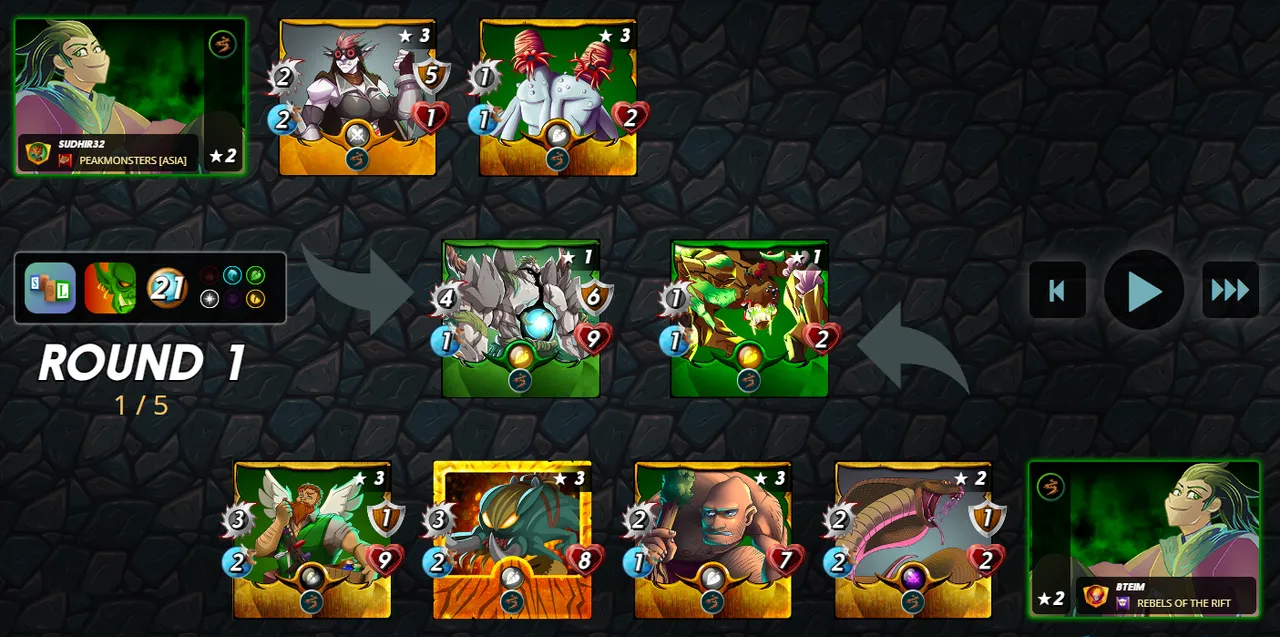
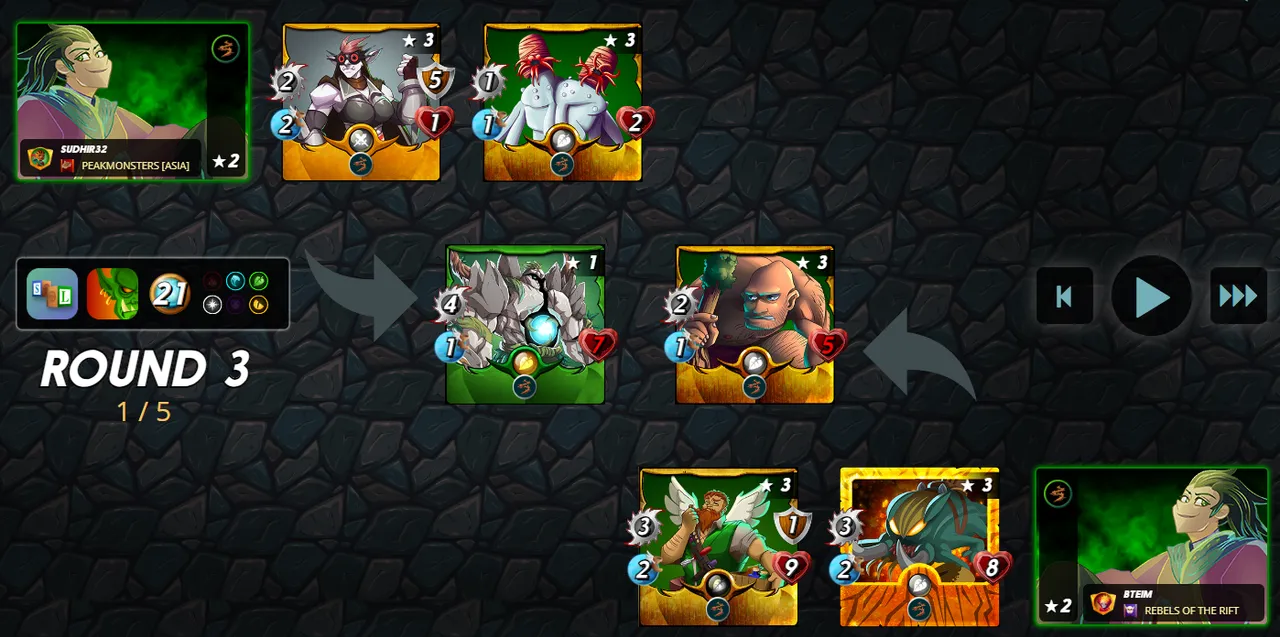
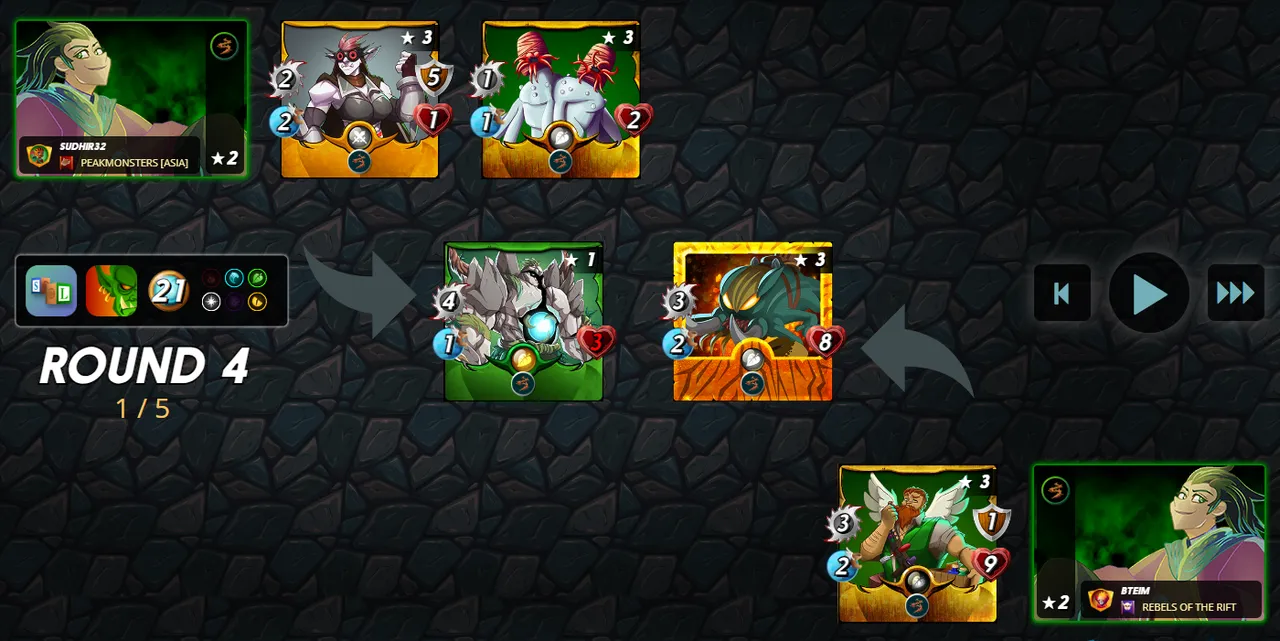
In the first couple of rounds the fight plays out just about the way I expect - the front line monsters duke it out, while everyone else just stands around. Thanks to Thorns at least, the battle is going a bit quicker than it would have otherwise. By the start of round 3, my weaker frontline monsters have been eliminated, but have dealt heavy damage to my opponent's main tank.
Another round and I am down to just a pair of monsters remaining - but the enemy tank is about to bite the dust.
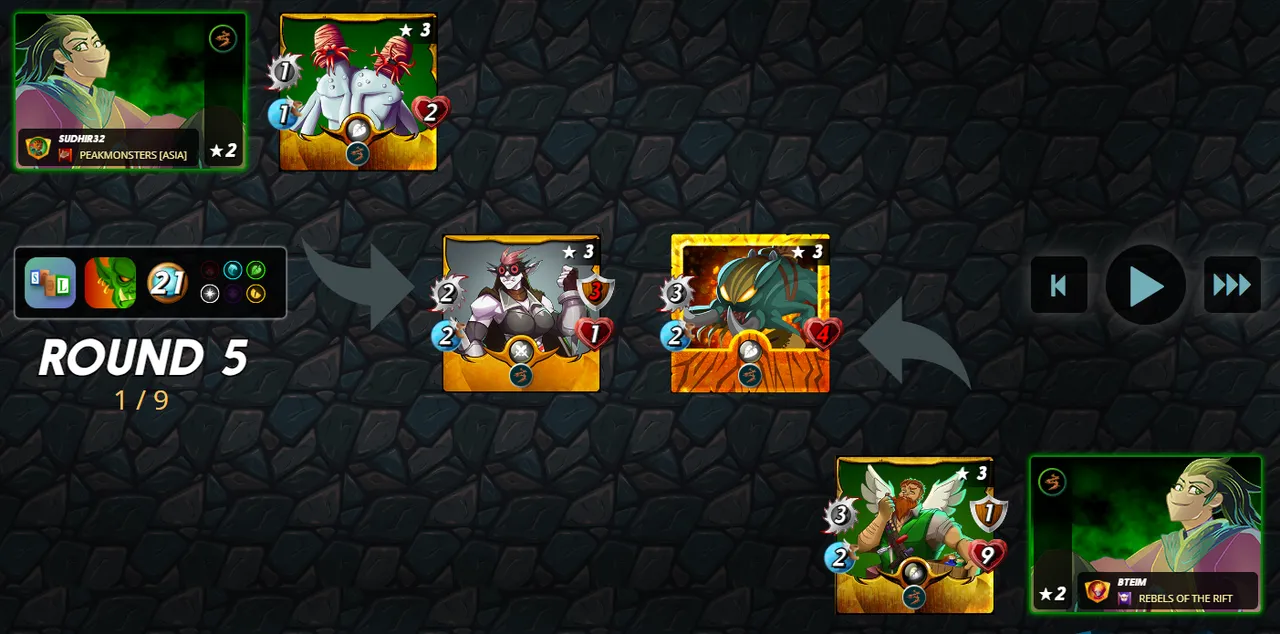
By the start of round 5 there are still several monsters left on the field. B if you look closely, you can see that the pieces are actually all set up for the battle to be done by the end of this round. One more exchange of attacks and Thorns damage and my team is able to pull off the victory! And again, if you wanted to see the whole battle for yourself, you can see it right here.
My strategy for this fight worked out perfectly - an emphasis on summoner abilities and cost efficiency was more than enough to come away with the win. The battle had a ruleset combination that was not so flashy, but careful attention to which monsters are the most relevant paid off in the end.

Thank you so much for reading all the way to the end. Interested in seeing some more of my writing in the future? Be sure to give me a follow! In the meantime, if you'd like to see some of my recent posts:
No Llama Drama - Battling with Fire and Regret! - A Splinterlands battle analysis, featuring Fire and Regret!
Splinterlands Economics: Causation - A look at causation, and how we can apply it to Splinterlands!
Splinterlands Economics: Ceteris Paribus - An introduction to the concept of Ceteris Paribus, and how we can apply it to Splinterlands!
Thinking about giving Splinterlands a try but haven't signed up yet? Feel free to use my referral link: https://splinterlands.com?ref=bteim, and be sure to reach out to me if you have any questions!
All images used in this article are open source and obtained from Pixabay or Unsplash. Thumbnails borrowed with permission from the Splinterlands team or made in Canva.