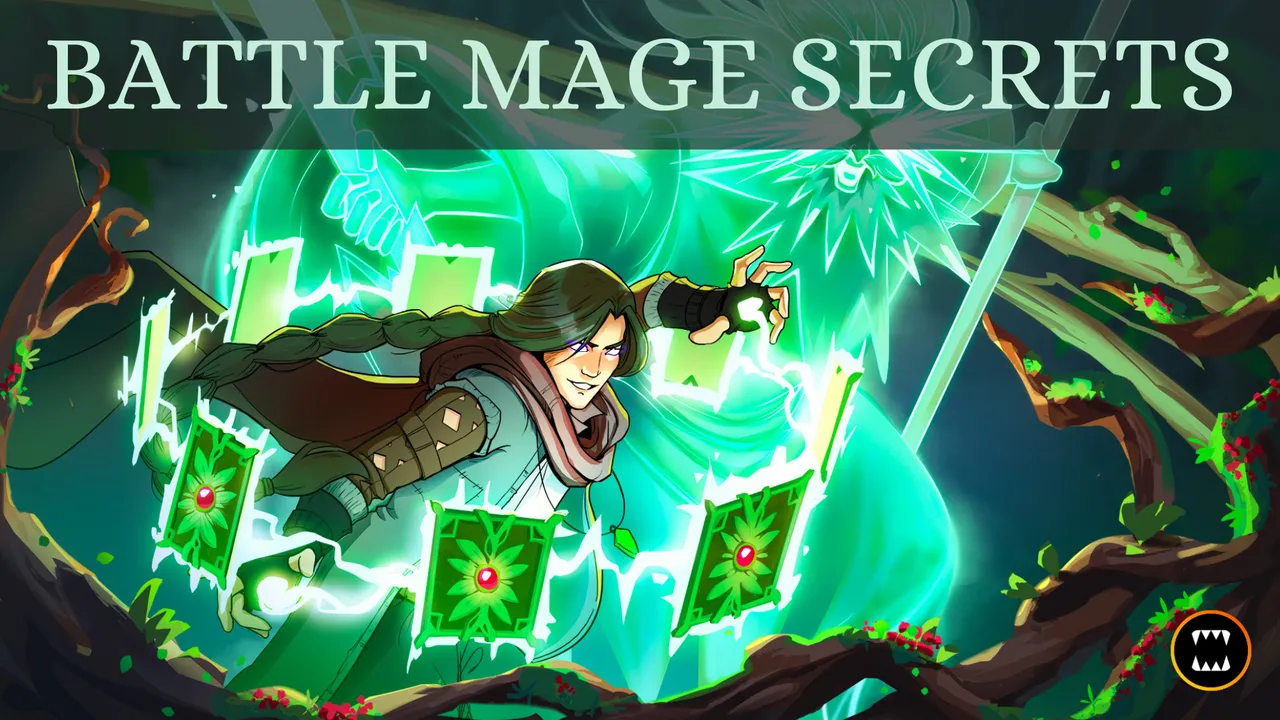
This week's Battle Mage Secrets challenge features the Earthquake ruleset! Earthquake is one of the rulesets that were one of my least favorite ones to deal with as a new player, but it has gotten more manageable as my collection and set of strategies have grown. In this battle I will be showcasing a few monsters (and one summoner) that really shine in this ruleset.
Earthquake is a ruleset that is a "soft" counter in that it deals some damage to specific monsters, but the annoying part is that it deals that damage to a large portion of the monsters that you have to choose from - everything WITHOUT the Flying ability. Every monster lacking Flying will take two physical damage per turn. The obvious winners here are monsters with Flying. But there are a few other good choices here - monsters that give your team additional armor, can provide some healing, or that take less physical damage due to Shield can be great options in the Earthquake ruleset.
If you wanted to jump right to the action, the Battle Link is right here. Want to hear some more about the lineup? Read on further!
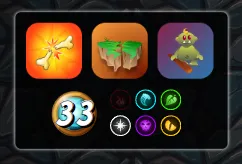
First up: the ruleset. This is honestly one of the more annoying ruleset combinations you can run into. The biggest one here is (as expected!) Earthquake. With Earthquake in play, any monsters had better either have Flying or plenty of health or they won't be sticking around for long. Unfortunately, we also have Tis but Scratches and Little League in this battle. That means that we can only bring cheap (i.e., generally weak) monsters, and the ones that do come into battle will be losing max hp quickly thanks to every monster gaining Cripple.
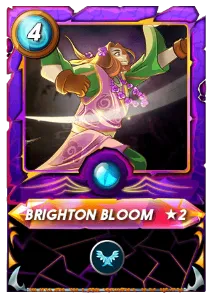
In battles with Earthquake, Brighton Bloom is always a summoner worth strong consideration. Brighton gives all of your monsters Flying, which means that they won't be taking that 2 damage from Earthquake every turn. Of course there are still all of the enemy monsters that you have to deal with, but that is one less thing to worry about and gives you the flexibility to design a more defensive team oriented to outlast the opposing lineup.
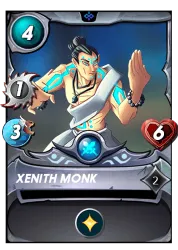
I started my team with my tank and secondary tank. Hill Giant and Xenith Monk are two great tanks that you can get in the Little League ruleset. Hill Giant has a solid 2 melee attack paired with a very respectable 7 health. Xenith Monk is right behind with 6 health, as well as Heal. In Earthquake battles this is normally enough to counteract the Earthquake damage, but since I also brought Brighton that healing will be able to offset some of the enemy attacks.
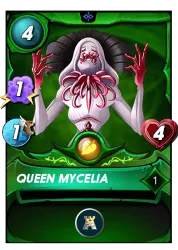
The middle of my lineup had a mix of damage and support. Goblin Thief is a great Sneak-y attacker, hitting the opponent's back monster for two per turn - and in Little League fights, two damage is great! Queen Mycelia pitches in a bit of magic damage, and also grants my entire team some additional armor with Protect. Similarly to Xenith Monk, she is a monster who is ordinarily already good in Earthquake, but with my summoner of choice she becomes another way to help me play defensively and let Earthquake do more work on the enemy team.
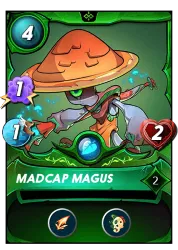
We'll round out our team with some more damage. Iza is the rare ranged attacker that can hit the back monster thanks to Sneak. She also has Scavenger, which means that she gains health as more monsters leave the battlefield - and with Earthquake in play, my hope is that there will be plenty of monsters leaving the field! Madcap Magus is somewhat similar in that it will get stronger with additional health as the battle progresses. Only, instead of gaining it as monsters die, it is from attacks with its Life Leach ability. Really, my hope is that neither of these will end up at the front. But if they do and it is late in the battle, then they should be very tanky for their mana cost.

With the lineup set, it's off into battle! When I see the selected teams I am hopeful - my opponent has only brought a single monster with Flying into the fight, and it is positioned in their very first slot with no attacks. This means that my team will be able to sit back in the defensive position I have selected, push out its indirect attacks, and let Earthquake do the rest.
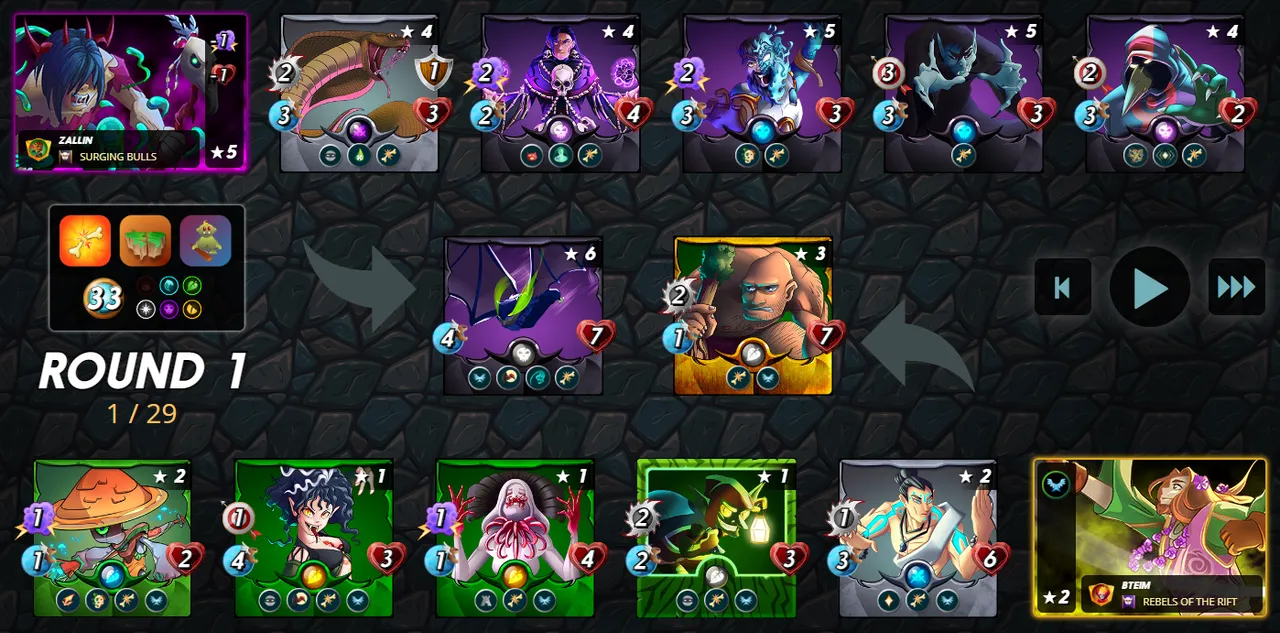
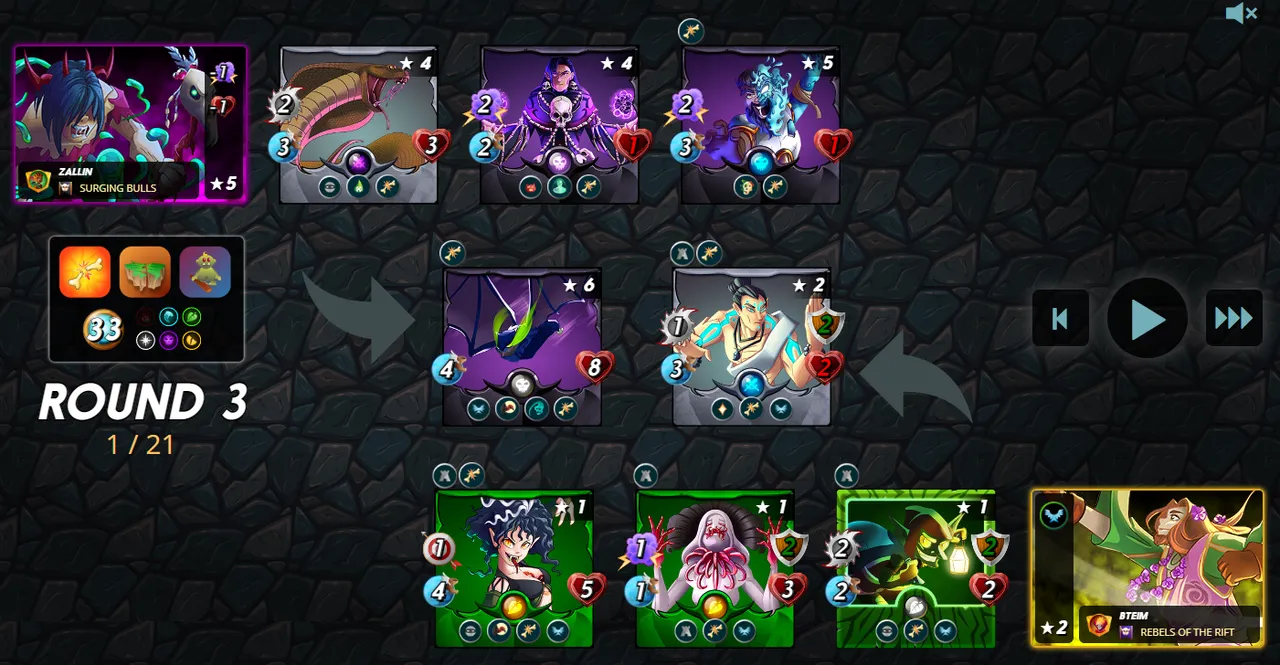
In the first round of battle things go about the way I expected - Hill Giant goes down quickly, but my monster's Sneak and Scattershot attacks chip away at the enemy monsters, and the first batch of Earthquake damage is about to take its toll on the opposing team.
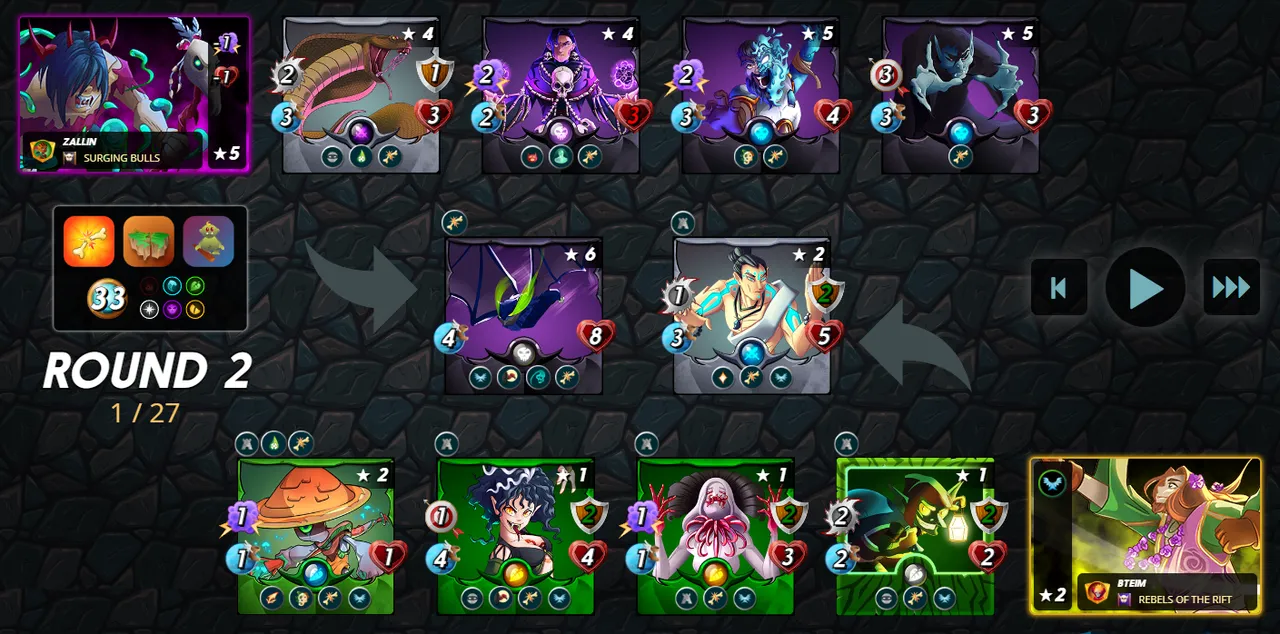
One more round and the battle is nearly won - recall that Earthquake damage is applied at the start of every round after the first one. So the Revealer and Life Sapper are dead men walking (or monsters, rather) - they'll be gone as soon as the third round begins. With the only remaining enemy attacker being Uraeus, things are looking rather good for my team.
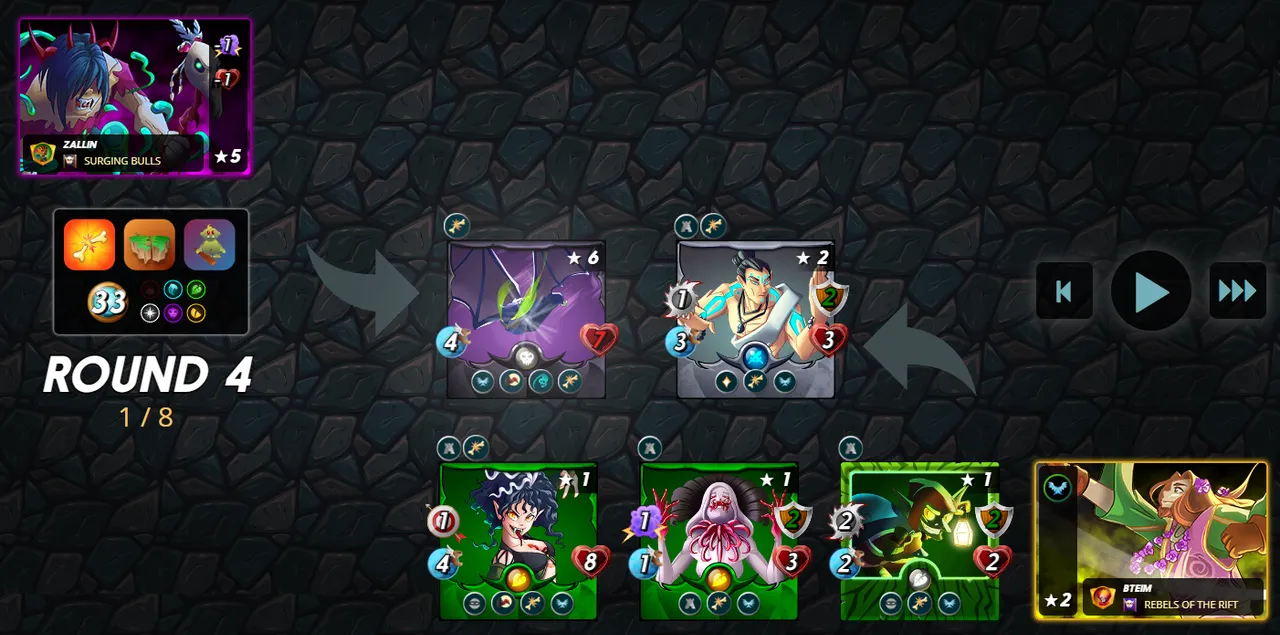
This battle actually finished in the fifth, but by the start of round 4 the battle was decided. My opponent's Riftwing stood alone against my remaining 4 monsters. While Riftwing could potentially do a bit of damage thanks to Backfire, Queen Mycelia with her magic attack was guaranteed to hit. And again, if you wanted to see the whole battle for yourself, you can see it right here.
Earthquake battles can be tricky to deal with, but can become quite a bit easier with the right summoners or monster abilities. While this battle presented a difficult set of rulesets to work with, Brighton Bloom and a team of defensively oriented monsters placed my team in a great position to win the battle by outlasting the enemy monsters.

Thank you so much for reading all the way to the end. Interested in seeing some more of my writing in the future? Be sure to give me a follow! In the meantime, if you'd like to see some of my recent posts:
Hocus Pocus - Battling with Counterspell! - A Splinterlands battle analysis, featuring Counterspell!
Splinterlands Economics: Causation - A look at causation, and how we can apply it to Splinterlands!
Splinterlands Economics: Ceteris Paribus - An introduction to the concept of Ceteris Paribus, and how we can apply it to Splinterlands!
Thinking about giving Splinterlands a try but haven't signed up yet? Feel free to use my referral link: https://splinterlands.com?ref=bteim, and be sure to reach out to me if you have any questions!
All images used in this article are open source and obtained from Pixabay or Unsplash. Thumbnails borrowed with permission from the Splinterlands team or made in Canva.