This week's Battle Mage Secrets challenge features the Unprotected ruleset! In battles with Unprotected, you can leave your armor at the door. That's right - no armor at all, regardless of the source. It doesn't matter if that armor comes from a monster's base stats, a monster ability, or a summoner - in these battles it won't have any effect on the battlefield!
Unprotected seems to be a fairly straightforward rule, but its full effects have some additional nuances. Clearly, any monster or summoner with an armor stat or the Protect ability loses out in these fights. You can still use them, but you are effectively paying a mana cost that is higher than it should be due to armor being removed by the ruleset. Similarly, monsters with Repair, Void Armor, and even Shatter are less impactful in Unprotected, since their abilities don't have any armor to work with.
If you wanted to jump right to the action, the Battle Link is right here. Want to hear some more about the lineup? Read on further!
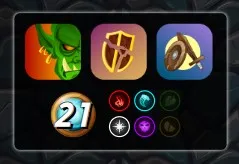
First up: the ruleset. Of course, we have the Unprotected rule, which means that all sources of armor are negated for this battle. To go along with it we also have Up Close and Personal and Rise of the Commons, which together mean that we are only able to select melee monsters with a common or rare rarity for this fight. Finally, we have a medium-lowish mana cap of 21 mana, and 4 different splinters to choose from.
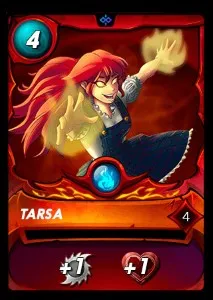
When I saw Up Close and Personal, one of my first thoughts was that Tarsa would be a strong summoner in this ruleset. Tarsa is great with melee monsters, and with Up Close and Personal we know that we can ONLY select melee monsters. This means that Tarsa's buffs to melee attack and health will have their maximum effect on our team.
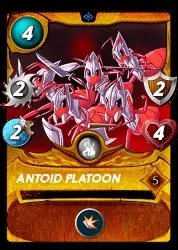
I started my team with Antoid Platoon. Antoid Platoon loses a little bit of value due to Unprotected stripping its armor, but the Shield ability is outstanding in Up Close and Personal. It is no slouch on the offensive side either, as 2 melee attack boosted to 3 with Tarsa is a bargain for just 4 mana.
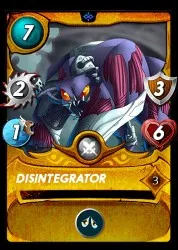
Disintegrator with its Demoralize ability is another card which is great in Up Close and Personal. It has decent stats for a melee monster, but its real strength in this lineup is how Demoralize will synergize with Antoid Platoon's Shield. Being able to lower all the enemy attacks and then cut them in half even on top of that is an incredibly powerful anti-melee combination.
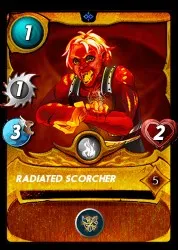
I closed out my team with some Sneak-y damage. Tenyii Striker can pick apart an enemy team from the back, while his Dodge ability also gives him a bit of durability if he ever comes under attack. My strategy for this battle was for Antoid Platoon and Disintegrator to hold the front while Tenyii Striker took out any weaker monsters at the back. Radiated Scorcher was thrown in as a meat shield - it wouldn't do any attacking from the back, but it could soak up a hit if my opponent had any Sneak or Opportunity attackers.

With the lineup set, it's off into battle! When I see the selected teams I feel pretty good about my chances. For some reason, my opponent has selected a summoner with armor as well as a monster with the Protect ability for an Unprotected rule battle! This means that they have likely overspent mana on their cards, and may have a team which is weaker for this particular fight.
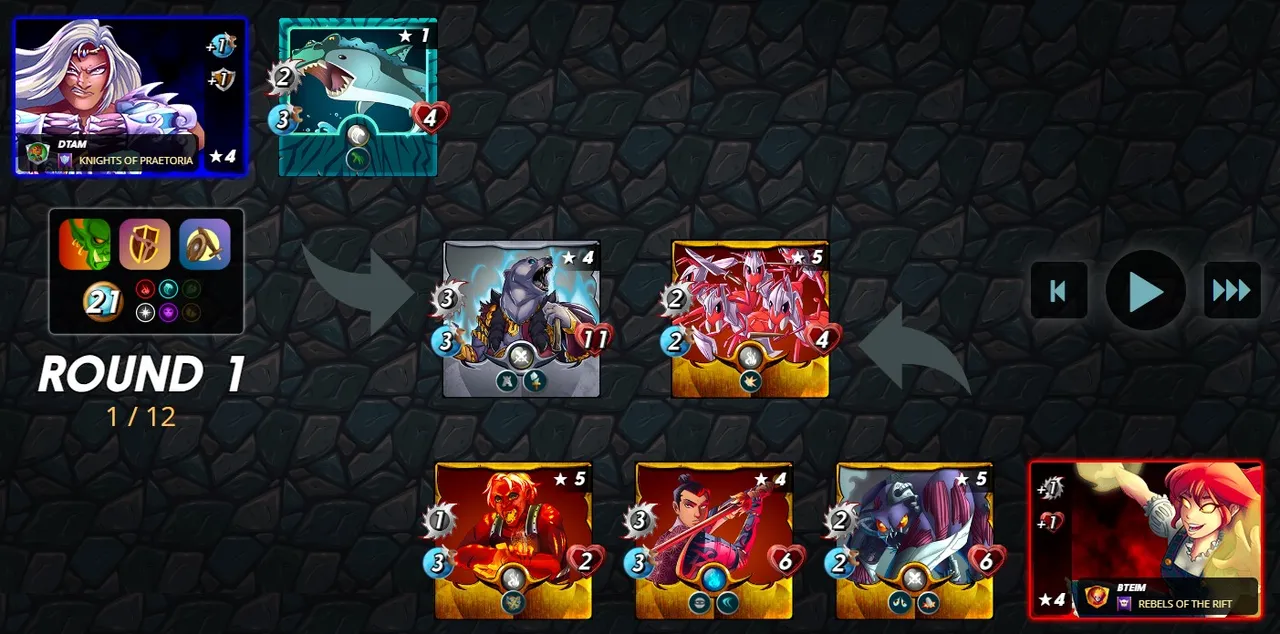
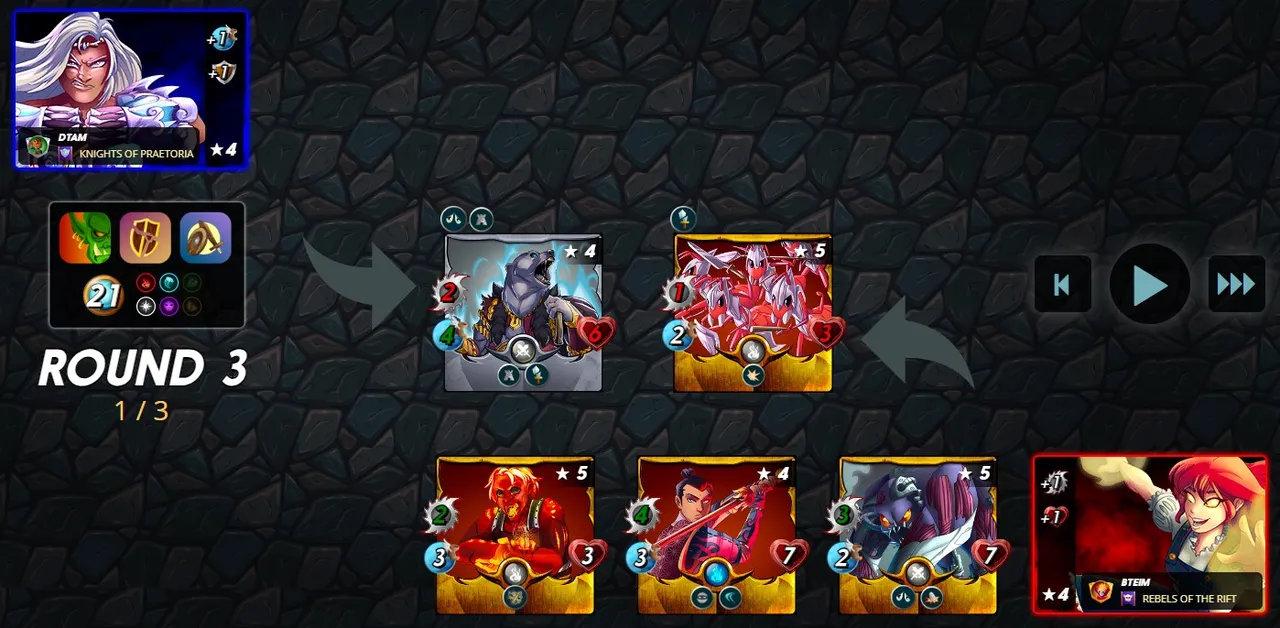
In the first round of battle it becomes apparent that my team is configured well to battle my opponent's lineup. Looking more closely at the monsters, my front line is sitting pretty, since the Demoralize and Shield combo will mean that my Antoid Platoon only takes a single point of damage each turn. And even after just a single round of battle, the only monster remaining on the opposing side of the battlefield is their Arkemis the Bear.
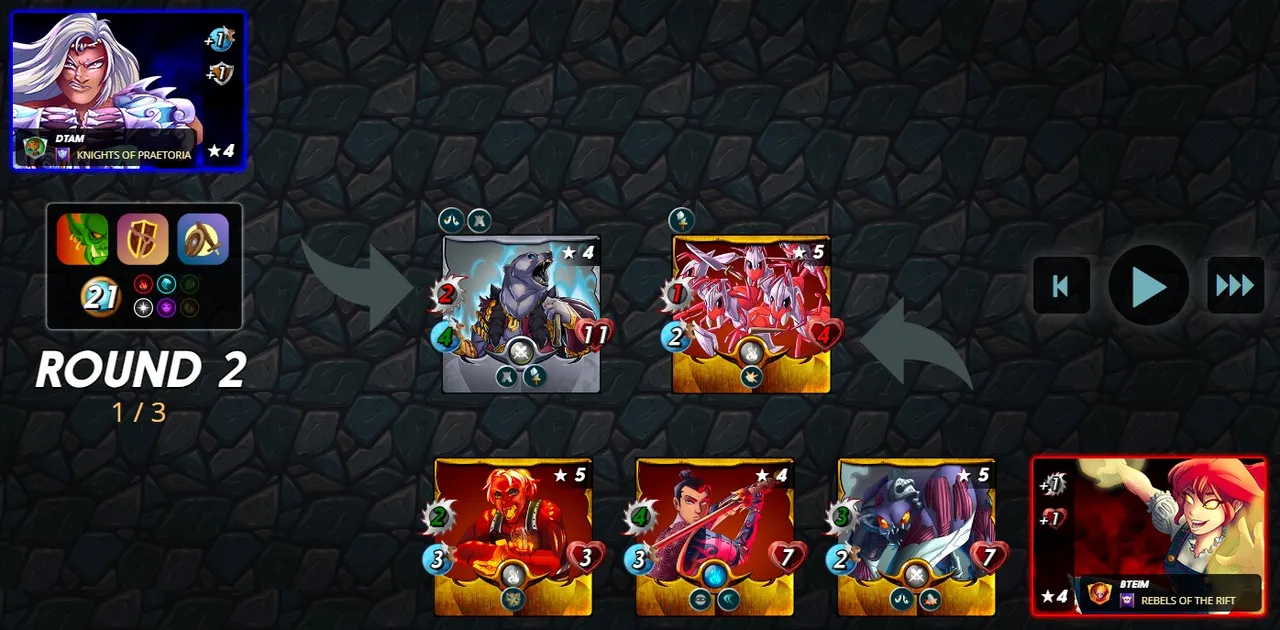
One more round and things continue to progress as expected - my Antoid Platoon takes only small amounts of damage, while Tenyii Striker contributes the bulk of the damage from the back.
By the beginning of round 4 the battle was just about over. My Tenyii Striker was poised to finish off Arkemis, and my team hadn't lost a single monster! And again, if you wanted to see the whole battle for yourself, you can see it right here.

My strategy for this battle worked out perfectly. Antoid Platoon and Disintegrator did an outstanding job of reducing the enemy lineup's damage output, and Tenyii Striker was able to sweep through the opposing team. This battle showcased the importance of playing to the ruleset - my opponent selected some cards which are normally very powerful, but had important elements stripped away by the Unprotected ruleset. This resulted in them overpaying for their lineup and ultimately bringing a team to the fight which was not able to stand up to my squad.

Thank you so much for reading all the way to the end. Interested in seeing some more of my writing in the future? Be sure to give me a follow! In the meantime, if you'd like to see some of my recent posts:
Eyes On the Prize - Setting your Splinterlands Goals - Starting out in Splinterlands? Be sure to come up with a plan!
Rebellion Sale Plans and Goals - My plans and goals as we approach the Rebellion release!
- Investing in a Changing Meta - Rebellion is Coming! - A few things to keep in mind as the Rebellion release approaches!
Thinking about giving Splinterlands a try but haven't signed up yet? Feel free to use my referral link: https://splinterlands.com?ref=bteim, and be sure to reach out to me if you have any questions!
All images used in this article are open source and obtained from Pixabay or Unsplash. Thumbnails borrowed with permission from the Splinterlands team or made in Canva.