Buen día artistas de Hive! He vuelto con los tutoriales y hoy quiero compartir con ustedes uno pequeño que hice recientemente, lleno de color y naturaleza. Les enseñaré paso a paso cómo pueden crear un hermoso prado con florecitas utilizando materiales que puede tengan en casa: acrílicos, colores y plumones. Esta técnica es perfecta si quieren relajarse un poquito pintando y darle un toque fresco y natural a su arte. ¡Espero que lo disfruten y se animen a intentarlo! 🌼🎨
Good morning, Hive artists! I'm back with some more tutorials, and today I want to share with you a little one I made recently. It's full of color and nature, and I hope you like it! I'm going to show you, step-by-step, how you can create a beautiful meadow with little flowers using materials you may have at home. You'll just need acrylics, colors, and markers. If you're looking to unwind while painting and give your art a fresh, natural feel, this technique is just what you need! I really hope you enjoy it, and I'd love for you to try it! 🌼🎨
PROCESO // PROCESS
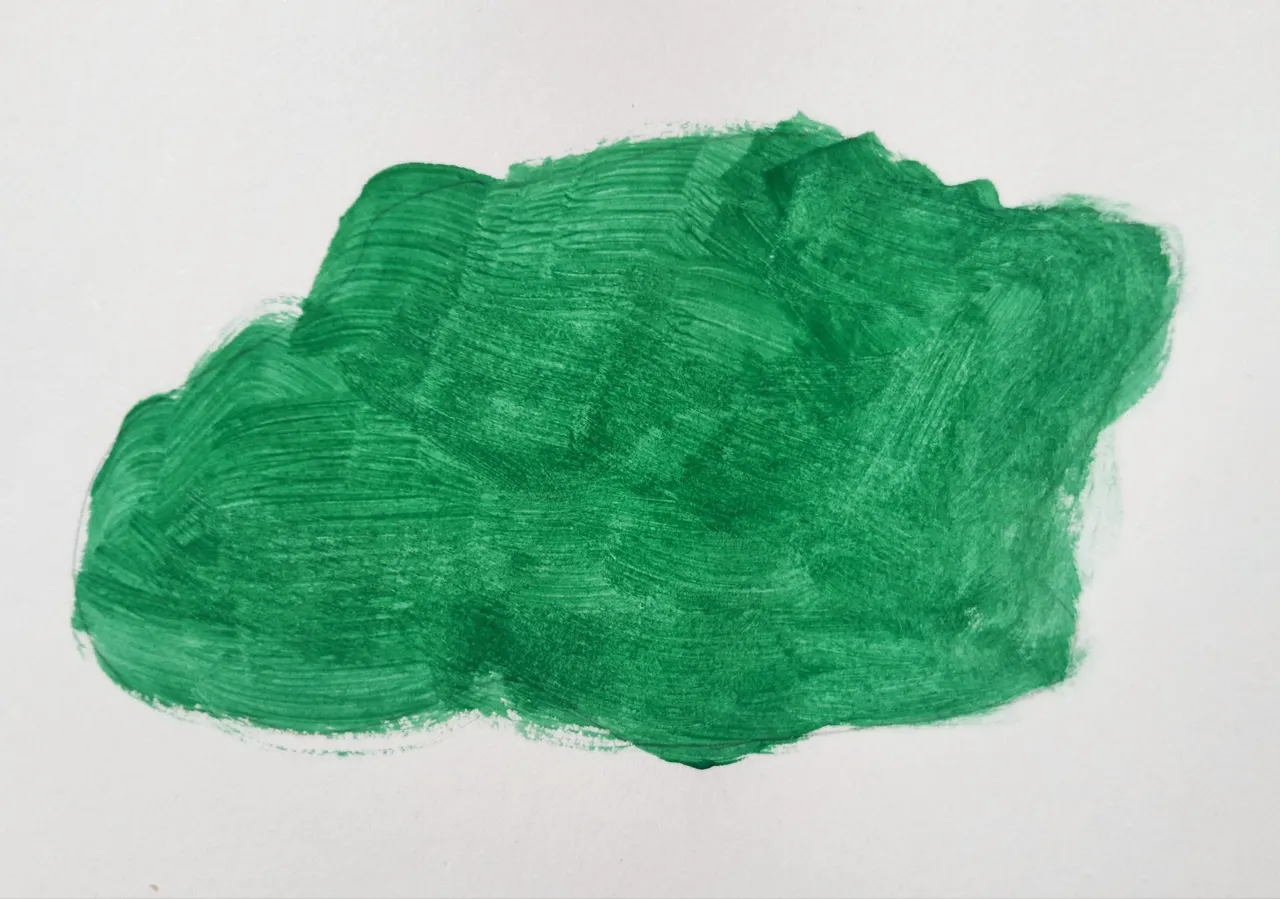
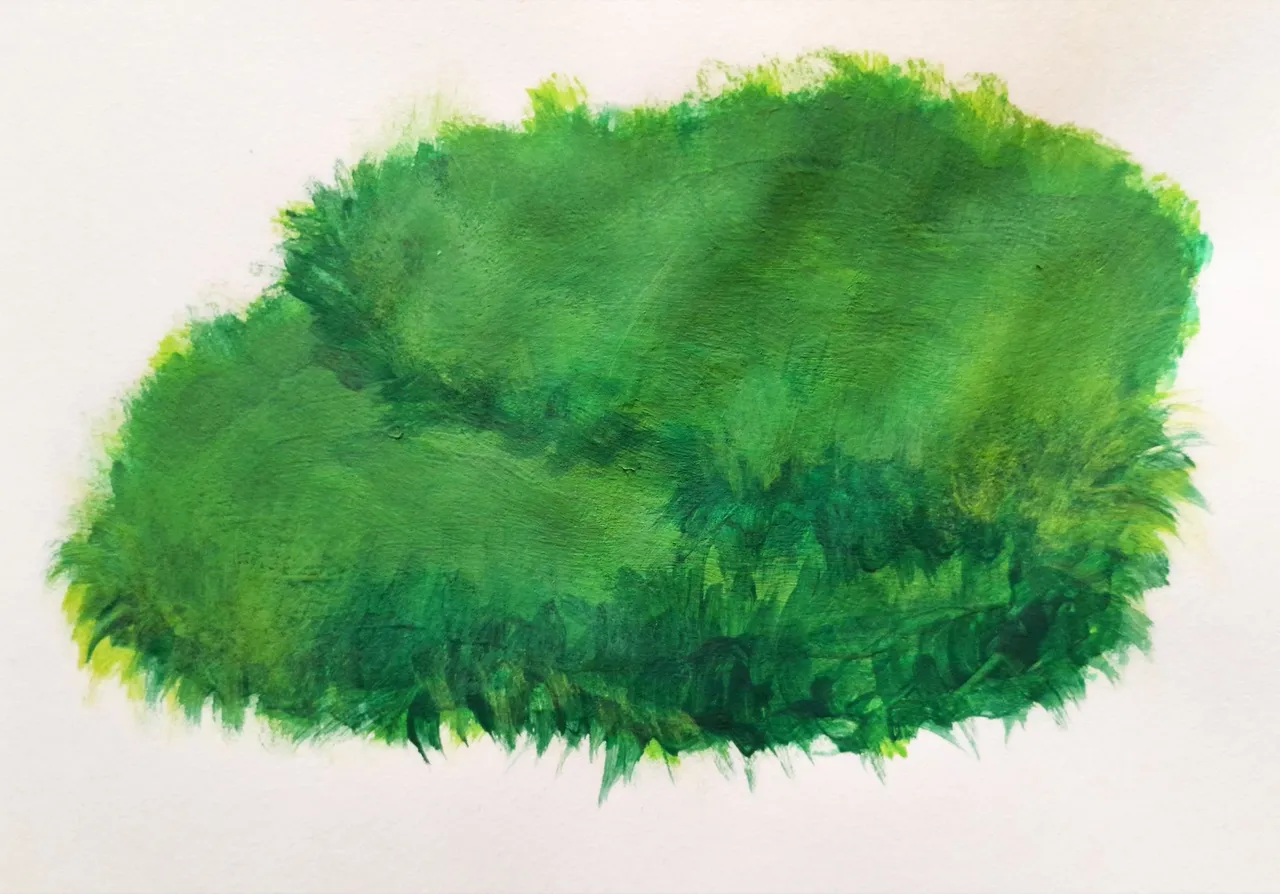
Para empezar, necesitamos un papel no muy delgado porque necesitamos que resista los materiales. Luego podemos empezar aplicando una capa de verde oscuro de forma irregular, pues todo depende de la forma que le quieran dar al prado.
To begin with, we need a paper that is not too thin because we need it to resist the materials. Then we can start by applying a layer of dark green in an irregular way, because it all depends on the shape you want to give the meadow.
Luego, agregamos un color verde mas claro, de la siguiente manera:
Then, we add a lighter green color, as follows:
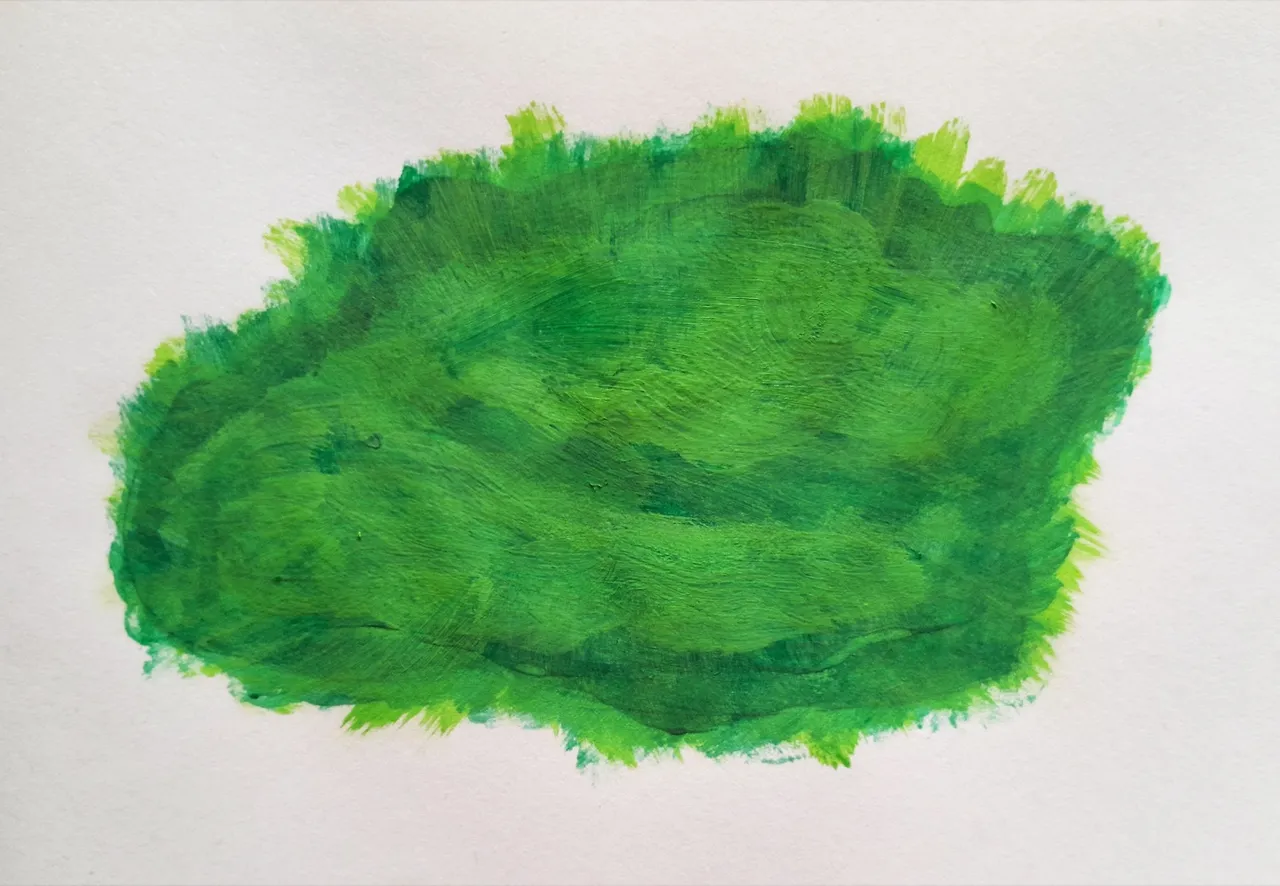
Aplicaremos ahora en toda la base un color verde limón, saliéndonos del borde a propósito para crear ilusión de pasto.
We will now apply a lime green color all over the base, purposely going off the edge to create the illusion of grass.
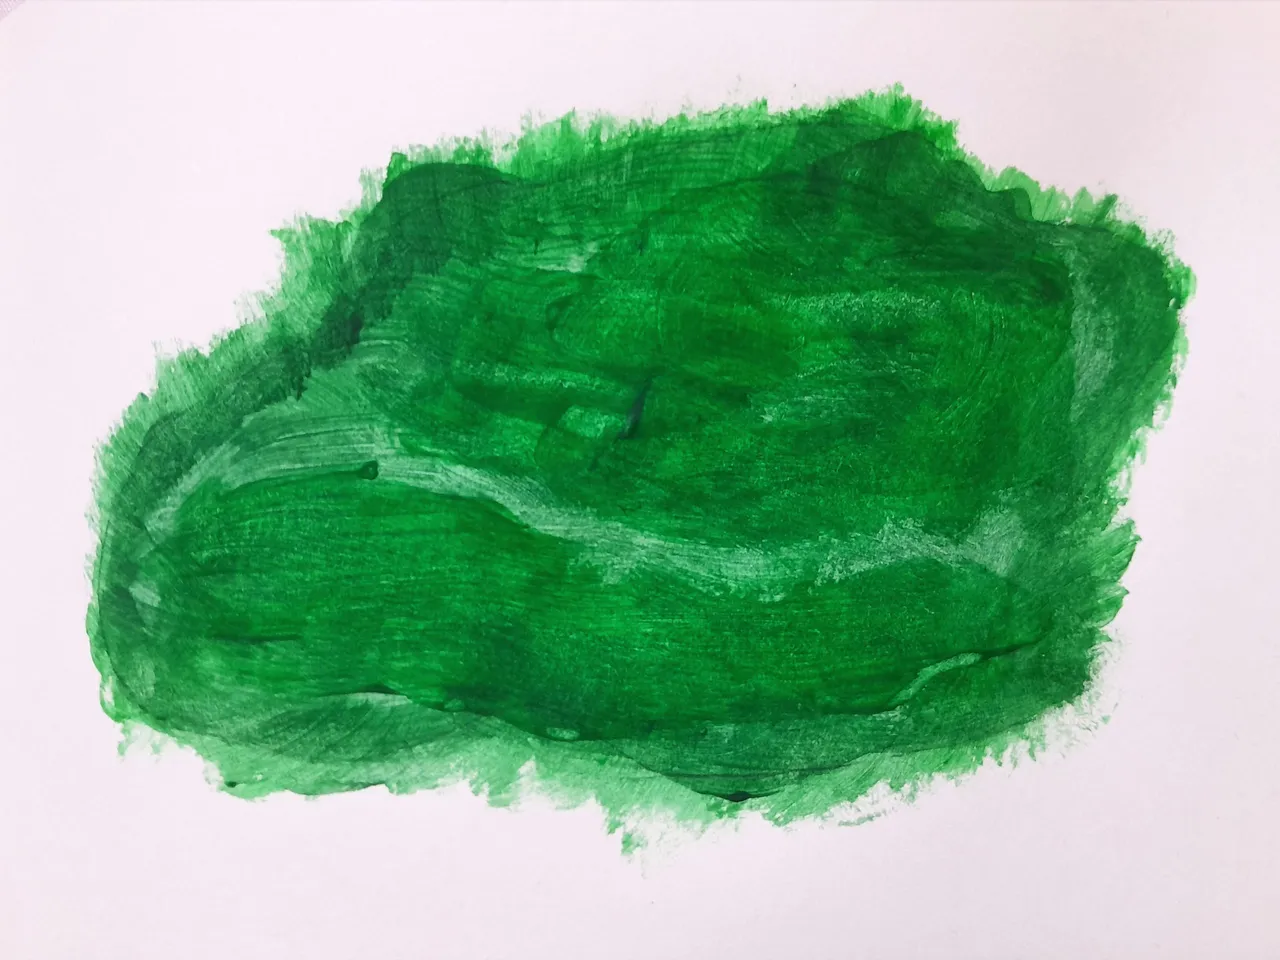
Llego la hora de dar dimensión a la ilustración y para eso agregaremos color verde oscuro (puede ser el primer tono que usamos) en zonas especificas, aquí se las muestro:
It's time to give dimension to the illustration and for that we will add dark green color (it can be the first tone we use) in specific areas, here I show them:
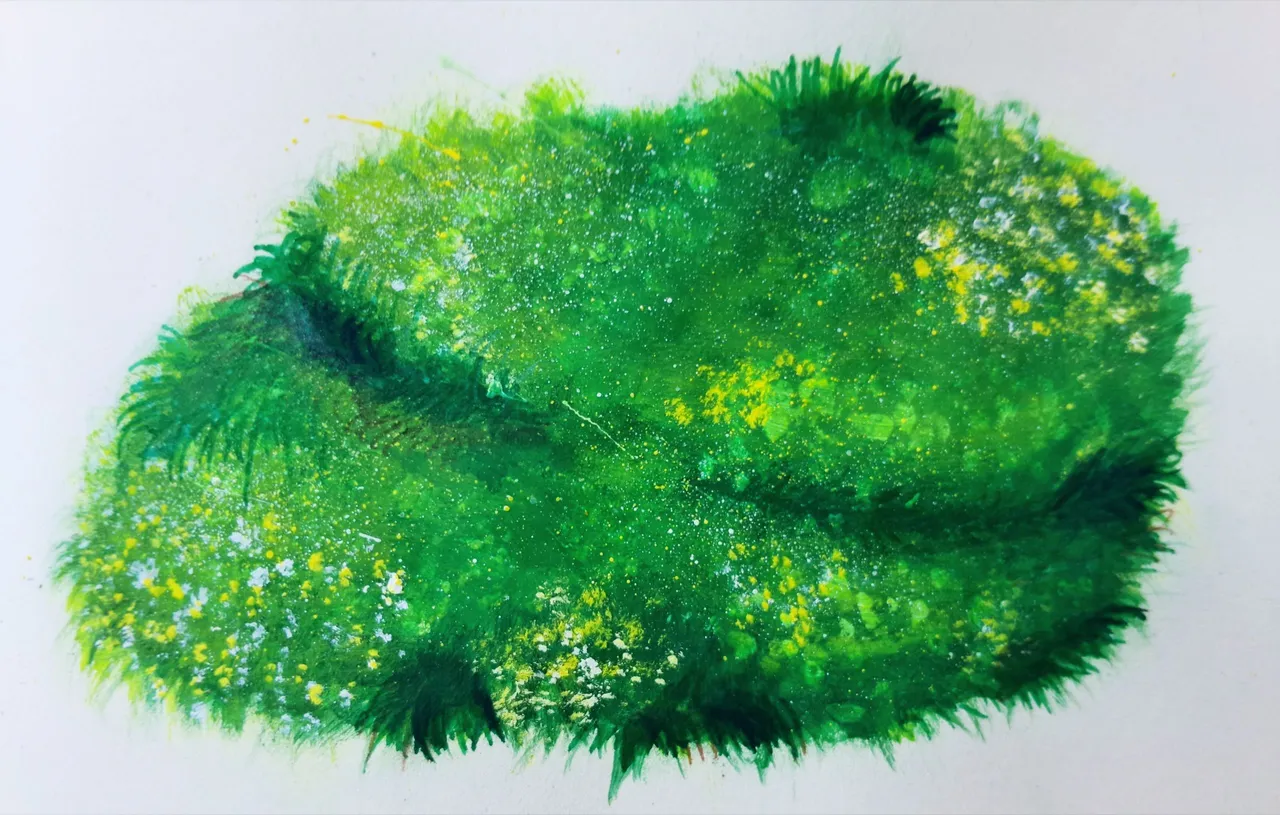
Con un pincel muy delgadito, aplicaremos puntitos de color amarillo y blanco en las partes que se quieran incluir las flores. Aquí utilicé la técnica de salpicado primeramente y luego si utilicé un pincel delgado para rellenar.
With a very thin brush, we will apply dots of yellow and white color in the parts where we want to include the flowers. Here I used the stippling technique first and then I used a thin brush to fill in.
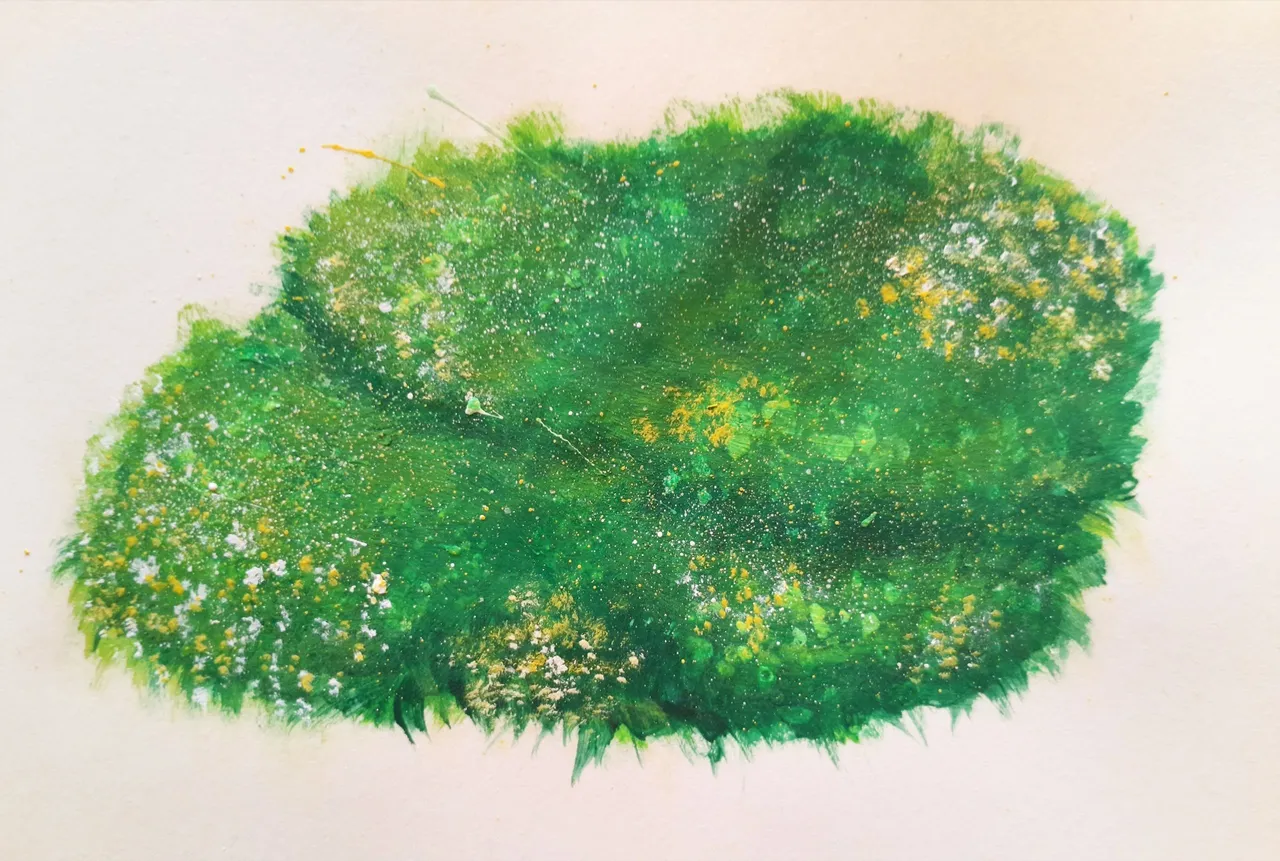
Como toque final, decidí agregar mas sobras utilizando plumones verde, negro y café. Utilicé plumones de agua para poderlos difuminar, y con los lápices de colores (amarillo y verde) agregué luz en algunas zonas.
As a final touch, I decided to add more leftovers using green, black and brown markers. I used water colors to blend them, and with the colored pencils (yellow and green) I added light in some areas.
Thanks for reading and watching.