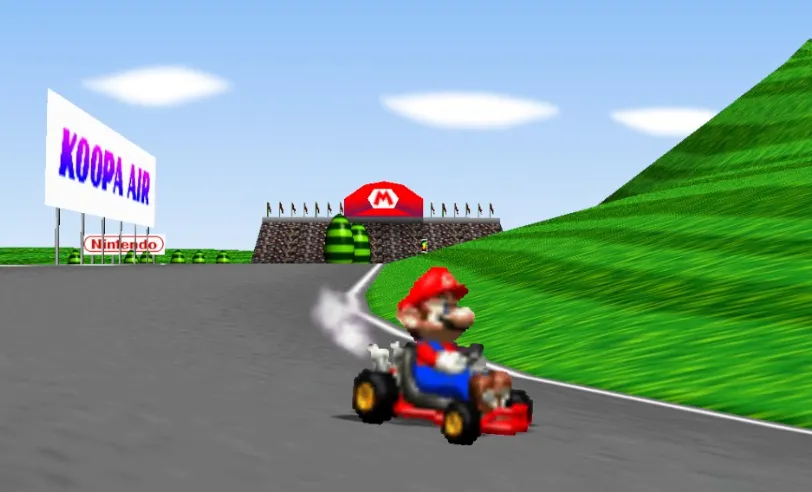

Well, you've read the title. Mario Kart World is finally out on the big brand new Nintendo Switch 2...but with how far away I am from the reach of one, I decided to sink my teeth into the older Mario Kart 64 game I hadn't played in a while.
And turns out Mario Kart 64 was one that, while I had played months ago for a quick lap at some RetroAchievements, I actually hadn't finshed going through the challenge of getting all 36 points in every 150cc cup, so...that's what I'll be talking about today.
Mushroom is easy, Flower not so much
Mushroom Cup in MK64 is fairly easy to perfect if you can keep attention at all times, since the tracks are simple and wide, giving you ample room to build drifts for miniturbos whenever needed. I did it in 150cc as Wario since there was an achievement for doing a 100/150cc 36 points run for Mushroom Cup with him, but again, it wasn't a big deal.
If anything, I already had beaten that cup before without touching any walls, which once again, is fairly easy because of the tracks being wide enough to not having to worry about them. I even had a chance this run to do the silly Koopa Troopa Beach shortcut.
Now, the Flower Cup? There's at least two troublesome tracks that will interefere with any attempts at a 36 point run - even when I was playing Toad to fill out another [beat Flower Cup with Toad and 36 points] achievement.
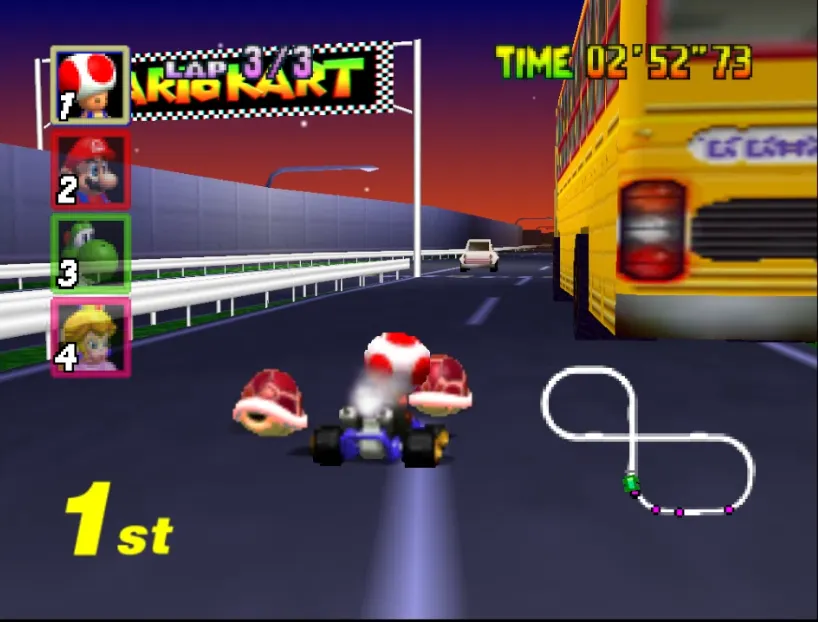
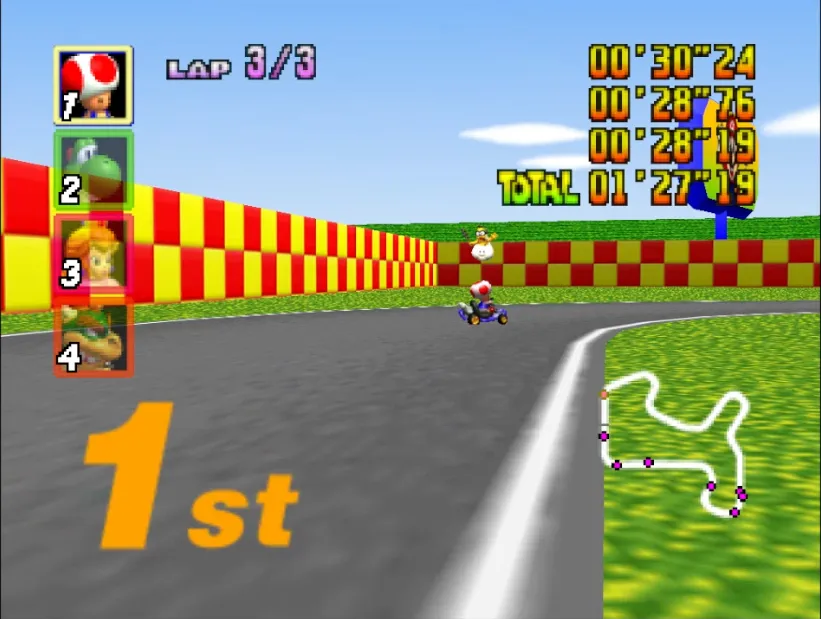
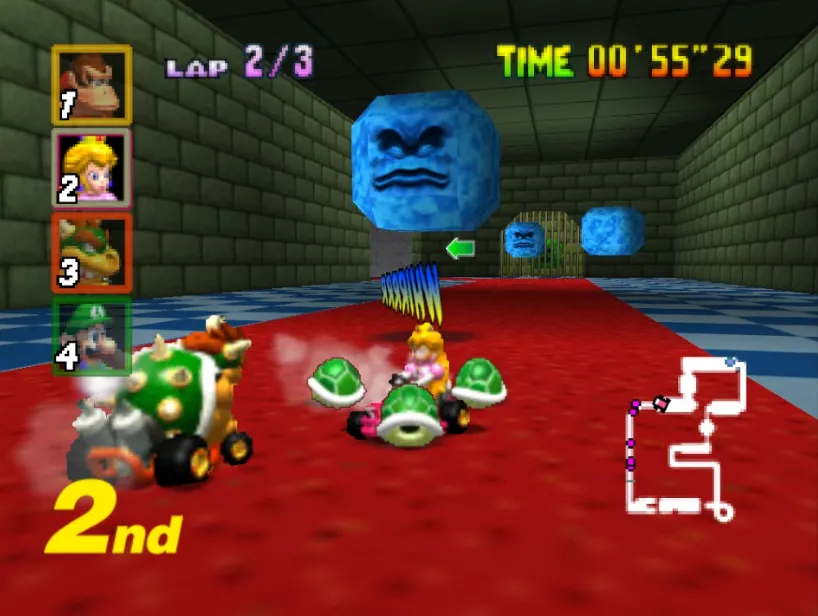
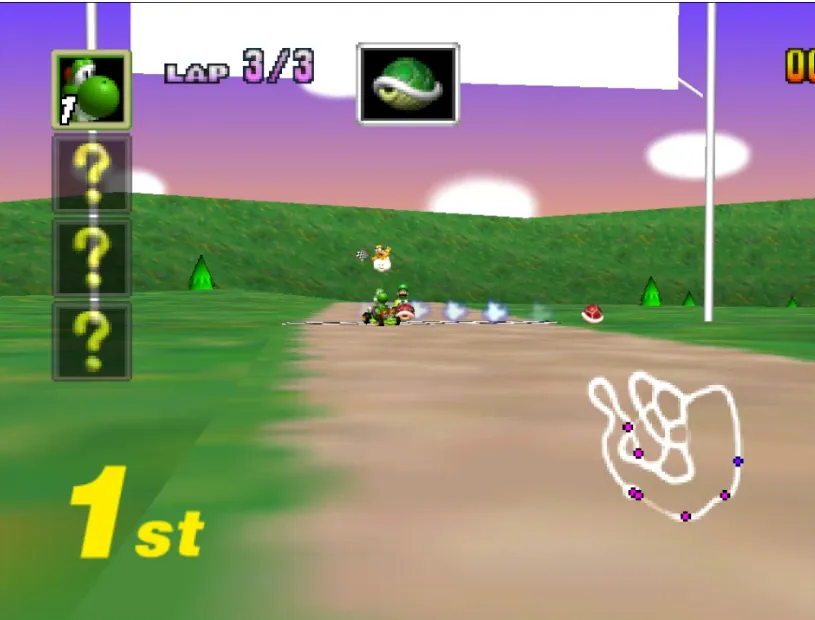
Toad's Turnpike is the first track of Flower Cup, and it is certainly one where you'll have to hold on to items smartly - trying to shoot down the CPU racers every time you have a chance to do them is a chance for them to fall behind, phase through any trucks you'd have to avoid off-screen and then keep up, while the possibility of not rolling a good item to deal with them again once they inevitably reappear being a legitimate threat to not getting 1st in this first race.
You can even see above how I was pretty much weaving between two big vehicles blocking the way in order to reach the finish line, only somewhat safe because of the triple red shells I was holding on [and even then, you can see the CPU right behind me on the minimap].
Now, while Frappe Snowland is a track that could also catch you off-guard if played wrong, mainly with the snowman obstacles and the hairpin turns near the end possibly eating up some of your time if handled wrong, it is certainly much easier to get 1st at consistently without a retry compared to what comes next: Choco Mountain.

As most of the track is walled and with thin roads, keeping up with the CPUs takes quite the skill when they can cruise through it effortlessly, les alone not bumping on walls and losing speed. Playing smart and holding to a item that can let you steal 1st in case a CPU is rubberbanding near the end is still key, as there often can happen to be cases where, right near the finish line, you either get overtaken by CPU...or the CPU has been on the front for a while but you can't overtake it no matter what.
I blame the Red Shells being particularly ineffective in this track for that as well, because unless you are on a straight with your target on sight, they will likely run off a wall for some reason.
And since you can't retry unless you get 5th or worse, I had to hit the brakes to let the other racers finish and retry. I had to reset twice to then get a race where I had a comfortable lead on the final lap to take 1st.
Oh yeah, that's something I should address now: Using the Retry feature.
While I could have set myself a challenge to do all four cups without retries, I decided to allow myself to use it as soon as I ran into the first chance to do so, not only because I felt like I should get more practice in all of the tougher tracks before...but also because I was unsure how much trouble some of those would cause. And boy, Choco Mountain took me like three retries before I locked in the first place.
The biggest caveat is that you do have to brake yourself to a halt to let enough CPUs finish to take 5th and retry, which if you already had a bad run or fell off before the end of the final lap, shouldn't take much, but there IS something slightly humilliating about having to stop yourself from crossing the finish line the moment you see first place is no longer obtainable.
Well, time to move on the other two cups.
And before you ask, Mario Raceway was sort of easy. I did get a few scares of CPUs not wanting to fall behind, but I was able to get a fair lead on the final lap to secure the 36 points at Flower Cup.
Struck on the Star Cup by Thwomps
Wario Stadium is a kind of infamously long track, even though not AS long as Rainbow Road, but still a track that takes you more than 3 minutes to complete...but at least the wide roads in almost all places meant that staying ahead wasn't too difficult, so I got a first try first place there.
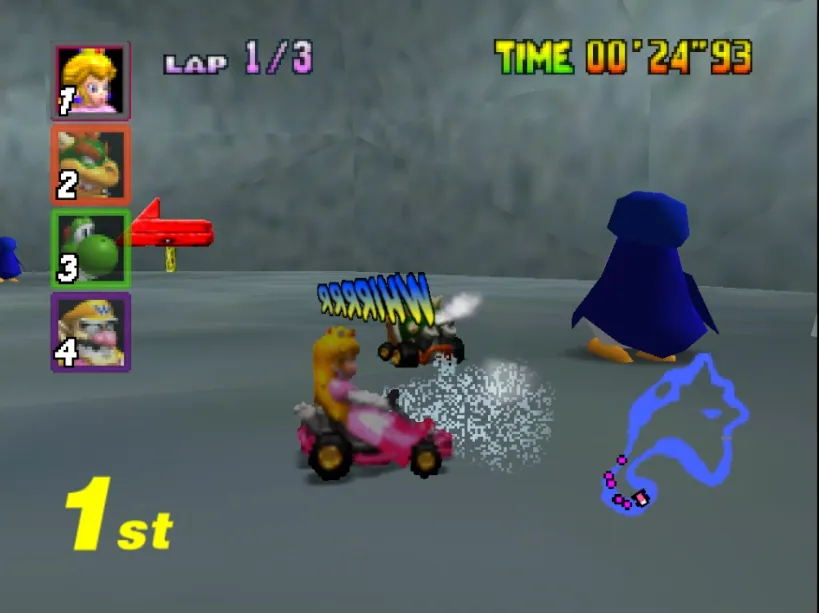
Sherbet Land is also mostly inoffensive, but note that there's always a risk when going into the cave, as you have to dodge a head-on collision with any of the walking penguins.
After that, there's Royal Raceway. Actually not that bad of a track to beat the CPUs at...but my first attempt on it had me do a mistake at the last uphill turns of the track, letting another racer get ahead and having to wait for 5th to be able to retry.
And...Bowser's Castle.
You may have guessed by the title of this section that the Thwomps were quite the annoyance on this one. Maybe not as serious as in Super Mario Kart's Bowser Castle and Rainbow Road tracks, but you certainly feel like you ran into a brick wall at high speeds anytime you accidentally crash into one.
Another race where it took me two retries to complete in first, but yet again another cup done

Special Cup got a specially fickle track awaiting
DK Jungle Parkway is, fittingly enough as the first track of the cup, the least threatening, but of course even that took me a few resets to get right first since I either ate the wall near the ending bridge or even failed to land over solid road after the big jump. Interestingly enough, the one run where I went through it with flying colors, I had hit a jump that I thought would have killed me - but it didn't, and led to a massive lead for me in the final lap.
Yoshi Valley is kinda funny. Was falling behind in Lap 2 until I rolled a Star and Lightning to stop the competition on their tracks, and at the start of the final lap I got lucky to roll Triple Red Shells to keep the CPUs at bay for the remainder of it.
I definitely underestimated Banshee Boardwalk A LOT before actually racing on it for the first time in a long time. It took me some retries to actually get a solid 1st Place in it, as in the other attempts I would fall off or get hit by something and miss the chance to catch up the first place racer.
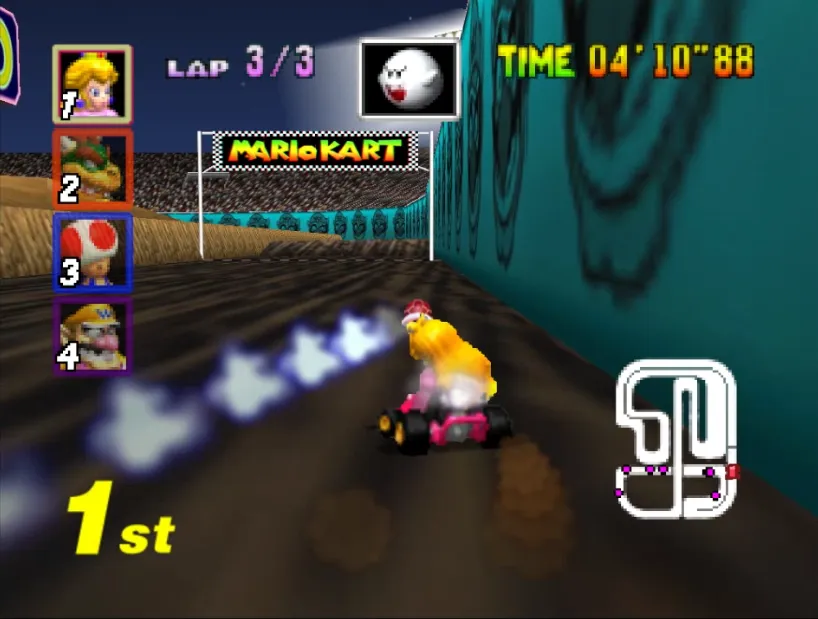
But when you finally survive that, there's the mythical Rainbow Road awaiting and- OHHHH NOOOOOOOOOOO

THE FIRST PLACE CPU GOT AWAY, NOT ANOTHER 5 MINUTES...

...Okay, NOW Rainbow Road is done.
It is a track that kind of comically switches between [easy peasy] and [somehow stressful] because the whole track is railed, but if a CPU somehow gets away too far at any point, you can try catching them up with smart drifts...but if that is somehow not enough, then the only chance you have may be with a Blue Shell or Lightning, since the Red Shells are noticeably dumber in this one track than usual, meaning that they can't help you much if a CPU runs away at any point.
There's also the giant Chain Chomp that sometimes rides the road, which can often catch the CPUs...but also make sure to not get caught yourself by it.
Well, those were all the 150cc cups completed with 36 points. Now what's next?

The plot twist
So, here's a little detail I didn't mention before: I did Special Cup before the rest in this new run.
Yeah, the actual order I played these was Special, Flower, Star and Mushroom, as I wanted to get a hard one out of the way early that wasn't Flower, so I went straight for Special, and THEN I went for Flower, and finally did Star then Mushroom.
The reason why I bring this up is because, it was after I did the Mushroom Cup run with Wario [which was the last run on 150cc I did] is when I unlocked the Extra mode. That mode is pretty much 150cc Mirror mode, and most tracks only really have that little change [except for Toad Turnpike having the cars drive AT you].
But even though just unlocking that already gets you the extra title screen, I still would like to run through all the Extra cups for good measure, and maybe someday the 50cc and 100cc cups, since those would take longer by virtue of being lower speeds.
At the very least, I had got a very funny event happen with my Extra Flower Cup run, as I was basically blessed by the item boxes, since I kept getting the right stuff to deal with Toad Turnpike, and in Choco Mountain got the huge combo of a Star, TWO Lightnings and Triple Shrooms going into the final lap to overtake the competition easily 😂
And regarding my runs for cheevos, there's way more that I ended up doing afterwards that could make for its own story, since its quite a handful that is part of the road of getting the mastered badge for Mario Kart 64 in the chevos page [Doing Grand Prix runs without hitting ANY track walls or else having to restart the race, doing Time Trials for all tracks without shrooms, trying to get a fast time at Choco Mountain].
But until then...
Thanks for reading, and see you next time.

Spanish translation with DeepL. All screenshots were captured by myself.
Español
Bueno, ya has leído el título. Mario Kart World por fin ha salido a la venta para la nueva Nintendo Switch 2... pero como estoy muy lejos de poder conseguir una, decidí sumergirme en un juego más antiguo, Mario Kart 64, al que no había jugado en mucho tiempo.
Y resulta que Mario Kart 64 era uno de esos juegos que, aunque había jugado hace meses para completar rápidamente algunos RetroAchievements, en realidad no había terminado el desafío de conseguir los 36 puntos en todas las copas de 150 cc, así que... eso es de lo que voy a hablar hoy.
La Copa Champiñón es fácil, la Copa Flor no tanto
La Copa Champiñón en MK64 es bastante fácil de completar si prestas atención en todo momento, ya que las pistas son sencillas y anchas, lo que te da mucho espacio para hacer derrapes y conseguir miniturbos cuando lo necesites. Lo hice en 150 cc con Wario, ya que había un logro por conseguir 36 puntos en la Copa Champiñón con él en 100/150 cc, pero, de nuevo, no fue nada del otro mundo.
En todo caso, ya había ganado esa copa antes sin tocar ninguna pared, lo que, una vez más, es bastante fácil porque las pistas son lo suficientemente anchas como para no tener que preocuparse por ellas. Incluso tuve la oportunidad en esta carrera de hacer el tonto atajo de Koopa Troopa Beach.
Ahora, ¿la Copa Flor? Hay al menos dos pistas problemáticas que interferirán con cualquier intento de conseguir 36 puntos, incluso cuando jugaba con Toad para completar otro logro [ganar la Copa Flor con Toad y 36 puntos].
Toad's Turnpike es la primera pista de la Flower Cup, y sin duda es una en la que tendrás que conservar los objetos de forma inteligente: intentar derribar a los corredores de la CPU cada vez que tengas la oportunidad de hacerlo es una oportunidad para que se queden atrás, atravesar cualquier camión que tengas que evitar fuera de la pantalla y luego mantener el ritmo, mientras que la posibilidad de no conseguir un buen objeto para enfrentarte a ellos de nuevo cuando reaparezcan inevitablemente es una amenaza real para no quedar primero en esta primera carrera.
Incluso puedes ver arriba cómo estaba zigzagueando entre dos grandes vehículos que bloqueaban el camino para llegar a la línea de meta, solo algo seguro gracias a los tres caparazones rojos que tenía [e incluso entonces, puedes ver a la CPU justo detrás de mí en el minimapa].
Ahora bien, aunque Frappe Snowland es una pista que también puede pillarte desprevenido si se juega mal, sobre todo con los obstáculos de los muñecos de nieve y las curvas cerradas cerca del final que pueden hacerte perder tiempo si no se manejan bien, sin duda es mucho más fácil conseguir el primer puesto de forma consistente sin tener que volver a intentarlo en comparación con lo que viene a continuación: Choco Mountain.
Como la mayor parte de la pista está rodeada de muros y tiene carriles estrechos, mantener el ritmo de las CPU requiere bastante habilidad, ya que ellas pueden recorrerla sin esfuerzo, sin chocar contra las paredes ni perder velocidad. Jugar con inteligencia y conservar un objeto que te permita robar el primer puesto en caso de que una CPU se acerque al final sigue siendo clave, ya que a menudo puede ocurrir que, justo antes de la línea de meta, te adelanta la CPU... o que la CPU lleve un rato en cabeza y no puedas adelantarla por más que lo intentes.
También culpo a los caparazones rojos por ser particularmente ineficaces en esta pista, ya que, a menos que estés en una recta con tu objetivo a la vista, es probable que se salgan de la pista por alguna razón.
Y como no puedes volver a intentarlo a menos que quedes quinto o peor, tuve que frenar para dejar que los demás corredores terminaran y volver a intentarlo. Tuve que reiniciar dos veces para conseguir una carrera en la que tuviera una cómoda ventaja en la última vuelta y quedara primero.
Ah, sí, eso es algo que debería mencionar ahora: El uso de la función de reintento.
Aunque podría haberme propuesto el reto de completar las cuatro copas sin reintentos, decidí permitirme usarla tan pronto como se me presentó la primera oportunidad, no solo porque sentía que debía practicar más en todas las pistas más difíciles antes... sino también porque no estaba seguro de cuántos problemas me causarían algunas de ellas. Y vaya, Choco Mountain me llevó como tres reintentos antes de asegurar el primer puesto.
La mayor pega es que tienes que frenar hasta detenerte para dejar que terminen suficientes CPU y poder quedar quinto y volver a intentarlo, lo cual, si ya has tenido una mala carrera o te has caído antes del final de la última vuelta, no debería llevar mucho tiempo, pero hay algo ligeramente humillante en tener que impedirte cruzar la línea de meta en el momento en que ves que ya no puedes alcanzar el primer puesto.
Bueno, es hora de pasar a las otras dos copas.
Y antes de que preguntes, Mario Raceway fue más o menos fácil. Tuve algunos sustos porque las CPU no querían quedarse atrás, pero conseguí una ventaja considerable en la última vuelta y me aseguré los 36 puntos en la Flower Cup.
Golpeado en la Star Cup por Thwomps
El estadio Wario es una pista famosa por su longitud, aunque no tan larga como Rainbow Road, pero aún así es una pista que te lleva más de 3 minutos completar... pero al menos las carreteras anchas en casi todos los lugares significaban que mantenerse en cabeza no era demasiado difícil, así que conseguí el primer puesto en mi primer intento.
Sherbet Land también es bastante inofensiva, pero hay que tener en cuenta que siempre hay riesgo al entrar en la cueva, ya que hay que esquivar una colisión frontal con cualquiera de los pingüinos que caminan.
Después está Royal Raceway. En realidad, no es una pista tan mala para ganar a las CPU... pero en mi primer intento cometí un error en las últimas curvas ascendentes de la pista, lo que permitió que otro corredor se adelantara y tuve que esperar a quedar quinto para poder volver a intentarlo.
Y... el castillo de Bowser.
Por el título de esta sección, habrás adivinado que los Thwomps eran bastante molestos en esta pista. Quizás no tanto como en las pistas del castillo de Bowser y Rainbow Road de Super Mario Kart, pero sin duda te sentías como si te hubieras estrellado contra un muro a gran velocidad cada vez que chocabas accidentalmente con uno.
Otra carrera en la que tuve que volver a intentarlo dos veces para terminar en primera posición, pero una vez más, otra copa completada
La Copa Especial tiene una pista especialmente caprichosa esperándote
DK Jungle Parkway es, como corresponde a la primera pista de la copa, la menos amenazante, pero, por supuesto, incluso esa me llevó varios reinicios hasta que la superé correctamente, ya que o bien me estrellaba contra la pared cerca del puente final o incluso fallaba al aterrizar sobre la carretera firme después del gran salto. Curiosamente, en la única carrera en la que lo superé con nota, había dado un salto que pensaba que me habría matado, pero no fue así, y me dio una ventaja enorme en la última vuelta.
Yoshi Valley es bastante divertido. Iba perdiendo en la vuelta 2 hasta que conseguí una estrella y un rayo que detuvieron a mis rivales, y al comienzo de la última vuelta tuve la suerte de conseguir tres caparazones rojos que mantuvieron a raya a las CPU durante el resto de la carrera.
Sin duda, subestimé MUCHO el Banshee Boardwalk antes de correr en él por primera vez en mucho tiempo. Me costó varios intentos conseguir un sólido primer puesto, ya que en los otros intentos me caía o me golpeaba con algo y perdía la oportunidad de alcanzar al corredor que iba en cabeza.
Pero cuando finalmente sobrevives a eso, te espera la mítica Rainbow Road y... ¡OHHHH NOOOOOOOOOOO
¡EL PRIMER LUGAR SE ESCAPÓ, NO OTROS 5 MINUTOS...
...Vale, YA ESTÁ Rainbow Road.
Es una pista que cambia de forma cómica entre [pan comido] y [algo estresante] porque toda la pista está encauzada, pero si la CPU se aleja demasiado en algún momento, puedes intentar alcanzarla con derrapes inteligentes... pero si eso no es suficiente, entonces la única oportunidad que tienes puede ser con un caparazón azul o un rayo, ya que los caparazones rojos son notablemente más tontos en esta pista que de costumbre, lo que significa que no te pueden ayudar mucho si la CPU se aleja en algún momento.
También está el gigantesco Chain Chomp, que a veces recorre la carretera y que a menudo puede atrapar a los CPU... pero asegúrate de que él no te atrape a ti.
Bueno, esas fueron todas las copas de 150 cc completadas con 36 puntos. ¿Y ahora qué?
El giro inesperado
Hay un pequeño detalle que no mencioné antes: Hice la Copa Especial antes que el resto en esta nueva partida.
Sí, el orden real en el que jugué fue Especial, Flor, Estrella y Champiñón, ya que quería quitarme de encima pronto una difícil que no fuera Flor, así que fui directamente a la Especial, y LUEGO fui a la Flor, y finalmente hice la Estrella y luego la Champiñón.
La razón por la que lo menciono es porque fue después de hacer la carrera de la Copa Champiñón con Wario [que fue la última carrera en 150cc que hice] cuando desbloqueé el modo Extra. Ese modo es prácticamente el modo Espejo de 150cc, y la mayoría de las pistas solo tienen ese pequeño cambio [excepto Toad Turnpike, donde los coches conducen hacia ti].
Pero aunque con solo desbloquearlo ya se obtiene la pantalla de título extra, me gustaría completar todas las copas Extra por si acaso, y tal vez algún día las copas de 50cc y 100cc, ya que esas llevarían más tiempo por ser a velocidades más bajas.
Como mínimo, me pasó algo muy divertido en mi carrera de la Copa Extra Flower, ya que básicamente me bendijeron las cajas de objetos, ya que seguía consiguiendo lo necesario para lidiar con Toad Turnpike, y en Choco Mountain conseguí la enorme combinación de una estrella, DOS rayos y tres setas en la última vuelta para adelantar fácilmente a la competencia 😂
Y en cuanto a mis carreras para conseguir logros, hay muchas más que acabé haciendo después y que podrían dar para otra historia, ya que son bastantes las que forman parte del camino para conseguir la insignia de maestro de Mario Kart 64 en la página de logros [Hacer carreras de Gran Premio sin chocar contra NINGUNA pared de la pista o sino tener que reiniciar la carrera, hacer pruebas contrarreloj en todas las pistas sin setas, intentar conseguir un tiempo rápido en Choco Mountain].
Pero hasta entonces...
Gracias por leer y hasta la próxima.
Traducción al español hecha con DeepL. Todas las fotos capturadas por mí.