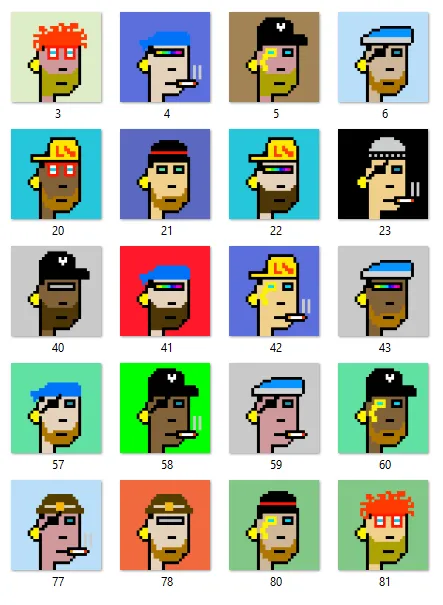
Nella prima parte abbiamo proceduto con l'installazione dei programmi necessari per il completamento del nostro progetto, e ci siamo fermati dopo aver terminato la creazione delle nostre combinazioni per le varie nft...vi consiglio ci andarvi a riprendere la prima parte se non l'avete vista...
Per prima cosa molto importante da fare estraiamo la cartella installata precedente e apriamo il percorso layer...,questo servirà più avanti per il caricamento delle nostre cartelle da poi caricare a loro volta su visual studio code,per la generazione del nostro codice.
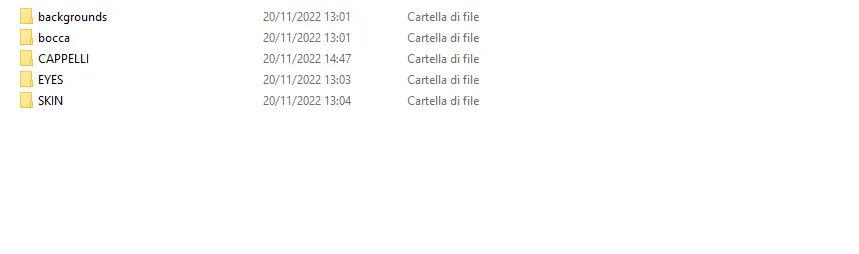
qui dentro andremo a sostituire le cartelle presenti con quelle create nella parte 1,dove sono presenti le nostre bozze, questo ci servirà dopo per visual studio code.
Passiamo alla parte informatica, per prima cosa apriamo visual studio code, ci servirà per la programmazioni per far generare i nostri nft in modo preciso e veloce...una volta aperto visual studio carichiamo la cartella che abbiamo appena creato,a sinistra vi appariranno tutti i nostri file con i vari percorsi, è li che andremo ad agire,tutto questo sarà fondamentale per la riuscita del nostro progett,se durante l'inserimento vi apparirà qualche errore non esitate a chiedere aiuto nei commenti.

Ci dirigiamo in src e poi in config,qui vi appariranno tutti i layer e le modifiche che possiamo andare a effettuare,ci dirigiamo in basso e nel layer "orde" andremo a modificare inserendo il nome delle nostre cartell in modo uguale altrimenti non verranno lette...
NOTA BENE
l'ordine delle cartelle andrà inserito in modo manuale, facendo attenzione a non sovrapporre i layer,altrimenti la nostra nft non verrà creata, per fare questo vi consiglio di effettuare delle prove tramite krita o photoshop, torniamo al nostro procedimento.
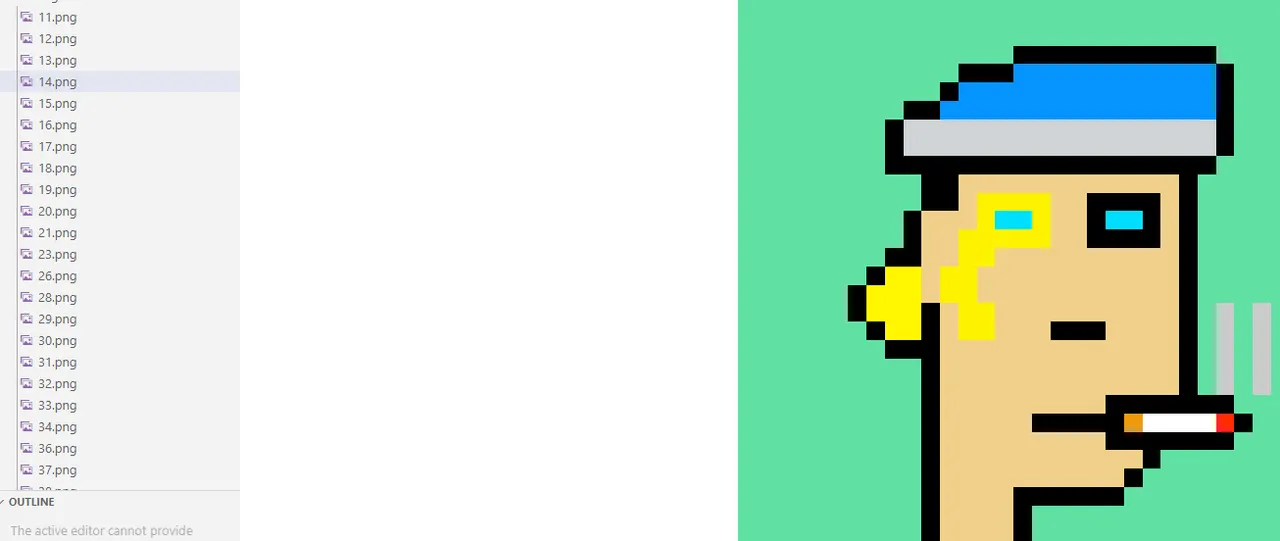
Una volta inserite le nostre cartelle ci dirigeremo a sinistra dove sono presenti le nostre cartelle e rinomineremo tutti i file inserendo un cancelletto e un numero,che starebbe a significare la percentuale di rarità della nostra nft...
Un altro passo molto importante è inserire la quantità delle nostre nft che vogliamo far generare,per farlo basta dirigerci più in basso rispetto al layer appena modificato e sarà presente un tag chiamato "growEditionSizeTo: 100,",inserite la quantità che desiderate ed il gioco è fatto.
NOTA BENE
ovviamente la quantità sarà in base alle cartelle e le combinazioni che avrete creto,se avete creato solo 3 skin e 3 occhi,non potrete di certo avere 100 combinazioni, quindi mi raccomando dovrete fare le cose in modo preciso altrimenti il comando che dopo andremo a inserire non verrà letto.
ESEMPIO (skin#10).
Come ultimo step ci dirigeremo sul terminale e cliccando sulla schermata bianca ci apparirà una casella di testo,li digiteremo il comando (node index.js) che darà via alla creazione delle nostre nft,una volta completato il caricamento a sinistra apparirà una cartella di nome BUILD,con all'interno nel nostre nft.
In the first part we proceeded with the installation of the programs needed to complete our project, and we stopped after we had finished creating our combinations for the various nfts...I recommend that you go and pick up the first part if you haven't seen it...
First very important thing to do we extract the previous installed folder and open the layer path...,this will be needed later for uploading our folders to then upload in turn to visual studio code,for generating our code.
in here we are going to replace the folders present with the ones created in part 1,where our drafts are present,this we will need later for visual studio code.
Let's move on to the computer part, first we open visual studio code, we will need it for programming to have our nft generated accurately and quickly...once we open visual studio we load the folder we have just created,on the left side you will see all our files with the various paths, that's where we are going to act,all this will be crucial for the success of our project,if during the insertion you see any error don't hesitate to ask for help in the comments.
We head to src and then to config,here you will see all the layers and the changes we can go to make,we head down and in the layer "hordes" we will go to edit by entering the name of our cartels in the same way otherwise they will not be read...
PLEASE NOTE
the order of the folders will have to be entered in a manual way, being careful not to overlap the layers,otherwise our nft will not be created, to do this I recommend you do some testing through krita or photoshop, back to our procedure.
Once we have entered our folders we will head to the left where our folders are and rename all the files by entering a hash mark and a number,which would stand for the percentage of rarity of our nft...
Another very important step is to enter the quantity of our nfts that we want to have generated,to do this just head further down than the layer we just edited and there will be a tag called "growEditionSizeTo: 100,",enter the quantity you want and you're done.
PLEASE NOTE
obviously the quantity will be according to the folders and the combinations you will have created,if you have created only 3 skins and 3 eyes,you will certainly not be able to have 100 combinations,so be sure to do things precisely otherwise the command that we are going to enter later will not be read.
EXAMPLE (skin#10).
As a final step we will head to the terminal and clicking on the white screen will bring up a text box,there we will type in the command (node index.js) which will kick off the creation of our nfts,once it completes loading on the left a folder named BUILD will appear,with inside in our nfts.