 b
b

Verás que es un fácil paso a paso!
You will see that it is an easy step by step!
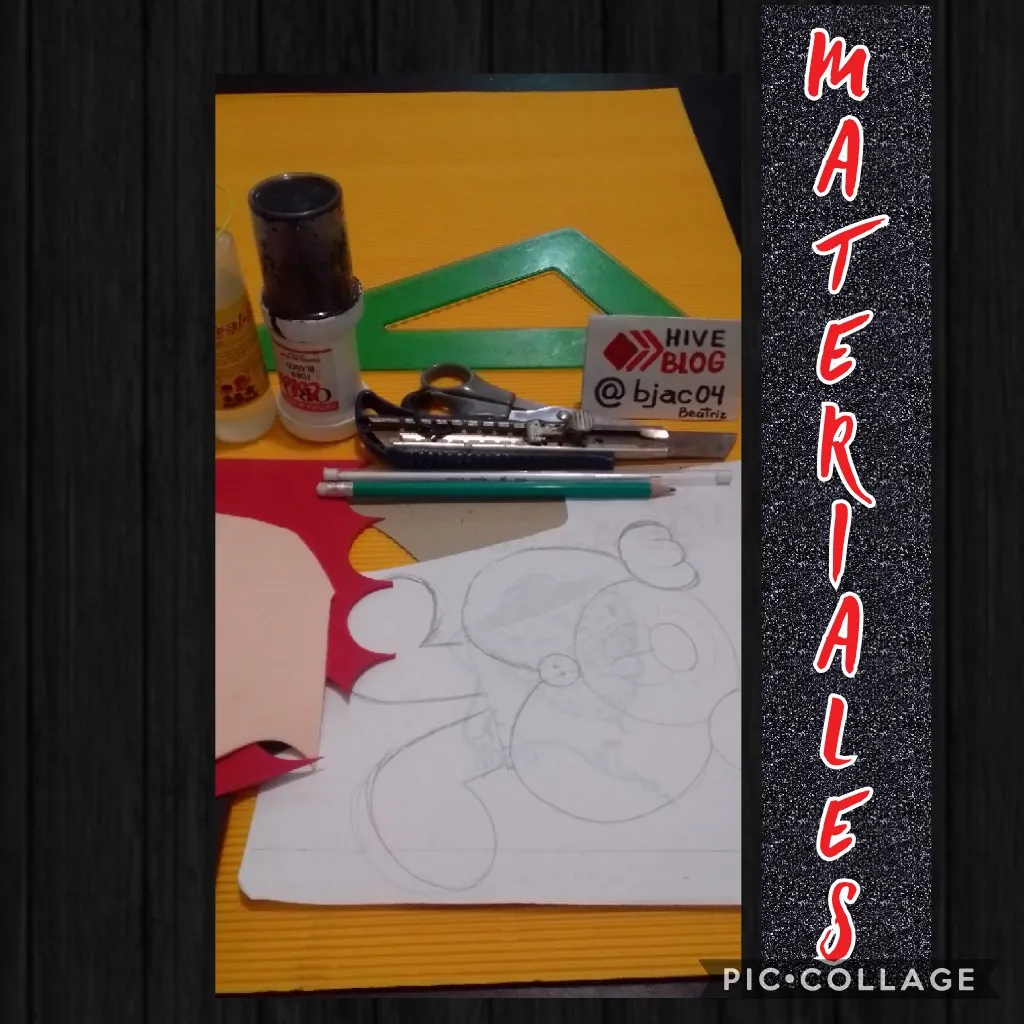
MATERIALES:
MATERIALS:
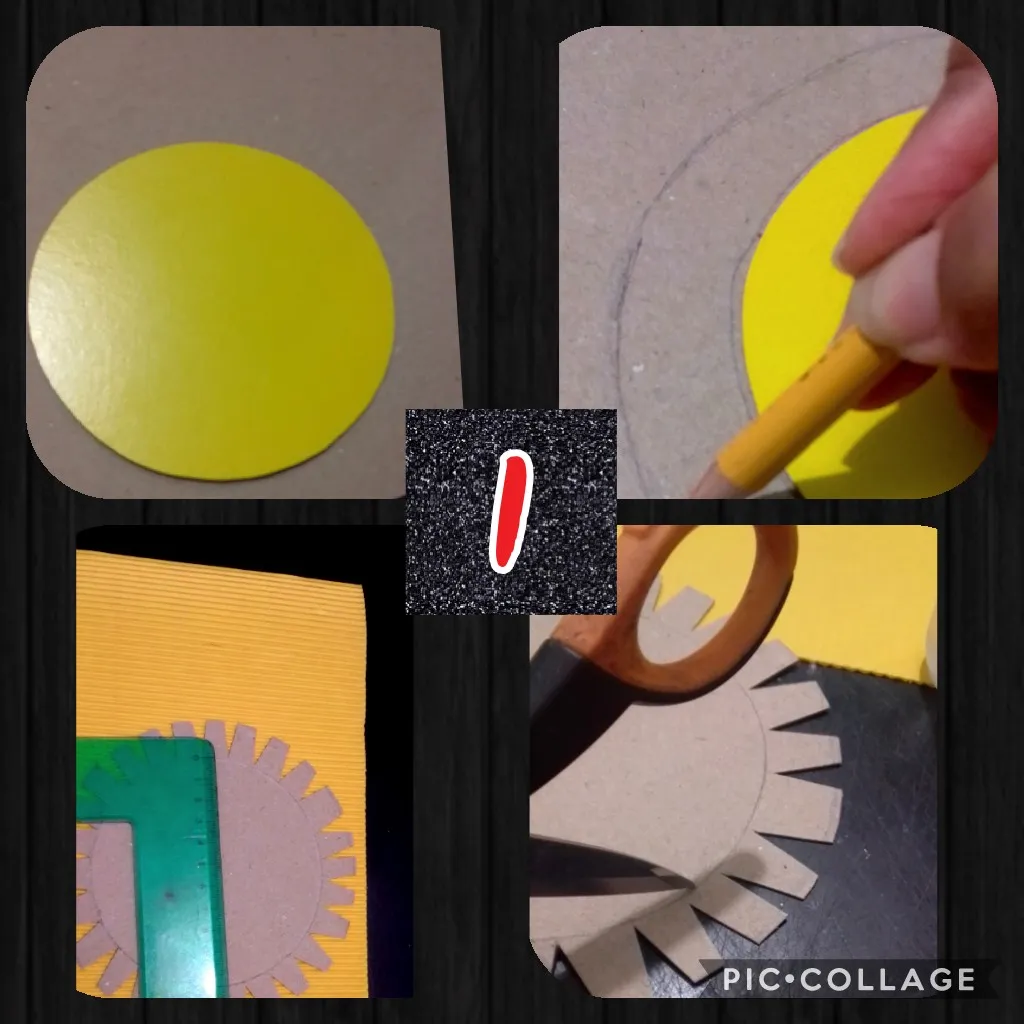
Para armar el cilindro, marcamos y recortamos un círculo de 8,5 cms, marcamos una pestaña de 2 cms, serán en total 10,5 cms.. y cortaremos la pestaña sacando triángulos. Repasamos por el borde de la tijera para que doblen las pestañas con facilidad.
También recortaremos un rectángulo de 34 cms, más 3 o 4 cms de pestaña para el cierre del cilindro.
To assemble the cylinder, we mark and cut a circle of 8.5 cm and mark a 2 cm flange, it will be a total of 10.5 cm .. and we will cut the flange taking out triangles and go over with the edge of the scissors so that they bend the lashes with ease.
We will also cut out a rectangle of 34 cm, plus 3 or 4 cm of flange for the cylinder closure.
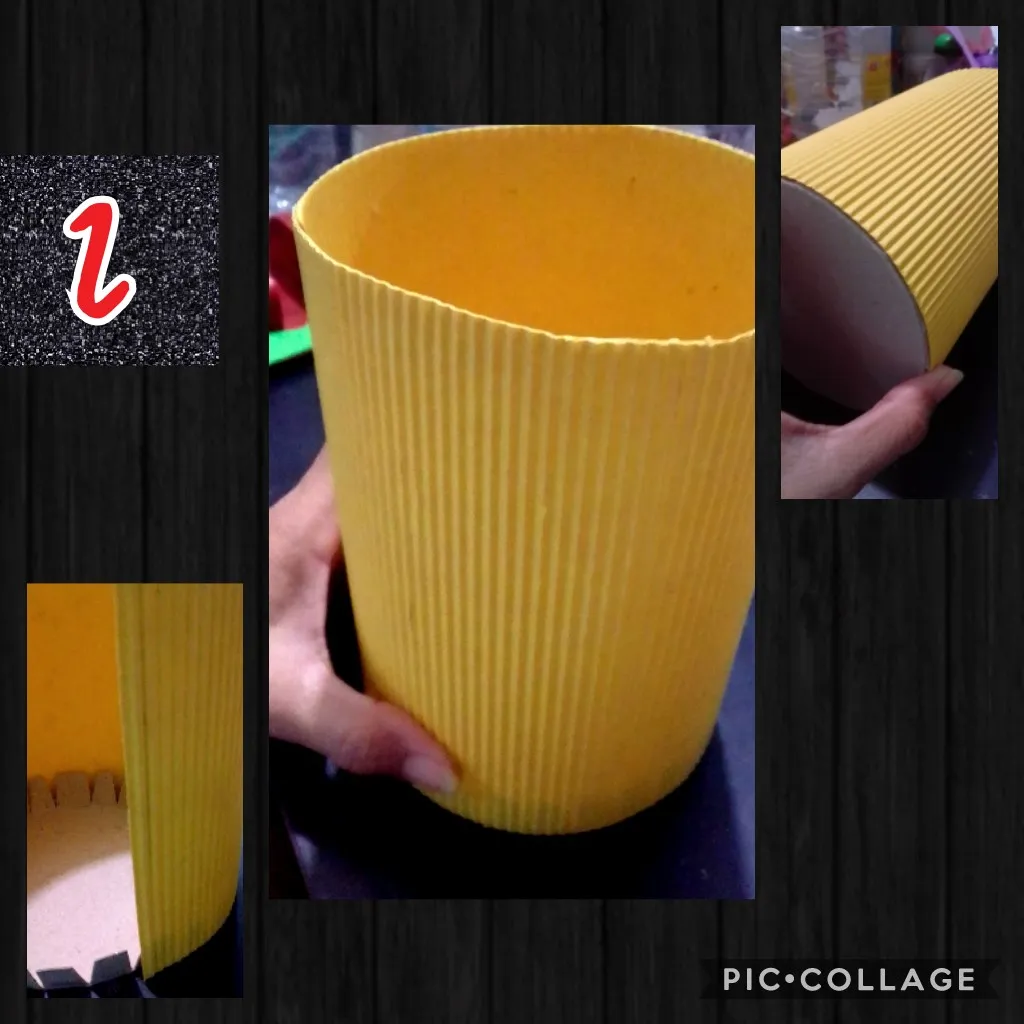
En este paso, doblamos las pestañas hacia arriba y ponemos silicón por toda la orilla del rectángulo, hacemos un poco de presión a medida que vamos pegando hasta cerrarlo por completo.
In this step, we fold the tabs up and put silicone around the edge of the rectangle apply a little pressure as we stick until it is completely closed.

Ahora transferimos cada una de las piezas en el foami haciendo presión con la tijera y recortamos para empezar a sombrear con pintura o con un pedacito de esponja.
Now we transfer each of the pieces in the foam by pressing with the scissors and cut to start shading with paint or with a piece of sponge.
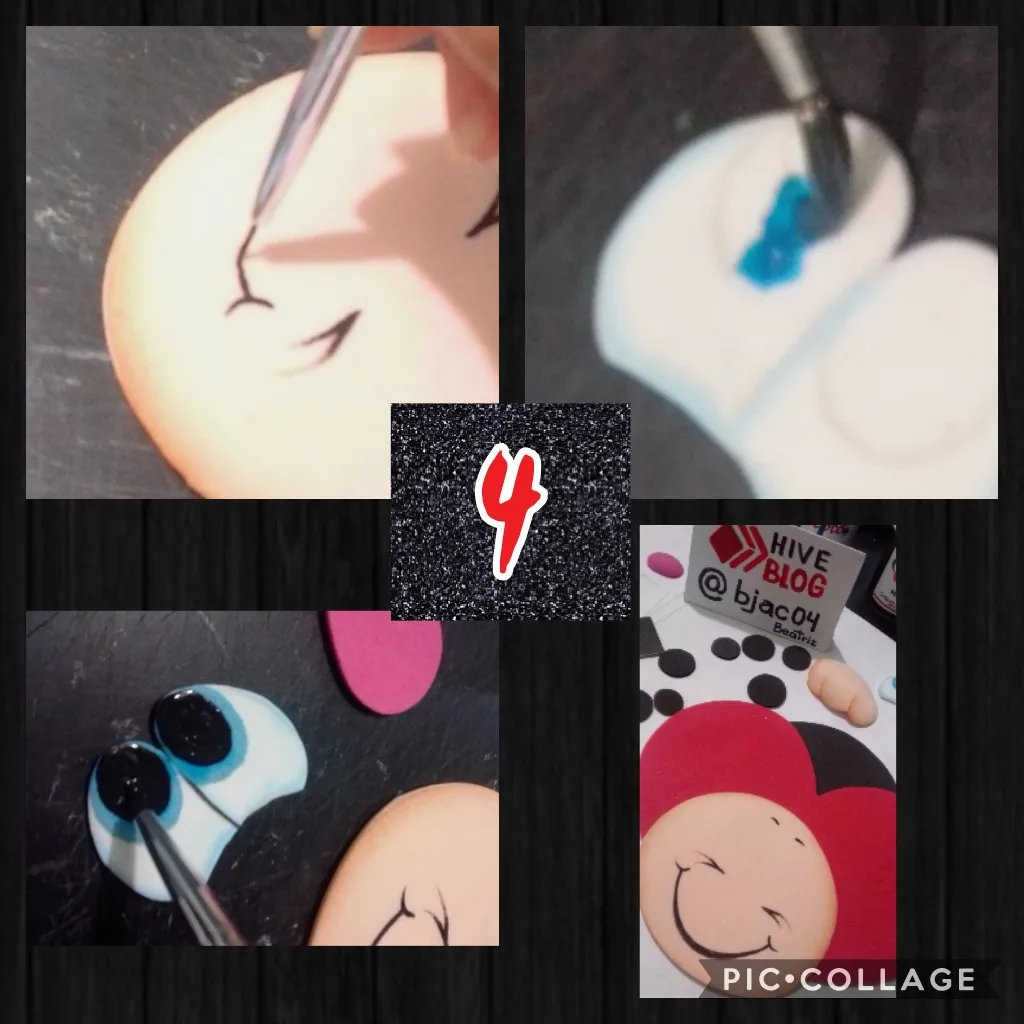
Seguimos pintando la carita, ojos, y mientras secan los ojos vamos pegando y armando la mariquita.
We continue painting the face, eyes, and while the eyes dry we are gluing and assembling the ladybug.

Aquí seguimos pegando los lunares, ojos y sobre la plancha caliente montaremos la nariz y manos para darle dimensión, pegamos también y recortamos 2 corazones para poner en las antenitas, luego pegaremos las patas para terminar de armar la mariquita, pintamos los cacheticos para dejar lista para pegar al cilindro.
Here we continue to glue the moles, eyes and on the hot iron we will mount the nose and hands to give it dimension, we also glue and cut 2 hearts to put on the antennas, then we will glue the legs to finish assembling the ladybug, we paint the cacheticos to make ready to stick to the cylinder.
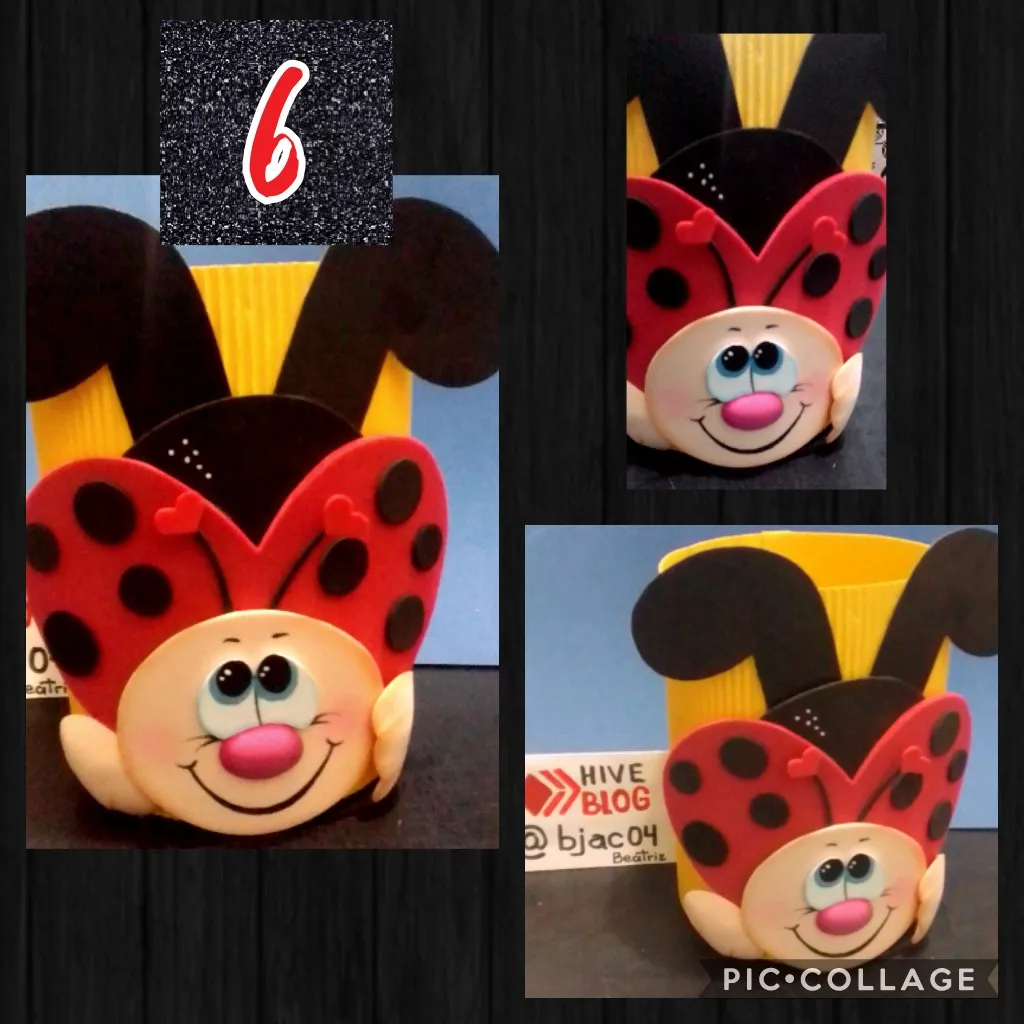
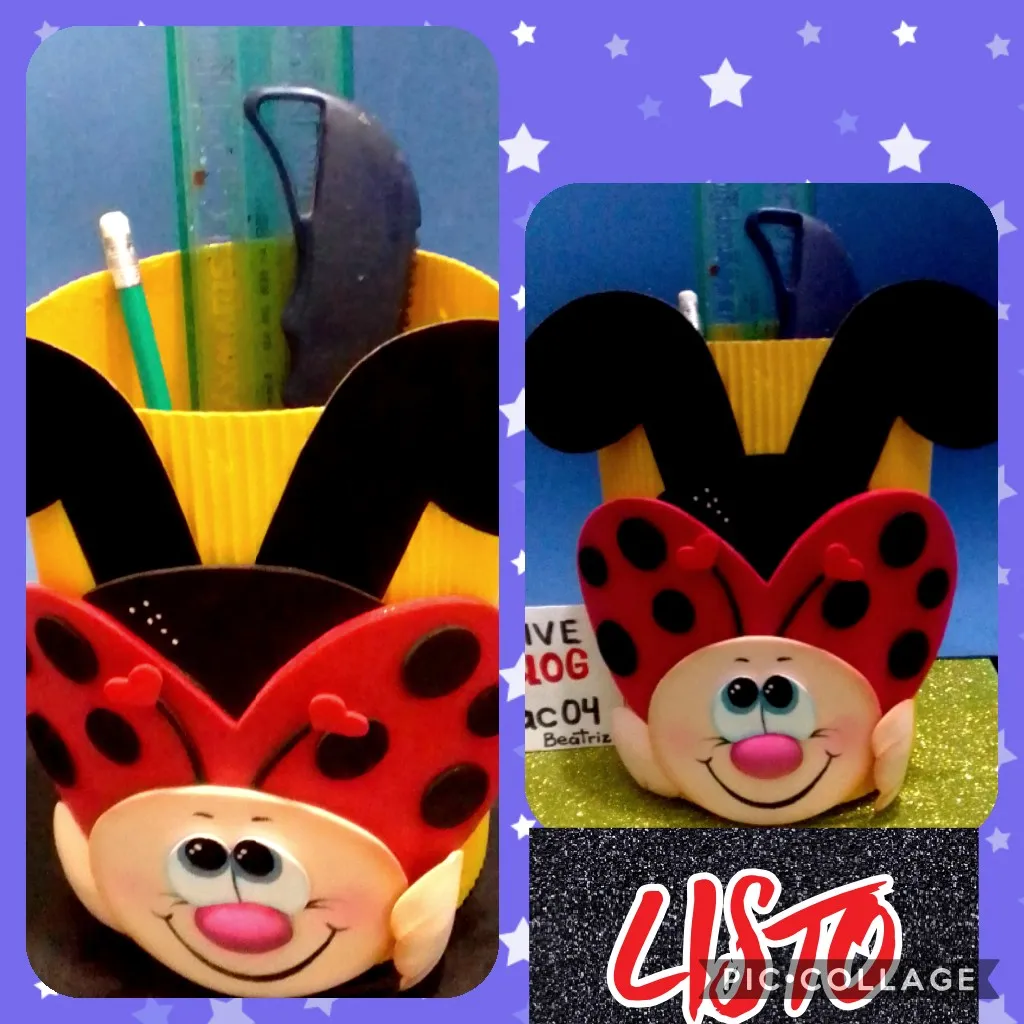
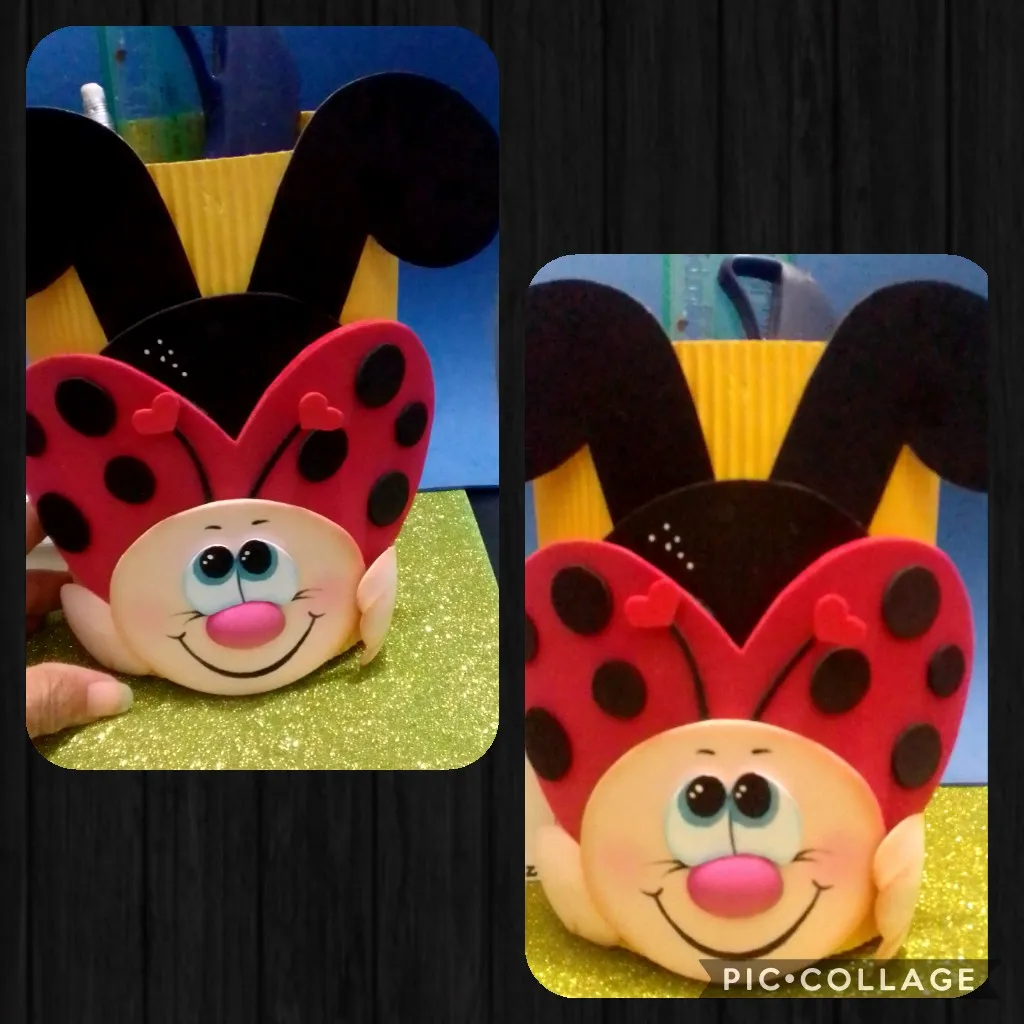
Y por último pegamos la mariquita al cilindro y ya, está terminado nuestro ORGANIZADOR, que te será útil para cualquier cosa que quieras ordenar o guardar.
Estos organizadores son especiales para guardar los lápices, colores, cepillos, lazos, en fín lo que quieras...
And finally, we glue the ladybug to the cylinder and now, our ORGANIZER is finished, which will be useful for anything you want to order or save.
These organizers are special for storing pencils, colors, brushes, bows, whatever you want ...