Hello, how are you friends? I hope you are very well ...
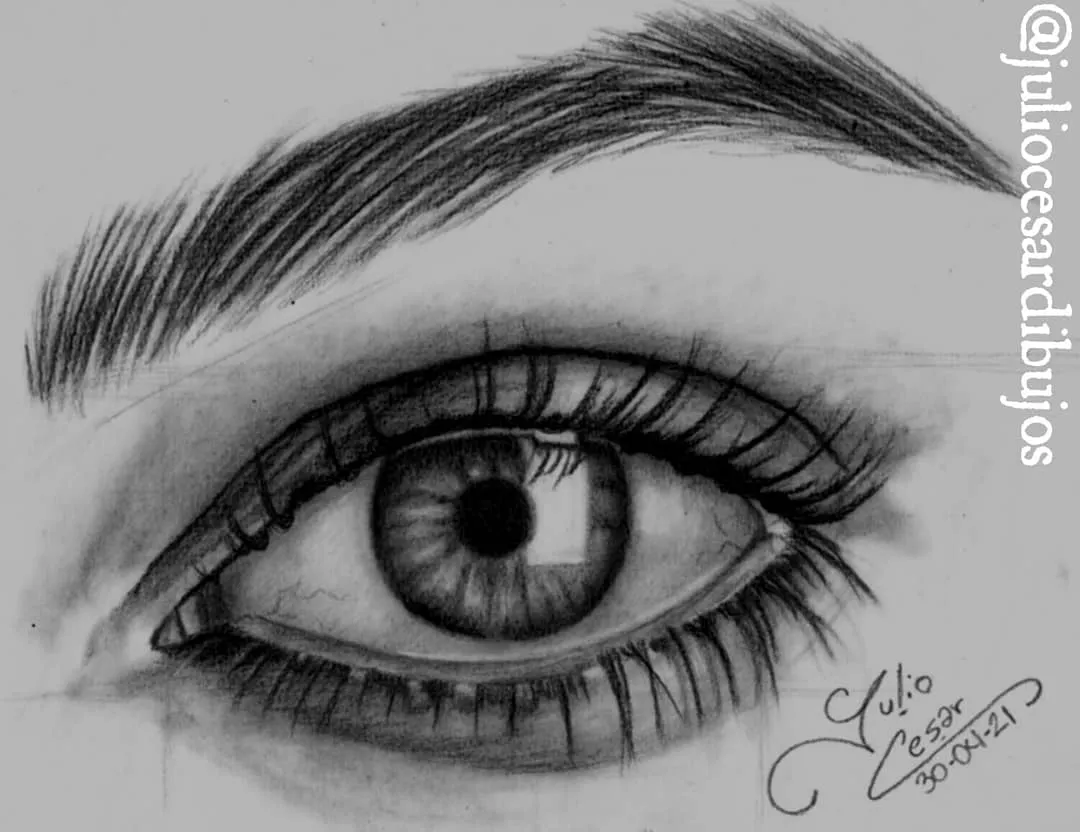
I've been a bit busy with other activities and this week I hadn't had time to draw. Until yesterday I was finally able to take some time and draw this great eye made with graphite pencils.
I took 3 photos that represent the three methods that I use when drawing, which are: Guide Lines, Sketch and Shading. Below each photo I will leave you a small description of each step.
I hope you like it, and if you liked to share it, maybe other cartoonists will use these little tips.
PS: soon I will do the same but with the nose and the mouth.

Guide lines:
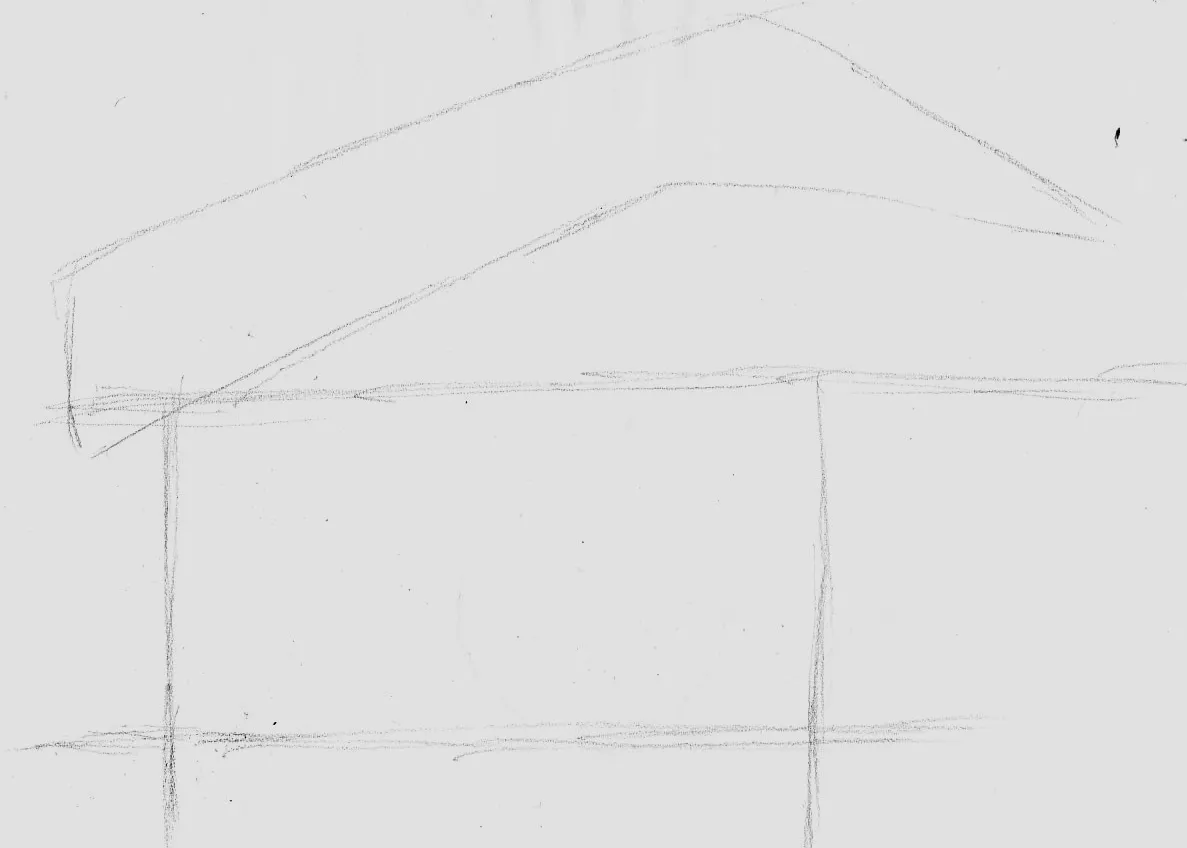
The guidelines are very simple lines that help us to locate the drawing and to do it in an appropriate size. They must be made very clear as they will be erased.

Sketch:
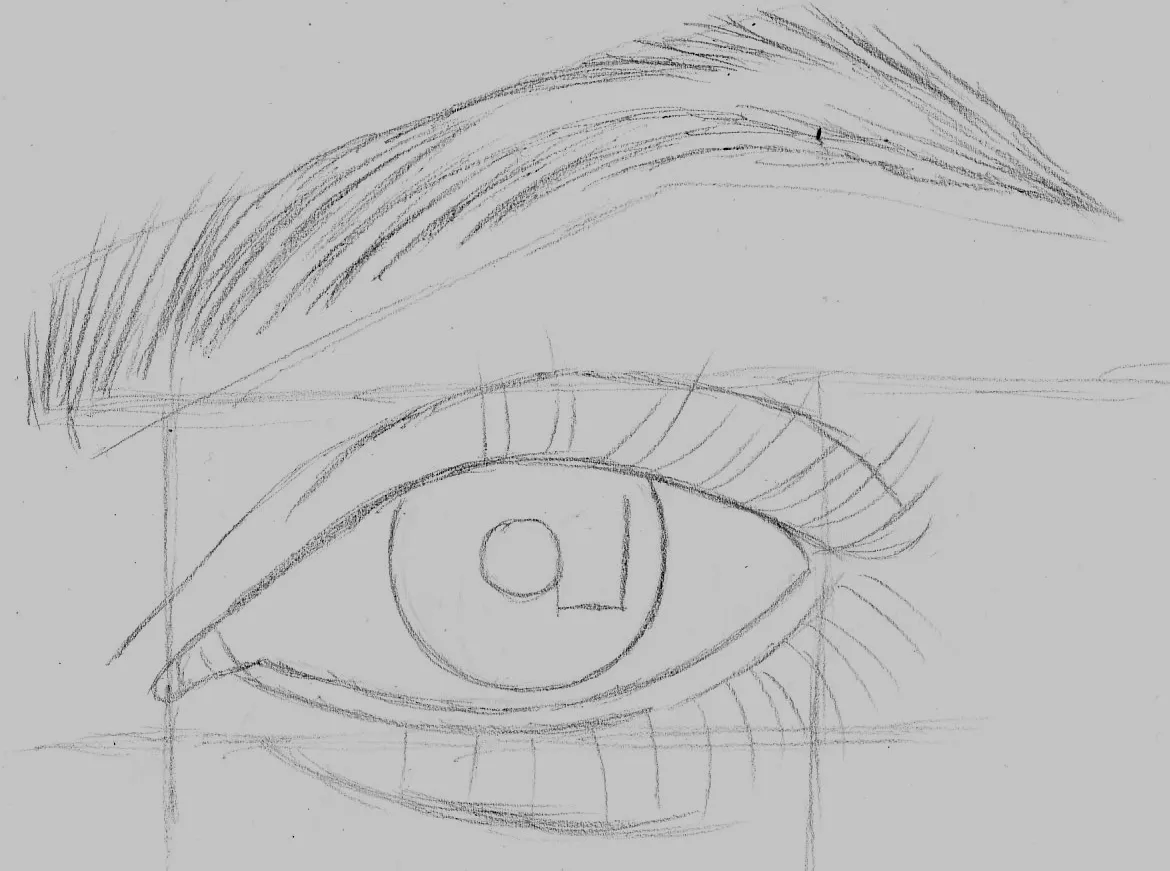
Once the guide lines are in place, it is time to draw up the sketch, here you must have a lot of patience since it is a fundamental part when making a good drawing.
You must have a good observation of what you are going to draw.
Take a good look at the shapes, the size of each element that you are going to draw and try to capture it on your sheet.
It is important to take the time to do this step well.
Shading:
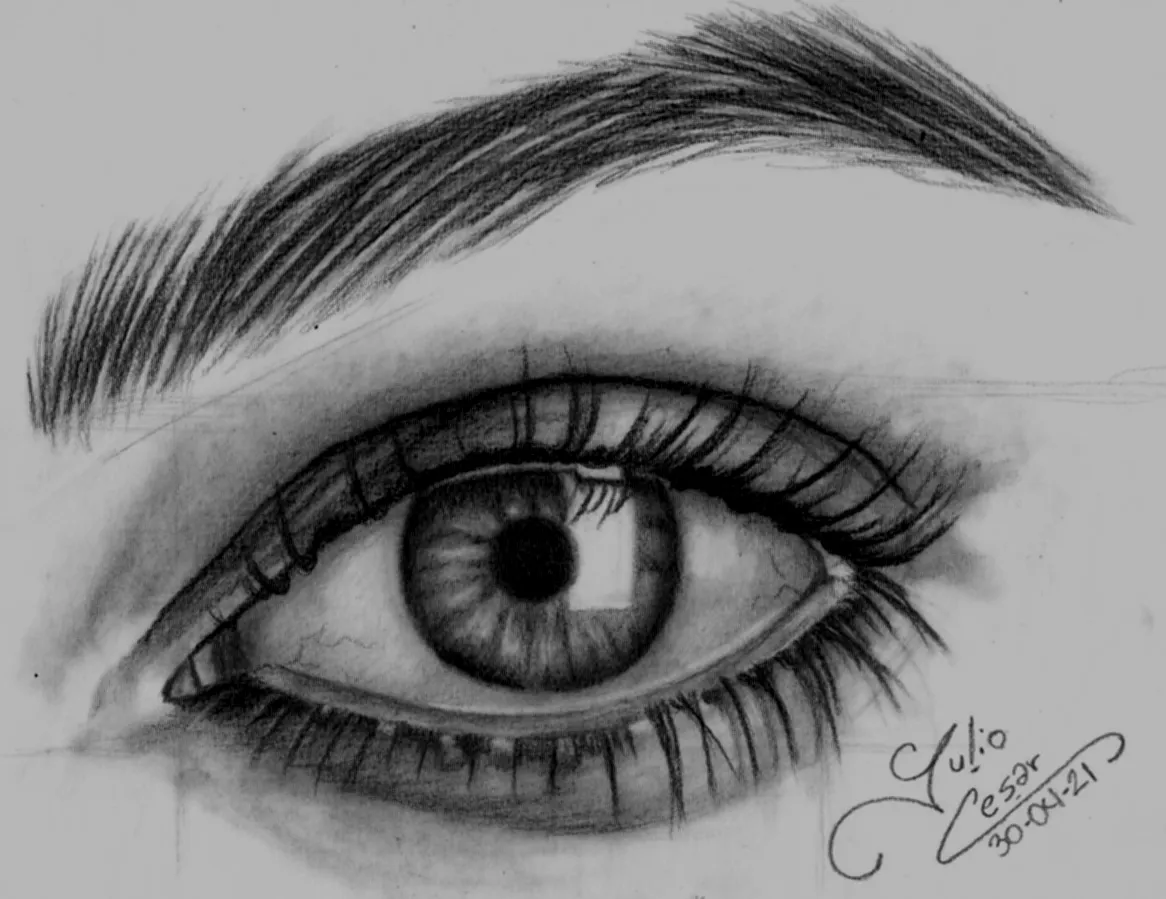
Now it's the last part, and it's the one I like to do the most. It is the shading, here you must pay close attention to the lights and shadows that are present in the image or objects that you are drawing, to make a shading with a realistic finish you must go from the lightest tone in the drawing, to the darkest but not see the transcision.
For that you can help yourself with pencils 2b (light tone), 4b (medium tone) and 6b (dark tone).
There are many shades of pencils, but those are fine to begin with.
MATERIALS:
- Pencils 2b, 6b and 9b
- Bond sheet
- Eraser and Sharpener
MY SOCIAL NETWORKS


THANK YOU FOR YOUR VISIT...
SEE YOU IN A NEXT POST.
SEE YOU IN A NEXT POST.