¡Un placer saludarles, amigos!
A pleasure to greet you, friends!
Hoy deseo compartir con ustedes este lindo y útil proyecto, el cual consiste en un "salva orejas" para mascarilla facial el cual lo tejí a crochet. Motivado a la pandemia esta prenda se ha vuelto de uso obligatorio al momento de acudir a los centros de trabajo o lugares públicos. En Venezuela el regreso a clases está previsto para mediados de Septiembre y esta prenda será de mucha utilidad para niños y adolescentes. Al usar este sujetador de mascarillas evitaremos las molestias causadas por la elástica muy ajustada que prensa permanentemente nuestras orejas. A continuación te animo a que lo hagas, dejándote el paso a paso.
Today I want to share with you this cute and useful project, which consists of an "ear saver" for face mask which I knitted to crochet. Motivated by the pandemic, this garment has become mandatory when it comes to going to workplaces or public places. In Venezuela the return to school is scheduled for mid-September and this garment will be very useful for children and adolescents. By using this mask bra we will avoid the discomfort caused by the very tight elastic that permanently presses our ears. Next I encourage you to do it, leaving you step by step.
Materiales // Materials
- Hilo amarillo
- Hilo beige
- Aguja para tejer N°2
- Aguja lanera (no indispensable)
- 2 botones
- Yellow thread
- Beige thread
- Knitting needle N°2
- Wool needle (not essential)
- 2 buttons

Paso a paso // Step by Step
Flor amarilla (Motivo central) // Yellow flower (Center motif)
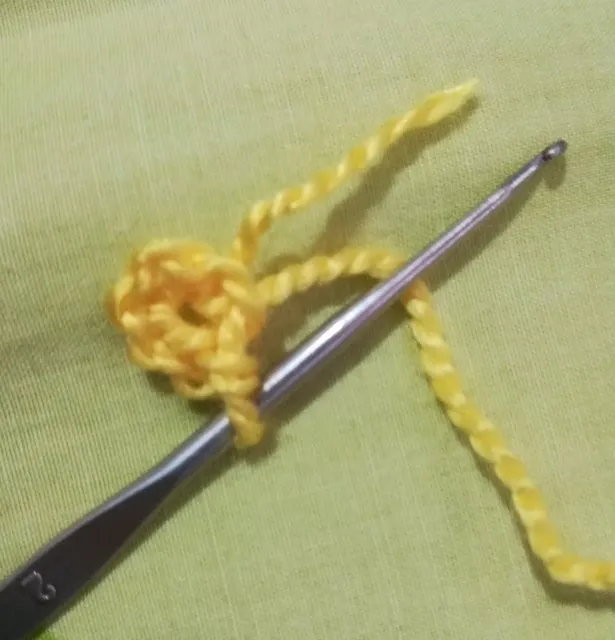
1° vuelta: Realizar una anilla de 6 cadenas y cerrar con un punto deslizado.
1° round: Make a 6-string ring and close with a slipped stitch.
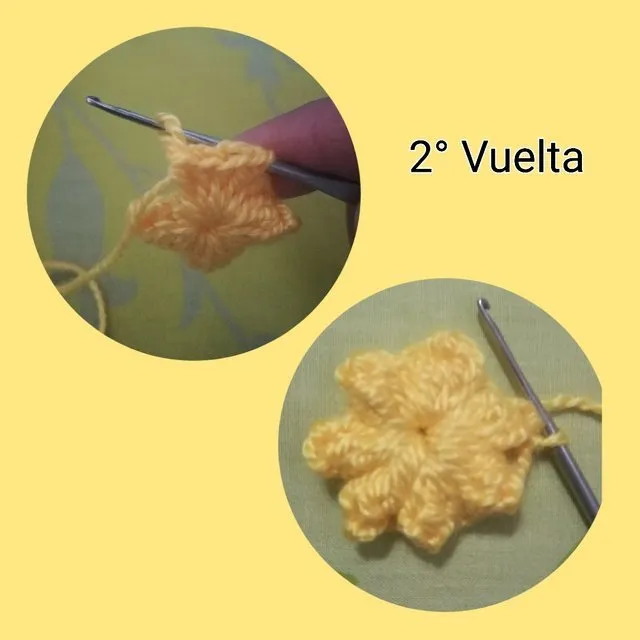
2° vuelta: Tejemos 3 cadenas y realizar 4 puntos altos (para obtener un total de 5 Puntos altos incluyendo el que formamos con las primeras 3 cadenas), seguidamente dejamos en descanso la argolla y nos vamos con el ganchillo a las 3 primeras cadenas y pasamos el ganchillo por la cadena que estaba en descanso haciendo un punto deslizado (bien apretado). Continuamos con 2 cadenas y tejeremos otro pétalo con 5 puntos altos. Repetiremos este procedimiento hasta completar la flor con 7 pétalos que uniremos con un punto deslizado.
2° round: We work 3 chains and make 4 treble crochets (to get a total of 5 treble crochets including the one we form with the first 3 chains), then we leave the loop at rest and we go with the crochet to the first 3 chains and we pass the crochet through the chain that was at rest making a slip stitch (tight). Continue with 2 chains and work another petal with 5 treble crochets. Repeat this procedure until the flower is completed with 7 petals, which are joined together with a slipped stitch.
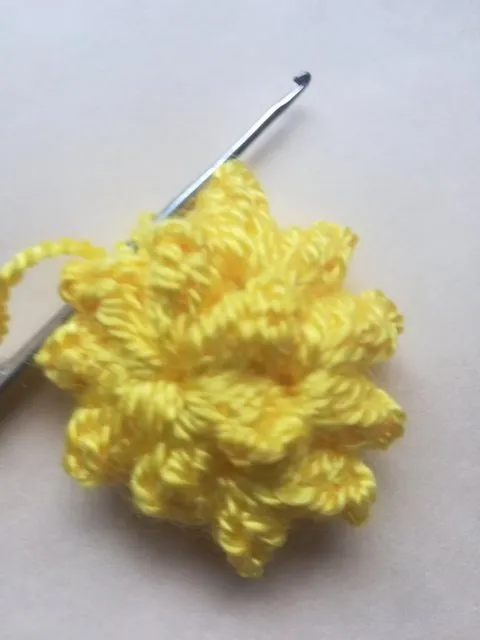
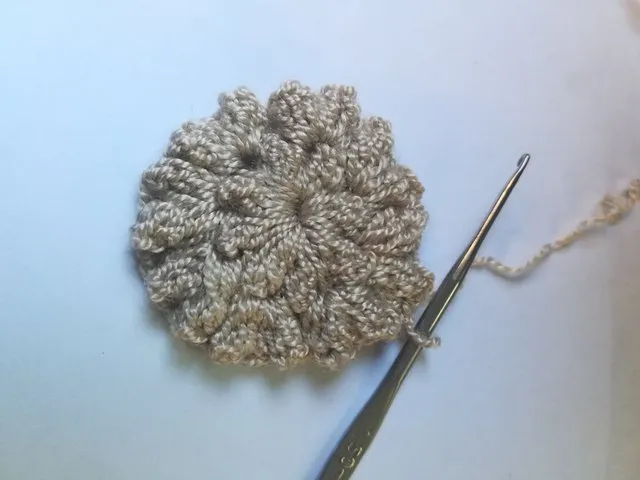
3° vuelta: Iremos con un punto deslizado hacia el espacio de las 2 cadenas y ejecutaremos 3 cadenas más 4 puntos altos de este modo repitiendo la misma secuencia de la 2° vuelta hasta completar 14 pétalos que al final uniremos con una puntada deslizada.
3° round: We will go with a point slipped into the space of the 2 chains and we will execute 3 chains plus 4 treble crochets in this way repeating the same sequence of the 2° round to complete 14 petals that at the end we will join with a slipped stitch.
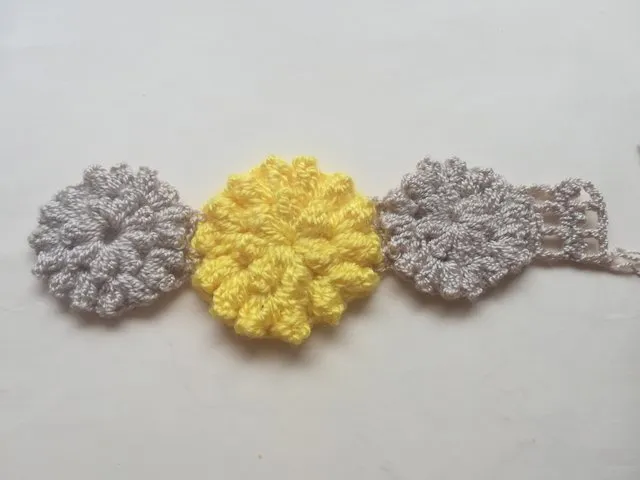
Flores beige (Motivos laterales) // Beige flowers (Side motifs)
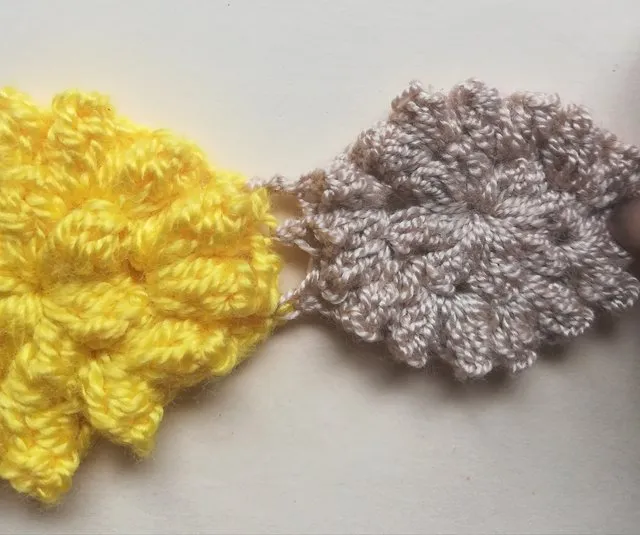
Para lograr las flores beige seguiremos igual procedimiento que el realizado con la flor amarilla, con la salvedad que en la primera vuelta montaremos 8 pétalos y en la segunda vuelta obtendremos 16 pétalos. En la última vuelta de los motivos beige uniremos con punto deslizados tres de sus pétalos al motivo central (Flor amarilla), finalizamos cerrando con un punto deslizado.
To achieve the beige flowers we will follow the same procedure as with the yellow flower, except that in the first round we will mount 8 petals and in the second round we will get 16 petals. In the last round of the beige motifs we will join with slipped stitch three of its petals to the central motif (Yellow flower), we finish closing with a slipped stitch.
Los flores beige quedaron más pequeñas que la flor amarilla porque la hebra del hilo beige era más fina (Recordemos que prefiero utilizar recortes de hilos que me han quedado de otros proyectos).
The beige flowers were smaller than the yellow flower because the strand of the beige yarn was thinner (Remember that I prefer to use thread cuttings that I have left from other projects).
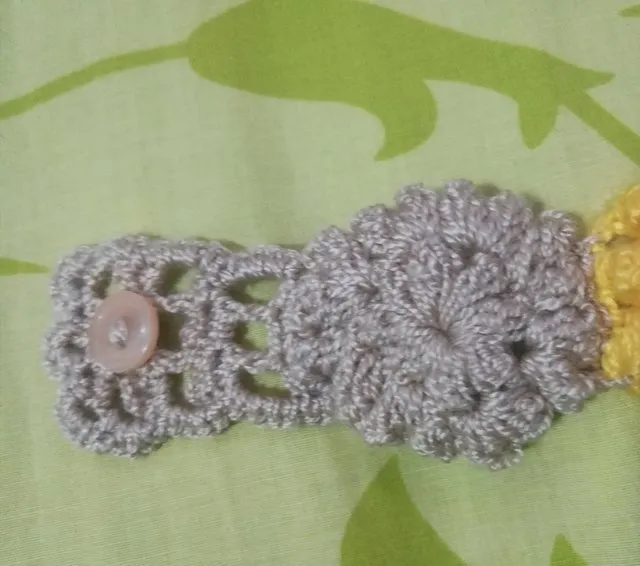
Pestañas para adaptar los botones // Tabs to adapt the buttons
1° vuelta: Contaremos cuatro pétalos de la flor beige a partir del empate con la flor amarilla y anudaremos el hilo para iniciar el tejido correspondiente a una de las pestaña y realizaremos 10 puntos bajos.
1° round: We will count four petals of the beige flower from the tie with the yellow flower and knot the thread to start the fabric corresponding to one of the tabs and we will make 10 double crochets.
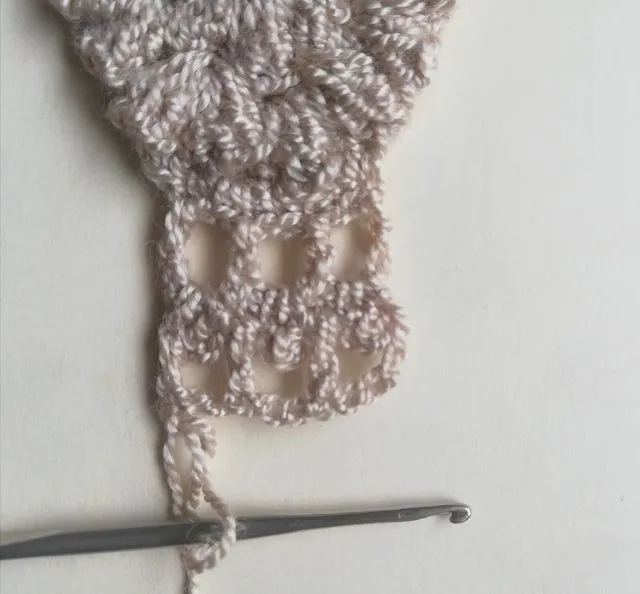
2° vuelta: Tejeremos 5 cadenas y un punto alto insertado en el cuarto punto bajo, luego 2 cadenas y un punto alto que engancharemos dejando dos puntos bajos por el medio y repetiremos una vez más esta misma acción.
2° round: We will work 5 chains and a treble crochet inserted in the fourth double crochet, then 2 chains and a treble crochet we will hook leaving two double crochets in the middle and we will repeat this same action again.
3° vuelta: Realizamos 1 punto bajo seguido de 4 cadenas que enlazaremos en la primera cadena de ese grupo de 4 cadenas (punto picort), luego un punto bajo seguido de otro picort, continuaremos la misma secuencia hasta el final.
3° round: We make 1 double crochet followed by 4 strings that we will link in the first string of that group of 4 strings (picort point), then a double crochet followed by another picort, we will continue the same sequence until the end.

La 4°, 5° y 6° vuelta son repeticiones en forma alterna de las vueltas 2° y 3°.
Laps 4, 5, and 6 are alternate repetitions of laps 2 and 3.
8° Vuelta: Realizaremos tres medios puntos seguidos de un punto en cada punto alto que encontremos en el borde de la pestaña. Finalizaremos con un punto deslizado, anudamos y perdemos la hebra utilizando la aguja lanera o con la ayuda del ganchillo.
8th Round: We will make three half points followed by a point in each high point that we find on the edge of the tab. We will finish with a slip stitch, knot and lose the thread using the wool needle or with the help of the crochet hook.
Este mismo procedimiento lo ejecutaremos en el otro extremo del tejido.
We will execute this same procedure at the other end of the fabric.
Lo último que haremos es coser los botones en ambos extremos con hilo beige.
The last thing we will do is sew the buttons at both ends with beige thread.
Así quedó este precioso sujetador de mascarilla // This is how this beautiful mask bra turned out
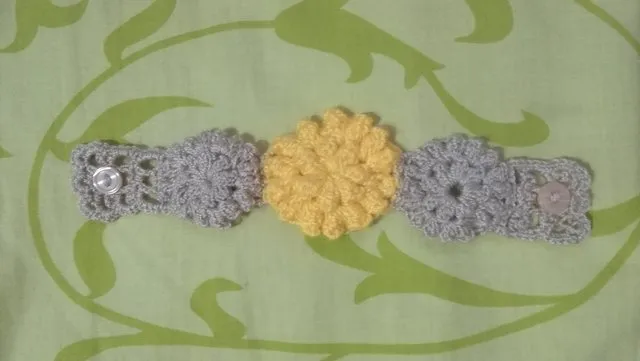
Estos sujetadores son una excelente manera de asegurar las mascarillas, así nos mantenemos protegidos y evitamos maltratos e incomodidades en las orejas. Se tejen muy rápido y son super fáciles de hacer. No necesitas mucho hilo y lo podemos tejer con hilos que nos han quedado de otras creaciones a crochet. Estaría complacida de leer tus opiniones en los comentarios.
These bras are an excellent way to secure masks, so we stay protected and avoid abuse and discomfort to the ears. They knit very quickly and are super easy to do. You don't need a lot of yarn and we can knit it with yarns that we have left from other crochet creations. I'd be happy to read your thoughts in the comments.
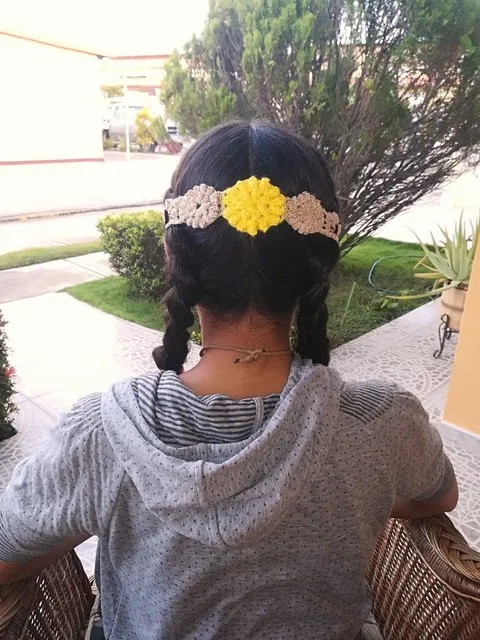
Siempre agradecida con mi amiga @emilycorvof por su agradable compañía y porque gentilmente fue mi modelo en esta tarde.
Always grateful to my friend @emilycorvof for her nice company and for graciously being my role model this afternoon.
¡UN ABRAZO y BENDICIONES! // A HUG AND BLESSINGS!
Fotos propias. Imágenes editadas por mí en FotoCollage.
Own photos. Images edited by me in FotoCollage.