Buen día tengan todos los amigos de Hive. Espero estén pasándola bien. Acá en Maturín, Venezuela esta haciendo un clima fresco. El clima que más me gusta. Muchas horas de lluvia desde ayer sumado a unos apagones de luz.
Good morning to all Hive friends. I hope you are having a good time. Here in Maturín, Venezuela is having a cool climate. The climate that I like the most. Many hours of rain since yesterday added to some power outages.
Hoy les traigo un tutorial para elaborar este baúl a fin de que guardes lo que quieras, también lo puedes usar como un empaque de regalo hecho a base de cartón.
Today I bring you a tutorial to make this trunk so that you can save what you want, you can also use it as a gift packaging made of cardboard.
¿Qué vamos a necesitar?
What are we going to need?
- Cartón
- Silicona liquida
- Tijera
- Papel bond
- Pintura al frio azul o del color que prefieras.
- Paperboard
- Liquid silicone
- Scissor
- Bond paper
- Cold blue paint or the color you prefer.
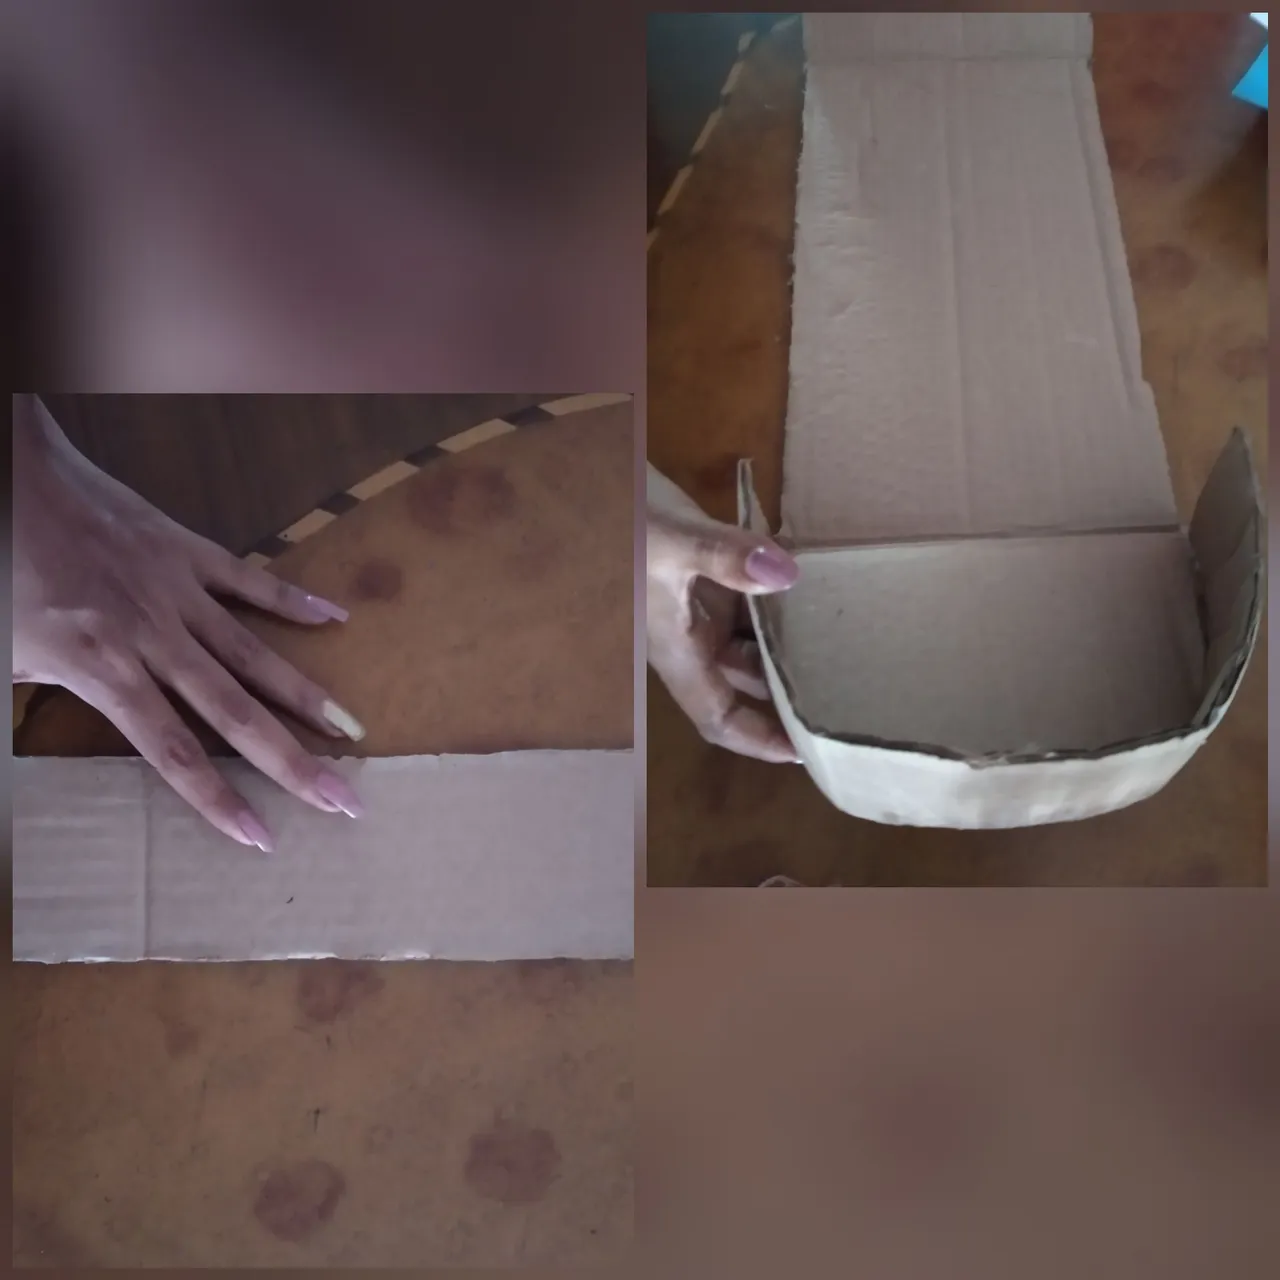
Lo primero es recortar un rectángulo de 18 cms x 45cms. Cuyo rectángulo lo dividiremos en tres partes: siendo la parte central de 33 cms de ancho y la parte derecha e izquierda de 19 cms de ancho.
The first thing is to cut out a rectangle of 18cms x 45 cms. Whose rectangle we will divide into three parts: the central part being 33 cm wide and the right and left part 19 cm wide.
Luego redondeamos los extremos como se puede apreciar en la imagen
Then we round the ends as you can see in the image
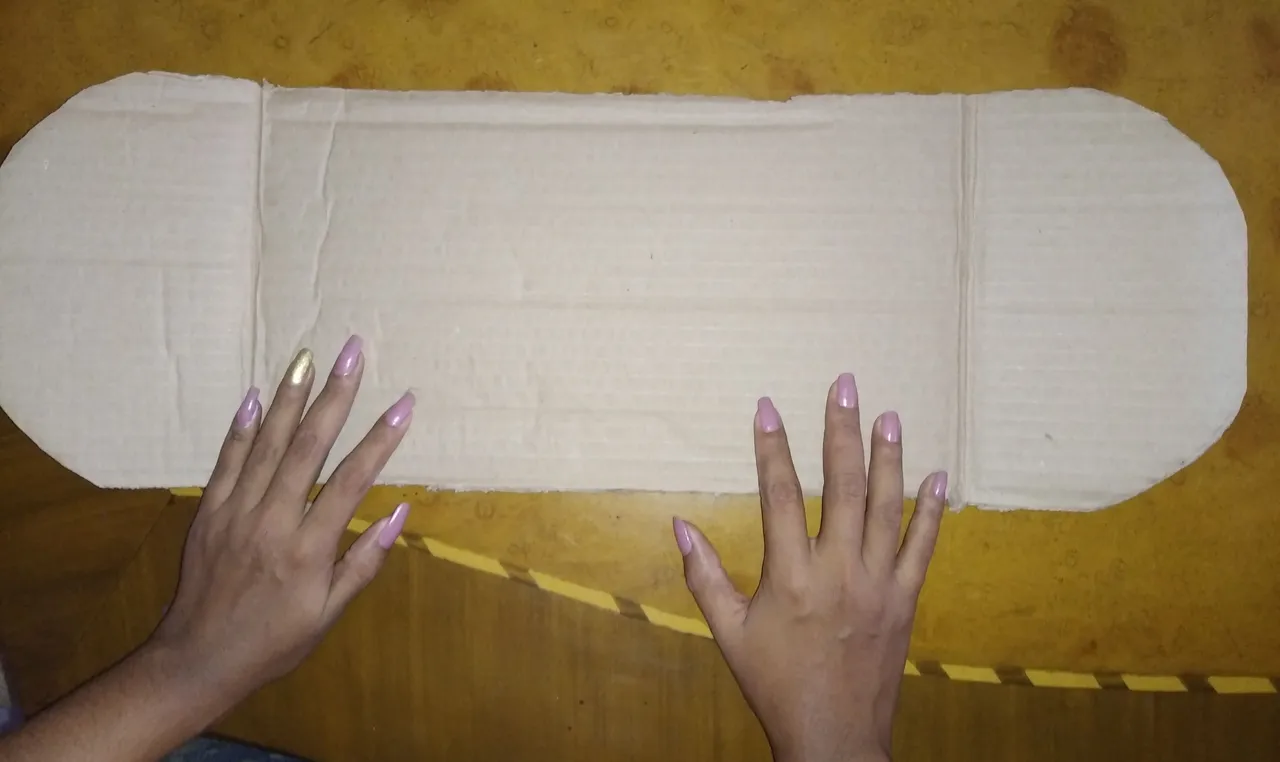
Fíjate que ya tenemos la base para armar nuestro baúl:
Notice that we already have the base to assemble our trunk:
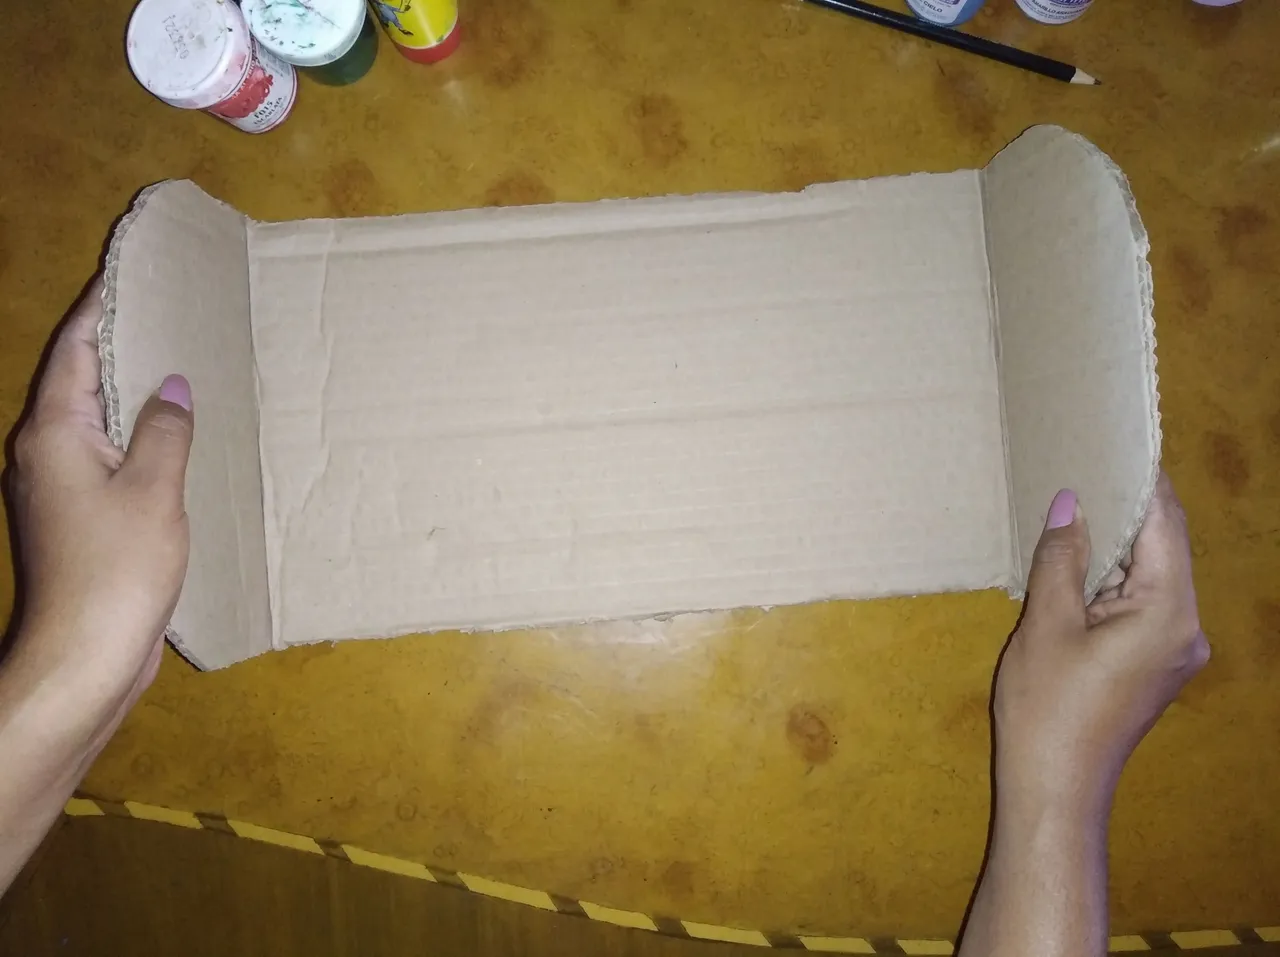
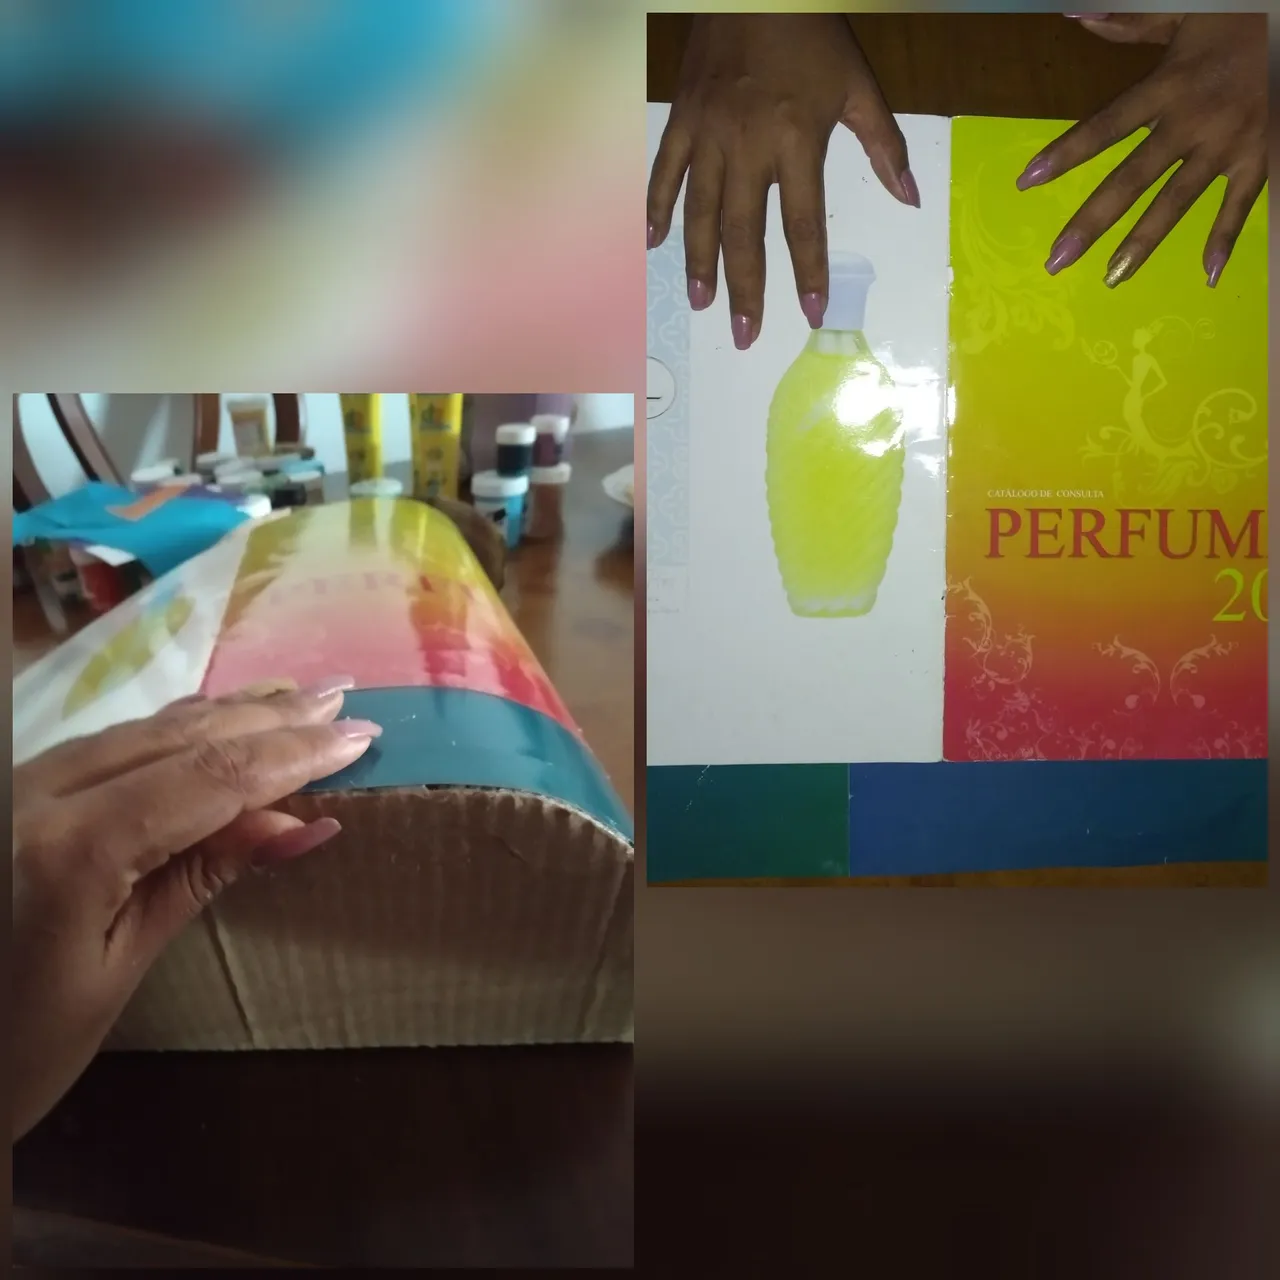
El siguiente paso es recortar una tira de cartón de 38 cms x 7cms que luego vamos a pegar con silicona liquida alrededor de uno de los extremos arqueados o redondeados, constituyendo así la tapa del baúl como se puede apreciar:
The next step is to cut a strip of cardboard from 38 cm x 7 cm that we are going to glue with liquid silicone around one of the arched or rounded ends, thus constituting the lid of the trunk as you can see:
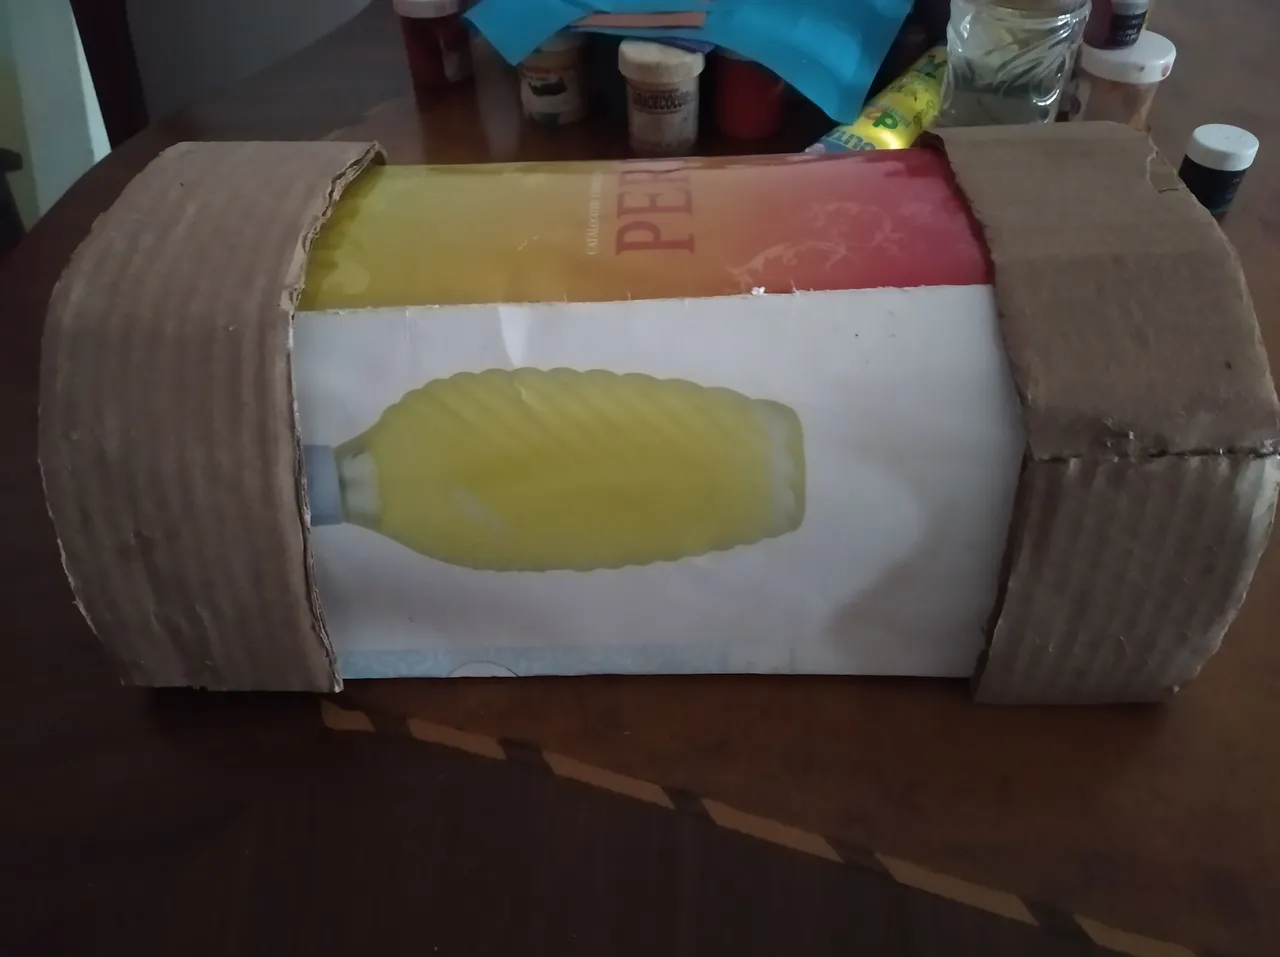
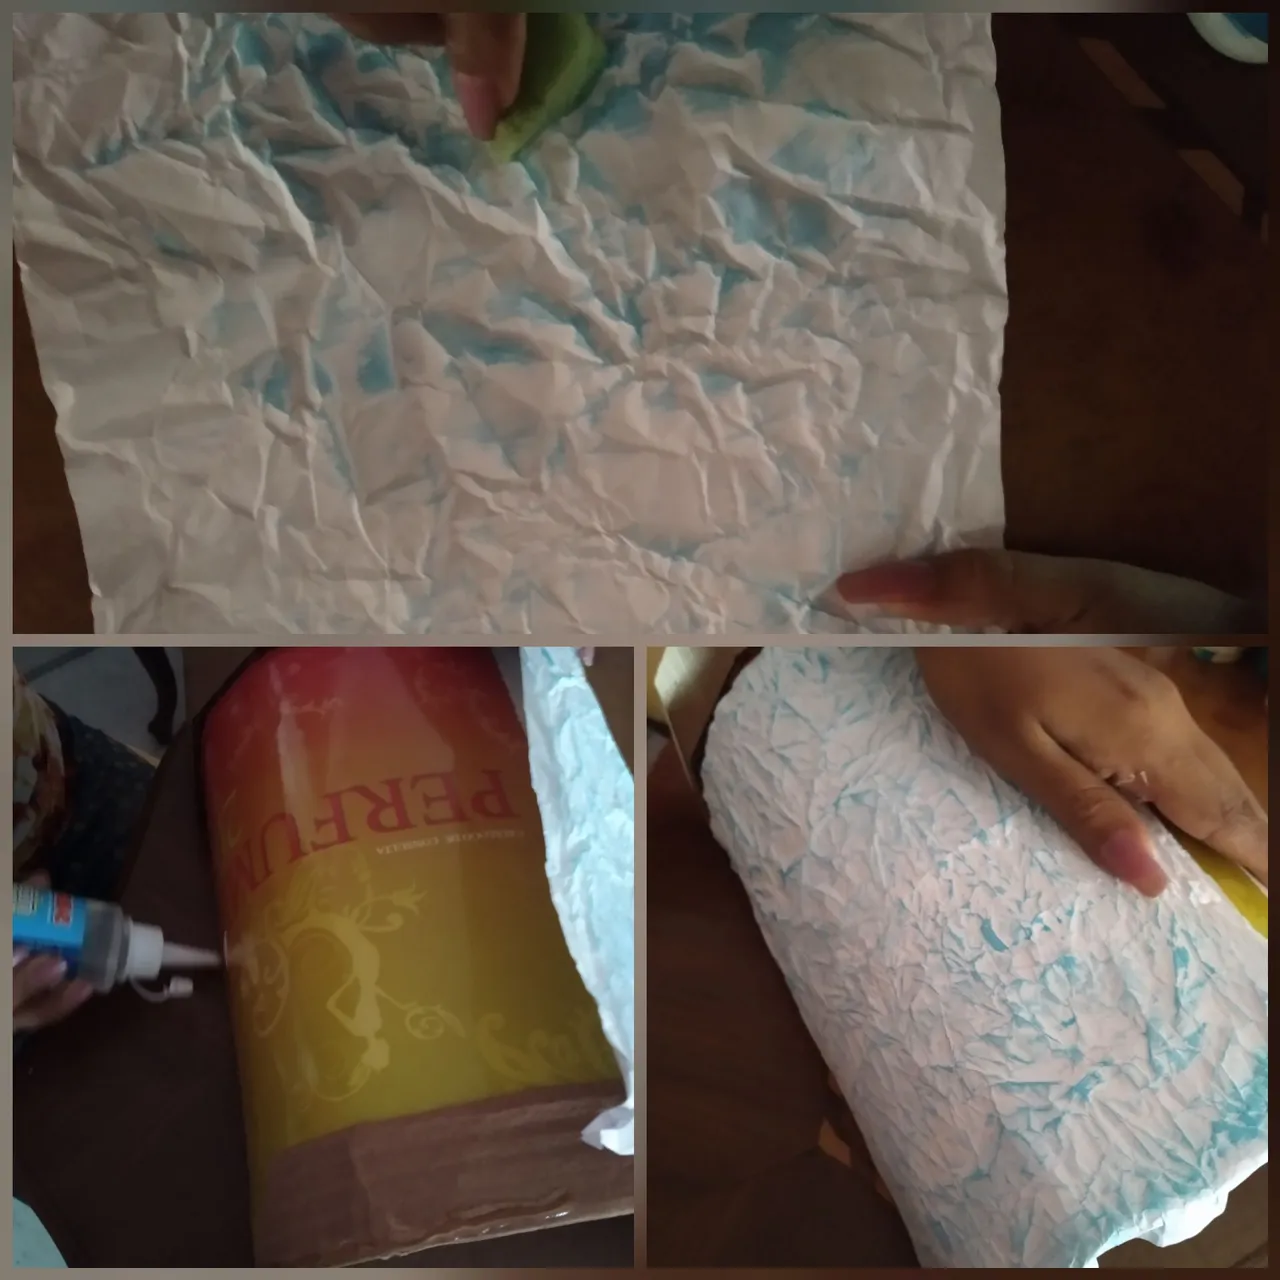
Con otra lámina de cartón de 8cms x 33cms forramos la base del baul de la siguiente manera:
With another 38cms x 33cms sheet of cardboard we cover the base of the trunk as follows:
De esta forma armamos la parte superior y luego recortamos otra tira de cartón con las medidas de la tapa anterior que colocaremos a modo decorativo en la otra parte de la caja. Quedando ya todo nuestro baúl armado. Solo nos queda pintar y decorar:
In this way, we assemble the upper part and then cut another cardboard strip with the measurements of the previous coverthat we will place as a decoration in the other part of the box. Leaving all our trunk armed. We only have to paint and decorate:
Para cubrir nuestro baúl, tomamos dos hojas papel bond y arrugamos lo mas que podamos.
To cover our trunk, we take two sheets of bond paper and wrinkle it as much as possible.
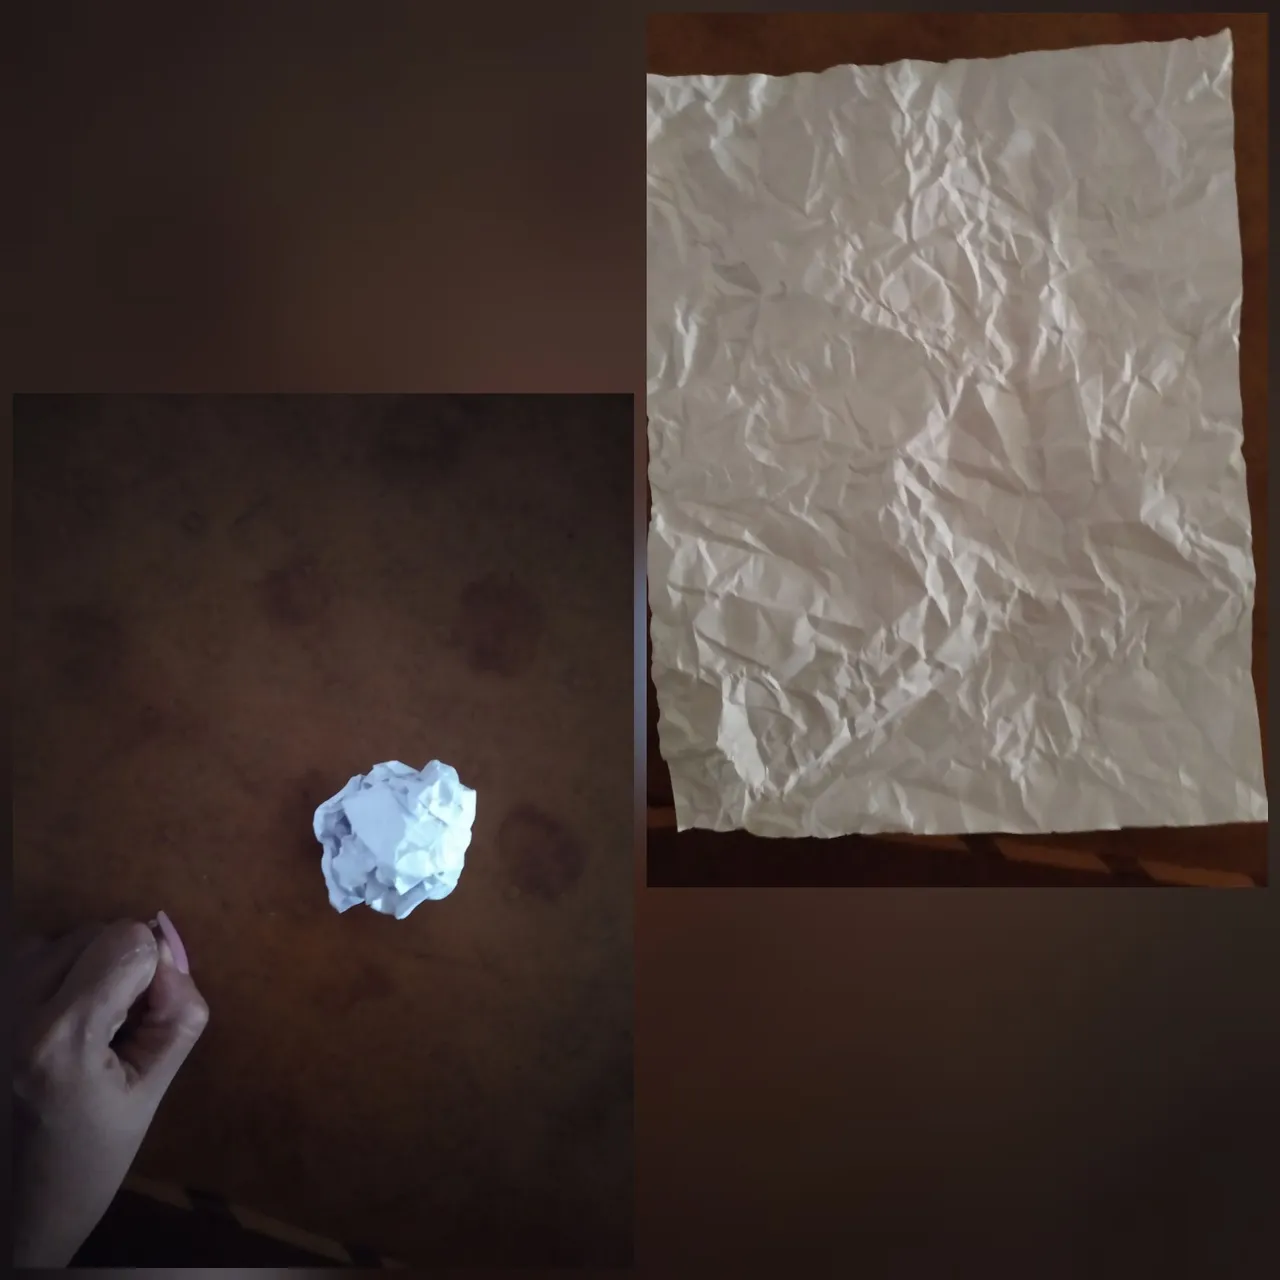
Luego abrimos y estiramos y con un pequeño pedazo de esponja humedecida en una pizca de pintura al frío, pintamos de forma circular. Dejamos secar y luego forramos toda la parte central.
Then we open and stretch and with a small piece of sponge moistened in a pinch of cold paint, we paint in a circular way. We let dry and then we cover the entire central part.
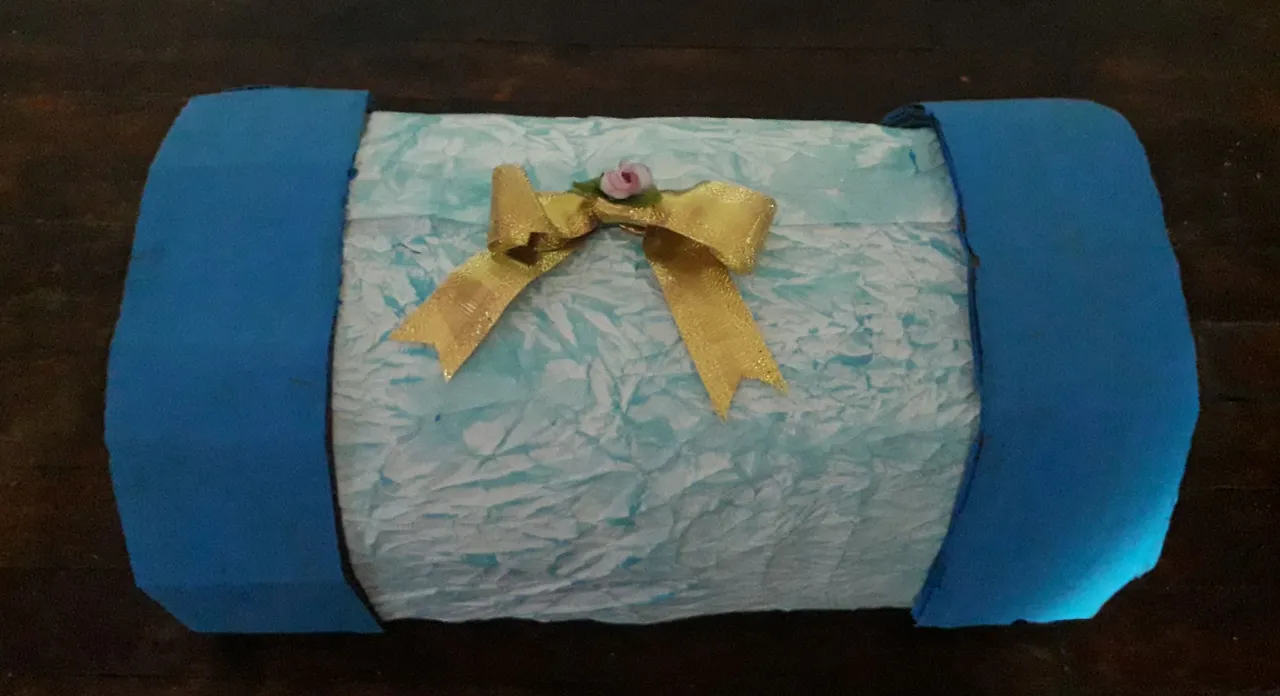
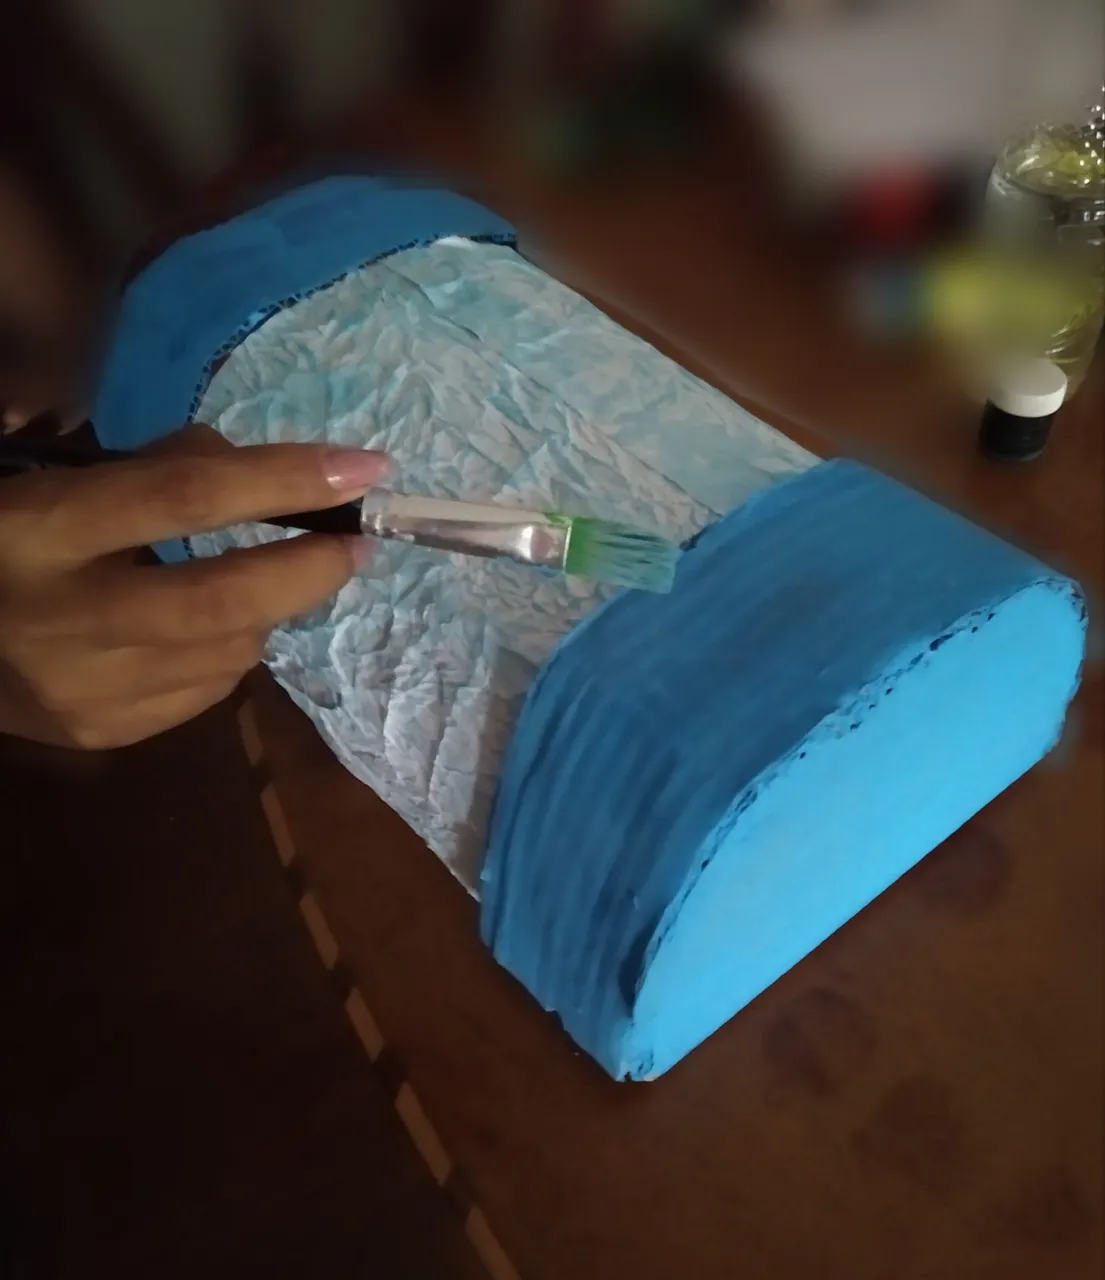
Pintamos a los lados:
We paint on the sides:
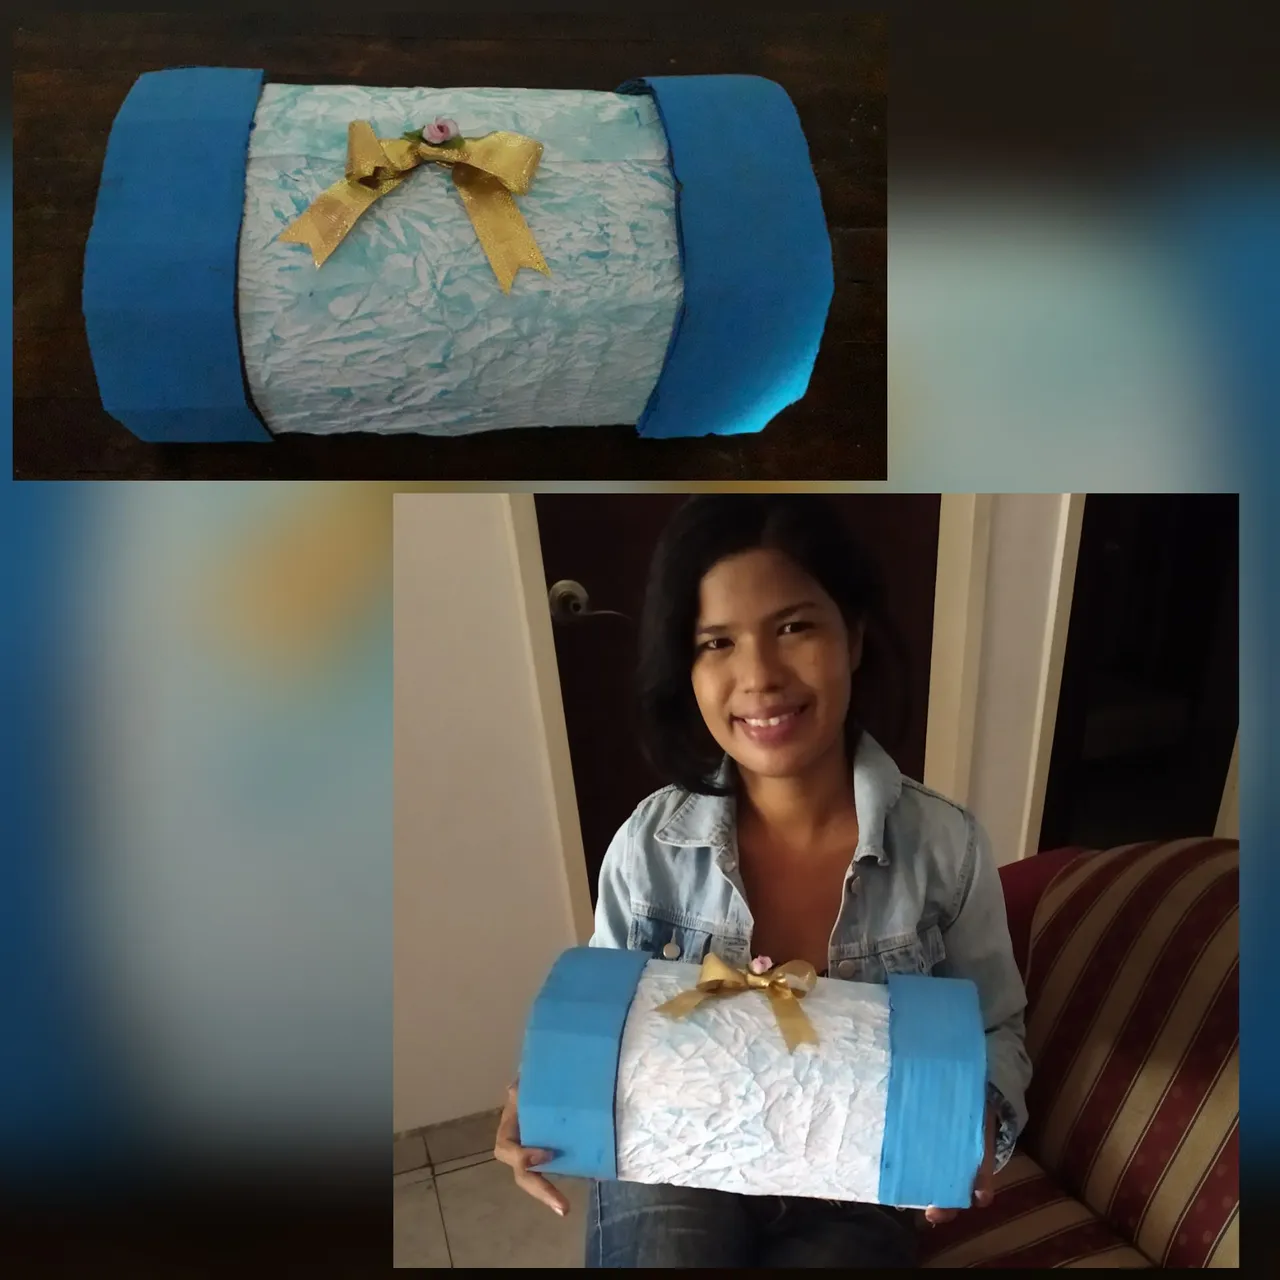
Y el último paso: Colocamos un lazo decorativo de esta manera y listo nuestro baúl listo para usarse. ¿Que te ha parecido?. Anímate a crear esta útil cajita. Gracias por leerme y nos vemos en un próximo post. Bye Bye!
And the last step: We put a decorative bow in this way and ready our trunk ready to use. What do you think?. Go ahead and create this useful box. Thanks for reading and see you in a next post. Bye bye!