Good day my fellow hivers and to the hive community. I have been a bit inactive to hive and to the discord because I got busy with my classes lately. I have to comply this and that so I really have to manage my time and make use of every free time that I got. Whenever it's vacant time, I spend that time for keeping up with my ocd friends, make my assignments and of course, entertain myself through art making or playing games.
And this day was really stressful for me. I only had few hours of sleep and I got to listen to the zoom discussion of my teacher for several hours. And I have to fight for my sleepiness because if not, I would really miss the lecture and learnings.
So much for that. Regarding the art, in my vacant time yesterday, I thought of making some art, another style. And I decided to make vector art. I really like hopping from one style to another. It's like I am still finding the kind of art that I like the most. I love making different styles but people say that it's better to focus on one and improve your skills on that.
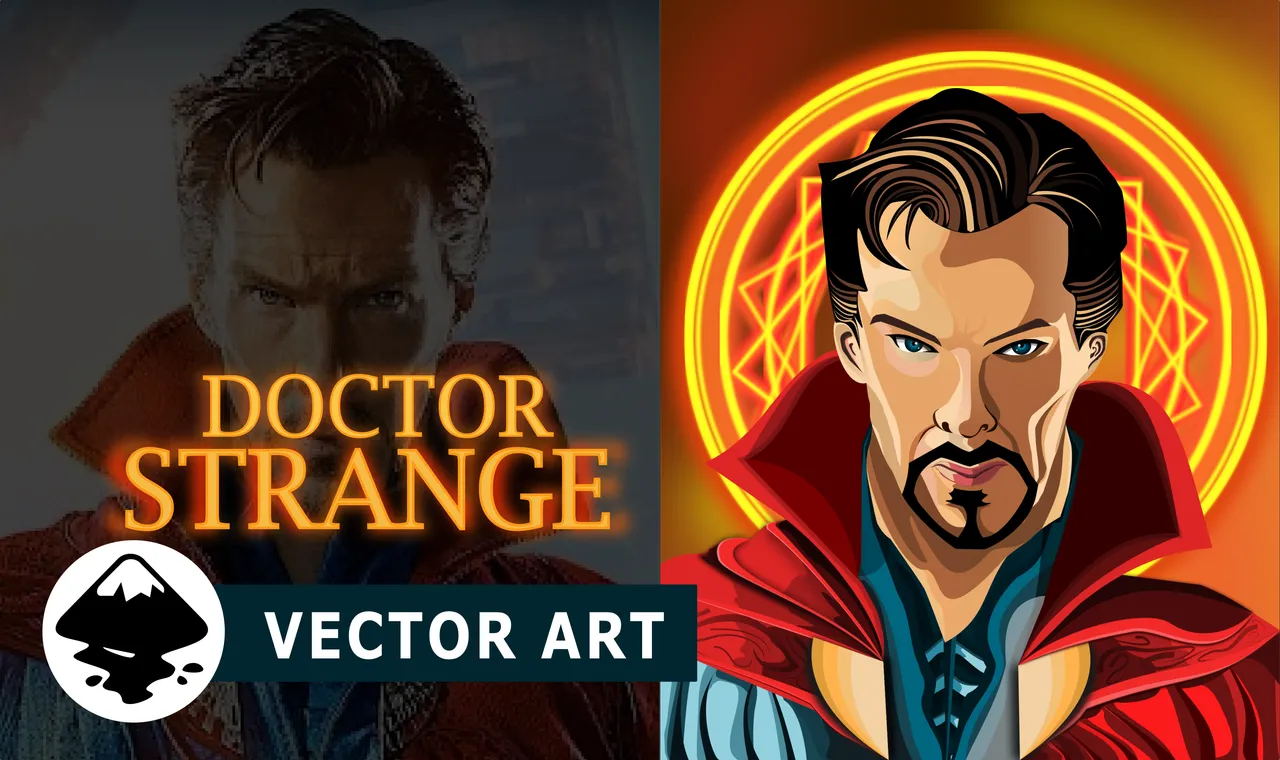
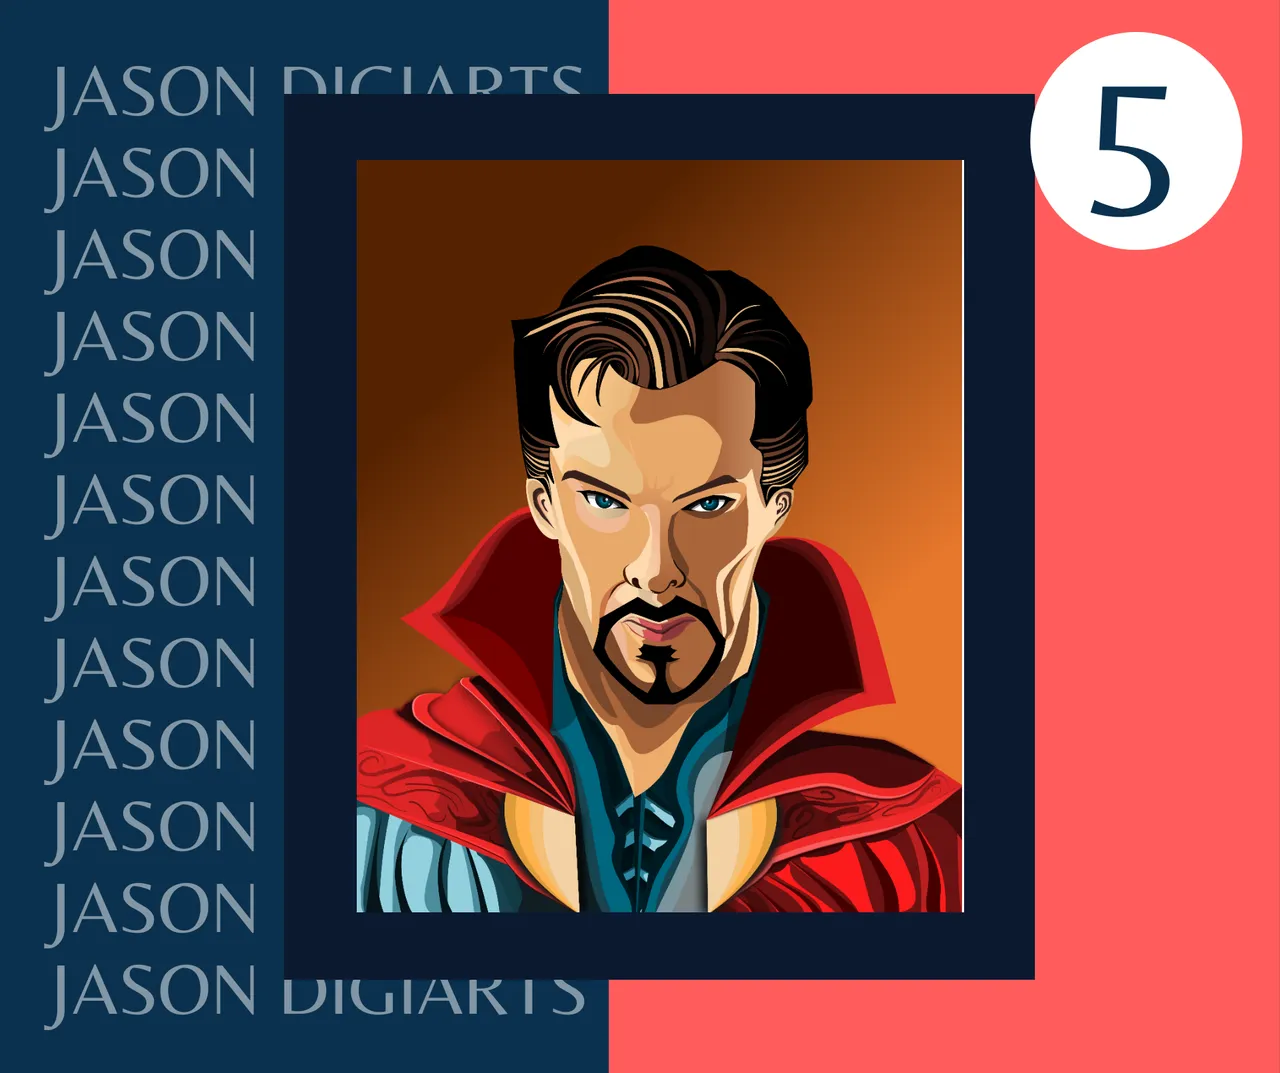
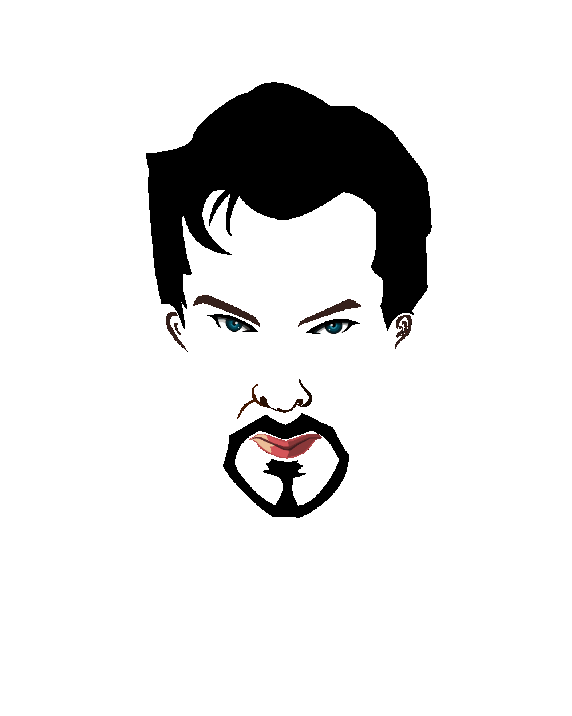
Anyway,I choose making an art for Benedict Cumberbatch. I was really not a die hard fan of him but I somehow idolized him when I saw Sherlock Holmes played by him. The role really fits him and he really portrayed it well. I also am a fan of Marvel and I have remembered that Benedict was also the one who portrayed Doctor Strange and yes, he never failed his fans. He really is a great actor. So I decided to draw a vector art of Doctor Strange. I started to search for reference and I chose this image as my reference.
I started drawing this vector yesterday and I finished it this day. I spent about 6 hours yesterday and 5 hours today. I spent a total of 11 hours. What makes it longer to be finished is that, my laptop is really laggy.

Process
I had a hard time clipping objects in Inkscape because unlike in MediBang Paint, Inkscape does not have a layer clipping (as far as I know) . It was like the shadows and highlights were just included in a single layer. I prefer to have the shadows and highlights on other layers but it is very tidious clipping the art and moving that to another layer.
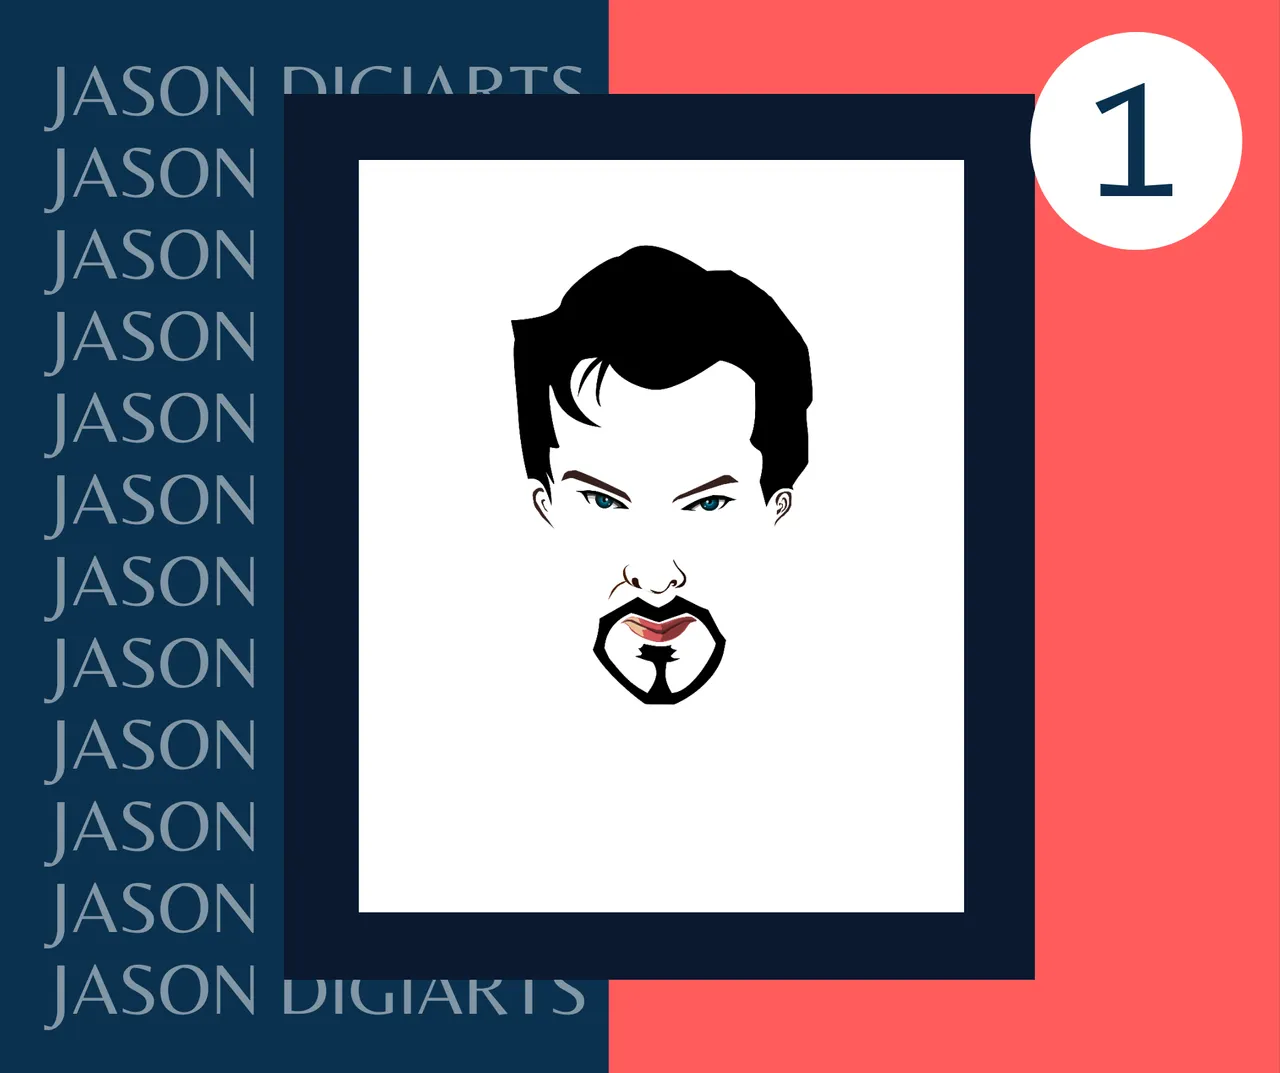
In making this vector art, as you can observe, you can not see any sort of sketches because I put the reference on the bottom most layer and like draw over my reference. It saves time not to sketch for this kind of art and it would be more accurate with regards to the figures.
Initially, I focused on the face first. I drew the parts of the faces first. You can observe in the lips that it already has shadows even in the first step but actually I applied the shadow after some time. As I said earlier, I just like compressed the base tone and shadows into a single layer to save some time.
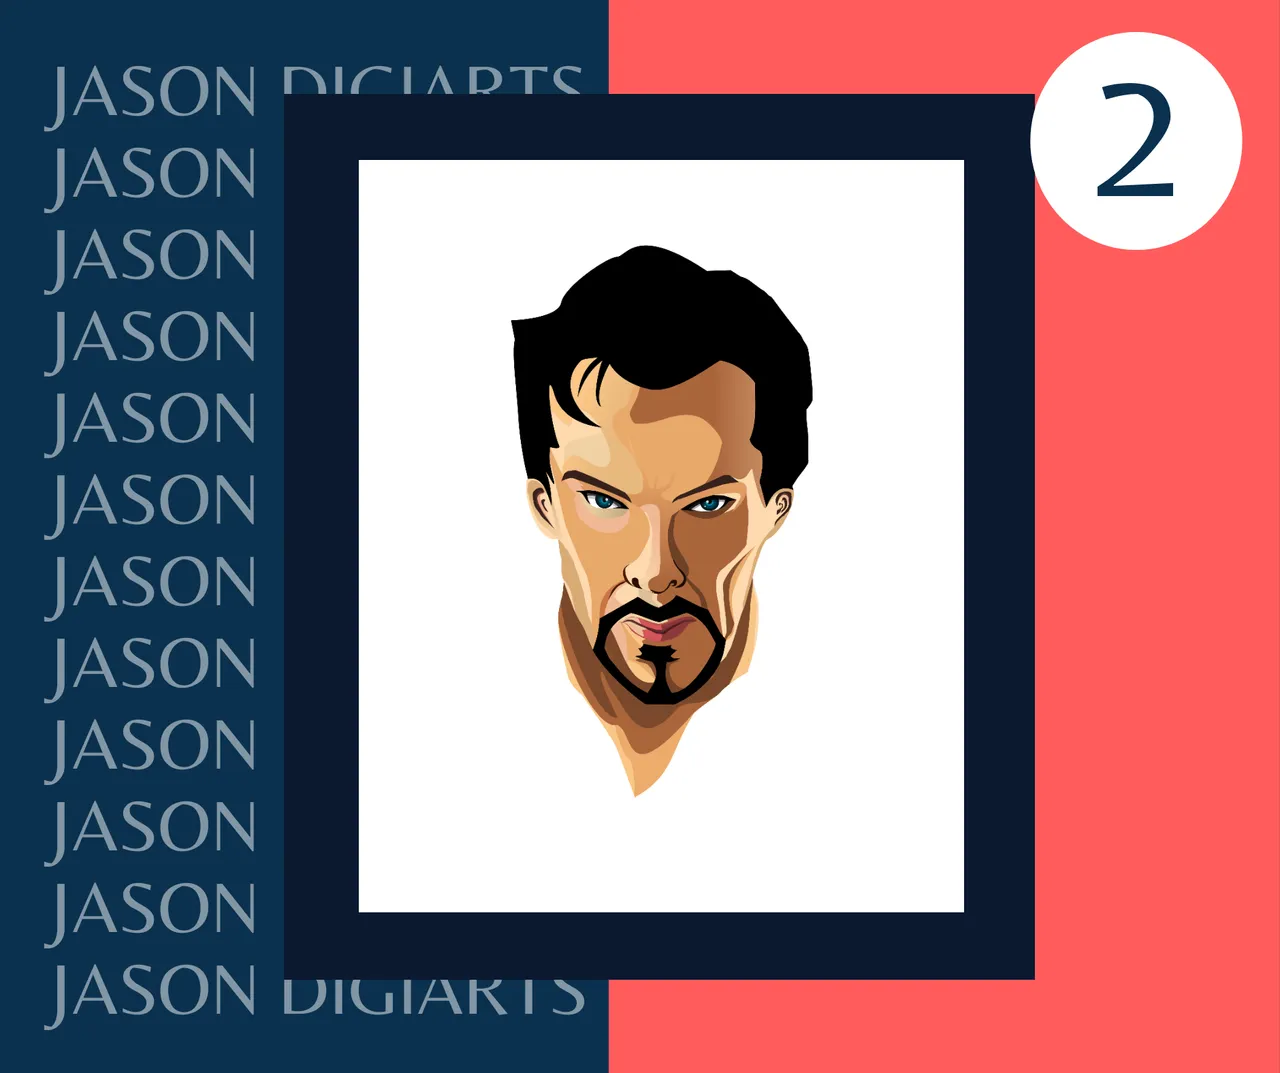
After, I then made the face details. It is really important to identify the source of light so you can know where the shadows take place and where you could put the highlights. By the way, actually the face is already done yesterday but this day, when I finished the art, I felt like the face details are a bit messy and I don't feel like it. So, I then changed some and had a hard time because when there is too many figures in the app, my laptop lags or the worst, it crashes.
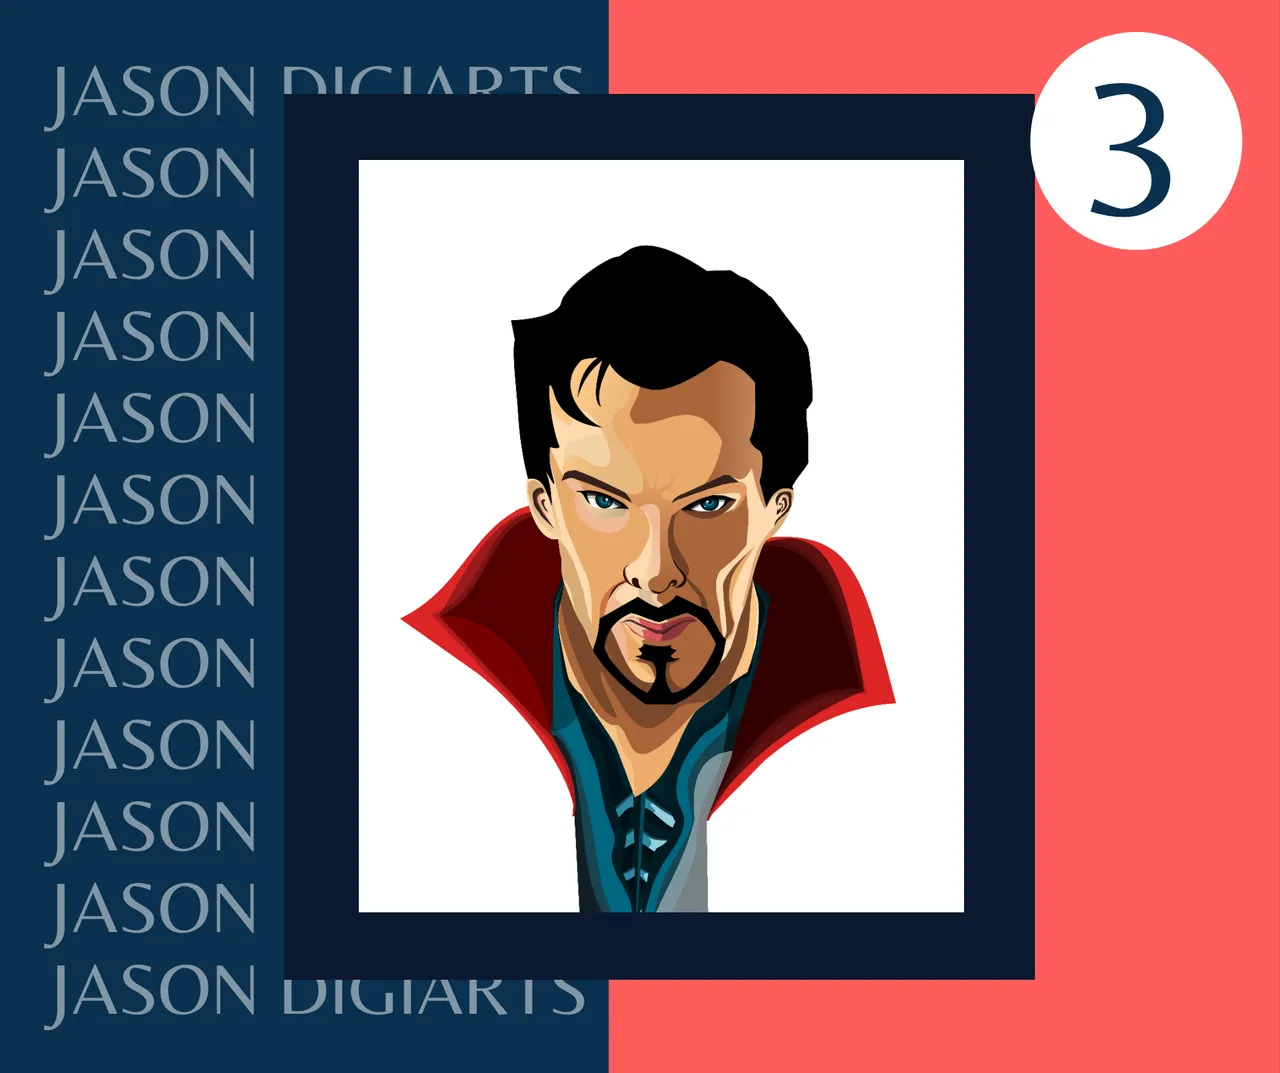

Anyway, following this step is the making of the inner coat with the collar and followed by the outer coat. I had many color experiments here because when I see that it seems a bit oversaturated or unsaturated compared to the other figures, I revise it again and pick a new color shade. I also then put the hair details using the bezier tool with the "triangle out" option.
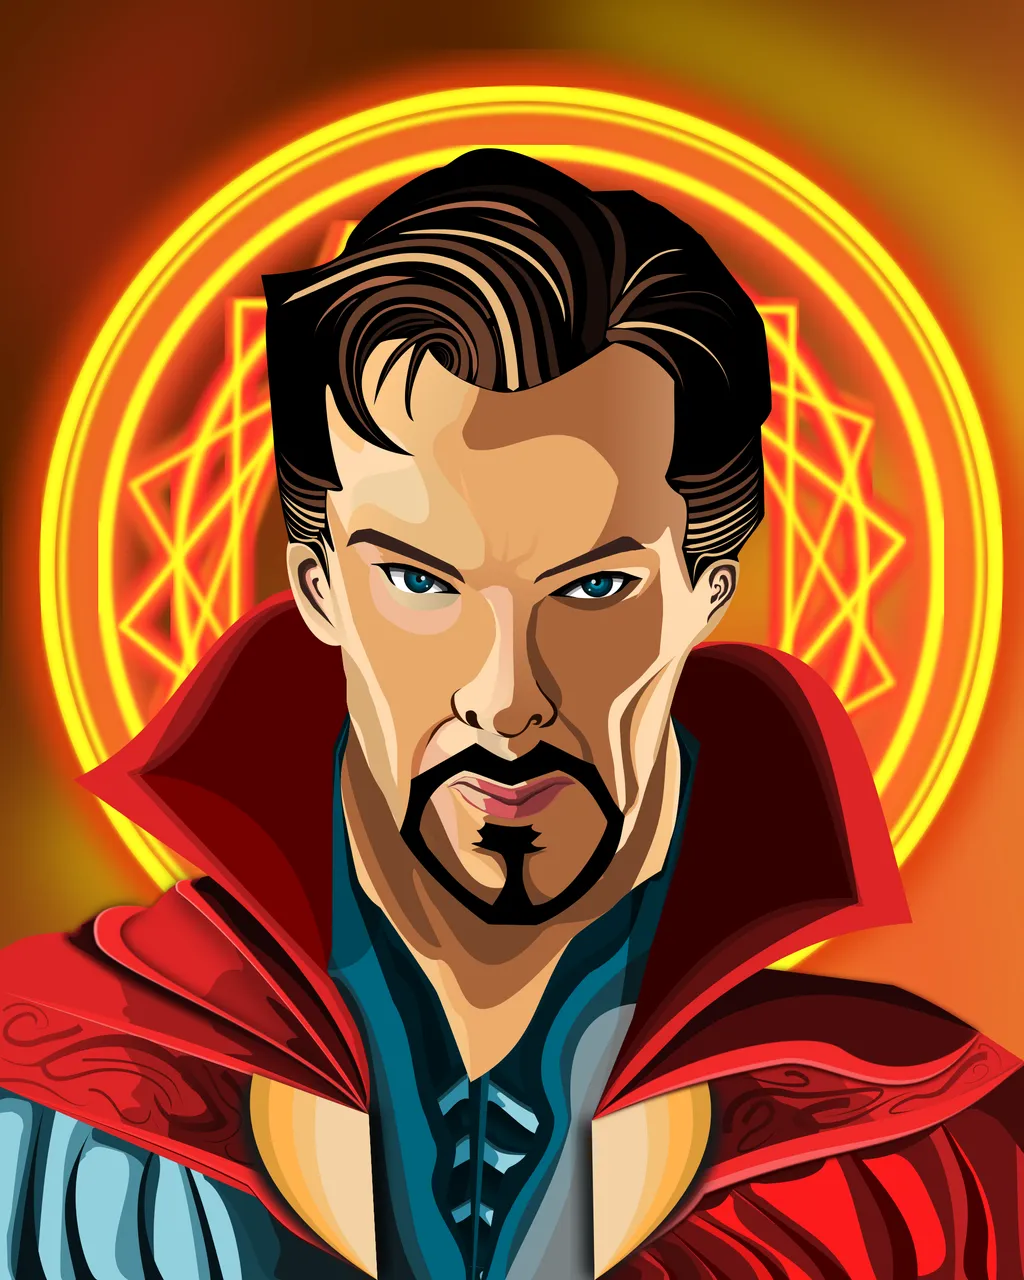
After, I then made the background. I made the base figure with a gradient dark and light orange. This is to compliment the color of the next figure that I am gonna be drawing which is Doctor Strange's power effect
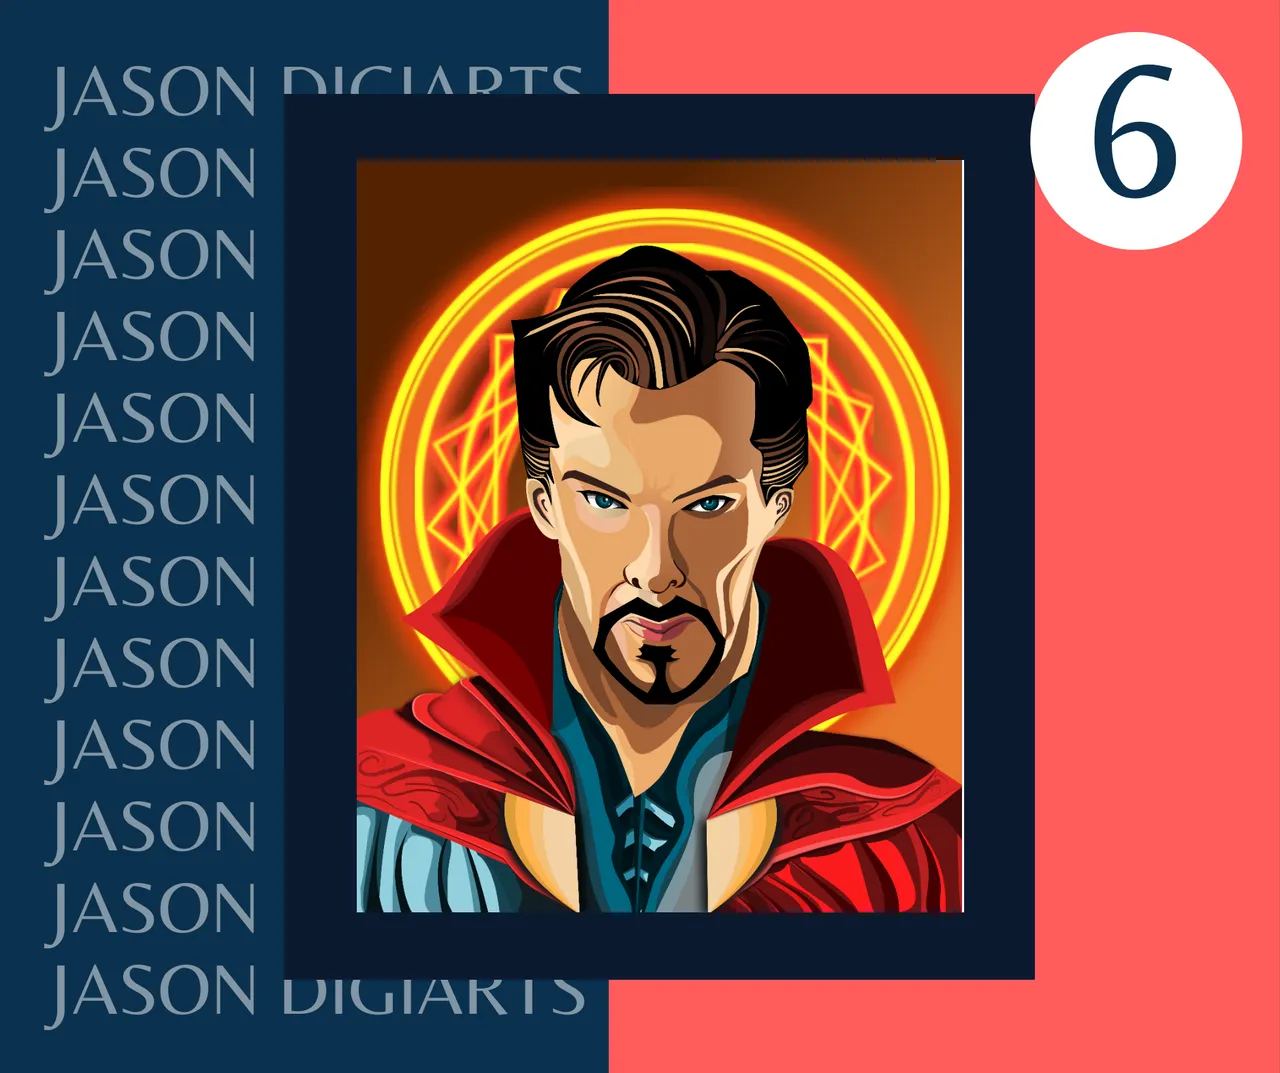
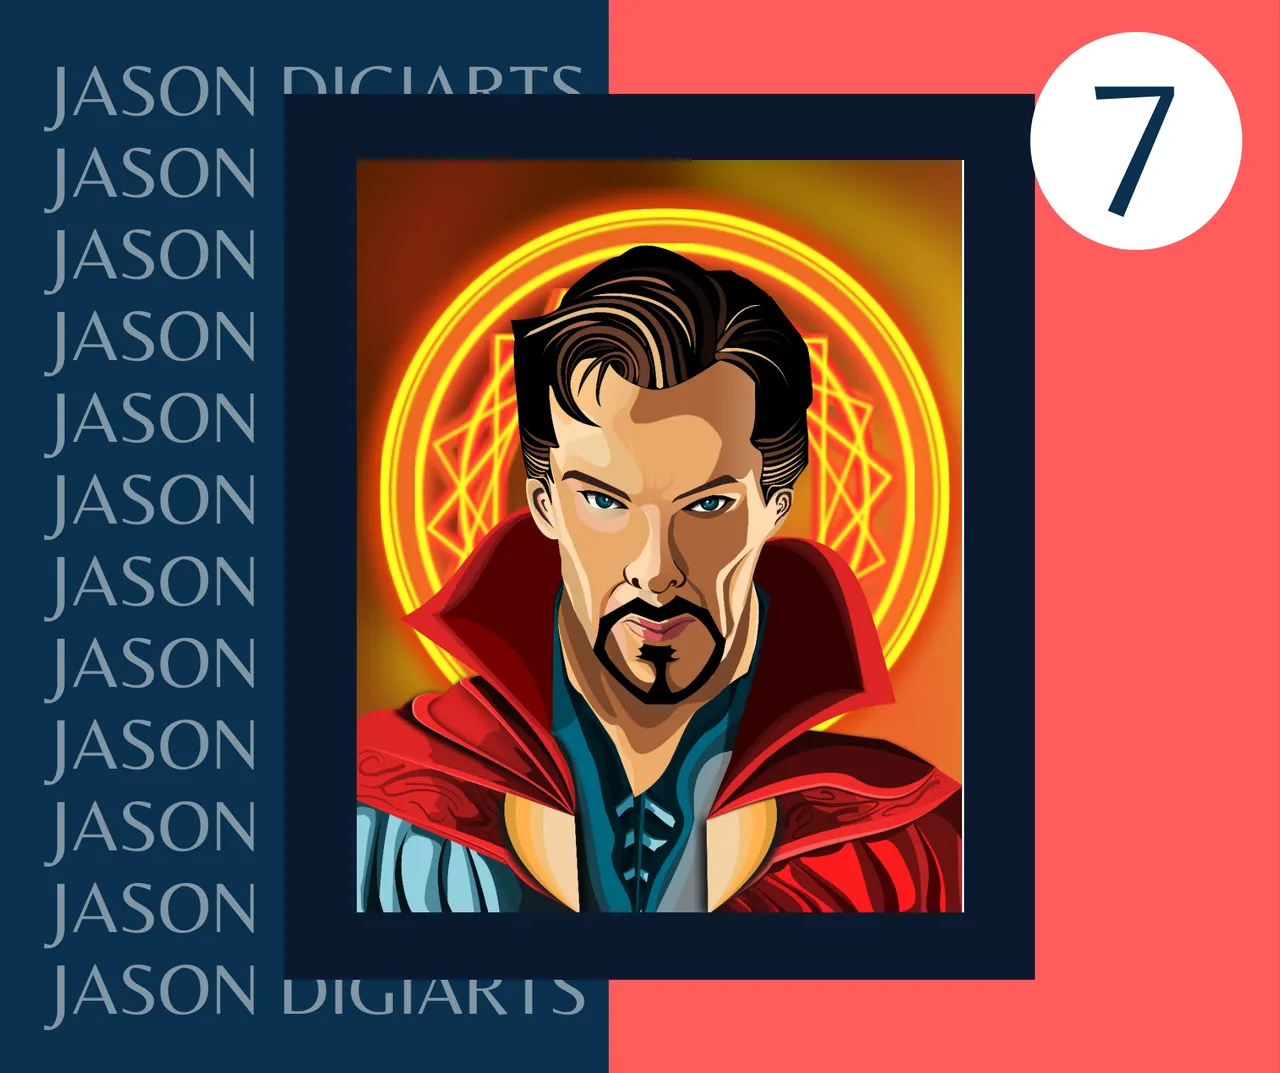
In making the circle figure when Doctor Strange casts his power, I used the arc tool. After, I removed its fill color and put a stroke line or the edge color. I first had a base yellow color for the main outline of the figure and duplicated it two times. The first duplicate is colored orange and the second one, has a bigger size than the first, is colored red. I then blurred these duplicates to make it look like a smoky or shining effect. Lastly, I then put a smoky blurred lines using the freehand tool.
Here is a GIF on how the process were done.
Materials
- Inkscape
- Main Tools Used:
- Bezier tool
- Freehand tool
- Arc tool
- Rectangle tool
Notes
This art wasa bit tiring though. What makes me more tired is because of my laggy laptop but who cares about lags and delays when you wanted to do a thing that you love, right? I have not spend some time lately in the OCD discord because I got busy though. It was truly fun there and the people were amazing. Sometimes, I just backread some messages in the OCD and HivePH discord server and the messages were really enjoying and funny. I just remembered about my Pokedex and I do not know yet when I can make another one again.
Wow. You reached this far? Thank you! That's it for today's blog. Hope you enjoyed it and had fun :)

Spread Positivity and Keep the Vibes Up!
What's up Hivers ! Give me a Hive Five.......................Nice! This is Chris Jason A. Oswa, your boy @jason04. I am a Computer Engineering student. I am proud to be a hiver and assures to give quality content as I can. I am a "jack of all trades, master of none" which means I can do a bit of poetry, a bit of travel blog, daily experiences and a bit of graphic designs. Hope you enjoyed reading my blog and don't forget to upvote, comment your suggestions and reblog. Lastly, follow me to be updated with my random blogs.