
Español
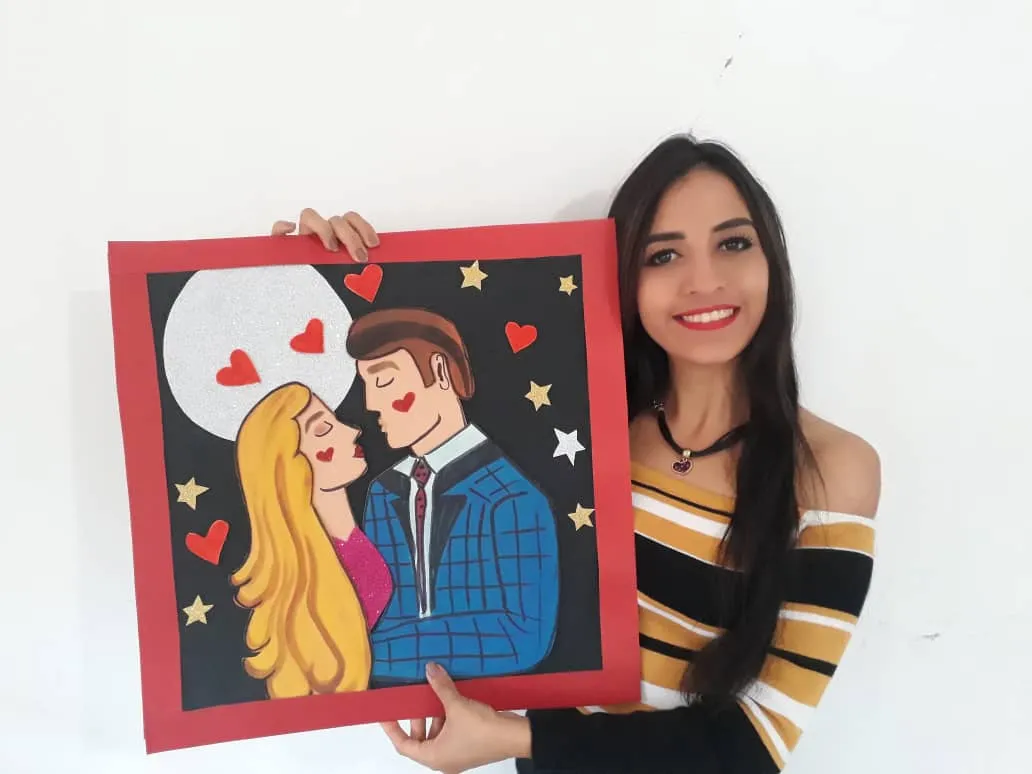
Hola querida familia de HIVE 💋 El día de hoy les traigo un nuevo y divertido paso a paso en donde les mostrare como realizar un hermoso cuadro de enamorados bajo la luna, hecho de foami y otros materiales fáciles de conseguir. Esta es una idea muy fácil y económica de decorar nuestras paredes favoritas. Así que, los invito a disfrutar de este divertido momento, ideal y perfecto para el desarrollo de la creatividad tanto de niños como adultos. Además es una idea perfecta para pasar un rato agradable con nuestros pequeños en casa e incentivarlos, ya que, pueden ir, de a poco, desarrollando su ingenio y acercándose un poco más al trabajo artístico.
English
Hello, dear family HIVE 👄 Today I bring you a new and fun step by step where I will show you how to make a beautiful painting of lovers under the moon, made of foamy and other easily available materials. This is a very easy and cheap idea to decorate our favorite walls. So, I invite you to enjoy this fun moment, ideal, and perfect for the development of creativity for both children and adults. It is also a perfect idea to spend a pleasant time with our little ones at home and encourage them, since they can go, little by little, developing their ingenuity and getting a little closer to artistic work.
¿Qué están esperando?
Gracias a esta técnica podemos crear nuestros propios cuadros, además, un hermoso cuadro hecho en casa, es una manera creativa y muy económica de darle un toque de alegría a nuestras paredes. Antes de comenzar no olvidemos lavarnos nuestras manos.
What are they waiting for?
Thanks to this technique we can create our own paintings, in addition, a beautiful homemade painting, is a creative and very economical way to give a touch of joy to our walls. Before we start, let's not forget to wash our hands.
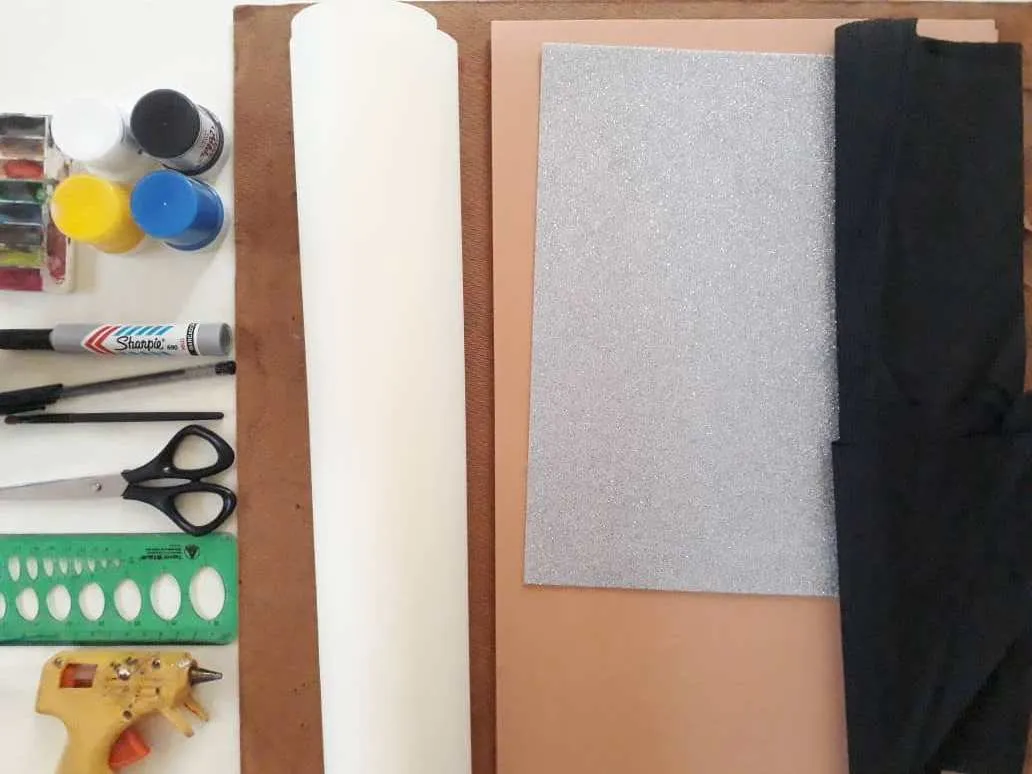
[Materiales | Materials]
Para hacer este hermoso cuadro necesitaremos:
- Moldes.
- Foami o goma eva.
- Papel vegetal o calco.
- Papel de color.
- Regla.
- Lápiz.
- Marcador.
- Tijera.
- Pincel o brocha.
- Pintura de acuarela.
- Madera MDF o Cartón.
- Silicona caliente o Pegamento.
To make this beautiful painting we will need:
- Molds.
- Foamy or eva foam.
- Vegetable paper or tracing.
- Colored paper.
- Rule.
- Pencil.
- Marker.
- Scissors.
- Brush or paintbrush.
- Watercolor paint.
- MDF wood or cardboard.
- Hot silicone or glue.
Procedimiento (paso a paso)
Process (step by step)
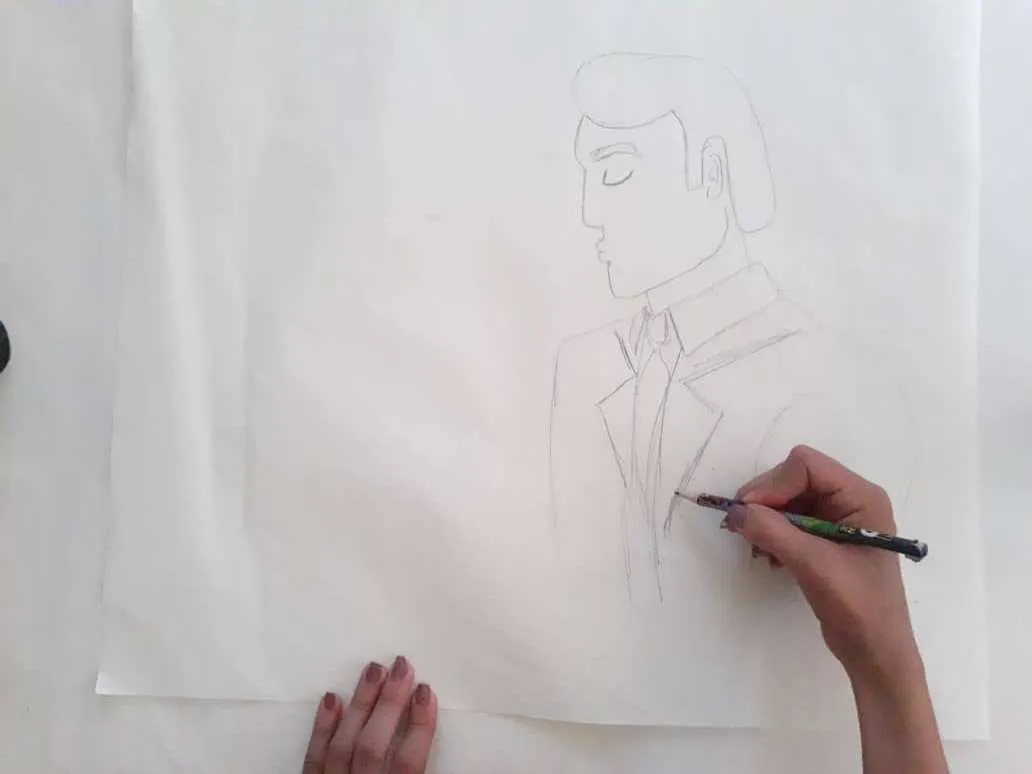
Primero, dibujamos un hermoso dibujo de dos enamorados bajo la luna en papel vegetal o de calco, o cualquier otro papel de dibujo que encontremos. Para este paso podemos utilizar un lápiz común de grafito o cualquier otro con el que se sientan más cómodos.
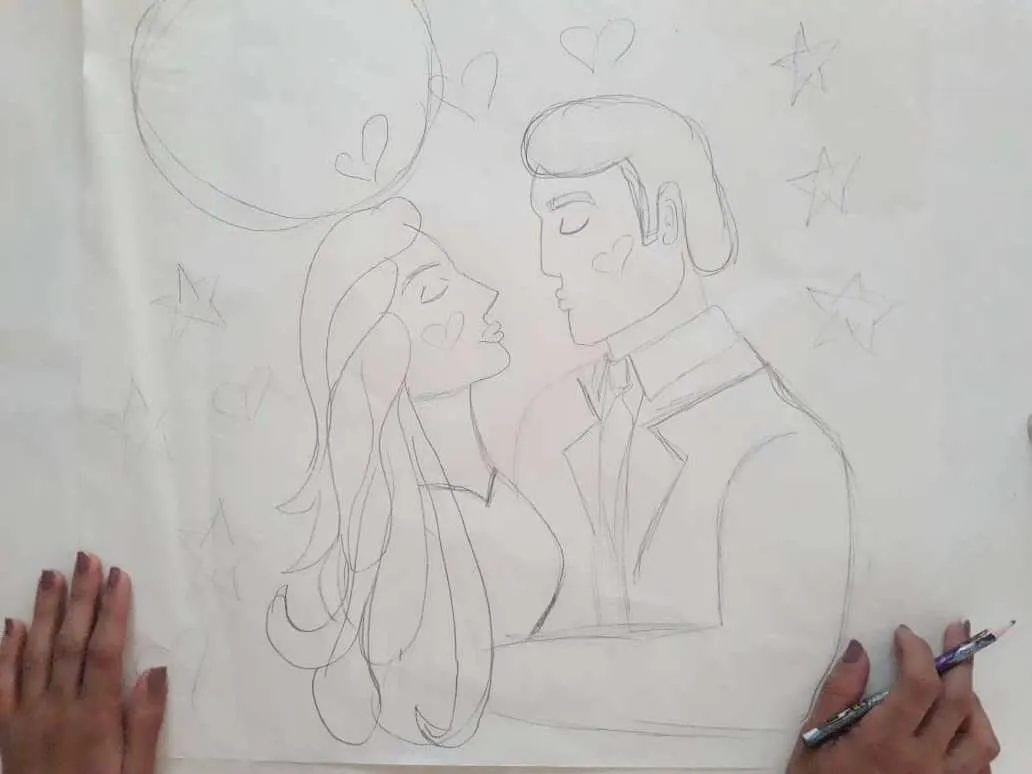
First, we draw a beautiful drawing of two lovers under the moon on tracing paper or tracing paper, or any other drawing paper we find. For this step, we can use a common graphite pencil or any other with which they feel more comfortable.
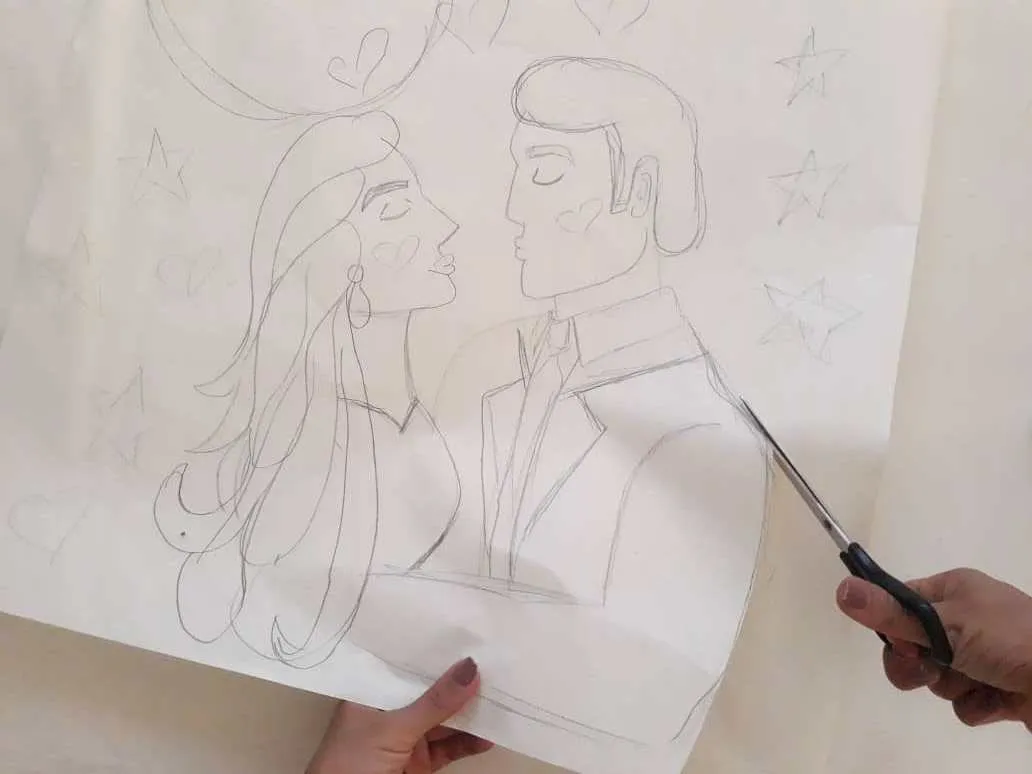
Ahora, recortamos y separando la luna, cabellos, vestuarios y rostros de los enamorados para obtener los moldes deseados. Debemos tener mucho cuidado para mantener las medidas intactas y evitar accidentes al utilizar la tijera.

Now, we cut and separate the moon, hair, costumes, and faces of lovers to obtain the desired molds. We must be very careful to keep the measurements intact and avoid accidents when using scissors.
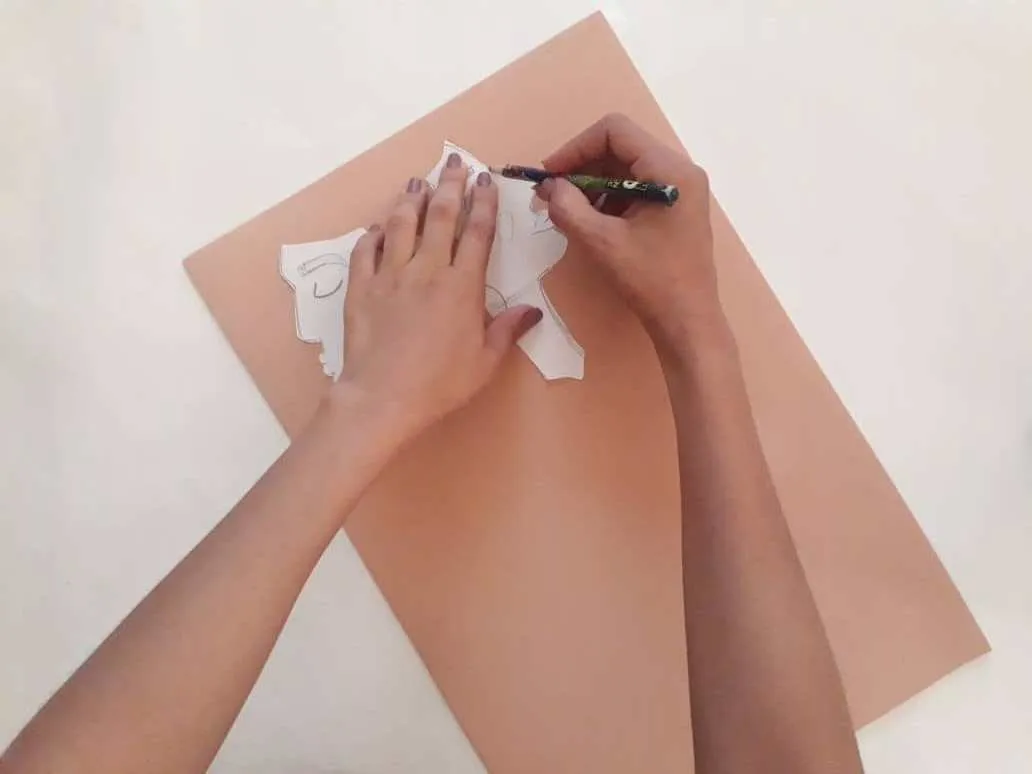
Luego, transferimos los moldes obtenidos al foamy del color que más nos guste. Debemos tener cuidado para mantener las medidas intactas y evitar accidentes con la tijera.
Then, we transfer the molds obtained to the foamy of the color that we like the most. We must be careful to keep the measurements intact and avoid accidents with the scissors.
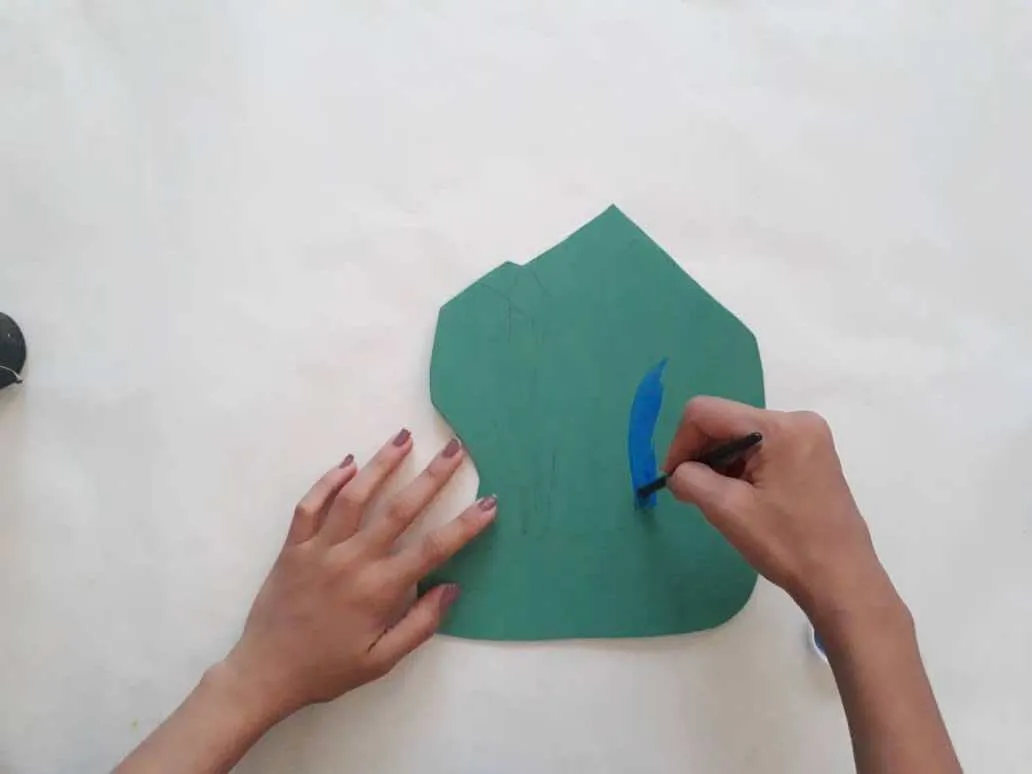
Ahora, le damos magia y color a saco del hombre, aplicando pintura de color azul y definimos detalles y corbatas con ayuda del marcador.
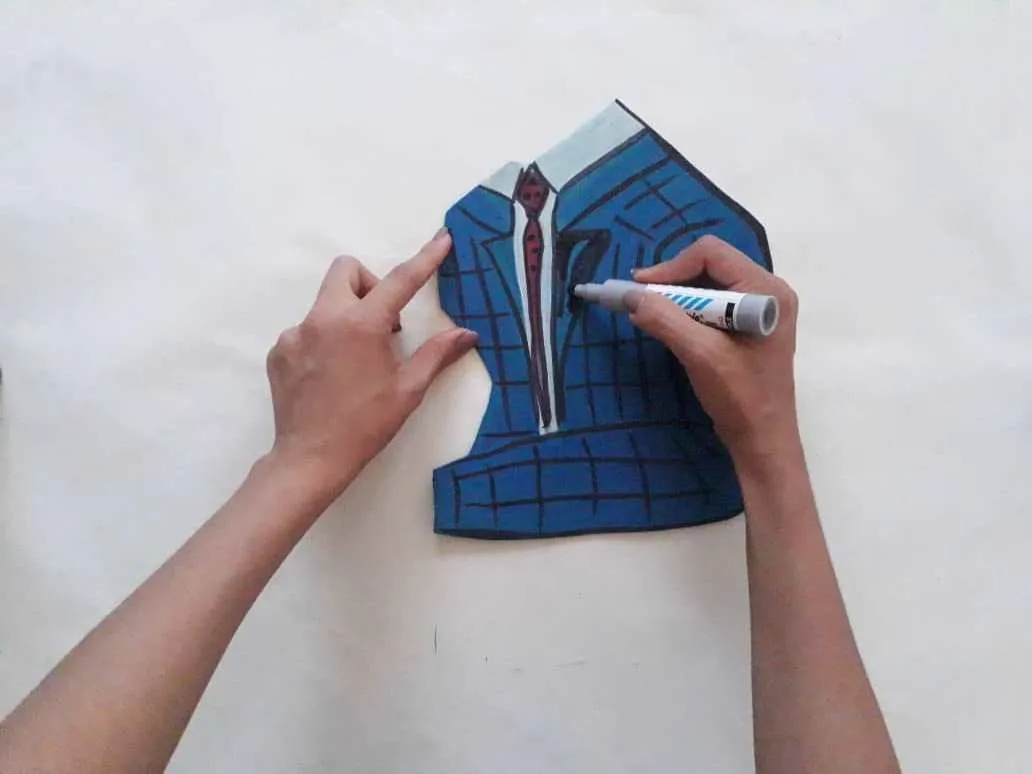
Now, we give magic and color to the man's coat, applying blue paint and define details and ties with the help of the marker.
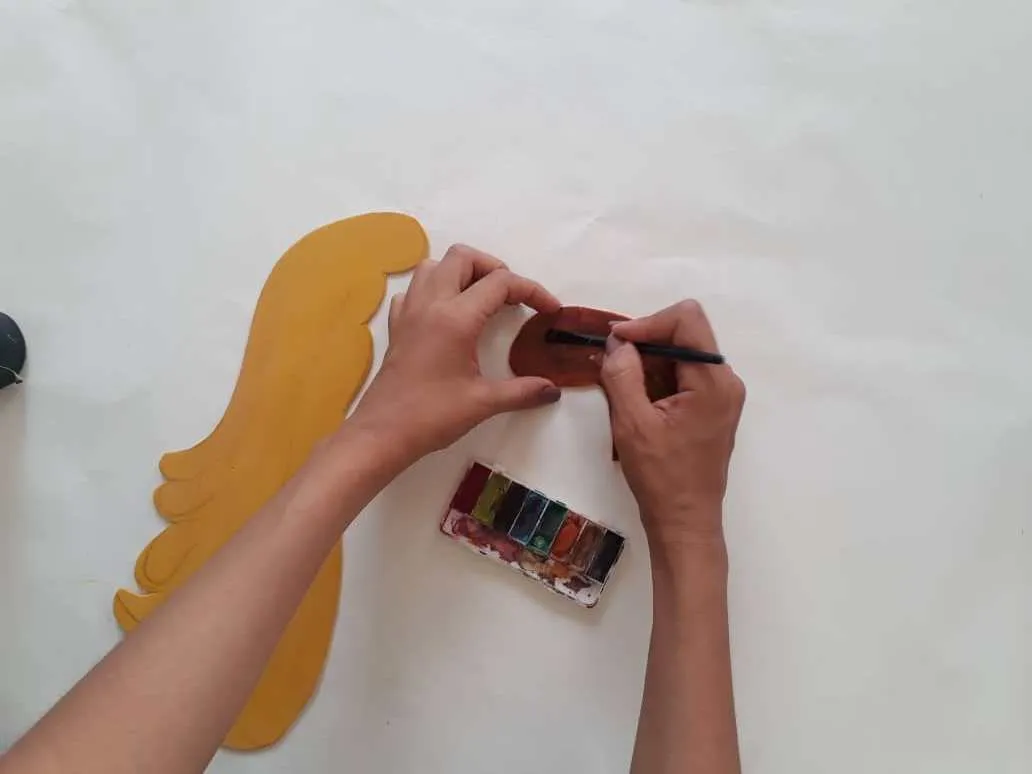
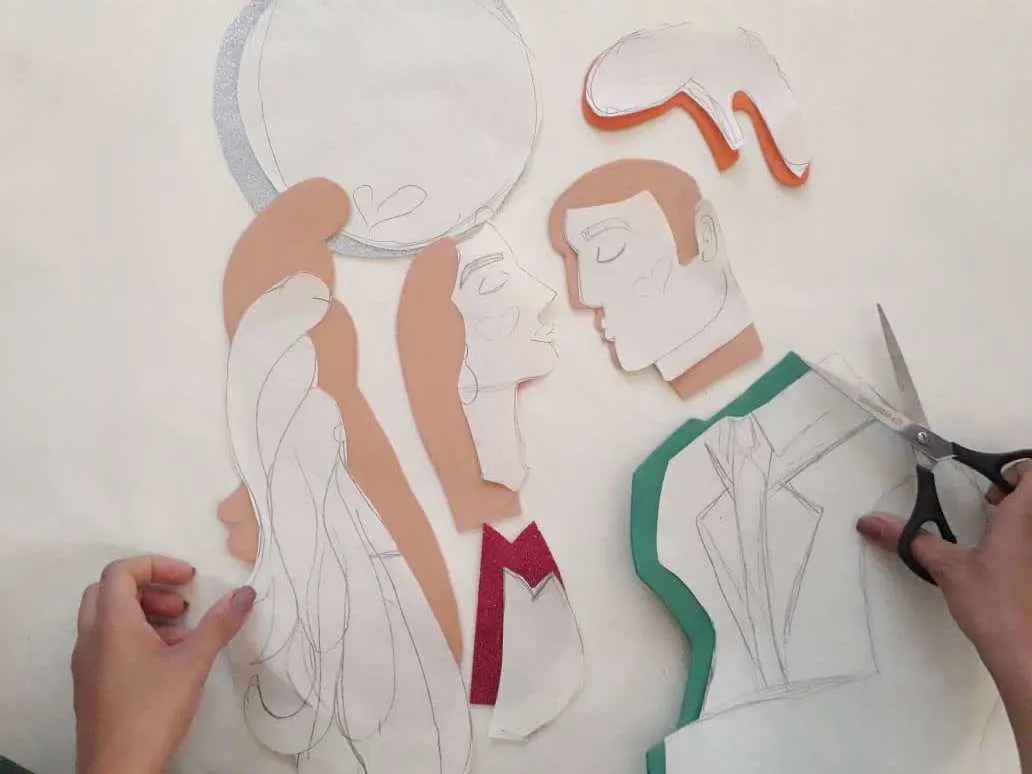
Luego, aplicamos un poco de pintura acuarela con la ayuda de un pincel para que el cabello luzca radiante. Para lograr un cabello hermoso definimos las puntas utilizando un marcador.
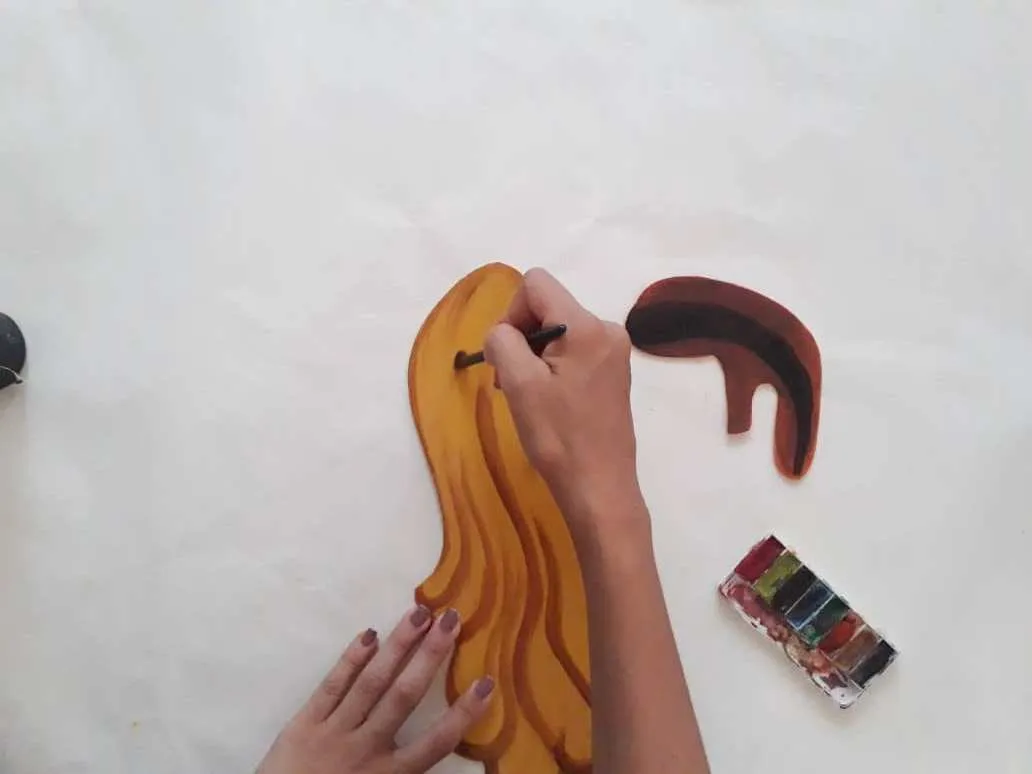
Then, we apply a little watercolor paint with the help of a brush to make the hair look radiant. To achieve beautiful hair we define the ends using a marker.
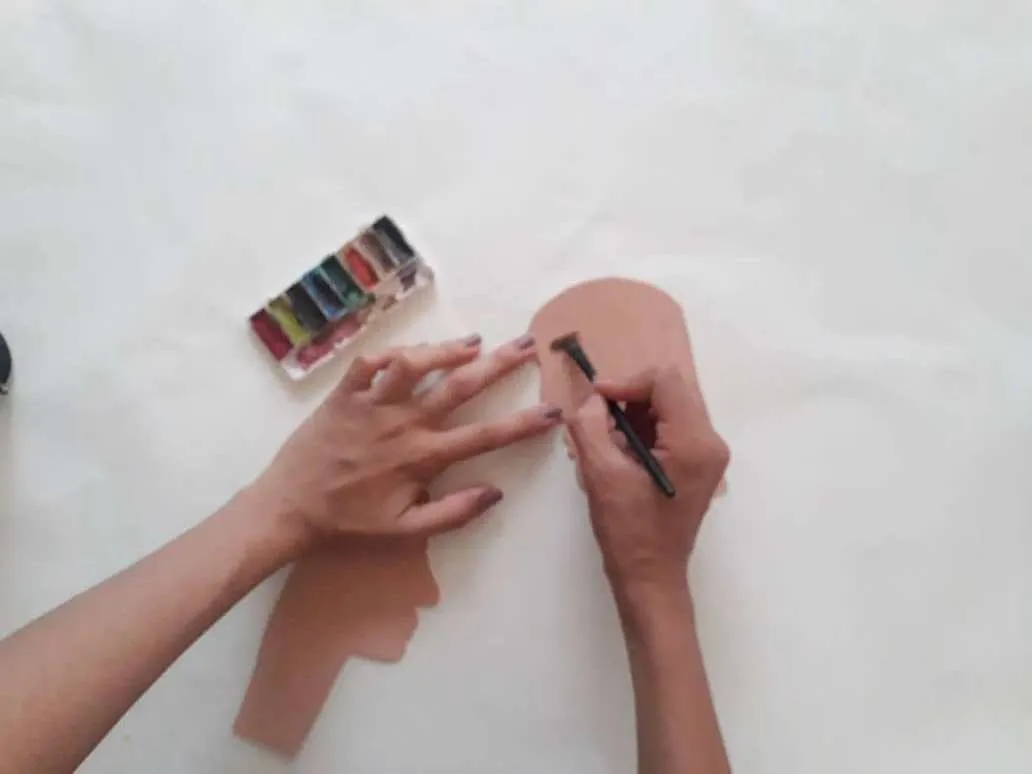
Con la ayuda de un pincel o brocha aplicamos pintura de acuarela y utilizamos el marcador para definir los rostros y detalles de nuestros enamorados. Al finalizar este paso esperamos que seque la pintura en todas nuestras partes.
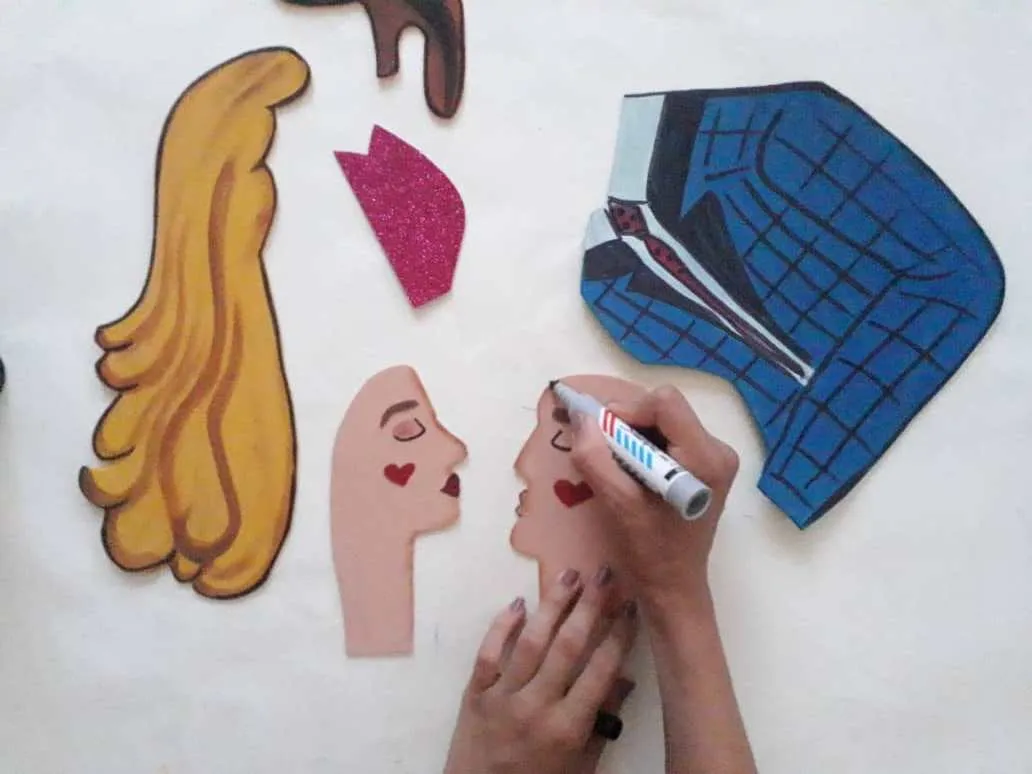
With the help of a brush or brush, we apply watercolor paint and use the marker to define the faces and details of our lovers. At the end of this step, we hope that the paint dries in all our parts.
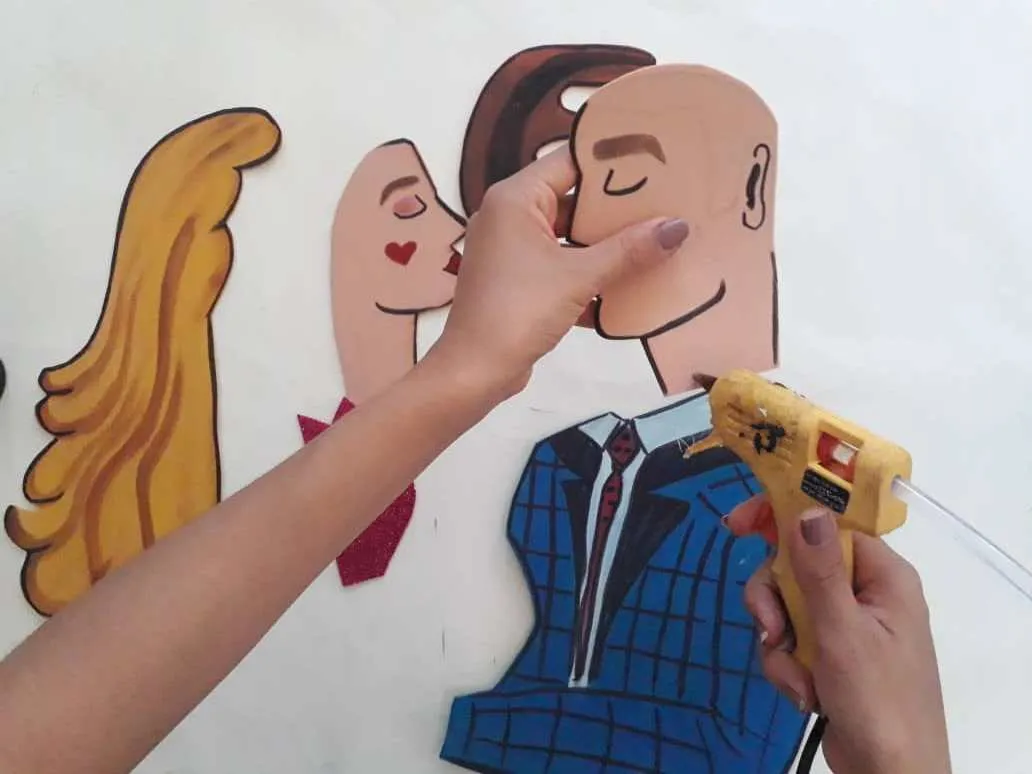
Una vez que la pintura este completamente seca, unimos las partes (cabellos, rostros y vestuarios) utilizando silicona caliente. Debemos hacer un poco de presión para asegurarnos que queden bien pegadas.
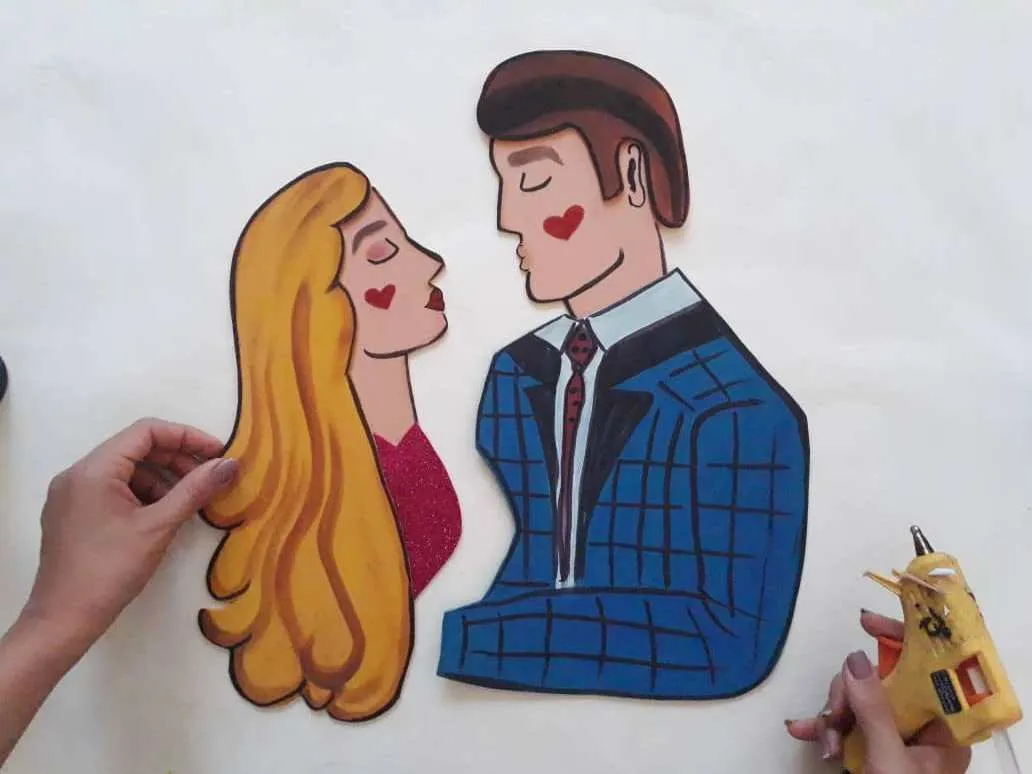
Once the paint is completely dry, we join the parts (hair, faces, and costumes) using hot silicone. We need to do a little bit of pressure to make sure they stick together.
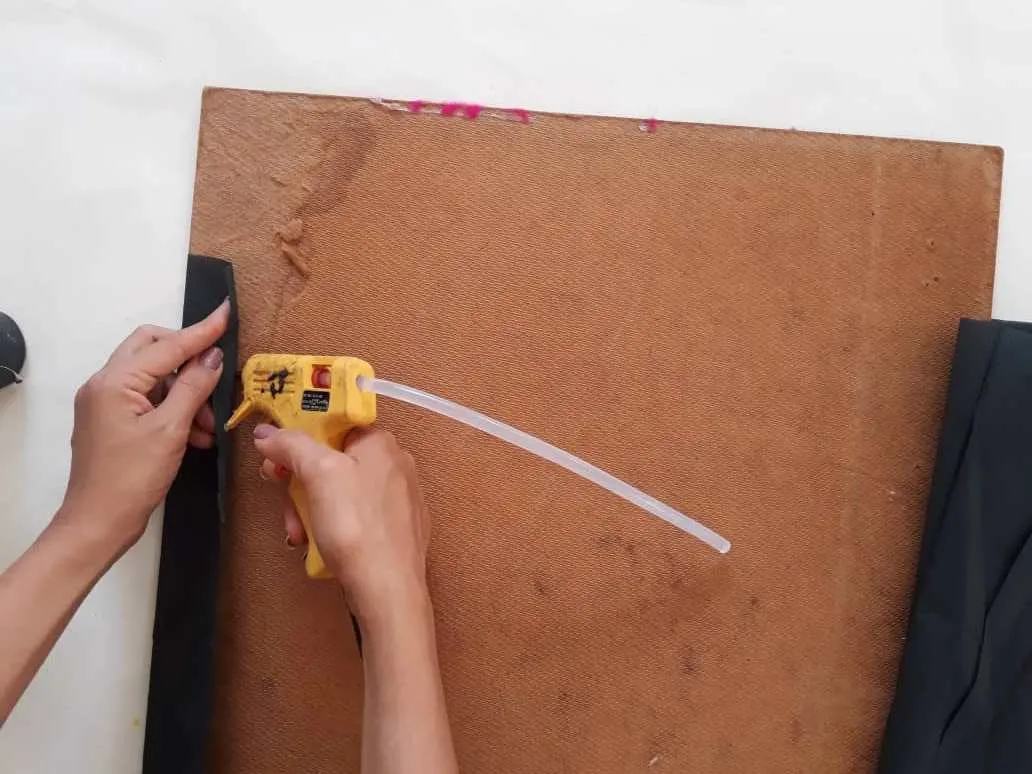
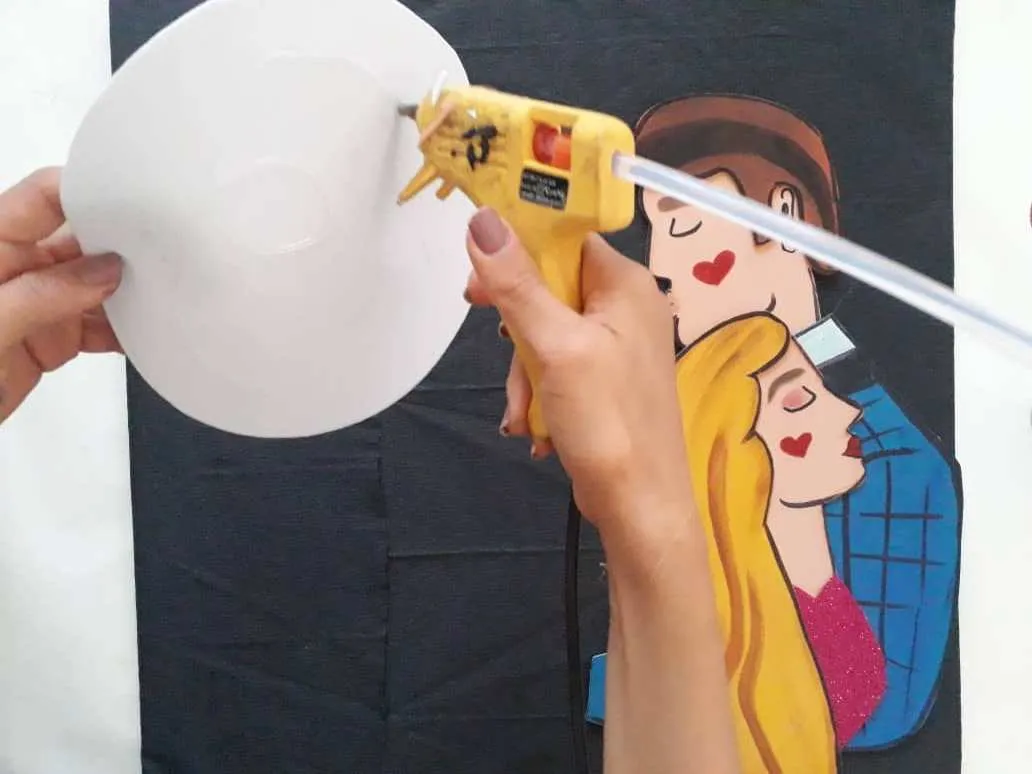
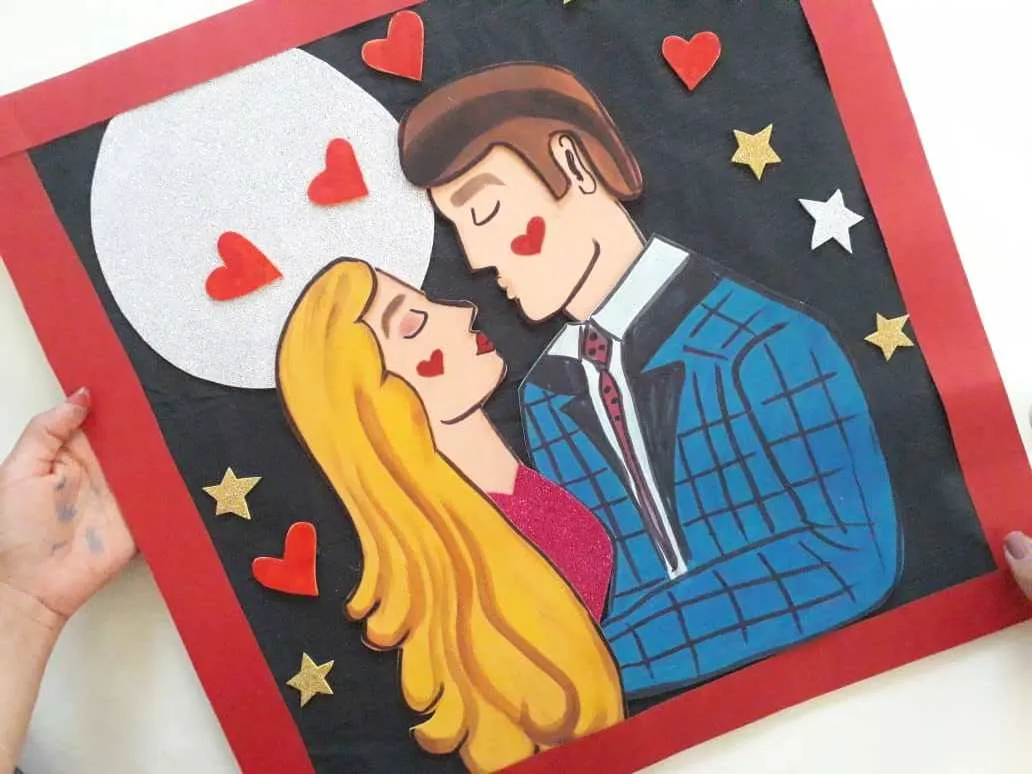
Ahora, recortamos un cuadrado de madera MDF o cartón de 42cm x 42cm y lo cubrimos con papel lustrillo negro o del color que más nos guste o combine. Recuerden que también pueden utilizar cartón para fabricar su base ya que es un material reciclable, económico y fácil de conseguir.
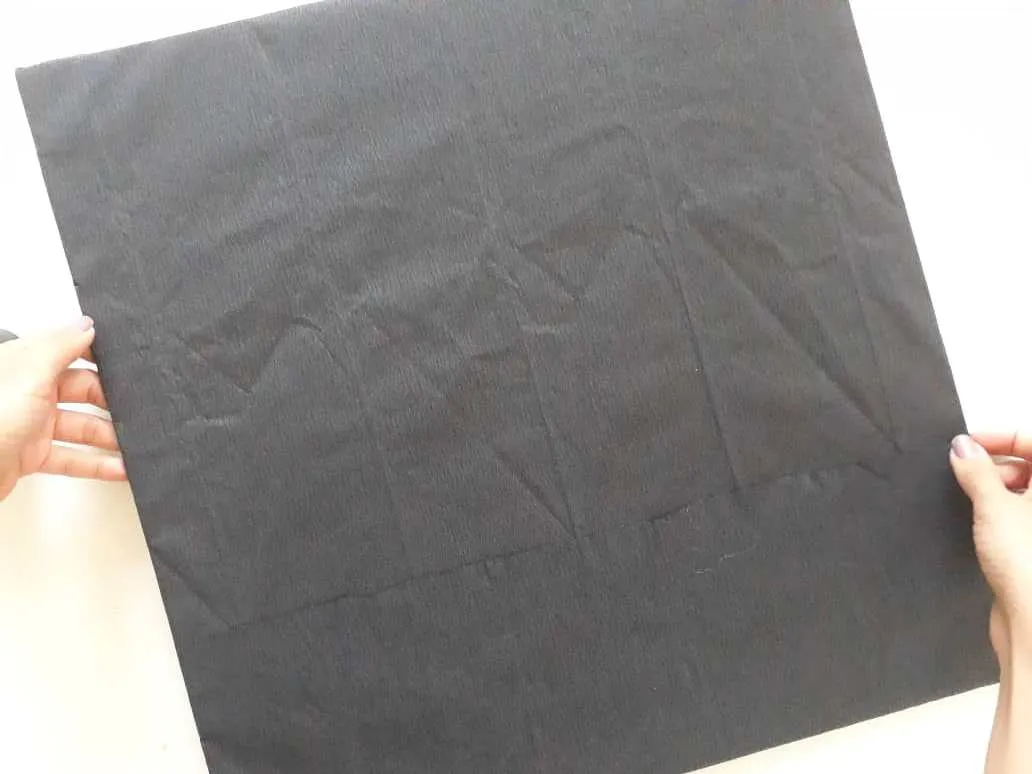
Now, we cut a square of MDF wood or cardboard of 42cm x 42cm and cover it with black gloss paper or the color that we like or combine the most. Remember that you can also use cardboard to make your base since it is a recyclable material, cheap and easy to get.
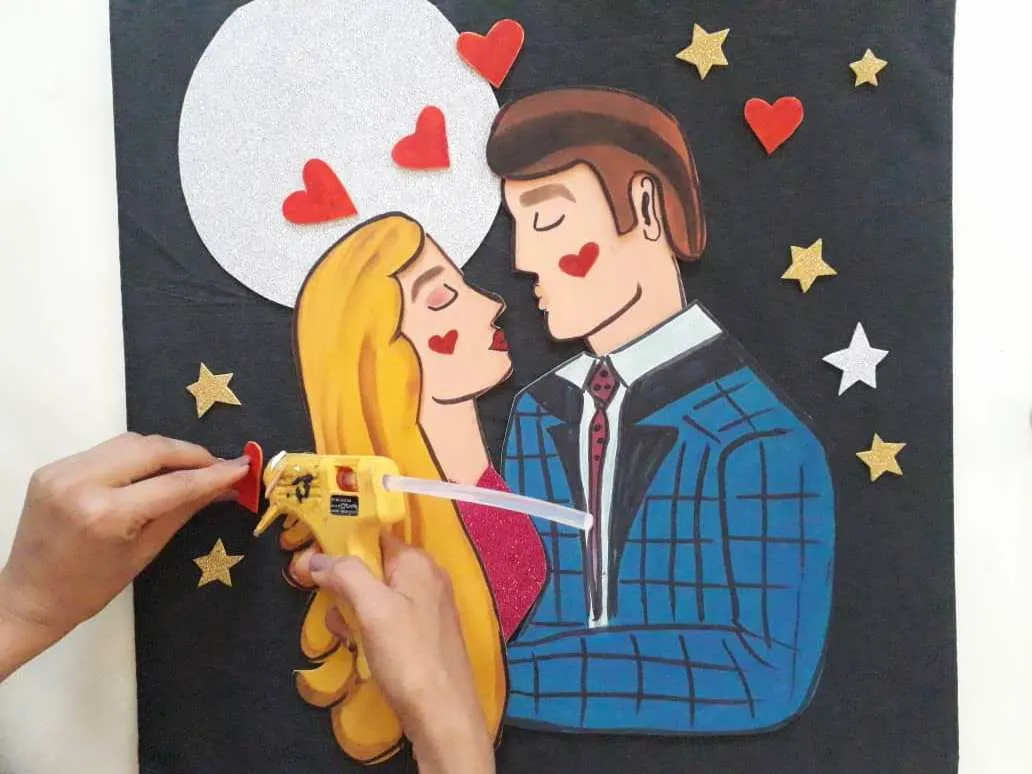
Luego, pegamos la luna y los enamorados a la base del cuadro utilizando silicona caliente o pegamento. Seguidamente fabricamos y pegamos pequeñas estrellas y corazones de foami para decorar la noche. Debemos hacer presión para asegurarnos de que todas las partes queden bien pegadas.
Then we glue the moon and lovers to the base of the painting using hot silicone or glue. Then we make and glue small stars and foamy hearts to decorate the night. We must put pressure to make sure that all parts are glued together.
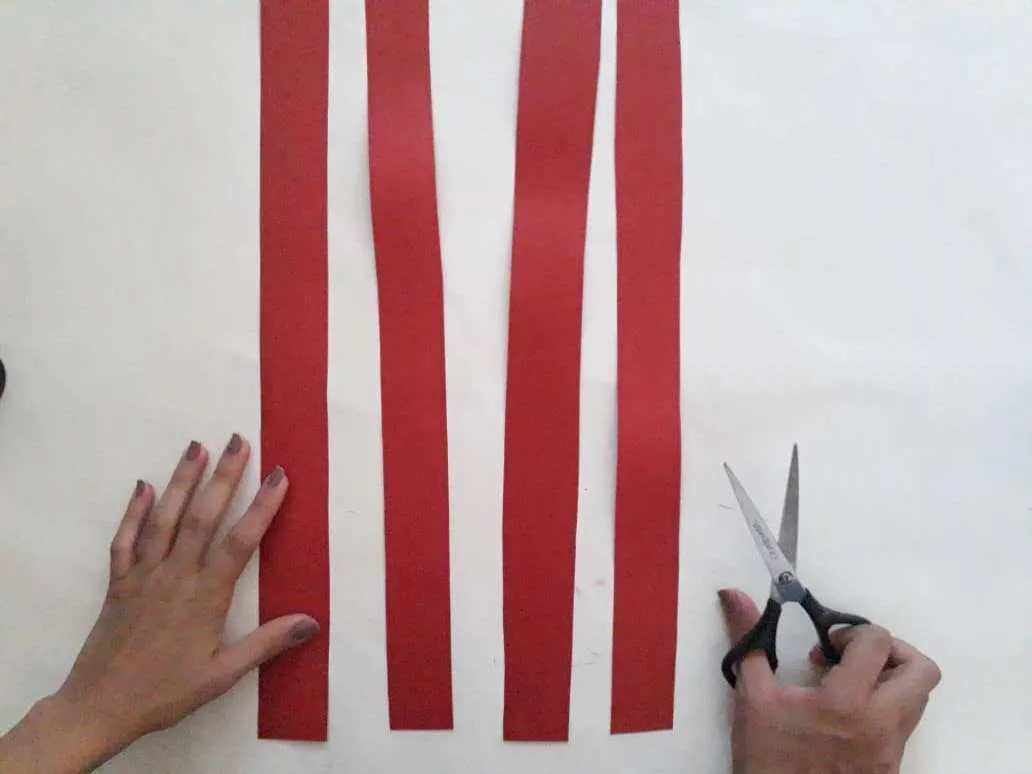
Finalmente, recortamos tiras de papel de color para obtener el marco del cuadro y pegamos en los bordes de la base. Y decoramos dejando volar nuestra imaginación.
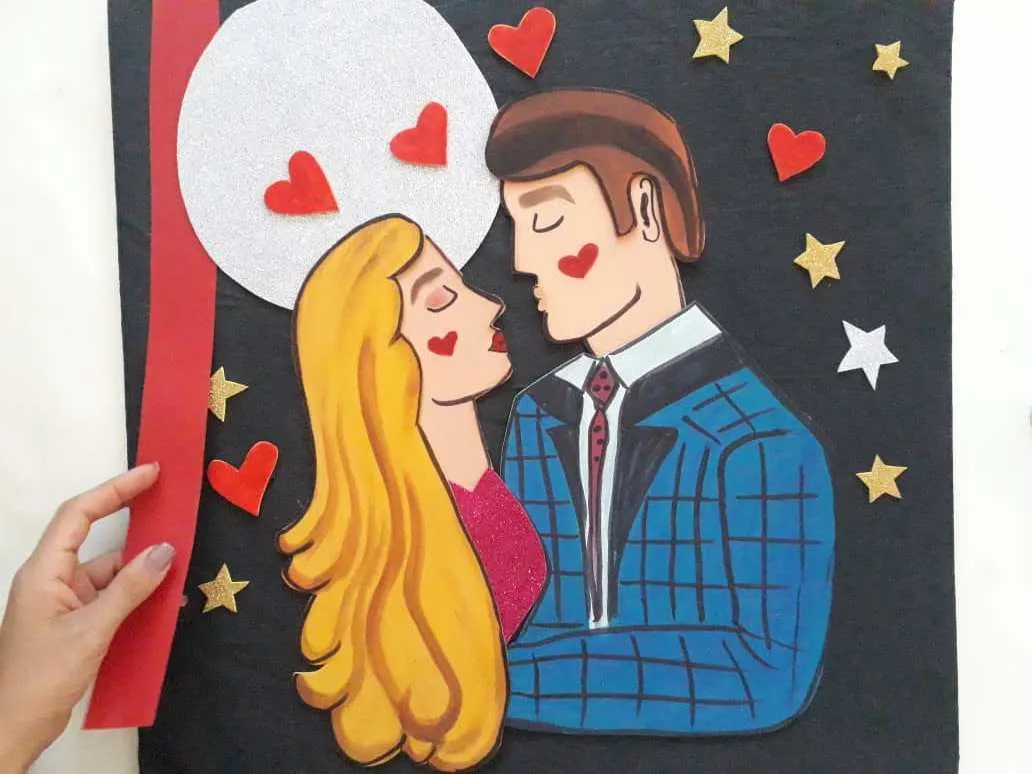
Finally, we cut strips of colored paper to get the frame of the box and glue on the edges of the base. And we decorate by letting our imagination run wild.

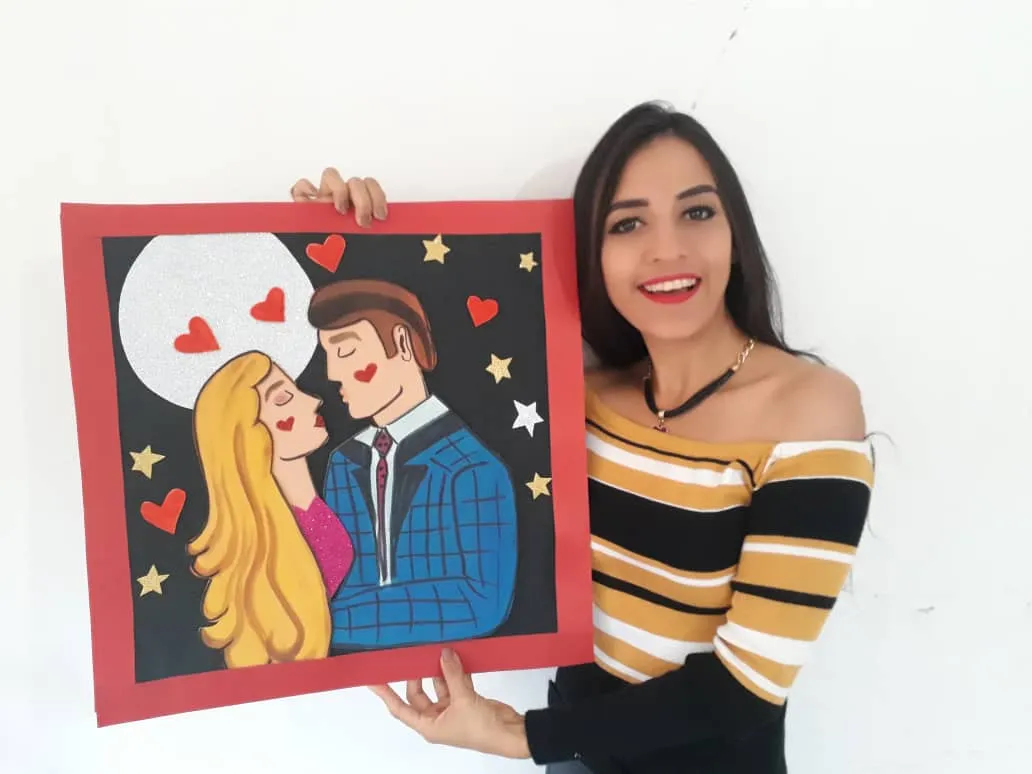
Gracias por acompañarme y espero que lo hayan disfrutado. ❤️
Thanks for joining and I hope you enjoyed it.❤️
Clic para ver trabajos anteriores | Click to see previous works

.jpeg)